6 Small Balcony Herb Garden Ideas For Fresh Herbs All Year
You want a tiny balcony that smells like basil at sunrise and looks like it should live on your “Small Outdoor Spaces” board. You hate the sad, droopy pots, the cluttered railings, and that one crispy rosemary that died the day you swore you’d start cooking more. Picture this instead: sun-warmed terracotta, rippling linen cushions, glossy leaves catching dappled light, and six simple layouts that make your small balcony herb garden work hard and look breathtaking. These ideas fix the chaos, protect your herbs through the seasons, and give you real results in under two weekends with a $400 cap for most versions.
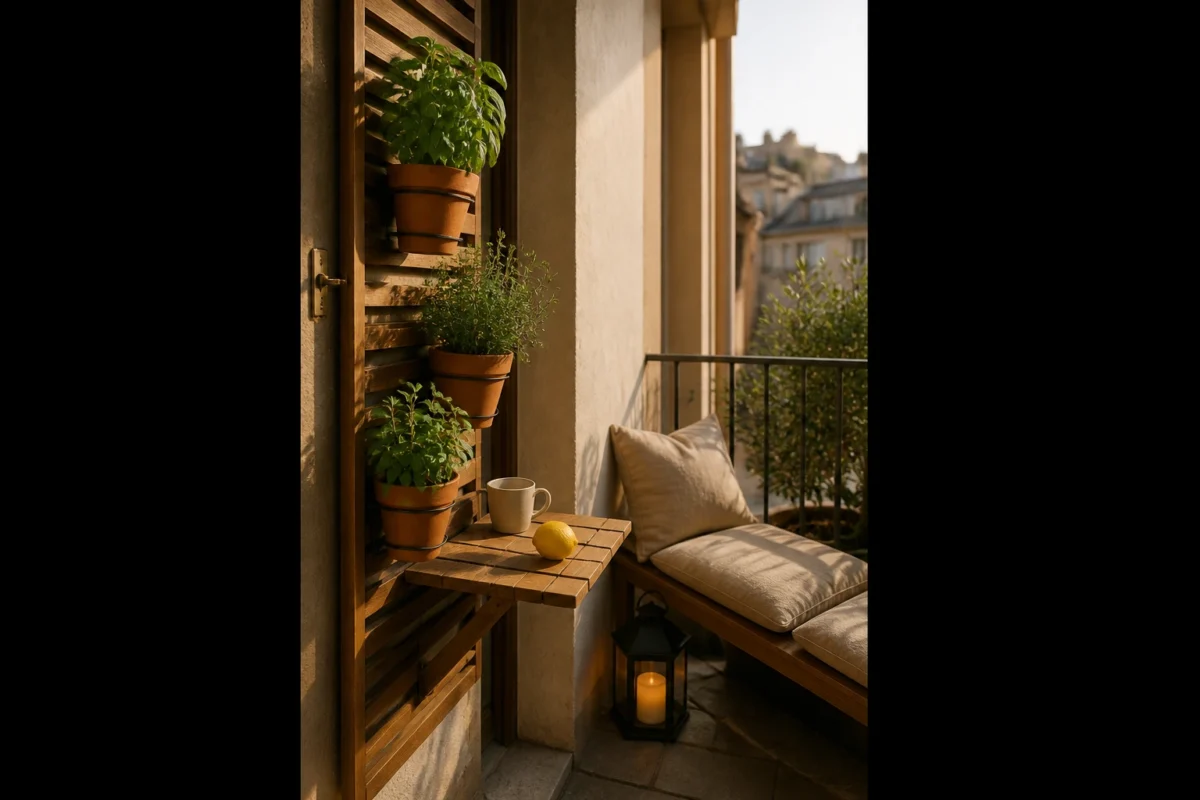
Get ready for color that feels intentional, textures that read high-end, and lighting that makes a handful of mint look cinematic. Each design is compact, renter-safe, and highly photogenic—seriously, your friends will ask for the link. This is the vibe for anyone who wants a little ritual—morning tea with fresh thyme, late-night pasta with just-snipped oregano—without turning your balcony into a potting shed.
1. Slatted Teak Balcony Rail with Warm Lantern Glow and a Slim Fold-Down Bar
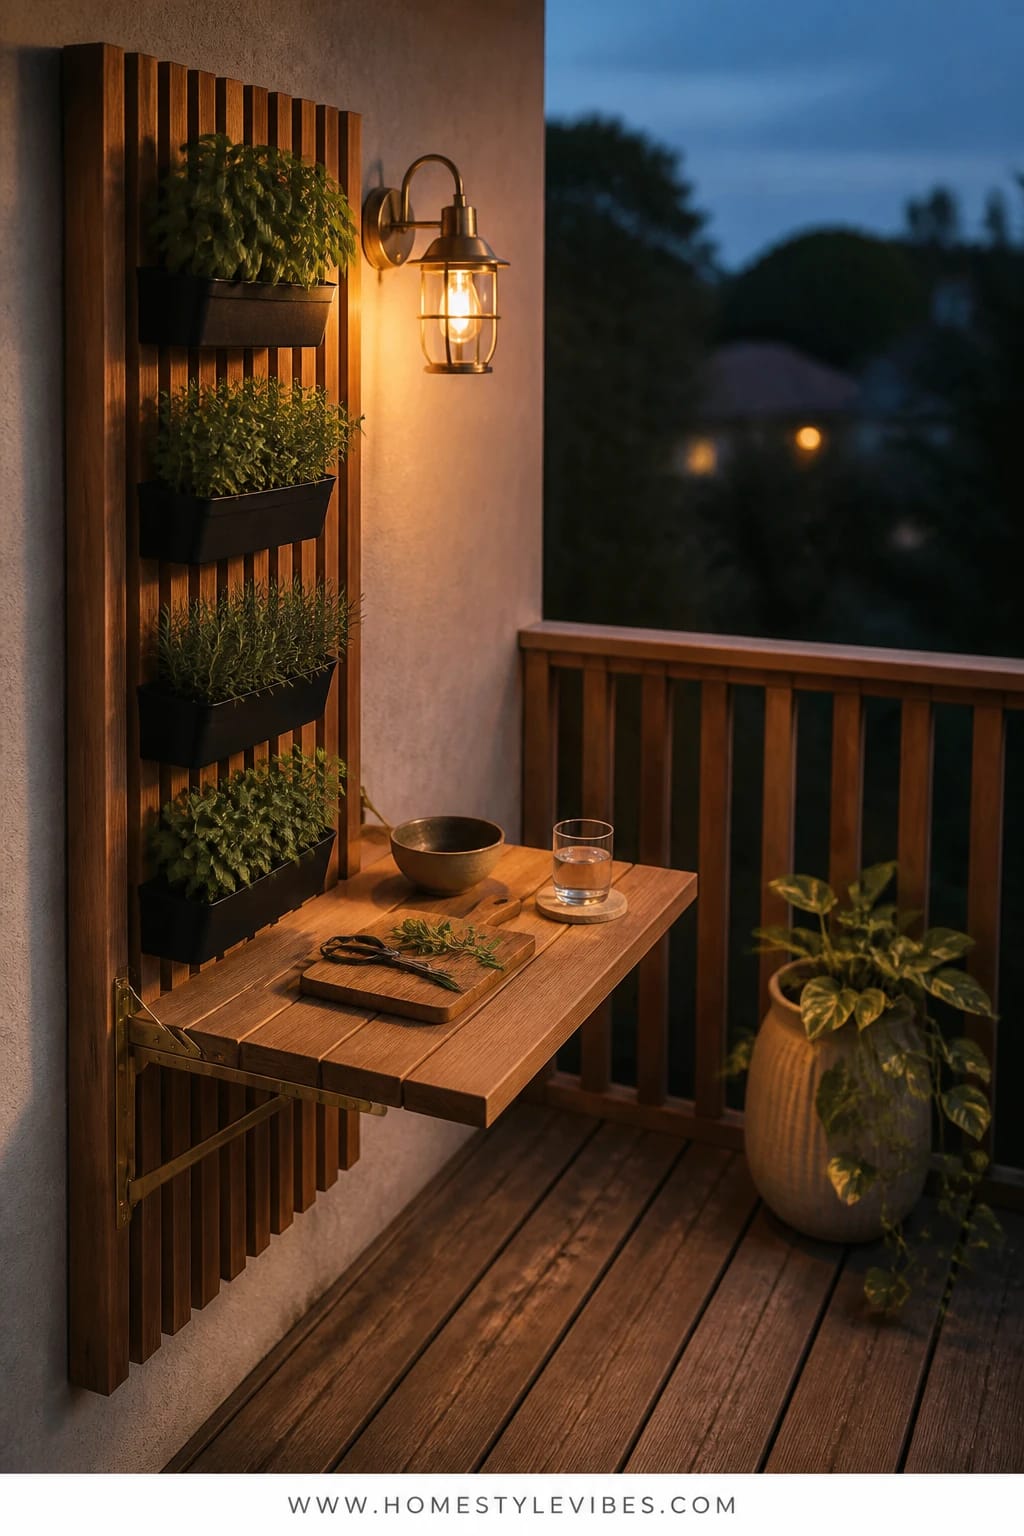
We’ve all been there: the balcony rail is prime real estate, but your herbs teeter in mismatched pots and steal your only elbow room. You want that warm, café-at-dusk feeling without sacrificing space for your coffee cup. This setup solves it with one move—the rail becomes a tidy vertical herb wall and your “table.” Teak slats bring warmth and weather resistance, the lantern glow adds soft magic after sunset, and a fold-down bar becomes your prep spot for snipping basil right over your plate.
The mood skews urban-luxe meets Mediterranean café. It works in real homes because the slatted panel keeps everything upright, out of foot traffic, and renter-friendly if you use clamp or tension mounts. Lighting matters here: a single rechargeable lantern or two makes the herbs look glossy and dimensional after dark, and even a gray day gets romantic. Teak, brushed stainless hardware, and matte black planters star for an elevated, durable mix that photographs beautifully thanks to the vertical lines and pocketed shadows between each plant.
Variations: For small budgets, swap teak for acacia slats and choose plain black metal S-hooks with basic rail planters. For ultra-tight balconies, reduce to a half-panel and one lantern. For a darker, moodier vibe, use charred wood finish on the slats and smoky glass lanterns. Renter swap: clamp-on rail brackets and a no-drill fold-down shelf keep the deposit safe.
Budget Breakdown:
- Teak or acacia slatted panel: $90–$180
- Clamp rail brackets + S-hooks: $25–$50
- Slim fold-down bar/shelf (no-drill option): $60–$120
- Matte black herb planters (4–6): $40–$90
- Rechargeable LED lantern(s): $30–$80
- Herbs and potting mix: $30–$60
Total Estimated Cost: $275 – $580
Best For: Narrow balconies that need every inch to count. Ideal for renters and night owls who want ambient light with easy-access herbs year-round.
Key Design Elements:
- Main materials: Teak (or acacia) slats, matte metal, brushed stainless hardware
- Color palette: Honey wood, matte black, fresh greens, warm candlelight
- Lighting strategy: One to two lanterns at rail height for soft side-glow
- Furniture silhouettes: Slim, fold-down bar; narrow rectangular planters; low-profile stool
- Texture layers: Smooth wood grain, matte metal, glossy leaf surfaces
- Accent details (hardware, decor pieces, plants): Minimalist hooks, linen napkin, basil/thyme/mint trio
How To Recreate This Look:
- Start with a slatted wood panel sized to your railing; secure with clamp brackets.
- Add S-hooks along the slats and hang lightweight planters for herbs (mint at the corner, basil and chives at eye level).
- Layer a fold-down bar at 36–38 inches high; test cup and plate stability before finalizing height.
- Install a rechargeable lantern at the rail height; place a second lantern low near the floor for depth.
- Style with a neutral linen napkin and one low stool tucked beneath the bar.
Why This Looks Expensive: The vertical rhythm of repeated slats plus consistent matte black planters reads custom. Warm light grazing the wood highlights grain and gives the herbs a glossy, editorial finish—no clutter, just intentional lines.
Watch Out: Don’t overload the rail with heavy ceramic pots; weight plus wind equals heartache. Keep planters narrow and evenly spaced so the bar can still fold down cleanly.
Pro Styling Tip: For photos, angle the lantern just off-center so the light rakes across the basil; those tiny leaf shadows scream “styled shoot.”
Keep scrolling—next is for the person who wants a garden that doubles as a sculptural moment.
2. Textured Terracotta Tier with Cool Morning Light and a Cascading Corner Ladder Shelf
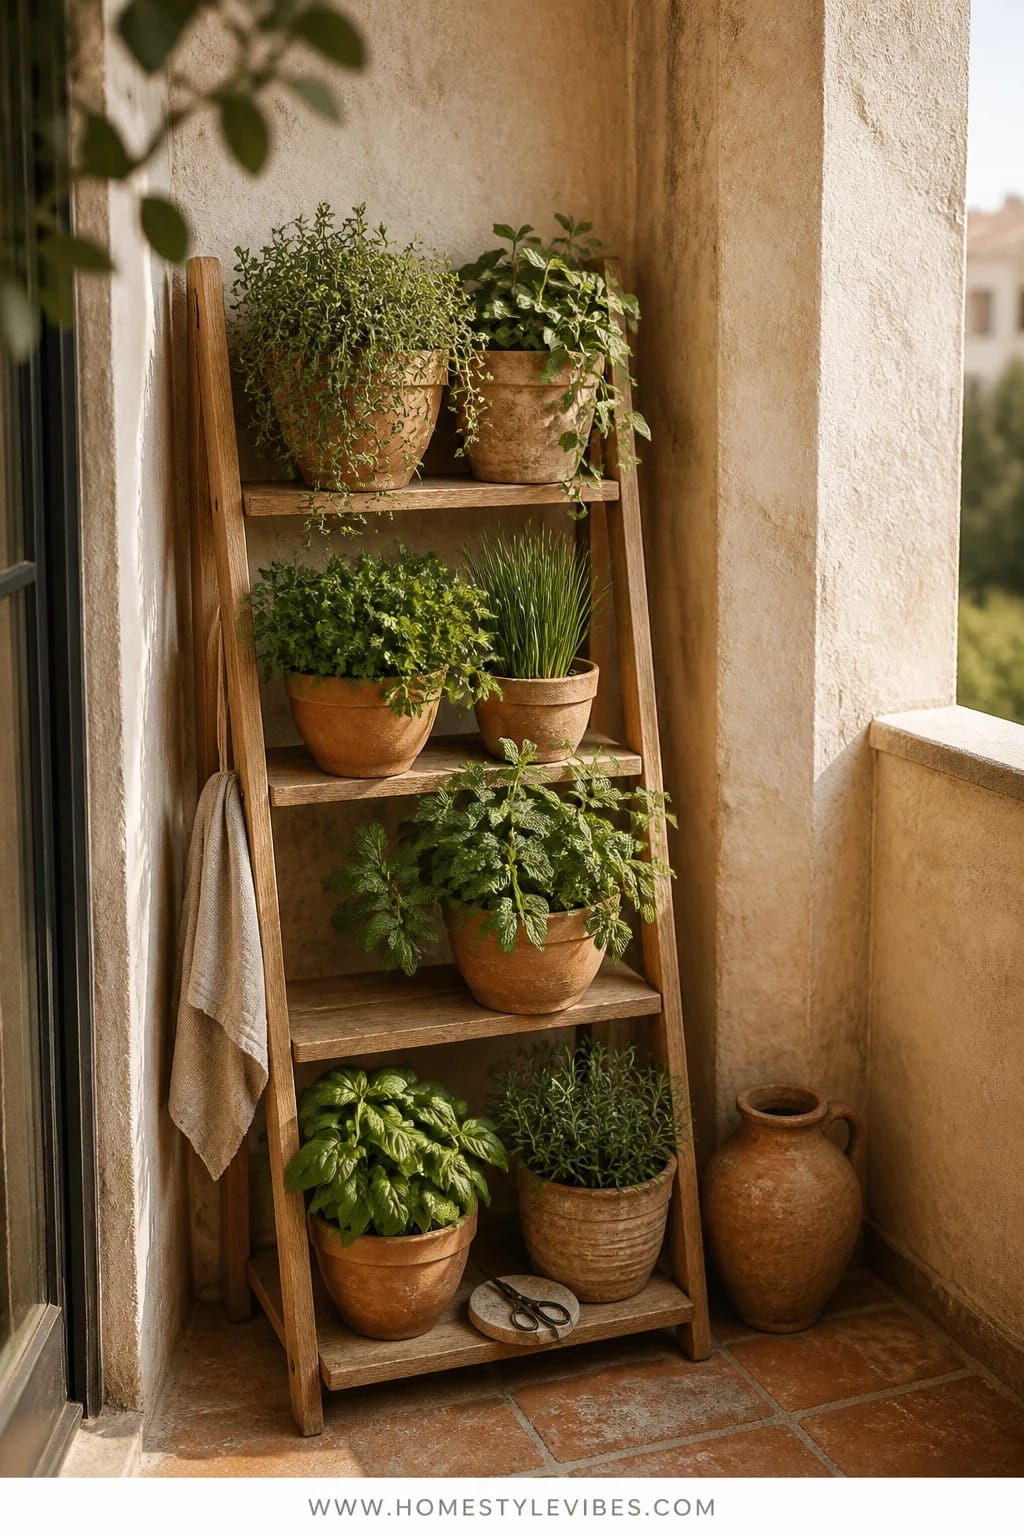
It’s that one corner that always feels off—awkward, shadowy, and somehow cluttered even when it’s empty. You’ve tried random pots, but it still looks piecemeal. This design leans into texture: terracotta in layered shapes and finishes (smooth, hand-thrown, lightly weathered) stacked on a narrow ladder shelf that hugs the corner. In cool morning light, the surfaces read creamy and soft, and your herbs spill gently layer by layer. It’s functional sculpture.
Mood-wise, think Tuscan farmhouse meets city balcony. It works because vertical tiers keep foot space open, and terracotta breathes—great drainage for mediterranean herbs like rosemary and thyme. The ladder shelf frames the corner, so even small groups of plants look abundant. Cooler natural light makes the warm terracotta pop, and that color contrast photographs with magazine crispness.
Variations: Budget-friendly? Use faux terracotta-finish paint on basic plastic pots for the same look with less weight. Small-space version: a half-height ladder with only three tiers. Renter-friendly: freestanding shelf, no drilling. Darker version: choose deeper clay tones and add a single charcoal pot for contrast.
Budget Breakdown:
- Narrow corner ladder shelf (outdoor-safe): $70–$160
- Terracotta pots (6–8, mixed sizes): $40–$120
- Saucers + pot feet: $15–$30
- High-drainage soil + grit for herbs: $20–$40
- Herbs (rosemary, thyme, oregano, sage): $24–$48
Total Estimated Cost: $169 – $398
Best For: East-facing balconies with cooler light; people who love texture and prefer low watering fuss.
How To Recreate This Look:
- Start by placing the ladder shelf in your emptiest corner; use small rubber shims if your floor slopes.
- Add largest terracotta pots to the bottom tier with woody herbs (rosemary); keep lighter, trailing herbs (oregano) higher.
- Layer textures: mix smooth, ribbed, and lightly patinaed pots for depth.
- Install pot feet to keep water from pooling; add grit to soil for drainage.
- Style with a single linen runner draped across the second tier for softness (remove before watering).
Why This Feels Designer: Repetition plus variation—same material, slightly different forms—creates cadence. The cool light meets warm terracotta for that editorial temperature contrast designers chase.
One Thing To Avoid: Don’t crowd every rung. Leave visual breathing room on the top tier so the ladder silhouette stays clean.
Pro Styling Tip: Before snapping photos, lightly mist oregano and thyme so leaves catch tiny highlights—instant freshness.
Quick Tip: Draw a simple floor sketch with plant heights marked. It takes five minutes and saves you from the “three tall pots in a row” look that flattens your photos and your vibe.
If texture made your heart flutter, wait until you see what a shift in layout can do for circulation and maintenance.
3. Powder-Coated Steel Trolley with Soft Edison String Lights and a Deep Basin Sink Insert
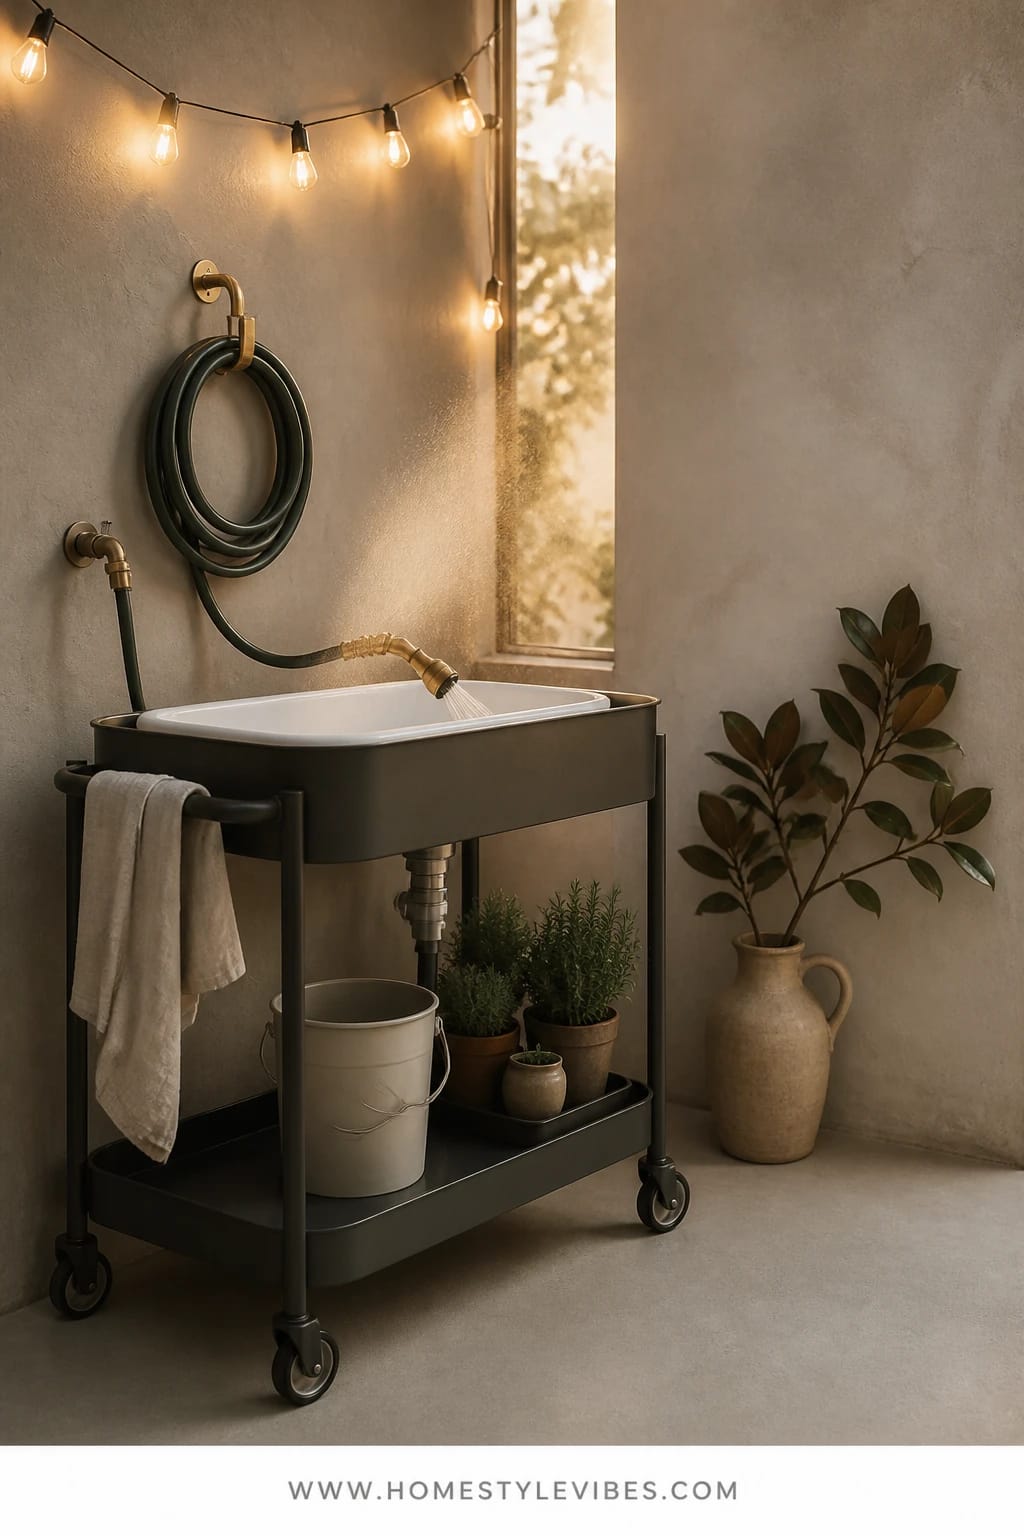
You want fresh herbs all year, but watering on a tiny balcony is chaos—drips, muddy floors, and that awkward dash to the kitchen. A bar-cart-style trolley in powder-coated steel fixes the flow. Add a removable deep basin insert (think enamel or heavy-duty plastic) for clean watering and draining, and hook a gentle spray nozzle to your indoor tap with a quick-connect hose. String lights wash the setup in a soft, honeyed glow that makes care feel like a ritual, not a chore.
The mood reads utilitarian-chic with a hint of speakeasy after dark. Real-life friendly? Totally. Locking wheels let you chase sunlight across seasons. The deep basin doubles as a potting spot so soil stays contained. Powder-coated steel resists weather and cleans fast. Soft Edison bulbs cast a low, flattering light on leaves, which matters at night: herbs look lush, not harsh.
Variations: Budget version—secondhand metal cart with a spray-painted finish and a plastic storage bin as the basin. Small-space—choose a half-width utility cart. Renter swap—adhesive hooks for lights and a sink insert that stores inside the cart when not in use. For a darker, moodier vibe, go forest green cart with amber bulbs.
Budget Breakdown:
- Powder-coated metal trolley: $90–$220
- Removable deep basin insert: $20–$60
- Quick-connect indoor hose kit + gentle nozzle: $25–$55
- Outdoor-safe string lights (Edison style): $25–$60
- Planters (lightweight): $30–$80
- Herbs + soil: $30–$60
Total Estimated Cost: $220 – $535
Best For: West or south-facing balconies with strong sun; anyone who waters often, cooks daily, or likes to rearrange with the seasons.
Key Design Elements:
- Main materials: Powder-coated steel, enamel/plastic basin, shatterproof bulbs
- Color palette: Charcoal or forest green, warm bulb amber, fresh green foliage
- Lighting strategy: String lights above eye level to avoid glare; one clip light at cart height for task work
- Furniture silhouettes: Industrial cart with rails; slim, straight-sided planters for clean lines
- Texture layers: Matte metal, glossy leaves, enamel sheen, soft cloth for clean-ups
- Accent details: Brass S-hooks for tools, labeled herb markers, small coir mat under cart
Why This Reads High-End: Utility that looks intentional—integrated watering and neat storage—signals custom design. The layered light (ambient string + task clip) creates depth and avoids the “single overhead glare” that cheapens everything.
How To Recreate This Look:
- Start with the cart; check that wheels lock and shelves fit your planters.
- Add the basin to the top shelf; keep soil and shears in a lidded box on the lower shelf.
- Layer planters by height along the top edge; keep tender herbs within easy reach of the nozzle.
- Install string lights along the perimeter above; clip one small task light to the cart handle.
- Style with a folded towel, a small cutting board, and labeled herb stakes.
The Most Common Mistake: Running lights too low. Eye-level bulbs glare and flatten texture. Keep bulbs above sightline so leaves glow, not blow out.
Pro Styling Tip: Coil the hose neatly in a shallow wire basket; when you photograph, it reads like part of the design, not a tool you forgot to hide.
Mindset moment: Remember, this isn’t about recreating a showroom. It’s about small moves that solve real annoyances—watering, clutter, light—and make your balcony feel like yours. If one idea sings, start there and ignore the rest for now.
4. Whitewashed Brick Planter Bench with Diffused Sheer Light and a Curved Bistro Chair
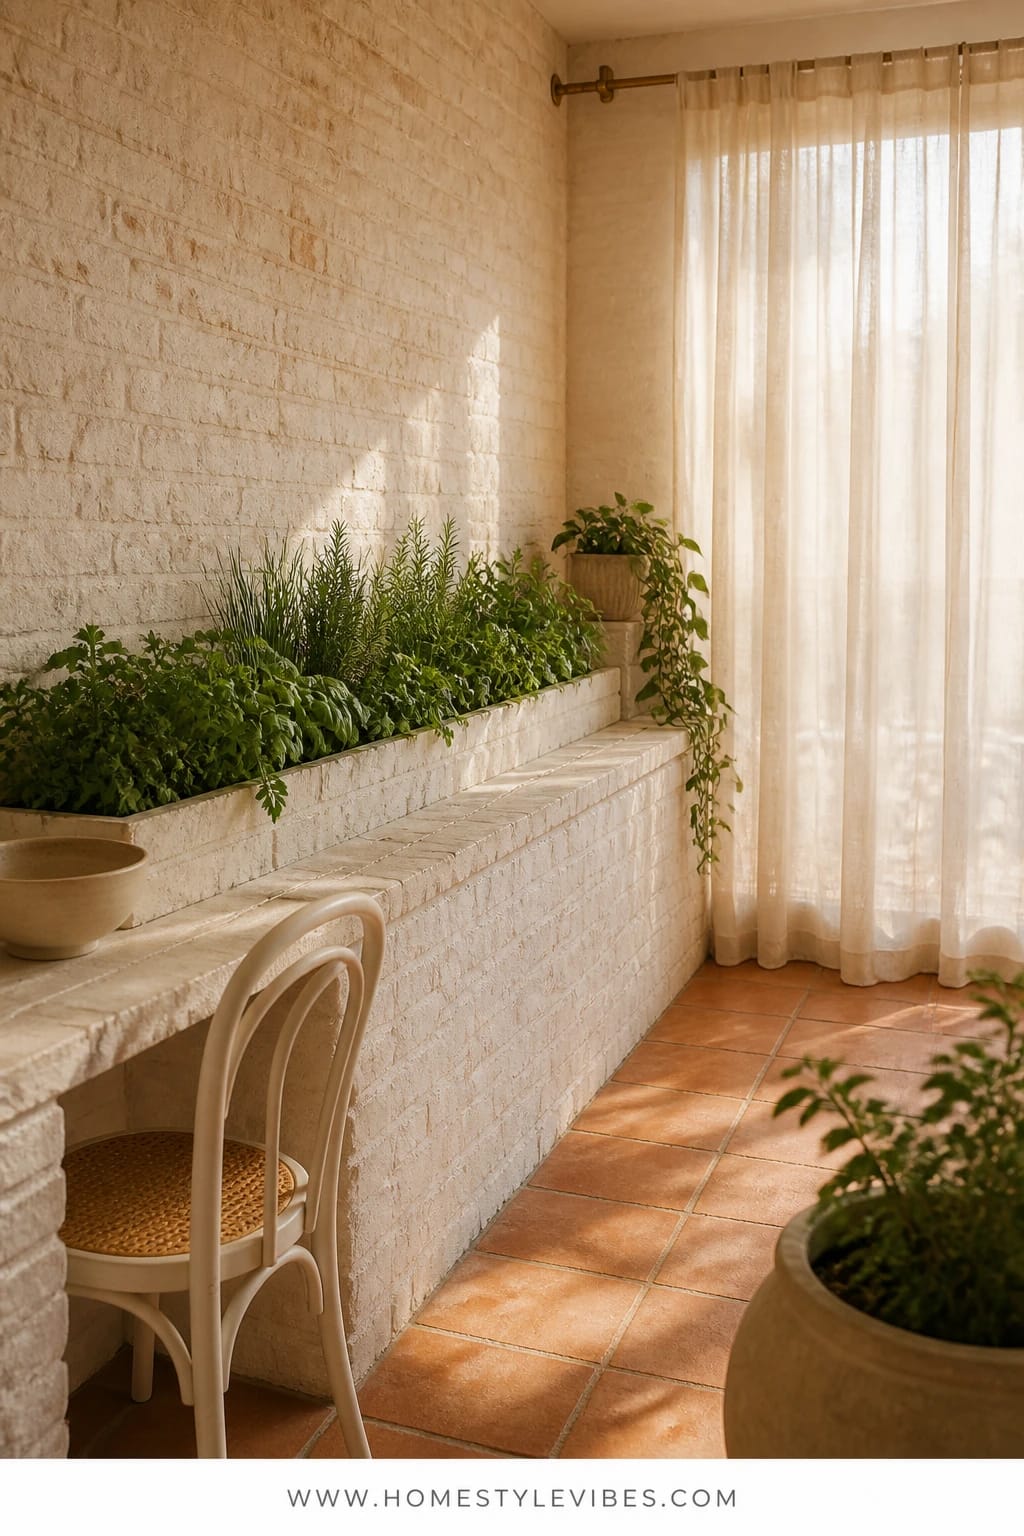
There’s always that tension between seating and plants—sit or garden, pick one. Not here. A slim planter bench runs along your wall, whitewashed to bounce light, and doubles as both storage and seating. Herbs line the top in low troughs, while a curved bistro chair tucks in to turn your balcony into a true destination. Sheer outdoor curtains soften harsh light and give everything that drift-and-glow effect you see in magazines.
The vibe is modern Mediterranean—breezy and clean but textured. In real homes, this works because the bench adds concealed storage for soil and tools, makes winterizing easy, and keeps a tidy profile. Whitewash keeps the balcony feeling bigger, and diffused sheer panels regulate sunlight so tender herbs don’t scorch. Photographing this is a dream: the pale bench against green herbs creates crisp contrast, while the curved chair adds a sculptural note.
Variations: Budget version—use painted concrete blocks with a wood top and long planter boxes. Renter-friendly—freestanding bench with removable whitewash-effect peel-and-stick wrap. Darker look—go pale taupe instead of white and swap the bistro chair for a black bentwood outdoor stool.
Budget Breakdown:
- Planter bench (DIY blocks + wood top or pre-made): $120–$280
- Whitewash paint or limewash: $20–$60
- Sheer outdoor curtains + tension rod: $40–$120
- Curved outdoor bistro chair: $60–$160
- Rectangular herb troughs: $30–$80
- Soil + herbs: $30–$60
Total Estimated Cost: $300 – $760
Best For: Small-to-medium balconies that need seating and greenery; east or south exposures with a need for light control.
How To Recreate This Look:
- Start by measuring your longest wall; build or place a bench 14–16 inches deep for comfort.
- Add a whitewash coat; keep brushstrokes visible so it feels hand-touched, not plastic.
- Layer low herb troughs on top; place taller herbs toward the wall, lower spilling herbs toward the edge.
- Install sheer curtains with a no-drill tension rod; aim for 1.5–2x fullness for soft ripples.
- Style with a curved bistro chair, a small cushion in stone or sand tones, and a tiny tray for snips.
Why This Looks Intentional: A single, continuous line (the bench) organizes the whole space. Sheers create a luminous backdrop that flatters both brick texture and leaves.
Don’t Do This: Avoid overstuffing troughs. Cramped roots mean sad herbs. Leave two fingers of space between plants.
Pro Styling Tip: For photos, pull the sheer panel just enough to veil the background; the soft edge makes greens pop like a still life.
Did You Know? Many herbs prefer being clipped regularly. Snipping promotes bushier growth. If your basil looks leggy, it’s begging you to make pesto, not asking for new soil.
Next up: a renter-safe take on vertical gardening that handles winter and looks like art.
5. Black Grid Trellis with Cool Moonlight LED Strip and Modular Magnetic Planters
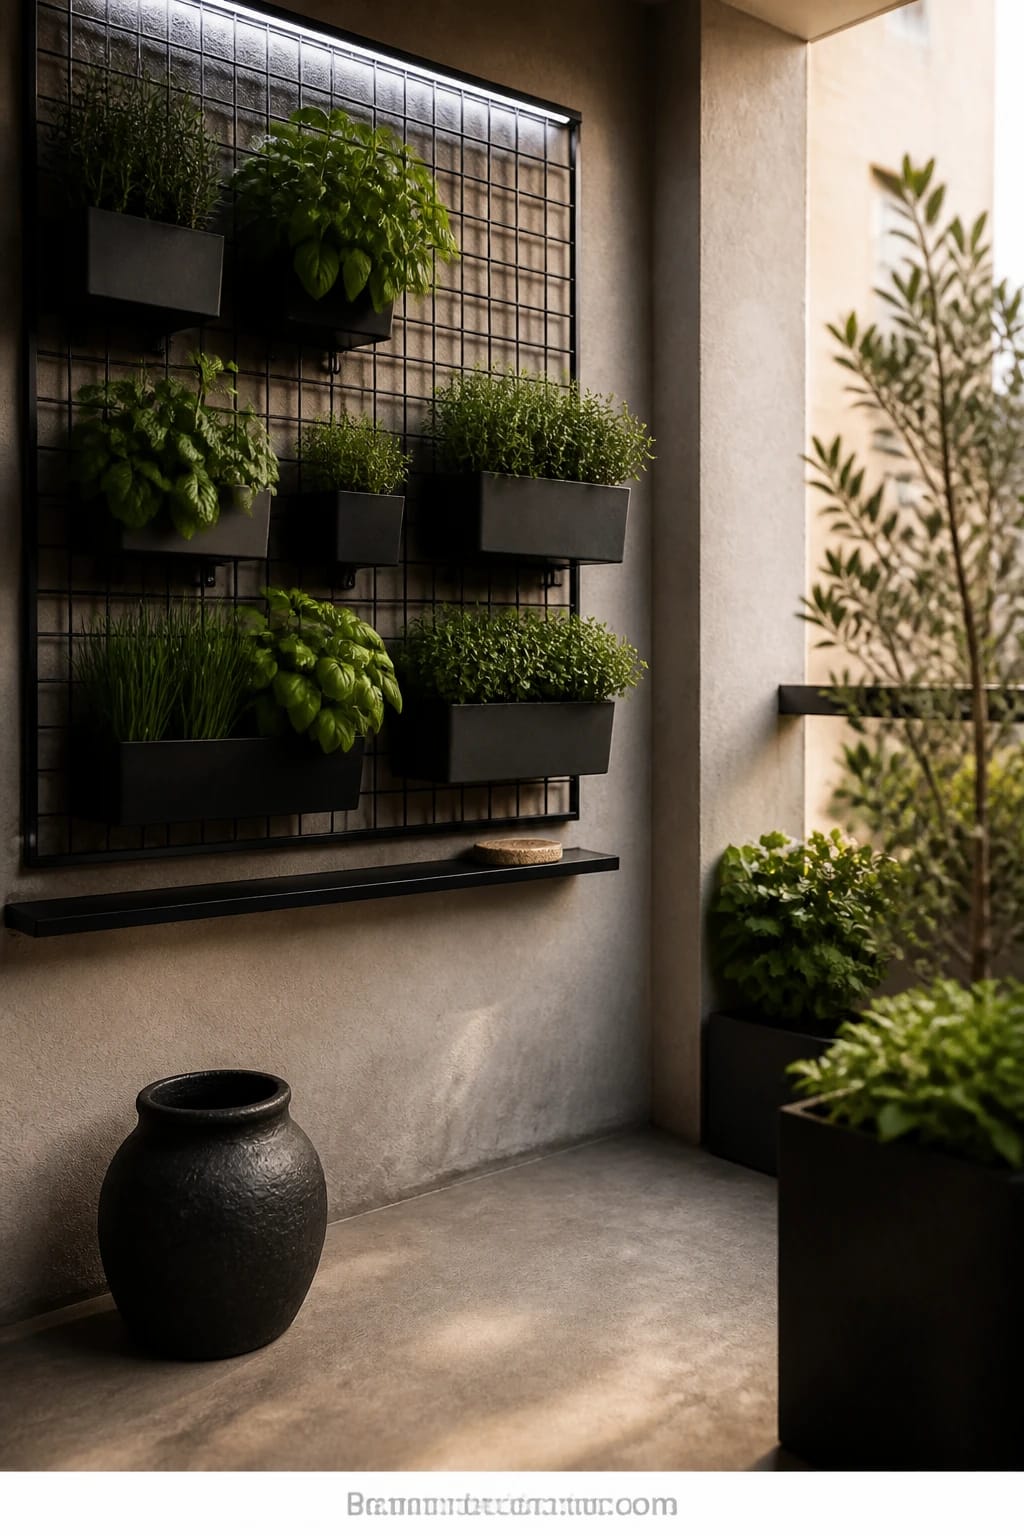
You’ve tried a living wall kit and ended up with streaks, leaks, and a patchy mess. This version trades fabric pockets for a powder-coated black grid, paired with magnetic or hook-on planters you can rearrange by season. A hidden cool white LED strip grazes from above like moonlight, crisping edges and making greens look hyper-fresh. The star? A grid that frames your collection like a gallery—clean, strong, graphic.
The mood is contemporary gallery meets urban garden. It works in real apartments because you can mount with minimal holes or use a freestanding frame. Modular planters let you rotate cold-tolerant herbs up front in winter and heat-lovers to the edges in summer. The cool LED temp keeps colors accurate at night—huge for winter gloom and small spaces where daylight is limited. Photos come out sharp with strong silhouettes and shadows between squares.
Variations: Budget—use a closet wire grid or mesh panel painted matte black. Small-space—half-grid with 6–8 planters for hero herbs only. Renter-friendly—tension frame or ceiling chain suspension with floor protectors. Dark palette—charcoal planters and sage green trailing thyme for tone-on-tone drama.
Budget Breakdown:
- Powder-coated metal grid (or DIY mesh): $40–$140
- Magnetic/hook-on modular planters (6–12): $60–$180
- Outdoor-safe LED strip (cool white) + channel diffuser: $35–$80
- No-drill mounting kit or freestanding frame: $25–$70
- Soil + herbs: $30–$70
Total Estimated Cost: $190 – $540
Best For: Tight balconies with one strong wall; renters; winter growers who want accurate color under LEDs.
Key Design Elements:
- Main materials: Powder-coated metal grid, aluminum LED channel, matte planters
- Color palette: Black, cool white light, crisp green foliage
- Lighting strategy: Top-grazing LED strip with diffuser for even glow and shadow play
- Furniture silhouettes: None required—let the grid be the star
- Texture layers: Matte metal, satin leaves, micro-shadows between grid lines
- Accent details: Minimal labels, slim watering can, one trailing plant to break the grid
Why This Feels Designer: Grids organize chaos. The consistent black frame with repeated planter shapes reads like custom millwork for plants. The cool, even light adds a museum quality that’s undeniably chic.
How To Recreate This Look:
- Start by placing the grid at eye level; center it on the wall for symmetry.
- Add the LED strip above the grid in an aluminum channel; hide the battery pack or plug-in unit in a corner box.
- Layer planters with a 30/70 mix: 30% trailing (thyme), 70% upright (parsley, chives, basil).
- Install a single trailing plant on the lower left or right to break rigidity on purpose.
- Style with minimalist labels and a single monochrome watering can nearby.
The Most Common Mistake: Overfilling the grid. Negative space is vital. Leave at least one square empty between clusters to keep it legible.
Pro Styling Tip: Photograph from a slight angle so the LED grazes across leaves; the micro-shadows sell the dimension.
Quick Tip: If your balcony faces a streetlight that casts a weird yellow-green tint, choose LEDs in the 4000–4500K range. Your herbs will look vibrant instead of sickly after dark.
Micro-story: A friend of mine spent weeks agonizing over which green to paint her planters before realizing the problem wasn’t color—it was that everything sat at the same height. She hung a grid, mixed in two trailing plants, and sent me a photo at 10 p.m. It finally looked alive.
6. Narrow Concrete-Look Planters with Golden Hour Up-Lighting and a Compact Fire Bowl Table
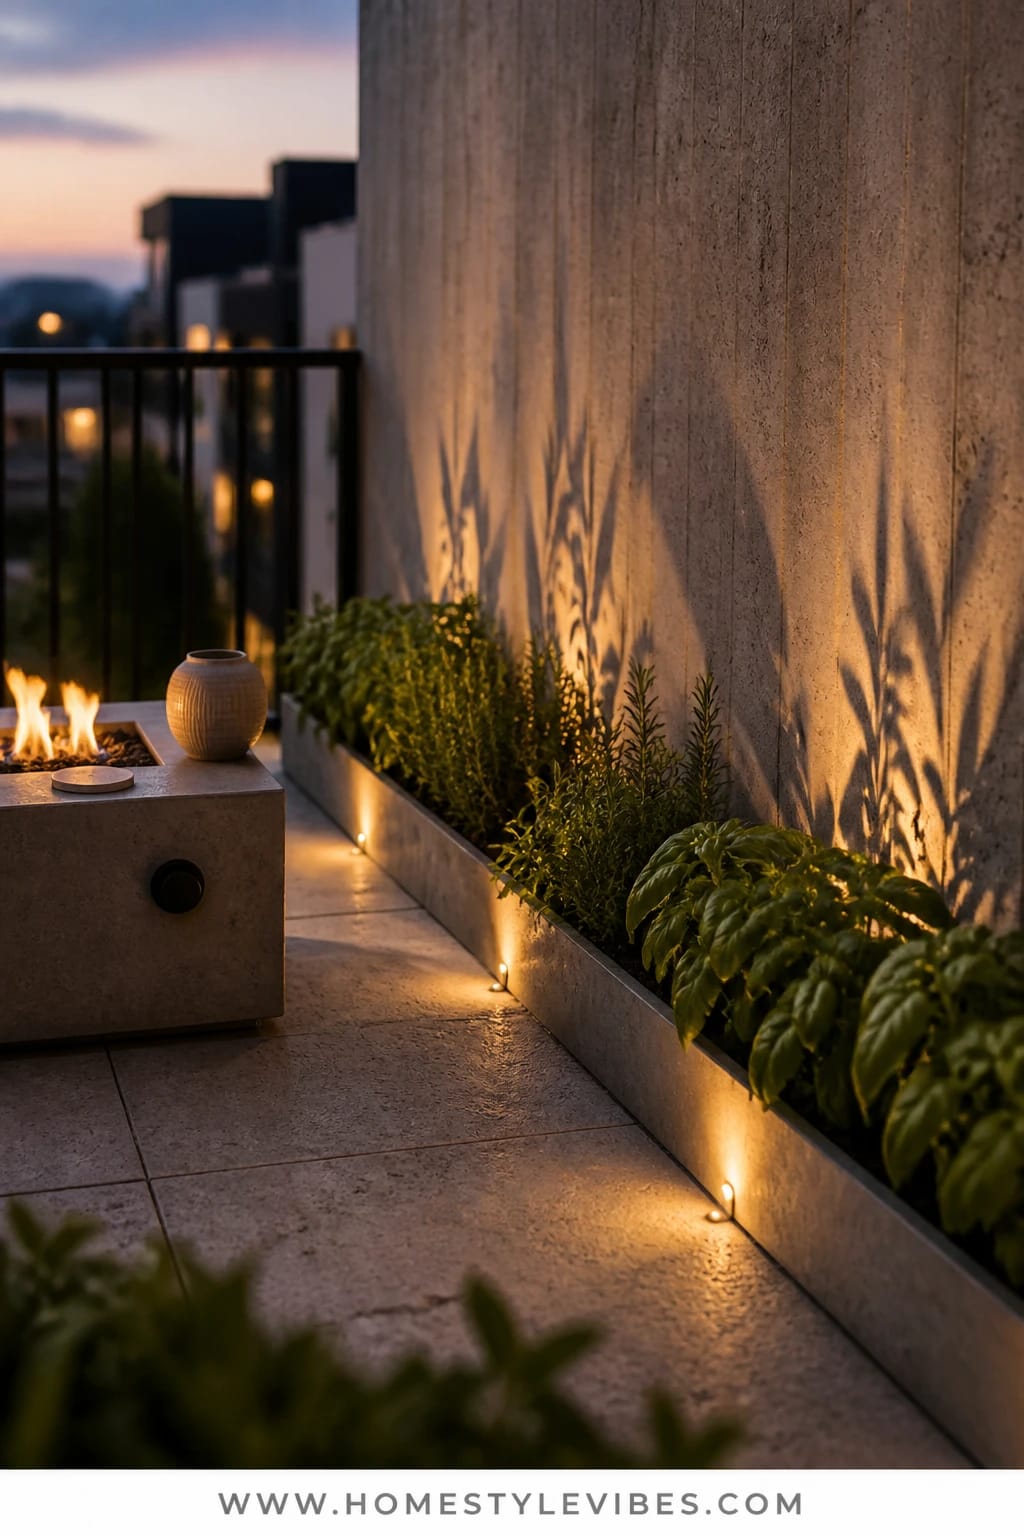
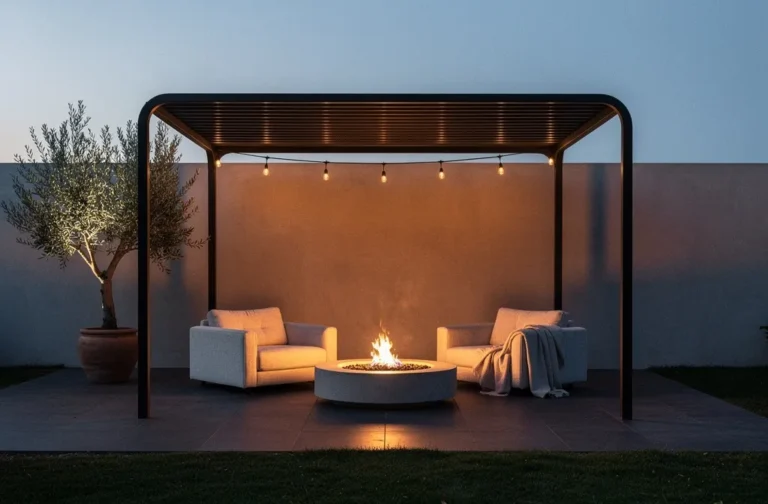
You want cozy. You hate clutter. And you absolutely refuse to give up a place to put your wine glass. This design anchors your small balcony herb garden with linear, concrete-look trough planters that sit low and sleek. Golden hour-style up-lighting installed at the base turns basil and rosemary into sculptural silhouettes at dusk. A compact, propane fire bowl table warms shoulder seasons, so your fresh herbs really do last almost year-round with a little heat and strategic covers.
The mood leans modern lodge meets city terrace: calm, understated, with one warm focal point. It thrives in real homes because the long planters maximize soil volume (better moisture and root health), the low profile keeps sightlines open, and the gentle heat extends time outdoors. Lighting from below creates drama—this is the part that makes the biggest visual difference. Photos look cinematic with the interplay of soft flame and crisp leaf edges.
Variations: Budget—fiberstone planters instead of true concrete, and a tabletop gel-fuel fire bowl. Small-space—one trough and a petite side table fire unit. Renter-safe—ensure the fire feature meets building rules; go for an electric “flame” heater if open flame is prohibited. Darker version—charcoal planters with warm brass up-lights.
Budget Breakdown:
- Concrete-look trough planters (2–3): $120–$360
- Low-voltage up-lights or rechargeable ground spots: $40–$120
- Compact fire bowl table (propane or gel): $90–$280
- Heat-tolerant herbs + frost cloth/plant covers: $35–$75
- Soil with compost for larger volume planters: $30–$70
Total Estimated Cost: $315 – $905
Best For: Balconies that host friends; cool-weather climates that still want outdoor dinners with fresh herbs into late fall.
Key Design Elements:
- Main materials: Concrete-look fiberstone, metal light housings, tempered glass for fire bowl wind guard
- Color palette: Cool gray planters, warm amber flame, deep green leaves
- Lighting strategy: Ground up-lighting to graze leaf undersides; flame as focal glow
- Furniture silhouettes: Low, linear planters; compact round table; armless lounge chair
- Texture layers: Smooth concrete finish, soft outdoor throw, glossy herb textures
- Accent details: Brass or black light fixtures, small ceramic match striker, slate coasters
Why This Looks Expensive: The combo of concrete texture with purposeful lighting reads architectural. The fire bowl adds movement, which tricks the eye into reading the space as more layered and luxe.
How To Recreate This Look:
- Start by placing the longest planter along the railing; keep 4–6 inches from the edge for safe watering.
- Add up-lights at the base angled at 30–45 degrees to graze leaves, not blind you.
- Layer a second trough perpendicular to form an L-shape; plant rosemary and sage in the corner for height.
- Install the fire bowl table at least 18 inches from planters; add a wind guard if your balcony is breezy.
- Style with two armless chairs, a neutral throw, and simple slate coasters.
One Thing To Avoid: Don’t place delicate herbs right next to the fire feature. Heat-stressed basil turns bitter. Keep heat-lovers like rosemary closest to warmth, and shield others with taller plants.
Pro Styling Tip: Photograph at dusk with up-lights on and flame low; you’ll catch leaf silhouettes and warm highlights on the concrete for a rich, editorial shot.
Mindset check: If one section feels doable in a single afternoon, pick it. Progress is addictive. Your small balcony herb garden doesn’t need a total overhaul to feel magical—just one strong idea carried through with consistency.
Did You Know? Most herbs prefer slightly lean soil. Over-fertilizing makes them tender and less flavorful. Aim for compost-light mixes and good drainage over rich, heavy soil.
Quick Checklist
- Choose one anchor: slatted wood, terracotta, powder-coated metal, whitewashed bench, black grid, or concrete-look troughs
- Repeat planter finish for cohesion
- Set a lighting plan: lanterns, string lights, LED graze, or up-lights
- Place tallest herbs toward walls, trailing near edges
- Leave negative space for air and photos
- Add one seating element or work surface
- Use pot feet and saucers for drainage
- Keep tools corralled in one box or basket
- Plan winter swaps: cold-tolerant herbs front and center
- Mist leaves pre-photo for a fresh look
Frequently Asked Questions
How much should I budget to make my small balcony herb garden look cohesive?
Plan on $200–$400 for a solid, photogenic setup with coordinated planters, basic lighting, and 6–10 herb starts. If you add a bench or fire feature, you’ll edge toward $600–$900. Spend first on matching planters and one good light source—they create the biggest visual impact.
I have a north-facing balcony with limited sun. Will any of these ideas still work?
Yes. Choose the grid trellis with a cool LED graze to keep color crisp in low light, or the trolley so you can chase any patch of sun you get. Grow shade-tolerant herbs like mint, parsley, chives, and cilantro, and supplement with grow-rated LEDs for winter.
What’s the easiest maintenance setup for renters who can’t drill?
Go with the slatted rail panel using clamp brackets and a fold-down bar or the corner ladder shelf. Use adhesive hooks for lanterns and string lights, and choose lightweight planters with saucers to avoid water stains. Everything lifts out on move day.
How do I keep herbs alive through colder months on a balcony?
Focus on hardy varieties—rosemary, thyme, sage—and protect with frost cloths or clear storage bins turned into mini cloches on cold nights. The fire bowl setup adds warmth on shoulder-season evenings, and LEDs help keep growth compact and healthy.
What common design mistake makes a small balcony herb garden look messy?
Mismatched planters at random heights. Pick one material or color for the majority of pots, set a clear height strategy (tall back, low front, one trailing), and leave a few inches of empty space between groups. It instantly reads curated, not chaotic.
Conclusion
Pick one of these six ideas and start this weekend. The truth is, luxury outdoors isn’t price—it’s texture, lighting, and restraint. One consistent planter finish, one thoughtful light source, and a layout that respects your walkway will make your small balcony herb garden look finished and feel easy.
If you’re hesitating, begin with height and light: get plants off the floor and add warm or cool glow where you need it. That single move creates clarity you can build on. You’ll be snipping basil at sunrise and mint at midnight, wondering why you waited so long.
You’ve got this. Your balcony is about to smell incredible and photograph even better—fresh herbs all year, and a daily moment that feels like a tiny vacation at home.

About the Author

Krisztina P.Rendes, Founder of Home Style Vibes
Founder of Home Style Vibes
Krisztina Puskásné Rendes created Home Style Vibes as a cozy-modern lifestyle space where homemaking meets inspiration. Her goal is to help women create beautiful, organized, and peaceful homes they truly love — without overwhelm. You’ll find here heart-driven content on home decor, cleaning tips, easy family recipes, organization and decluttering, DIY home projects, plants, and seasonal ideas — all designed to bring more calm, comfort, and style into everyday life.