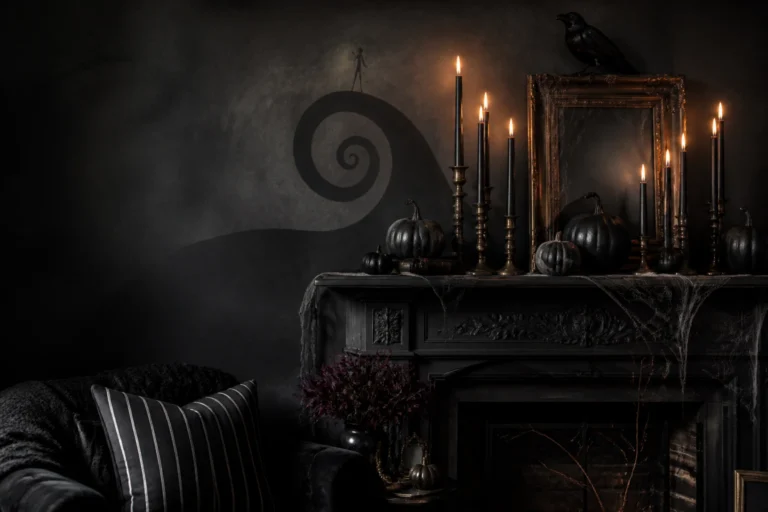
5 Halloween Sleepover Ideas For The Ultimate Spooky Night In
You want a Halloween sleepover that actually feels haunted-in-a-fun-way: black taper candles flickering, shadowy corners, a playful crow perched somewhere questionable, and the kind of cozy that keeps everyone up telling stories. You hate that it usually turns into a chaotic mess of random spiderwebs and plastic skeletons, plus a sugar hangover that doesn’t photograph well. This guide gives you five fully styled, insanely doable room setups—each one moody, stylish, and built for real homes—so you can host a Halloween sleepover that looks like candlelit magic without spending over $250 per room or losing your mind. Expect inky shadows, oxblood velvet, antique brass, and jack-o’-lantern grins that glow on cue.
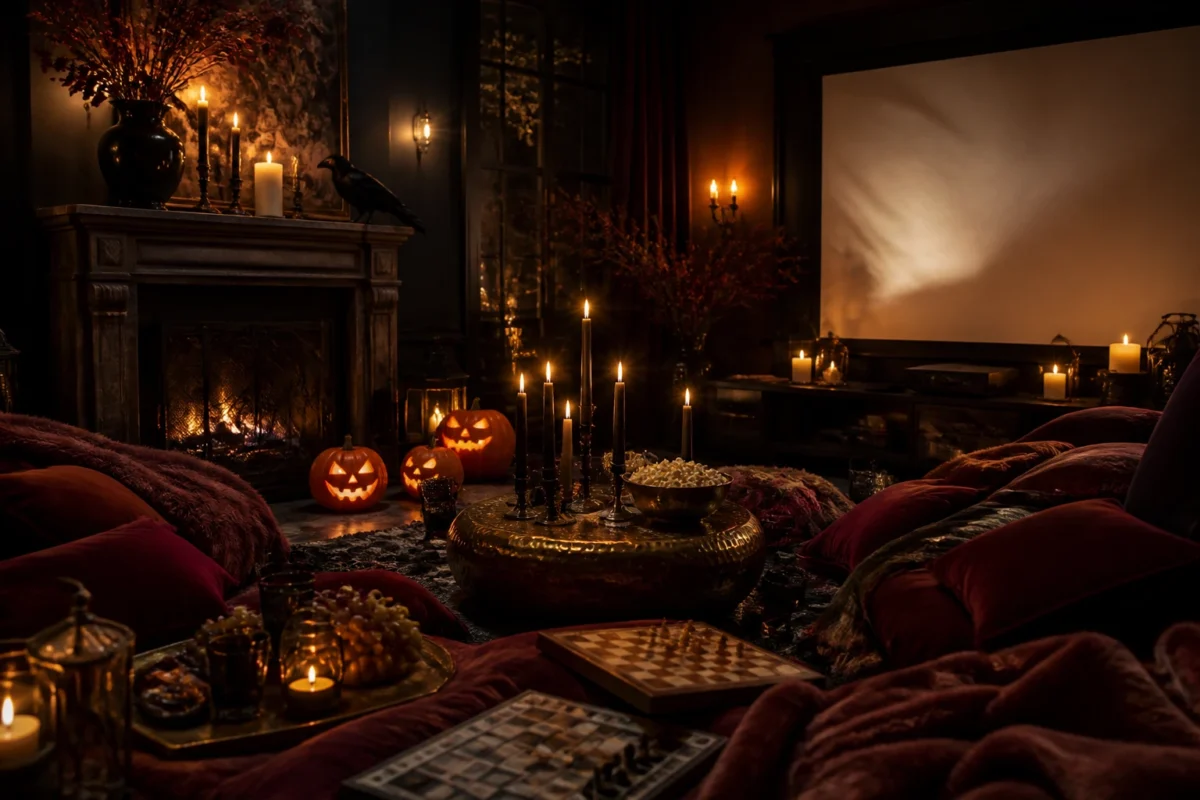
We’ll fix the biggest frustration: making it feel intentional and cohesive, not like a costume store exploded in your living room. These 5 Halloween sleepover ideas create mood and structure—clear zones for snacks, games, movie marathons, and actual sleep—so the night flows and your photos look Pinterest-level. If you love witchy, dark autumn coziness with a playful spooky twist, you’ll use these from the last week of September through Halloween night itself. Let’s turn “random party” into “haunted house, but chic,” and keep it indoors where the shadows do their best work.
1) Oxblood Velvet Pumpkins, Black Candlelight, and a Living Room Floor Camp
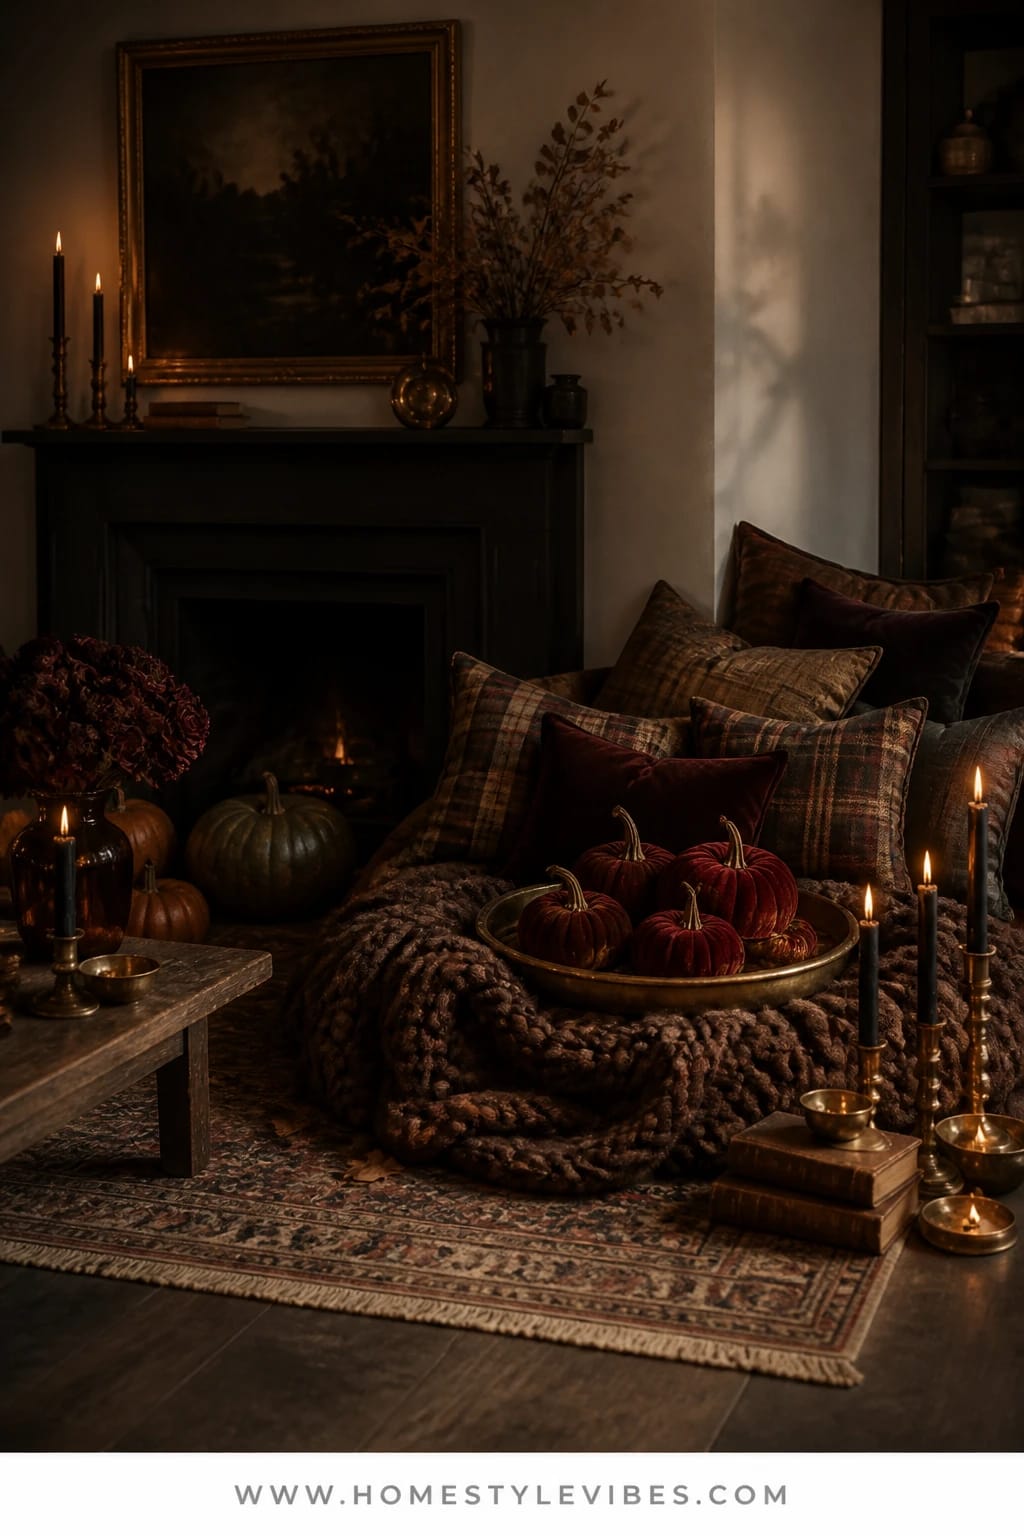
We’ve all been there: the living room is where everyone ends up, but your floor camp just looks like a collapsed linen closet. Pillows, blankets, and no actual vibe. This idea builds a Halloween sleepover “base camp” that feels like a Victorian séance with a playful wink—think oxblood velvet pumpkins, clusters of black taper candles in antique brass holders, and movie-night nesting built right on the rug.
The mood leans witchy and intimate. You’ll get clustered candlelight and layered shadows, so faces glow and the background falls away for that moody, mysterious look. It works for real homes because it doesn’t demand a full room redo—just strategically placing textiles, pumpkins, and a low “altar” coffee table where snacks and a board game can live. Once the night ends, everything folds into a single bin. It’s small-space friendly and wildly photogenic thanks to deep burgundy tones and reflective brass warming the black candlelight.
Lighting does the heavy lifting here. Black taper candles flicker at eye level, while a single floor lamp dimmed to 30% throws soft light across the scene. Add two LED jack-o’-lanterns tucked near the TV stand for a grin-in-the-shadows moment. Pro tip: keep candles away from the edge of the rug and use dripless tapers; I learned this the hard way when a rogue wax teardrop took out an heirloom throw. RIP granny’s blanket fringe.
Variations: Go budget with DIY velvet pumpkins using thrifted pillow covers and polyfill (no sewing necessary, just wrap and tie with twine underneath). In a smaller room, anchor with one large oxblood throw, four oversized floor pillows, and a single candle cluster on the coffee table for simplicity. If you prefer a subtler look, switch oxblood to deep aubergine and use matte black candlesticks instead of brass for a quieter profile that still reads Halloween.
Budget Breakdown:
- Set of black taper candles (12): $18–$28
- Antique brass candlesticks (thrifted or new set): $25–$70
- Velvet pumpkins (set of 6, mixed sizes): $22–$60
- Oversized floor pillows (2–4): $40–$120
- Oxblood throw blanket: $20–$45
- LED jack-o’-lanterns (2): $18–$36
Total Estimated Cost: $143 – $359
Best For: Families or friend groups who want a film-and-storytelling hub in the living room from late September through Halloween night. Works beautifully in medium to large rooms with a central rug or sectional.
Key Design Elements:
- Main seasonal props: velvet pumpkins, jack-o’-lanterns, black taper candles
- Color palette: oxblood, aubergine, antique brass, matte black, shadowy charcoal
- Lighting strategy: clustered candlelight and a single dim lamp for shadow play
- Textile layers: velvet throws, chunky knits, heavy cotton floor pillows
- Natural elements: dried burgundy roses in a small bud vase
- Accent details: brass trays, vintage match striker, leather-bound books as risers
How To Recreate This Look:
- Start with your rug as home base and pull the sofa forward a few inches to create intimacy.
- Add oversized floor pillows and a draped oxblood throw to define the sleepover zone.
- Layer velvet pumpkins on the coffee table and one or two on stacked books near the floor.
- Place brass candlesticks in a tight cluster on a tray; add LED jack-o’-lanterns on the media cabinet.
- Style with a dried-rose bud vase, a bowl of candy, and your favorite spooky board game.
Why This Looks Expensive: The deep, saturated oxblood velvet paired with antique brass introduces depth and sheen, which reads collected, not themed. The tight color story keeps the eye calm and intentional.
Watch Out: Don’t scatter pumpkins everywhere. Keep them clustered in two or three vignettes to avoid visual clutter and trip hazards when the lights go low.
Pro Styling Tip: Photograph from sofa height with the candle cluster in the foreground and the jack-o’-lantern grin blurred behind—instant magazine depth.
2) Black Lace Cobwebs, Aubergine Glow, and a Dining Table Fort
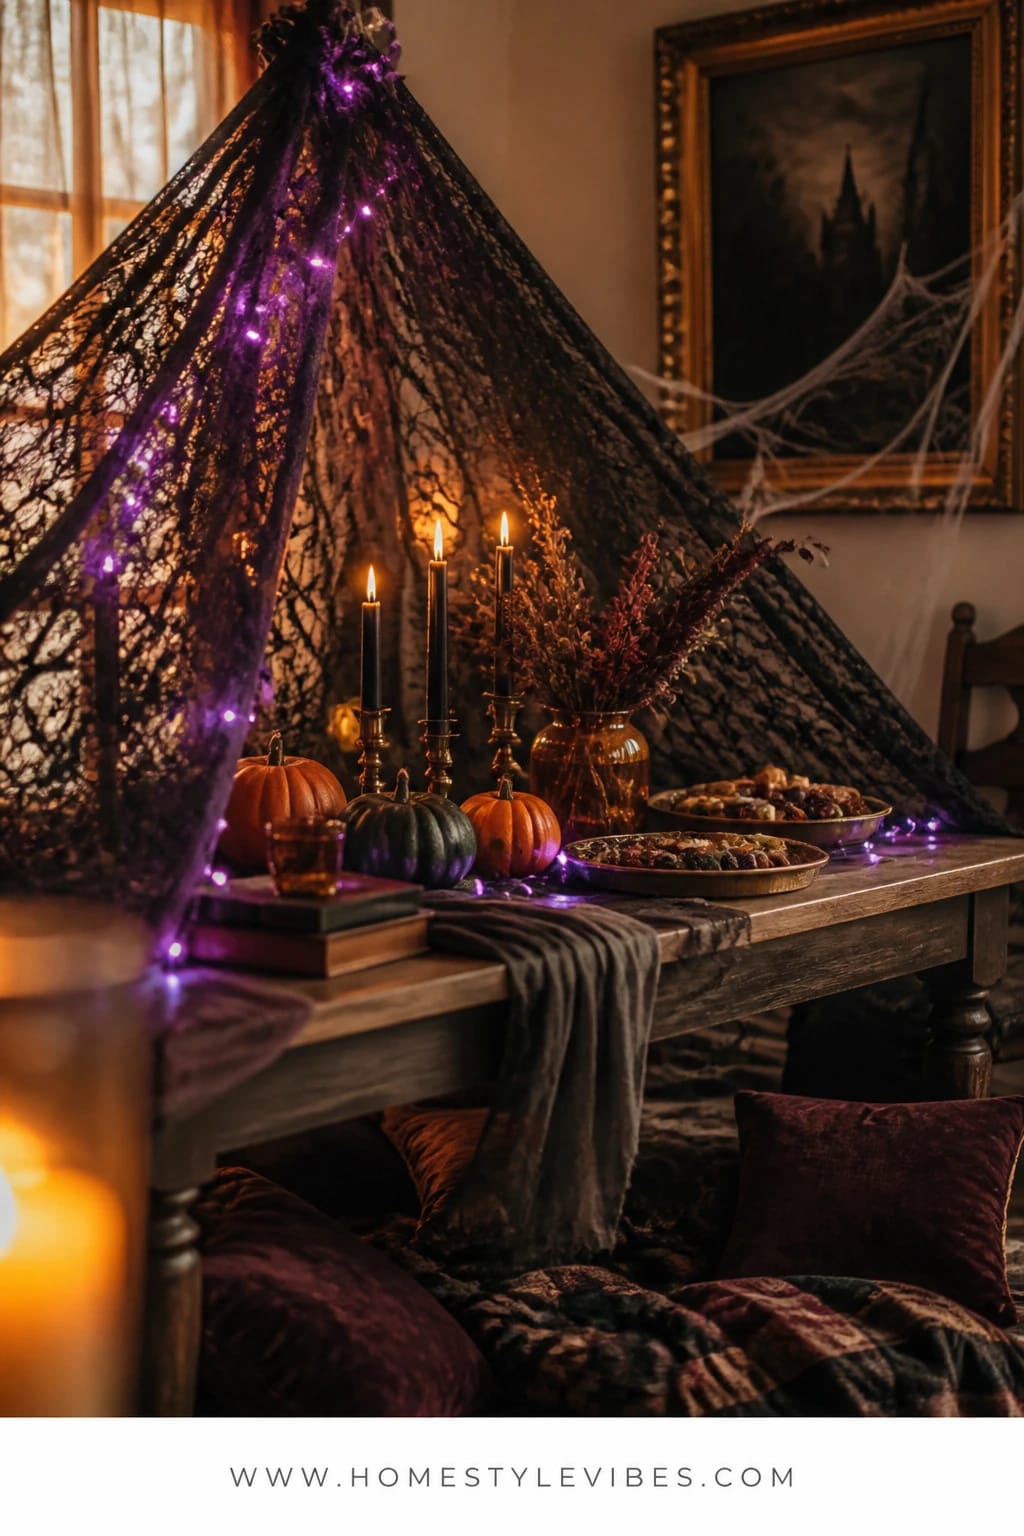
It’s that one corner that always feels off: your dining room becomes the “snack drop-zone” and never recovers. You tried a runner and a tray, but it still looks like a grocery bag unboxing. Turn the table into a dramatic, high-style “fort” and serve snacks beneath a canopy of black lace cobwebs and aubergine twinkle lights. It’s moody, photogenic, and doubles as a late-night story nook.
This concept creates a theatrical Halloween sleepover vibe—part Victorian tent, part witch’s lair. Why it works? You’re containing the chaos. Food lives here, games live here, drawing and pumpkin stenciling live here. In a real home, turning the dining table into an activity fort keeps crumbs in one place and gives the rest of your home some breathing room. Plus, the vertical drama from the lace canopy makes even a small dining space feel like a set piece.
Lighting is everything: dim overheads and string aubergine micro-lights across a simple dowel or curtain rod suspended from two Command hooks above the table. Drape black lace loosely from the rod corners to the chair backs so it cascades like cobwebs. Add two short black pillars on a tray in the center so little hands don’t reach through open flame. We keep it stylish, never gory—think subtle cobwebs and paper bats, not slimy body parts.
Variations: For a smaller table, do a half-canopy over only one end and create a cozy “captain’s chair” vibe with layered pillows. On a budget, swap lace for cheesecloth dyed gray-black with fabric paint. Not into purple light? Use warm white micro-lights and an aubergine table runner instead to keep the color story grounded.
Budget Breakdown:
- Black lace fabric or pre-made spider lace (4–6 yards): $24–$60
- Aubergine micro string lights (2 strands): $18–$30
- Command hooks (4): $10–$14
- Wooden dowel or curtain rod: $6–$22
- Short black pillar candles (2–4): $10–$24
- Paper bats or black cardstock for DIY: $5–$12
Total Estimated Cost: $73 – $162
Best For: Households that need a central snack-and-craft zone from early October through Halloween week. Perfect for compact dining rooms and eat-in kitchens.
Key Design Elements:
- Main seasonal props: black lace cobweb canopy, paper bats, pillar candles
- Color palette: black, aubergine, aged brass, warm white accents
- Lighting strategy: aubergine micro-lights, dimmed overheads, low candle pillars
- Textile layers: lace drapes, velvet runner, plush seat cushions
- Natural elements: a few dark pumpkins or ornamental eggplants in a bowl
- Accent details: low brass tray for candles, matte black plates, vintage goblets
How To Recreate This Look:
- Start with a cleared table and a dark runner down the center.
- Add Command hooks to the ceiling or adjacent walls and suspend a dowel over the table.
- Layer black lace from the rod down to chair backs, letting it puddle at the corners.
- Place a brass tray with short black pillars and sprinkle paper bats along the runner.
- String aubergine lights across the rod and down the lace for an eerie glow.
Why This Feels Designer: The canopy creates architectural lines and frames the table. Strong vertical drama makes a basic dining set feel like a moody set piece.
One Thing To Avoid: Don’t overpack the tabletop. Leave negative space around your candle tray so the lace and lights can breathe.
Pro Styling Tip: Snap photos with the camera slightly below tabletop height so the lace canopy looms—instant haunted-theater energy.
Remember, this isn’t about recreating a showroom. It’s about building a Halloween sleepover that actually works for your people. If one idea resonates more than the others, start there and ignore the rest until next year. Your spooky night in should feel like you, not like a set of rules.
3) Jack-O’-Lantern Shadows, Antique Brass Glow, and a Fireplace Mantel Tale-Telling Zone
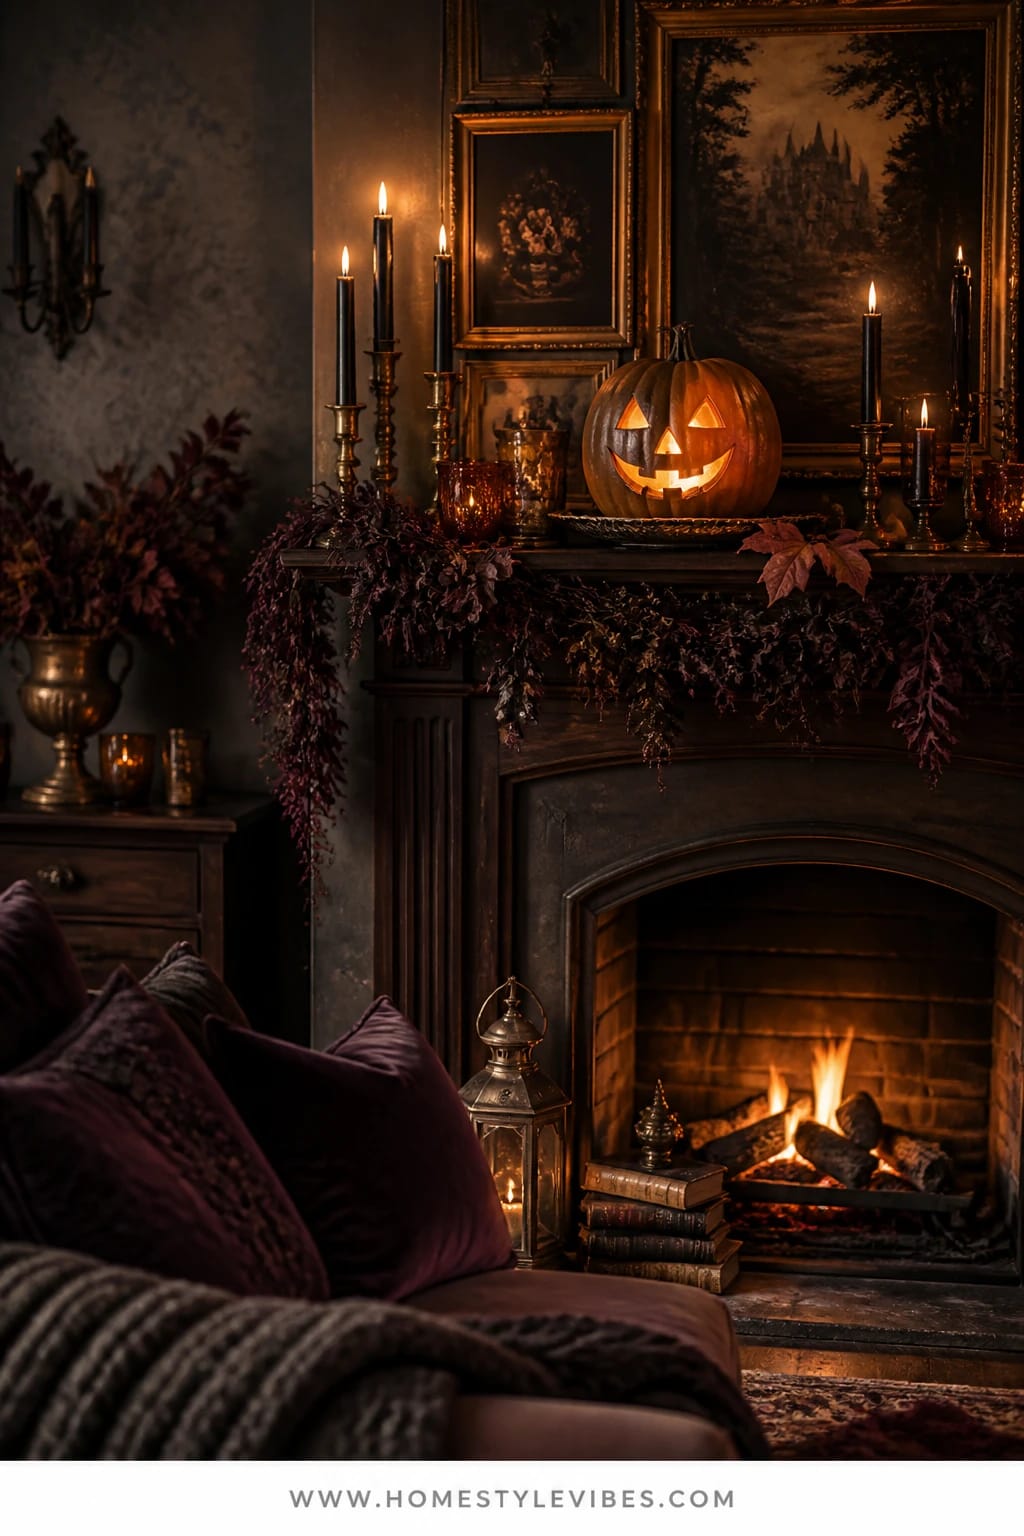
Here’s the truth: the mantel often stays pretty all season, which is lovely, but during a Halloween sleepover it needs a job. You’ve stacked a few pumpkins up there before and called it a day, but it didn’t change the mood. This time, we’re crafting a storytelling zone—the place where scary stories get told, lights are low, and a jack-o’-lantern face throws shifting shadows across vintage frames.
The mood is layered and cinematic: black taper candles in antique brass, dark art in gilt frames, a cluster of dark pumpkins, and a few dried burgundy roses in a low urn. Light the scene primarily from the mantel, then cut the overheads completely. When the room goes quiet and someone describes the creak on the stairs, the candle wicks crackle and the carved pumpkin grin dances on the wall. It works because the mantel is already a visual stage—use it. Keep the floor in front of the fireplace clear and lay down a rich, heavy throw with two floor cushions for the “storyteller” and a friend.
It photographs beautifully thanks to the depth of layered frames and high-low light sources. The black tapers are your verticals, the pumpkins your grounding horizontals, and the antique brass reflects warmth onto matte black and aubergine elements. Small-space friendly? Absolutely. It’s all vertical. Storage-friendly? Everything packs into one box, except the pumpkins, which you’ll eat or compost—IMO, real pumpkins win every time for that satiny, natural skin that just reads luxe on camera.
Variations: No working fireplace? Perfect. Skip the flame in the box and place a caged battery candle inside for soft uplight. Have curious pets? Swap real tapers for LED tapers with realistic wicks. If your mantel is white, accent with an oxblood runner to ground the look.
Budget Breakdown:
- Black taper candles (8): $12–$20
- Antique brass candlesticks: $25–$70
- Dark art printable + thrifted gilt frames: $18–$40
- Dark pumpkins (real or faux mix): $20–$45
- Dried burgundy roses + urn: $16–$36
- LED candle for firebox: $14–$25
Total Estimated Cost: $105 – $236
Best For: Homes with a fireplace or faux mantel looking to create a dedicated storytelling area from mid-October through Halloween week.
Key Design Elements:
- Main seasonal props: jack-o’-lantern, black tapers, dried roses
- Color palette: black, oxblood, aubergine, antique brass, cream accents
- Lighting strategy: candles at varied heights, one battery candle in the firebox, no overheads
- Textile layers: oxblood mantel runner, heavy floor throw, two oversized cushions
- Natural elements: real pumpkins, dried florals
- Accent details: gilt frames, leather-bound books as risers, a vintage bell for “storytime” calling
How To Recreate This Look:
- Start with a dark runner across the mantel to ground your vignettes.
- Add gilt-framed dark art in a layered stack—one leaning, one slightly overlapping in front.
- Place candlesticks in odd numbers at different heights along the mantel.
- Carve one pumpkin with a classic grin and set a battery candle inside; add two dark uncarved pumpkins for balance.
- Style with a dried rose urn and two stacked books to lift a smaller candle.
Why This Reads High-End: Layered frames and candlesticks create rhythm and repetition, while limited, saturated color makes it look curated. The eye reads “collection” instead of “holiday décor.”
The Most Common Mistake: Spreading everything out. Keep pieces grouped in tight clusters to create visual strength and clean negative space in between.
Pro Styling Tip: When photographing, let the jack-o’-lantern be your brightest light source and let everything else fall a stop darker. That contrast is what feels haunted and chic.
Take a breath. You don’t need all five Halloween sleepover ideas to have an unforgettable night. Pick one main zone and one supporting idea. Done. Your home will feel intentional and your photos will tell a real story.
4) Witchy Cocoa Bar, Black Mugs, and a Kitchen Island Midnight Mix-In Station
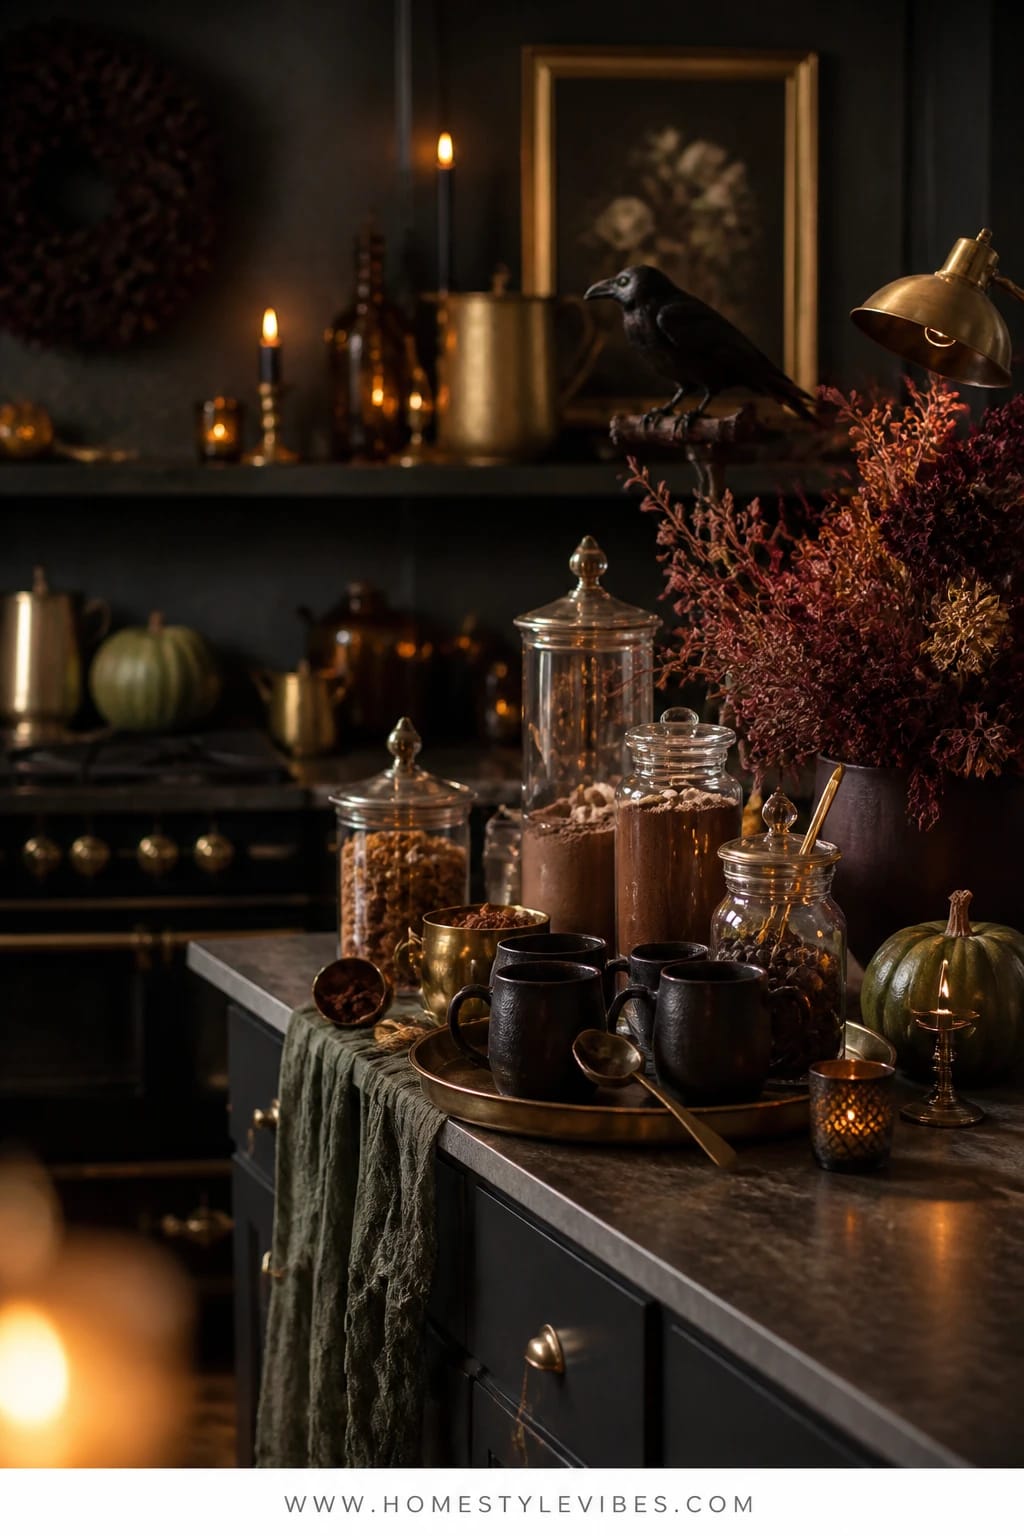
Let’s be honest: snacks are where chaos swallows the vibe. Candy bags everywhere, sticky counters, and a trail of marshmallows from the sink to the sofa. This kitchen island cocoa bar corrals the sweet stuff into one moody, beautiful station: black ceramic mugs, antique brass scoops, labeled apothecary jars for cocoa and “potion” toppings, plus a crow perched on the stand to keep everyone grinning. It’s a Halloween sleepover perk that doubles as set décor—stylish and wildly functional.
The mood is witchy apothecary meets midnight cafe. It works because self-serve prevents constant kitchen traffic, and black mugs hide drips while looking incredibly chic under dimmed pendants. Keep lighting low with warm bulbs and add a single black taper in a heavy, wide-based candlestick beside the jar lineup (or use LED if kids are scooping). The look photographs beautifully thanks to the contrast between matte black ceramics, glass jars, and metallic scoops against a dark runner.
I tried this last October and honestly didn’t expect it to change the flow so much. Guests naturally formed a line, created their own cocoa “spells,” and then drifted back to the living room, which stayed neat. And because the jars were labeled (Bone-Dry Marshmallows, Bat Wings a.k.a. chocolate chips, Ghost Dust a.k.a. powdered sugar), everyone giggled as they built their drinks.
Variations: Small island? Use a two-tier stand to build vertical interest. No island? Convert a bar cart or the countertop near an outlet for the kettle. Prefer tea? Swap cocoa for black tea and chai in apothecary jars and call it the “Night Watcher’s Blend.” For a cleaner look, keep the labels minimal—cream paper with tiny serif font and a black wax seal sticker if you’re feeling fancy.
Budget Breakdown:
- Set of matte black mugs (6–8): $24–$56
- Apothecary jars (4–6 mixed sizes): $28–$72
- Small brass scoops/spoons (set): $12–$26
- Tiered stand or long tray: $16–$45
- Black taper or LED candle: $8–$16
- Crow decor piece: $10–$20
- Ingredients (cocoa, marshmallows, chips, cinnamon sticks): $15–$35
Total Estimated Cost: $113 – $270
Best For: Homes with a kitchen island or counter run that can host a late-night snack station throughout October; especially helpful for larger groups that graze all night.
Key Design Elements:
- Main seasonal props: apothecary jars, black mugs, crow
- Color palette: matte black, clear glass, antique brass, oxblood label accents
- Lighting strategy: dimmed pendants, single candle, no overhead fluorescents
- Textile layers: narrow black runner, small oxblood napkins
- Natural elements: cinnamon sticks, dried orange slices in a jar
- Accent details: wax-sealed labels, aged brass scoop handles, slate coasters
Why This Looks Intentional: Repetition is the secret. Matching mugs and a consistent jar style with restrained labels look curated, not random. The crow is the one wink that keeps it fun.
How To Recreate This Look:
- Start with a narrow black runner or tray to anchor the vignette.
- Add your jars in descending height order and space them evenly.
- Layer in black mugs on one side and a kettle or thermos on the other.
- Place a brass-handled scoop in each jar and a crow perched on the stand edge.
- Style with a small candle, a bowl of cinnamon sticks, and clean tongs for marshmallows.
Don’t Do This: Avoid mixed, colorful packaging. Decant everything. Visual noise kills the spell.
Pro Styling Tip: For photos, backlight the jars slightly so the glass edges glow and the contents read clearly without shining a spotlight on them.
5) Velvet Cloak Fort, Black Battery Candles, and a Bedroom Spooky Story Cinema
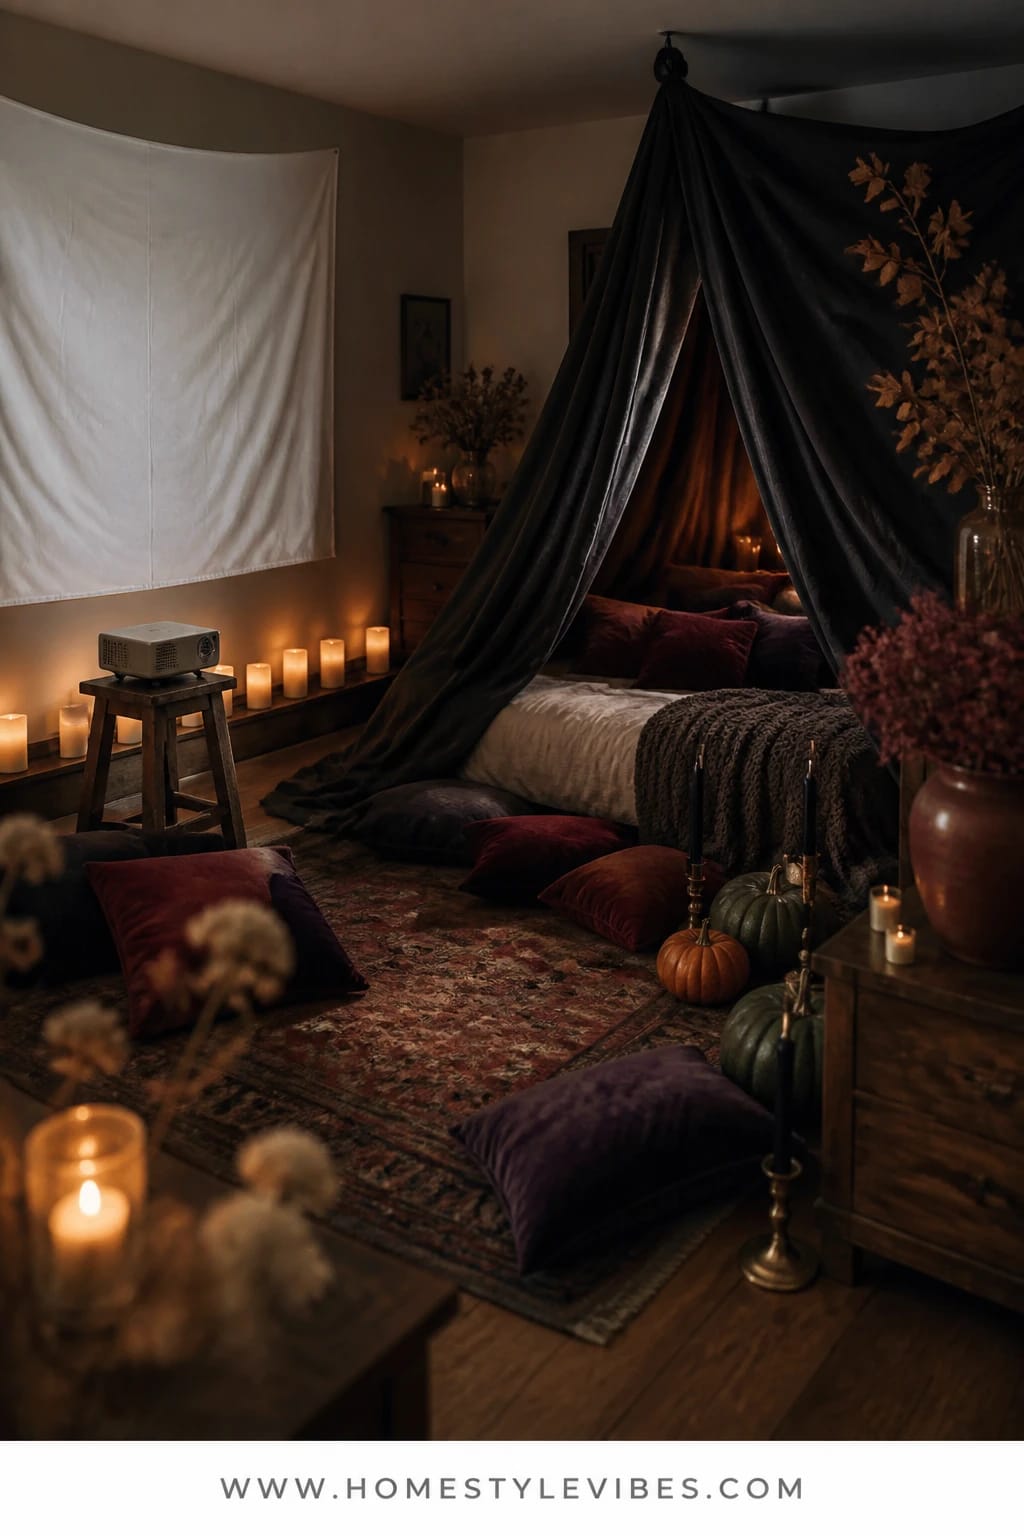
Sleepovers fall apart in bedrooms when they feel like a laundry pile with an audience. You’ve tried throwing every blanket at the problem, but it still looks messy and no one wants to sleep under the overhead light glare. Here’s the antidote: a velvet “cloak fort” suspended over the bed or floor mattresses, black battery candles lining the baseboards, and a portable projector aimed at a blank wall or a pale sheet for a private spooky cinema.
The mood is decisively moody and cocooned: low light, pillow nests, and a soft hush as the movie starts. It works because it creates zones—one side for watching, one side for sleeping—without furniture shuffles. Compact rooms benefit from the height created by the draped “cloak” and the consistent dark palette that eats visual clutter. Lighting stays safe and transportable: battery tapers in stable holders or flameless pillars on the dresser, and a dim string of aubergine lights run under the bed edge for a subtle glow. If you have a ceiling fan, set Command hooks in the corners and drape velvet from the hooks to the bed posts—easy to remove in the morning.
In terms of photography, this one wins. Those inky folds of fabric, glow at ankle level, and faces lit by the film—perfection. I once borrowed a friend’s mini projector for this setup, projecting Halloweentown onto a cream wall. Everyone gasped because it felt like a secret theater. We passed popcorn and caramel apples, then fell asleep in ten minutes—sugar crash meets velvet cave. No regrets.
Variations: No projector? Place a tablet on a small easel at the foot of the bed and drape a black scarf behind it to cut reflections. Small room? Use a single velvet throw draped from two high hooks over a corner of the bed to create a “witch’s canopy.” Prefer zero-fabric? Use matte-black paper pennants across the room with aubergine micro-lights instead of a velvet cloak; still moody, less maintenance.
Budget Breakdown:
- Velvet curtain panels or large throws (2–3): $36–$120
- Command hooks (6–8): $12–$18
- Black battery candles (6–8): $20–$48
- Micro string lights (aubergine or warm white): $10–$20
- Mini projector (purchase or borrow): $55–$200
- Pillows and extra bedding: $0–$60 (use what you have, add one deep-colored throw)
Total Estimated Cost: $133 – $466
Best For: Primary or guest bedrooms where the sleepover ends, October weekends or Halloween night. Ideal if you want a winding-down zone that actually encourages sleep.
Key Design Elements:
- Main seasonal props: velvet drape, battery candles, aubergine lights
- Color palette: black, deep burgundy, aubergine, soft cream for projection wall
- Lighting strategy: ankle-level glow, projector light as main source, no overheads
- Textile layers: velvet throws, heavy knits, dark pillow shams
- Natural elements: a small bowl of pomegranate seeds or dark grapes for a midnight snack
- Accent details: matte-black lanterns, a vintage-look bell for “lights-out” call
Why This Looks Expensive: The fabric ceiling trick adds architecture where there wasn’t any. Velvet absorbs light and noise, so the room reads richer and calmer.
How To Recreate This Look:
- Start with cleared floors and a neutral wall or sheet for projection.
- Add Command hooks high in the corners and drape velvet panels to create a gentle tent shape.
- Layer the bed with dark throws and extra pillows along the wall side to form a lounge backrest.
- Place battery candles low along baseboards and dim other sources.
- Set up the projector or tablet and cue your film playlist before guests arrive.
Watch Out: Don’t block airflow around vents with heavy fabric. Leave breathing room on the sides, or you’ll get stuffy fast.
Pro Styling Tip: Angle the projector slightly off-center and shoot photos from the darker side; the asymmetry looks editorial and avoids lens flare.
If your brain’s buzzing with options, pause. You don’t need perfection. You need a plan that makes your home feel like a spirited hideout for one night. Choose a main hub (living room floor camp or bedroom cinema), then add one support zone (cocoa bar or dining fort). That’s your winning combo.
Quick Checklist
- Black taper candles and sturdy holders
- Antique brass accents for warmth
- Velvet pumpkins in oxblood or aubergine
- Micro string lights in aubergine or warm white
- Apothecary jars with simple labels
- Matte black mugs for late-night cocoa
- Lace or cheesecloth canopy for the dining table
- A dedicated storytelling spot at the mantel
- Battery candles for safe glow in bedrooms
- One dramatic textile (runner, throw, or curtain) to ground each zone
- A crow or bat detail for playful spooky energy
- A projector or tablet stand for movie time
- Floor pillows and heavy throws for comfort
- One storage bin labeled “Halloween Sleepover” for easy teardown
Frequently Asked Questions
How can I keep costs down for a Halloween sleepover without it feeling cheap?
Pick one focal zone and invest in two elements there: great lighting (black tapers or battery candles) and one rich textile (velvet runner or throw). Decant snacks into jars and keep colors tight—black, oxblood, brass. Borrow a projector or skip it and center around storytelling at the mantel.
Real or faux pumpkins—what works best indoors for a whole month?
Real pumpkins look lush on camera and feel authentic, but keep them away from heat vents and direct sun. For longer display windows or warm homes, mix faux dark pumpkins with one real carved pumpkin you swap out mid-October. IMO, real wins for short stints; faux saves your sanity for the long haul.
My space is small. Which two ideas should I combine for maximum impact?
Do the living room floor camp with oxblood velvet pumpkins and the kitchen cocoa bar. They’re compact, easy to set up, and they create clear hubs so traffic flows. Keep lighting low and color consistent so the space reads cozy, not crowded.
What about storage after Halloween? I don’t want ten bins of decor.
Stick to multi-season pieces: brass candlesticks, black mugs, apothecary jars, velvet throws. Only the bats, crow, and a few pumpkins need an October bin. Aim for one medium bin labeled “Halloween Sleepover” so teardown takes 20 minutes.
Are candles safe with kids and pets around during a sleepover?
Use battery tapers and LED pillars anywhere kids or pets roam. If you light real tapers on the mantel or table, keep them at adult height, in heavy bases, and away from fabric. Never leave flame unattended. You still get the moody shadows with safer tech, trust me.
When should I start decorating for a Halloween sleepover?
Start with non-perishables and lighting in late September. Add real pumpkins the first two weeks of October and carve the jack-o’-lantern 24–48 hours before your event so it stays perky and photo-ready.
The Wrap-Up
Pick your favorite of these 5 Halloween sleepover ideas and set it up this weekend. Keep the palette dark and tight, lean on candlelit shadows, and let one dramatic textile anchor each zone. The secret isn’t having more stuff—it’s choosing a mood and repeating it with intention.
Halloween at home loves depth, candlelight, and rich color. When you build a living room floor camp under black candlelight, or crown your dining table with a lace canopy, you create a world your people won’t forget. The photos will glow, the stories will linger, and the cleanup won’t crush your soul.
You’ve got this. Light the candles, cue the movie, pass the cocoa—your ultimate spooky night in starts the second the shadows start to dance.
About the Author

Krisztina P.Rendes, Founder of Home Style Vibes
Founder of Home Style Vibes
Krisztina Puskásné Rendes created Home Style Vibes as a cozy-modern lifestyle space where homemaking meets inspiration. Her goal is to help women create beautiful, organized, and peaceful homes they truly love — without overwhelm. You’ll find here heart-driven content on home decor, cleaning tips, easy family recipes, organization and decluttering, DIY home projects, plants, and seasonal ideas — all designed to bring more calm, comfort, and style into everyday life.