
6 Big Front Porch Fall Decor Ideas That Fill The Space Beautifully
You want that cozy, welcoming front porch that makes neighbors slow down and friends linger. You hate that your current setup feels flat, skimpy, or like a jumbled pile of pumpkins that never quite looks finished. This is your fix: six big front porch fall decor ideas that fill the space beautifully with saturated rusts and burgundies, warm amber light, layered plaid, and heaps of harvest textures. These ideas solve the clutter-vs.-cozy battle and give you rich, photogenic depth — porch styling that looks pulled from a magazine, but is achievable over a weekend for under $250 per concept if you plan smart.
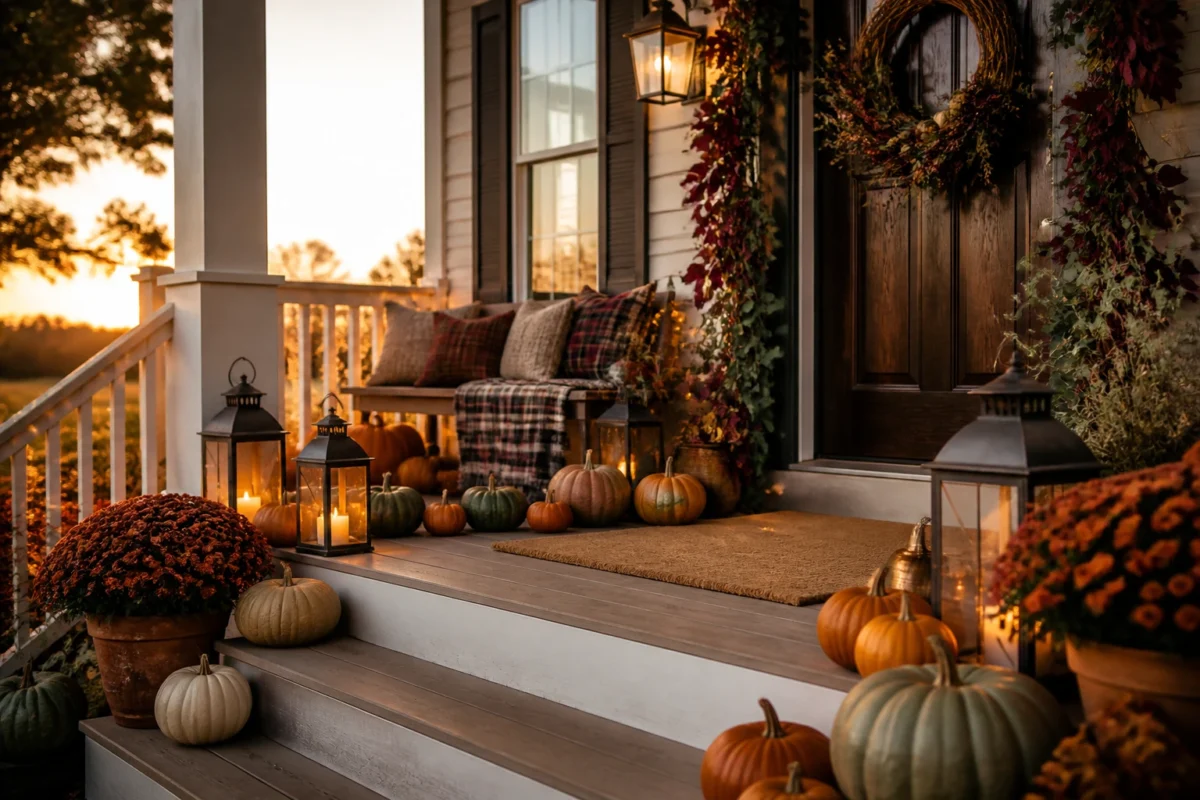
We’ll dive into full, cohesive concepts — not random tips — so you can stop second-guessing and start styling with confidence. Expect stacks of heirloom pumpkins, glowing lanterns, lush garlands, and tactile textiles that read warm and abundant from the street and even better up close. Each idea solves a different front porch struggle and includes styling steps, budgets, and smart swaps. If you love the cozy bright autumn vibe with glow, color, and harvest abundance, you’ll feel right at home here. Ready for a porch you can’t wait to come back to at dusk?
1) Lantern Cluster Glow With Warm String Lights On Wide Steps
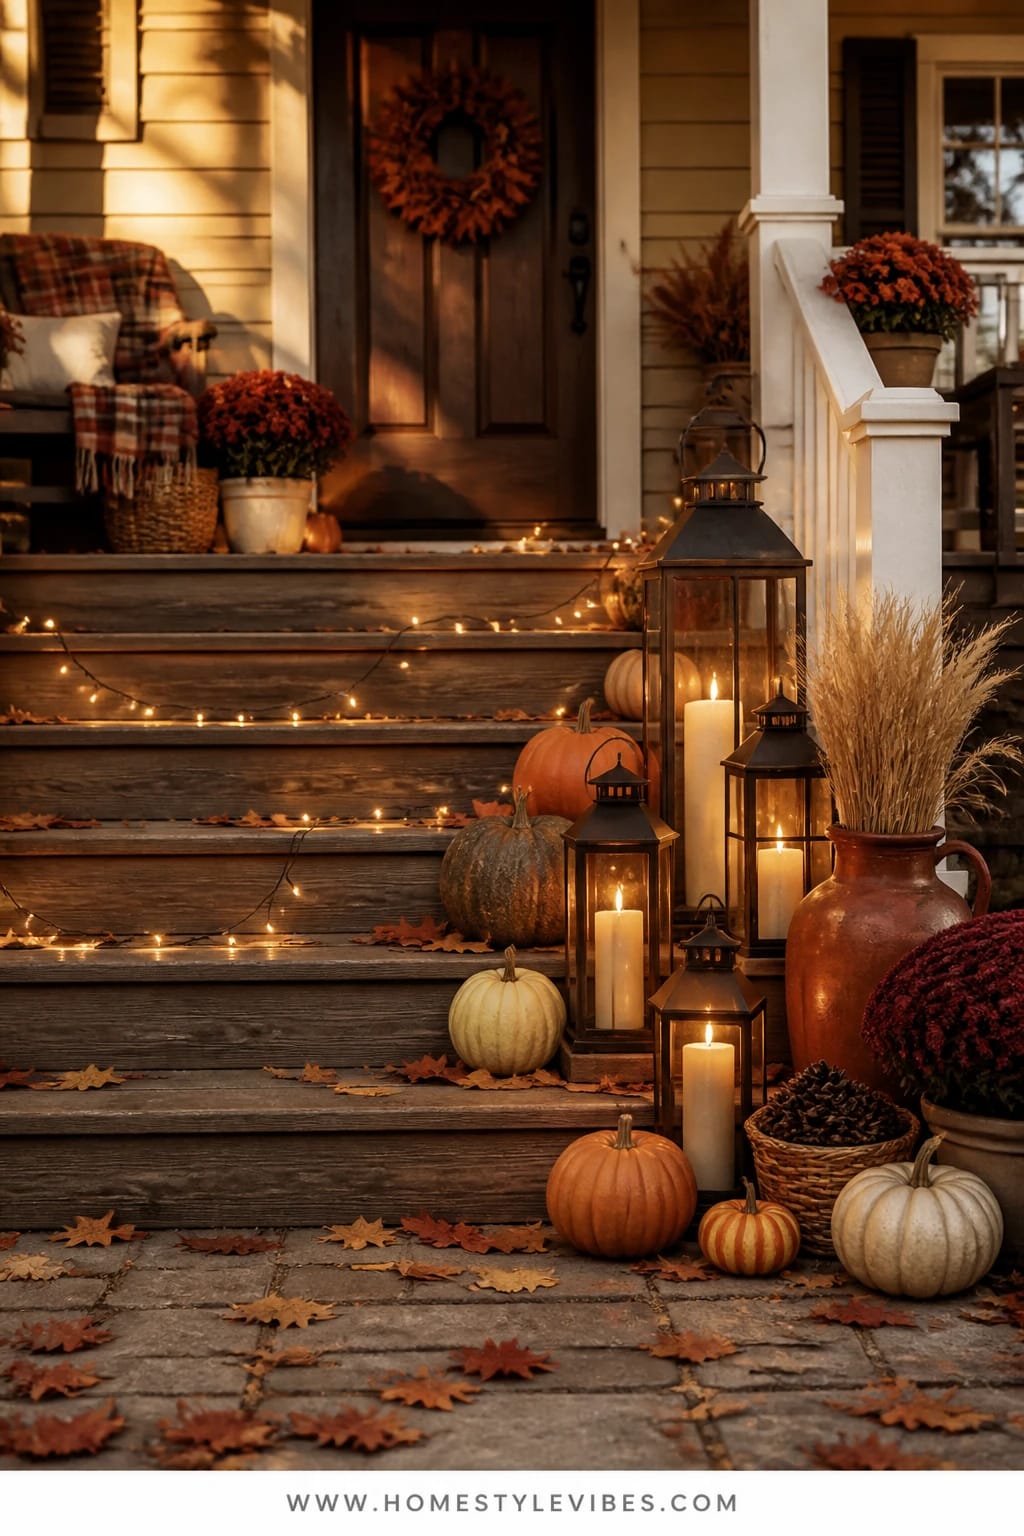
We’ve all been there: you have gorgeous front steps, but everything you set out looks minisized and swallowed by the space. The trick is not one lantern — it’s many. This idea builds a glowing threshold using a cluster of lanterns in varying heights, paired with warm white string lights that trail along the treads. It creates that unmistakable cozy bright autumn feeling: golden light dancing across pumpkins, soft plaid blankets on a bench, the soft hum of evening settling in.
Why it works: light equals presence. Multiple warm light sources add depth and make your porch feel bigger and more welcoming at night. In real homes, steps get heavy foot traffic, so keeping the core decor to the sides (lantern clusters, pumpkins tucked at corners) prevents tripping hazards and keeps the look tidy. It stores easily when the season ends — lanterns work year-round, and string lights slip right into a bin.
Lighting is the star here. Think oversized black or brass lanterns with LED pillars that flicker like real wicks, then layer one strand of incandescent or “vintage glow” LEDs along the handrail or the stair edges. Mix in saturated pumpkin colors — deep orange and creamy heirloom varieties — and nestle them near each lantern. This photographs beautifully because you get pools of amber glow, soft shadows, and those curving pumpkin silhouettes stepping down like a grand entrance.
Variations: For small porches, do a single lantern trio on one side of the steps and wind a short 25-foot strand of lights along the railing only. On a budget, thrift mismatched lanterns and unify them with a quick coat of matte black spray paint; tuck battery LED candles inside for evening charm. For a more muted look, stick to white and pale sage pumpkins and skip bright orange — the glow will still deliver the cozy factor.
Budget Breakdown:
- 3–7 lanterns in assorted sizes: $12–$45 each
- Warm white outdoor string lights (1–2 strands): $18–$40
- Battery LED pillar candles (set of 6–9): $20–$45
- Pumpkin mix (real or faux): $40–$120
- Optional plaid throw for bench or chair: $15–$30
Total Estimated Cost: $105 – $280
Best For: Homes with visible steps or a long front walkway; anyone who wants a dramatic evening glow that reads welcoming from the street September through Thanksgiving. Ideal when you host trick-or-treaters or sunset porch hangs.
Key Design Elements:
- Main seasonal props: lantern clusters, heirloom pumpkins, LED pillar candles
- Color palette: deep orange, creamy white, warm brass/black metals, soft wheat
- Lighting strategy: multiple lanterns plus a single warm string light line for dimension
- Textile layers: one throw blanket over a bench or chair
- Natural elements: mixed pumpkins, a handful of dried corn husks or wheat stems in a pot
- Accent details: metal lantern finishes, jute doormat, small wooden stool for height
How To Recreate This Look:
- Start with a clean slate: sweep steps and shake out your doormat.
- Add your largest lantern at the top step corner, then stage two medium and two small sizes down the steps, alternating sides.
- Layer warm white string lights along the railing or the step edges; secure with outdoor-safe clips.
- Place a mix of pumpkin sizes beside or slightly in front of each lantern, avoiding the center walking path.
- Style with an autumn plaid throw on any bench/chair and tuck one dried wheat bundle into a pot near the door.
Why This Looks Expensive: Multiple light sources create depth and a sense of intention — the warm glow makes even budget lanterns feel luxe. Repetition (lantern-lantern-lantern) reads curated rather than random.
Watch Out: Don’t over-brighten. Cool-white LEDs wash everything out and kill the fall mood. Stick to warm 2200–2700K bulbs for that golden, candlelit vibe.
Pro Styling Tip: For photos, turn on all lights right at blue hour — the five-minute window after sunset — to capture maximum warmth against a dusky sky.
2) Pumpkin Pillars In Rust And Cream Beside The Front Door
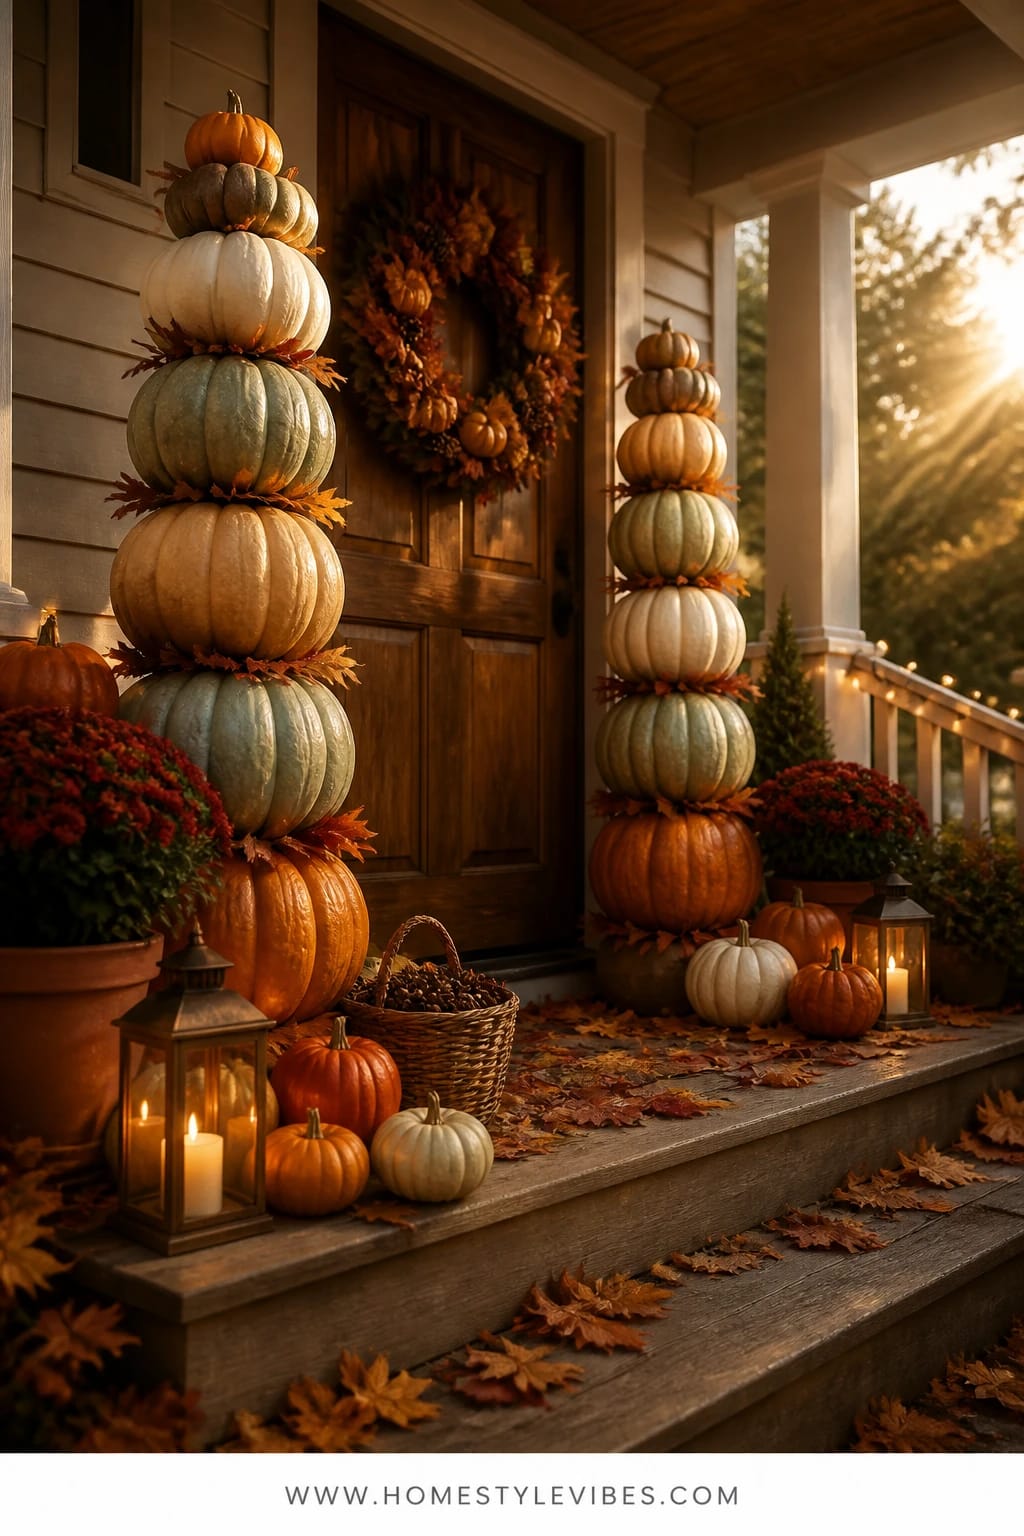
It’s that one corner that always feels off — the dead space right beside your door that either goes empty or turns into a clutter tower. Enter symmetrical pumpkin pillars: tall, stacked arrangements of pumpkins in rust, cream, and sage that flank your door like fall’s version of topiaries. This creates an instant sense of arrival with bold vertical lines and a deliciously cozy bright autumn palette.
Here’s why it works in real life: vertical stacks fill height without eating floor space, so your porch still functions. If you deal with wind, you can skewer real pumpkins onto a dowel set into a heavy planter; for faux, use floral foam and skewers. The color story — rust, cream, and a whisper of sage — pops in daylight and still holds its own at night if you add a couple of discreet spotlights or a lantern at the base.
Photographs love this look. Tall stacks create varied heights, the chalky matte skin of heirloom pumpkins gives texture, and the repeated rust-cream-rust-cream pattern reads beautifully from any angle. Pro tip: keep your doormat simple and oversized; it frames the pillars and makes everything feel deliberate, not chintzy.
Variations: On a budget, style three pumpkins per side in graduating sizes on sturdy crates or planters instead of full height stacks. If you prefer more neutral, go all white and pale green and add dried eucalyptus at the base. Small stoop? Do a single stack on the hinge side of the door and balance with a lantern and wheat bundle on the other.
Budget Breakdown:
- Real heirloom pumpkins (8–12 total): $60–$140
- Heavy planters or crates (2): $30–$120 (reuse later)
- Wooden dowels/metal rods and floral foam: $10–$25
- Optional ground spotlights or small lanterns (2): $20–$50
- Oversized coir doormat: $25–$45
Total Estimated Cost: $145 – $380
Best For: Porches with a standard-width door and a bit of breathing room on either side; classic or farmhouse-style homes; anyone who wants a strong September-through-November anchor that still looks great after Halloween.
Key Design Elements:
- Main seasonal props: stacked pumpkins, heavy planters/crates, wheat or eucalyptus base
- Color palette: rust, cream, pale sage, warm wood
- Lighting strategy: optional low spotlights or a lantern base glow
- Textile layers: minimal — the stacks do the talking
- Natural elements: heirloom pumpkin skins, dried greens
- Accent details: simple, oversized doormat; slim brass house numbers
How To Recreate This Look:
- Start with two sturdy bases set symmetrically on either side of the door.
- Add floral foam inside planters or anchor a dowel/rod vertically.
- Layer pumpkins largest to smallest, piercing or seating them snugly so they feel secure.
- Place a collar of dried eucalyptus or wheat at the base to hide mechanics.
- Style with a clean, oversized doormat centered to frame the pillars.
Why This Feels Designer: Symmetry plus scale. The vertical stacks read architectural, like seasonal columns. The restrained palette keeps it chic, not kiddish.
One Thing To Avoid: Don’t use glossy craft pumpkins alongside matte heirlooms. That texture mismatch photographs harshly. If faux, pick matte finishes.
Pro Styling Tip: Slightly angle the top pumpkin toward the street for that “hello there” vibe in photos — it catches light and shows off the stem curl.
Still feeling good? Up next: a full harvest bench vignette that makes even a blank siding wall feel styled on purpose.
3) Harvest Bench With Plaid Throws And Amber Lanterns By The Railing
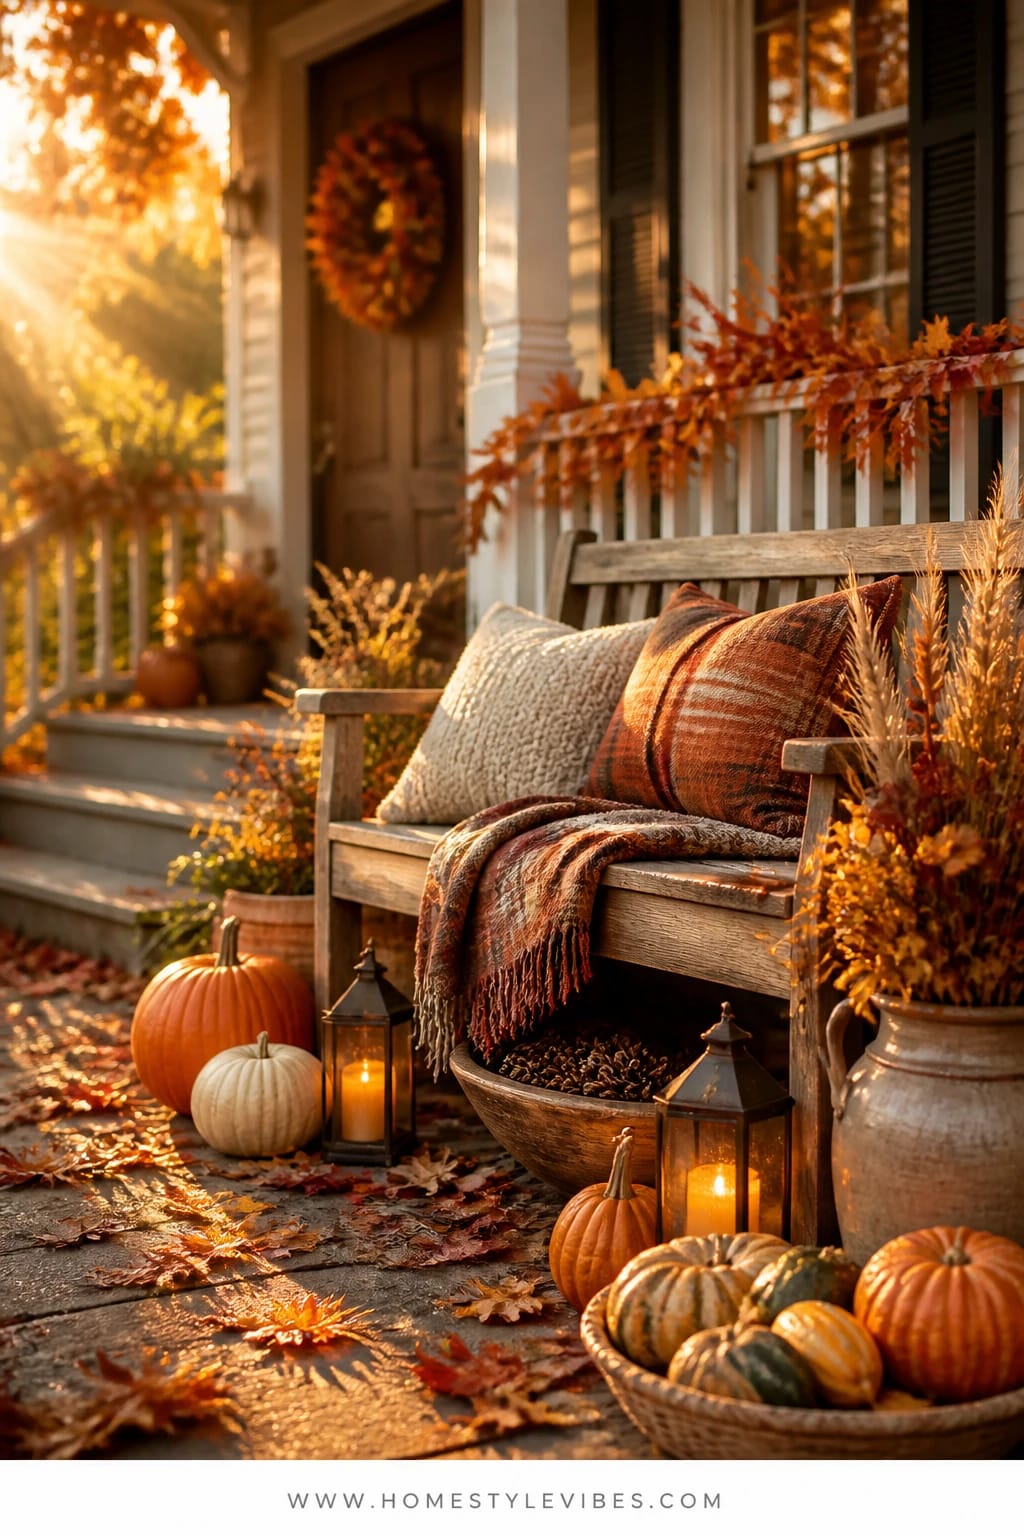
You’ve tried a couple of pumpkins on the floor and maybe a mum, but it still looks scattered. A bench changes everything. Treat your porch railing area like a mini room: a weathered wood bench layered with plaid throws and chunky pillows, a couple of amber lanterns at the feet, and a low basket overflowing with gourds. This setup creates that cozy bright autumn mood — like you’re pouring cider for friends even when you’re just dragging in groceries.
It works because it builds a clear focal area that sits at seating height, where our eyes naturally scan. Benches give you a clean styling surface, keep textiles off the damp ground, and make everything feel gathered. With covered porches, pillows survive fine; in uncovered spots, store pillows inside and style with throws that can be brought in at night. The lighting? One or two lanterns at the bench feet produce a warm glow that anchors the scene after dark.
Photographically, this is gold: texture on texture — the nubby weave of pillows, the plaid lines, the wicker basket, the smooth pumpkin skins. All those textures create visual rhythm and depth. Plus, benches give you height variation without cluttering the floor path. I tried this on my own porch last October, and honestly the bench alone made the space finally feel finished instead of perpetually “under construction.”
Variations: Small porch? Use a narrow console-style bench or even a sturdy garden stool to hold a folded throw and one pumpkin. On a tight budget, thrift the bench and sand it; you want a matte, cozy wood tone. For a softer palette, use oatmeal and cream pillows with one rust throw as the pop.
Budget Breakdown:
- Outdoor bench: $60–$200 (thrifted/new)
- Plaid throws (2): $30–$60
- Outdoor pillows (2–3): $40–$90
- Lanterns (2): $24–$80
- Basket + mixed gourds: $25–$55
Total Estimated Cost: $179 – $485
Best For: Medium to large covered porches; families who use the entry daily and want soft warmth plus easy-swappable styling through the whole season.
Key Design Elements:
- Main seasonal props: bench, plaid throws, woven basket of gourds, amber lanterns
- Color palette: rust, burgundy, cream, warm wood, touches of black
- Lighting strategy: low-level lanterns for foot-level glow
- Textile layers: 2 throws, 2–3 pillows in fall textures (tweed, boucle, canvas)
- Natural elements: gourds, pumpkins, dried wheat bundle on bench corner
- Accent details: leather pillow trim, iron lantern handles
How To Recreate This Look:
- Start with your bench against the railing or wall, centered with room to pass.
- Add two pillows at one end and a folded plaid throw draped on the seat edge.
- Layer a woven basket on the ground beside the bench; fill with gourds and a mini pumpkin or two.
- Place two lanterns at the feet of the bench on opposite sides to anchor.
- Style with a small wheat bundle or eucalyptus stems propped on the bench corner for height.
Why This Reads High-End: Benches create structure and scale. The layered textiles look intentional, not improvised, and the warm amber light softens every edge for that editorial feel.
The Most Common Mistake: Tiny throw blankets that vanish visually. Choose full, cozy throws with a noticeable plaid or herringbone so they read from the street.
Pro Styling Tip: Slightly tuck a throw under a pillow front corner — that “casually rumpled” look adds dimension and photographs beautifully.
Need something lush and vertical next? Let’s climb upward with a garland moment.
Remember, this isn’t about recreating a showroom. It’s about making your porch feel like the happiest hello after a long day. If one idea resonates more than the others, that’s your starting point. You don’t need all six.
4) Maple Leaf Garland In Burnished Gold Draped Over The Doorframe
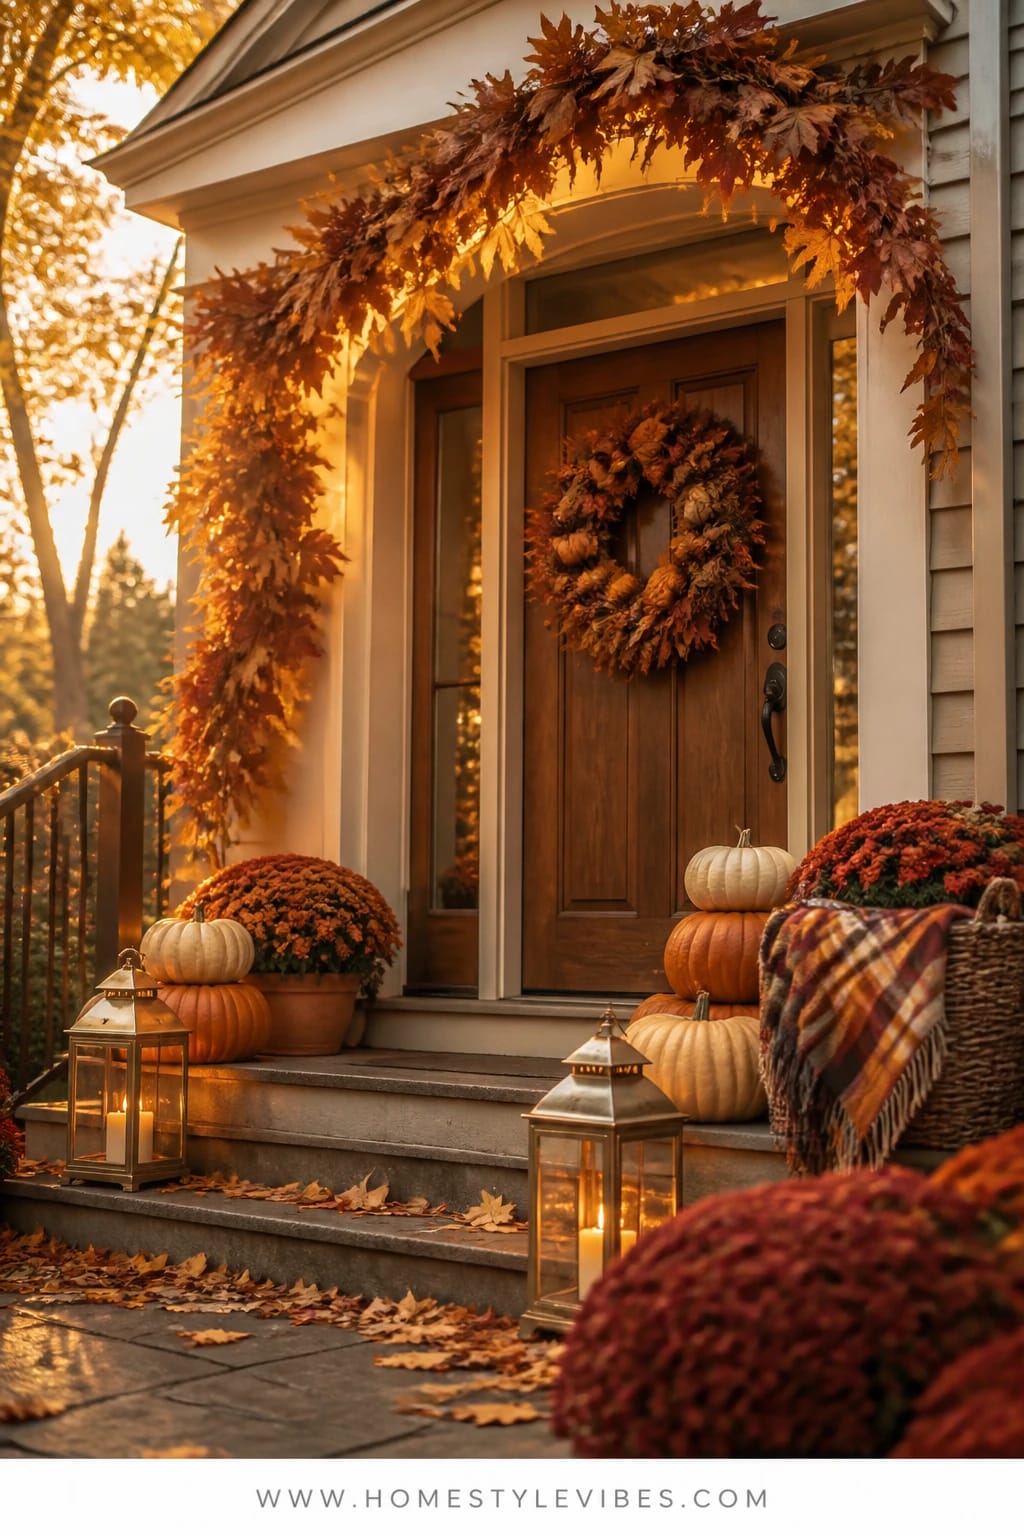
Doors can look stark, even with a wreath. If your entry feels too flat, drape it. A thick maple leaf garland in burnished gold and warm copper tones, swagged over the doorframe, instantly adds height, movement, and that cozy bright autumn richness. It frames your entry so the whole facade reads warm and generous, not sparse.
Why it works: most porches have strong vertical lines but no soft curves. A garland adds a graceful arc that pulls the eye up and emphasizes your architecture. It’s renter-friendly and easy to store; use outdoor command hooks or masonry clips. Layer two or three garlands for fullness — this is the part that makes the biggest visual difference, so resist going too thin.
Light matters here too. Tuck a micro LED copper wire strand into the leaves for an evening twinkle. The reflected glow off gold and copper foliage gives your entry that warm shimmer that friends notice even before they knock. Photographically, the layered leaves, twined lights, and curved silhouette create depth and frame faces beautifully in front door photos — no more harsh shadows only.
Variations: Prefer neutrals? Choose a garland in wheat, pale taupe, and cream. On a tighter budget, mix one faux garland with a layer of foraged, dried branches to bulk it up. Smaller door? Keep it as a generous top swag and skip the side drapes to avoid feeling crowded.
Budget Breakdown:
- Faux maple leaf garlands (2–3): $15–$40 each
- Outdoor-safe micro LED wire lights: $10–$25
- Adhesive outdoor hooks or clips: $8–$18
- Optional wreath that coordinates: $30–$80
Total Estimated Cost: $78 – $203
Best For: Any porch with a defined doorframe; homeowners who want major curb appeal with minimal floor clutter and easy storage in one bin post-season.
Key Design Elements:
- Main seasonal props: maple leaf garlands, coordinating wreath
- Color palette: burnished gold, copper, rust, warm bronze
- Lighting strategy: tucked micro LEDs for a delicate evening twinkle
- Textile layers: optional — a plaid doorframe ribbon if desired
- Natural elements: added dried seed pods or wheat picks for texture
- Accent details: bronze hooks, satin or velvet ribbon ties
How To Recreate This Look:
- Start with clean trim; attach outdoor hooks along the top of the doorframe and two down the sides.
- Add the first garland as the base swag, letting it dip slightly at the center.
- Layer the second garland to thicken, staggering leaves to avoid a “rope” look.
- Place micro LED wire lights into the leaf clusters and secure every 12 inches.
- Style with a matching wreath or a simple ribbon bow at the center dip for a polished touch.
Why This Looks Intentional: The garland frames your architecture rather than competing with it, and the subtle sparkle reads like candlelight in motion after dusk.
Don’t Do This: Avoid short, choppy garland pieces with obvious gaps. Build fullness or it will look stringy and cheap.
Pro Styling Tip: Photograph with the door slightly ajar and interior lights on — that warm backglow plus the garland sparkle is peak porch magic.
5) Harvest Crate Garden In Amber And Wheat Along The Porch Edge
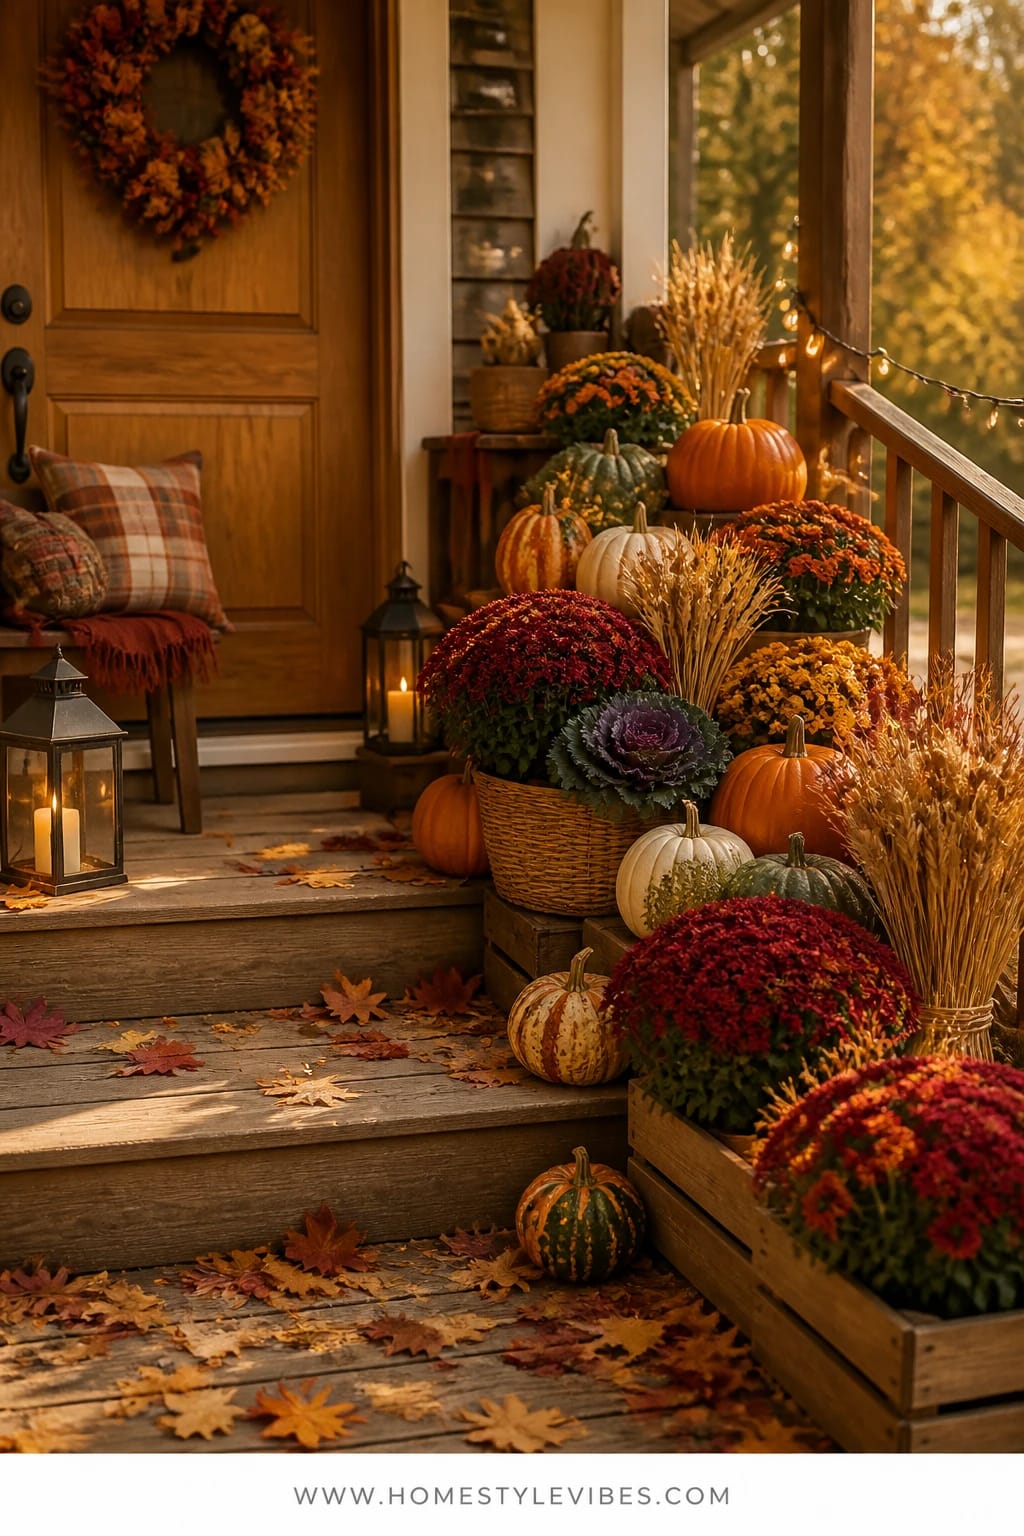
Empty edges are sneaky. They make your middle look crowded while the perimeter sits blank. Solve it with a harvest crate garden: staggered wooden crates and baskets along the porch edge, filled with mums, kale, wheat bundles, and a few scattered pumpkins. It’s a low, linear look that stretches your decor across the entire porch, making the whole space feel layered and abundant — classic cozy bright autumn energy without blocking your view.
Here’s why it shines in real life: crates are flexible. You can tuck them under eaves, shift for seating, or bring a few in during a storm. They store flat or stack neatly in the garage later. The mixed textures (wood slats, ruffled kale leaves, papery wheat) provide tons of visual interest in daylight, and if you add a couple of solar path lights or stake lanterns, you’ll get a gentle glow across the edge after dark.
Photos love the repetition and rhythm: crate, plant, pumpkin, repeat. And because the height stays low, your porch rail or columns still feel open. A friend of mine once bought three different garlands before realizing the real issue was her blank porch edge. We did the crate garden in an afternoon, and suddenly her front entry looked “done.” Sometimes the missing piece is horizontal, not vertical.
Variations: On a small porch, try three crates grouped in one corner with varied heights. Budget save: use reclaimed fruit crates or simple stacking cubes, and fill with grocery-store mums and a few bulk pumpkins. Prefer a softer look? Stick to white mums, ornamental cabbages, and pale wheat with white pumpkins for a calm, tonal palette.
Budget Breakdown:
- Wood crates/baskets (4–8): $8–$25 each
- Mums/ornamental kale (4–10): $6–$18 each
- Dried wheat bundles (2–4): $8–$15 each
- Pumpkin mix (6–12): $40–$120
- Optional solar stake lights (2–4): $20–$50
Total Estimated Cost: $130 – $370
Best For: Porches with a long front edge, bungalow stoops, and anyone who prefers grounded, low-profile styling that won’t interfere with kids, dogs, or sightlines.
Key Design Elements:
- Main seasonal props: wooden crates, mums, kale, pumpkins, wheat
- Color palette: amber, rust, deep green, creamy white, natural wood
- Lighting strategy: discreet solar stakes or small lanterns dotted through
- Textile layers: none needed — the foliage is your texture
- Natural elements: living mums, ornamental cabbages, dried grasses
- Accent details: jute rope-handled baskets, galvanized pots for contrast
Why This Looks Expensive: Repetition and rhythm. When you repeat a shape (crates) and intersperse organic textures (plants and pumpkins), it reads curated and generous, like a boutique storefront.
How To Recreate This Look:
- Start by placing crates along the porch edge, staggering heights and angles.
- Add potted mums and kale into crates and baskets; hide plastic pots with moss or burlap.
- Layer in pumpkins at the base and one or two perched securely on crate tops.
- Place wheat bundles at intervals to create vertical accents every 2–3 feet.
- Style with two or three solar stake lights set behind plants for a subtle nighttime glow.
Watch Out: Don’t overwater mums on wood — use saucers or line crates with plastic to prevent staining and rot.
Pro Styling Tip: For photos, angle one crate 15 degrees toward the camera — that diagonal line adds movement and prevents a flat “row of boxes” look.
Ready for something bolder and more dramatic? Let’s talk oversized statement planters that act like sculpture.
Quick reminder: choose one hero element per area — glow, stacks, or foliage. Too many heroes on a single porch competes for attention and causes visual noise. Give each idea room to breathe.
6) Oversized Urns With Rust Chrysanthemums Framing The Steps
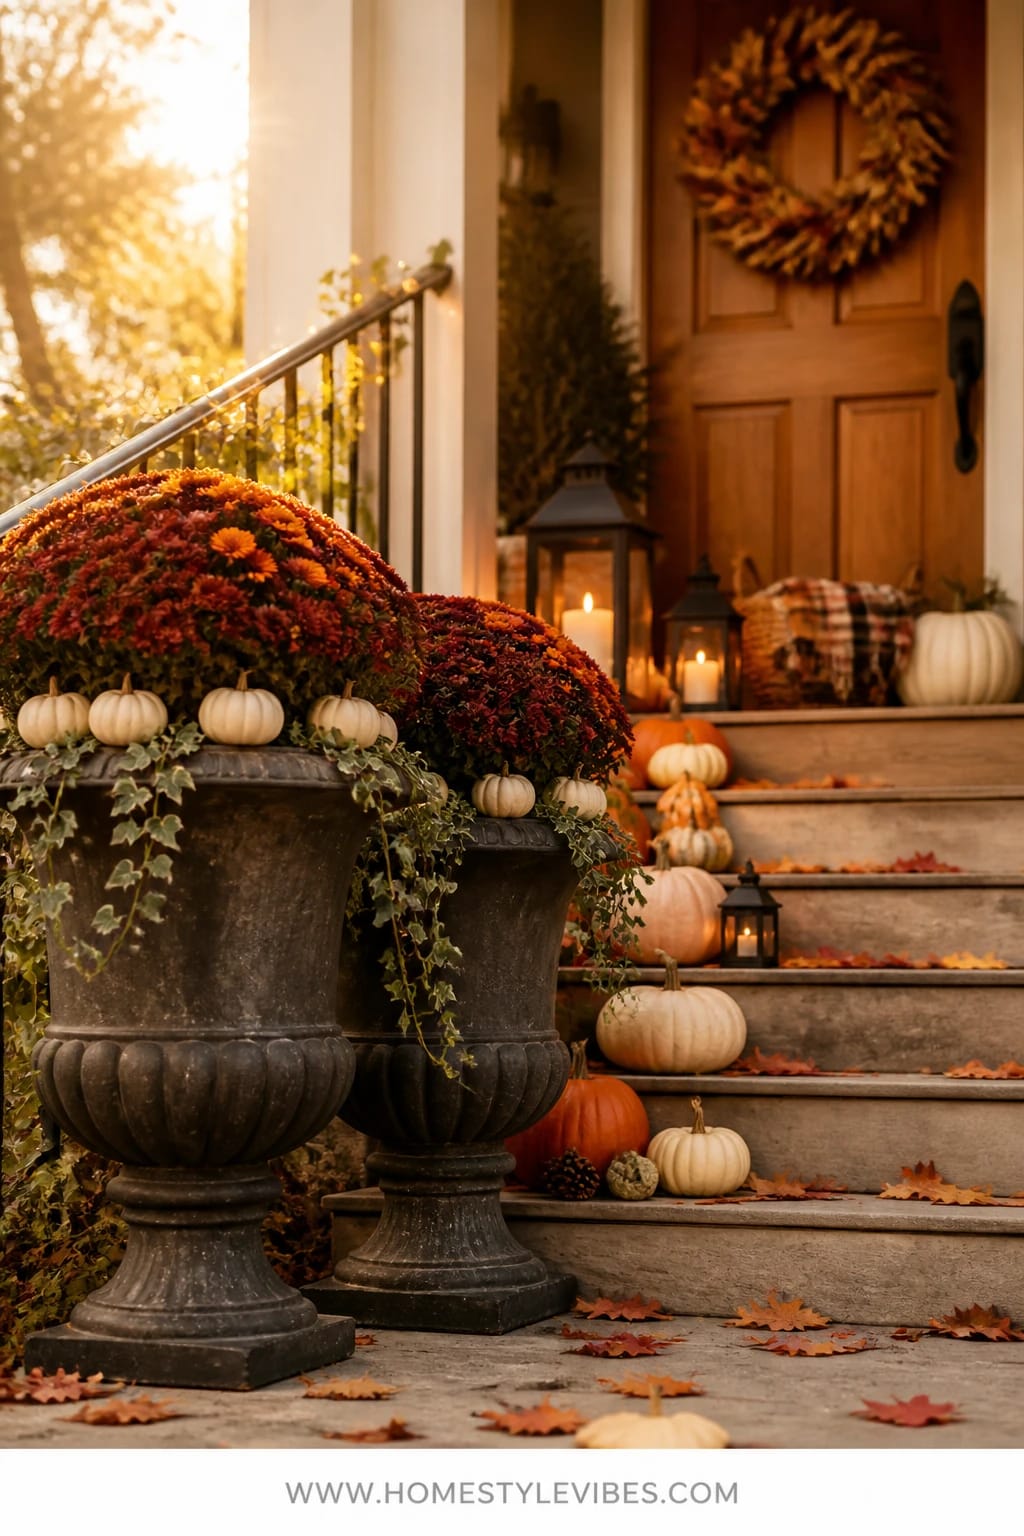
Ever notice how small planters disappear beside tall columns or wide stairs? Oversized urns fix the scale issue immediately. Set a pair of large, classic urns at the foot of your steps filled with rust chrysanthemums, trailing ivy, and a halo of small white pumpkins tucked right at the rim. The mood is grand and welcoming — cozy bright autumn, but with a touch of stately presence.
This works in real homes because big planters don’t blow away, they fill vertical space without blocking paths, and they’re easy to refresh: swap in new blooms if needed or add pinecones and cedar for winter. A single spotlight per urn can up-light the blooms and create a warm wash across your steps, so your porch looks alive after dark.
Photography goodness: height, color saturation, and clean silhouettes. The dark urns ground the scene, the rust mums glow in golden hour, and the circle of tiny pumpkins adds that irresistibly charming detail. I’ll admit, placing urns can feel tricky at first — too close and the steps feel pinched, too far and they drift visually. Stand back and adjust until your footpath feels generous and your eye naturally lands at the center of the stairs.
Variations: On a budget, seek out resin urns that mimic cast iron — they’re lightweight and cheaper but look convincing from the curb. Prefer a lighter palette? Use white mums with trailing silvery dichondra and pale pumpkins. Small porch? Use one statement urn on the railing side with a lantern on the opposite corner for balance.
Budget Breakdown:
- Large urn planters (1–2): $45–$180 each
- Rust chrysanthemums (2–4 large pots): $12–$24 each
- Trailing ivy or dichondra (2–4): $6–$12 each
- Mini pumpkins for rim (12–20): $12–$30
- Optional spotlights (1–2): $18–$40
Total Estimated Cost: $105 – $406
Best For: Homes with wide steps or a formal entry vibe; anyone who wants a one-and-done focal anchor that delivers from September right through early winter with a quick plant refresh.
Key Design Elements:
- Main seasonal props: oversized urns, rust mums, mini white pumpkins
- Color palette: deep charcoal or black urns, rust blooms, crisp white accents, dark green trailing foliage
- Lighting strategy: single spotlights for upward glow on blooms
- Textile layers: none needed — sculptural plants do the work
- Natural elements: live plants, mini pumpkins, optional curly willow branches
- Accent details: moss to topdress soil, discreet irrigation spike if you’re forgetful
How To Recreate This Look:
- Start by positioning urns at the base of the steps, leaving a generous walking path.
- Add soil or drop in nursery pots; topdress with moss for a tidy finish.
- Layer rust mums in the center, trailing ivy around the edges.
- Place mini pumpkins snugly around the inner rim to create a crown effect.
- Style with one low spotlight angled to graze the blooms; adjust to avoid glare.
Why This Looks Expensive: Scale. Large, classic shapes give architectural weight. The restrained palette and clean planting style read intentional and timeless.
One Thing To Avoid: Don’t overcrowd with too many plant varieties. Two or three is plenty — let the color do the talking.
Pro Styling Tip: Water in the morning, then brush stray soil off the urns; a clean edge makes the colors pop on camera.
Quick Checklist
- Warm white bulbs or LEDs in the 2200–2700K range
- At least one oversized element to correct porch scale
- Layered heights: floor, mid-level, and eye-level decor
- Matte finishes for pumpkins and lanterns for better photos
- One consistent color story (rust and cream, or whites and sage)
- Textured textiles: plaid throws, boucle or canvas pillows
- Repetition for rhythm: multiples of lanterns, crates, or pumpkins
- Natural elements: mums, kale, wheat, eucalyptus
- Simple, oversized doormat to ground the scene
- Weather-friendly hooks/clips for garlands and lights
- Sturdy bases and clear footpaths for safety
- Storage plan: bins for lights/garlands, stackable crates
Frequently Asked Questions
How much should I budget to decorate a big front porch for fall?
Plan on $150–$400 per concept depending on scale and whether you choose real or faux elements. Start with one hero category — lanterns, pumpkins, or florals — and build from there. Reusable items like lanterns, planters, and garlands stretch your budget year over year.
Are real or faux pumpkins better for front porch decor?
IMO, real pumpkins win for texture and color. They do require shade and occasional rotation to avoid soft spots. Faux is great if you need long-lasting stacks or you’re in a hot climate. A hybrid approach works beautifully: real on the edges for character, faux on higher stacks for stability.
My porch is small. Which idea works without feeling crowded?
Go for the lantern cluster on one side of the steps or a single pumpkin pillar. Keep the center path clear and stick to a tight palette (rust and cream or whites and sage). One focused moment looks bigger than five tiny accents.
What about storage after the season ends?
Choose collapsible or stackable items: crates nest, garlands coil into labeled bins, and lanterns work year-round. Keep a dedicated “fall” bin for lights, ribbons, and extra faux stems. Donate or compost real pumpkins after Thanksgiving; save seeds if you’re crafty.
Are candles safe on the porch with kids and pets?
Use battery LED candles in lanterns. They give that flicker without open flame. If you love real candles, keep them high and attended during gatherings only. For daily life, LEDs are the stress-free glow.
When should I start decorating the front porch for fall?
Late September is perfect for most climates. If it’s still hot, begin with lanterns and garlands, then add mums and pumpkins as temperatures drop so everything lasts longer into November.
Can I do these ideas if my porch isn’t covered?
Yes. Choose weather-tolerant elements: resin lanterns, outdoor-rated garlands, and hardy mums. Bring textiles inside at night. Use heavy planters or add river rocks to lantern bases to prevent tipping in wind.
Final Thoughts
Pick one idea that makes your heart do a little happy dance and start there. Maybe it’s the glow of lanterns cascading down your steps, or that maple leaf garland catching the last light of the day. Build a clear focal point, choose a warm palette, and repeat a few elements so your front porch looks cohesive instead of piecey.
The truth is, cozy bright autumn styling isn’t about having everything — it’s about layering what matters: warm light, saturated color, and harvest abundance arranged with intention. Give your porch a hero, some supporting players, and a little space to breathe. Light the glow, fluff the plaid, and step back. You’ll feel it click — that easy, welcoming warmth that makes coming home in October feel like a small celebration.
Seriously, you’ve got this. Start with glow, add texture, and let fall do the rest. When your porch greets you with amber light and rust-colored blooms, you’ll know you nailed it.

About the Author

Krisztina P.Rendes, Founder of Home Style Vibes
Founder of Home Style Vibes
Krisztina Puskásné Rendes created Home Style Vibes as a cozy-modern lifestyle space where homemaking meets inspiration. Her goal is to help women create beautiful, organized, and peaceful homes they truly love — without overwhelm. You’ll find here heart-driven content on home decor, cleaning tips, easy family recipes, organization and decluttering, DIY home projects, plants, and seasonal ideas — all designed to bring more calm, comfort, and style into everyday life.





