6 DIY Christmas Garland Ideas You Can Make in One Evening
You want that cozy, Tartan Hearth Christmas vibe—layered greenery, soft glow, a little brass sparkle—without spending your whole weekend crafting. But here’s what keeps tripping you up: by the time you wrestle with tangled lights and the one strand where half the bulbs die the second it hits the tree, your mantel still looks bare, your staircase feels stark, and the entryway? A shrug. These six DIY Christmas garland ideas you can make in one evening fix the exact frustration: quick wins that deliver classic red-and-green warmth, with brass and velvet notes that read heirloom-cozy on camera and feel downright storybook in real life.
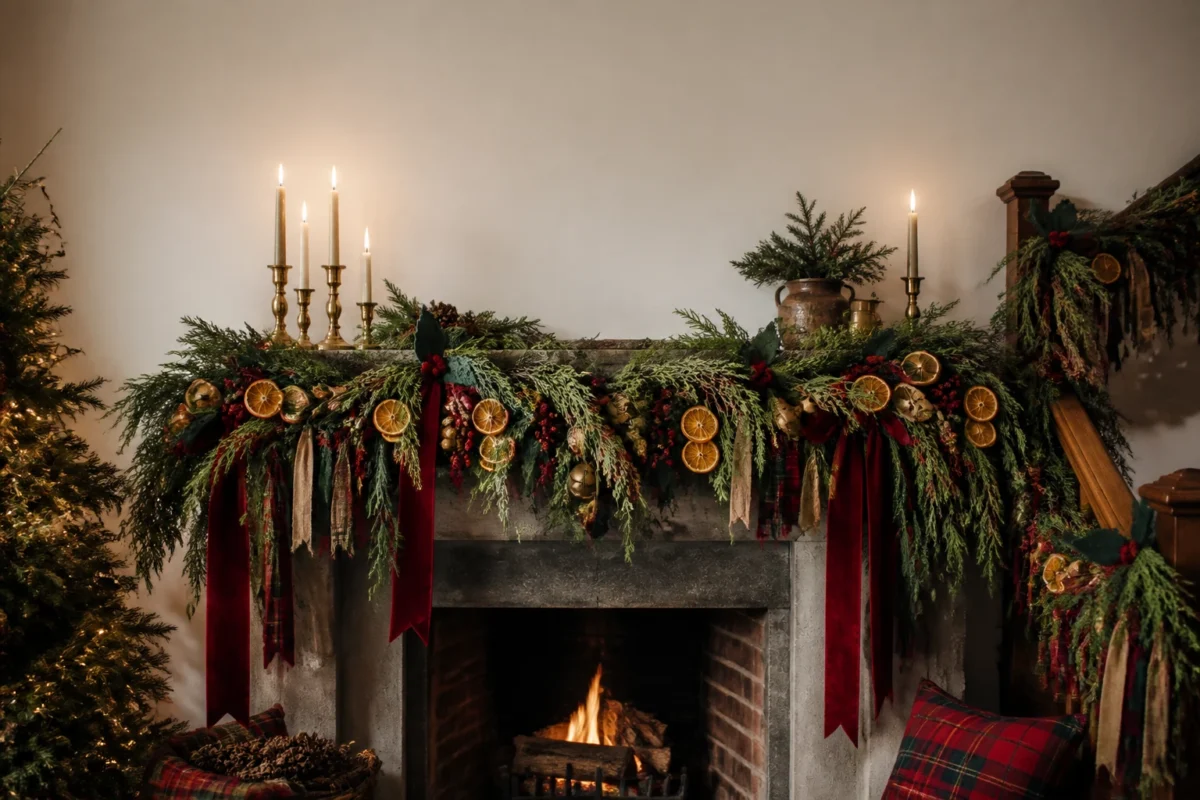
We’ll build lush looks from easy materials—dried oranges, felt, ribbon scraps, fresh or faux cedar, even cinnamon sticks—and anchor everything in that cranberry-and-brass palette that photographs beautifully in low winter light. Each project is beginner-easy, kid-and-pet friendly, and stores flat. Most ring in under $30, all clock in at one evening, and several glide right into January with a quiet winter mood once you tuck away the red accents. These garlands are designed for interiors: mantel, staircase, doorway, dining chandelier, cabinets, even a quiet shelf vignette. They’re photogenic, Pinterest-ready, and honestly just fun. Perfect for Thanksgiving weekend through New Year’s, and then a calm edit into winter.
1) Dried Orange Slices With Cranberry Velvet On A Cedar Mantel
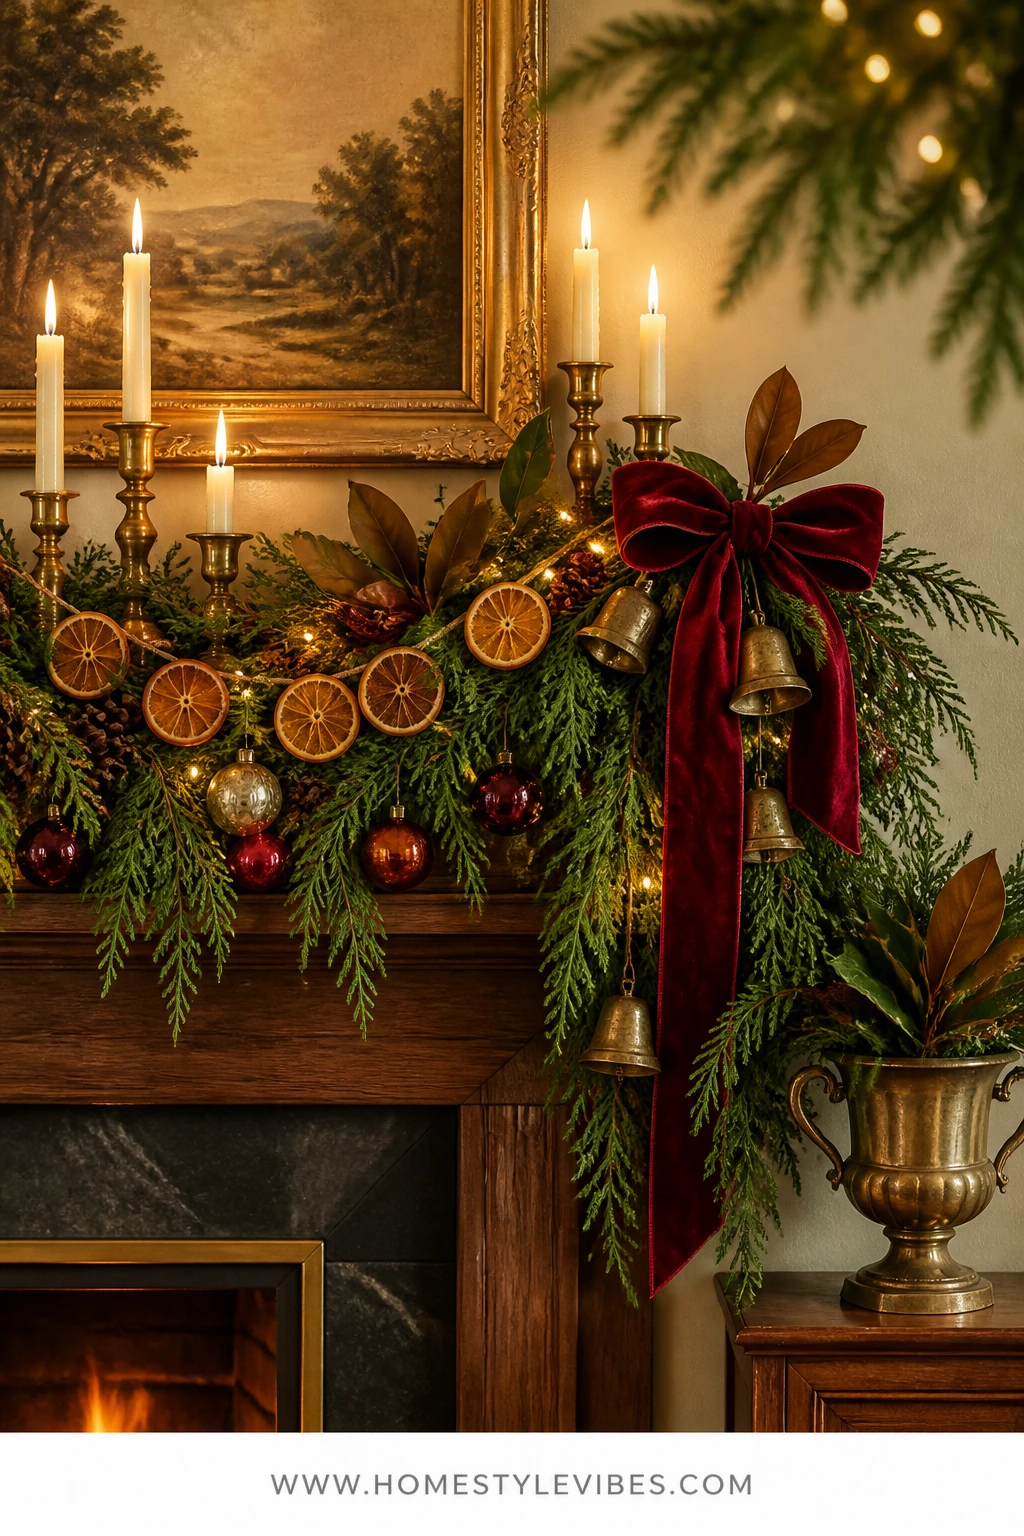
It’s that one mantel that never feels finished, right? You’ve tried one flimsy strand, but it sags in the middle and looks like a sad necklace. This garland brings classic warmth in a single evening: translucent dried oranges strung like tiny suns, layered over a cedar garland with cranberry velvet ribbon tails and a few brass bells for soft, old-world sound.
The mood is candlelit heritage—deep evergreen, tartan-in-the-soul without an actual plaid, and a little brass gleam. It works in real homes because it’s light, flexible, and looks equally good over stone, shiplap, or drywall. Warm white micro-lights tucked behind the cedar make the oranges glow like stained glass at blue hour. Cedar, oranges, and velvet create texture-on-texture that photographs with layered depth and rich color contrast.
Variations: Go budget-friendly with faux cedar and a single spool of ribbon cut into shorter tails. For a quieter January look, remove the velvet and bells after New Year’s and leave the oranges and cedar—instant cozy winter, no Santa in sight.
Supplies and Cost:
- Pre-dried orange slices (or DIY at home) — $8–$14
- Faux or fresh cedar garland — $15–$45
- Warm white micro fairy lights — $8–$12
- 1-inch cranberry velvet ribbon — $6–$12
- Brass jingle bells — $5–$10
- Clear fishing line or baker’s twine — $3–$5
- Command hooks or small nails for mantel attachment — $6–$8
Total Estimated Cost: $38 – $101 (re-usable core components bring year-two cost down)
Time and Skill Level: 50–70 minutes active time · Beginner
Best For: Living room mantels that need warmth and dimension; families who want nostalgic scent and glow with minimal fuss from Thanksgiving through New Year’s and into early January.
Key Design Elements:
- Main holiday props: cedar garland, dried oranges, brass bells, velvet ribbon
- Color palette: evergreen, cranberry, warm brass, orange-amber
- Lighting strategy: micro-lights behind greenery to backlight oranges
- Textile and ribbon layers: cranberry velvet in short tails and bows
- Greenery and natural elements: fresh or faux cedar with a few pinecones
- Accent details: slim brass bells, antique brass candlesticks with flameless ivory tapers nearby
How To Make It:
- Dry your oranges the night before, or buy pre-dried. If drying: 200°F oven, 2–3 hours, flipping every 30 minutes until translucent; cool fully.
- Attach the cedar to the mantel with clear hooks placed every 12–18 inches so it won’t sag. Keep it slightly draped, not taut.
- Weave the micro-lights behind the cedar branches, hiding the battery pack at one end; test before tucking in.
- String oranges on fishing line: pierce near the rind with a thick needle, spacing every 3–4 inches. Create 2–3 lengths to layer at different heights.
- Hang the orange garlands across the cedar, letting some slices rest on greenery for stability and depth.
- Cut velvet ribbon into 12–18 inch lengths; tie small bows or simple tails at hook points and near mantel corners.
- Knot brass bells at the ends of a few ribbons and let them hang in the negative spaces.
- Turn on lights, step back, adjust oranges so a few overlap for camera-friendly layers.
Why This Looks Expensive: Stained-glass glow through the oranges plus velvet and brass hits that heritage lane. The key is layering at different depths—cedar, then lights, then oranges, then velvet and bells—so it reads dimensional instead of flat.
Watch Out: Don’t drape the garland too low over an active fireplace. Always use flameless candles on the mantel near greenery. Fresh cedar can crisp near heat by week two—mist lightly every few days if you burn fires frequently.
Pro Styling Tip: For photos, turn off overheads and use only tree + micro-lights; the oranges will halo and you’ll get dreamy bokeh in the background.
2) Cranberry Wool Felt Balls And Brass Bells On A Staircase Banister
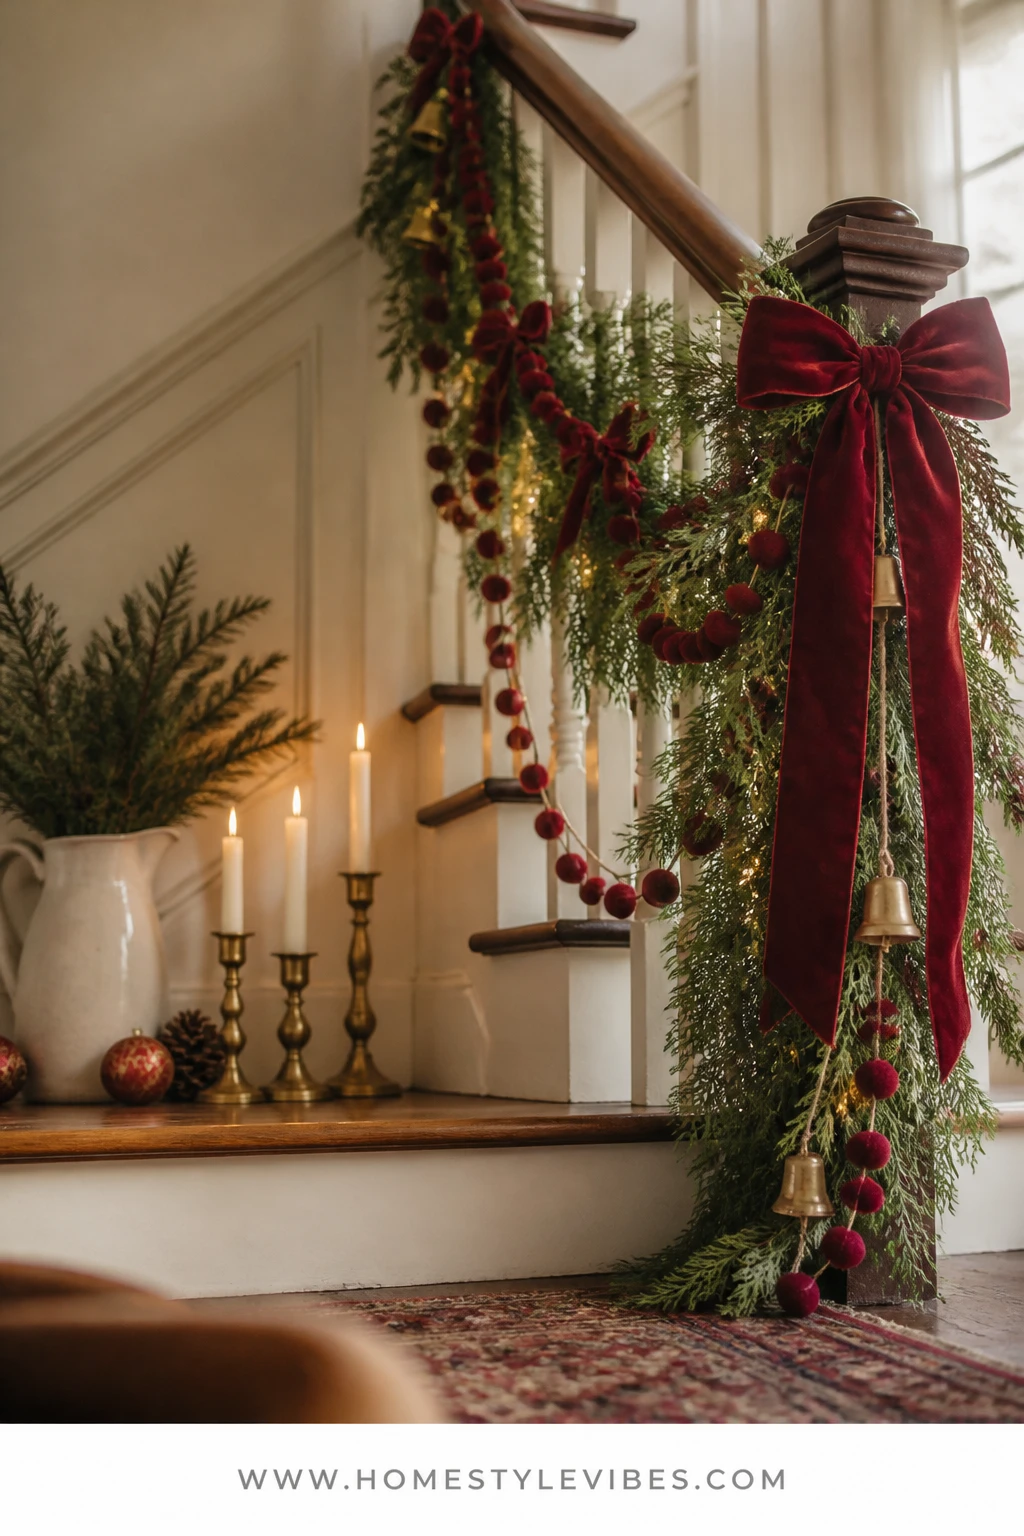
Staircases can feel like a long, intimidating stretch—lots of railing, not a lot of plan. You’ve tried a heavy greenery swag before, but it drooped and hijacked the handrail. This felt-and-bell garland runs the outside of the banister (so your grip stays clear), brings cheerful red dots in a classic palette, and adds that gentle bell jingle when you come home with the grocery bags.
The mood is classic and playful without skewing childish: cranberry felt balls, evergreen tie-ins, and little brass highlights. It’s lightweight and renter-friendly with clear zip ties to the balusters. In evening light, warm white strands tucked under the stair treads or at the baseboard give side-glow that outlines the felt beads and bells for a crisp, high-contrast look on camera.
Variations: Go neutral with ivory, sage, and charcoal felt balls for a Scandinavian-meets-classic feel. For small staircases, make a mini swag just at the newel and first two balusters for a concentrated pop that still reads festive.
Supplies and Cost:
- Wool felt balls (cranberry and cream), 1–1.5 cm — $12–$24
- Strong thread or fishing line + large needle — $4–$6
- Small brass bells — $6–$12
- Short faux cedar picks or clippings — $6–$10
- Clear zip ties or floral wire — $4–$6
- Optional micro-lights — $8–$12
Total Estimated Cost: $30 – $60
Time and Skill Level: 45–60 minutes active time · Beginner
Best For: Staircases with kids and pets—soft, shatter-free decor that won’t block the handrail; runs from early December through New Year’s and can stay as a winter neutral if you skip the bells and cranberry after January 1.
Key Design Elements:
- Main holiday props: felt balls, brass bells, cedar picks
- Color palette: cranberry, cream, evergreen, warm brass
- Lighting strategy: optional micro-lights tucked along the banister base
- Textile and ribbon layers: narrow velvet ties at newel posts
- Greenery and natural elements: minimal cedar clippings tied at intervals
- Accent details: slim brass bells spaced for sound and shine
How To Make It:
- Thread the needle with strong thread; string felt balls in a repeating pattern (cranberry-cream-cranberry), spacing 1 inch apart for impact.
- Tie off every 3–4 feet to create manageable sections that won’t tangle during installation.
- Attach the garland to the outside of balusters with clear zip ties every two or three spindles—snip tails flush.
- Slip small cedar picks under a few ties for softness; secure with floral wire if needed.
- Thread bells onto short bits of thread and tie them at random intervals for a natural rhythm.
- Optional: weave micro-lights behind the felt so bulbs peek between balls; hide the battery pack at the newel base.
- Finish with a cranberry velvet bow on the newel post for that classic note.
Why This Feels Designer: Repetition with restraint—consistent bead spacing, restrained bell placement, and a single bow anchor—reads curated, not crafty.
One Thing To Avoid: Don’t run the garland across the top of the handrail. Keep it to the outside of the banister so stairs stay safe and usable.
Pro Styling Tip: For a magazine-ready shot, shoot from the bottom of the stairs at an angle so the garland recedes into creamy bokeh lights above.
Ready for something greener and a touch glam? Keep scrolling—our next DIY garland idea layers magnolia and velvet that feels like a holiday painting come to life.
3) Magnolia Leaves With Antique Gold Ribbon On A Dining Room Chandelier
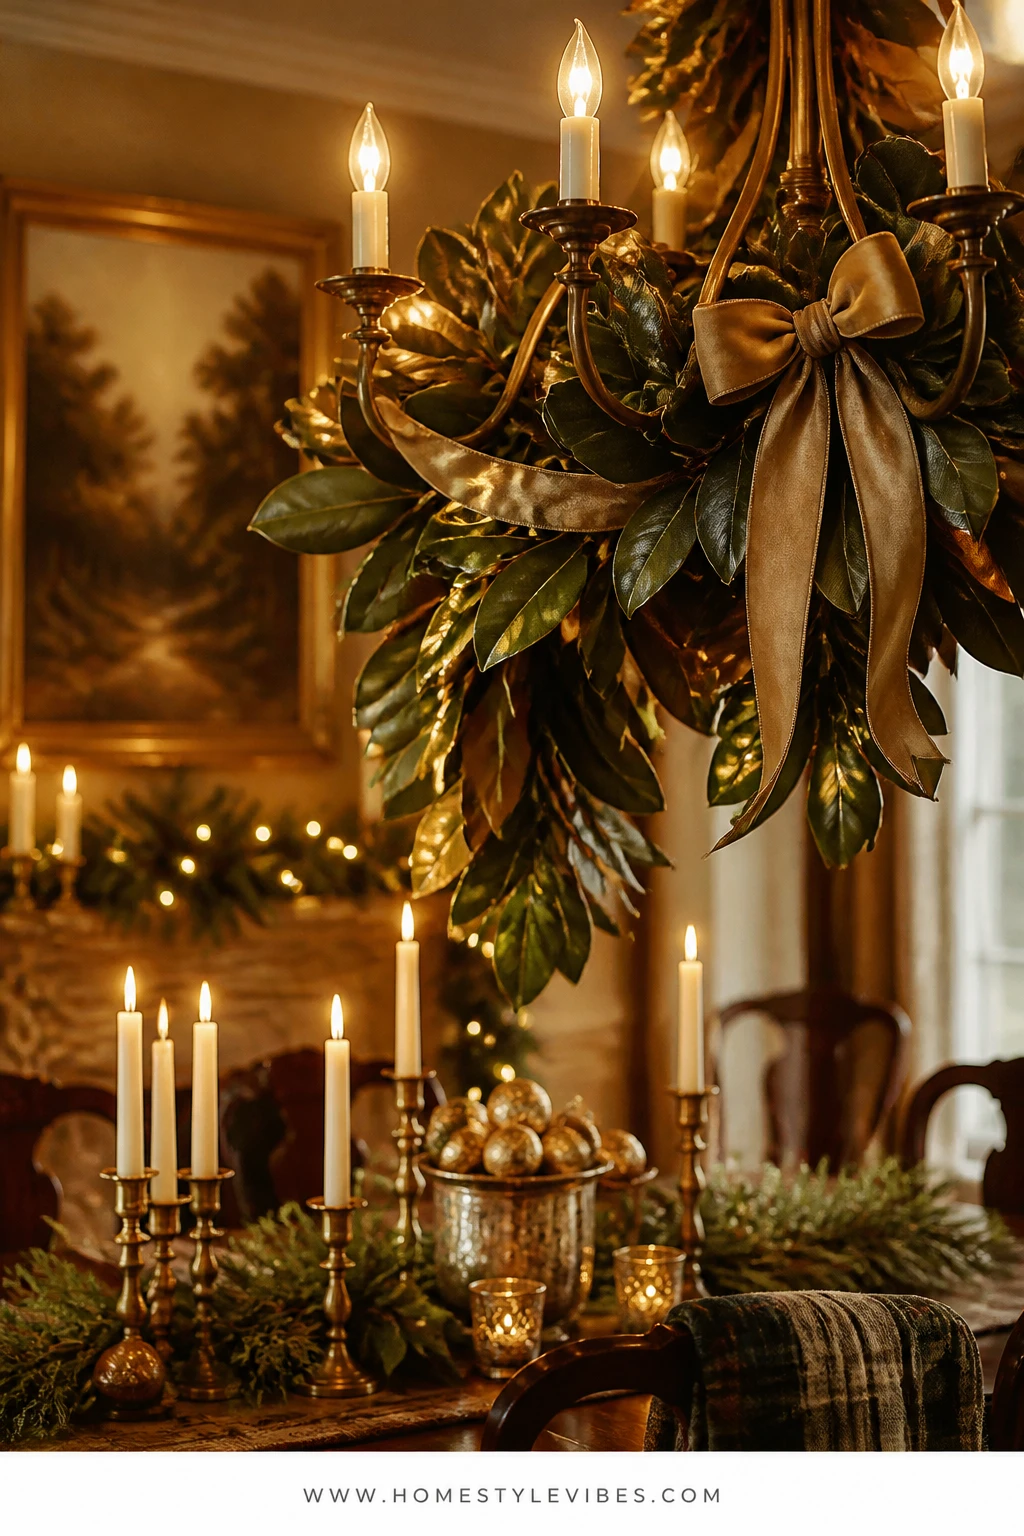
Dining chandeliers can skew either stark or fussy with the wrong materials. You’ve tried ornaments dangling overhead and it felt busy and clinky over dinner. Enter a magnolia leaf garland: glossy green on top, velvety brown underneath, laced with antique gold ribbon. It feels luxe and candlelit without getting in your sightline during a meal.
The mood is regal classic: green-and-gold old-world notes folded into a Tartan Hearth palette. Why it works: magnolia leaves are broad and architectural, so fewer pieces make a bigger impact—perfect if you’re cooking, hosting, and don’t want a craft explosion. Lighting is simple: let the chandelier bulbs glow warm, and add flameless ivory tapers on the table to reflect off the gold ribbon for a diffused amber halo. On camera, the wide leaves catch highlights and create beautiful curves, so your holiday table looks intentional even before the place settings go down.
Variations: No magnolia? Use faux camellia leaves or even clipped evergreen mixed with a few leather leaf fern stems. For a small space, wrap just the chandelier arms and skip any downward-hanging pieces for clean sightlines.
Supplies and Cost:
- Fresh or faux magnolia leaves/branches — $18–$40
- Antique gold or champagne ribbon (1–1.5 inches) — $8–$14
- Floral wire (brown or green) — $4–$6
- Clear zip ties (small) — $4–$6
- Optional: a few small brass bells or gold leaf picks — $6–$12
Total Estimated Cost: $34 – $78
Time and Skill Level: 40–60 minutes active time · Easy
Best For: Dining rooms with medium-to-large chandeliers; hosts who want dramatic impact that won’t drip needles; beautiful from early December through New Year’s (switch ribbon to cream in January for a winter reset).
Key Design Elements:
- Main holiday props: magnolia leaves, antique gold ribbon
- Color palette: deep green, warm brown, antique gold, cream
- Lighting strategy: chandelier dimmed to warm, flameless tapers on table
- Textile and ribbon layers: softly looped ribbon along chandelier arms
- Greenery and natural elements: magnolia branches/leaves
- Accent details: discreet brass bells or gold picks for light-catching moments
How To Make It:
- Turn off the chandelier and let the bulbs cool. Dust quickly (you’ll see it in photos!).
- Pre-wire magnolia clusters by pairing 3–4 leaves with floral wire at the stems.
- Attach clusters along each chandelier arm from center out, securing with tiny zip ties hidden under the leaves; snip extra.
- Layer additional clusters where arms meet for fullness, always keeping leaves upward and away from bulbs.
- Weave gold ribbon in soft arcs along the arms, tucking tails near the center column.
- Optional: add a couple of tiny brass bells at the base of chains for a barely-there shimmer.
- Stand back, dim lights to warm, and adjust leaves so they don’t touch bulbs.
Why This Reads High-End: The restrained palette—just green + gold—with one oversized botanical builds quiet drama. Magnolia’s duotone leaves bring built-in depth without extra stuff.
The Most Common Mistake: Overloading the chandelier so leaves block the bulbs or hang too low over plates. Keep it airy. You want presence, not a leafy obstacle course.
Pro Styling Tip: For photos, place a small mirror or brass tray on the table to catch candle reflections and send warm light upward into the magnolia canopy.
Take a breath. You don’t need a dozen supplies to make a room feel like home. You need one strong idea that solves a real irritation—the empty mantel, the echoey chandelier—and a color story that repeats on purpose. If one idea here is calling your name, that’s your sign to stop scrolling and start crafting tonight.
4) Cinnamon Sticks And Red Velvet Ribbons On A Kitchen Cabinet Run
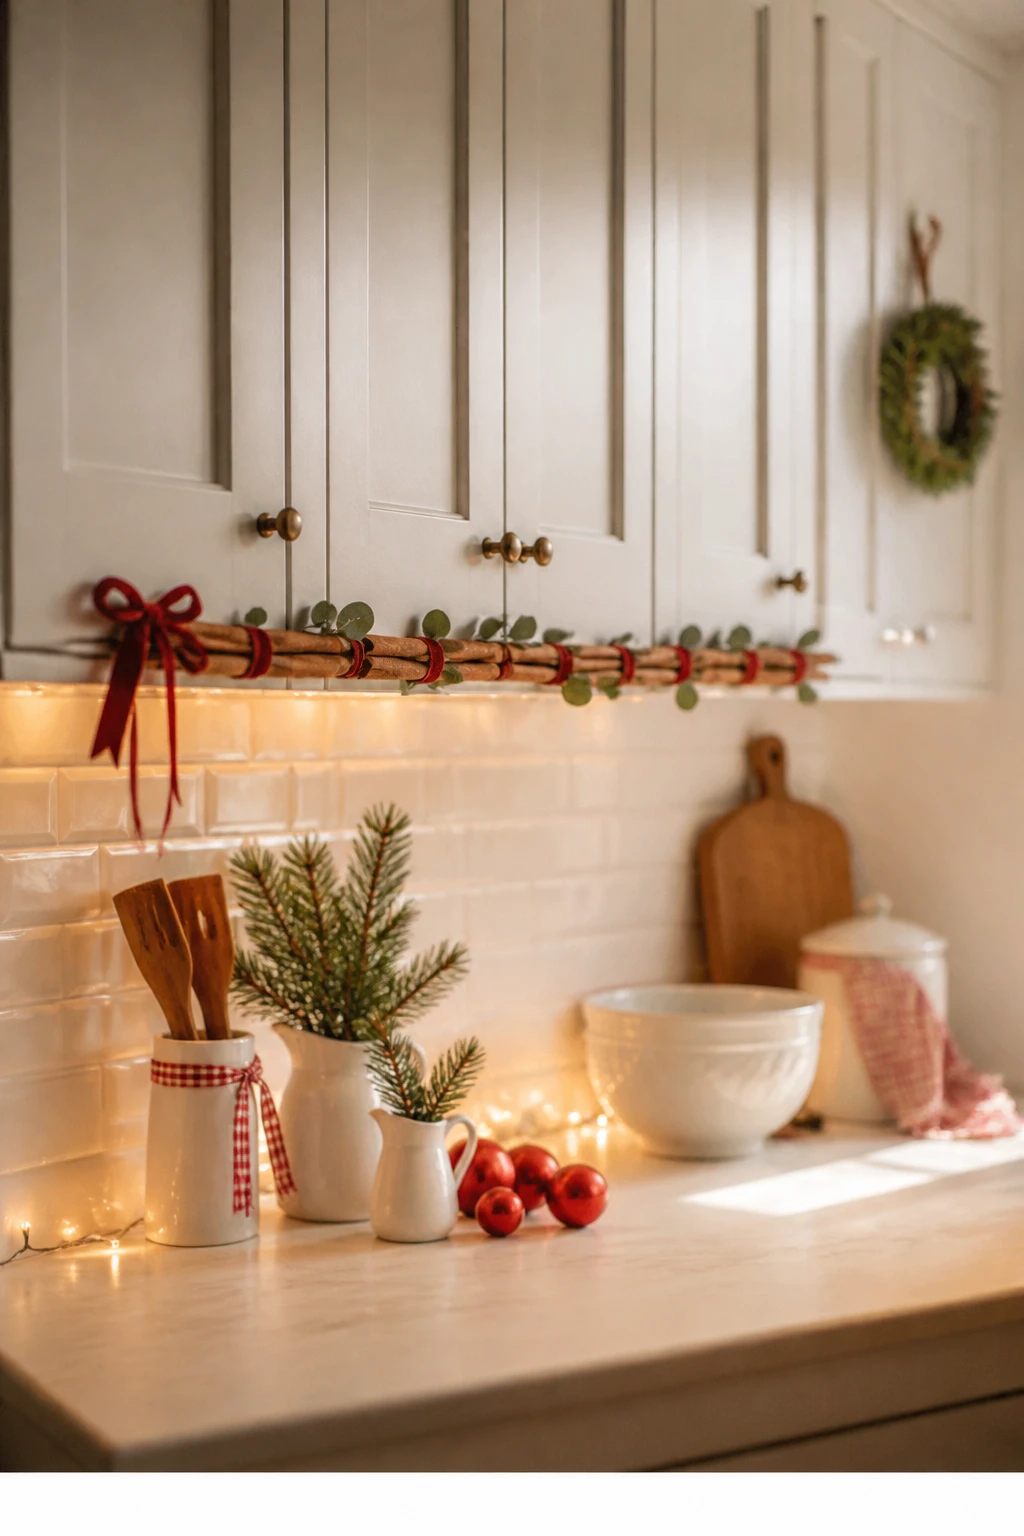
Kitchens want cheer but not clutter. You’ve tried hanging mini wreaths on every cabinet door and found yourself swatting at ribbons every time you made coffee. This slim garland runs the cabinet run once—like a soft underline—using cinnamon sticks, red velvet, and a whisper of eucalyptus for a bakery-warm fragrance that won’t hog your prep space.
The mood is nostalgic and practical: a subtle red-and-green note that hints at mulled cider and fresh cookies without turning your kitchen into a craft store. It works because it’s narrow, wipe-friendly, and can be installed at the top trim or along open shelves without getting in your way. Light it with under-cabinet strips or a single lamp on the counter; the velvet reads rich, and the cinnamon adds warm texture that photographs beautifully against white tile or wood.
Variations: Make a micro version for a coffee station shelf. Or swap red velvet for cream velvet and keep it through January as a winter spice accent.
Supplies and Cost:
- Whole cinnamon sticks (bulk) — $8–$12
- Narrow red velvet ribbon (3/8 – 1/2 inch) — $6–$10
- Thin jute twine — $3–$5
- Preserved eucalyptus (seeded or baby) — $6–$10
- Clear removable hooks or tiny nails for top trim — $6–$8
- Optional: small brass bells — $5–$10
Total Estimated Cost: $28 – $55
Time and Skill Level: 35–45 minutes active time · Beginner
Best For: Kitchens with upper cabinet runs or open shelves; decorators who want scent and subtlety without blocking doors or counters; perfect from early December, converts to winter by swapping ribbon color.
Key Design Elements:
- Main holiday props: cinnamon sticks, red velvet ribbon, eucalyptus
- Color palette: cinnamon brown, cranberry red, sage green
- Lighting strategy: under-cabinet lighting or a single warm lamp for glow
- Textile and ribbon layers: slender velvet bows tied at intervals
- Greenery and natural elements: preserved eucalyptus sprigs
- Accent details: a few tiny brass bells where doors won’t hit them
How To Make It:
- Measure your cabinet run and cut jute twine to length, leaving extra for tying.
- Bundle cinnamon sticks in pairs with a short wrap of velvet (a simple knot looks charming), then tie bundles to the twine every 6–8 inches.
- Tuck 2–3 inch eucalyptus sprigs under the velvet wraps, facing in one direction for flow.
- Add tiny bells sparingly between every few bundles for a little sparkle.
- Install clear hooks along the cabinet top trim and hang the garland just beneath crown molding or the lowest point that won’t interfere with doors.
- Turn on under-cabinet lights at dusk for a bakery-window glow.
Why This Looks Intentional: The linear rhythm of repeated cinnamon bundles with consistent spacing feels like trim—part of the kitchen architecture—not an afterthought.
Don’t Do This: Avoid hanging it at mid-door height; it will snag on handles and drive you bananas by day three. Keep it high and out of the swing path.
Pro Styling Tip: For a quick photo, place a bowl of clementines on the counter under the garland—the pop of orange plays beautifully with cinnamon brown and red velvet.
5) Twined Pinecones With Ivory Tapers On A Narrow Entryway Console
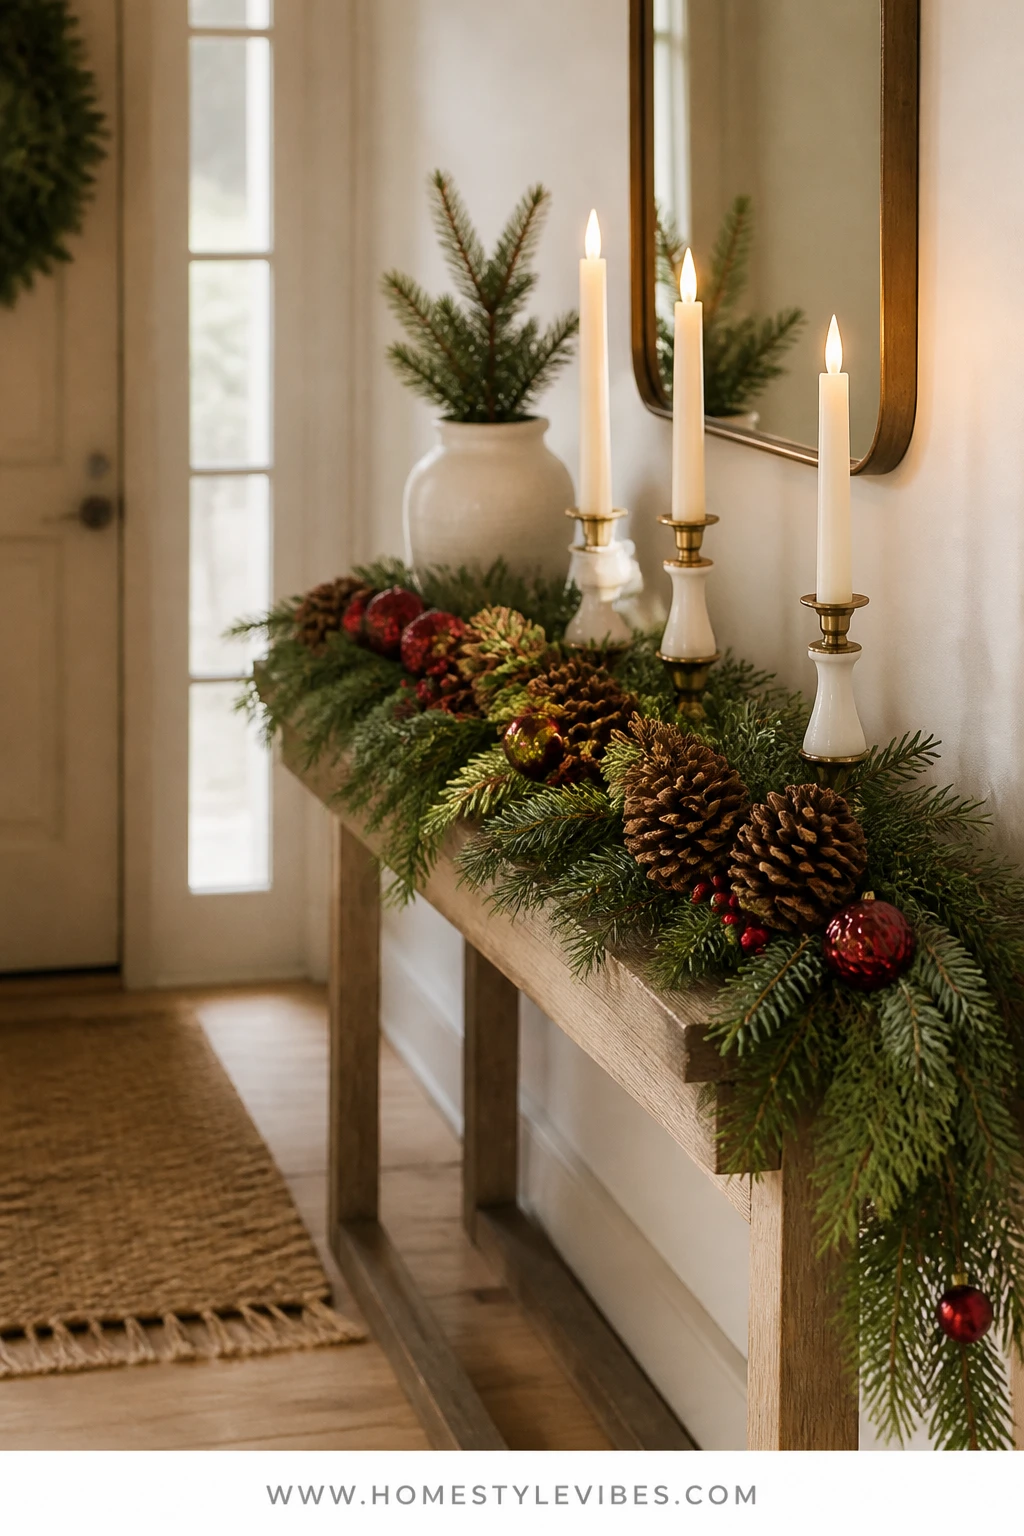
Entry consoles can be, frankly, a dumping ground: mail, gloves, the random tape measure. You’ve set cute houses there before, but it turned into clutter soup. This slim pinecone garland anchors the console with texture and height—twined cones, a few cedar sprigs, and flameless ivory tapers in brass holders for a calm, classic welcome that says “we planned this.”
The mood is warmly traditional: clean lines, cream candles, forest textures. Why it works: it’s narrow and low-profile so you still have space for keys. Pinecones are sturdy and re-usable for years. Lighting is stress-free with flameless tapers—soft glow that greets you at dusk with no hazard. In photos, the matte pinecones contrast beautifully with shiny brass and the soft ivory candlelight—it’s that subtle “expensive” look without a single ornament.
Variations: Go mini for an apartment console by using smaller cones and a single taper pair. For January, remove the red bow (if used) and it becomes a pure winter vignette.
Supplies and Cost:
- Assorted pinecones (medium) — $8–$12
- Jute twine or thin rope — $4–$8
- Faux or fresh cedar sprigs — $6–$12
- Flameless ivory taper candles — $16–$28
- Brass candlestick holders (thrift or new) — $12–$30
- Optional: small cranberry velvet bow for one end — $3–$6
Total Estimated Cost: $49 – $90
Time and Skill Level: 30–45 minutes active time · Easy
Best For: Foyers and entry consoles that need order and softness; pet-friendly households (no glass ornaments at dog-tail height), perfect from Thanksgiving through late January.
Key Design Elements:
- Main holiday props: pinecone garland, flameless ivory tapers
- Color palette: bark brown, evergreen, cream, warm brass
- Lighting strategy: flameless tapers on timers for evening glow
- Textile and ribbon layers: optional single velvet bow for a classic note
- Greenery and natural elements: cedar and pinecones
- Accent details: shallow brass tray for keys to keep the surface tidy
How To Make It:
- Cut twine to your console length plus a little extra for knots.
- Wrap twine twice around the base of each cone and secure with a square knot; space cones every 4–6 inches.
- Lay the garland on the console, draping slightly so cones rest naturally and don’t roll.
- Tuck cedar sprigs between cones, all facing the same direction for flow.
- Place two brass candlesticks off-center with flameless tapers; set them to a 6-hour evening timer.
- Optional: tie a small velvet bow at one end for a hint of red; skip it if you want more January mileage.
Why This Feels Designer: Negative space. You’re not filling every inch—just enough texture and light to say “styled,” with breathing room to feel calm.
Watch Out: Don’t let sprigs overhang where coats or bags will snag them. Keep the highest texture in the back third of the console, nearest the wall.
Pro Styling Tip: Place a mirror above the console; the candle glow doubles in reflection and makes that narrow space read bigger in photos.
True story: I tried a version of this on my own console last December and found a pine needle in my tote bag at a meeting two weeks later. Consider it a portable holiday souvenir. Worth it.
6) Paper Stars And Tartan Ribbon On An Interior Doorway Arch
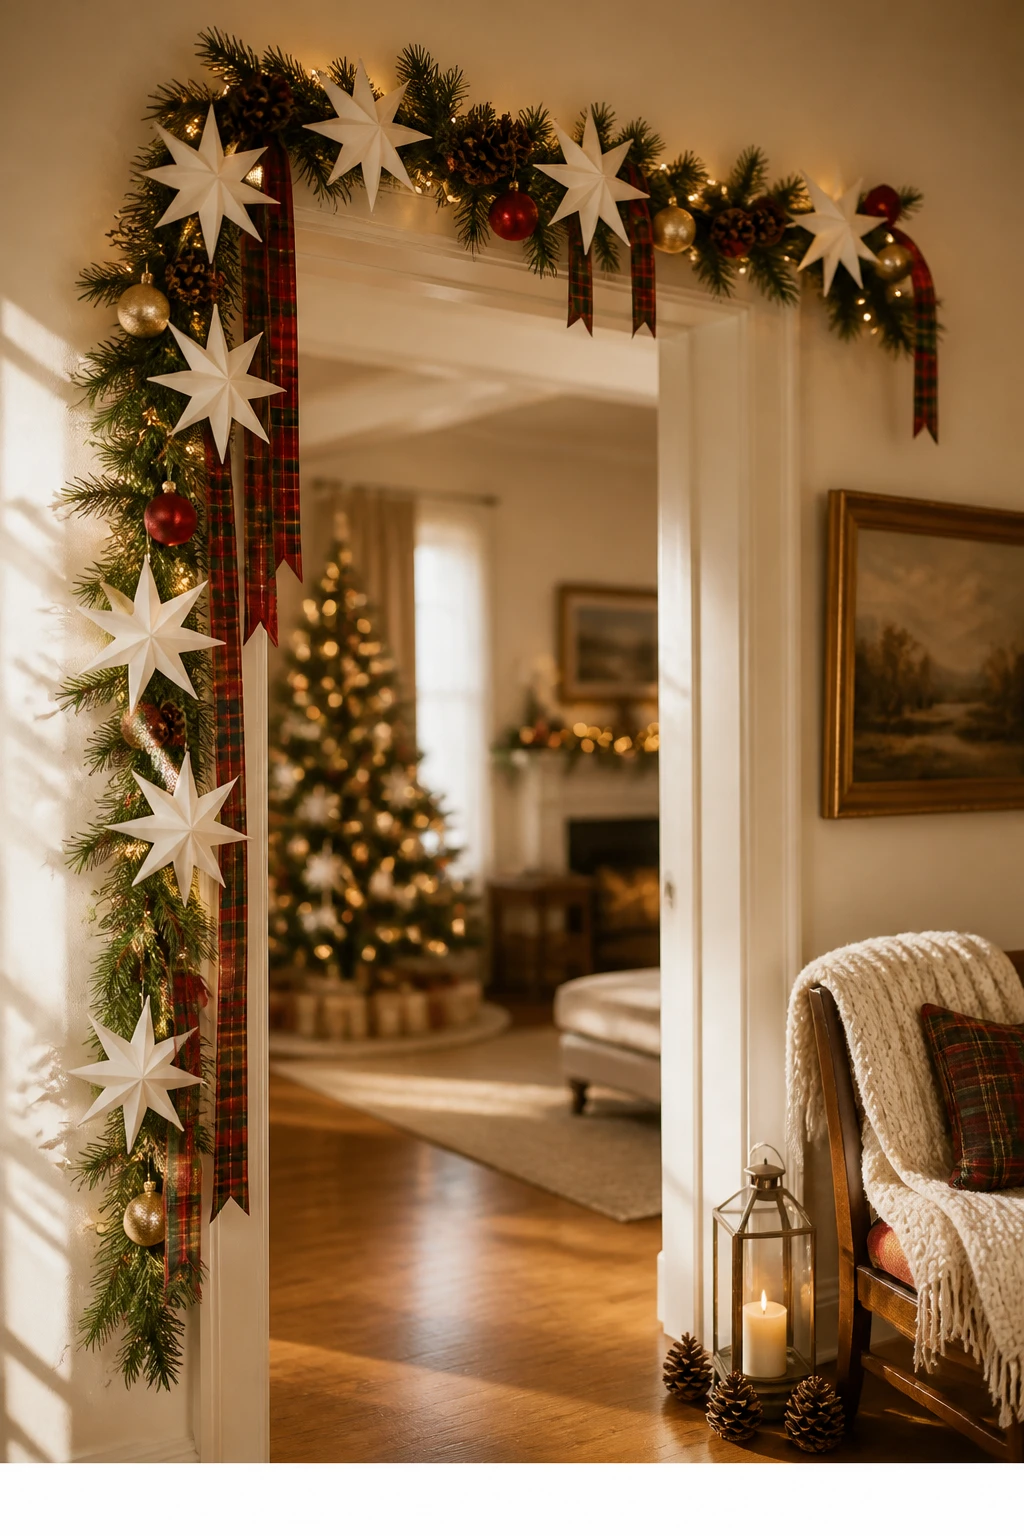
Doorways are the forgotten canvas. You’ve tried a heavy swag and it bonked every tall person at Christmas Eve. This airy garland brings lightness: paper stars in crisp white layered with slim tartan ribbon tails and a skinny line of faux fir. It frames the room without intruding, and because it’s feather-light, it stays put with clear tape tabs or micro hooks.
The mood is classic yet graphic: white stars against evergreen with a whisper of red-and-green tartan to tie into the rest of your Tartan Hearth palette. It’s a relief for busy rooms—no glitter shedding, no heavy branches to avoid. Lighting is easy: the stars love warm white fairy lights zig-zagged along the top trim, creating soft halos that photograph like quiet snowfall. In-person, the gentle movement when someone walks by brings it to life without noise or clutter.
Variations: Swap tartan for plain cranberry ribbon for a simpler look. Or go neutral with cream ribbon and keep the stars up through January for a post-holiday winter vibe.
Supplies and Cost:
- Pre-made paper stars (assorted sizes) or DIY folded — $10–$18
- Thin faux fir rope garland — $8–$14
- Tartan ribbon (1/2–1 inch) — $6–$12
- Warm white micro-lights — $8–$12
- Clear mini hooks or painter’s tape tabs — $4–$8
- Fishing line for hanging stars at different heights — $3–$5
Total Estimated Cost: $31 – $59
Time and Skill Level: 45–60 minutes active time · Beginner
Best For: Interior doorways, arches, or wide openings between living and dining rooms; homes that love a festive frame without bumping heads or blocking views, great from early December through mid-January with ribbon swap.
Key Design Elements:
- Main holiday props: white paper stars, faux fir rope, tartan ribbon
- Color palette: evergreen, crisp white, tartan red-and-green
- Lighting strategy: micro-lights tracing the top of the arch for a soft halo
- Textile and ribbon layers: narrow tartan tails grouped in threes
- Greenery and natural elements: skinny fir rope for structure
- Accent details: varied star sizes for rhythm and scale
How To Make It:
- Attach clear hooks along the top interior of the doorway, one every 8–10 inches.
- Hang the skinny fir garland along the hooks; keep it close to the trim for a tidy outline.
- Weave micro-lights along the fir, hiding the battery pack off to one side.
- Tie 10–12 inch tartan ribbon tails and group them in clusters; attach clusters asymmetrically (heavier on one corner) for a designer tilt.
- Cut fishing line at varying lengths and tie stars, then attach lines to hooks so stars hang at staggered heights inside the frame.
- Turn on lights, step back, and adjust star overlap for layered depth.
Why This Looks Expensive: Scale play. Mixing small and large stars with tight tartan clusters creates a rhythm designers love—your eye dances along the frame.
One Thing To Avoid: Overcrowding the top center. Keep a few inches of breathing room so the arch reads architectural, not clogged.
Pro Styling Tip: For a scroll-stopping shot, stand just outside the doorway and focus through the stars into the lit tree beyond—instant foreground depth and twinkle bokeh.
Remember, this isn’t about recreating a showroom. It’s about crafting one corner that feels like your family’s holiday rhythm—kid bedtime stories on the stairs, cinnamon cocoa in the kitchen, a quiet sigh when the console candles flicker on. Pick the one that fixes your personal “ugh” spot and let that be enough.
Quick Checklist
- Measure your zone before cutting twine or lights
- Use clear hooks at 12–18 inch intervals to prevent sag
- Test light strands before weaving into greenery
- Layer elements front-to-back for depth (greenery, lights, feature pieces, ribbon)
- Stick to a tight palette: evergreen + cranberry + brass + cream
- Set flameless candles on timers for automatic evening glow
- Keep stair garlands on the outside of the banister
- Use fishing line for invisible star and orange slice hangs
- Label garland sections and storage by location for next year
- Swap red ribbons for cream in January to extend the season
Frequently Asked Questions
How much should I budget to make one of these garlands tonight?
Most of these DIY Christmas garland ideas land between $30 and $90 depending on materials you already own (lights, ribbon, hooks). The mantel oranges with cedar and lights often come in around $50–$70. Reuse lights, bells, and ribbon next year to bring the cost way down.
Should I use real or faux greenery for these one-evening projects?
Faux wins on staying power and needle control; fresh wins on scent and that lived-in drape. For mantels and chandeliers near heat, faux is lower maintenance. For entry consoles and doorways, fresh cedar or magnolia brings beautiful fragrance. IMO, mix them—faux base with a few fresh sprigs tucked in for scent.
When is the best time to put up garlands indoors?
Thanksgiving weekend is a sweet spot: you get the ambiance for the whole season without feeling rushed. If you use fresh greenery, plan to refresh a few sprigs mid-December. Many of these look great into January—just remove the red accents and keep the greens and neutrals.
Are lights and candles safe near garlands?
Use flameless candles around all greenery, especially near mantels and consoles. Keep bulbs from touching leaves on chandeliers, and don’t drape garland over active fireplaces. Micro-lights are low heat, but still avoid direct contact with very dry foliage.
How do I store garlands so they don’t look crushed next year?
Coil each section around labeled cardboard pieces, tuck tissue between delicate areas, and store by location. Keep bells and lights in small zip bags attached to that coil so you don’t go on a scavenger hunt next December. For paper stars, store flat in a rigid folder.
Final Thoughts
If you’re still reading, I’m betting one corner in your home is calling your name. Start there tonight. Pick the garland that solves the nagging problem—the bare mantel, the echoey chandelier, the stair that never quite looks festive—and give yourself one simple hour. String, tie, tuck, and then flick the lights off and let the warm glow do its thing.
This is classic Christmas the way it was meant to feel: cedar and magnolia scent in the air, cranberry velvet and brass catching the tree light, textures that look as good in a candid phone photo as they do in your memory. These DIY Christmas garland ideas aren’t about perfection; they’re about a room that finally feels finished and a season that feels held.
Trust me—you’ve got this. Brew something warm, put on your favorite album, and make a little holiday magic with your own hands tonight.

About the Author

Krisztina P.Rendes, Founder of Home Style Vibes
Founder of Home Style Vibes
Krisztina Puskásné Rendes created Home Style Vibes as a cozy-modern lifestyle space where homemaking meets inspiration. Her goal is to help women create beautiful, organized, and peaceful homes they truly love — without overwhelm. You’ll find here heart-driven content on home decor, cleaning tips, easy family recipes, organization and decluttering, DIY home projects, plants, and seasonal ideas — all designed to bring more calm, comfort, and style into everyday life.