5 Christmas Cookie Bar Recipes That Feed a Crowd With One Pan
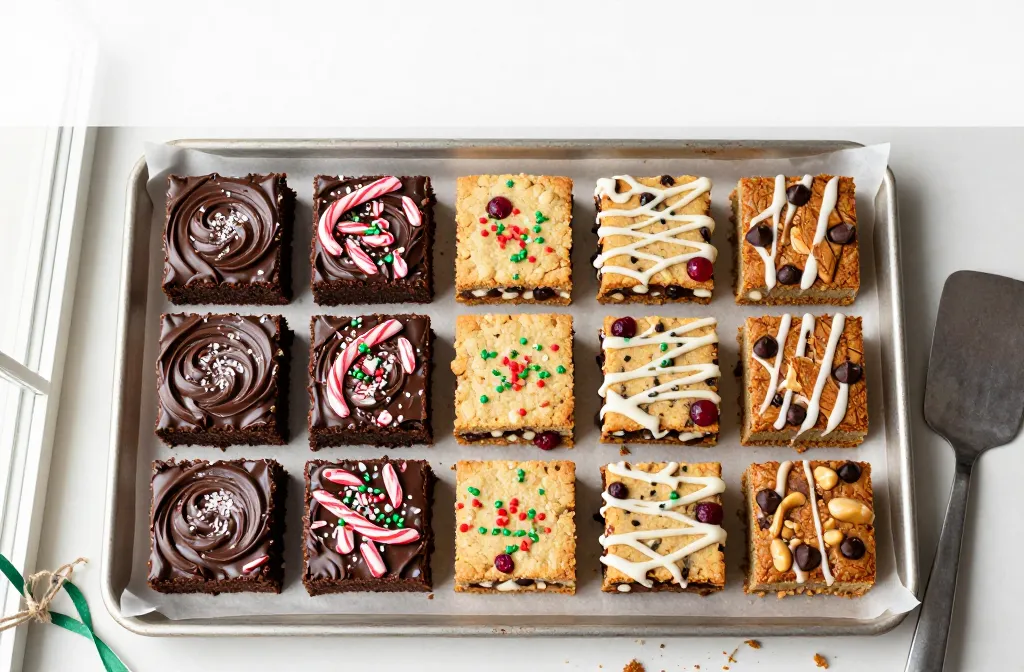
You want a cookie platter that makes your family light up and your cookie exchange friends ask for the recipe. But batch-baking dozens of individual cookies always eats your time and your sanity. These Christmas cookie bar recipes promise big-batch payoff: one pan, clean slices, and festive flavors that travel well and freeze like a dream. Expect quick prep, real-ingredient pantry staples, and bars that photograph beautifully for your holiday board — and yes, they’re absolutely worth bookmarking for next year too.
Quick quiz to warm up your whisking arm:
What’s the smartest way to bake for a big holiday crowd when you’re short on time?
- Roll and cut individual sugar cookies
- Pipe intricate royal icing designs
- Bake one-pan Christmas cookie bars and slice
- Fry doughnuts for everyone
Correct answer: 3 — One-pan Christmas cookie bars minimize hands-on time and maximize yield, so you get consistent, giftable pieces fast.
1. Peppermint Brownie Cookie Bars With Swirled Ganache Shine
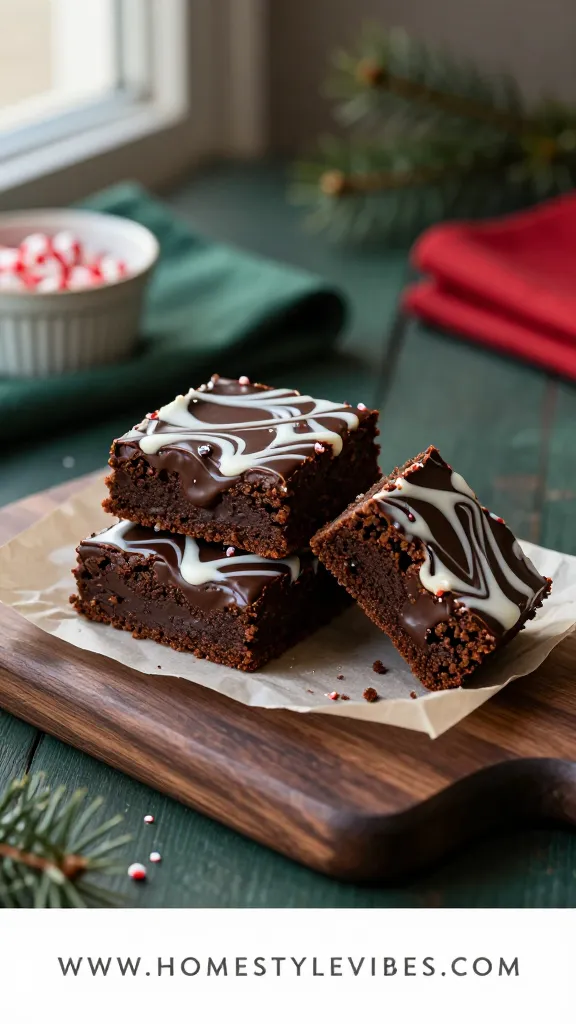
These peppermint brownie cookie bars are the showy square on a Christmas cookie tray — deeply fudgy base, cool mint crunch, and a glossy ganache swirl that looks like a marble countertop in the best way. They slice cleanly, stack well in tins, and the flavor improves overnight.
Make them for cookie exchanges, office trays, or that moment when kids come in from sledding and need “just one more square.” The technique is simple: a dense, cocoa-forward batter baked in a metal pan for chewy edges and a soft center, finished with a peppermint ganache you can swirl with the back of a spoon.
Storage is easy. Keep tightly covered in the fridge up to 5 days or freeze up to 2 months with parchment between layers. For gifting, nestle pieces in mini paper candy cups so the ganache stays pristine.
Prep Time: 20 minutes
Cook Time: 24–28 minutes
Total Time: 55 minutes
Servings: 24 bars
Best For: Cookie trays, peppermint lovers, make-ahead gifting with high “ooh” factor.
Ingredients:
- 1 cup (2 sticks) unsalted butter
- 2 cups granulated sugar
- 4 large eggs, room temp
- 1 tsp vanilla extract
- 1 tsp peppermint extract
- 1 cup unsweetened cocoa powder
- 1 cup all-purpose flour
- 1/2 tsp kosher salt
- 1/2 tsp baking powder
- 1 cup semisweet chocolate chips
- 1/2 cup crushed candy canes (plus extra for garnish)
- Ganache: 8 oz semisweet chocolate, chopped; 1/2 cup heavy cream; 1 tbsp unsalted butter; 1/4 tsp peppermint extract
- Garnish: additional crushed candy canes and mini chocolate curls
Instructions:
- Preheat oven to 350°F. Line a 9×13-inch light-colored metal baking pan with parchment, overhanging two sides as a sling. This is your serving vessel post-slice; bars will be transferred to a white rectangular platter.
- Melt butter in a saucepan until just melted, not sizzling. Whisk in sugar until glossy and thick, about 1 minute.
- Whisk in eggs one at a time, then vanilla and peppermint extract, until batter looks satiny.
- Sift in cocoa, flour, salt, and baking powder. Stir gently until no dry streaks remain. Fold in chocolate chips and 1/2 cup crushed candy cane.
- Spread evenly in pan. Bake 24–28 minutes until edges are set and center has a slight, moist jiggle; a toothpick should show a few damp crumbs, not wet batter.
- For ganache: heat cream to steaming. Pour over chopped chocolate with butter and peppermint extract; sit 2 minutes, then whisk until smooth.
- Cool brownies 15 minutes. Pour ganache on top and swirl with the back of a spoon for a shiny ripple. Sprinkle with extra crushed candy canes and chocolate curls.
- Chill 30–45 minutes until set. Lift with sling, slice into 24 bars, and transfer to a white rectangular platter. Serve without additional garnish.
Variations: Use orange extract plus finely grated orange zest instead of peppermint for a chocolate-orange twist. Gluten-free swap: replace flour with a 1:1 gluten-free baking blend; reduce bake time by 2 minutes and check early.
Pro Plating Tip: Cluster three bars at different angles and dust the platter with a tiny pinch of crushed candy cane for color contrast and sparkle.
Ready for something to balance all that chocolate? The next pan is buttery, toasty, and speckled with cranberries that look like confetti.
2. Brown Butter Cranberry Shortbread Bars With Sparkling Sugar Tops
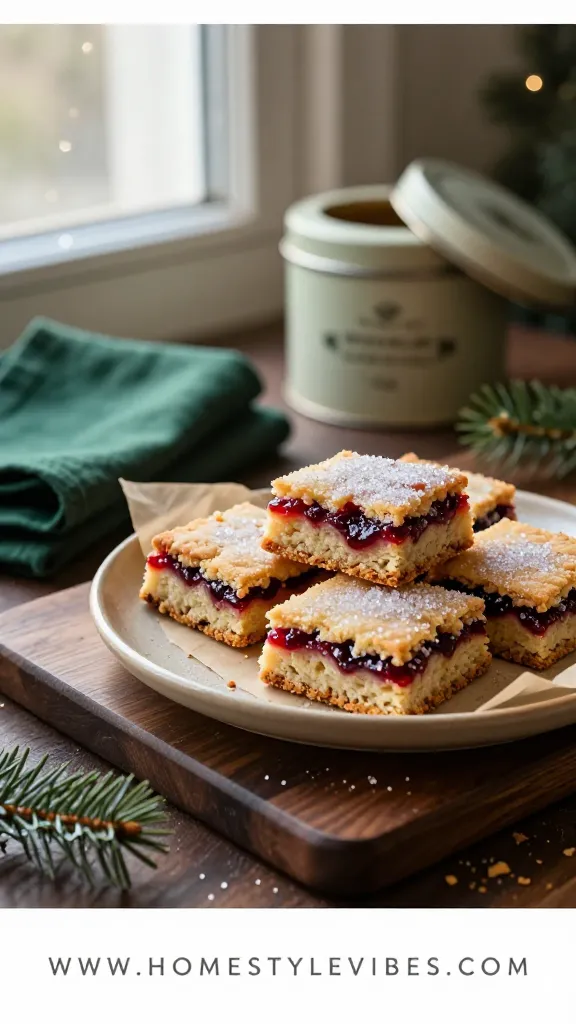
I keep a tray of these in the freezer for surprise neighbors and last-minute teacher gifts. They’re buttery, gently tart, and sanded with sugar that glitters like frost. The texture is firm but tender — not crumbly to the point of chaos, just dense enough for tidy squares in a cookie tin.
They’re ideal for afternoon coffee, Christmas brunch pastry plates, and shipping. The secret is browned butter for nutty depth and a quick stovetop cranberry jam that bakes into the shortbread like stained glass.
Prep Time: 25 minutes
Cook Time: 35–40 minutes
Total Time: 1 hour 15 minutes
Servings: 24 bars
Best For: Gifting, mailing, and anyone who says they’re “not into super sweet.”
Ingredients:
- 1 cup (2 sticks) unsalted butter
- 3/4 cup granulated sugar
- 1/3 cup light brown sugar
- 1 tsp vanilla extract
- 2 1/2 cups all-purpose flour
- 1/2 tsp kosher salt
- 1 cup fresh or frozen cranberries
- 1/4 cup granulated sugar (for jam)
- 2 tbsp orange juice
- 1 tsp finely grated orange zest
- 1 tbsp turbinado or sparkling sugar (for topping)
Instructions:
- Preheat oven to 325°F. Line a 9×13-inch glass baking dish with parchment. You’ll slice and serve straight from the dish with no garnish.
- Brown the butter: Melt in a light-colored saucepan over medium heat, stirring, until amber bits form and it smells nutty, 5–7 minutes. Cool 10 minutes.
- Whisk in 3/4 cup granulated sugar, brown sugar, and vanilla until glossy. Stir in flour and salt until a soft dough forms.
- Press two-thirds of dough evenly into the lined dish. Dock with a fork. Chill remaining dough.
- Make cranberry layer: In a small pan, simmer cranberries, 1/4 cup sugar, orange juice, and zest 6–8 minutes, smashing berries, until thick and jammy with visible whole berries. Cool 5 minutes.
- Spread cranberry jam over base. Crumble remaining dough over the top, leaving cranberry peeks. Sprinkle with turbinado sugar.
- Bake 35–40 minutes until edges are light golden and the top looks set with no wet spots. Cool completely before cutting.
Make-ahead: Bars keep airtight at room temp 3 days, fridge 1 week, or freeze up to 2 months. Layer with parchment. For mailing, wrap tight in plastic, then foil, and pad the tin with crumpled parchment so squares don’t knock around.
Variations: Swap cranberries for raspberry jam in a pinch. Nut-free as written; for almond lovers, add 1/2 tsp almond extract to the dough and top with 1/4 cup sliced almonds in place of sugar.
Pro Plating Tip: On a matte black slate board, alternate bars cranberry-side up and browned-crumble-side up to push color contrast.
Craving something with cinnamon-sugar comfort you can slice in big party squares? The next pan brings snickerdoodle nostalgia with a festive swirl.
Quick mindset reset: Baking for the holidays doesn’t have to feel like a performance. If one of these pans makes it to your table this week, you’re winning. The mess on your counter is proof of love, not failure.
3. Snickerdoodle Cheesecake Bars With Cinnamon Sugar Crackle
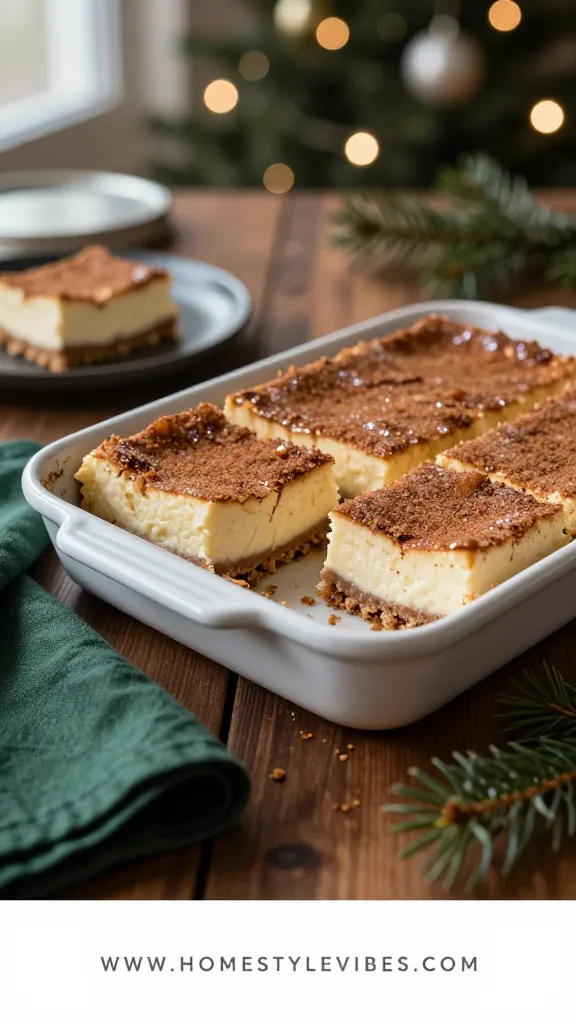
Two desserts, one pan: a soft snickerdoodle base and a creamy cheesecake layer under a shattering cinnamon-sugar top. It tastes like a cinnamon roll met a cheesecake at a Christmas party and decided to be practical about it.
This is my go-to for Christmas Eve dessert because I can bake it in the afternoon and chill it during dinner. Slices stay sturdy on a dessert buffet and look gorgeous with those crackled tops catching the light.
Ingredients:
- Snickerdoodle base: 1/2 cup (1 stick) unsalted butter, melted; 1 cup granulated sugar; 1 large egg; 1 tsp vanilla; 1 1/2 cups all-purpose flour; 1 tsp cream of tartar; 1/2 tsp baking soda; 1/4 tsp kosher salt
- Cheesecake layer: 16 oz cream cheese, room temp; 1/2 cup granulated sugar; 2 large eggs; 1 tsp vanilla; 1/4 cup sour cream; 1/2 tsp ground cinnamon
- Topping: 2 tbsp granulated sugar; 1 tsp ground cinnamon
Prep Time: 25 minutes
Cook Time: 32–36 minutes
Total Time: 1 hour 30 minutes
Chill Time: 2 hours
Servings: 20–24 bars
Best For: Christmas Eve dessert tables, potlucks, and creamy-slice lovers who want tidy squares.
Instructions:
- Preheat oven to 325°F. Line a 9×13-inch rimmed quarter sheet pan with parchment, leaving overhang. You’ll transfer cooled bars to a red ceramic platter to serve. No additional garnish.
- Base: Whisk melted butter and 1 cup sugar until glossy. Whisk in egg and vanilla. Stir in flour, cream of tartar, baking soda, and salt until a soft dough forms. Press evenly into pan.
- Cheesecake: Beat cream cheese and 1/2 cup sugar until smooth, 2 minutes. Beat in eggs one at a time, then vanilla, sour cream, and cinnamon until silky.
- Pour cheesecake over base. Mix 2 tbsp sugar and 1 tsp cinnamon; sprinkle evenly over the top.
- Bake 32–36 minutes, until edges are set and the center has a gentle jiggle like firm Jell-O. Do not overbake — cracks happen if it dries out.
- Cool to room temp, then chill at least 2 hours before slicing with a hot, dry knife. Transfer slices to the red ceramic platter.
Make-ahead: Chill up to 48 hours before serving. Store covered in the fridge up to 5 days. Freeze individual bars up to 2 months; thaw in the fridge. For gifting, keep refrigerated delivery in mind — these are best for local handoffs.
Variations: Dairy-light option: use lactose-free cream cheese and sour cream. Gluten-free: swap a 1:1 baking blend; add 2 extra minutes to the base par-bake if needed for firmness.
Pro Plating Tip: Slice into neat rectangles and stagger them in two tight rows, cinnamon side up, to emphasize the crackle pattern.
Next up, a no-fuss blondie that wears a caramel coat and delivers that cozy gingerbread vibe without rolling a single man-shaped cookie.
Perspective shift: If you overbake a pan once this season, you didn’t “ruin” dessert — you learned your oven runs hot. Stick a $10 oven thermometer inside and keep going. Progress tastes sweet too.
4. Gingerbread Blondie Bars With Salted Caramel Drizzle Shine
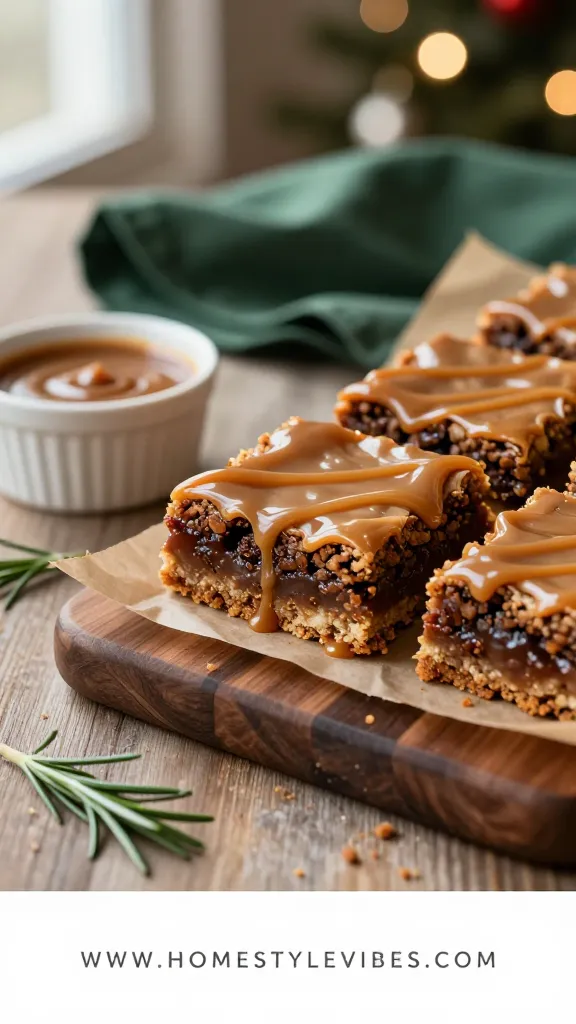
Forget the cookie cutters. These gingerbread blondie bars give you everything you love about the spice — molasses depth, warm cinnamon-clove-nutmeg — baked into a chewy, buttery square. A quick salted caramel drizzle adds glossy ribbons that set into picture-ready stripes.
I made a test batch on a Tuesday last December; my kids asked for them again before school Wednesday morning. They’re party-proof and very sliceable, which is what you want when half your guests are already balancing a mug of cocoa.
Prep Time: 20 minutes
Cook Time: 25–28 minutes
Total Time: 55 minutes
Servings: 24 bars
Best For: Potlucks, cocoa bars, and anyone craving gingerbread flavor without the fuss.
Ingredients:
- 3/4 cup (1 1/2 sticks) unsalted butter, melted and cooled
- 1 cup light brown sugar, packed
- 1/3 cup granulated sugar
- 1/3 cup unsulphured molasses
- 2 large eggs
- 2 tsp vanilla extract
- 2 cups all-purpose flour
- 1 tsp baking powder
- 1/2 tsp baking soda
- 3/4 tsp kosher salt
- 2 tsp ground ginger
- 1 1/2 tsp ground cinnamon
- 1/4 tsp ground cloves
- Caramel drizzle: 1/2 cup granulated sugar; 2 tbsp water; 3 tbsp unsalted butter; 1/3 cup heavy cream; 1/2 tsp flaky sea salt
- Garnish: extra flaky sea salt for finishing
Instructions:
- Heat oven to 350°F. Line a 9×13-inch anodized aluminum pan with parchment. Bake and cool in this pan, then transfer slices to a wood board for serving. Garnish with flaky salt.
- Whisk melted butter, brown sugar, granulated sugar, and molasses until smooth. Whisk in eggs and vanilla.
- In another bowl, whisk flour, baking powder, baking soda, salt, ginger, cinnamon, and cloves. Fold into wet ingredients just until combined.
- Spread batter evenly. Bake 25–28 minutes until the top is matte and edges are set; a tester should have moist crumbs, not wet batter.
- Make caramel: In a light saucepan, combine 1/2 cup sugar and water. Cook over medium without stirring until amber, 5–7 minutes — watch closely; it goes from amber to burnt in about four seconds.
- Off heat, whisk in butter, then cream. Return to low heat, whisk smooth, stir in 1/2 tsp flaky salt. Cool 5–10 minutes to thicken slightly.
- Drizzle caramel over cooled blondies in crosshatch stripes. Sprinkle lightly with extra flaky salt.
- Cool until caramel sets, about 20 minutes, then slice into 24 bars and arrange on a wood board.
Make-ahead: Store airtight at room temp up to 3 days. Freeze without caramel up to 2 months; thaw and drizzle the day you serve. For gift tins, let caramel set fully so bars don’t stick together; use parchment between layers.
Variations: Add 1 cup white chocolate chips for creamy pops. Dairy-free: use vegan butter in blondies and a coconut milk caramel (swap cream for full-fat coconut milk) with fine sea salt.
Pro Plating Tip: Angle bars in alternating directions and finish with two or three visible salt flakes per piece for that artisan look.
Time to end with a crunchy, nutty showstopper that slices thin and keeps forever — perfect for cookie swaps and coffee breaks into January.
5. Pecan Praline Cookie Bars With Buttery Crinkle Top
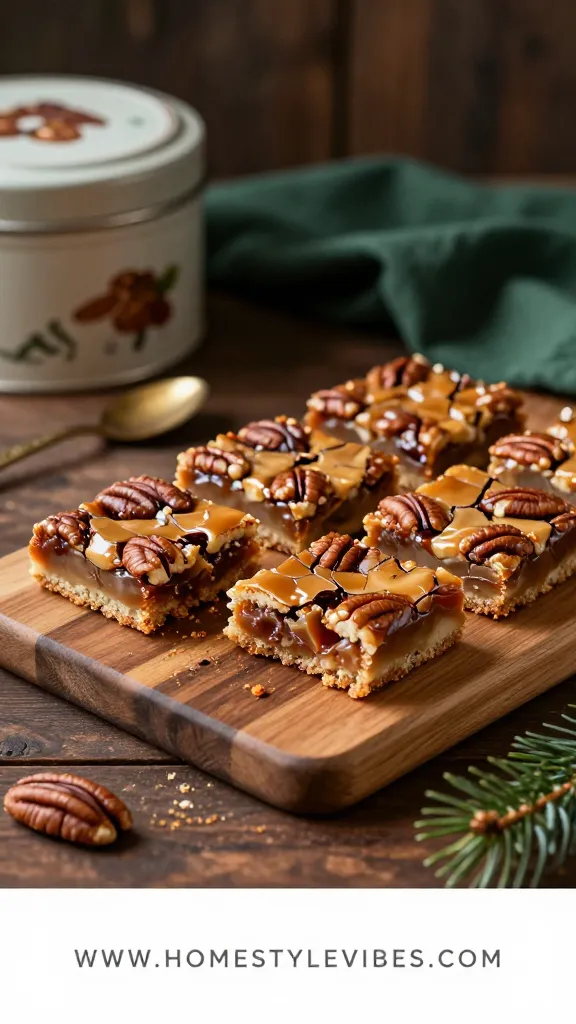
Imagine the best parts of pecan pie — toasty nuts, caramelized edges, that barely-sticky chew — baked into a cookie bar that actually holds its shape in a tin. These praline cookie bars cut into slim fingers or hearty squares and deliver a satisfying crunch with a soft center.
They’re my secret weapon for big family gatherings because they use pantry staples and one bowl for the crust. The topping bakes into a crinkled, glossy sheet that looks like stained glass when you slice through the pecans.
Prep Time: 20 minutes
Cook Time: 28–32 minutes
Total Time: 1 hour
Servings: 24–30 bars
Best For: Cookie exchanges, travel-friendly gifting, and anyone who loves pecan pie but wants neat slices.
Ingredients:
- Crust: 1 cup (2 sticks) unsalted butter, softened; 1/2 cup granulated sugar; 2 cups all-purpose flour; 1/2 tsp kosher salt
- Topping: 1/2 cup unsalted butter; 1 cup light brown sugar, packed; 1/3 cup honey or light corn syrup; 2 tbsp heavy cream; 1 tsp vanilla extract; 1/2 tsp kosher salt
- 2 1/2 cups pecan halves, roughly chopped
- Garnish: very light dusting of powdered sugar (optional)
Instructions:
- Preheat oven to 350°F. Line a 9×13-inch ceramic baker with parchment. You’ll present slices directly from the baker or transfer to a silver tray. Light powdered sugar garnish optional.
- Crust: Beat 1 cup butter and 1/2 cup sugar until creamy. Mix in flour and 1/2 tsp salt just until combined. Press evenly into the pan. Bake 12–14 minutes until edges turn pale gold.
- Topping: In a saucepan, melt 1/2 cup butter with brown sugar, honey, and cream. Bring to a gentle boil 2 minutes, stirring. Off heat, stir in vanilla, 1/2 tsp salt, and pecans.
- Pour topping over hot crust and spread evenly. Bake 16–18 minutes until the top bubbles across and looks slightly crinkled, with deeper golden edges.
- Cool completely before lifting out by parchment and slicing into bars or fingers. Dust lightly with powdered sugar if using, then arrange on a silver tray.
Make-ahead: Keeps airtight at room temp for 5 days. Freezes well up to 2 months; layer with parchment. For gifting, these are sturdy — wrap stacks in cellophane bags tied with twine, then pack in a cookie tin to prevent crushing.
Variations: Nut-free: use toasted pumpkin seeds and sunflower seeds for a “praline crunch” vibe; add 1/2 tsp cinnamon. Maple twist: replace honey with maple syrup and add 1/4 tsp maple extract.
Pro Plating Tip: Slice into skinny fingers and fan them slightly; the pecan pattern catches light and looks luxe on a reflective tray.
Quick Checklist
- Line every pan with parchment for easy lifting and sharp edges
- Use light-colored metal pans for fudgy brownies; glass/ceramic for gentle, even bakes
- Chill cheesecake bars fully before slicing to prevent cracks
- Brown butter for deeper, nutty shortbread flavor
- Check doneness with visual cues: matte tops, set edges, slight center jiggle
- Cool completely before cutting to avoid ragged, smeared edges
- Slice with a hot, dry knife and wipe between cuts
- Layer bars with parchment in tins to protect finishes and garnishes
- Freeze bars without delicate drizzles; add toppings after thawing
- Pack gift tins tightly so bars don’t shift in transit
Frequently Asked Questions
Can I double these Christmas cookie bar recipes for a bigger crowd?
Yes, bake in two 9×13 pans instead of one larger pan for even results. Oversized pans change bake times and heat distribution; two standard pans ensure consistent centers and edges.
How far ahead can I make cookie bars for a cookie exchange?
Make most bars 1–3 days ahead; cheesecake bars up to 48 hours ahead chilled. For longer, freeze up to 2 months, then thaw overnight in the fridge and finish with garnishes the day of.
What’s the best way to ship cookie bars without smushing toppings?
Freeze cut bars first, then layer with parchment in tins, pad empty spaces, and ship priority. Freezing firms delicate tops so they arrive intact and slows staling during transit.
Any gluten-free or dairy-free swaps that still taste great?
Use a 1:1 gluten-free flour blend in all bars and dairy-free butter plus coconut milk for caramel. Expect slightly softer textures; chill before slicing for the cleanest cuts.
How do I prevent dry, cakey brownies and blondies?
Pull pans when edges set and the center shows damp crumbs or a slight jiggle. Overbaking kills fudginess fast; start checking 3–4 minutes early and trust visual cues over the clock.
Bring It Home
Pick one pan this week. Peppermint and brownie, cranberry shortbread, cheesecake crackle, spiced blondies, or praline crunch — any single batch will fill a platter and your house with holiday energy without you playing short-order baker all night.
The truth is, great Christmas baking isn’t about perfection. It’s about simple, repeatable moves that make you feel calm and capable when the kitchen is buzzing. These Christmas cookie bar recipes deliver that calm, one pan at a time.
Preheat the oven, line the pan, and claim your square. You’ve got this — and your cookie tins are about to prove it.

About the Author

Krisztina P.Rendes, Founder of Home Style Vibes
Founder of Home Style Vibes
Krisztina Puskásné Rendes created Home Style Vibes as a cozy-modern lifestyle space where homemaking meets inspiration. Her goal is to help women create beautiful, organized, and peaceful homes they truly love — without overwhelm. You’ll find here heart-driven content on home decor, cleaning tips, easy family recipes, organization and decluttering, DIY home projects, plants, and seasonal ideas — all designed to bring more calm, comfort, and style into everyday life.