6 Halloween Kitchen Decor Ideas That Make Cooking Spooky Fun
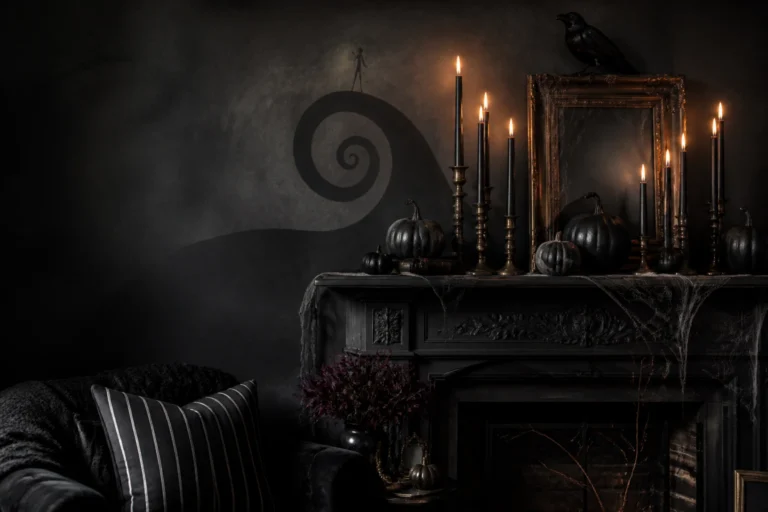
You want a kitchen that makes October dinners feel like a cozy witchy movie night. You hate when your Halloween decor looks like a party store exploded on your counters, leaving you with cluttered chaos and zero room to actually cook. Picture this instead: candlelit shadows flickering across matte black mugs, a regal crow perched by the spice rack, subtle cobwebs glinting in the under-cabinet light, and a jack-o’-lantern grin watching over your bubbling pot of chili. These 6 Halloween kitchen decor ideas will fix that “cute but chaotic” frustration and make the room photogenic, practical, and seriously fun — all with a $200 cap per concept if you want to keep it lean, and most can be styled in under an afternoon.
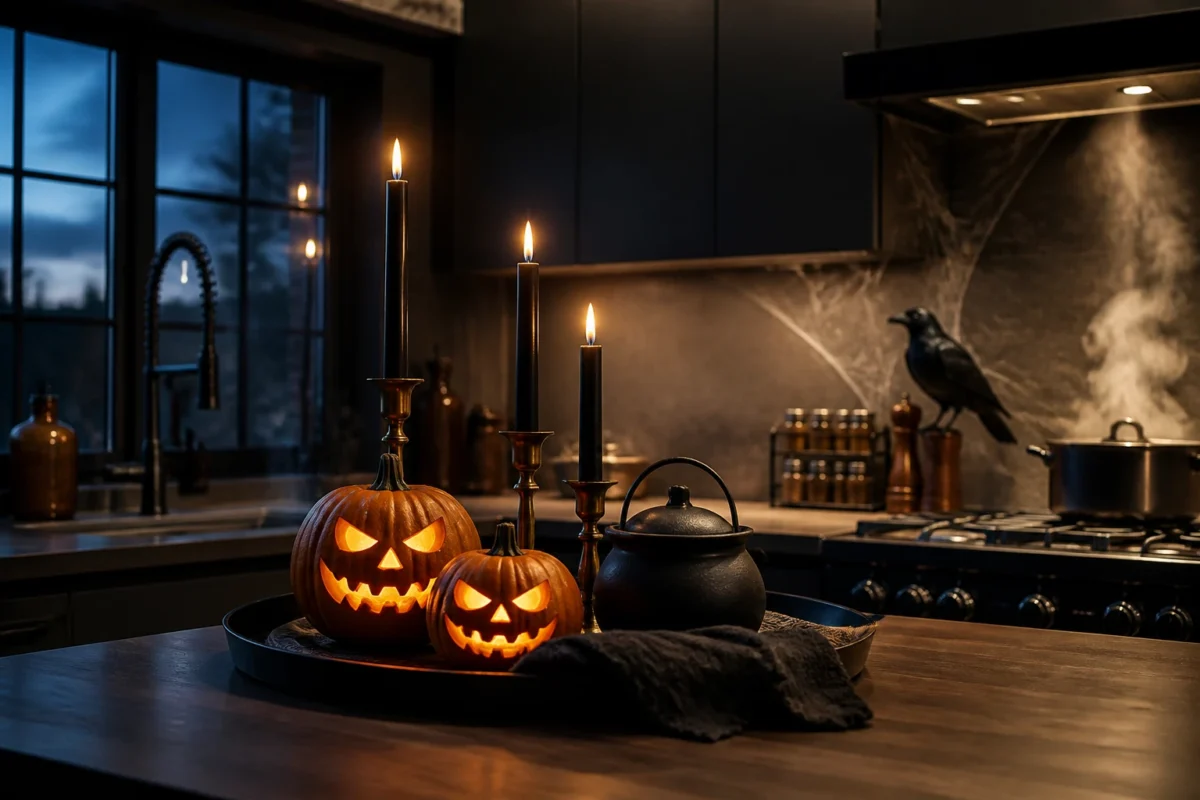
We’ll mix dark autumn elements with playful spooky touches — think black taper candles in antique brass, charcoal linen tea towels, crows, ravens, mini cauldrons, and a few cleverly placed jack-o’-lanterns. By the end, you’ll have a kitchen that cooks like a dream and looks Pinterest-ready. If you love a stylish haunted vibe that still respects your meal-prep reality, you’re in the right place.
1) Jack-O’-Lantern Glow With Black Iron On The Kitchen Island
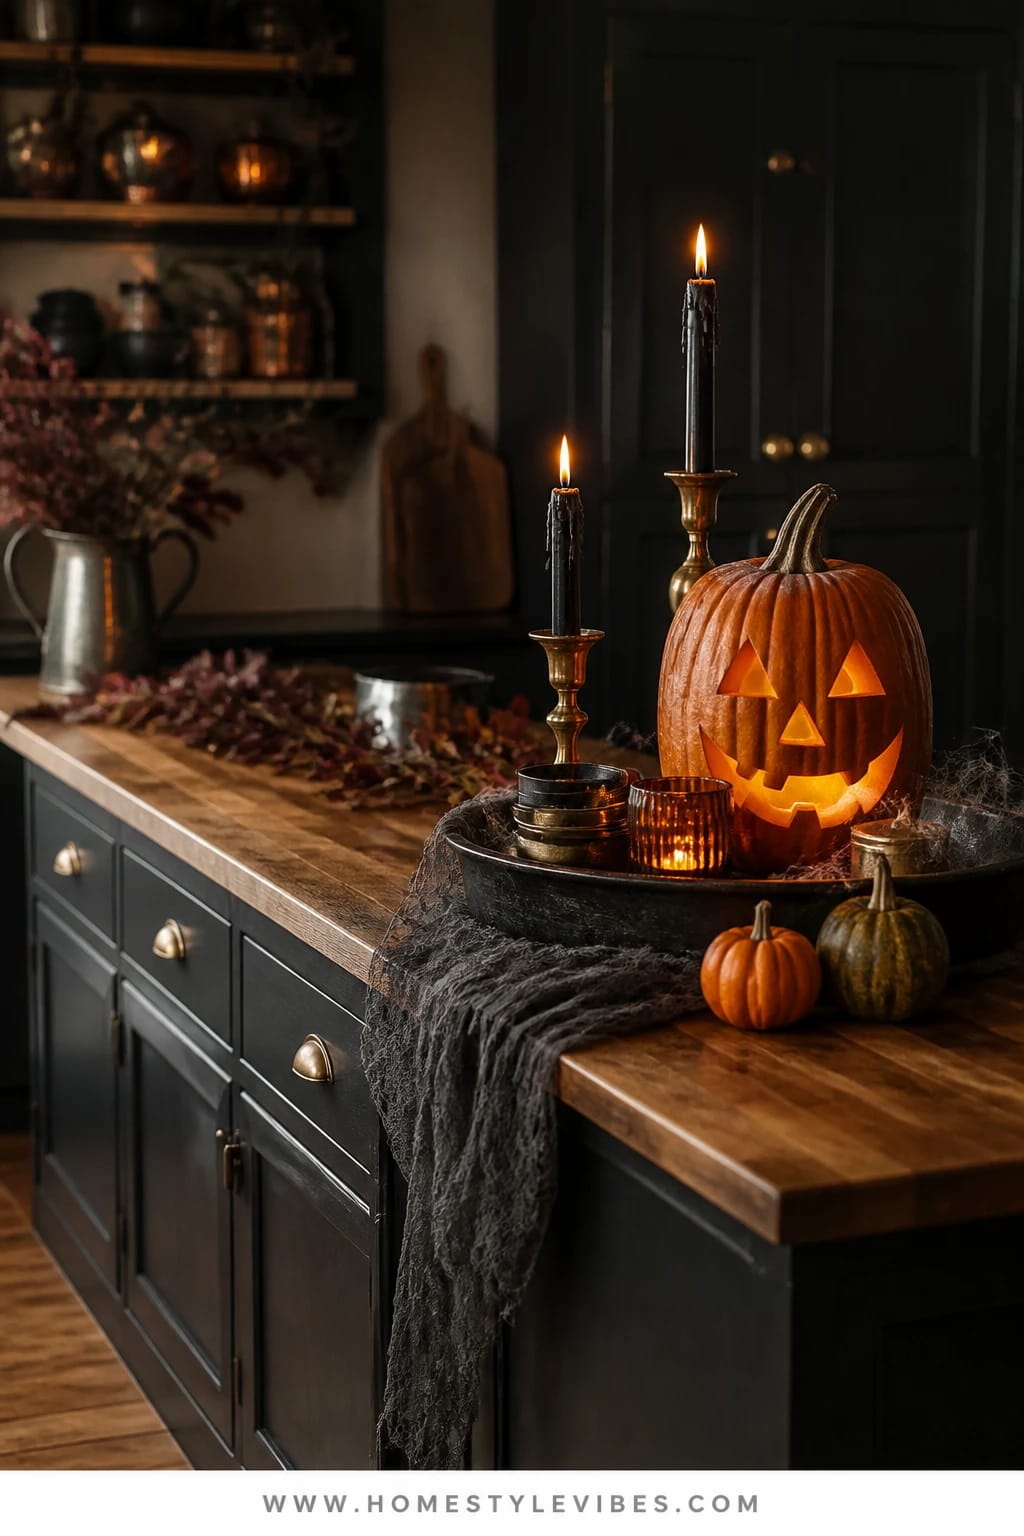
We’ve all been there: your island turns into a drop zone for backpacks, mail, and the random whisk you swear you put away. You’ve tried a tray and a pumpkin, but it still looks like a pile of stuff rather than a scene. This Halloween kitchen decor idea leans into drama and function — a low black iron tray corralled with a carved jack-o’-lantern (or a chic faux one), vintage-looking brass candleholders, and a small stack of matte black bowls. The mood hits “playfully haunted,” not cheesy. The glow softens everything and makes Tuesday-night pasta feel like a cozy ritual.
Why this works in real homes: The island is command central. Crowding it with tall, fussy decor just gets knocked over. This setup anchors everything on one sturdy tray, keeps wipe-down simple, and lets you actually chop vegetables without moving fifteen things first. Lighting-wise, the jack-o’-lantern creates a warm focal point, while a pair of black tapers adds vertical flicker and shadow. You’ll photograph this scene constantly — the strong central glow, dark metallic accents, and curved pumpkin grin layer beautifully and read high-contrast in photos.
Variations you’ll love: Do a budget-friendly version with a thrifted metal pizza pan sprayed matte black as the tray and a $5 LED pumpkin rather than a carved one. If your island is tiny, scale down to a black dinner plate as the “tray,” a mini LED pumpkin, and one small candleholder. Prefer an even moodier October-to-November bridge? Swap the jack-o’-lantern for a black pumpkin and nestle a tiny faux crow on the rim of the tray for a Halloween-to-Thanksgiving slow fade.
Budget Breakdown:
- Black iron or metal tray: $20–$50
- Jack-o’-lantern (real or LED): $8–$40
- Brass or black candlesticks (set of 2): $18–$45
- Black taper candles (dripless if possible): $8–$15
- Matte black bowls (2–3): $12–$24
Total Estimated Cost: $66 – $174
Best For: A medium to large kitchen island where you can spare a 14–18 inch footprint; works beautifully for families who want seasonal charm that doesn’t block meal prep. Best mid-October through Halloween week.
Key Design Elements:
- Main seasonal props: Jack-o’-lantern, black tapers, small matte black serveware
- Color palette: Black, antique brass, warm pumpkin orange
- Lighting strategy: Central pumpkin glow with taper candle flicker; dim overheads to let shadows play
- Textile layers: Black linen napkin or towel under the tray for depth
- Natural elements: Real pumpkin if you’ll light it nightly; a few cinnamon sticks for scent
- Accent details: Minimalist iron tray, vintage-look brass candleholders
How To Recreate This Look:
- Start with a low-profile black iron or metal tray centered on the island.
- Add your jack-o’-lantern (LED or carved) as the main focal point.
- Layer in two brass or black candleholders at differing heights.
- Place 2–3 matte black bowls or mugs to one side for useful styling.
- Style with a folded black linen napkin peeking out to soften the metal-on-stone look.
Why This Looks Expensive: The restrained palette and real metal finishes make it feel curated, not crafty. Anchoring everything on a single tray reads purposeful and high-end.
Watch Out: Don’t crowd the tray with extra knickknacks. Negative space is the secret. And keep the pumpkin away from a heat vent — the sad, slumpy look shows up fast.
Pro Styling Tip: For photos, lower overhead lights and let the jack-o’-lantern be the star; shoot slightly from the side so the candleholders add layered silhouettes.
2) Cobweb Drape With Antique Brass On Open Shelves
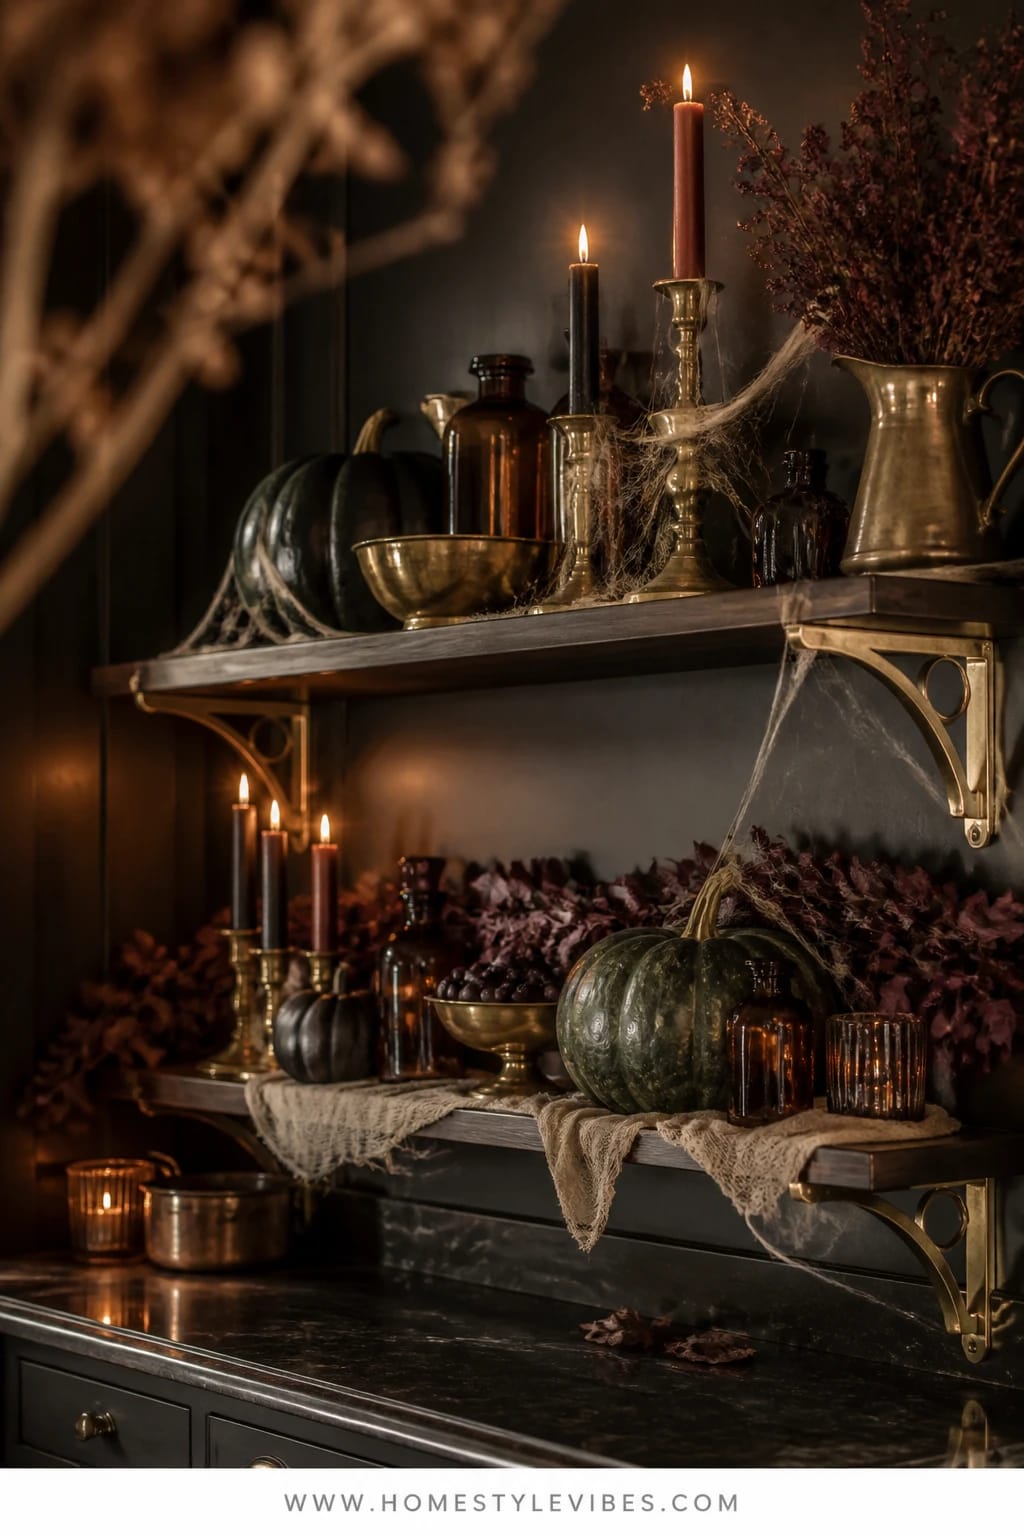
It’s that one corner that always feels off — the open shelves look flat and utilitarian once you stash the cereal bowls. You’ve stacked plates, added a pumpkin, and still…meh. This idea trades “pumpkin on a plank” for a subtle cobweb drape, layered with antique brass accents and a couple of darker props that give the shelves dimension. The vibe lands “tasteful haunted house” — like the kitchen belongs to a kind witch with impeccable taste and a spice drawer to envy.
Here’s why it works: Texture is the unsung hero. Cobwebbing (use the fine, stretchable style) catches the light from under-cabinet LEDs, creating shadows that make your shelves look styled, not storefront. Brass warms the palette and keeps the Halloween black balanced. A vintage apothecary bottle or two adds a whisper of story. It photographs beautifully because the cobwebs create soft texture that your camera picks up like lace.
Try these variations: For a small kitchen, drape just one corner of a single shelf with webbing and tuck in a tiny crow figurine beside a brass pepper mill. Want more modern? Skip the figurines and use a single dark botanical art print leaning behind your plates. If you’re hunting for a longer season, swap the crow for dried burgundy eucalyptus after Halloween.
Budget Breakdown:
- Stretchable faux cobwebs: $3–$7
- Antique brass pepper mill or small vase: $15–$40
- Apothecary bottles (2–3, thrifted or repro): $10–$35
- Small dark figurine (crow, bat, or raven): $6–$20
- Mini black pumpkins (2–3, faux or real): $6–$15
Total Estimated Cost: $40 – $117
Best For: Kitchens with open shelving or glass-front cabinets; ideal for anyone who loves moody, layered styling that still keeps dishes within reach.
Key Design Elements:
- Main seasonal props: Cobwebs, mini black pumpkins, small crow or bat figurine
- Color palette: Black, antique brass, deep brown glass
- Lighting strategy: Under-cabinet or shelf puck lights to skim across the texture
- Textile layers: None required; the webbing is your main texture
- Natural elements: Dried seed pods or eucalyptus if you want extra movement
- Accent details: Apothecary bottles, tiny framed dark art print
How To Recreate This Look:
- Start by clearing one section of shelving and grouping dishes by color for a calmer base.
- Add a sparing amount of stretchable cobwebs, pulling thin so it reads delicate, not puffy.
- Layer a brass object for warmth, like a pepper mill or bud vase.
- Place a few dark accents (apothecary bottles, mini black pumpkins) in varied heights.
- Style with one small figurine to the side — never dead center — so it feels discovered.
Why This Feels Designer: It plays with contrast: hard ceramics vs. wispy webbing, warm brass vs. cool black. That tension creates depth without clutter.
One Thing To Avoid: Don’t over-web. If you can’t see the shelf, you’ve gone too far. Thin, thin, thin — like whispery threads that catch the light.
Pro Styling Tip: For that “magazine shot,” angle a small puck light so it grazes the webbing at night; the fine fibers will glow without looking fake.
Keep scrolling — the next idea turns a tired coffee corner into a spell-casting station you’ll actually use every morning.
3) Witchy Coffee Nook In Candlelit Shadow By The Countertop
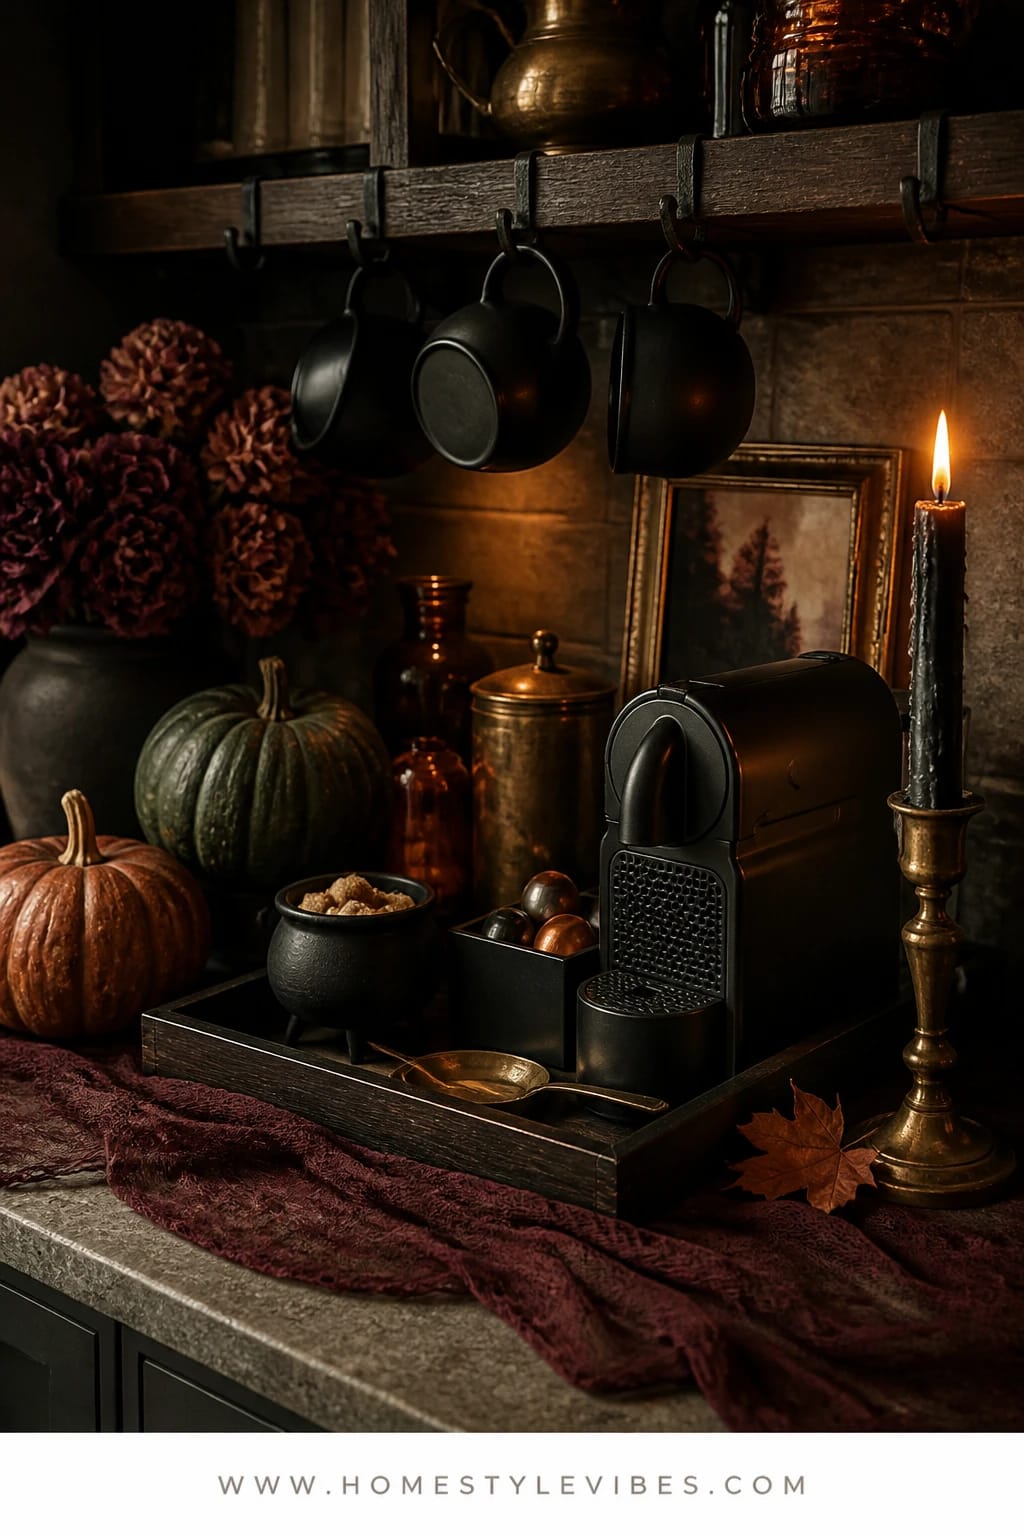
You want mornings to feel magical, but your coffee zone currently looks like a tangle of cords and mugs. You’ve added a cute sign before — and it did nothing. Let’s go for a full-on witchy coffee nook: matte black mugs on iron hooks, a small black tray to corral the pods, a brass spoon rest, a mini ceramic cauldron for sugar, and a single black taper in a heavy brass holder that throws moody shadows across the backsplash.
The mood is intimate and theatrical. Candlelight at dawn changes everything — it makes steam rising from your cup feel ceremonial. This setup works in real homes because it’s compact, easy to clean, and each piece is doing a job. The mini cauldron isn’t just cute; it’s your sugar bowl. A printed label on a dark apothecary jar turns coffee grounds into “Night Brew,” because why not? Photos love this: steam + low candle glow + matte textures = instant vibe.
Variations to try: If open flames aren’t your thing before caffeine, swap the taper for a black battery candle with a realistic flicker. Tiny space? Mount an iron hook rail under the cabinet for mugs to free up counter space. Prefer less Halloween-forward? Keep the jars and mugs black, skip the labels, and add one small raven silhouette sticker near the outlet cover — subtle but cheeky.
Budget Breakdown:
- Matte black mugs (set of 4): $16–$40
- Iron hook rail: $12–$25
- Small black tray: $10–$25
- Mini ceramic cauldron or sugar bowl: $8–$20
- Brass spoon rest: $10–$25
- Black taper + brass holder or LED taper: $15–$35
- Apothecary jar + label: $6–$15
Total Estimated Cost: $77 – $185
Best For: Coffee lovers with a 24–30 inch countertop sliver; great for anyone who wants Halloween charm that’s functional at 6 a.m.
Key Design Elements:
- Main seasonal props: Mini cauldron, black taper, apothecary jars
- Color palette: Black, brass, hints of charcoal
- Lighting strategy: Single candle or LED taper; optional under-cabinet light set to warm
- Textile layers: Black linen coaster or small square cloth under the tray
- Natural elements: Whole cloves or cinnamon sticks in a jar for scent
- Accent details: Iron hooks, simple dark labels with serif type
How To Recreate This Look:
- Start by clearing the counter and wiping down the backsplash.
- Add the iron hook rail under the cabinet and hang 3–4 matte black mugs.
- Layer a small black tray for pods, spoons, and the mini cauldron of sugar.
- Place a brass candleholder to the side and add a black taper or LED version.
- Style with one labeled apothecary jar — keep it clean, not cluttered.
Why This Reads High-End: Repetition of matte black with one warm metal accent feels intentional. Also, everything has a task — designer rooms avoid “useless cute.”
The Most Common Mistake: Using too many different blacks. Keep finishes close — matte or satin. One glossy piece is fine, but five is noisy.
Pro Styling Tip: For photos, wait until the kettle steams and shoot from a low angle with the candle behind — instant moody morning moment.
Remember, this isn’t about recreating a showroom. It’s about building a kitchen that fits your life — the cooking, the coffee, the after-school snacks — with just enough spooky mood to make it feel special.
4) Raven Silhouette With Aubergine Linen On The Dining Nook Table
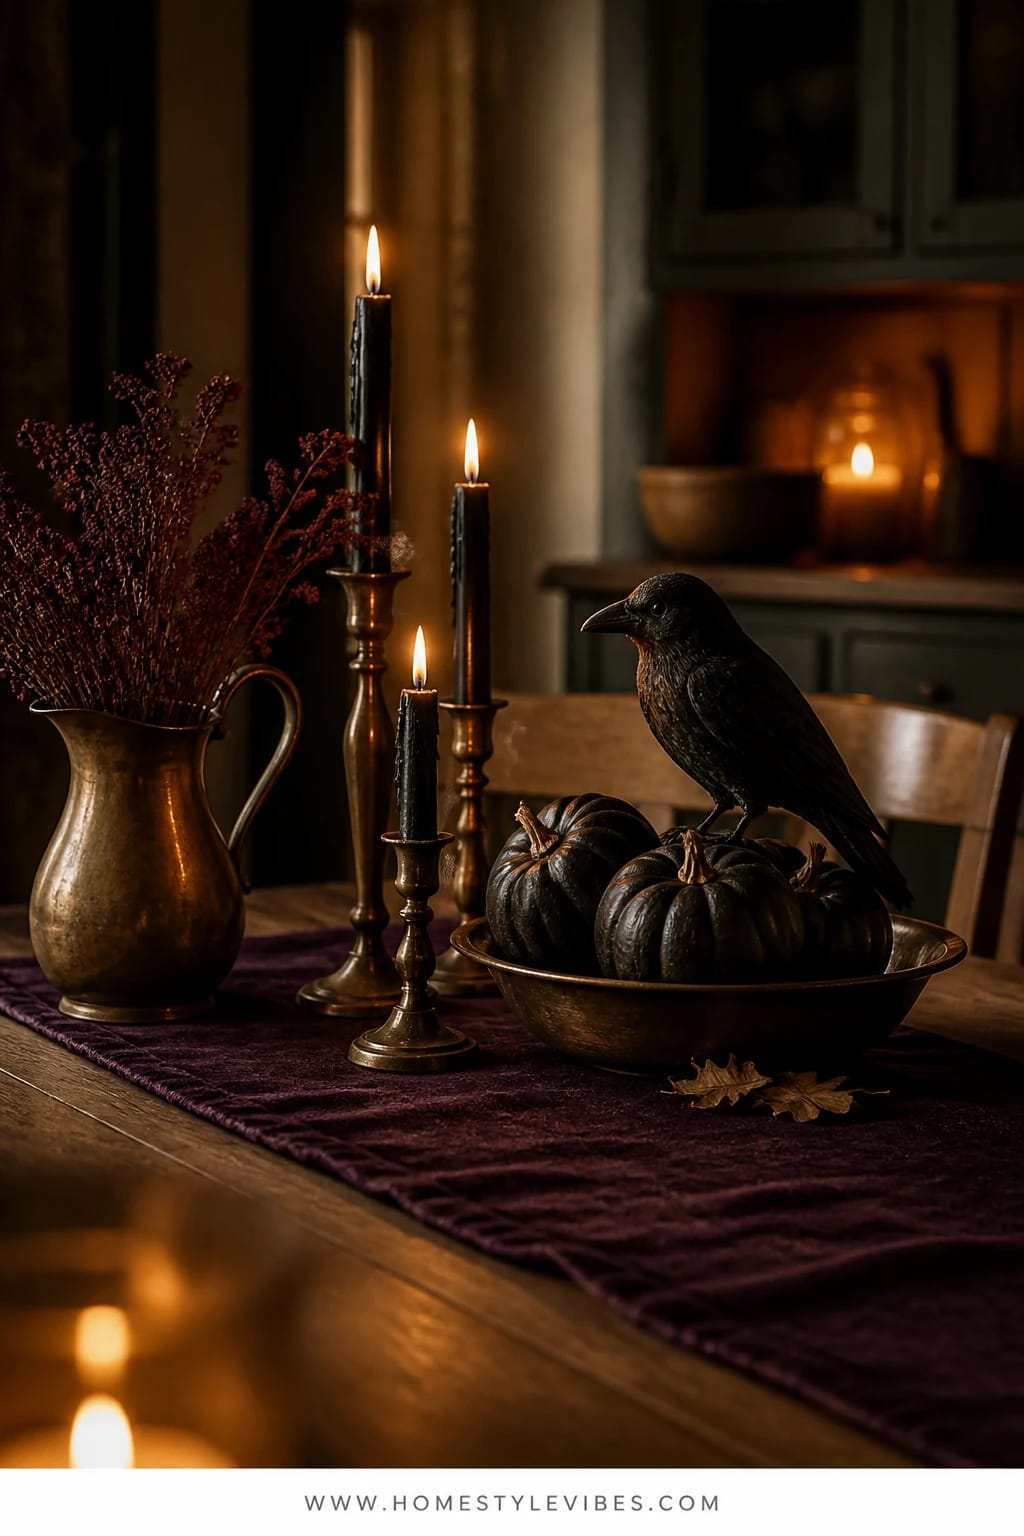
Some dining nooks feel like holding pens for clutter. Keys, permission slips, the mail pile — you know the story. You’ve tried a cute runner and a pumpkin, but the table still reads “temporary.” This idea stakes a dramatic claim: a deep aubergine linen runner, a cluster of black candlesticks, and a sleek raven silhouette perched on a low bowl of dark pumpkins. The effect? Candlelit shadows that creep across the runner in the best way, like a little Victorian ghost story landed in your breakfast corner.
Why it works: Color depth and negative space. The aubergine runner gives you a saturated base that swallows light just enough to make brass and black gleam. Keep the centerpiece low-and-long so you can still eat dinner. Because we’re tethering everything to a single runner, you can whisk it all off in seconds if you need to set out homework. It photographs beautifully because that dark textile reads velvety on camera and the ravens offer crisp, graphic contrast.
Variations you may love: For a more family-friendly take, use battery pillars in smoked black hurricanes instead of tapers. Small table? Cut the runner to 36 inches and style one raven plus a single brass candlestick. Prefer less purple? Swap aubergine for deep oxblood or charcoal. Keep the raven — he’s the star.
Budget Breakdown:
- Aubergine linen runner: $25–$60
- Black candlesticks (3–5 heights): $24–$60
- Raven silhouette statue or cutout: $10–$30
- Bowl (matte black or brass): $15–$45
- Small dark pumpkins (real or faux): $8–$20
- Optional smoked glass hurricanes (set of 2): $24–$48
Total Estimated Cost: $102 – $263
Best For: Eat-in kitchens or breakfast nooks that need a moody focal point but remain family-ready; perfect for dinners the week of Halloween.
Key Design Elements:
- Main seasonal props: Raven silhouette, black candlesticks, dark pumpkins
- Color palette: Aubergine, black, antique brass
- Lighting strategy: Low candle cluster with dimmed overhead pendant
- Textile layers: Linen runner with a soft hand and weight
- Natural elements: Real mini pumpkins or dried burgundy eucalyptus sprigs
- Accent details: Smoked glass hurricanes, a hammered brass bowl
Why This Looks Intentional: Consistent heights that step down toward the center, a single bold textile, and a focal raven keep the eye moving but never frantic. The runner “grounds” the whole scene like a stage.
How To Recreate This Look:
- Start with the aubergine runner centered on your table, leaving at least 6 inches of wood showing on each side.
- Add a low bowl slightly off-center and fill with 3–5 dark pumpkins.
- Layer 3–5 black candlesticks around the bowl, varying the heights.
- Place the raven silhouette perched at the bowl’s rim or on a small riser to lean in.
- Style with one or two sprigs of dried eucalyptus tucked low under the bowl edges.
Don’t Do This: Don’t let the raven face outward like he’s about to dive-bomb dinner. Angle him in toward the centerpiece so it feels like he belongs in the scene.
Pro Styling Tip: Photograph at dusk with only the candles and one dimmed pendant — position the camera so the raven reads in profile for a crisp shape.
If one idea resonates more than the others, that’s your starting point. You don’t need all six. Nail one corner you use constantly, and the rest of the kitchen starts to feel pulled together almost by default.
5) Potion Bottles And Black Candles On The Stove Backsplash Ledge
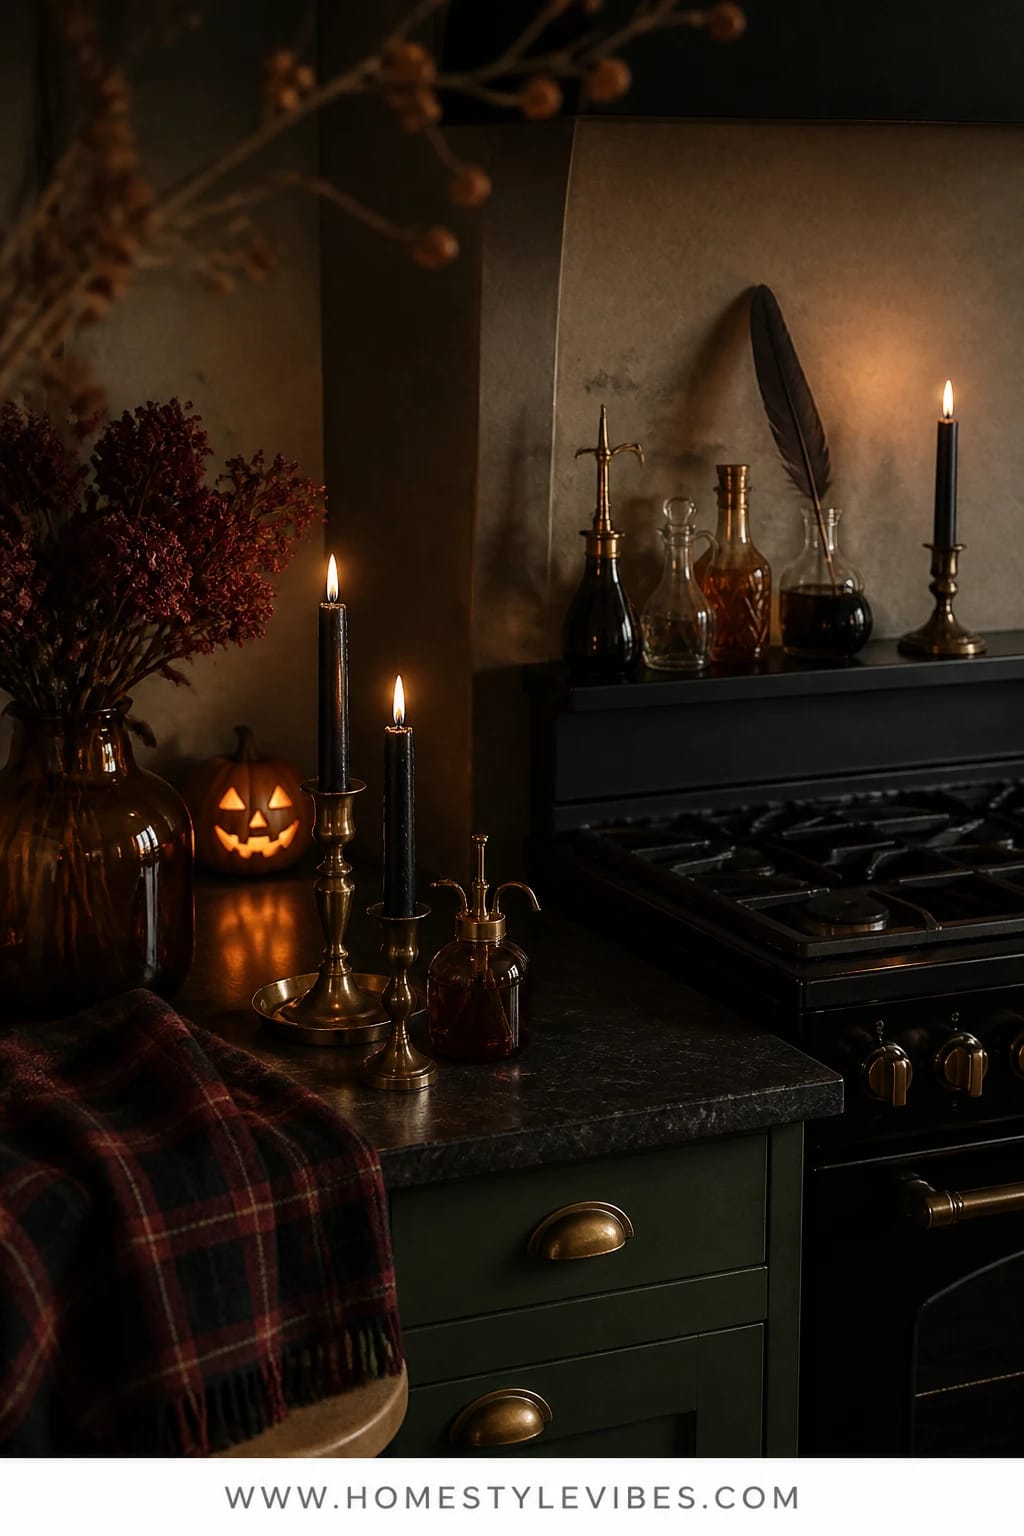
Hear me out: the backsplash ledge (or the few inches behind your stove if you have a flat back) is prime Halloween real estate. It’s usually ignored or cluttered with random oil bottles. You’ve tried a faux plant there before — it got greasy. This time, let’s go “subtle potion lab”: smoky glass bottles labeled with salt, oil, and vinegar; a sleek black taper in a short, sturdy holder tucked to the side; and a discreet raven feather in a bottle for a wink of drama. The mood is old-apothecary meets today’s Tuesday-night pasta.
Why it works IRL: It’s practical. The labeled “potions” are literally your cooking basics. Keep everything low and wipeable. A single black taper — or better, a short battery taper — adds glow without risking anything near the flame. Side lighting at night creates shadows that dance across tile like a gentle haunted whisper. It photographs well because bottles in a row create rhythm and the dark labels ground the composition.
Variations to try: No ledge? Use a slim black picture ledge mounted on the side wall away from heat and set your “potions” there. Prefer a cleaner look? Skip the feather and use uniform bottles with identical black-and-ivory labels. If your tile is patterned, keep labels minimal and the candle small to avoid visual clutter.
Budget Breakdown:
- Smoky glass bottles (3–5): $12–$40
- Waterproof black-and-cream labels: $6–$12
- Short black taper + squat holder or LED taper: $12–$28
- Decorative raven feather (or faux): $4–$10
- Optional slim picture ledge: $15–$35
Total Estimated Cost: $49 – $125
Best For: Busy home cooks who want the backsplash to work hard and look seasonally moody; great for kitchens with neutral tile needing a little drama.
Key Design Elements:
- Main seasonal props: “Potion” bottles, black taper, raven feather
- Color palette: Smoke glass, black, cream label accents
- Lighting strategy: One small candle or LED, plus the stove’s hood light set to warm
- Textile layers: None — keep this zone wipeable
- Natural elements: Feather or a short dried herb bundle (rosemary looks witchy-chic)
- Accent details: Matching labels and consistent bottle shapes for order
How To Recreate This Look:
- Start by decanting oil, vinegar, and salt into smoky bottles and apply simple labels.
- Add a short, sturdy candleholder at the far edge of the ledge, away from burners.
- Layer bottles in a gentle stagger, tallest to shortest, not in a straight regimented line.
- Place a single raven feather in the smallest bottle for height and story.
- Style with a quick wipe-down routine after cooking to keep the scene crisp.
Why This Looks Expensive: Uniform containers with pared-back labels read like a boutique kitchen. The dark tones against tile give you that designer contrast you see in magazines.
Watch Out: Safety first. Keep real flames a safe distance from the cooktop. If in doubt, grab a battery taper and sleep easy.
Pro Styling Tip: Turn the hood light to warm and dim. Cool lighting makes the bottles look clinical; warm light sells the apothecary mood.
True story: I tried this on my own backsplash last October, and I didn’t realize how much the mismatched oil bottles bugged me until I swapped them for “potions.” Dinner suddenly felt like a little show — in the best way.
6) Gothic Pantry Door With Black Paper Bats And Brass Hooks
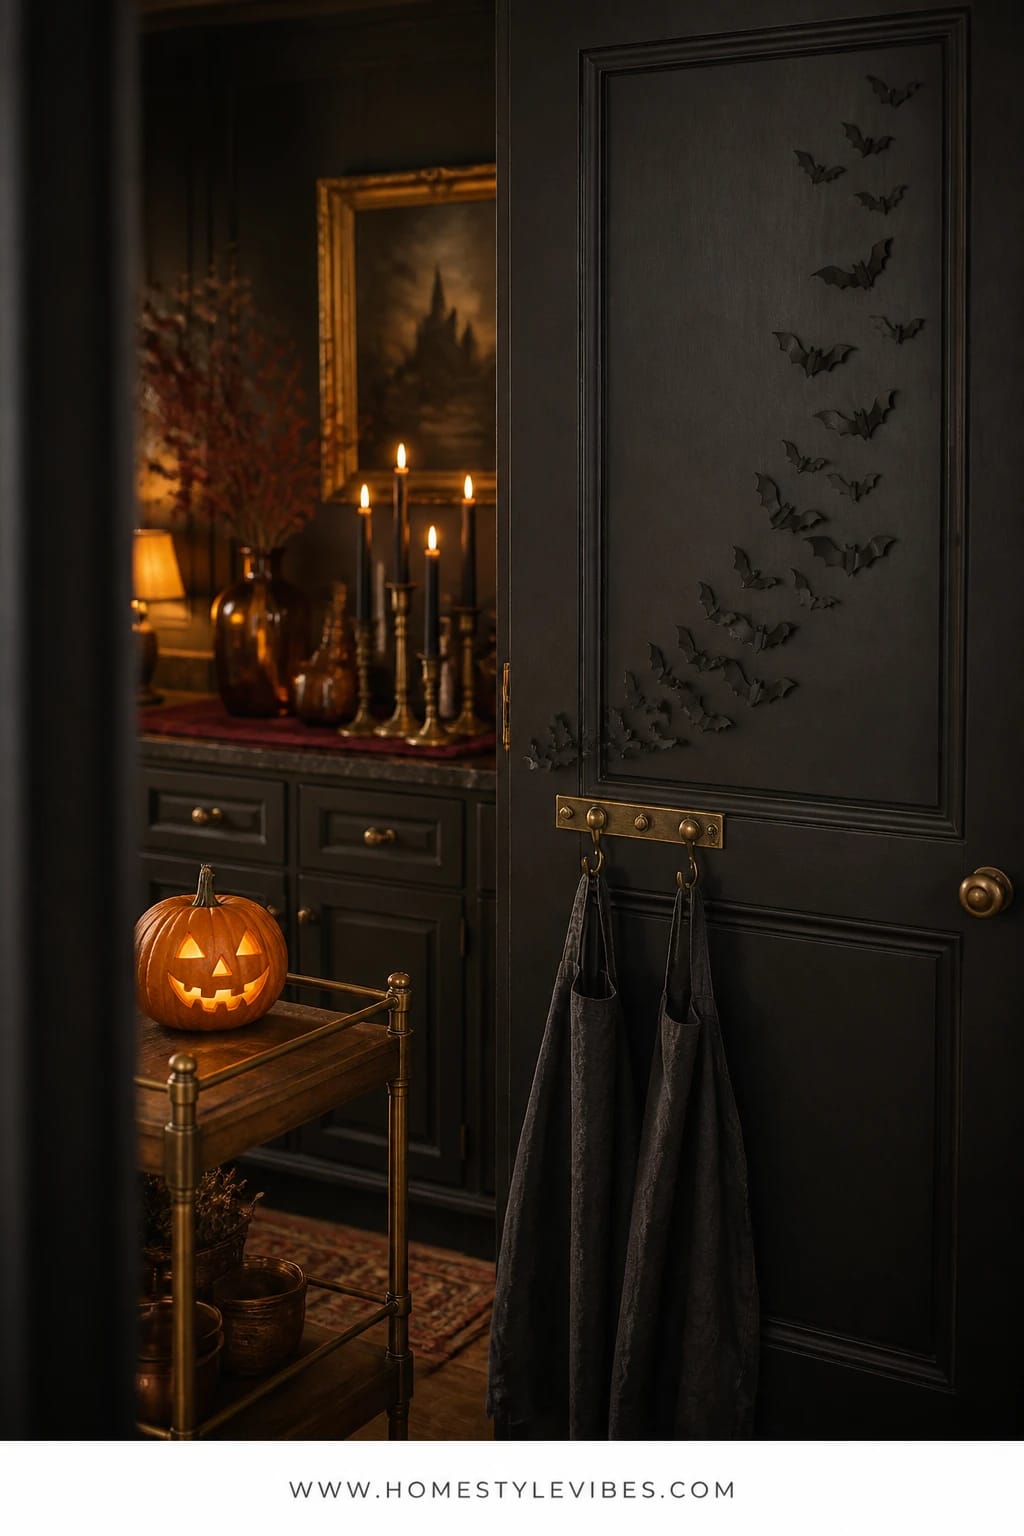
Pantry doors often get ignored or turned into a command center eyesore. You’ve taped random art there before — it fell off by week two. This idea is fast and wildly photogenic: a flutter of matte black paper bats sweeping up the pantry door, a small brass hook rail with black linen aprons, and a single mini jack-o’-lantern on the nearby cart or counter to tie it into the room. The vibe says “chic haunted manor,” but it takes under an hour and costs less than a takeout night.
Why it works: Movement plus restraint. The bats create a sense of motion, which instantly livens up a dead-flat surface. Brass hooks bring warmth and function — aprons look intentional instead of “hung wherever.” It photographs insanely well because diagonal movement (bats flying upward) leads the eye from counter to ceiling, giving you that tall-room illusion even in a small kitchen.
Variations you’ll love: Renters or commitment-phobes can use removable putty or painter’s tape loops on the back of each bat. No pantry door? Use the side of a tall cabinet or even the fridge side panel if it’s not too textured. Want more drama? Add a strip of antique-style gallery molding above the door and perch a small faux crow there, peeking down like a guardian of the snacks.
Budget Breakdown:
- Pack of matte black paper bats (reusable): $8–$18
- Small brass hook rail: $15–$35
- Black linen or cotton apron: $12–$28
- Mini jack-o’-lantern (LED or carved): $6–$18
- Optional small crow figurine: $8–$20
Total Estimated Cost: $49 – $119
Best For: Any kitchen with a visible door or tall cabinet panel; excellent for families who want Halloween energy that doesn’t eat counter space.
Key Design Elements:
- Main seasonal props: Paper bats, mini jack-o’-lantern, optional crow
- Color palette: Black, antique brass, warm pumpkin orange
- Lighting strategy: Hall or pendant light grazing the door; candlelight nearby to catch bat shadows
- Textile layers: Black apron(s) to soften and add utility
- Natural elements: None required; keep it crisp and graphic
- Accent details: Simple brass rail, tidy apron folds
How To Recreate This Look:
- Start by cleaning the door so adhesives stick well.
- Add the brass hook rail at a comfortable height and hang your apron.
- Layer bats from lower left to upper right (or vice versa) in a loose, upward flight path.
- Place a small jack-o’-lantern on the adjacent counter or cart to echo the black-and-orange palette.
- Style with one last look from across the room — remove any bat that disrupts the flow.
Why This Feels Designer: Controlled repetition (bats) plus one functional element (hook rail) looks thought-out. Diagonal movement is a stylist’s trick to create energy and height without clutter.
One Thing To Avoid: Don’t stick bats in a perfect grid. Nature isn’t a spreadsheet. Vary sizes and spacing.
Pro Styling Tip: For photos, angle a warm lamp or candle from the side so the bats cast soft shadows — it adds instant depth to a flat door.
Here’s a tiny moment from my own kitchen: I stuck three bats above the pantry and promptly watched my kid tiptoe in for pretzels like he was sneaking past a sentry. That’s the vibe we want — playful, a little spooky, totally livable.
Quick Checklist
- Black iron or metal tray for island corral
- Jack-o’-lantern with LED or real candle
- Black taper candles and sturdy brass holders
- Stretchable faux cobwebs for subtle shelf texture
- Apothecary bottles with simple black-and-cream labels
- Matte black mugs and iron hook rail for a coffee nook
- Mini ceramic cauldron for sugar or treats
- Aubergine (or oxblood) linen runner for the dining nook
- Raven silhouette statue or cutout
- Smoked glass hurricanes or battery pillars
- Smoky glass “potion” bottles for oil, vinegar, salt
- Short black taper or LED taper for backsplash safety
- Raven feather or dried rosemary bundle
- Matte black paper bats for doors or tall cabinets
- Small brass hook rail and black linen apron
- Mini jack-o’-lantern for counter or cart
- Under-cabinet or puck lights set to warm tone
- Black linen napkins or towels for soft layering
Frequently Asked Questions
How do I keep Halloween kitchen decor on budget without it looking cheap?
Pick one zone — island, shelves, or coffee nook — and go deep there. Use a restrained palette (black, brass, aubergine) and real materials like metal and linen. Thrift candlesticks and bowls, then spend a little more on one hero item like a great raven or a quality LED candle. Anchoring on a tray or runner makes everything read intentional.
Are real pumpkins worth it in the kitchen, or should I go faux?
IMO, real pumpkins win every time for color and weight, but keep them away from heat vents and sunny windows or they’ll slump early. If your kitchen runs hot, use a realistic faux on the island and keep real minis in cooler corners like the dining nook. For carved jack-o’-lanterns, refrigerate during workdays to extend life.
My kitchen is tiny. Which idea works best without stealing prep space?
Try the pantry door bats with a brass hook rail or the witchy coffee nook with a wall-mounted mug rail. Both give big visual payoff with minimal counter footprint. You can also style one open shelf with cobwebs and a single brass accent for a quick mood hit.
How do I store everything after Halloween so it doesn’t get ruined?
Group by zone and pack each vignette into a labeled bin. Wrap brass and candles separately to prevent wax smears. Tuck paper bats and labels in a flat document folder. Store faux cobweb in a zip bag to avoid tangles and odors. Keep everything climate-controlled to prevent warping and fading.
What about candle safety with pets and kids in the kitchen?
Use LED tapers and pillars for high-traffic zones, especially around the coffee maker, island edges, or by the stove. If you burn real tapers, choose dripless and place them well away from fabric and walkways. Never leave flames unattended, and trim wicks to 1/4 inch for cleaner burns.
When should I start decorating my kitchen for Halloween?
Begin with the dark-neutral pieces (black mugs, brass accents, aubergine runner) in late September. Add obvious Halloween elements — jack-o’-lanterns, bats, ravens — the first or second week of October. If you want a slower fade into November, swap obvious Halloween icons for dark pumpkins and dried botanicals after the 31st.
Conclusion: Your Spooky-Ready Kitchen Awaits
Pick one idea — just one — and set it up this weekend. Maybe it’s the jack-o’-lantern glow on your island, or a witchy coffee nook that makes mornings feel like a little ritual. When you focus on a single corner and commit to the Halloween palette — inky blacks, antique brass, aubergine, a sly pumpkin grin — the whole kitchen starts to hum with candlelight, shadow, and story.
The truth is, spooky style in the kitchen isn’t about piling on props. It’s about contrast, glow, and a few well-placed icons: a raven here, bats there, a bowl of dark pumpkins lit by warm flicker. Keep it simple, repeat your materials, and let the candlelight do the heavy lifting. You’ll cook, you’ll laugh, you’ll sneak candy while the chili simmers — and your space will look like a moody, playful dream along the way.
Now light the taper, cue the cauldron (okay, the kettle), and start with the spot you see first when you walk in. You’ve got this — and your kitchen is about to make Halloween cooking downright spooky fun.

About the Author

Krisztina P.Rendes, Founder of Home Style Vibes
Founder of Home Style Vibes
Krisztina Puskásné Rendes created Home Style Vibes as a cozy-modern lifestyle space where homemaking meets inspiration. Her goal is to help women create beautiful, organized, and peaceful homes they truly love — without overwhelm. You’ll find here heart-driven content on home decor, cleaning tips, easy family recipes, organization and decluttering, DIY home projects, plants, and seasonal ideas — all designed to bring more calm, comfort, and style into everyday life.