6 Vintage Retro Halloween Decor Ideas With Nostalgic Charm
You want a Halloween home that feels like the warm, playful memories of childhood—black cats with arched backs, smiling jack-o’-lanterns, flickering candlelight, a trusty bowl of candy corn—but every time you try, it looks a little flat or a little too Party City. You love the nostalgia and the spooky-cute vibe. You hate clutter, plastic overload, and decor that feels disposable. If you crave vintage retro Halloween decor with real nostalgic charm, these six ideas are your fix—indoor-ready, stylish, and surprisingly doable in a weekend with a modest budget cap and a few thrift runs.
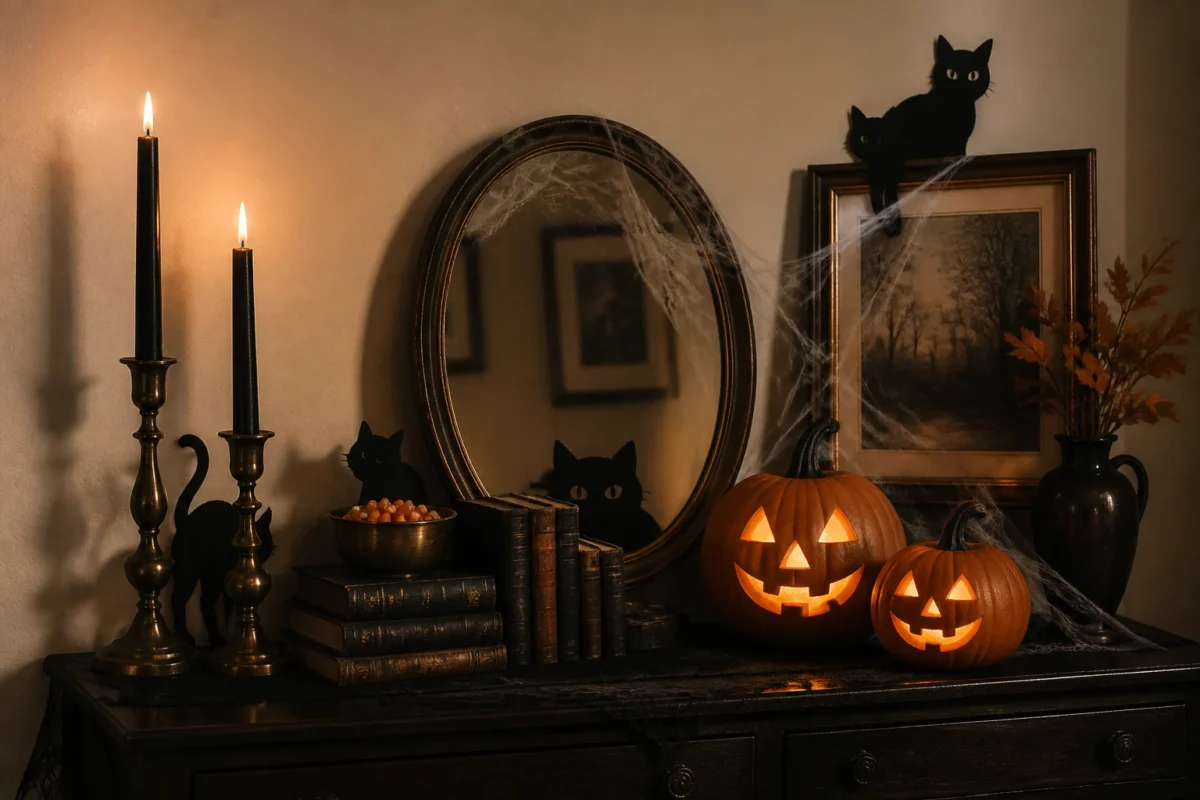
We’re lighting black tapers, bringing in antique brass, stacking old books, staging classic jack-o’-lantern grins, and styling it all with a thoughtful, photographed-on-purpose sensibility. Think candlelit shadows, iconic orange-and-black palettes, subtle cobwebs, and cheeky black cats—spooky but never gory. Each of these six ideas solves a specific styling frustration and gives you a complete little world to build on. They’re highly photogenic, scroll-stopping, and flexible enough to ride from early October straight through Halloween night. If you love the playful magic of the season and still want your home to feel grown-up, let’s go.
1) Black Cat Silhouettes With Pumpkin Orange Glow On The Entry Console
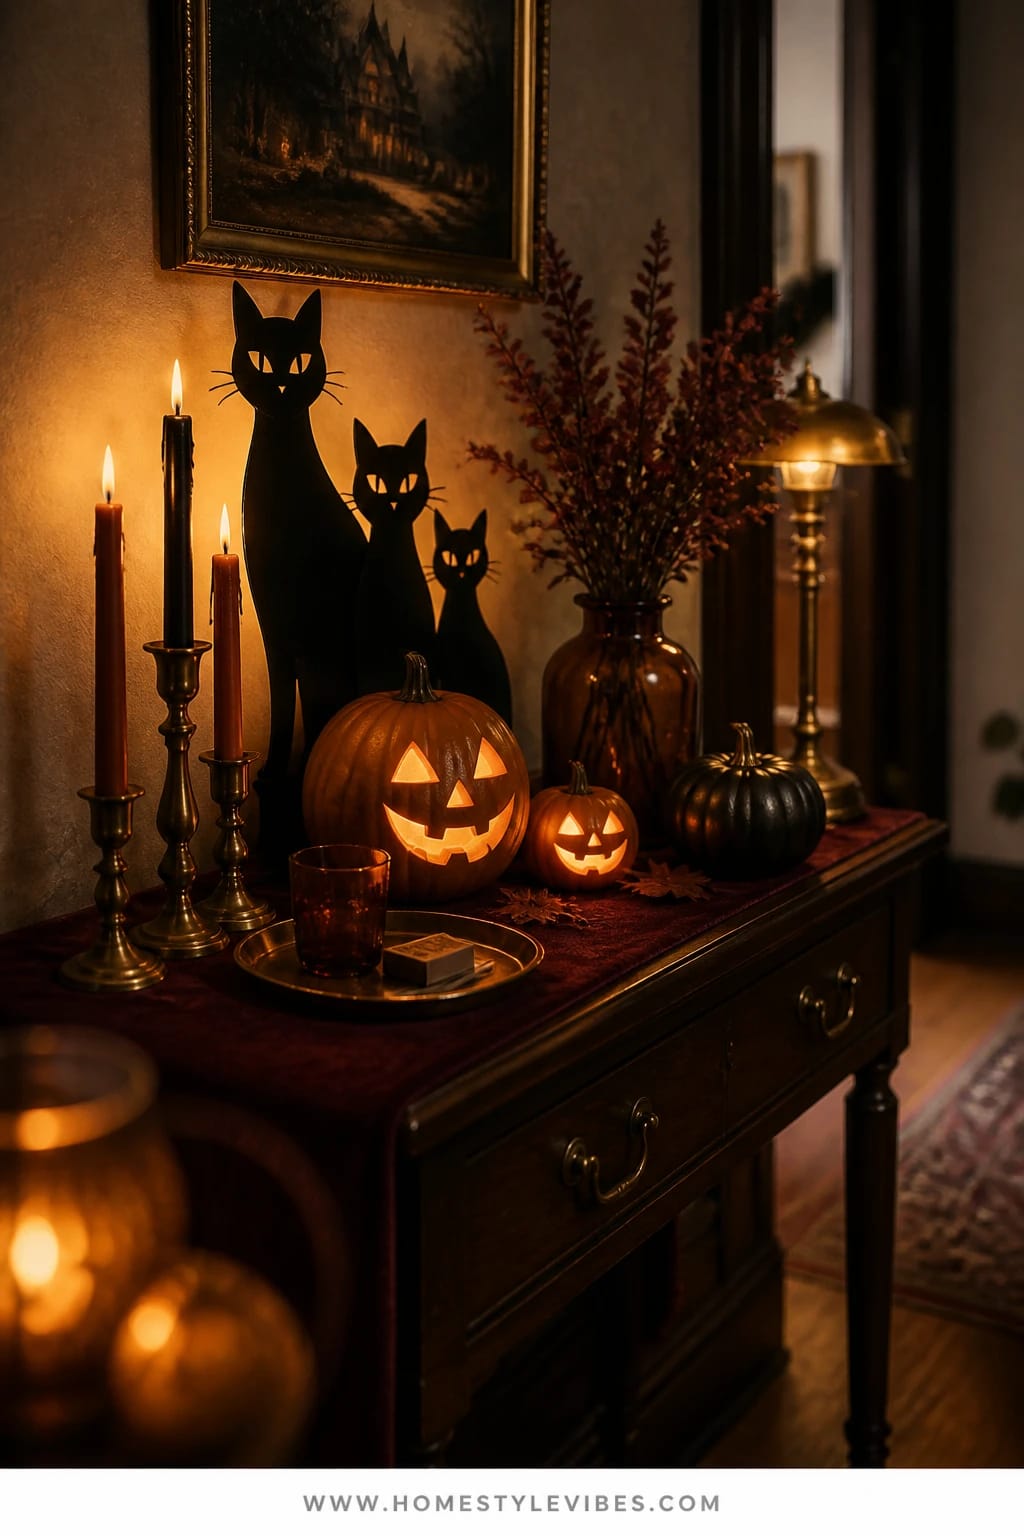
It’s that one spot that greets everyone—the entry console—and it never quite screams Halloween. You’ve tried a random pumpkin or two, but it still looks like a grocery run parked there. This setup turns that landing zone into pure retro charm: think smooth black cat silhouettes leaning into soft pumpkin-orange glow and a smattering of antique brass. The mood is friendly-spooky, like a 1950s cartoon intro. It works because it’s layered but not busy, built on repetition (cats + pumpkins) and warm light that throws playful shadows on the wall.
Lighting does the heavy lifting here. Clustered flameless pillar candles with backlighting under a console shelf bounce a soft halo onto the wall; add two black taper candles in brass holders for those delicious little flickers that make everything feel alive. Props stay nostalgic: paper honeycomb pumpkins, tin jack-o’-lantern candy buckets, and 8×10 repros of vintage Halloween postcards popped into thrifted frames. It photographs beautifully thanks to the clean silhouette shapes against the glow, plus a tidy vignette that reads instantly as “entry moment.” Small space? This still works on a narrow console or even a floating shelf by the door.
Variations: On a tighter budget, print black cat silhouettes at home and mount them to cereal-box cardboard; use string lights under cheesecloth for diffused glow. Small-space version: one cat silhouette, one candy bucket, one taper—stacked vertically with a mirror behind for double impact. Want a quieter palette? Swap the bright orange for muted persimmon and rust, and keep the cats matte black for a calmer vibe.
Budget Breakdown:
- Paper honeycomb pumpkins: $8–$18 each
- Vintage-style tin candy bucket: $15–$30
- Black taper candles (set of 6): $10–$16
- Antique brass candlesticks (thrifted): $5–$25 each
- Flameless pillar candles/string lights: $15–$35
- Printed vintage postcards + thrifted frames: $10–$30 total
Total Estimated Cost: $63 – $154
Best For: Homes with a defined drop zone or console; families who want a warm welcome that’s kid-pleasing but still design-minded; perfect for early October through Halloween night.
Key Design Elements:
- Main seasonal props: black cat silhouettes, paper honeycomb pumpkins, tin jack-o’-lantern bucket
- Color palette: matte black, pumpkin orange, antique brass
- Lighting strategy: layered backlighting + candle flicker
- Textile layers: a thin wool runner or black-and-cream stripe cloth
- Natural elements: a small bundle of dried orange slices or cinnamon sticks in a dish
- Accent details (vessels, baskets, metal accents): shallow brass tray for keys, small wicker basket for gloves
How To Recreate This Look:
- Start with a clean console and hang a mirror or simple vintage-inspired art above it.
- Add backlighting with string lights or a flameless pillar candle set under the console shelf.
- Layer in 2–3 black cat silhouettes at varied heights; lean one against the mirror for depth.
- Place 1–2 honeycomb pumpkins and one tin candy bucket; fill with wrapped candy or pinecones.
- Style with two black tapers in brass holders and a small brass tray to corral daily clutter.
Why This Looks Expensive: Repetition of materials (brass + black) and restrained color reads purposeful, not random. The silhouettes feel custom and graphic, like boutique shop styling.
Watch Out: Don’t scatter tiny objects across the whole surface. Cluster in odd numbers and leave negative space so the glow can breathe.
Pro Styling Tip: Angle one candle so its flame throws a cat-ear shadow on the wall—tiny moment, huge photo payoff.
2) Jack-O’-Lantern Record Sleeves With Warm Amber Light On The Bookshelf
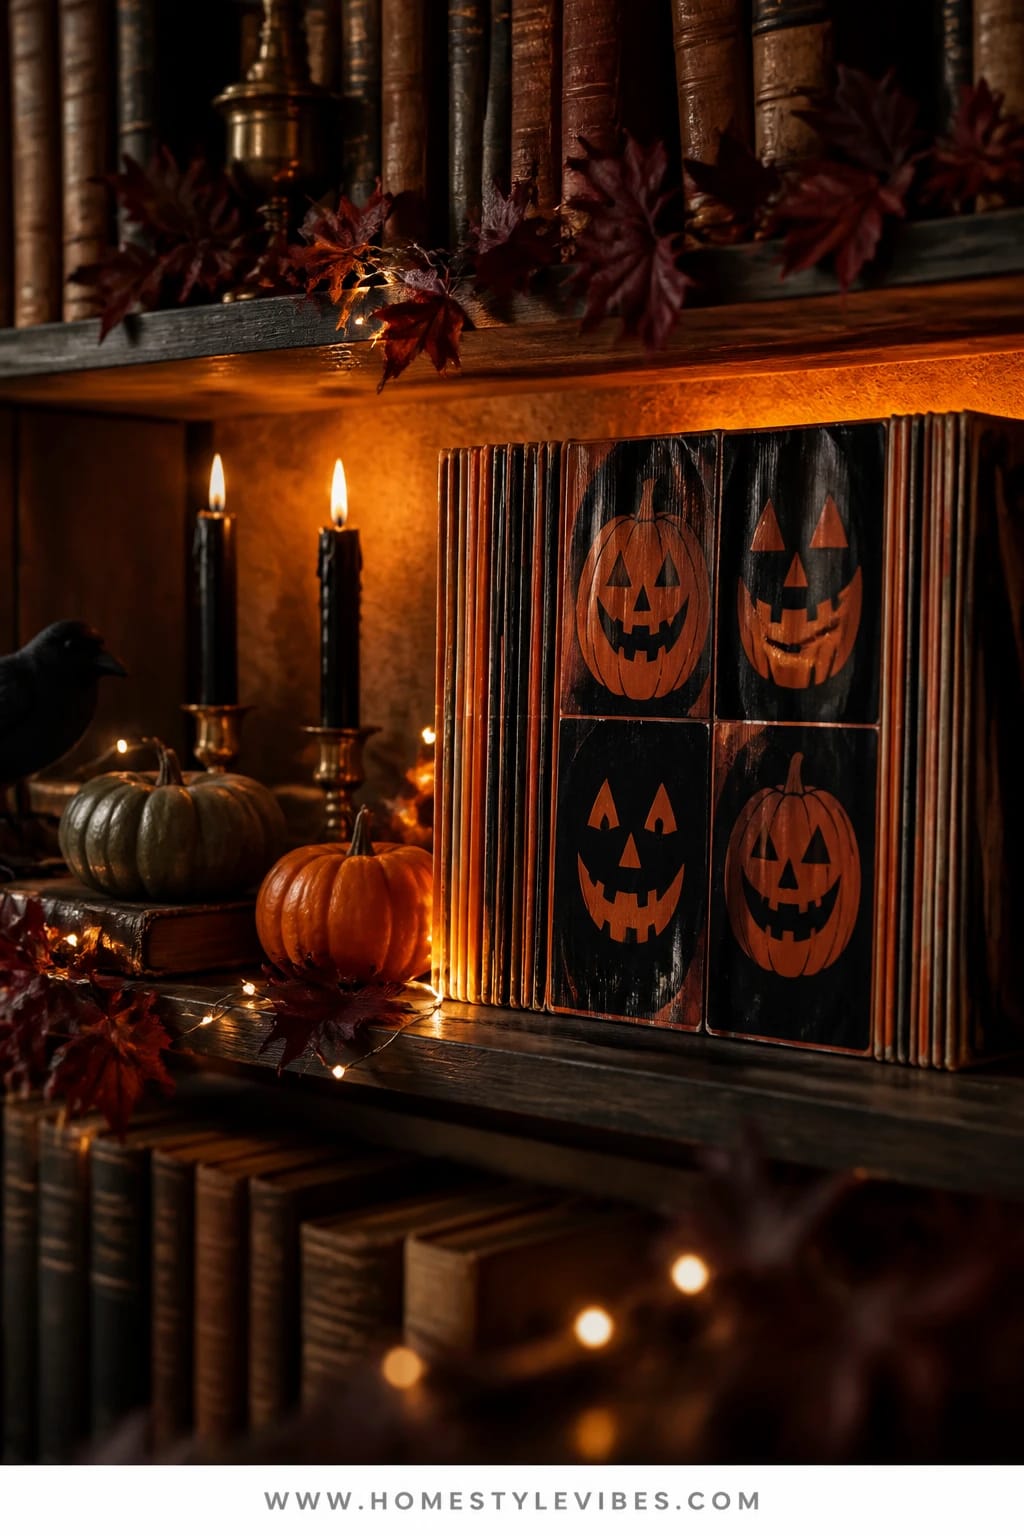
We’ve all been there: a bookshelf that just looks like… a bookshelf, even in October. You tuck a pumpkin in, maybe a crow, and it still reads “office.” This idea sneaks in retro Halloween charm through graphic shapes and music nostalgia—vintage record sleeves with jack-o’-lantern faces, orange-and-black spines, and warm amber light tucked between stacks.
The mood here is playful and intelligent—like a mid-century listening party with a spooky twist. It works because records are naturally graphic and flat, so they double as art without crowding shelves. Add a few classic Halloween books with orange dust jackets and stage a tiny “vinyl moment” with a portable turntable on the lowest shelf. Lighting makes the trick: LED strip lights set to amber tucked under the lip of each shelf create soft pools of glow that spotlight the orange shapes and send gentle shadows behind them.
Photographs thrive on strong shapes and color contrast. Orange circles, black type, and that thin halo of light? Chef’s kiss. For a small-space version, style just one cube shelf with a single record, a black taper, and a ceramic pumpkin. Budget-friendly approach: print retro record art covers and mount to cardstock; thrift shop for orange-spined books, then remove slippery dust jackets to reveal cloth textures.
Key Design Elements:
- Main seasonal props: vintage-style record sleeves, ceramic jack-o’-lantern, crow figurine
- Color palette: pumpkin, black, cream, antique brass
- Lighting strategy: amber LED strips under shelves + one taper
- Textile layers: a wool herringbone throw draped on the nearby chair
- Natural elements: a small bowl of acorns or star anise pods for scent and texture
- Accent details: brass bookends, tiny easel stands to prop records at angles
Budget Breakdown:
- Printed or thrifted record sleeves: $0–$25 each
- LED strip lights (warm/amber): $12–$25
- Ceramic jack-o’-lantern: $15–$40
- Brass bookends (thrifted): $10–$35
- Crow figurine or paper cutout: $5–$15
- Portable turntable (optional): $40–$100
Total Estimated Cost: $42 – $240
Best For: Living room or den shelves where you want mood at night and cheerful color during the day; great for music lovers and collectors who like witty seasonal nods.
How To Recreate This Look:
- Start by clearing 20–30% of shelf clutter to make space for focal moments.
- Add amber LED strips under the shelf lips, hiding cords at the back edge.
- Prop 1–3 retro-looking record sleeves per shelf using small stands or leaning them.
- Layer orange-spined books horizontally to create “platforms” for small props.
- Place one jack-o’-lantern or crow figurine per eye-level shelf to echo the theme.
Why This Feels Designer: Using album art as seasonal decor reads clever and personal—like you shopped your own story, not a big-box aisle. The lighting tucks into architecture, which always looks custom.
One Thing To Avoid: Don’t mix neon purple or green lights here; stick to amber so the oranges feel rich and not cartoonish.
Pro Styling Tip: Prop one record sleeve slightly off-center and overlap it with a ceramic pumpkin by an inch—overlap adds depth in photos.
Keep scrolling—our next one moves from shelves to the table, where the candlelight does more than set a mood. It tells a whole timeless story.
3) Black Tapers, Oxblood Glassware, And Grinning Pumpkins On The Dining Table
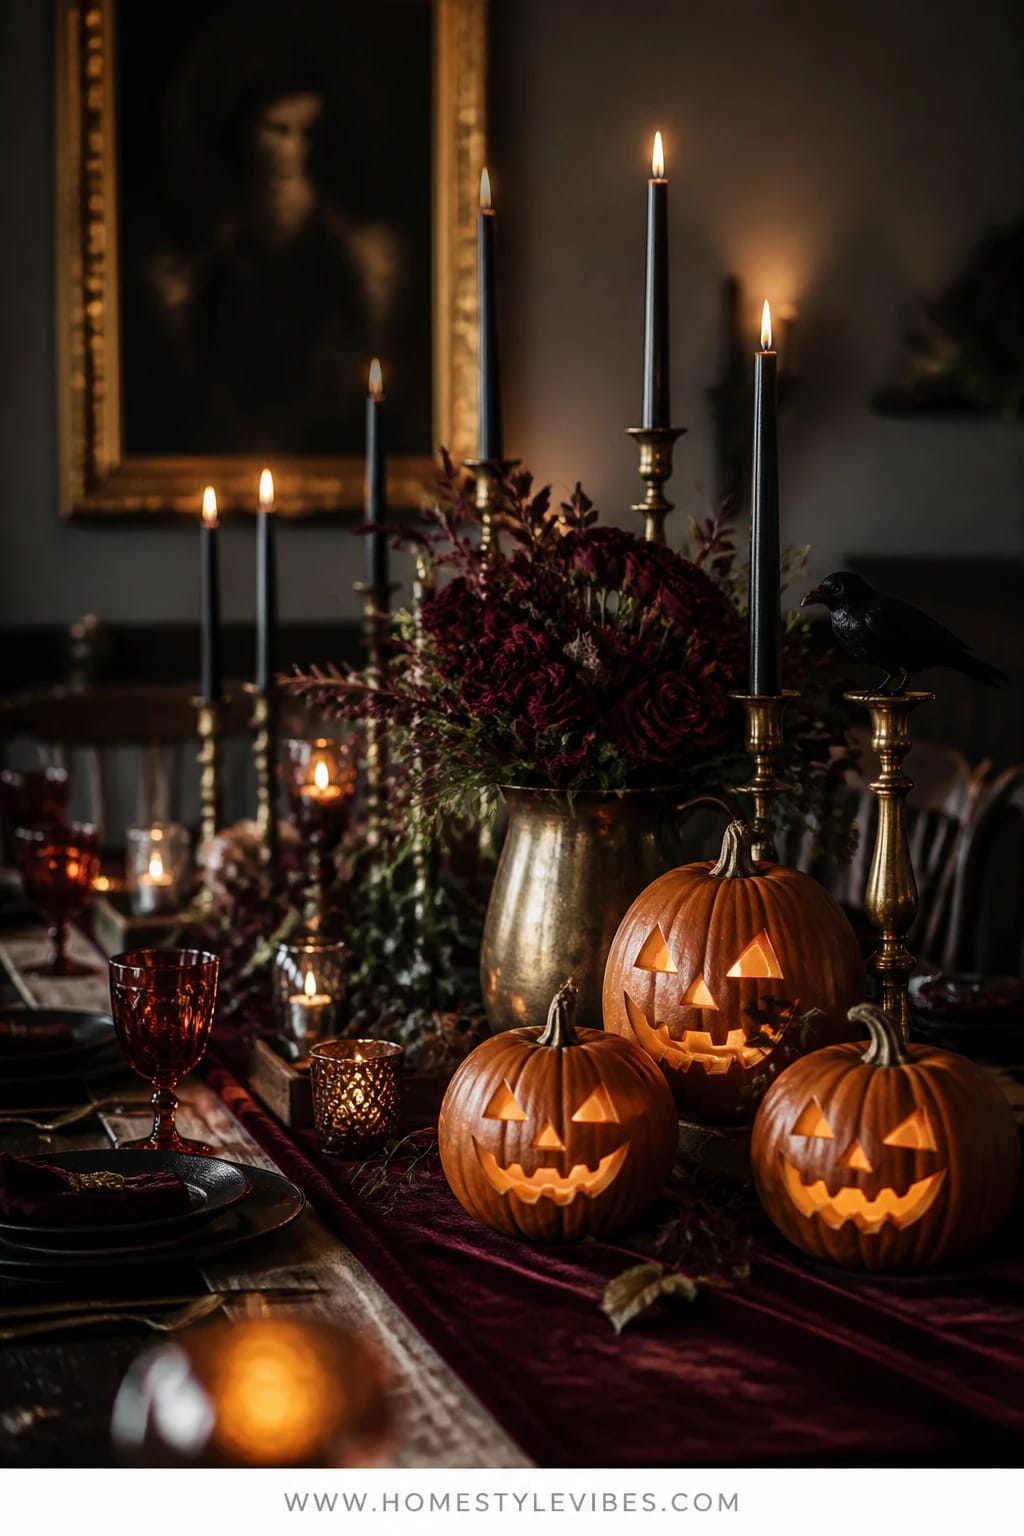
You want that dramatic Halloween dinner vibe, but your table keeps reading “Tuesday spaghetti night.” This setup leans theatrical in a retro way: black taper candles in a parade of antique brass, oxblood red glassware for moody pops, and a trio of smiling pumpkins as the friendlier counterbalance. The vibe is candlelit drama with a wink—gothic meets old-school trick-or-treat.
Why it works: timeless materials and a tight palette. Brass feels collected, not costume-y. Black tapers throw elegant shadows. Oxblood glass adds depth and color without screaming red. The grinning pumpkins keep it from getting too serious. Photographing this is a dream—reflections on glass, tall taper flames, and a low line of pumpkins for a face-level shot across the table.
Lighting is everything at dinner. Layer candle heights: tall tapers for drama, squat votives for low glow, and a single dimmed pendant overhead. If you only buy one thing, make it black tapers—seriously. Variations: Budget version uses thrifted brass mismatches and deep-red thrift glass. Minimal version swaps the grinners for simple black pumpkins. Family-friendly swap: use flameless tapers with a realistic flicker and keep real candles on a sideboard instead.
Budget Breakdown:
- Black taper candles (box of 12): $16–$25
- Brass candlesticks (assorted thrifted): $30–$80 total
- Oxblood or dark ruby glassware: $20–$60 (set of 4 thrifted)
- Carved or ceramic smiling pumpkins (3): $25–$75
- Classic black cotton table runner: $12–$25
- Branch cuttings or dried eucalyptus: $6–$16
Total Estimated Cost: $109 – $281
Best For: Dining rooms or kitchen tables where you host a spooky supper or a pumpkin-carve-and-pasta night; shines for late October evenings.
Key Design Elements:
- Main seasonal props: smiling pumpkins, black taper candles, dried branches
- Color palette: black, oxblood, antique brass, pumpkin orange
- Lighting strategy: staggered candle heights + dimmed pendant
- Textile layers: matte black runner, vintage lace overlay if you like a retro nod
- Natural elements: bare branches or burgundy eucalyptus
- Accent details: vintage silver flatware, black napkins with brass napkin rings
How To Recreate This Look:
- Start with a black runner down the center of the table.
- Add brass candlesticks in a zigzag line; insert black tapers at alternating heights.
- Place three grinning pumpkins spaced evenly; keep them low enough for conversation.
- Layer in oxblood glassware and dark plates; stack black napkins with brass rings.
- Style with a few dried branches snaking between candlesticks to add movement.
Why This Reads High-End: Limited color palette + real materials. Brass and dark glass look collected over time. The table looks finished because it commits to a theme without extra filler.
The Most Common Mistake: Overcrowding the center so plates have nowhere to land. Keep a palm-width of clear space at each setting’s inner edge.
Pro Styling Tip: For photos, light candles five minutes early so wicks crackle and the first gentle wax tears catch the camera.
Take a breath. The point isn’t perfection—it’s personality. If one section sparks excitement, that’s your start. You don’t need all six to make the house feel delightfully haunted.
4) Retro Paper Garlands, Warm Twinkle Lights, And Witchy Vinyl On The Media Console
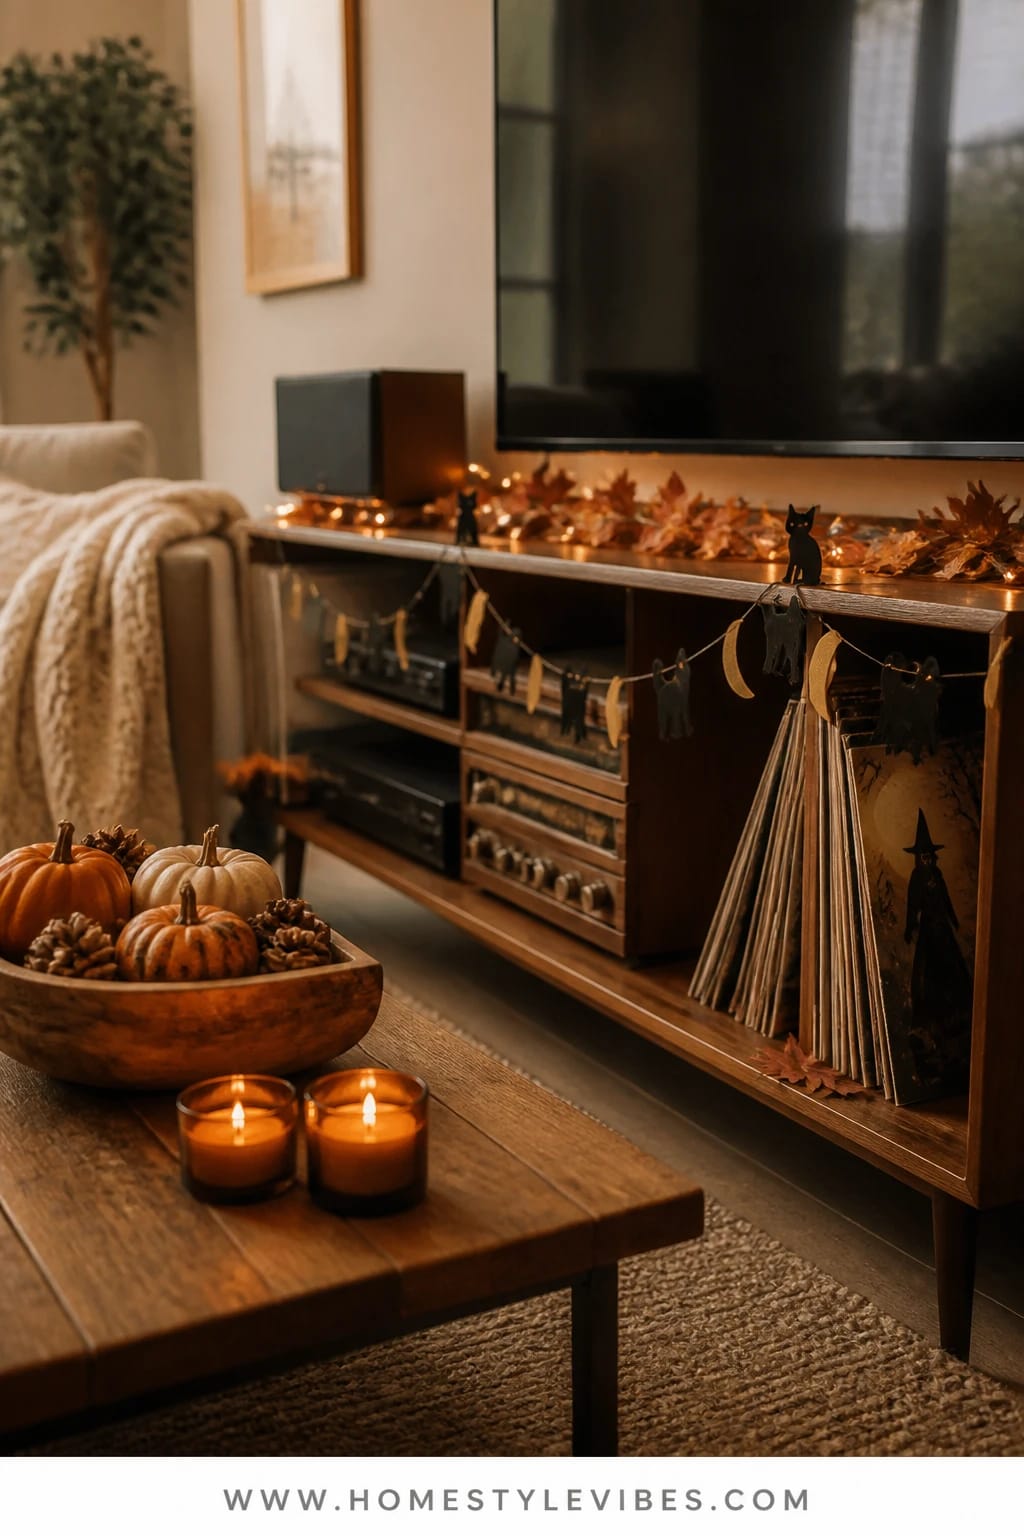
Your living room does movie night well but fails the Halloween vibe check. The media console, especially, can feel like a black hole of screens and remotes. Let’s turn it into a nostalgic stage with retro paper garlands (think black cats and moons), warm twinkle lights tucked behind stereo gear, and a small stack of witchy vinyl leaning artfully at the end.
The mood is cozy-watch-party meets mid-century charm. Why it works: thin, lightweight pieces that don’t block the TV view or mess with airflow, plus a consistent orange-black-brass story. The paper garlands bring that childhood-classroom memory in a way that actually looks stylish when you layer them, especially if you add a brass lamp with a parchment shade and a single black taper on a low tray. Photographing it is easy—warm microlights bounce off the console’s surface and soft wash across the wall, creating dimension even when the TV is off.
Variations: For minimalist households, use just one garland and a slim line of micro fairy lights under the console lip. On a tight budget, print your own garland shapes and thread them on twine. If you’re worried about kids pulling decor down, mount a narrow shelf above the console for garlands and keep anything fragile behind glass doors.
Budget Breakdown:
- Retro paper garlands (2–3): $12–$30 total
- Warm micro string lights: $8–$18
- Small brass lamp with warm bulb: $25–$60
- Witchy vinyl or printed album art: $10–$30
- Low tray for remotes + taper: $12–$25
Total Estimated Cost: $67 – $163
Best For: Family rooms and living rooms where TV time happens; great when you want a big vibe lift without blocking screens or speakers.
Key Design Elements:
- Main seasonal props: retro paper garlands (cats/moons), witchy vinyl, black taper
- Color palette: black, pumpkin orange, brass, warm cream
- Lighting strategy: micro fairy lights hidden behind gear + a single lamp wash
- Textile layers: a wool plaid throw in orange-and-black over the sofa arm
- Natural elements: a little jar of dried marigold petals on the tray
- Accent details: brass tray, matte black taper holder, twine for garlands
How To Recreate This Look:
- Start by routing cords neatly and clearing the console surface.
- Add micro lights behind or under the console lip for subtle glow.
- Drape one garland across the console edge and a second above on tiny removable hooks.
- Lean 2–3 vinyl records at the end, with a brass lamp anchoring the opposite side.
- Style the center with a low tray holding remotes, a black taper, and a tiny bowl of candy corn.
Why This Looks Intentional: Everything earns its spot. The garlands echo the record art shapes, and the warm lamp marries screen glare with a human glow, so the console stops looking like a tech island.
Don’t Do This: Skip cool-white LEDs. They clash with orange and make everything feel sterile.
Pro Styling Tip: For a photo, turn off the TV, leave the lamp on low, and shoot from couch height so the garland lines lead your eye across the frame.
5) Vintage Classroom Chalkboard With Creamy Spiderwebs On The Kitchen Wall
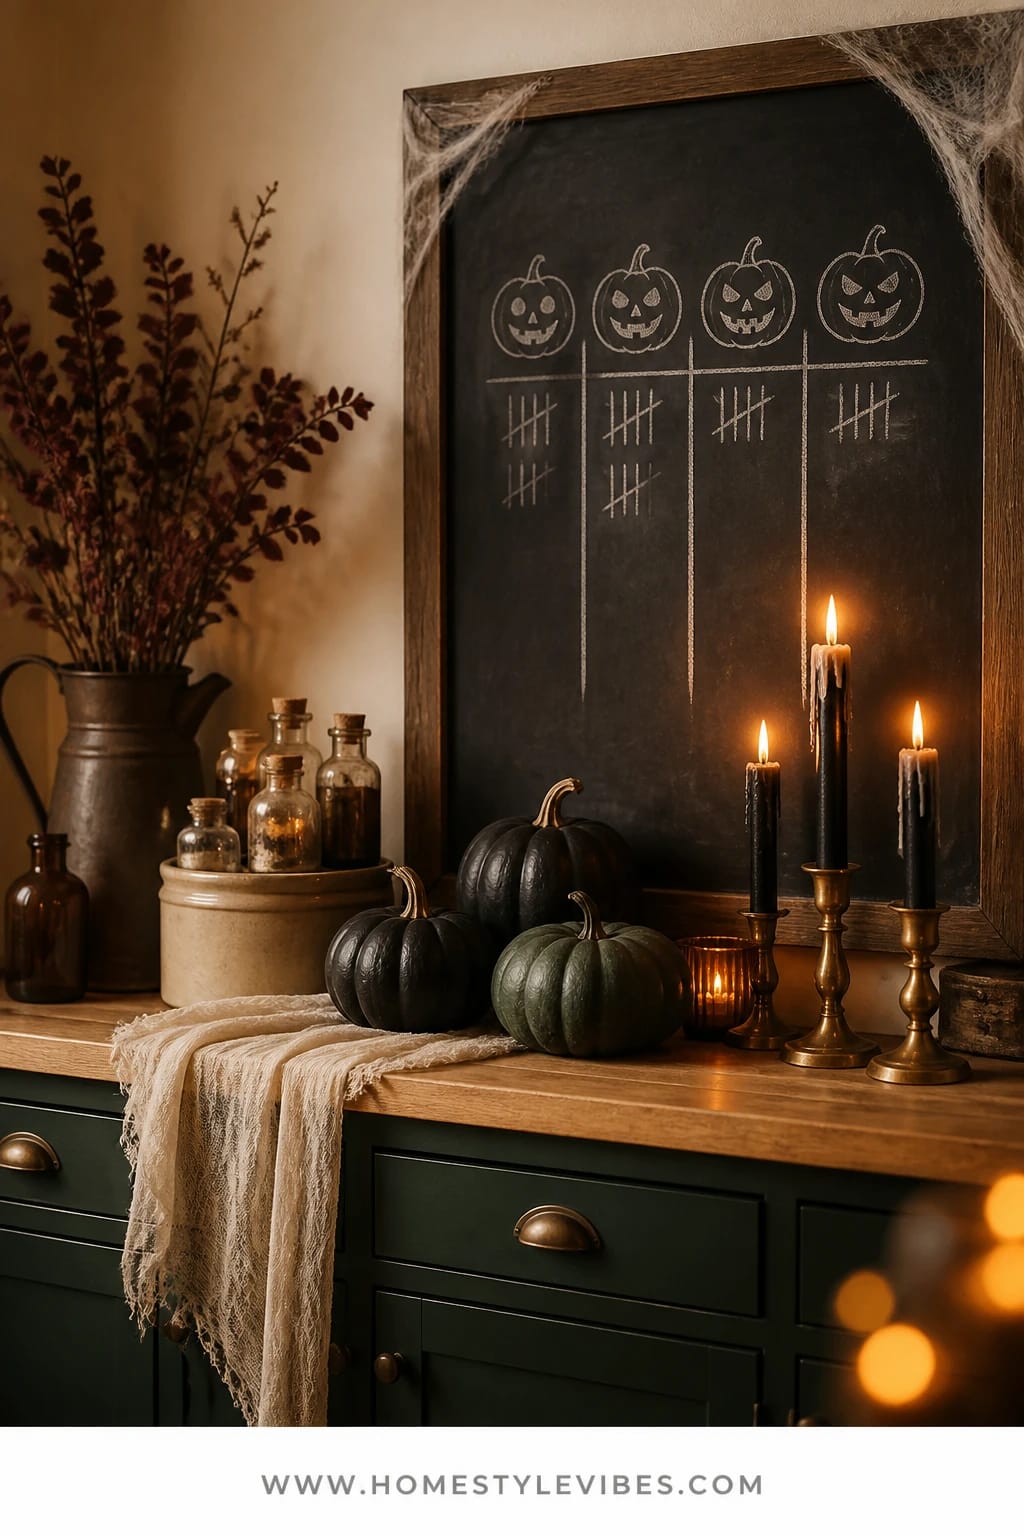
The kitchen is where everyone ends up, but Halloween decor in there often looks like last-minute leftovers—one random towel, a jar label, done. This idea builds a nostalgic centerpiece on the wall: a vintage classroom-style chalkboard with hand-drawn jack-o’-lantern faces, a tally for “treats stolen,” and creamy faux spiderwebs tucked just at the corners for a retro movie-set vibe. Add a small lineup of apothecary jars with old-timey labels (sugar becomes “Bone Dust,” cinnamon sticks “Witch Wood”).
It creates a friendly, lived-in Halloween mood—think school harvest party meets 1930s kitchen. It works in real homes because the chalkboard is functional: write the dinner plan, add a countdown to Halloween, let kids doodle. Lighting matters here: a single warm sconce or under-cabinet light sends a soft wash over the chalk dust and makes the webs glow slightly cream, not stark white. Tiny brass or black clips hold mini paper bats on the frame. It photographs beautifully because chalk texture reads like art, and the little jars add scale and story.
Variations: Small-space version uses a framed chalkboard letter board on a shelf. Budget version uses black kraft paper as a “chalkboard” backdrop with chalk marker art. Subtle version? Skip spiderwebs and lean into typography—vintage fonts, arrows, a big “Trick or Treat.” My anecdote: I tried this last October and honestly couldn’t believe the difference. The second I scribbled “Apple Cider Tonight,” the whole kitchen felt like we were hosting the coziest haunted bake sale.
Budget Breakdown:
- Vintage or vintage-look chalkboard: $30–$120
- Chalk or chalk markers: $4–$12
- Creamy faux spiderwebs (quality, not the super stringy kind): $6–$12
- Apothecary jars (set of 3–5): $15–$40
- Printed vintage labels: $5–$12
- Mini paper bats + clips: $6–$12
Total Estimated Cost: $66 – $208
Best For: Busy family kitchens or breakfast nooks; perfect for early October through Halloween; doubles as a menu board for cider nights.
Key Design Elements:
- Main seasonal props: chalkboard with retro lettering, faux spiderwebs, apothecary jars
- Color palette: black, cream, pumpkin, a touch of antique brass
- Lighting strategy: warm sconce or under-cabinet light grazing the chalk texture
- Textile layers: a black-and-cream tea towel and a pumpkin-orange potholder
- Natural elements: cinnamon sticks, dried orange slices in a jar
- Accent details: brass clips, black frame, handwritten labels
How To Recreate This Look:
- Start by hanging the chalkboard where it’s visible but not in splash zone.
- Add a warm light source aimed to skim across the surface.
- Draw a central jack-o’-lantern face, a treats tally, and a big retro header.
- Place apothecary jars beneath with vintage labels and seasonal pantry items.
- Tuck spiderwebs into two corners only; leave negative space so it doesn’t look messy.
Why This Looks Expensive: Hand-drawn typography feels custom. Vintage-look jars and a restrained spiderweb application read as curated, not costume aisle.
Watch Out: Don’t over-web. If you can see the pull strings from across the room, you’ve used too much. Think “hint at a corner” not “engulfed in polyester.”
Pro Styling Tip: Smudge a bit of chalk along the ledge and leave the eraser slightly dusty—those tiny imperfections make photos feel real and cozy.
Quick mindset check: This isn’t about recreating a showroom. It’s about telling your family’s Halloween story with a few smart anchors—light, shape, and nostalgia. Start small, have fun, adjust as you live with it.
6) Antique Brass Candelabra, Retro Postcards, And Shadowy Crows On The Mantel
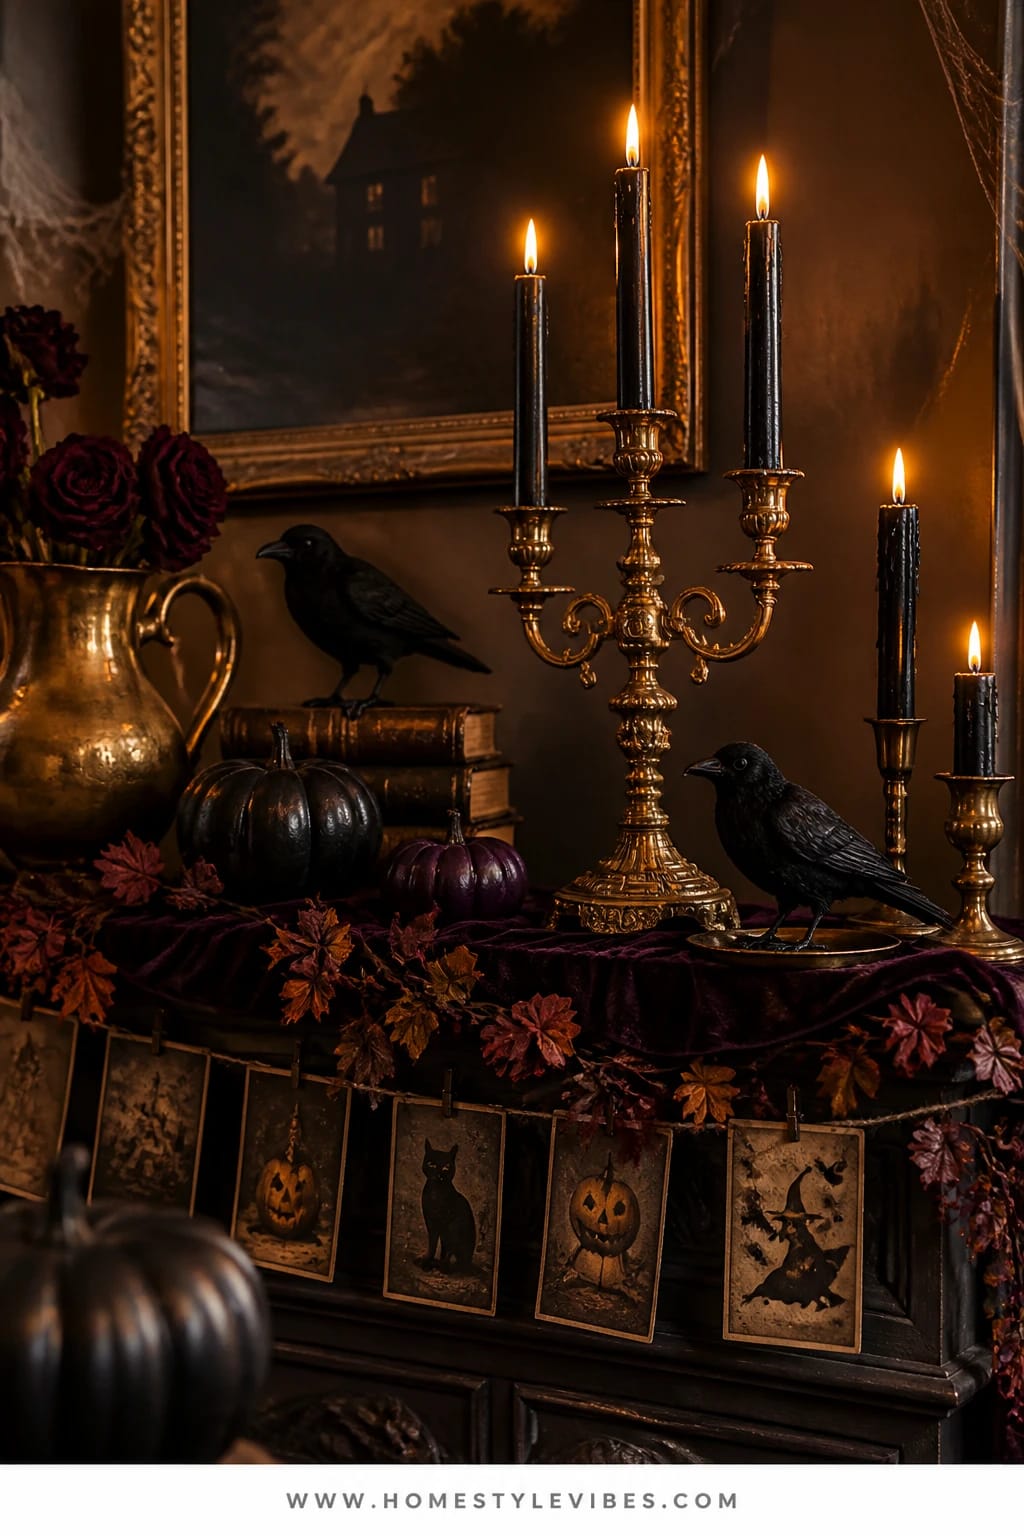
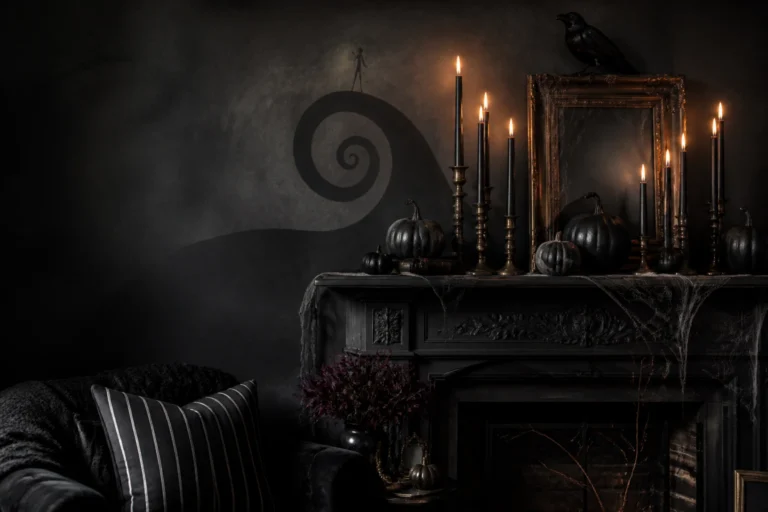
Mantels can feel like a final exam. You’ve got height, you’ve got a focal point, and then… it somehow looks chaotic and skimpy at the same time. This mantel concept brings a classic haunted parlor energy: an antique brass candelabra at center, a lineup of retro Halloween postcards clipped onto twine like a mini gallery, and two black crow figures perched at different heights. Add a few aubergine or black mini pumpkins to ground the line visually.
The mood is moody-but-charming—candlelit shadows, vintage ephemera, and familiar Halloween icons. It works because you get clear vertical hierarchy (the candelabra), a middle band of story (postcards), and low anchors (mini pumpkins), which together create that layered triangle designers live for. Photographing it yields deep shadows licking up the wall, a warm brass sheen, and graphic crow silhouettes that instantly read October.
Variations: Small mantel? Use a single five-arm candelabra and two postcard clusters instead of a full garland. Budget approach: print postcard scans and mount to cardstock; thrift a brass candelabra or spray-paint a less expensive one in antique brass finish. Kid-friendly version: swap real flames for realistic flameless tapers and add a soft garland of black felt circles for texture without fuss. Honest note: getting the postcard spacing right can be fiddly—I’ve redone mine three times in a night. Use painters’ tape to plan your arc before you commit to hooks.
Budget Breakdown:
- Antique brass candelabra: $35–$120
- Retro postcard prints (10–15): $10–$25
- Twine + mini brass clips: $8–$15
- Black crow figures (2): $12–$30
- Mini pumpkins (real or ceramic): $8–$24
- Flameless tapers (optional): $20–$40
Total Estimated Cost: $93 – $254
Best For: Living room mantels and media mantels where you want a focal moment visible from across the room; ideal for late October evenings when the room goes full candlelit.
Key Design Elements:
- Main seasonal props: brass candelabra, crow silhouettes, retro postcards
- Color palette: black, brass, aubergine accents, pumpkin highlights
- Lighting strategy: tall candlelight for shadow play + one table lamp nearby
- Textile layers: a narrow black lace runner or gauzy cheesecloth
- Natural elements: dried burgundy roses in a bud vase
- Accent details: brass postcard clips, tiny bell jar over a single mini pumpkin
How To Recreate This Look:
- Start by centering the candelabra and ensuring safe clearance to your mantel surround.
- String twine in a gentle arc and clip postcards at staggered heights.
- Perch one crow on a stack of dark books and another near the edge facing inward.
- Scatter 3–5 mini pumpkins at the base, tucking one under a small cloche for a museum vibe.
- Light candles at dusk and adjust postcard spacing so no two are exactly aligned.
Why This Feels Designer: Strong vertical center, considered midline, grounded base. The rule of thirds plays out physically, so the composition feels artful, not accidental.
One Thing To Avoid: Don’t make the postcard garland too taut—slight drape adds softness and nostalgia. Too tight looks like office supplies.
Pro Styling Tip: Shoot from a side angle so candle flames overlap the crows—layered silhouettes read beautifully in low light.
Quick Checklist
- Black taper candles with varied brass holders
- Paper honeycomb pumpkins in classic orange
- Retro Halloween postcards or record sleeve art
- Warm amber string or strip lights for under-shelf glow
- Crow figures or black cat silhouettes
- Antique brass candelabra for a mantel centerpiece
- Ceramic or real pumpkins with friendly grins
- Vintage-look chalkboard and creamy faux spiderwebs
- Oxblood or deep ruby glassware for table drama
- Apothecary jars with old-timey labels and spices
- Brass clips, twine, and tiny easels for display
- Gauzy cheesecloth or lace runner for texture
Frequently Asked Questions
How do I stick to a budget for vintage retro Halloween decor without it looking cheap?
Pick one hero material (antique brass or matte black) and repeat it across the room. Thrift for candlesticks and frames, then mix in a few new seasonal pieces like paper garlands or honeycomb pumpkins. Limit your palette to black, pumpkin, and one accent (oxblood or cream) so everything reads cohesive and intentional.
Should I use real or faux pumpkins for these ideas?
IMO, real pumpkins win for scent and texture, but they can sag near heat vents and don’t store. For high-heat or hard-to-reach spots (over a mantel, near electronics), go faux. On tables and consoles at kid height, mix: one hero real pumpkin plus two faux for stability and longevity.
My living room is small—can I still pull this off without clutter?
Yes. Work vertically and choose one focal area (entry console or mantel). Keep your counts low: 1–2 silhouettes, 1 pumpkin, 1 candle cluster. Add lighting first, then props. Negative space is your friend; it makes what you do add look special.
What about storage after the season?
Flattenable is your rule. Paper garlands, postcard prints, and silhouettes store flat in a labeled envelope. Choose stackable ceramic pumpkins and nestable brass candlesticks. Keep a small “Halloween toolkit” box with clips, twine, and extra tapers so you’re not hunting next year.
Are candles safe with kids and pets around?
Use flameless tapers and pillars in high-traffic zones and save real flames for supervised evenings or out-of-reach mantels. Add museum putty under candlesticks and keep wicks trimmed to 1/4 inch to reduce flicker and soot.
When should I start decorating for Halloween?
Begin with lighting and neutral black/brass pieces in late September. Layer in pumpkins and postcards the first week of October. Save the cheekier items (crows, grinning jack-o’-lanterns) for mid-October so they feel fresh by Halloween night.
Can I do this in a rental without damaging walls?
Absolutely. Use removable hooks for garlands and postcard strings, lean framed art instead of hanging, and rely on console and shelf styling. Battery-operated lights and tabletop candles do most of the mood work without any drilling.
Final Thoughts
Start with one idea that made you smile—that’s the room to begin in. Maybe it’s the black-cat entry that greets you at the door, or the candlelit dining table that finally makes Tuesday pasta feel like a Halloween supper. Pick your anchor—light, silhouette, or a single nostalgic prop—and build around it.
The secret to vintage retro Halloween decor with nostalgic charm isn’t more stuff; it’s better story. Tight color, layered candlelight, and a few iconic shapes are enough to shift the whole mood. Let the brass catch the flame, let the postcards whisper their old-timey jokes, and let the grinning pumpkins do their cheerful little job.
You’ve got this. Light the taper, cue the witchy vinyl, and watch your home fall into that perfect October glow—warm, a bit shadowy, and full of friendly spooks that make every night feel like a memory in progress.

About the Author

Krisztina P.Rendes, Founder of Home Style Vibes
Founder of Home Style Vibes
Krisztina Puskásné Rendes created Home Style Vibes as a cozy-modern lifestyle space where homemaking meets inspiration. Her goal is to help women create beautiful, organized, and peaceful homes they truly love — without overwhelm. You’ll find here heart-driven content on home decor, cleaning tips, easy family recipes, organization and decluttering, DIY home projects, plants, and seasonal ideas — all designed to bring more calm, comfort, and style into everyday life.