6 Fall Staircase And Banister Decor Ideas With Garlands And Lanterns
You want that cozy-bright autumn moment every time you round the corner: golden candle glow, a banister draped in leaves and berries, soft plaid whispers, and lanterns giving off that warm “come in, dinner’s almost ready” vibe. But your staircase keeps reading like an afterthought — bare railing, mismatched décor, or a tangled garland that never sits right. Here’s the truth: a fall staircase and banister decorated with garlands and lanterns can anchor your whole home’s seasonal story, and it doesn’t need to cost a fortune or take all weekend. These six ideas nail the cozy bright autumn look — saturated rust, deep burgundy, amber candles, natural textures — and solve the common pain points that make stairways tricky.
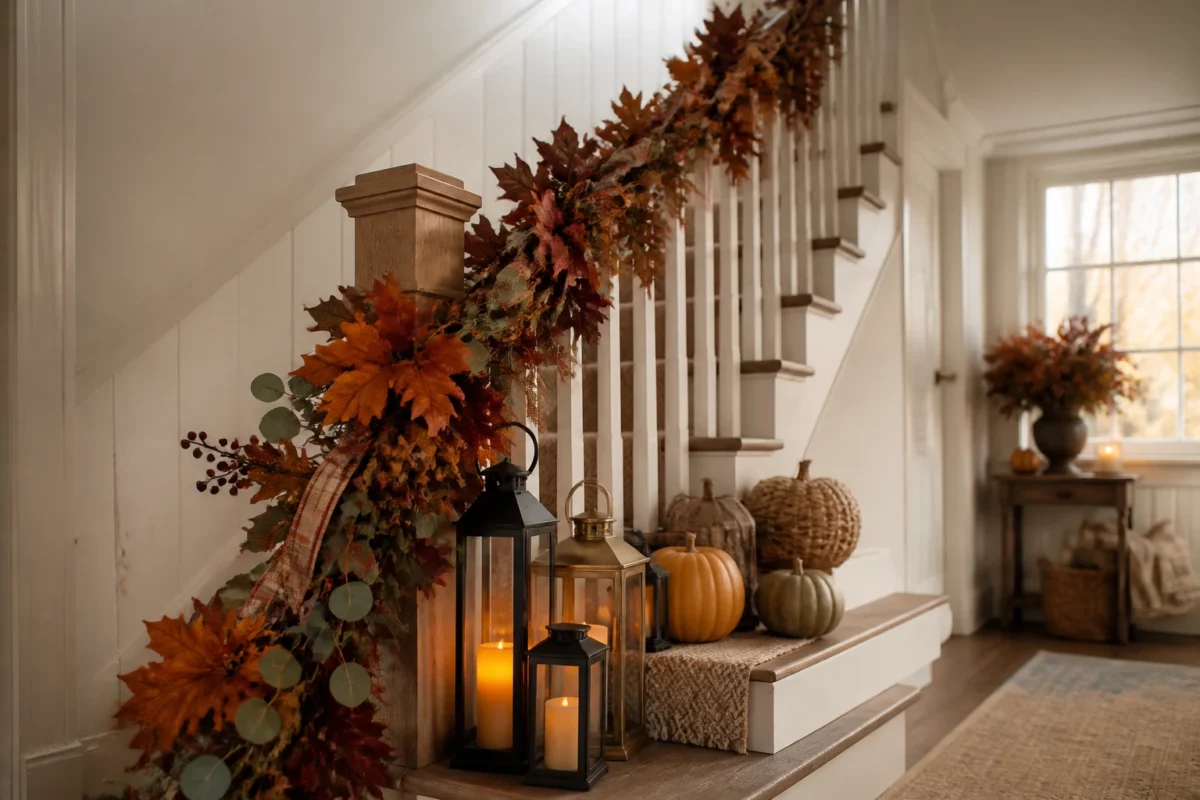
Each concept feels photogenic and lived-in: think layered garlands, lanterns with golden battery candles, a few well-placed pumpkins, and textiles that make the whole scene feel finished. We’re talking achievable timelines (one hour to an afternoon) and budget caps that won’t shock you. Try one now, then add a second for peak October — this is perfect for when you’re hosting a casual chili night, a friendsgiving, or just craving that full fall vibe at home.
1) Amber Lantern Cluster and Harvest Garland on the Bottom Newel Post
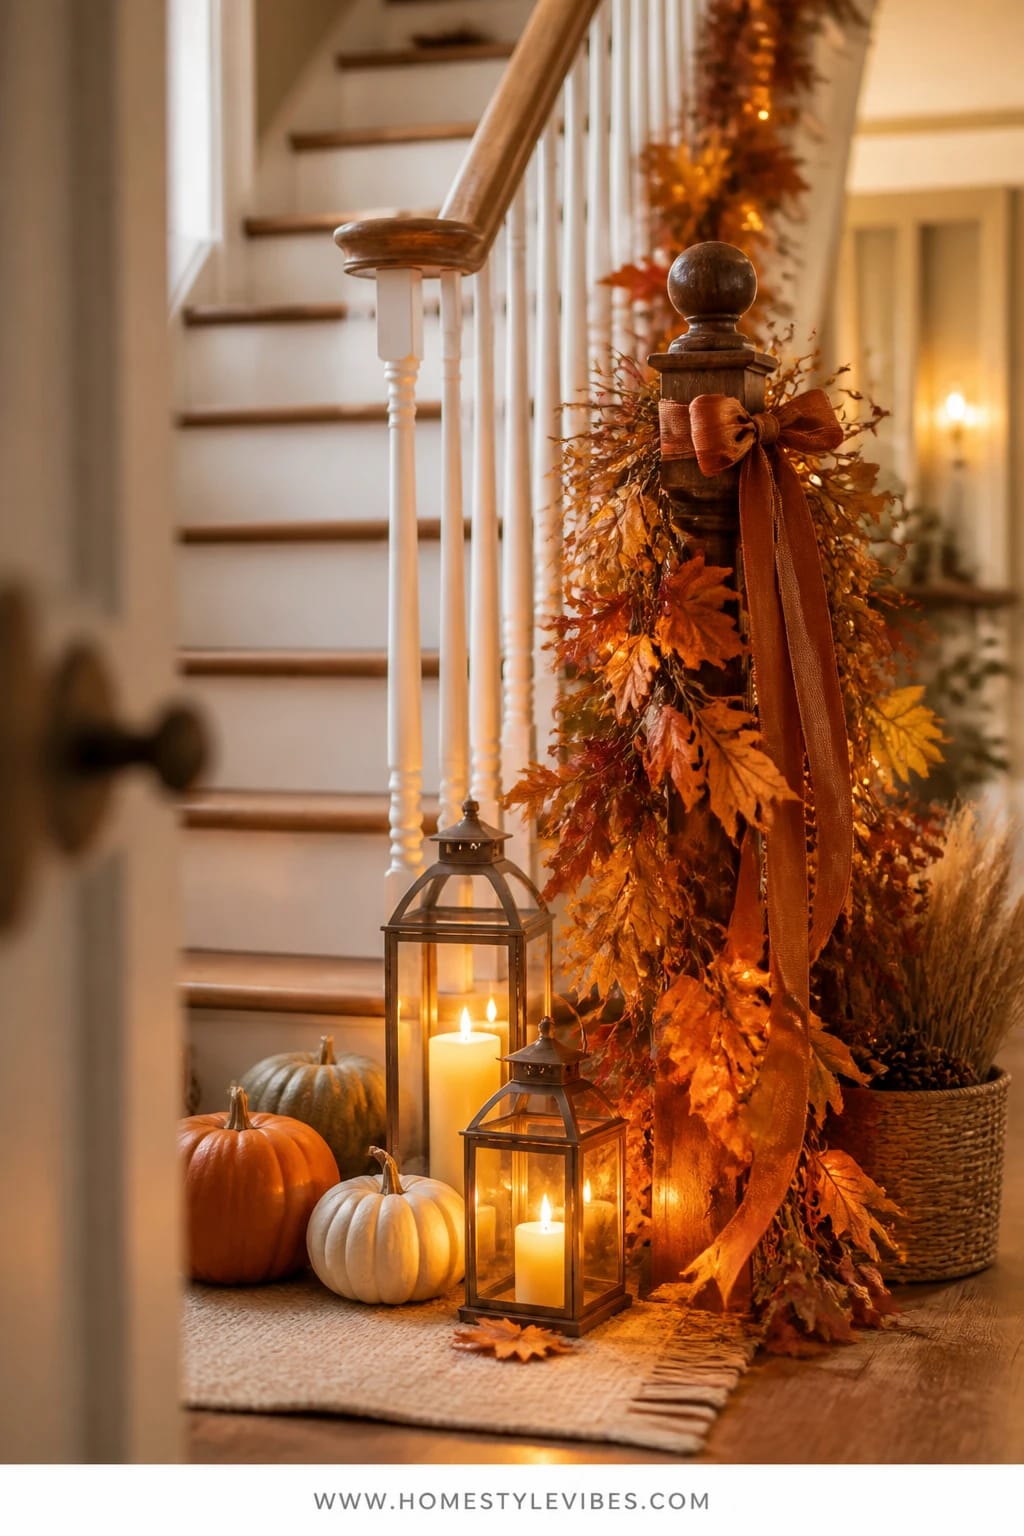
We’ve all been there: the staircase looks decent except for that one awkward bottom corner where the railing meets the floor. It’s supposed to be the grand “hello,” yet it always reads like a pause. This idea solves that in five minutes flat — gather amber-glow lanterns at the base, then wrap your newel post with a harvest garland anchored by warm-toned ribbon. Instantly, you get that cozy bright autumn welcome the second anyone steps inside.
The mood is relaxed harvest abundance: rust, marigold, deep berry, wood grain, and candlelit warmth. It works in real homes because the cluster sits solidly on the floor — kid and dog-friendly if you choose battery candles — and the garland hugs the post (no full-rail wrestling required). Lighting is key here: one to three lanterns in graduated heights will paint gentle gold on the surrounding walls, telling your eyes, “Yes, fall lives here.” It photographs beautifully because of the vertical focal point (the post) and the little halo of light from the lanterns, plus the color saturation from berries and oak leaves.
Variations that fit real life: For a budget version, use a single large lantern with a flameless pillar and thrift a faux garland to fluff with a few real stems from the yard. For a small-space entry, scale down to one lantern and a half-garland tied to the post with velvet ribbon — same vibe, smaller footprint. If you love a gentler palette, swap in muted rust-and-wheat garland with brass accents.
Budget Breakdown:
- Faux harvest garland: $18–$45
- Ribbon (velvet or grosgrain in rust or burgundy): $6–$14
- Lanterns (set of 2–3 metal or wood): $35–$120
- Battery-operated pillar candles (warm white/amber): $12–$30
- Optional: Mini pumpkins for the lantern bases: $6–$12
Total Estimated Cost: $77–$221
Best For: Homes where the staircase opens into a foyer or living room. Ideal from mid-September through Thanksgiving, especially if you host and want a fast, high-impact entry moment.
Key Design Elements:
- Main seasonal props: Harvest garland with leaves and berries, 2–3 lanterns with pillar candles
- Color palette: Rust, marigold, deep burgundy, warm brown, antique brass
- Lighting strategy: Clustered lantern glow at floor level for soft, welcoming light
- Textile layers: Velvet ribbon at the post, optional small plaid throw folded on a nearby bench
- Natural elements: Real mini pumpkins, a few dried seed pods tucked in
- Accent details: Brass or black metal lantern frames, wood bases for warmth
How To Recreate This Look:
- Start with the newel post: secure your harvest garland using clear zip ties or brown floral wire.
- Add a ribbon bow or long tail knot at eye level for a tailored finish.
- Layer 1–3 lanterns at the base, angled so the tallest sits closest to the post.
- Place flameless pillar candles inside; choose flicker mode and warm color temperature.
- Style with a few mini pumpkins around the lantern bases to add shape and color.
Why This Looks Expensive: Grounded symmetry. The lantern cluster reads intentional and layered, while the tailored ribbon and cohesive metal finishes pull it into “designer did this” territory.
Watch Out: Plopping lanterns too far from the post looks random. Keep them tight to the corner so the grouping reads as one story, not separate props.
Pro Styling Tip: Angle the tallest lantern 10–15 degrees toward the traffic path so the candlelight splashes across the stair risers — it photographs like a warm spotlight.
2) Plaid Ribbon Weave and Berry Garland Along the Banister Rail
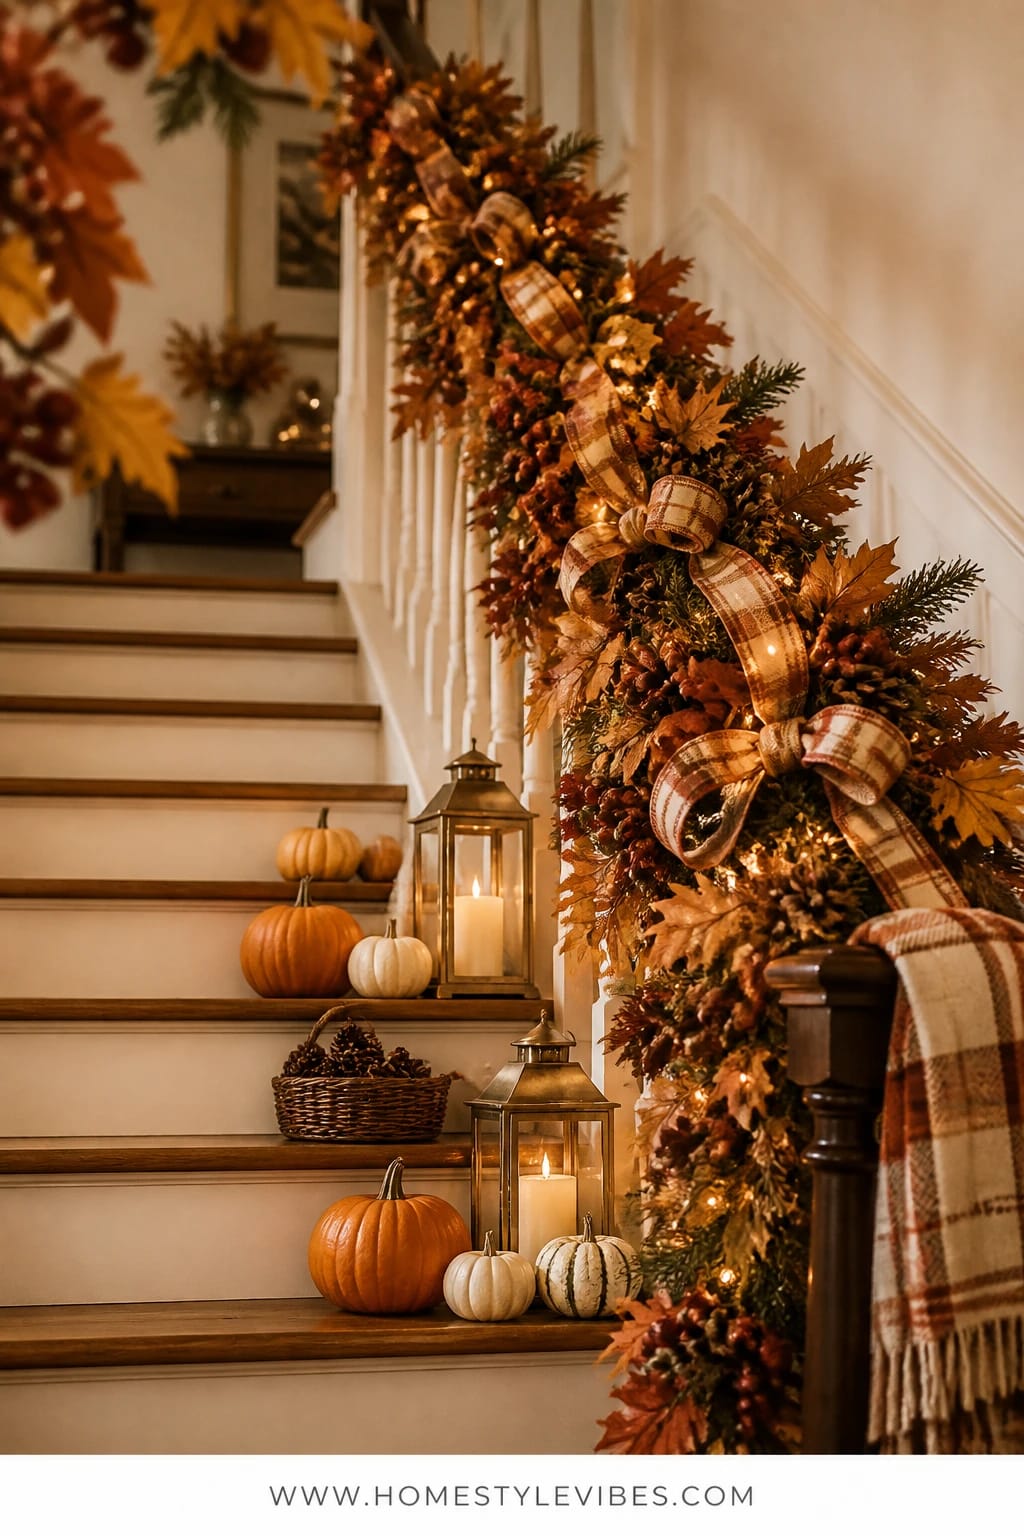
It’s that one stretch of railing that always looks a little bare, even after you try a garland. You’ve draped, you’ve swagged, and it still feels like a limp line. The fix is a plaid ribbon weave added right into the garland — think tartan or buffalo check in rust and cream. The texture does the heavy lifting, and the repeating plaid rhythm pulls the eye up the stairs in the best way.
This look leans cozy bright and cheerful: layers of checked ribbon, clusters of faux berries, maybe a cinnamon stick tucked here and there if you’re extra. It’s family-friendly, pet-tug resistant (use zip ties under the ribbon), and easy to store — the ribbon unthreads and coils flat. Lighting plays support here: you’ll rely on ambient lamps nearby and perhaps a few mini lanterns on landings. Photography-wise, the plaid line creates movement and pattern, perfect for those angled staircase shots we all love saving to Pinterest.
For a pared-back version, use a simple cream and rust grosgrain instead of plaid, or choose a narrow ribbon in double rows. For small staircases, try a partial run on the lower half only, with a standout bow at the newel — concentrated charm with less material.
Budget Breakdown:
- Faux berry-and-leaf garland (9–12 ft): $22–$65
- Plaid wired ribbon (2–3 spools): $14–$36
- Zip ties or floral wire: $3–$8
- Optional: Mini lanterns for steps or landing: $18–$45
Total Estimated Cost: $39–$154
Best For: Standard family homes with continuous banisters. Great if your living room sightline faces the staircase and you want a bold, classic fall statement from September through early November.
Key Design Elements:
- Main seasonal props: Berry-leaf garland, wired plaid ribbon
- Color palette: Cream, rust, deep red, warm brown, hints of olive
- Lighting strategy: Ambient side-table lamps nearby; optional micro-LED fairy strands woven behind the ribbon
- Textile layers: Wired ribbon creates built-in structure; optional small plaid lumbar on adjacent bench
- Natural elements: Dried wheat tips and faux rose hips for contrast
- Accent details: Matte black zip ties trimmed tight to disappear
How To Recreate This Look:
- Start with the garland: attach along the top of the rail with zip ties every 10–14 inches.
- Add the ribbon: weave over-and-under the garland spine, letting 3–4 inch loops pop for depth.
- Layer in berry clusters every 12 inches to create visual beats up the staircase.
- Place optional micro-LED wire behind the ribbon loops to bounce warm light off the fabric.
- Style with a single, dramatic bow at the bottom newel to finish the line.
Why This Feels Designer: The controlled repetition of plaid plus consistent loop size makes the garland read tailored, not crafty. Precision is the secret, not more stuff.
One Thing To Avoid: Too-narrow ribbon. Anything under 1.5 inches tends to disappear on a standard banister. Aim for 2.5 inches for that plush, photogenic wave.
Pro Styling Tip: Keep ribbon tails long — 18 to 24 inches — and trim at an angle or fishtail. The length adds graceful movement in photos.
Remember, this isn’t about recreating a showroom. It’s about making the staircase you walk past ten times a day finally feel finished. If one idea calls your name louder than the rest, start there and let the others wait.
3) Warm Brass Lanterns and Maple Leaf Swags on Each Stair Tread
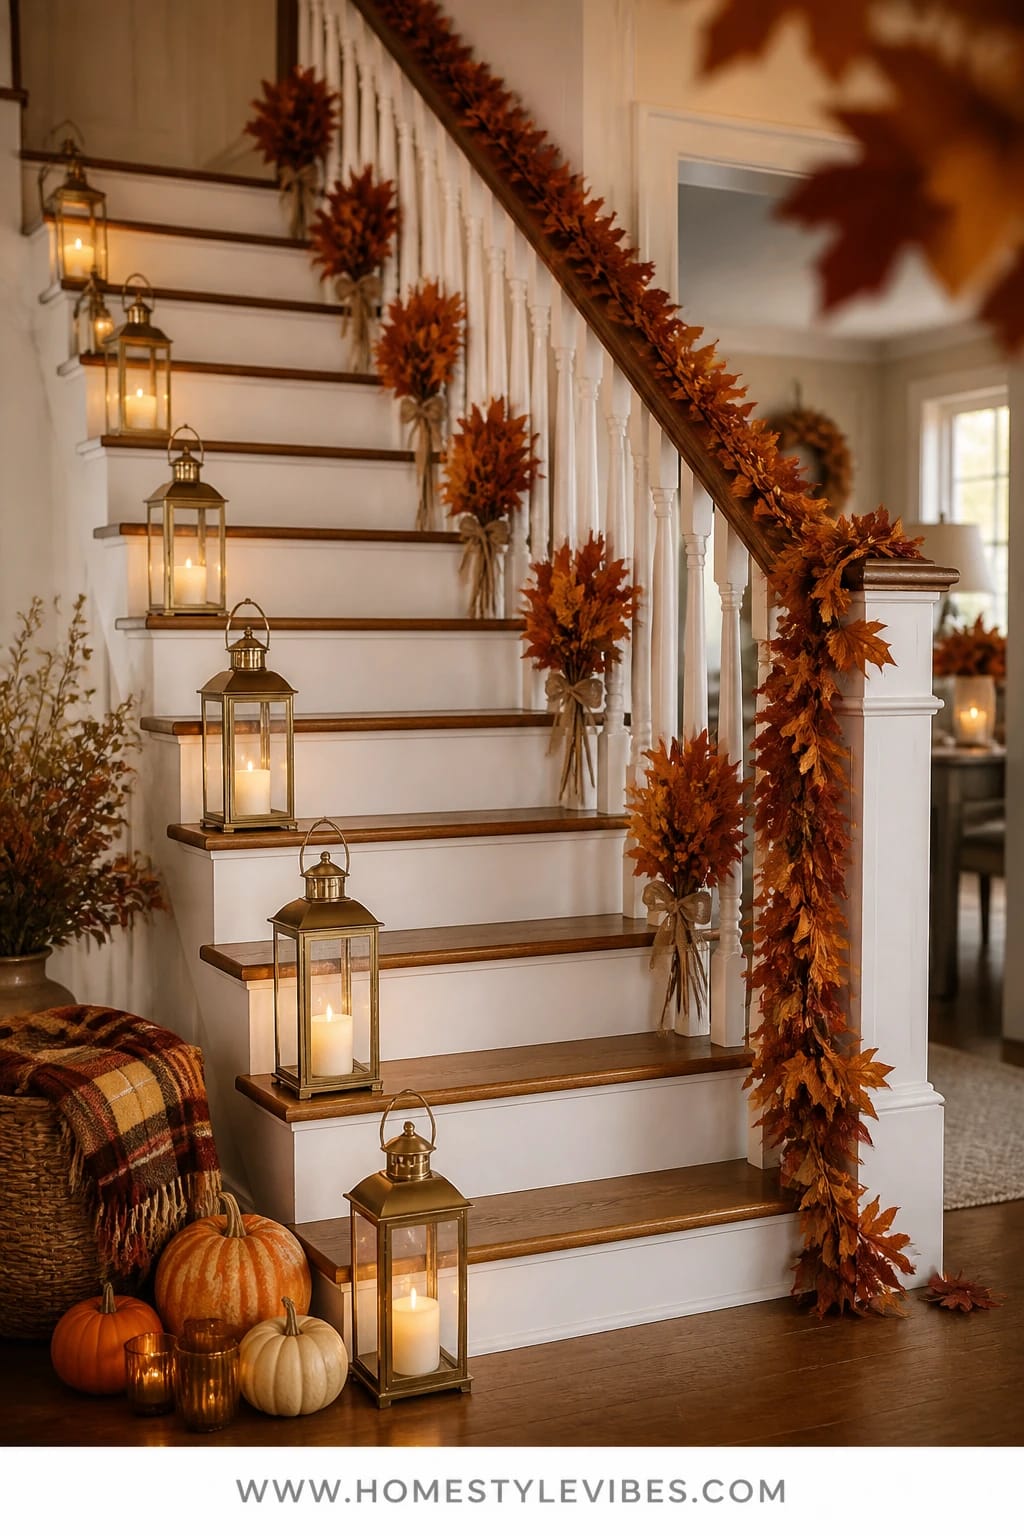
You’ve tried a banister garland before, but the steps still read empty and echo-y. The staircase looks nice from the side, yet front-on it’s all risers with nowhere for your eye to land. This idea fixes that with rhythm: place small warm brass lanterns on alternating treads, then echo the movement with short maple leaf swags tied to the spindles at those same intervals. It’s like adding a beat to the whole stair — a gentle, warm, one-two, one-two up the flight.
The mood nods to classic, cheerful harvest: brass glow, maple leaves in saturated rust and amber, maybe a tiny pinecone tucked in for texture. It works beautifully because you don’t cover every tread; you keep walkways clear and kid-safe while still getting that seasonal presence. Lighting matters most: choose amber flameless votives for the lanterns, so evening turns the staircase into a softly lit runway without blinding brightness.
For a budget version, thrift mismatched mini lanterns and spray them antique brass. For a small staircase, use tea light cups with protective holders instead of full lanterns. If you love a less saturated look, choose wheat-and-cream leaves mixed with eucalyptus for a toned-down palette.
Budget Breakdown:
- Set of 6–8 small brass lanterns: $36–$120
- Faux maple leaf mini swags or cut garland sections: $16–$48
- Flameless tea lights/votives: $12–$28
- Ribbon or twine for spindle ties: $4–$12
Total Estimated Cost: $68–$208
Best For: Homes with straight stair runs or wide treads. Perfect for early evenings when you want a subtle path of light and color that carries from September right through Thanksgiving.
Key Design Elements:
- Main seasonal props: Small brass lanterns, maple leaf swags
- Color palette: Amber, rust, honey, brass, warm walnut
- Lighting strategy: Alternating tread lighting with low-profile votives
- Textile layers: Twill or linen ribbon to tie swags discreetly
- Natural elements: Dried mini pinecones, wheat sprigs
- Accent details: Antique brass finish pulls the whole palette warm
How To Recreate This Look:
- Start by placing lanterns on every other tread, tucked to the outer edge away from the main walking path.
- Add flameless tea lights or votives set to a 6-hour timer so evenings glow automatically.
- Layer short maple leaf swags on the corresponding spindles using linen ribbon.
- Place a few pinecones at lantern bases for texture and weight.
- Style the bottom landing with a slightly larger lantern to anchor the rhythm.
Why This Reads High-End: The measured spacing looks purposeful. Repeating forms with slight size variation (one larger lantern on the landing) hints at a designer’s hand.
The Most Common Mistake: Overcrowding the treads. Too many lanterns equals clutter and tripping hazards. Keep at least half the steps clear.
Pro Styling Tip: Photograph from halfway up the stairs at a slight angle; the alternating glow creates a gorgeous leading line that pulls the viewer’s eye upward.
4) Layered Eucalyptus-and-Pumpkin Garland with Soft Rust Lanterns on the Landing
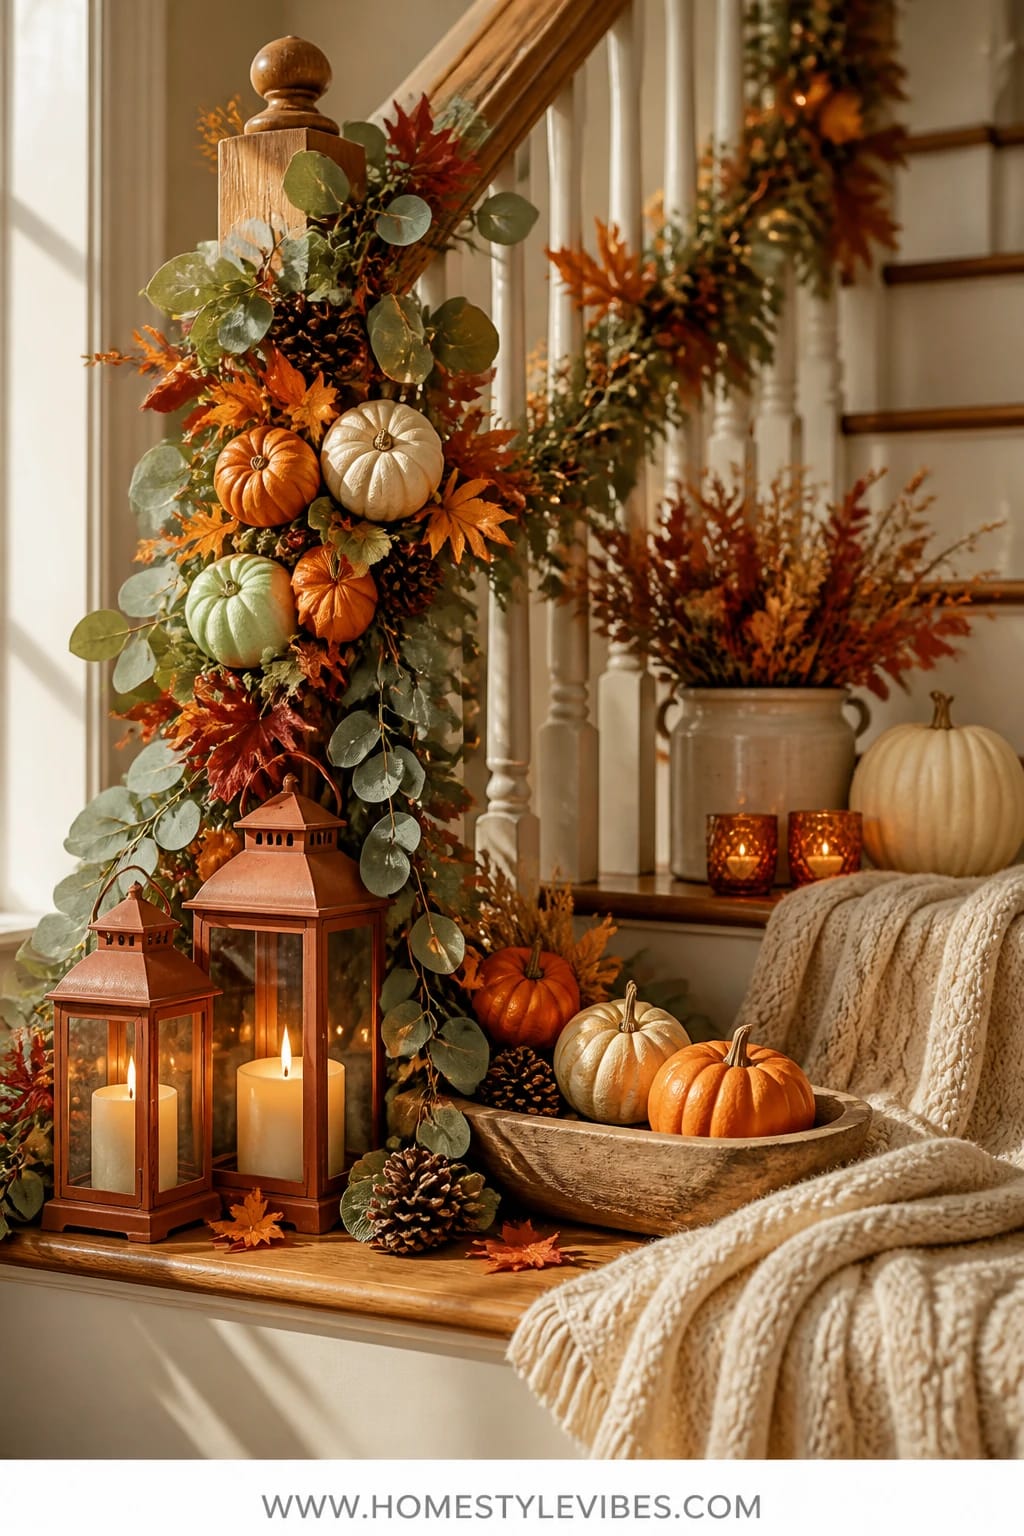
Sometimes the banister looks okay, but the mid-landing is a dead zone — a weird in-between that never quite earns its keep. You’ve tossed a basket there before, but it always ends up catching random mail or a rogue sock. Let’s give the landing a purpose with a layered garland drape that pools gently onto the ledge, then add soft rust-painted lanterns or lanterns with rust-toned glass for a subtle, warm note.
The mood is collected and calm, still very cozy bright: eucalyptus softens the edges, while small white and heirloom-orange pumpkins nestled in the greens add depth without screaming Halloween. It works for busy homes because everything sits above foot level on the landing surface, and the garland’s wire spine lets you shape away from the stairwell for safety. To photograph, angle a lantern behind a cluster of pumpkins so the glow halos them — it’s that magazine moment where the color saturates and the textures of eucalyptus leaves show off.
Variations: If you have a narrow landing, scale to a half-garland with two pumpkins and a single lantern. For a deeper look, add berry sprigs in dark cranberry. If storage is tight, go faux pumpkins and keep them in a lidded tote for next year — they’ll still read rich with the right lighting.
Budget Breakdown:
- Faux eucalyptus garland (2 strands for pooling): $28–$70
- Faux or real mini pumpkins (5–7): $8–$28
- Rust-toned lanterns or lanterns with rust glass inserts (2): $30–$90
- Battery pillar candles: $12–$30
- Optional: Cranberry berry picks: $6–$16
Total Estimated Cost: $84–$234
Best For: Homes with a visible mid-landing or turn; shines in open-concept living rooms where the landing is part of the view.
Key Design Elements:
- Main seasonal props: Eucalyptus garland, mini pumpkins, rust lanterns
- Color palette: Sage green, soft rust, cream, pale orange, warm brass
- Lighting strategy: Backlight pumpkins with soft, low-height candles
- Textile layers: A minimal linen runner under the garland to protect the surface
- Natural elements: Dried eucalyptus scent (if you add a stem or two), wheat sprigs
- Accent details: Brass or antiqued handles on the lanterns to tie to nearby frames
How To Recreate This Look:
- Start by laying a neutral runner or folded tea towel along the landing ledge.
- Add two eucalyptus garlands, allowing the ends to softly pool at one side.
- Layer 5–7 mini pumpkins in clusters of two or three for a natural look.
- Place 1–2 rust-toned lanterns behind or beside pumpkin clusters with flameless pillars.
- Style with a handful of berry picks where greenery meets lantern bases for cohesion.
Why This Looks Intentional: The pooling garland feels relaxed yet curated, while the repetition of rust in lanterns and subtle berry tones brings the whole display into one color story.
Don’t Do This: Don’t push everything to the exact center of the landing. Offset the bulk to one side to create motion and visual interest.
Pro Styling Tip: Place one pumpkin halfway under the edge of the garland so it peeks out — that layered reveal reads beautifully in close-up shots.
If your staircase is starting to feel fuller and warmer in your head, that’s the sign you’re on the right track. Start small, then layer — you don’t need to finish in one afternoon.
5) Cranberry-and-Wheat Garland with Aged Wood Lanterns on the Stair Niche
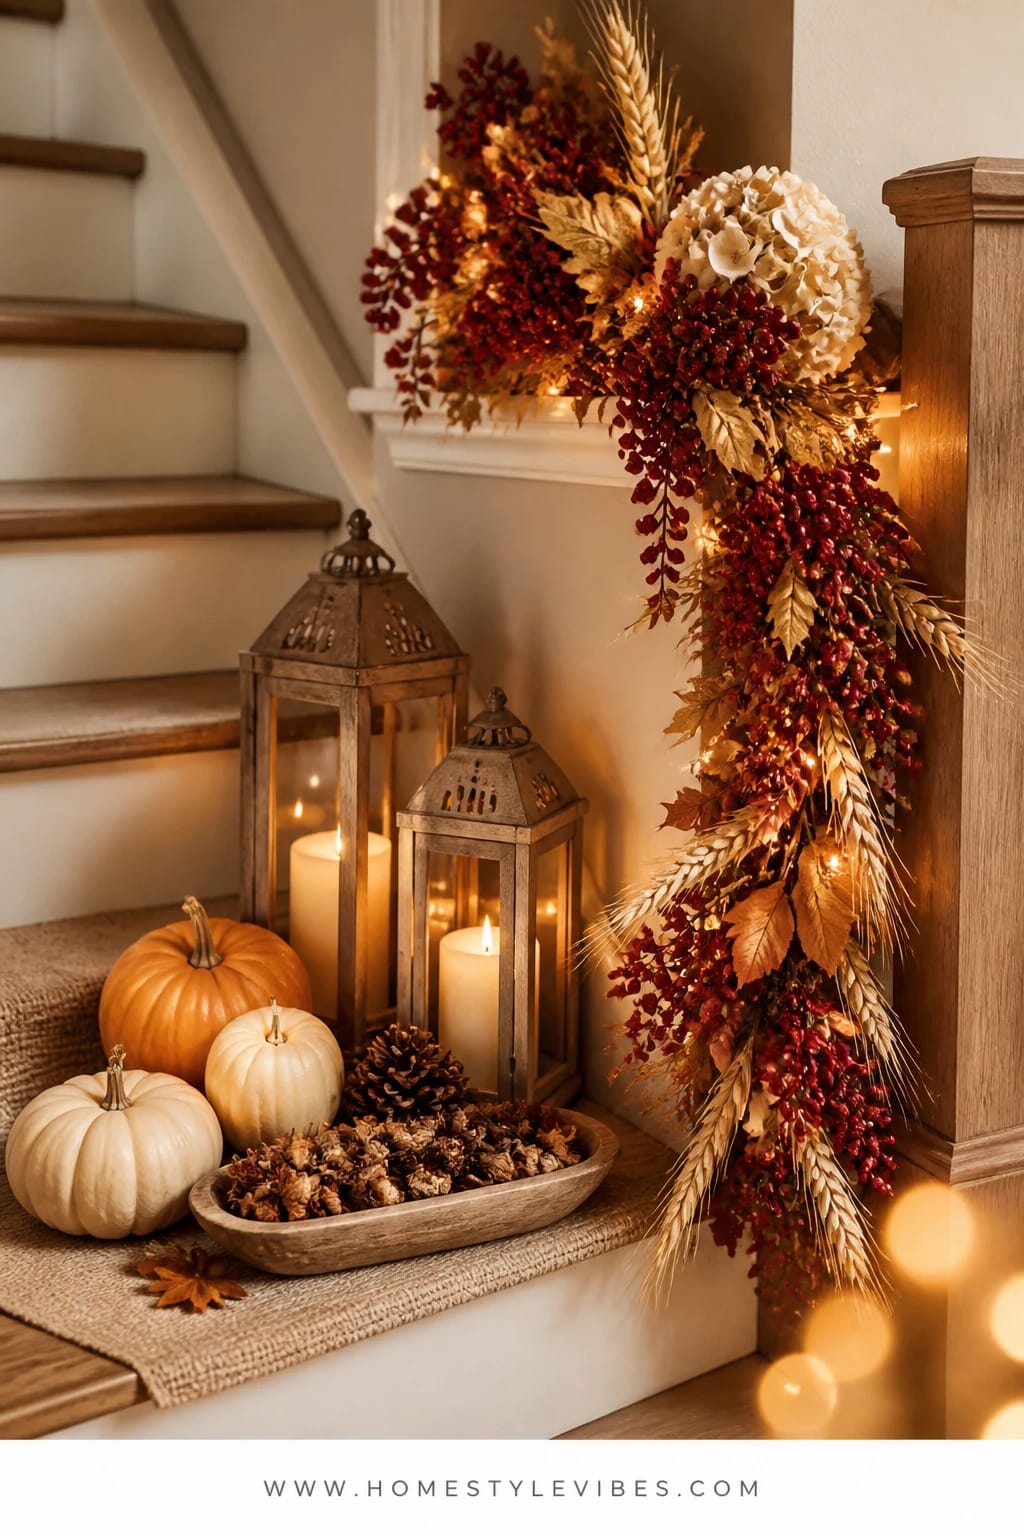
Some homes have that small stair niche or halfway shelf that’s adorable in theory and awkward in practice. You’ve popped a photo frame there and it’s… fine. But it begs for fall personality. Enter a cranberry-and-wheat garland that reads like a little harvest bundle, paired with aged wood lanterns that feel collected over time. This blend looks like you picked everything up at a cozy barn sale — in the best way.
The mood is country-warm and friendly: ruby cranberry pops against neutral wheat and natural wood. It works for families because the niche is safely above reach, and the lanterns with timed candles require zero babysitting. Lighting becomes a quiet accent — you’re not blasting light here, just a mellow glow that kisses the garland tips. Photographs love this combo because of the matte wood texture against gleaming candlelight and that pop of cranberry that draws the eye immediately.
For a budget-friendly version, grab a basic faux wheat garland and add a few cranberry picks for color. If storage is a concern, choose flat-packing lantern frames or collapsible options. For a more muted read, swap cranberry for dusky rose hips and stick to bleached wheat.
Budget Breakdown:
- Faux wheat garland: $18–$42
- Cranberry or red berry picks: $8–$20
- Aged wood lanterns (1–2): $28–$88
- Flameless candles: $12–$30
- Optional: Small brass bowl for stray berries or acorns: $10–$24
Total Estimated Cost: $66–$204
Best For: Traditional homes with built-in stair niches or wall shelves along the staircase. Looks great through the full season and pairs nicely with Thanksgiving décor.
Key Design Elements:
- Main seasonal props: Wheat garland, cranberry picks, wood lanterns
- Color palette: Honey wheat, cranberry red, warm oak, cream
- Lighting strategy: Understated warm candlelight for glow without glare
- Textile layers: A small burlap or linen mat under the lantern to protect shelves
- Natural elements: Acorns, dried pods, bleached ruscus
- Accent details: Aged hardware on lanterns, vintage-style latch
How To Recreate This Look:
- Start with a protective cloth or mat on the niche surface.
- Add the wheat garland in a soft crescent, letting one end trail slightly.
- Layer 3–5 cranberry picks evenly across the curve for balanced color hits.
- Place a single wood lantern to one side with a flameless candle set to a warm tone.
- Style with a small brass bowl filled with acorns to tie metal tones from nearby rooms.
Why This Feels Designer: The crescent shape adds movement and frames the lantern, while the aged wood texture looks storied — as if it’s been part of the home forever.
Watch Out: Overfilling the niche. Negative space is your friend here. Leave breathing room around the lantern for shadow play.
Pro Styling Tip: Tuck one cranberry pick deeper in, one more forward; depth variation keeps the camera from flattening the scene.
6) Double-Garland Cascade with Velvet Bows and Iron Lanterns on the Upper Rail
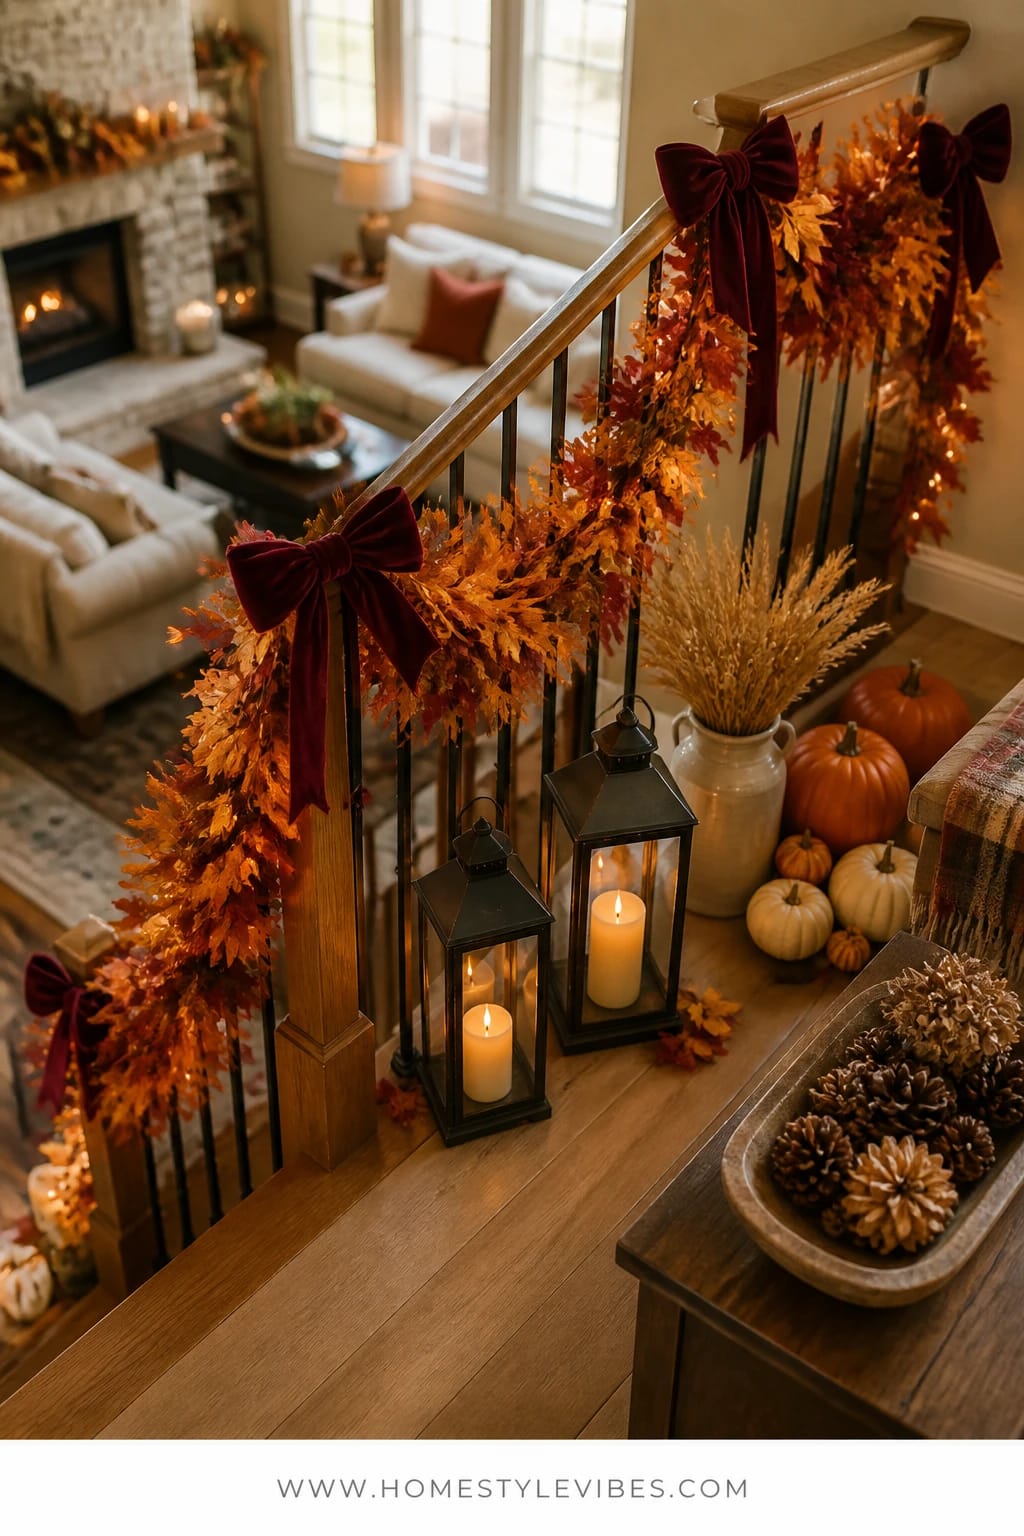
Let’s talk about the upper rail — the part upstairs you can see from the living room but never get around to styling. You’ve clipped a single garland there before and it felt thin and a little skimpy. The fix is a double-garland cascade with velvet bows at each swag point and a trio of iron lanterns placed on the upper landing. The effect is lush and celebratory without being fussy.
The mood here channels cozy bright grandeur: think layered leaves in rust and gold, velvet bows in deep burgundy or burnt orange, and sturdy iron lanterns that ground the softness. It works in real homes because the double layer solves the “see-through” problem of many faux garlands, and iron lanterns can handle a little bump from small hands. Lighting becomes more dramatic upstairs — pull the glow a bit dimmer for moody warmth after sunset. It photographs like a storybook: swooping lines from the garland, tactile velvet, and the quiet glint of iron.
I did this on our own upstairs rail last October, and honestly, the double layer was the part that made the whole staircase sing. One garland looked fine. Two made it feel finished — like a holiday card waited to happen, but for fall.
Variations: If your rail runs long, create larger swags closer together for rhythm. For a tighter budget, double up a single affordable garland by folding it lengthwise and fluffing aggressively. If you prefer a toned-down palette, choose wheat-and-olive garlands with caramel velvet bows.
Budget Breakdown:
- Two faux leaf garlands (12–18 ft total): $36–$110
- Velvet ribbon (2–3 spools): $16–$42
- Iron lanterns (set of 2–3): $45–$140
- Flameless pillars (3): $18–$42
- Optional: Brass command hooks for non-damaging swag points: $10–$18
Total Estimated Cost: $115–$352
Best For: Open staircases visible from downstairs living spaces; perfect for homes that entertain in October and November and want a quietly dramatic upgrade.
Key Design Elements:
- Main seasonal props: Double-layered leaf garlands, velvet bows, iron lanterns
- Color palette: Deep burgundy, rust, amber, iron black, warm wood
- Lighting strategy: Dimmed flameless pillars upstairs for a soft, moody wash
- Textile layers: Velvet ribbons with long tails for elegance
- Natural elements: Dried magnolia leaves for structure, a few wheat stems
- Accent details: Brass or black hooks that echo nearby hardware
How To Recreate This Look:
- Start by mapping swag points along the upper rail — every 18–24 inches for a generous curve.
- Add the first garland with light tension, securing at each point.
- Layer the second garland slightly offset so leaves interlock and hide gaps.
- Place velvet bows at swag points; keep tails long to emphasize the curves.
- Style 2–3 iron lanterns on the upper landing with warm pillars on timers.
Why This Looks Expensive: The double layering erases sparse spots and creates plush depth. Velvet adds a luxe note that always photographs beautifully and reads higher-end than satin.
One Thing To Avoid: Short bow tails. They can look stiff and skimpy. Aim for 18–30 inches so they drape with intention.
Pro Styling Tip: Fan out velvet tails and twist slightly; the fabric catches light differently at each angle, giving you that rich, dimensional shot.
Here’s your gentle reminder: pick one zone and finish it. The magic isn’t in doing everything — it’s in one thoughtful, cohesive moment that greets you every time you pass by.
Quick Checklist
- Harvest garland secured tightly to the bottom newel post
- Cluster of 2–3 lanterns at the base with warm flameless pillars
- Plaid wired ribbon woven through a banister garland
- Alternating small lanterns on every other stair tread
- Short maple leaf swags tied to corresponding spindles
- Eucalyptus garland layered and pooled on the landing
- Mini pumpkins clustered near lantern bases
- Rust-toned or rust-glass lanterns for subtle color warmth
- Wheat-and-cranberry garland styled in a crescent on a stair niche
- Aged wood lantern with warm candle glow on a shelf or niche
- Double-garland cascade along the upper rail
- Velvet bows with long tails at each swag point
- Iron lantern trio on the upper landing
- Warm, consistent candlelight temperature throughout
- Zip ties or floral wire trimmed flush to disappear
Frequently Asked Questions
How much should I budget to decorate my staircase with garlands and lanterns?
Plan on $75–$250 for a single-focus area like the bottom newel post or a landing, and $150–$400 if you’re doing a full banister plus lantern accents. Reuse core pieces (lanterns, quality faux garlands) year after year to keep long-term costs down.
Should I use real or faux pumpkins and garlands on the staircase?
For stairs and banisters, faux garlands are safer and easier. I prefer real mini pumpkins on landings or niches where they won’t get bumped or warmed by a vent. If you run warm or have a curious cat, go faux pumpkins — today’s options look shockingly realistic, especially by candlelight.
What if my staircase is small or very steep?
Choose one high-impact zone: the bottom post, a single landing, or a compact ribbon weave on the lower third of the rail. Keep treads clear or style just one lantern at the base. Scale is everything — a little, done precisely, looks better than a whole lot crammed in.
How do I store everything after fall without making a tangled mess?
Coil garlands around a piece of cardboard or a hanger and label the end with painter’s tape. Nest lanterns with towels between them. Keep ribbons rolled and clipped with binder clips. A single under-bed tote can usually hold a full staircase setup if you’re strategic.
Are lanterns and candles safe with kids and pets on the stairs?
Use flameless candles exclusively on stairs. Choose lanterns with sturdy bases and place them away from the main walking line. Timers help you set it and forget it. If you have toddlers, skip tread lanterns and focus on the banister and landing only.
When should I start decorating my staircase for fall?
Late September is a sweet spot. Start with garlands and lanterns, then layer richer tones and a few pumpkins by early October. Keep it through Thanksgiving by swapping any Halloween-specific accents for more harvest elements like wheat or magnolia leaves.
My banister has an odd curve — will garlands look messy?
Curves can look beautiful if you secure the garland at consistent intervals and let it follow the rail’s shape naturally. Use extra zip ties on the inside of the curve and fluff leaves to hide connection points. Velvet bows at the bends make it look intentional.
Conclusion
Staircases and banisters don’t have to be the neglected middle child of your fall décor. Pick one of these six cozy bright ideas — the amber lantern cluster at the newel post, the plaid ribbon weave, the rhythmic tread lights, the layered landing, the cranberry-and-wheat niche, or the double-garland cascade — and commit to finishing that one zone well. That’s your starting line.
The secret isn’t cramming in more stuff; it’s warm light, saturated harvest color, and layered textures that feel generous but not fussy. Let the garlands drape, let the lanterns glow, and give yourself a moment of everyday ritual: walking past a banister that finally looks like fall lives here. You’ve got this — and honestly, once you see the evening glow spill across your risers, you’ll wonder why you waited.
Grab your ribbon, fluff that garland, and press “on” for the candles. Your staircase is about to become the most photographed corner of your home, and IMO, that first night’s glow is the coziest hello of the season.

About the Author

Krisztina P.Rendes, Founder of Home Style Vibes
Founder of Home Style Vibes
Krisztina Puskásné Rendes created Home Style Vibes as a cozy-modern lifestyle space where homemaking meets inspiration. Her goal is to help women create beautiful, organized, and peaceful homes they truly love — without overwhelm. You’ll find here heart-driven content on home decor, cleaning tips, easy family recipes, organization and decluttering, DIY home projects, plants, and seasonal ideas — all designed to bring more calm, comfort, and style into everyday life.