
7 Friendsgiving Table Decor Ideas Your Friends Will Talk About For Weeks
You want that golden, cozy-bright Friendsgiving table that feels like a warm hug. You hate when it turns into a last-minute scramble with a mismatched runner and a pile of random gourds that somehow reads “chaos,” not “harvest glow.” Picture saturated rust napkins, amber candlelight flickering off simple glass, plaid that feels cheerful not cheesy, and a whisper of eucalyptus weaving between heirloom pumpkins. These 7 Friendsgiving table decor ideas will fix the overwhelm, give you photogenic results, and keep everything inside a real-life budget and a doable timeline—think under $200 if you need to, and most setups styled in under an hour once you gather supplies.
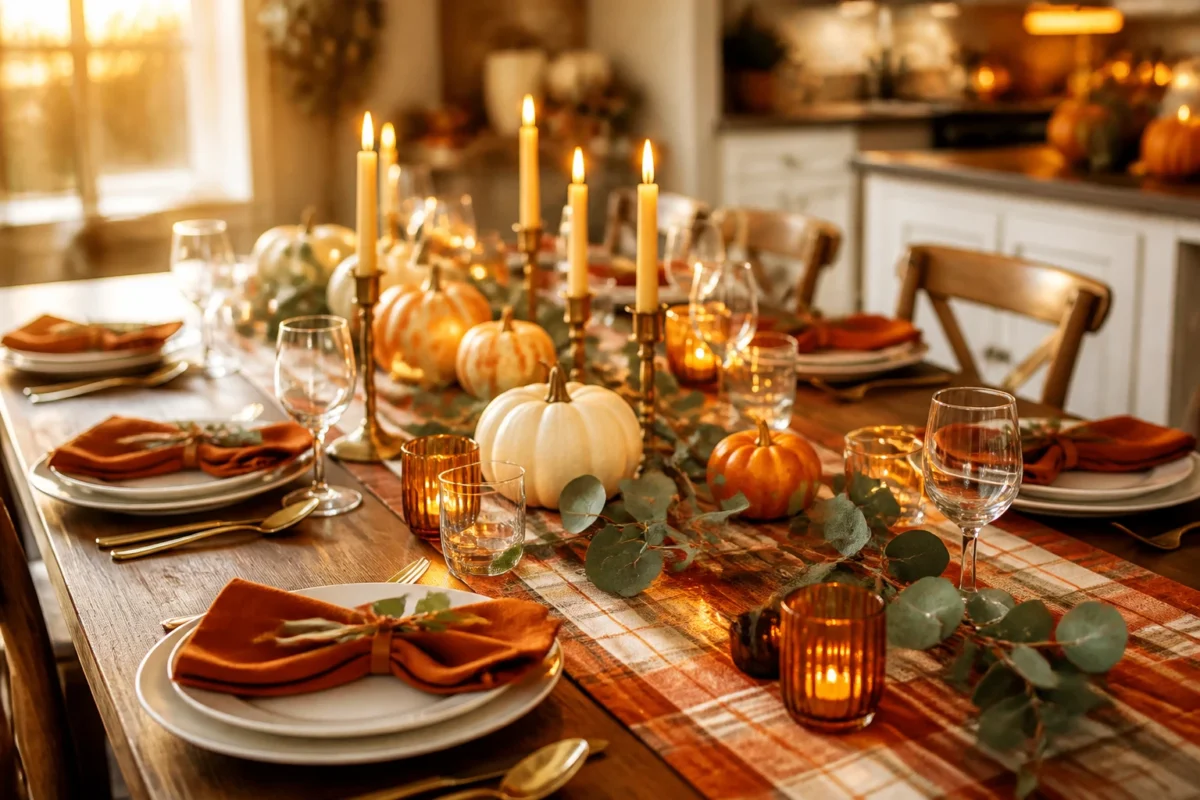
We’re talking cozy bright autumn in an indoor dining scene only: warm wood tables, kitchen islands, bar carts, and sideboards—no porches here. Expect practical, pretty, and seriously scroll-stopping. Host this for your favorite people any weekend in late October through Thanksgiving; it’s for the friend whose group loves lingering, second helpings, and “Wait, can I take a picture of this?” moments.
1) Plaid Runner With Amber Candle Glow On The Dining Table
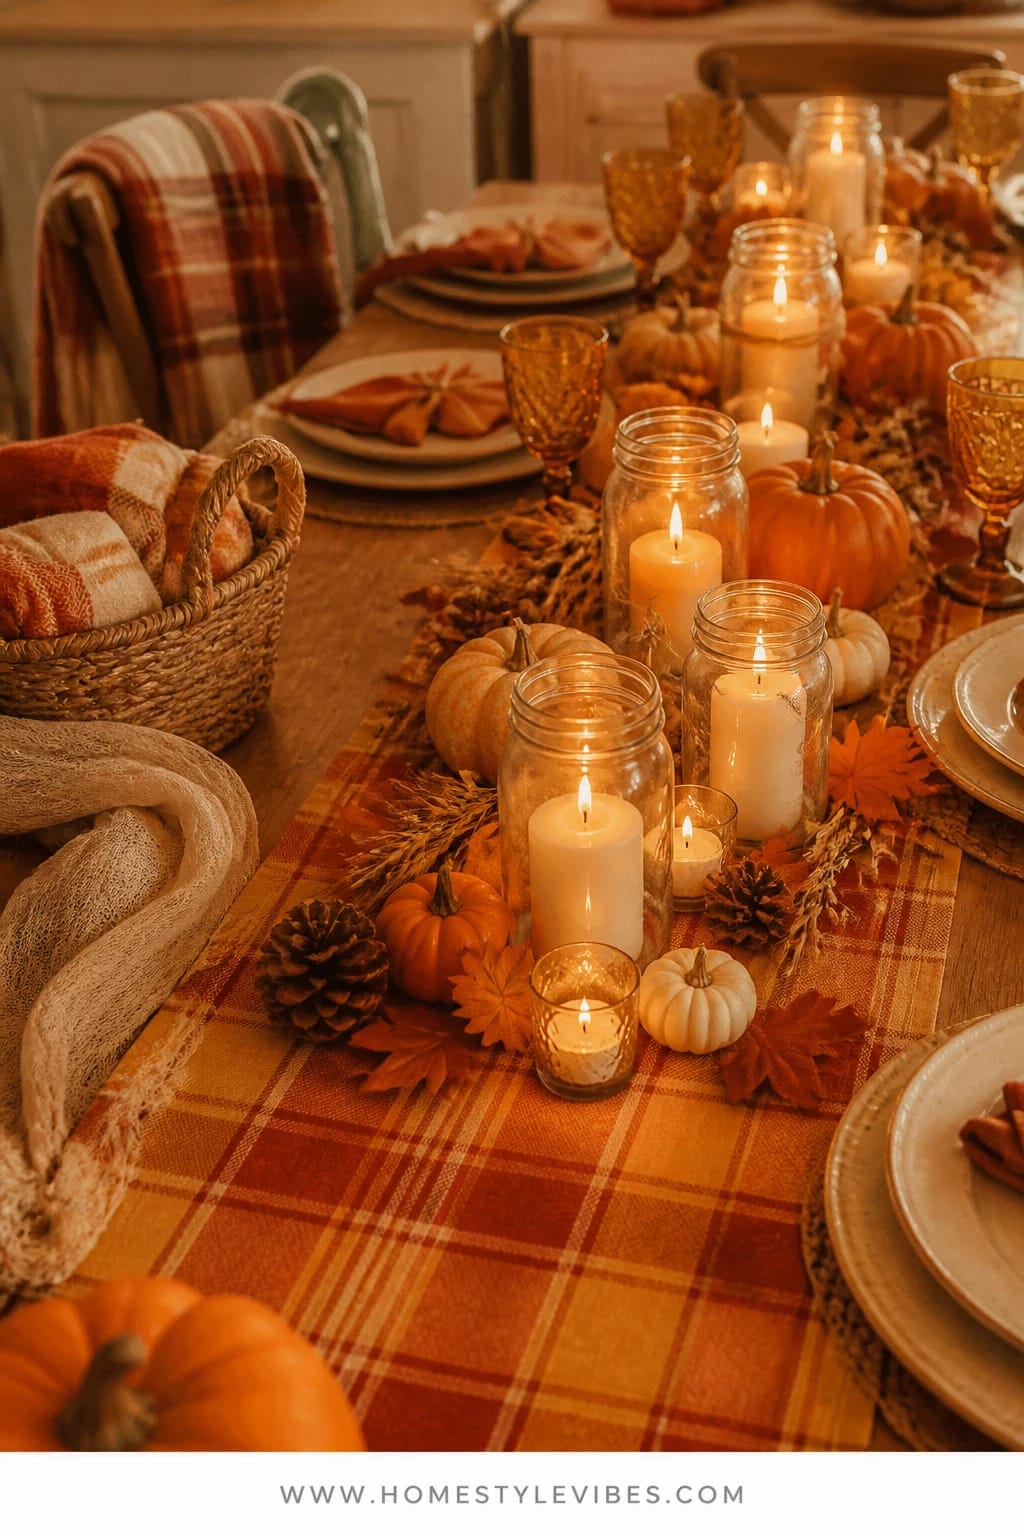
We’ve all been there: you lay out a runner, set plates, and somehow the whole table still looks a little flat and unfinished. This look solves the “too safe, not special” problem with three anchors—one classic plaid runner, a river of amber candle glow, and a simple rhythm of pumpkins and greenery. The vibe is warm cabin meets generous harvest, the kind of cozy bright autumn that makes people sigh when they sit down.
Why it works in real homes: plaid adds instant story and color without overwhelming the room, amber votives create flattering light (nobody’s mad at that), and the low profile keeps sightlines clear. You can store everything easily—roll the runner, wrap the votives, and pop the faux stems in a tote for next year. It photographs beautifully because the warm light bounces off the glass, the plaid gives pattern, and the pumpkins add sculptural shape. You’ll get that layered, abundant look without fuss.
Lighting matters here. Kill the overhead glare during dinner and let the candles do their thing; in late afternoon, crack a window for cool air and let that golden window light mix with the warm candlelight. It’s peak fall mood—soft faces, saturated color, and a steady glow.
Variations:
- Budget-friendly: Use one plaid scarf as a runner, thrift clear votive holders, and grab a grocery-store bouquet split into baby bud vases.
- Small-space version: Do two short clusters of candles and pumpkins instead of a full runner; leave open space for dishes to land.
Budget Breakdown:
- Plaid runner or scarf: $15–$35
- Amber glass votives (8–12): $16–$48
- Unscented tea lights or LED: $8–$20
- Mix of small pumpkins (real or faux): $10–$30
- Eucalyptus or seasonal greenery: $8–$18
Total Estimated Cost: $57 – $151
Best For: A standard dining table that needs instant warmth; perfect from late October through Thanksgiving for groups who linger and love candlelight.
Key Design Elements:
- Main seasonal props: small heirloom pumpkins, eucalyptus, amber votives
- Color palette: rust, burgundy, warm gold, soft green
- Lighting strategy: dim overheads, rely on amber votives and late-day window light
- Textile layers: plaid runner, linen napkins
- Natural elements: eucalyptus, mini pumpkins
- Accent details: simple glass, brushed brass flatware if you have it
How To Recreate This Look:
- Start with a plaid runner centered on the dining table, letting 6–10 inches hang off each end.
- Add a meandering line of amber votives down the runner, staggering heights slightly.
- Layer in mini pumpkins—alternate colors and sizes for rhythm.
- Tuck eucalyptus sprigs along the base of the candles and pumpkins to soften edges.
- Style with linen napkins in rust or wheat tones at each place setting.
Why This Looks Expensive: The mix of glass glow with plaid and real greenery reads curated, not store-bought. The key is repetition (same candle holders) plus small variations (pumpkin sizes) for that designer “collected” feel.
Watch Out: Avoid strong scented candles near food. Choose unscented so your stuffing still smells like… stuffing. Also, don’t overcrowd—leave negative space so the table breathes.
Pro Styling Tip: For photos, turn a couple votives slightly so the flame reflects off the nearest glass twice—instant depth and sparkle.
2) Harvest Garland And Golden String Lights On The Kitchen Island
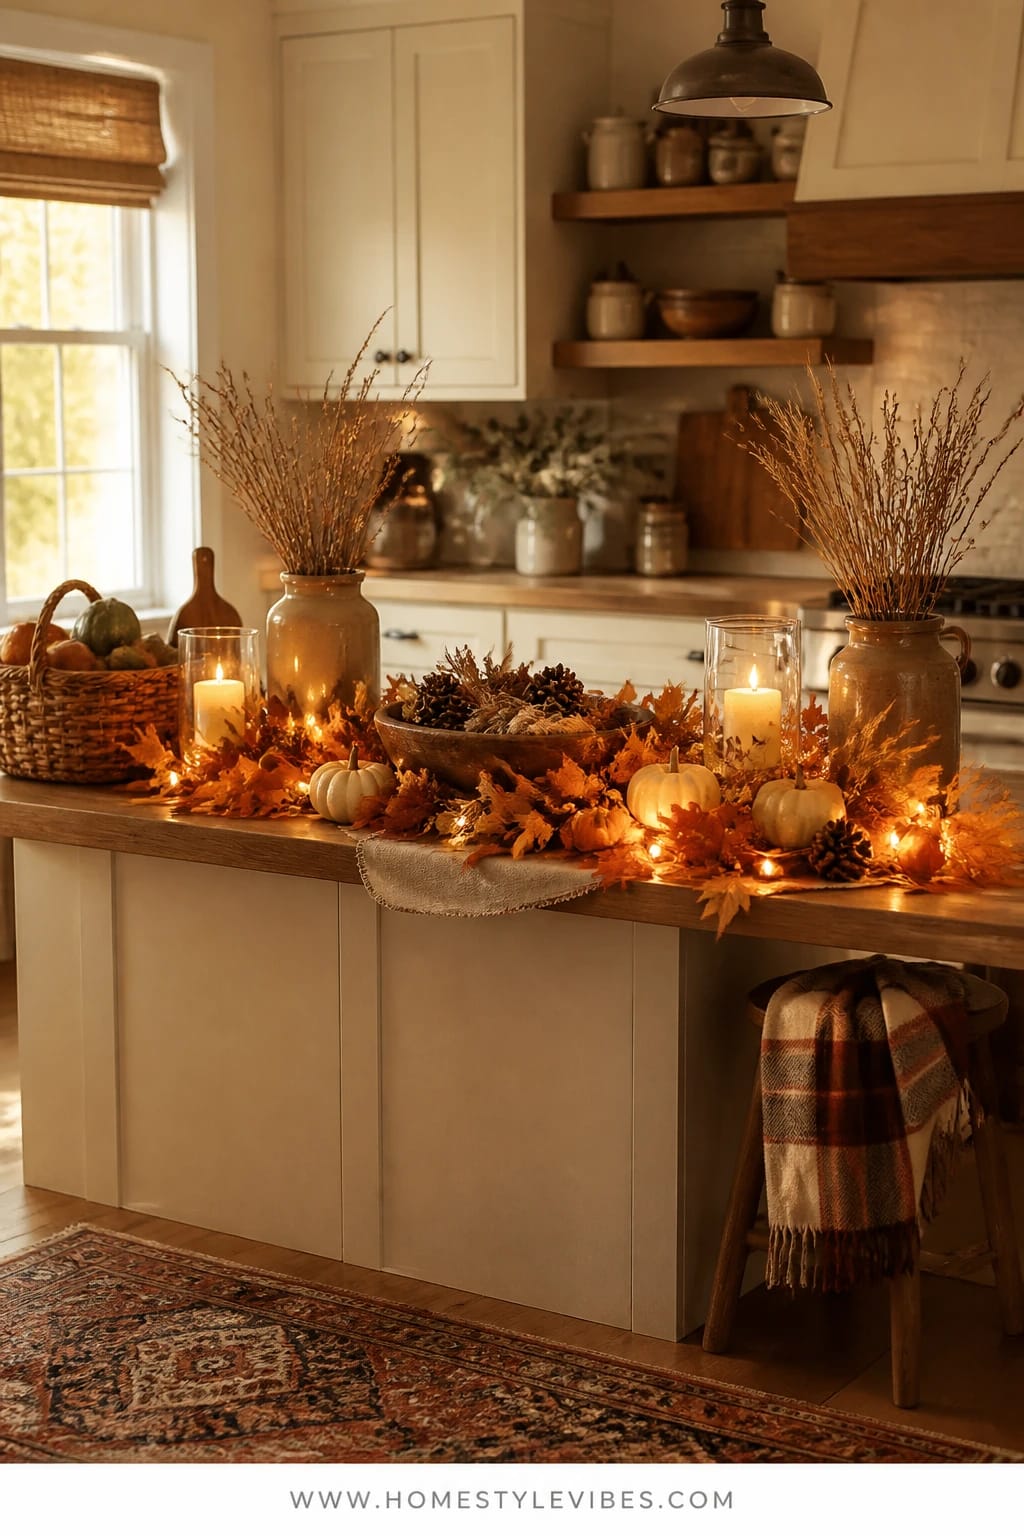
It’s that one surface that becomes a clutter magnet—mail, keys, a rogue pumpkin with a chipped stem. You’ve tried a bowl of fruit or a vase of leaves, but it still looks like a stuff-drop zone, not a Friendsgiving hub. Enter the island garland: a lush harvest swag dotted with golden string lights that turns your kitchen into the warm heart of the gathering.
This creates undeniable cozy bright energy. It’s abundant but contained, perfect for real homes where the island does double duty as buffet and hangout spot. The twinkle lights deliver that soft, festive glow without stealing attention, and because it’s on the island, you’re keeping the dining table less busy. It photographs like a charm, especially when the room lights are low and the counters reflect the glow.
Variations:
- Budget-friendly: Use faux leaf garland from a craft store, layer in produce you already bought (pomegranates, pears), and one strand of warm white micro-lights.
- Make-ahead: Style the garland on a narrow runner off the island, then move it into place right before guests arrive.
Budget Breakdown:
- Faux harvest garland (2–3 strands): $24–$60
- Warm white micro string lights: $8–$18
- Seasonal fruit (pomegranates, pears): $10–$20
- Few small pumpkins: $8–$15
Total Estimated Cost: $50 – $113
Best For: Open kitchens with a central island or peninsula where guests graze and chat; great for Friendsgiving potlucks.
Key Design Elements:
- Main seasonal props: faux leaf garland, small pumpkins, seasonal fruit
- Color palette: warm gold, rust, cranberry red, green
- Lighting strategy: micro string lights with under-cabinet lights dimmed
- Textile layers: narrow runner or butcher paper base
- Natural elements: fruit, eucalyptus or rosemary cuttings
- Accent details: small brass bowls for nuts or olives
How To Recreate This Look:
- Start with a narrow runner or kraft paper down the island to protect the surface.
- Add two to three strands of faux garland, twisting them together for fullness.
- Layer micro-lights through the garland, hiding the battery pack at the end.
- Place small pumpkins and fruit in odd-numbered clusters along the length.
- Style with herb sprigs tucked at intervals for fragrance and texture.
Why This Feels Designer: The subtle interplay of real fruit with faux foliage reads believable and rich. The lights aren’t shouting; they’re winking. That restraint is what designers lean on.
One Thing To Avoid: Don’t do multicolor lights here. Warm white only. Also, watch the height if you’ll be plating food—keep most elements under 6 inches.
Pro Styling Tip: For photos, turn off every cool-toned light in the kitchen. Keep only warm under-cabinet lights and the garland lights for honeyed color.
Keep scrolling—your bar cart is about to become the secret conversation starter.
3) Maple-Leaf Ice Bucket And Warm Brass On The Bar Cart
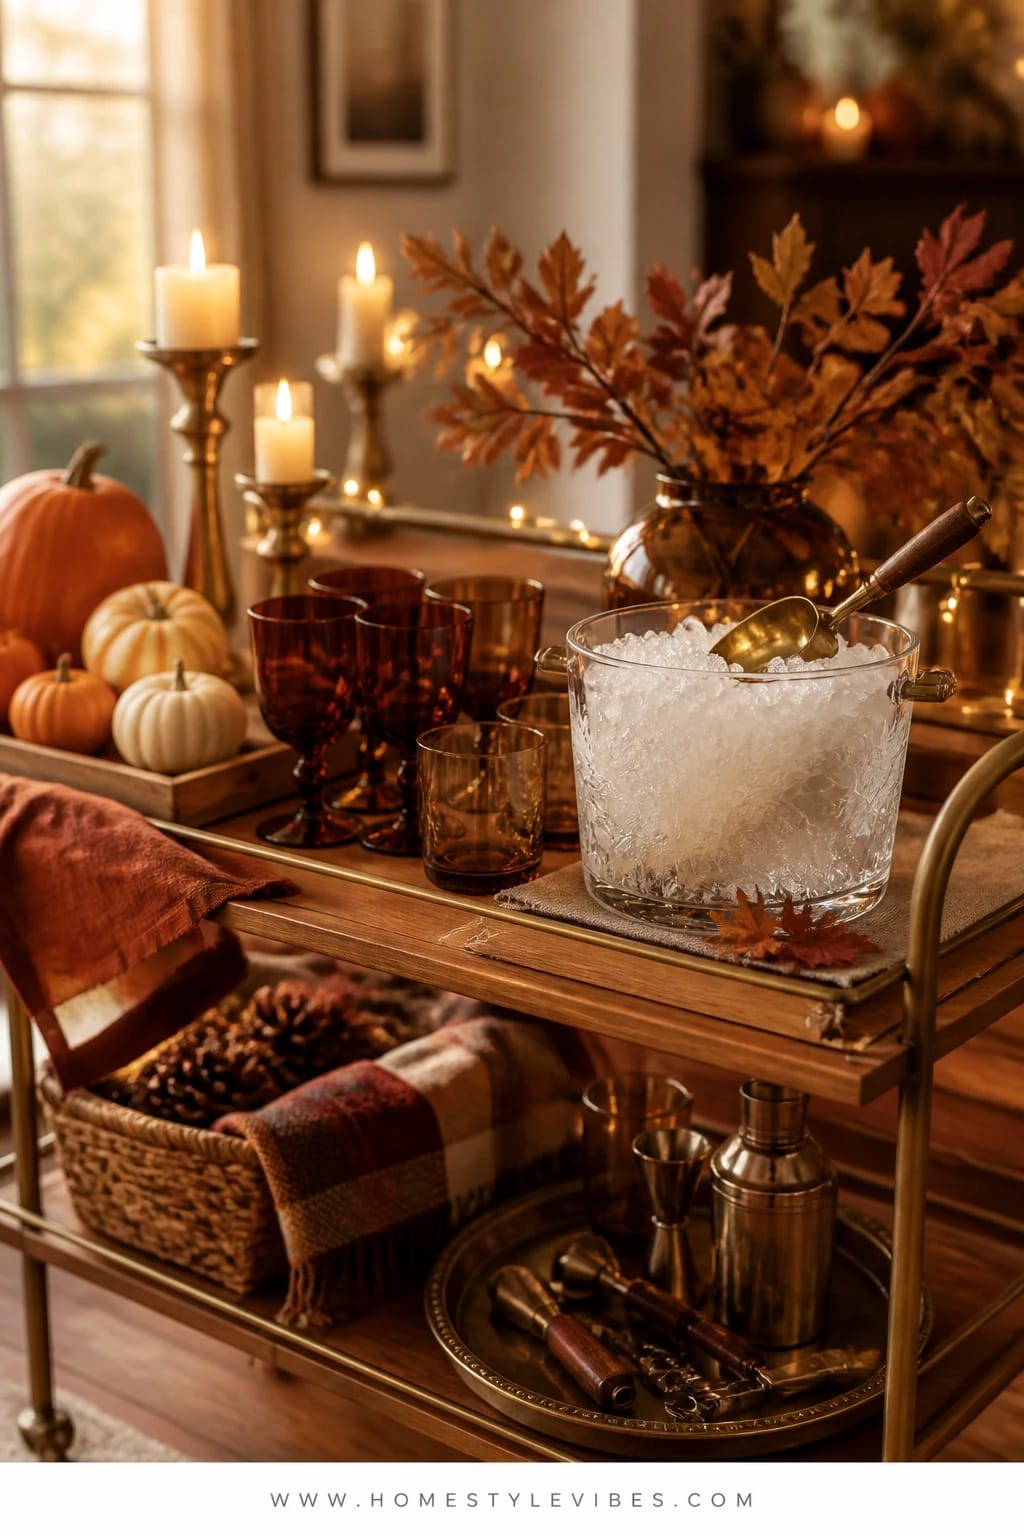
Hosting stress hits hard when guests hover at the kitchen sink looking for ice, corkscrews, and glasses. You’ve tried a cute tray, but it still turns chaotic. This bar cart setup—with a maple-leaf-etched ice bucket, warm brass accents, and a tidy layering of essentials—solves the traffic jam and adds a glam harvest moment away from the main table.
The mood is cheerful hospitality: glowing brass, garnet-hued wine, rust-toned napkins. It works in real homes because everything’s reachable and corralled, and the cart can roll next to the dining table or a sideboard so the kitchen stays calm. Lighting-wise, one small lamp or a cluster of tea lights on the top shelf gives just enough glow to make glassware sparkle in photos without blinding anyone. It looks polished because you’re repeating materials—brass, glass, wood—while letting the maple leaf detail do the seasonal storytelling.
Variations:
- Small-space version: Use a narrow console or even a sturdy bookshelf shelf—same styling rules, fewer items.
- Budget: Skip the etched bucket and tie a maple leaf charm or tag on a plain glass ice bucket for the same vibe.
Budget Breakdown:
- Bar cart or console you already own: $0
- Maple-leaf ice bucket (etched or decal): $25–$80
- Brass bottle opener + shaker: $12–$40
- Amber or clear glassware set (6–8): $24–$60
- Tea lights and holders: $10–$20
- Small lamp or LED puck light: $15–$30
Total Estimated Cost: $86 – $230
Best For: Homes where the kitchen fills up fast; groups who love a self-serve cocktail or mocktail moment.
Key Design Elements:
- Main seasonal props: maple-leaf-etched bucket, mini gourds in a bowl, rust cocktail napkins
- Color palette: brass, amber, rust, deep cranberry
- Lighting strategy: micro lamp or tea lights for localized glow
- Textile layers: linen cocktail napkins
- Natural elements: cinnamon sticks or rosemary sprigs for garnishes
- Accent details: brass bar tools, wood tray
Why This Reads High-End: Keeping a cohesive metals story (brass only) and limiting color to two warm tones plus glass makes it feel intentional, not thrown together. The etched or tagged leaf is the understated seasonal wink.
How To Recreate This Look:
- Start by placing a small lamp or tea light cluster on the top shelf for glow.
- Add the ice bucket front and center with tongs hooked on the rim.
- Layer a wood tray with 6–8 glasses and rust cocktail napkins.
- Place a bowl of mini gourds and a small jar of cinnamon sticks for garnish.
- Style with brass tools to one side and a bottle or two of wine or cider on the lower shelf.
The Most Common Mistake: Overloading the cart. You only need the basics. If you cram every bottle you own on there, it stops looking special and starts feeling like a liquor store endcap.
Pro Styling Tip: Angle a couple of glasses so they catch the lamp glow; that tiny reflection reads luxe in photos.
Deep breath. This is where things get lush and layered—no craft-store chaos, just quiet abundance.
4) Heirloom Pumpkins With Golden Lanterns On The Sideboard
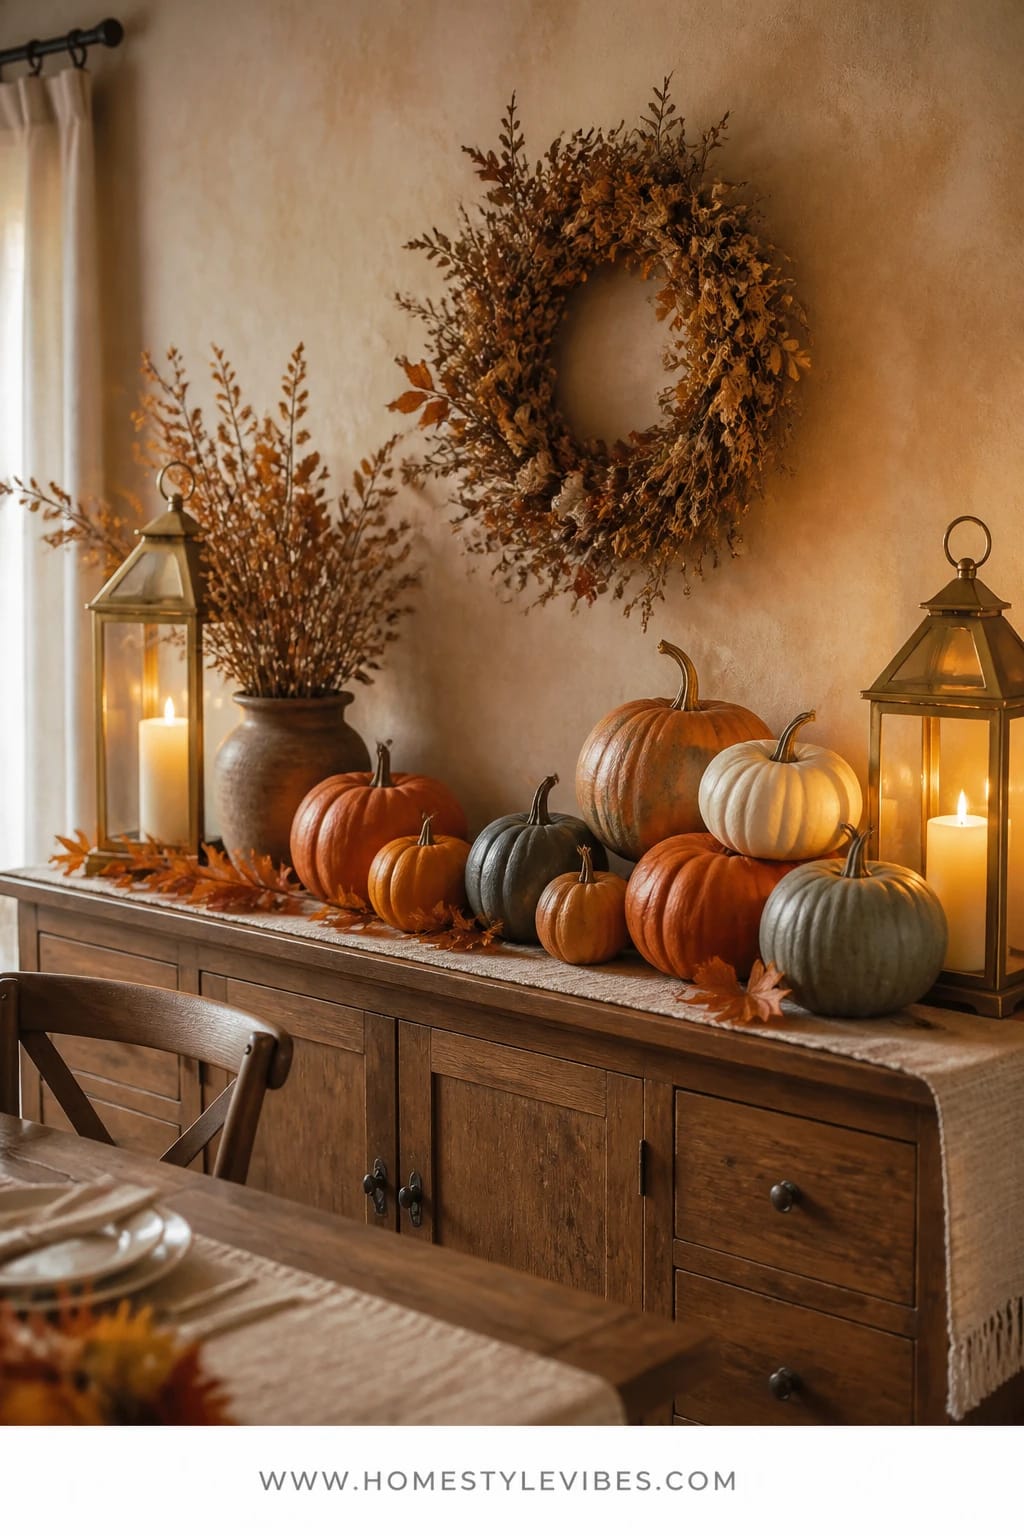
Sideboards can feel like the awkward cousin of the dining room—big, blank, and easy to overdo. You’ve probably lined up pumpkins like a parade and still felt underwhelmed. This approach stacks the sideboard with heirloom pumpkins in varied sizes and colors, then anchors the scene with golden lanterns at either end. It’s harvest abundance with grown-up balance.
The mood is generous and saturated: muted pumpkin blues and creams next to deep orange, lanterns casting warm light up the wall. It works because the sideboard becomes your showpiece while the dining table stays service-friendly. For lighting, let the lanterns carry the evening; during the day, they read as metallic sculptural pieces. It photographs beautifully thanks to those soft arches of pumpkin silhouettes and the bookend lantern glow that frames the entire vignette.
Variations:
- Budget: Mix one or two real heirloom pumpkins with lighter faux ones to keep cost and weight down.
- Minimalist option: One oversized pumpkin, one lantern, one low bowl of walnuts—simple and striking.
Budget Breakdown:
- Heirloom pumpkins (3–7): $15–$60
- Two golden lanterns: $30–$90
- LED pillar candles: $12–$36
- Bowl + walnuts or pinecones: $8–$20
Total Estimated Cost: $65 – $206
Best For: Dining rooms with a sideboard or long console that needs purpose and presence from October to Thanksgiving.
Key Design Elements:
- Main seasonal props: heirloom pumpkins, walnuts/pinecones
- Color palette: deep orange, dusty blue, cream, warm gold
- Lighting strategy: lanterns with LED pillars, dim overheads
- Textile layers: optional linen runner under the pumpkins
- Natural elements: seasonal nuts, a few dried leaves
- Accent details: brass or gold lanterns, ceramic bowl
How To Recreate This Look:
- Start with a neutral runner or bare wood on the sideboard.
- Place a lantern on each end with LED pillar candles inside.
- Add your largest pumpkin off-center, then cascade smaller ones diagonally.
- Fill a shallow bowl with walnuts or pinecones and tuck it into the composition.
- Style with one or two dried leaf sprigs for texture—edit ruthlessly.
Why This Looks Intentional: The lantern “bookends” tell your eye where the vignette starts and stops. That clarity is the design trick that makes the arrangement feel finished.
Don’t Do This: Don’t push everything flush against the wall. Pull the pumpkins forward an inch or two so you get shadow play behind them—hello, depth.
Pro Styling Tip: Snap a photo on your phone and convert to black-and-white. If the shapes still look balanced, you nailed it; if not, shift heights until the silhouette flows.
Quick mindset reset before we head back to the table.
Remember, this isn’t about recreating a showroom. It’s about building a Friendsgiving table that actually feels like your people. If one idea resonates more than the others, that’s your starting point. You don’t need them all.
5) Cranberry Florals And Candlelit Shadows On A Round Dining Table
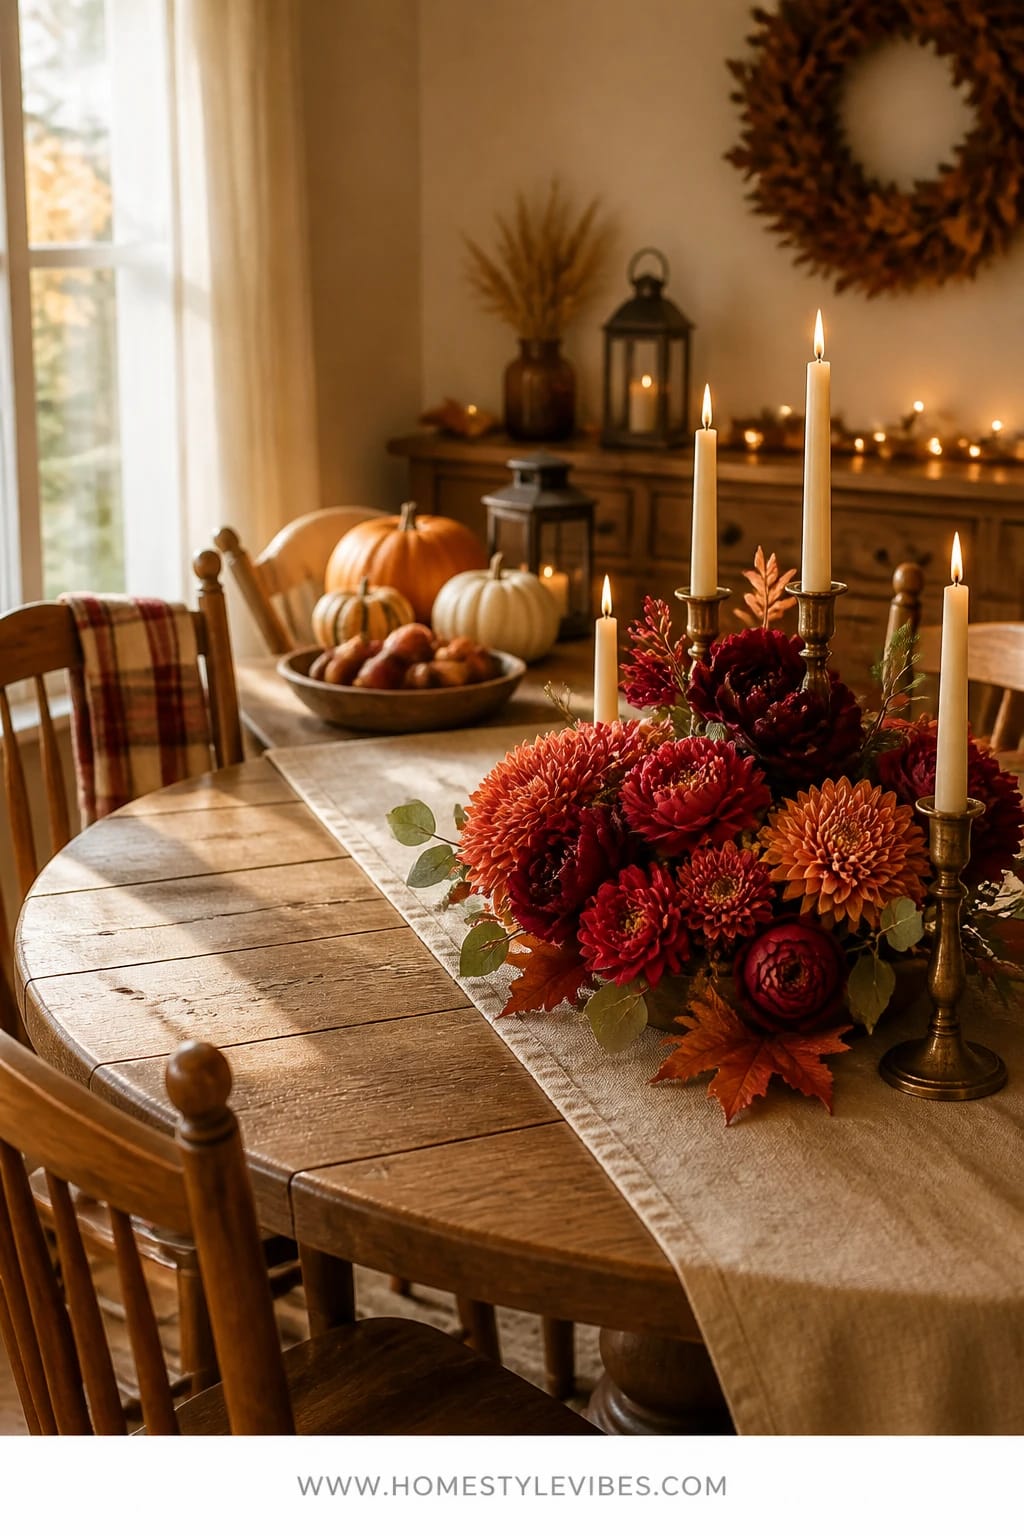
Round tables are forgiving for conversation, tricky for styling. You’ve tried a single vase that felt lonely or a big centerpiece that blocked faces. This concept clusters cranberry-hued florals in low bowls with taper candles that cast candlelit shadows across the table—intimate, warm, and face-friendly.
The mood lands between cozy and romantic: saturated berry tones, soft green eucalyptus, and a few rust mums for texture. It works because low bowls won’t interfere with passing dishes, and the trio layout gives symmetry without stiffness. Lighting is the star—tapers create graceful shadows that flatter skin and make glassware sparkle. Photos love the curve of a round table, and with three focal points, every angle has a story.
Variations:
- Small-space: Two low bowls and two candles instead of three to keep more plate room.
- Make-ahead: Prep the bowls with soaked floral foam the morning of; add flowers two hours before guests arrive.
Budget Breakdown:
- Low ceramic bowls (2–3): $18–$45
- Florals (mums, dahlias, eucalyptus): $24–$60
- Taper candles + holdfasts: $12–$28
- Glass candleholders: $16–$36
Total Estimated Cost: $70 – $169
Best For: Round tables 36–60 inches wide where you want eye contact and easy passing during Friendsgiving.
Key Design Elements:
- Main seasonal props: cranberry florals, rust mums, eucalyptus
- Color palette: cranberry, rust, soft green, cream
- Lighting strategy: 2–4 taper candles, dimmed overhead
- Textile layers: neutral round placemats or a linen tablecloth
- Natural elements: loose eucalyptus sprigs at place settings
- Accent details: clear glass candleholders, ceramic low bowls
Why This Looks Expensive: Low, lush florals with negative space around them feel editorial. It’s the art-gallery approach: fewer, better pieces with strong color.
How To Recreate This Look:
- Start with a clean tablecloth or bare table and set placemats to mark plate zones.
- Add two or three low bowls filled with soaked floral foam.
- Layer eucalyptus first, then cluster cranberry blooms and rust accents.
- Place two to four taper candles around the bowls to shape a gentle triangle.
- Style with single eucalyptus tips on each napkin for connection.
Watch Out: Avoid scent-heavy florals near very aromatic dishes—it’s a fragrance battle no one wins. Choose unscented varieties like mums and dahlias.
Pro Styling Tip: Trim candle wicks to ¼ inch so the flame burns clean and steady. Flicker is pretty; soot trails on white ceilings are not.
6) Rust Linen Napkins With Pumpkin Place Cards On The Farmhouse Table
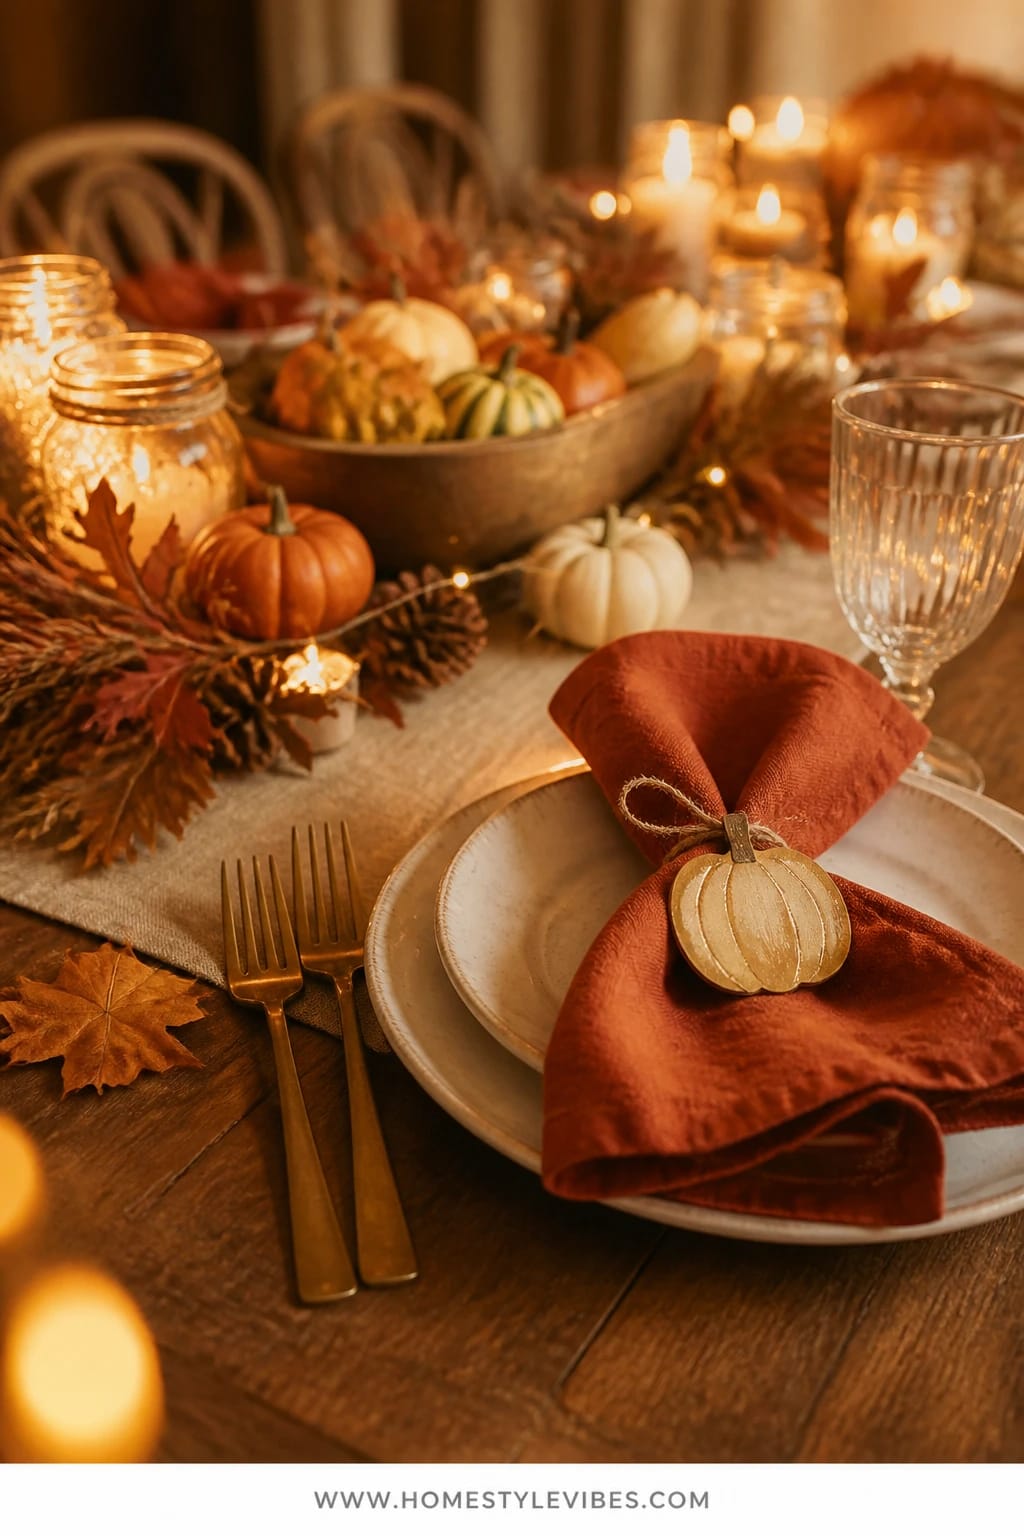
Place settings can feel perfunctory—plate, fork, napkin, done. You’ve probably folded napkins a dozen ways, and yet it never looks intentional. This setup makes each seat feel special with rust linen napkins and mini pumpkin place cards written in a soft gold paint pen. It’s a tiny detail with huge payoff: people light up when they see their name.
It brings cozy bright charm right to the seat—warm color, a bit of shine, a tactile linen napkin you actually want to hold. It works for real homes because it’s repeatable and stores well, and you can prep all the place cards earlier in the week. Light matters here too: set small tea lights at intervals or rely on the main centerpiece candles so the gold names catch a little sparkle. Photos pop because of the micro-contrast between rust, cream plates, and pumpkin stems.
I tried this last October for a 10-person Friendsgiving and quietly watched every guest pick up their mini pumpkin and smile before sitting down. My favorite moment? Two friends swapping pumpkins so they could sit together, which somehow made it even sweeter.
Variations:
- Budget-friendly: Use leaf-shaped kraft tags tied to plain napkins with twine.
- Neutral twist: Swap rust for wheat or taupe napkins and use white mini pumpkins with gray lettering.
Budget Breakdown:
- Rust linen napkins (set of 8–12): $24–$72
- Mini pumpkins (real or faux): $8–$24
- Gold paint pen or metallic marker: $4–$8
- Tea lights (optional): $6–$12
Total Estimated Cost: $42 – $116
Best For: Long farmhouse or rectangular tables, especially when you want guests to feel personally welcomed.
Key Design Elements:
- Main seasonal props: mini pumpkins as place cards
- Color palette: rust, cream, warm gold, soft green stems
- Lighting strategy: tea lights or centerpiece glow catching the gold names
- Textile layers: linen napkins, optional jute placemats
- Natural elements: pumpkin stems, a clipped rosemary sprig tied to napkins
- Accent details: metallic marker, thin ribbon or twine
How To Recreate This Look:
- Start by ironing napkins and folding them into a simple rectangle or knot.
- Add plates and flatware, then place the napkin horizontally across each plate.
- Write guest names on mini pumpkins; let dry for 10 minutes.
- Place each pumpkin centered on the napkin, stem angled slightly for personality.
- Style with a sprig of rosemary or eucalyptus tucked under the pumpkin.
Why This Feels Designer: Personalization plus cloth napkins instantly reads thoughtful. It signals that the table was set for these specific people, not for a catalog shoot.
One Thing To Avoid: Don’t use wet paint on pumpkins right before guests arrive. It transfers. Ask me about the time my friend wore “LILY” on her sleeve, lol.
Pro Styling Tip: Angle your overhead dimmer to 70% so metallic ink gleams in photos without washing out the rust color.
Pause here for a breath. You’re not behind—you’re curating. Swap, edit, and keep what feels like your crew.
7) Cinnamon-Stick Napkin Rings And Golden Pears On The Breakfast Nook Table
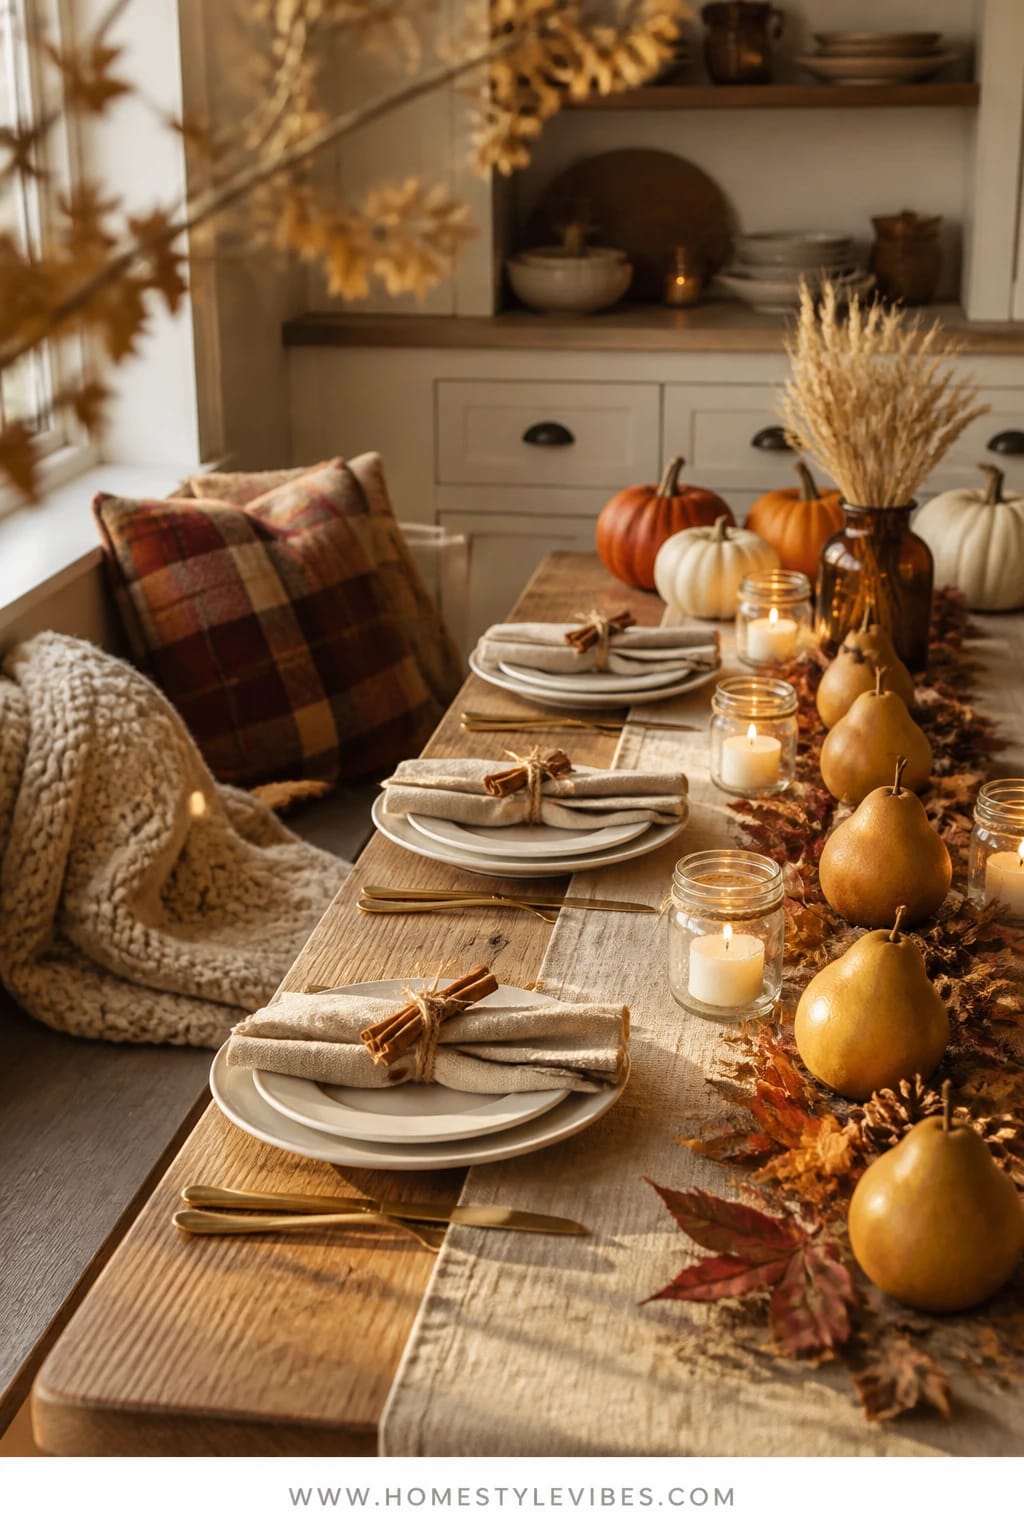
Small dining nooks can feel like an afterthought when you host, but they’re perfect for a Friendsgiving brunch or a kid table that still looks grown-up. You’ve tried to make it festive, but the limited space kills the vibe. This design keeps it airy and delicious: cinnamon-stick napkin rings tied with twine and a simple row of golden pears down the center. It’s scented, subtle, and totally charming.
The mood leans bright and fresh—warm white plates, glints of brass flatware, a few tea lights. It works because you’re using slim décor that doesn’t swallow precious tabletop real estate. Lighting here is key: morning or early afternoon light mixed with a couple of flickering tea lights gives that crisp-meets-cozy look. Photos love the repetition of pears and the tight shot of cinnamon rings.
Small confession: tying those twine knots neatly can be fiddly. Do it the night before while watching a movie, and you’ll thank yourself. Also, check your pears—if one is bruised, it’ll read as “oops” in photos. Quick swap fixes it.
Variations:
- Budget: Use apples instead of pears; still gorgeous with cinnamon and twine.
- Color tweak: Brush pears with a whisper of edible luster dust for a soft-gold glow at night.
Budget Breakdown:
- Cinnamon sticks (pack of 20–30): $6–$12
- Twine or thin ribbon: $3–$8
- Golden pears (6–10): $8–$18
- Tea lights and holders: $8–$16
- Plain linen napkins (if needed): $24–$48
Total Estimated Cost: $49 – $102
Best For: Breakfast nooks and petite tables where simplicity wins; ideal for a Friendsgiving brunch spread.
Key Design Elements:
- Main seasonal props: cinnamon sticks as napkin rings, golden pears
- Color palette: cream, flax, warm gold, cinnamon brown
- Lighting strategy: natural daylight with a few tea lights for evening warmth
- Textile layers: neutral runner or bare wood with linen napkins
- Natural elements: fruit and spice
- Accent details: clear or amber glass bud vases (optional)
Why This Looks Expensive: Editing. You’re using two materials—fruit and spice—plus good textiles. The restraint feels confident and considered.
How To Recreate This Look:
- Start with a narrow runner or keep the tabletop bare and clean.
- Roll napkins and tie with twine around two cinnamon sticks per setting.
- Line the center with evenly spaced pears, stems alternating directions.
- Add two or three tea lights between pears for gentle glow.
- Style with a tiny bud vase or two if the table needs a lift.
The Most Common Mistake: Using scented candles with the cinnamon sticks—too much scent. Unscented only so the pear and cinnamon aroma stays soft and real.
Pro Styling Tip: For photos, stand to the side and shoot low along the pear line—those repeating shapes will make your feed look editorial.
Another mindset nudge: you don’t need a decorator’s warehouse. One standout anchor (a runner, a garland, a lantern pair) plus consistent warm lighting is 90% of the wow. The rest is editing and confidence.
Quick Checklist
- Plaid runner or scarf for the dining table
- Amber votives and unscented tea lights
- Faux harvest garland and warm micro-lights for the kitchen island
- Maple-leaf ice bucket and brass bar tools on the bar cart
- Heirloom pumpkins and golden lanterns for the sideboard
- Cranberry florals and taper candles for a round table
- Rust linen napkins with mini pumpkin place cards
- Cinnamon-stick napkin rings with twine
- Golden pears for simple centerlines
- Eucalyptus or rosemary sprigs for texture and scent
- LED pillars for lanterns and safety
- Metallic marker for names and little flourishes
Frequently Asked Questions
How do I keep costs down for a Friendsgiving table without it looking sparse?
Pick one “hero” element and repeat it. For example, a plaid runner plus 10 identical amber votives looks styled and full, even with minimal extras. Layer in grocery-store eucalyptus and a few small pumpkins rather than big, pricey arrangements.
Are real or faux pumpkins and florals better for a Friendsgiving table?
Real pumpkins and simple market florals look the most authentic, IMO. Use faux for height or filler where needed and mix them in. Keep real pumpkins away from heat vents so they don’t do the sad slump by week three.
My dining room is tiny. Which idea should I choose?
Go with the rust napkins and mini pumpkin place cards or the cinnamon-stick rings and pear line. Both are slim, easy to set, and won’t eat up space. Skip tall pieces and keep candles to low votives.
How do I store everything after the season without clutter?
Group by category: napkins and runners in a labeled bin; votives wrapped in bubble sleeves; faux garlands coiled and tied with fabric straps. Slip a note card into the bin with what worked this year so you can quickly reset next fall.
What about pets and kids around candles?
Use LED pillars in lanterns and unscented LED tea lights on low surfaces. Save real flames for high, stable spots where tails and little hands can’t reach. You’ll keep the glow and ditch the stress.
When should I start decorating for a Friendsgiving dinner?
Style your sideboard and bar cart 3–5 days ahead, prep napkin rings and place cards 1–2 days before, and set florals and fresh fruit the morning of. Light candles or turn on LEDs 15 minutes before guests arrive for peak glow.
Your Friendsgiving, Your Way
Pick one idea. That’s your anchor. Maybe it’s the plaid runner with amber glow or the heirloom pumpkins and lanterns framing the room. From there, layer thoughtfully: warm light, a mix of textures, and a little harvest abundance. The secret isn’t buying more—it’s repeating a few elements so the whole scene feels coherent and welcoming.
Friendsgiving decor lives in the cozy-bright world: rich color, soft textiles, and candlelight that makes people relax. Build in pockets of glow at the table, island, and sideboard, and let everything else support the meal and the laughter. If something feels fussy, edit. If it makes you smile, keep it.
You’ve got this. Light the candles, pass the pie, and watch your friends pull out their phones because, seriously, this is the table they’ll talk about for weeks.

About the Author

Krisztina P.Rendes, Founder of Home Style Vibes
Founder of Home Style Vibes
Krisztina Puskásné Rendes created Home Style Vibes as a cozy-modern lifestyle space where homemaking meets inspiration. Her goal is to help women create beautiful, organized, and peaceful homes they truly love — without overwhelm. You’ll find here heart-driven content on home decor, cleaning tips, easy family recipes, organization and decluttering, DIY home projects, plants, and seasonal ideas — all designed to bring more calm, comfort, and style into everyday life.





