5 Fall Porch Steps Decor Ideas (Pumpkins, Lanterns And Hay Bales)
You want a cozy, glowy, stacked-and-layered fall porch that makes neighbors slow down and smile. You hate that your steps always look flat and sparse—like a random pile of pumpkins and a candle you forgot to light. This is your fix: five wildly different, totally doable fall porch steps decor ideas (yes, all about pumpkins, lanterns, and hay bales) that create that saturated harvest look you love. Think warm amber candlelight, gingham and plaid moments, heaps of heirloom pumpkins, and the kind of layered abundance that photographs beautifully even on a cloudy October afternoon.
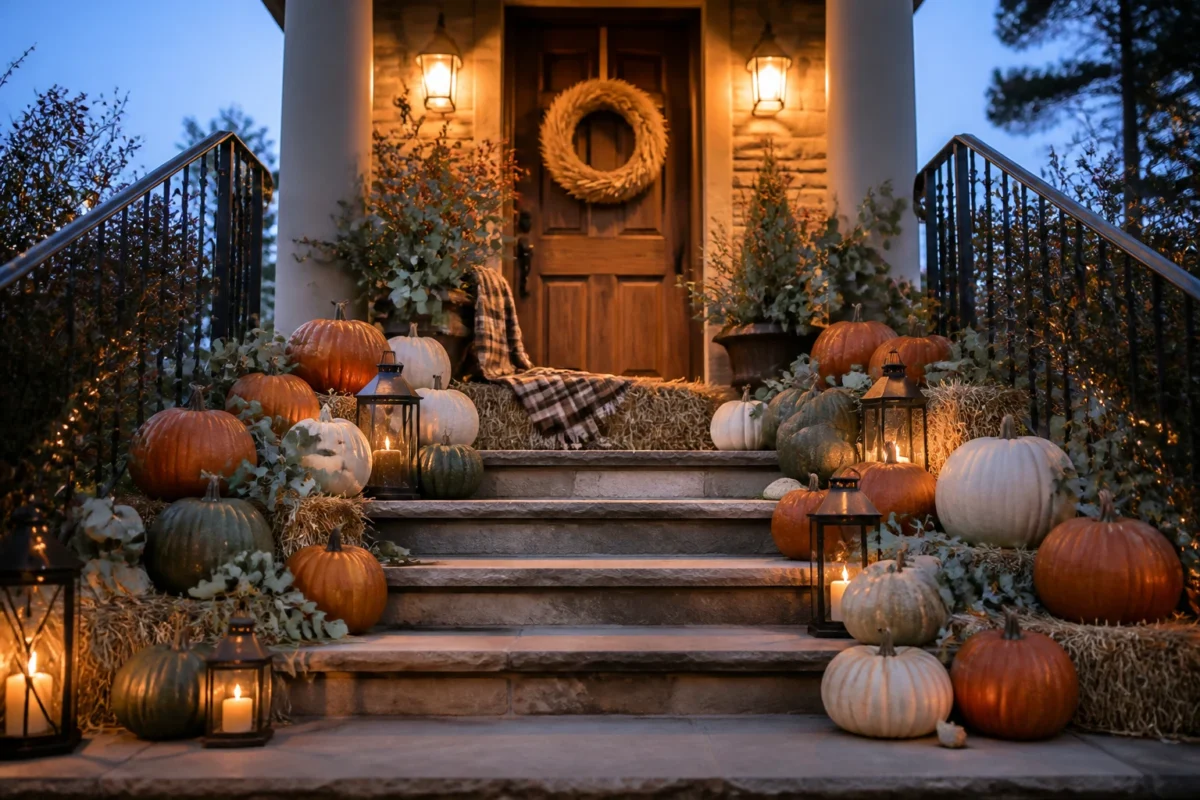
These are not elaborate installs. You can pull each look together in a weekend afternoon, cap the budget at a level you choose, and keep reusing pieces through Thanksgiving. Expect saturated color, texture you can practically touch, and small styling tweaks that solve real-life frustrations—uneven steps, kids who treat gourds like bowling balls, and that one lantern that always looks lonely. If you crave cozy bright autumn with real depth and glow, you’re exactly where you should be. This vibe is perfect for spirited households, pumpkin-spice diehards, and anyone who wants front steps that feel like a warm welcome home after the pumpkin patch.
1) Lantern Cluster Glow With Rust Pumpkins On Wide Front Steps
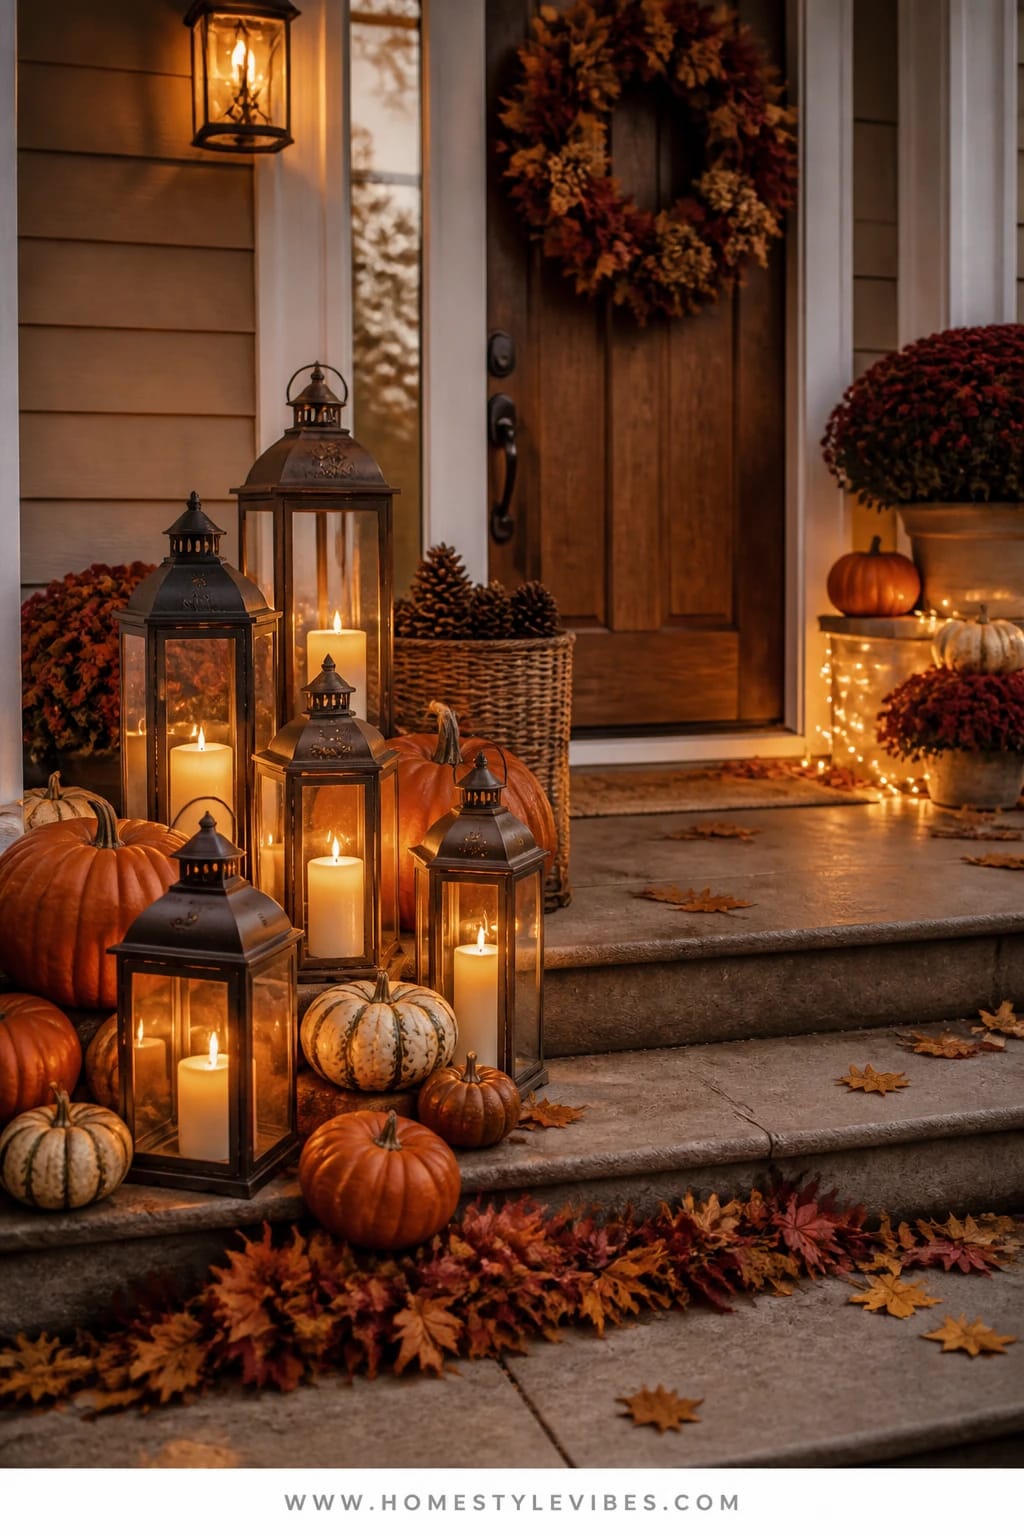
We’ve all been there—your porch steps are wide, your pumpkins are cute, and somehow the whole thing still looks…empty. Wide steps can swallow scale, so the pieces you carefully placed look like tiny dots in a big open field. That’s why a tight cluster of lanterns paired with rich rust and deep orange pumpkins is the move. It reads like a warm campfire at your front door: layered candle glow, pockets of light and shadow, and lush color that holds its own even at dusk.
This look creates classic cozy bright warmth. It’s family-friendly, easy to move for trick-or-treaters, and you can store most of it for next year. Lanterns are workhorses—use flameless candles on timers so your porch lights itself every night. On wide steps, clustered lighting makes all the difference. You’re corralling light, not scattering it, which brings the whole composition together. The glossy glass of lanterns bounces candlelight back onto the pumpkins, and the rust tones saturate beautifully in photos. That little flicker against matte pumpkin skin? Chef’s kiss.
Want to tailor the cost? Start with three lanterns and five pumpkins instead of going full harvest. Live somewhere windy? Weighted lanterns with latch doors keep you from relighting candles every five minutes. Going into November? Swap in a few muted tan pumpkins and add a plaid blanket scarf folded neatly on the bottom step for a nod toward Thanksgiving without rebuilding the whole display.
Budget Breakdown:
- Lanterns (metal + glass, medium to large): $25–$60 each
- Flameless candles with timers (set of 3–6): $20–$45
- Rust and deep orange pumpkins (mix of sizes): $2–$15 each
- Doormat in coordinating tones (optional): $15–$40
- Small brass or black candle snuffer (optional styling prop): $8–$15
Total Estimated Cost: $120–$260
Best For: Homes with broad or deep steps that need strong focal points. Great from late September through Halloween, then soften with neutral pumpkins and wheat for early November.
Key Design Elements:
- Main seasonal props: 5–9 lanterns in mixed heights, rust and deep orange pumpkins, a single plaid scarf or doormat
- Color palette: Rust, cinnamon, deep orange, hits of black or oil-rubbed bronze from the lanterns
- Lighting strategy: Clustered flameless candles on staggered timers for an effortless nightly glow
- Textile layers: One plaid scarf folded on the lowest step for warmth
- Natural elements: Real pumpkins, a few clipped branches or dried oak leaves tucked beside the clusters
- Accent details: A small copper bucket with strike-anywhere matches (purely decorative if using flameless), black metal handles
How To Recreate This Look:
- Start with three lanterns grouped at one end of your bottom step; vary heights for visual interest.
- Add a second cluster of two lanterns on the opposite side two steps up to create a zig-zag rhythm.
- Layer 5–7 pumpkins around the lantern bases; nestle the smallest close to lantern edges so the glow hits them.
- Place a single plaid scarf folded like a runner on the bottom step under one cluster.
- Style with a few dried leaves and a copper bucket; set candle timers for sunset and midnight off.
Why This Looks Expensive: Repetition makes it feel intentional. Multiple lanterns in similar finishes read like a collected set, and the tight color story—rust and bronze—feels curated, not random.
Watch Out: Don’t spread lanterns evenly across every step. That creates a dotted-line effect that looks sparse. Keep them in clusters for drama and warmth.
Pro Styling Tip: For photos at dusk, turn off porch overheads for five minutes so your lantern glow shines; then switch them back on for guests.
Ready for more? The next idea leans into texture and height so your pumpkins stop looking like a bowling league waiting for lane assignments.
2) Hay Bale Stacks With Golden String Lights On Narrow Porch Steps
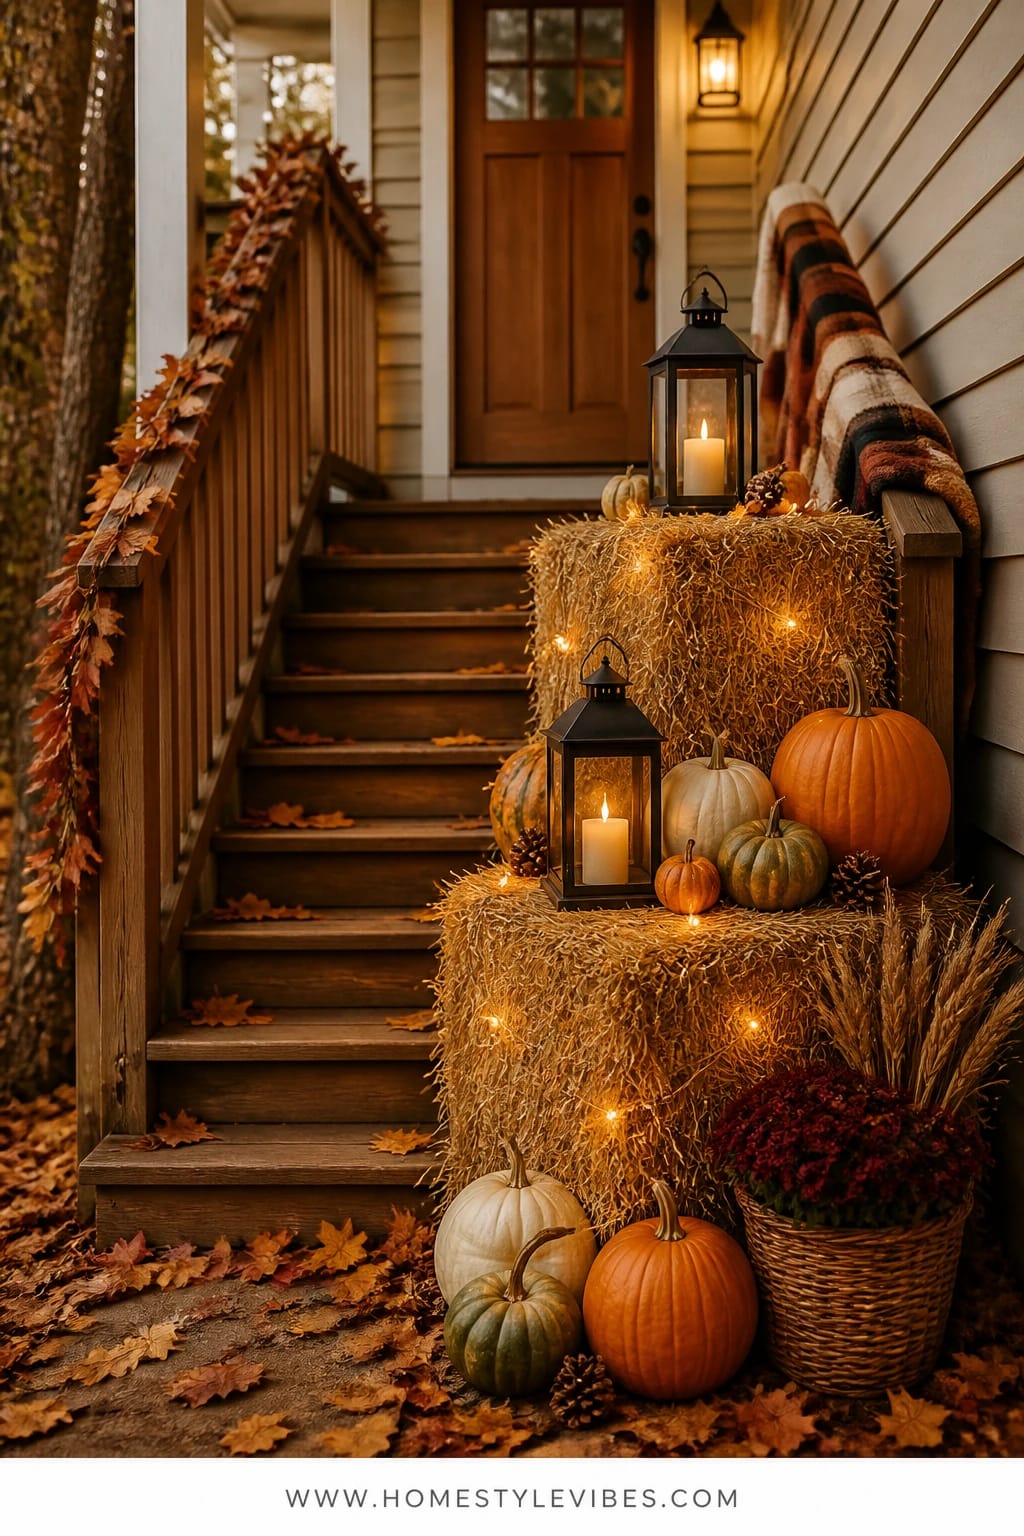
It’s that one corner that always feels off—the side with a skinny set of steps where pumpkins roll, lanterns wobble, and nothing wants to sit straight. You’ve tried a few gourds, but they still look like orphans waiting for adoption day. This setup solves the layout problem with hay bales as step “furniture.” They create platforms, texture, and instant height—then the golden string lights lace everything together, like a frame around your favorite painting.
The mood is harvest abundance. Hay brings a barn-visit feeling in the best way—papery rustle, warm gold, the invitation to linger. It works in real homes because hay bales anchor everything. They’re forgiving on uneven steps, give you levels for pumpkins and lanterns, and photograph like a dream with all that rough texture. Add a glow line with mini string lights and suddenly even a tiny stoop looks styled and finished.
Live in a leafy neighborhood? The hay catches fallen leaves that would otherwise scatter, turning mess into mood. Concerned about critters? Wrap bales in burlap—still rustic, less enticing. For a small-space variation, use straw wreaths laid flat as mini platforms instead of full bales. It’s surprisingly sturdy and great for renters who don’t want to wrangle full-size hay blocks.
Budget Breakdown:
- Hay or straw bales (2–4): $8–$15 each
- Mini outdoor warm-white string lights (2–3 strands): $10–$20 each
- Pumpkins in mixed sizes and colors (lean warm/gold/peach): $2–$15 each
- Two mid-size lanterns (to flank the hay stack): $25–$45 each
- Burlap or plaid throw (optional wrap): $10–$30
Total Estimated Cost: $100–$220
Best For: Narrow or slightly sloped steps that need stable display surfaces. Best from early October through Thanksgiving, with lights keeping things festive as days get shorter.
Key Design Elements:
- Main seasonal props: 2–4 hay bales, golden string lights, pumpkins, 2 lanterns
- Color palette: Golden straw, warm white glow, peach and amber pumpkins, touches of brown from burlap
- Lighting strategy: Wrap lights around the bales and trail up the stair rail or edge to guide the eye
- Textile layers: Burlap wrap on bales or a plaid throw for softness and visual order
- Natural elements: Hay/straw texture plus a few wheat bundles
- Accent details: Simple galvanized bucket for mums or twigs; wire U-pins to secure lights
How To Recreate This Look:
- Start by placing one hay bale on the bottom step, then one offset on the step above to create a staggered stack.
- Add a second pair on the opposite side if you have room; keep a clear walking path.
- Layer pumpkins on top and slightly into the hay; press gently so they nestle and don’t roll.
- Wrap warm-white string lights around the bales, then drape a loose trail up the rail or along the step edges.
- Place a lantern on each side of the main bale stack, and tuck a few wheat bundles between pumpkins.
Why This Feels Designer: Height variation and texture do the heavy lifting. The hay acts like built-in risers, so every pumpkin reads as intentional instead of accidental.
One Thing To Avoid: Don’t choose cool-white or blue-tinted lights. They fight the hay’s golden warmth and make the whole display look sterile.
Pro Styling Tip: Coil extra string light length behind a bale and pin it with a U-clip; visible tangles kill the magic in photos.
Pause for a breath: Remember, this isn’t about building a showroom. It’s about crafting a welcome that actually feels like yours. If one idea whispers “yep, that’s me,” start there and let the rest wait for next year.
3) Pumpkin Spiral Stack With Amber Lantern Light On a Center Step
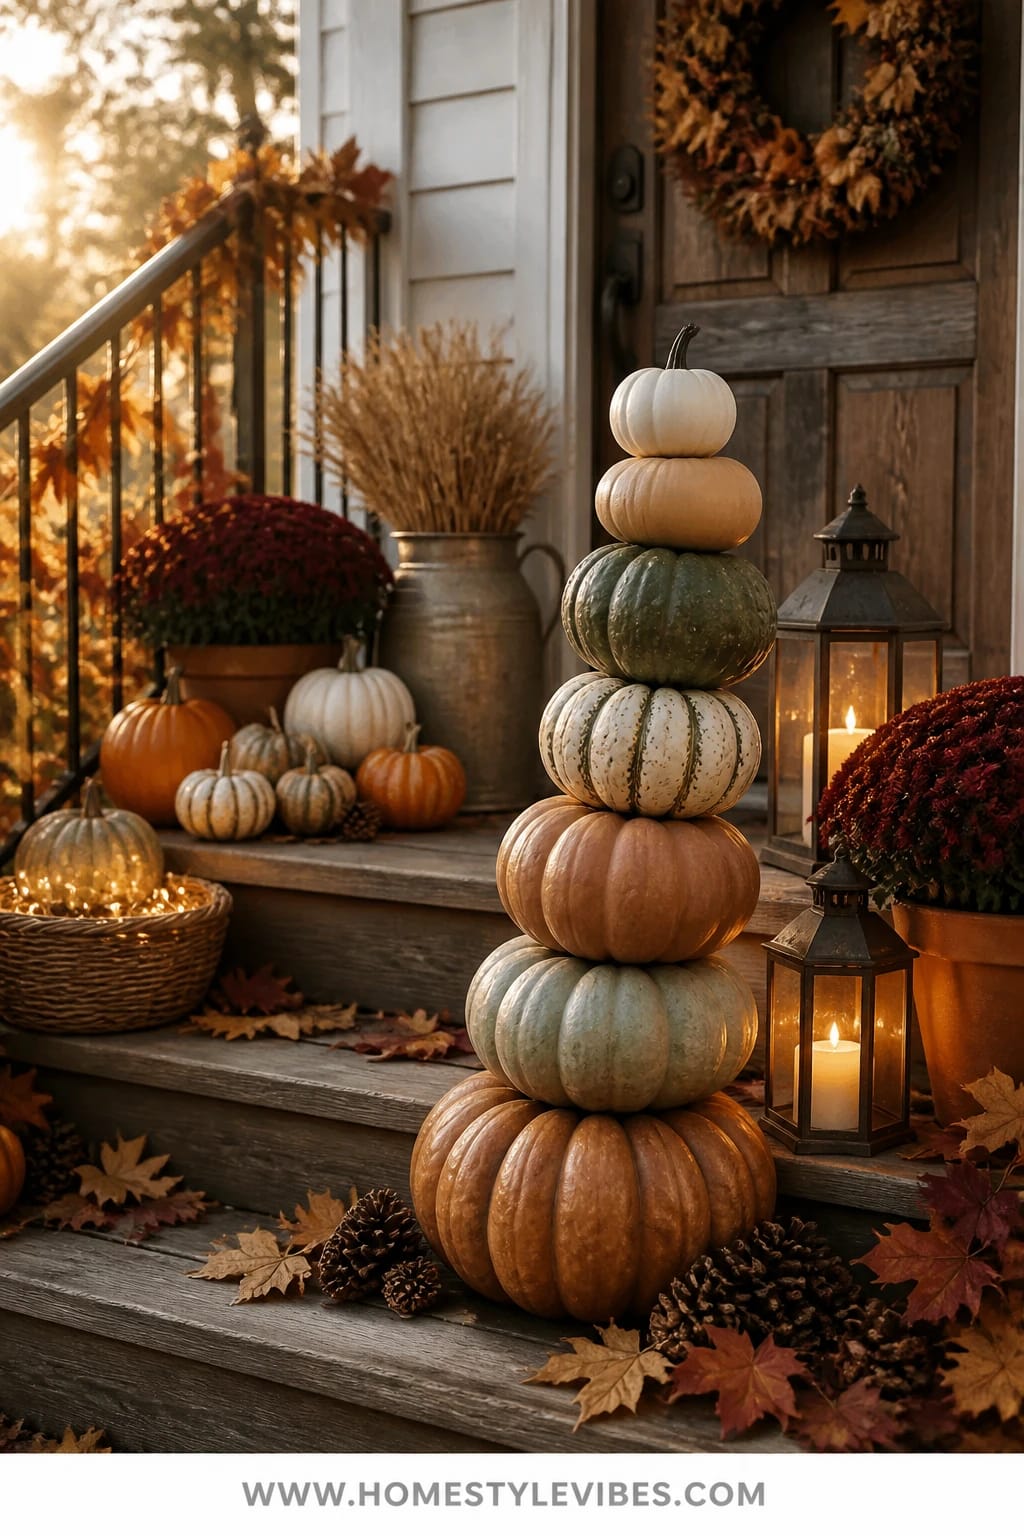
Let me guess: your steps have a “dead center” that always looks bare because you’re nervous about blocking the walkway. Same. I used to shove everything to the edges and then wonder why the middle felt like an empty stage. Enter the pumpkin spiral. It’s a sculptural stack that rises from the center step like a little harvest column, with amber lantern light grazing the curves. No clutter, just a focal point that makes the whole porch feel styled.
The mood is effortlessly cozy and a little theatrical. Because the spiral pulls the eye upward, it makes even shallow steps feel grand. It works in real life because you can scale the spiral to your space—three pumpkins for a mini version, seven for drama. Add two low lanterns on either side and boom: instant symmetry without blocking the path. At night, that amber glow catching the pumpkin ridges is pure fall poetry.
Here’s why it photographs beautifully: stacked curves create natural shadows; variation in pumpkin tone prevents a flat look; and the lantern light gives a warm gradient instead of a harsh spotlight. Variation ideas? For a simple budget, use three sizes in a soft ombre (pale orange, medium, deep). For a more playful look, add a single fairy-tale pumpkin (those squat, wavy ones) at the base for character. If kids will inevitably “gently” nudge the stack, skewer with thin wooden dowels for stability. Learned that one after my nephew sent a tower flying during an impromptu porch dance party.
Budget Breakdown:
- Mixed pumpkins (3–7): $3–$20 each depending on size and heirloom variety
- Two low-profile lanterns: $20–$40 each
- Flameless pillars or rechargeable tea lights: $10–$25
- Thin dowels or metal stakes (for stability): $5–$10
Total Estimated Cost: $85–$220
Best For: Homes with a central landing or a wide center step that needs a single showpiece. Great through the full season; scale down after Halloween by removing the boldest tones.
Key Design Elements:
- Main seasonal props: 3–7 pumpkins in gradated sizes, 2 amber-glow lanterns
- Color palette: Soft to deep orange, a hint of rust, warm amber light
- Lighting strategy: Lanterns placed slightly forward and to the sides to graze the pumpkin edges
- Textile layers: Optional thin jute or sisal mat under the base pumpkin
- Natural elements: A few dried leaves arranged around the base for “fallen” realism
- Accent details: Subtle copper or brass candle cups for extra warmth
Why This Reads High-End: A strong singular focal point looks intentional. The spiral has a sculptural quality that feels styled by design, not accident.
How To Recreate This Look:
- Start by placing your largest, flattest pumpkin as the base in the center of the chosen step.
- Add the next two sizes on slight diagonals to create a gentle spiral—avoid perfect vertical stacking.
- Layer smaller pumpkins and gourds around the base to widen the footprint and secure the column.
- Place one lantern on each side, about 8–12 inches forward, angled toward the stack.
- Style with a sprinkle of dried leaves and set candle timers for dusk.
The Most Common Mistake: Perfectly vertical towers. They look stiff and topple easier. The tiny diagonal offset is what creates movement and stability.
Pro Styling Tip: For photos, shoot slightly from the side where the spiral is most visible; you’ll get satisfying depth and a sense of motion in still images.
Halfway there. Ready for a porch moment that works even when you have almost no steps at all? The next one is your MVP.
4) Crate-and-Plaid Pumpkin Nook With Warm Lantern Glow Beside the Bottom Step
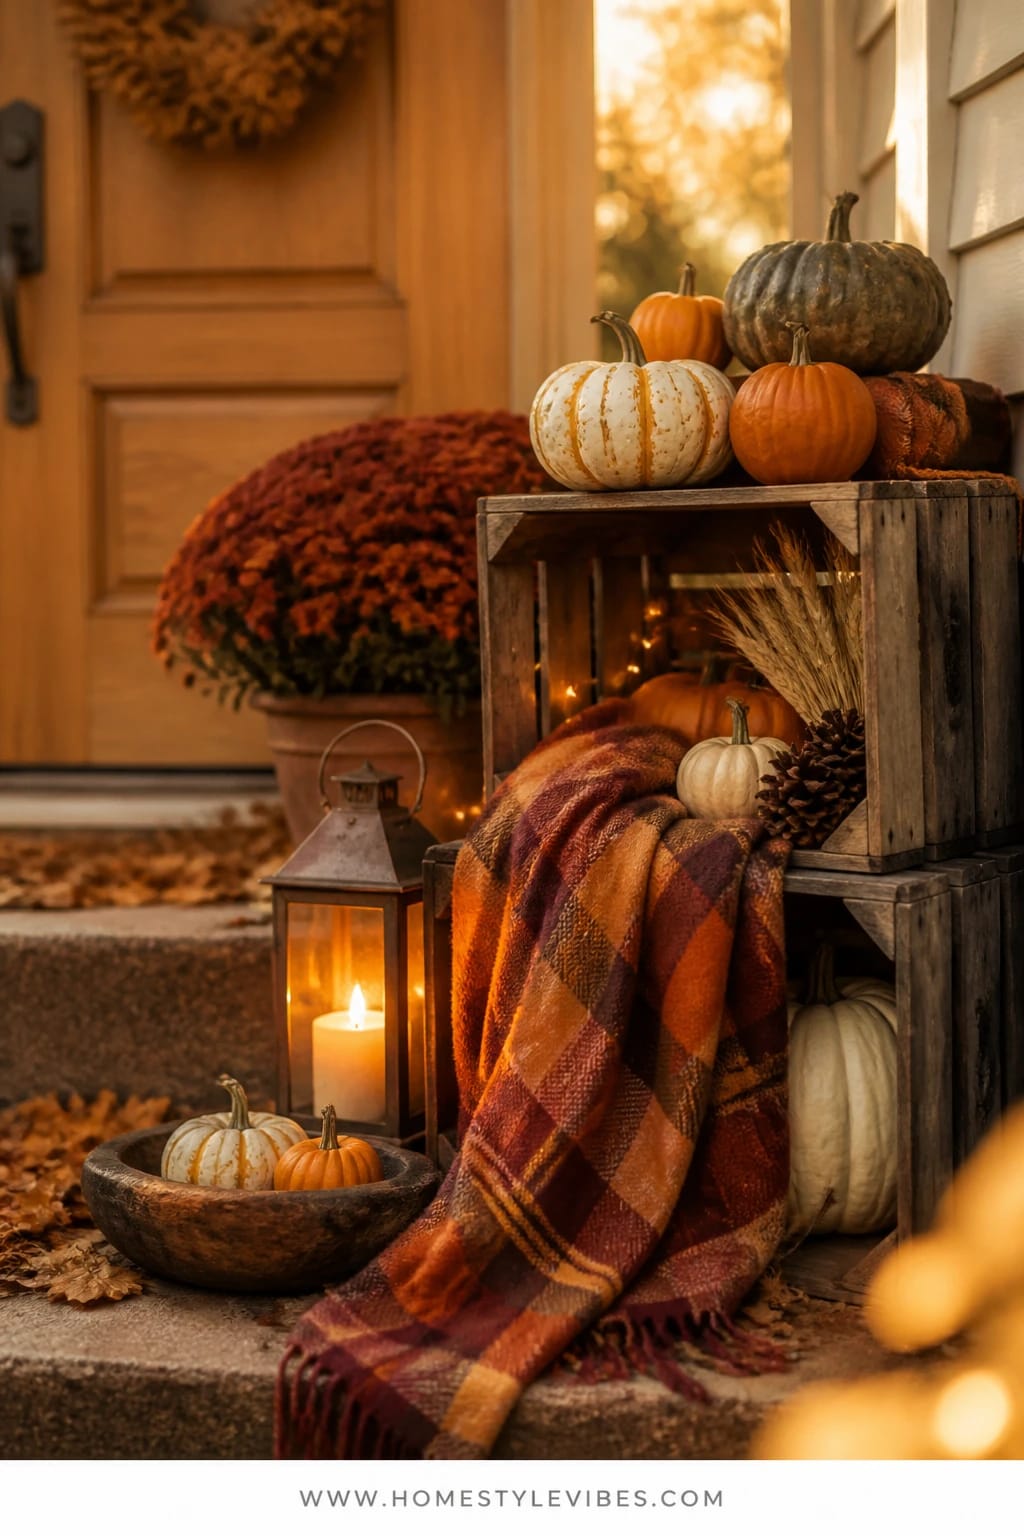
You have one or two steps, tops, and you’re convinced “porch steps decor” doesn’t apply to you. I hear this a lot, and honestly, I used to skip styling my sister’s tiny stoop entirely because everything looked crammed. Then we tried a simple wooden crate nook tucked beside the bottom step—and it turned into a small but mighty photo magnet. Think: stacked wooden crates, a plaid throw cascading like a waterfall, a handful of pumpkins, and one brave lantern leading the way.
The mood here is intimate and cozy-bright. You’re building a tiny scene just off the steps, not on them, so you protect the walkway and still get the fall vibe. Crates act like mini furniture—great for renters because they’re light, reusable, and stash in a closet off-season. The plaid adds a soft drape that makes even a sparse pumpkin collection feel abundant. At night, the lantern glow hugs those wood textures and makes the nook look intentional rather than “oops, we ran out of space.”
Here’s my micro-story: Last October, I borrowed two vintage apple crates from a friend, threw a wool throw over the top, and tucked in three white pumpkins. My phone started pinging with “OMG your porch!” texts before I even finished sweeping. The secret isn’t more stuff—it’s a defined zone with layered textures and one light source.
Budget Breakdown:
- Wooden crates (2–3): $8–$25 each depending on vintage or new
- Plaid wool or cotton throw: $20–$45
- Mixed pumpkins (3–5): $2–$12 each
- Single medium lantern: $25–$40
- Small mum or dried bouquet in a crock (optional): $10–$25
Total Estimated Cost: $75–$180
Best For: Small stoops and entryways with minimal stair space. Ideal for early season through Thanksgiving; swap in a darker plaid and a wheat bundle in November.
Key Design Elements:
- Main seasonal props: 2–3 crates, plaid throw, 3–5 pumpkins, 1 lantern
- Color palette: Warm plaid tones—rust, burgundy, wheat—plus natural wood and amber light
- Lighting strategy: Single lantern placed just in front or on the top crate for focused glow
- Textile layers: One throw draped and partially tucked for softness
- Natural elements: A small mum or dried wheat stems for vertical lift
- Accent details: Ceramic crock, small brass bell, or vintage book for character
How To Recreate This Look:
- Start by placing one crate upright and one on its side to create two levels beside the bottom step.
- Add the plaid throw across the top crate, letting it spill over one edge like a soft banner.
- Layer 3–5 pumpkins: one on top, two in the lower crate opening, and one on the ground in front.
- Place the lantern to the side of the crates so the light washes across the plaid.
- Style with a small mum in a crock on the lower crate for vertical interest.
Why This Looks Intentional: Framing. By clustering within the outline of the crates, you create a defined “scene” instead of a scatter of things that looks like leftovers.
Don’t Do This: Avoid overly busy plaids with too many colors. They compete with the pumpkins. Stick to 2–3 warm tones and let texture do the talking.
Pro Styling Tip: For photos, pull the throw forward to just kiss the ground—it leads the eye from the step into the vignette and gives that magazine-worthy drape.
Take a breath here. You don’t need five porch personalities at once. Pick the one your steps can actually hold and let it be enough. The best fall porches feel generous, not crowded.
5) Harvest Ledge With Deep Orange Pumpkins, Lantern Path, and a Hay Bale Bench
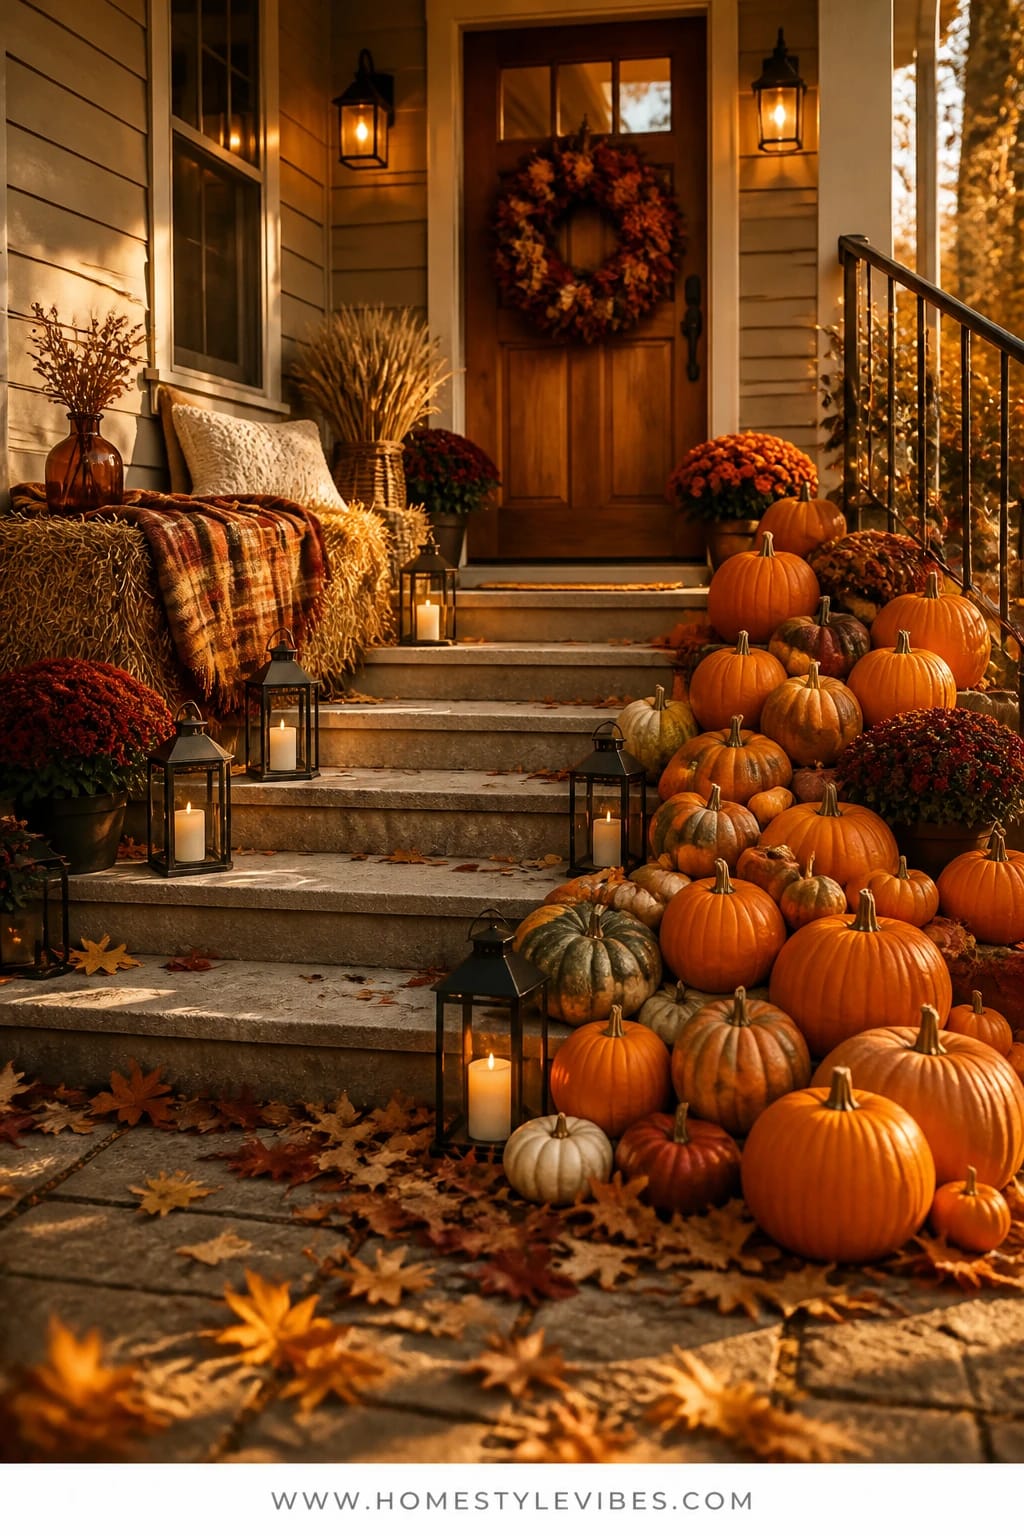
You love the idea of a porch that feels like a harvest party waiting to happen, but your steps sit in a weird configuration—maybe a side entry, maybe an L-shape—and nothing ever reads as a single story. This setup ties it all together by creating a “harvest ledge” along one edge of the steps, plus a hay bale bench that looks charming and doubles as a perch for tying shoes or sipping cider. A narrow lantern path lines the step edges, guiding guests without blocking foot traffic.
The mood is welcoming and layered—like you just came home from the pumpkin patch and artfully “forgot” to put everything away. It works in real homes because it solves the circulation puzzle. The ledge gives you a continuous zone for pumpkins, the hay bale bench anchors the scene with a friendly seat, and the lantern path marks where to walk. At night, staggered lanterns create that golden breadcrumb trail of light that looks gorgeous on a chilly evening. You’ll hear the faint crackle of wicks and catch a whiff of cinnamon if you tuck a scented pillar into one lantern by the door. Seriously, it’s delightful.
Photographs love this layout because it creates foreground, midground, and background naturally. Lanterns in front, the pumpkin ledge in the middle, door and wreath in back. If your home skews modern, choose sleek black lanterns and smooth heirloom pumpkins. If farmhouse is more you, go with galvanized lanterns, classic orange pumpkins, and a plaid throw across the bale. For longevity, I sometimes mix in two faux pumpkins at the far ends where real ones tend to sag first by the rail—no one notices, and it helps avoid the sad, half-deflated look by week three.
Budget Breakdown:
- Hay bales (1–2 for the bench): $8–$15 each
- Deep orange and classic pumpkins (8–12 total): $2–$15 each
- Lanterns for the path (4–6 smaller units): $15–$30 each
- Flameless pillars or rechargeable tea lights (multi-pack): $20–$40
- Outdoor-safe plaid cushion or throw for the bale (optional): $15–$35
Total Estimated Cost: $160–$380
Best For: Side-entry porches, L-shaped step runs, or homes with a railing that creates a natural edge. Perfect for late October gatherings and easy to soften for Thanksgiving with a wheat bundle and a gratitude sign.
Key Design Elements:
- Main seasonal props: Hay bale bench, pumpkin ledge line, 4–6 lanterns forming a gentle path
- Color palette: Deep orange, cinnamon, wheat, and black or galvanized metal
- Lighting strategy: Evenly spaced, low lanterns along the step edges for safe, warm glow
- Textile layers: One plaid throw or outdoor cushion on the bale to invite sitting
- Natural elements: Wheat bundle or dried corn stalks at the end of the ledge for height
- Accent details: A small wooden sign, vintage apple basket, or hammered copper mug
How To Recreate This Look:
- Start by placing the hay bale at the top or side of your steps where it won’t block the door swing.
- Add a plaid throw or cushion to soften the seat.
- Layer pumpkins along the step edge opposite the walking path, mixing heights and sizes tightly.
- Place lanterns 24–30 inches apart along the open side to form a gentle, safe light path.
- Style with a wheat bundle or corn stalks at the far end for a vertical punctuation mark.
Why This Looks Expensive: Cohesion through repetition. The lantern line guides the eye and the pumpkin ledge creates a continuous band of color. Together, they read like a professional install.
Watch Out: Don’t set lanterns where people step. Keep them just outside the footpath to avoid stubbed toes and toppled decor.
Pro Styling Tip: For photos, crouch low so the lanterns create a leading line into the scene; that layered depth screams “pin me.”
Before we wrap, a quick mindset nudge: You don’t need designer everything. You need rhythm—clusters and lines, tall and low, glow and shadow. That mix is what makes your fall porch steps decor feel alive and welcoming.
Quick Checklist
- Decide on one focal strategy: cluster, stack, ledge, nook, or path
- Choose a warm palette: rust, cinnamon, deep orange, wheat
- Gather 2–6 lanterns in one metal finish
- Set flameless candles on staggered timers
- Buy pumpkins in mixed sizes and at least two tones
- Add one texture amplifier: hay bale, straw wreath, crates, or plaid throw
- Secure pieces on uneven steps with museum putty or silicone bumpers
- Hide cords and extra light length behind hay or within crates
- Leave a clear walking path for safety
- Plan one quick November swap: add wheat, remove the brightest oranges
Frequently Asked Questions
How do I keep the budget in check when styling my fall porch steps?
Choose one hero element and build around it. For example, invest in 3–4 good lanterns you’ll use every year, then buy affordable pumpkins from a local farm stand. Skip the extras until you see what gaps need filling. Also, crates and straw wreaths act as budget risers instead of multiple hay bales.
Should I use real or faux pumpkins for outdoor steps?
IMO, real wins for texture and color. That said, mix two or three high-quality faux pumpkins at the edges where real ones tend to soften first. It keeps the display looking fresh longer and you’ll spend less replacing mushy gourds mid-season.
What if I have very small steps or a rental stoop?
Go with the crate-and-plaid nook beside the bottom step. It keeps the walkway clear and uses lightweight, non-permanent pieces. Choose flameless candles and avoid drilling or attaching anything to the building.
How do I store everything after the season without taking over my garage?
Nest lanterns if possible, tuck smaller ones inside bigger ones with bubble wrap, and store in a single labeled tote. Fold throws and burlap flat in a vacuum bag. If you used hay or straw, compost it or offer it to a neighbor with a garden. Keep a small box of flameless candles and extra batteries together so you’re not hunting next year.
Are candles safe with kids and pets on the porch?
Use flameless candles for nightly glow—set them on timers and forget it. If you must have a real flame for a party, light only the top-level lanterns, keep doors closed to block curious noses, and snuff everything before guests leave.
When should I start decorating my porch steps for fall?
Late September is a sweet spot. If you decorate earlier, lean on faux or long-lasting pumpkins and mums, then refresh with a few fresh heirlooms in October. Transition to Thanksgiving by dialing down the bold oranges and adding wheat or a deep plaid.
Where To Go From Here
Pick one concept that matches your steps and commit. Cluster lanterns for glow, stack a pumpkin spiral for a sculptural focal point, or build a tiny crate nook that turns nothing space into a warm hello. The truth is, cozy bright autumn magic comes from layering—pumpkins in mixed sizes, warm amber light, and a little texture that catches the eye.
You don’t need more stuff; you need a rhythm that feels like home. Light plus color plus texture. That’s it. Start small this afternoon, set those candle timers, and step back at dusk. You’ll see it—the glow that says, “Come on in.” And you’ll think, yep, we did fall right this year.

About the Author

Krisztina P.Rendes, Founder of Home Style Vibes
Founder of Home Style Vibes
Krisztina Puskásné Rendes created Home Style Vibes as a cozy-modern lifestyle space where homemaking meets inspiration. Her goal is to help women create beautiful, organized, and peaceful homes they truly love — without overwhelm. You’ll find here heart-driven content on home decor, cleaning tips, easy family recipes, organization and decluttering, DIY home projects, plants, and seasonal ideas — all designed to bring more calm, comfort, and style into everyday life.