5 Halloween Porch Lighting Ideas For A Spooky Glow After Dark
You want your Halloween porch to stop neighbors in their tracks with a spooky glow after dark. You hate that it always turns into a chaotic tangle of orange lights and plastic that somehow reads “kid birthday party” instead of “stylish haunted mood.” You picture candlelit shadows, flickering jack-o’-lantern grins, crows perched quietly, and a gentle, eerie light that makes everyone whisper, “Whoa.” These five Halloween porch lighting ideas fix the most common frustrations—dead zones with no light, messy cords, flat color, and décor that looks great at 4 p.m. and tragic at 9. Give me one evening and a modest budget cap of $200 per setup, and we’ll get you a porch that photographs like a dream and feels like a small theatrical moment every night in October.
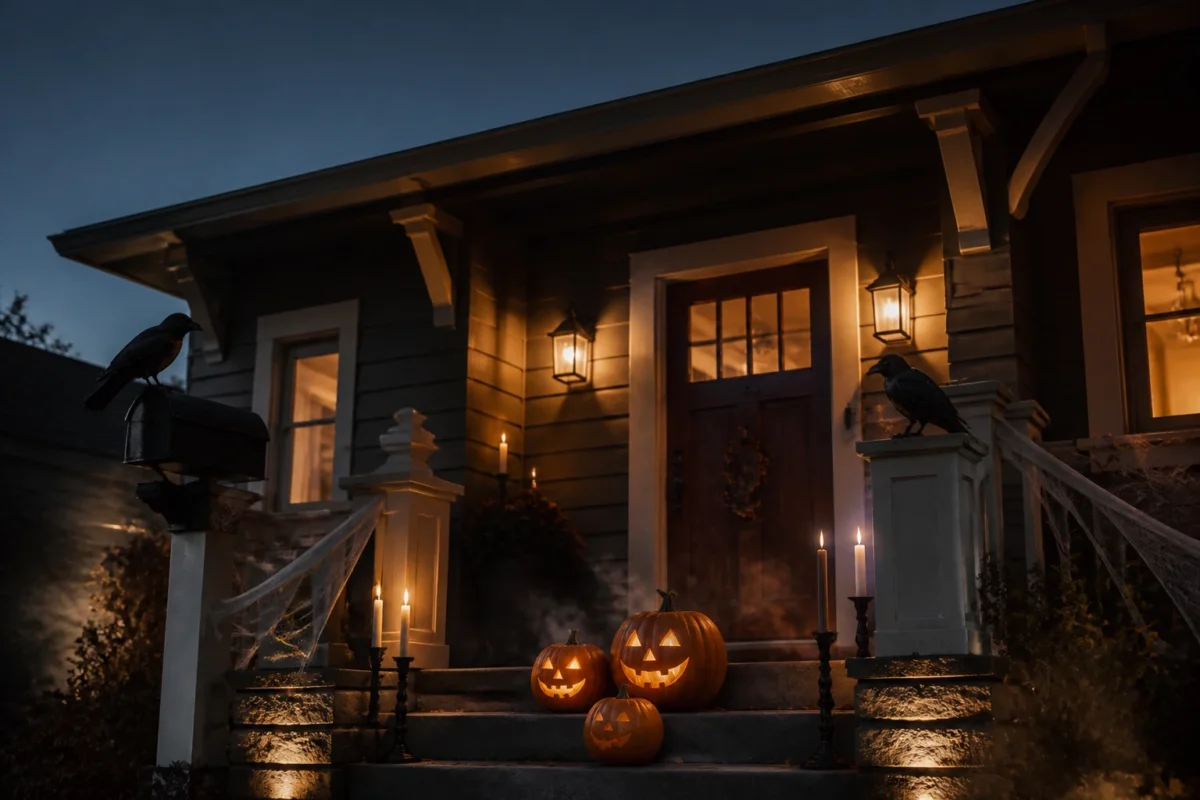
We’re going full Halloween here—classy spooky, not gory. Think black taper candles, antique brass, matte-black lanterns, jack-o’-lanterns with carved personalities, subtle cobwebs, and a few ravens that look like they’ve been nesting there since 1887. This is seasonal styling for real homes with actual foot traffic, delivery boxes, excited kids in costumes, and pumpkins that realistically will get a little soft by week three. If you love moody magic with practical tricks, you’re home. Ready? Let’s light it up.
1) Jack-O’-Lantern Cluster With Smoky Candlelight On the Porch Steps
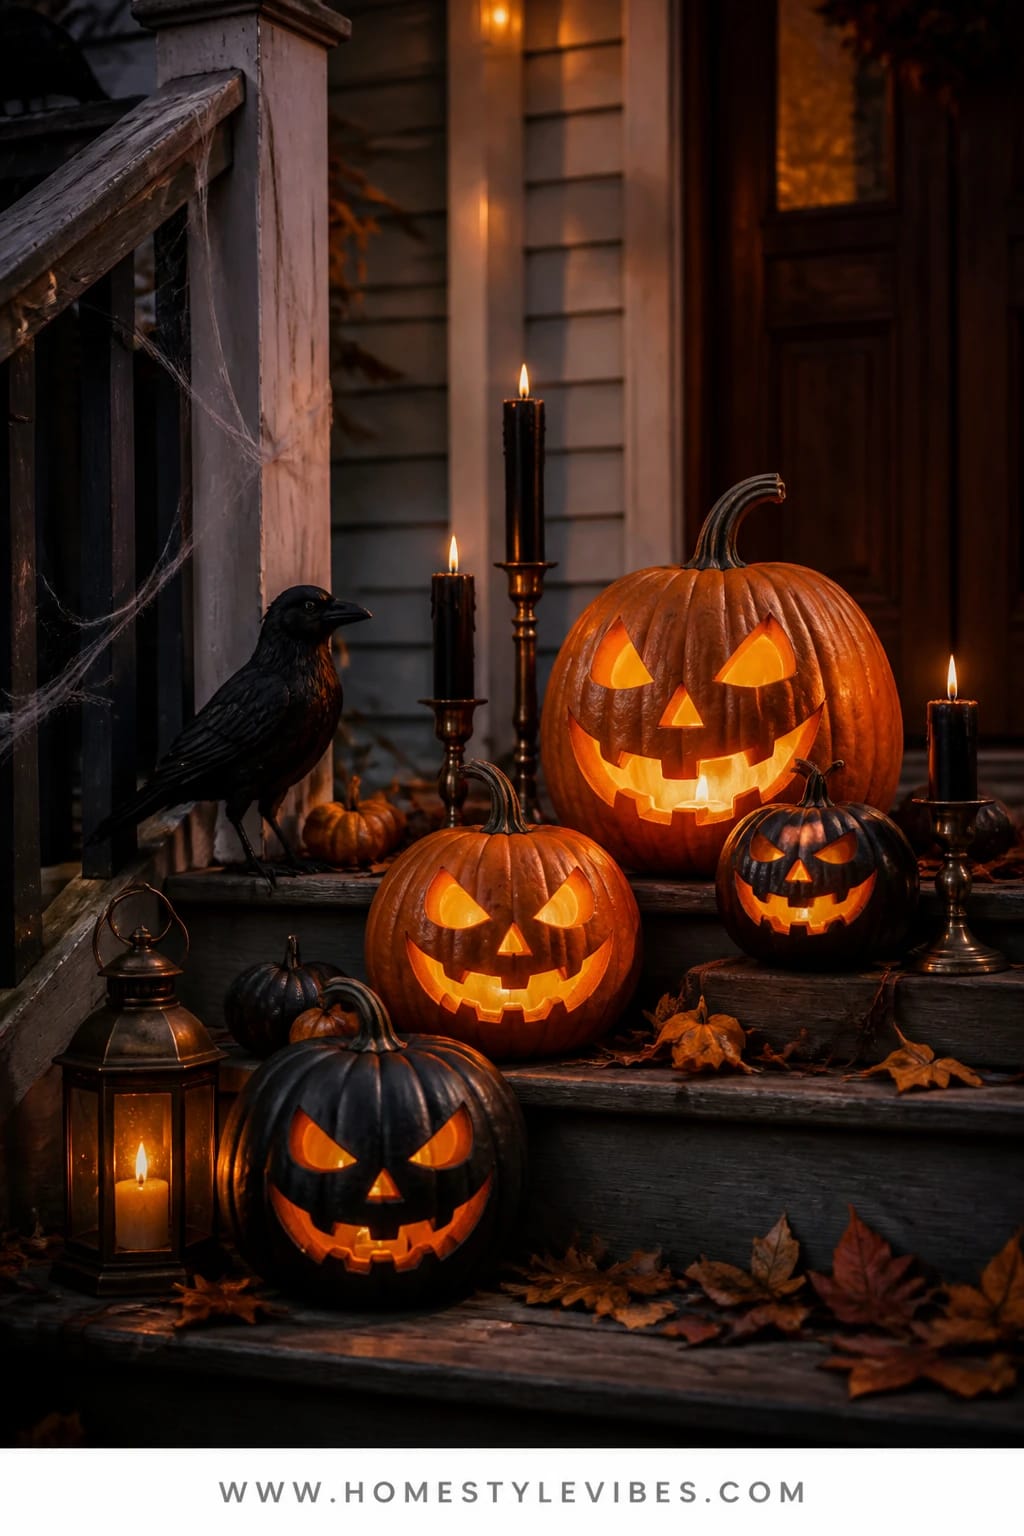
We’ve all been there: you carve three pumpkins, plop them on the steps, and by nightfall the glow disappears because the light gets swallowed by the dark and your porch looks… meh. This setup solves that with layered candlelight—some real, some faux—so your steps glow with a moody, Halloween hush. The vibe is playful haunted: mischievous pumpkin faces, candlelit shadows licking the risers, a hint of smoke in the cool air. It works on any front stoop with a few steps, and it’s easy to scale up or down depending on your budget and how many trick-or-treaters storm your walkway.
Here’s why it works in real life: steps create vertical rhythm. When you stagger heights and faces, the light catches the eye in a zigzag pattern that reads exciting and dramatic in photos. Black pillar candles tucked between gourds pull the brightness downward, so you get glow at ground level and at midheight from the jack-o’-lantern mouths. The look photographs beautifully because of depth—pumpkins in the foreground, candlelight midground, a darker door as backdrop.
Variations keep it flexible: go budget-friendly with grocery-store pumpkins, a pack of battery tea lights, and a bag of Spanish moss to fill gaps. Or go for a more refined tone with heirloom dark pumpkins (nearly black-green or dusky gray), antique-brass lanterns, and beeswax tapers in hurricane sleeves. For small steps, reduce the pumpkin count and cluster tight—three is still a “party.”
Budget Breakdown:
- Real pumpkins: $3–$12 each (plan 6–10 for a fuller look)
- Battery tea lights (50-pack): $12–$20
- Black pillar candles: $10–$18 each
- Antique-style lanterns (2): $40–$80 total
- Spanish moss or preserved moss: $6–$12
- Subtle faux crow accents (2–3): $10–$24
Total Estimated Cost: $95 – $230
Best For: Porches with at least two steps, families who love Halloween night photos, and anyone who wants a high-impact look that reads festive without inflatable props. Perfect for mid-October through Halloween.
Key Design Elements:
- Main seasonal props: carved jack-o’-lanterns, black pillar candles, a raven or two
- Color palette: inky black, deep orange, candlelit amber, a little brass
- Lighting strategy: staggered glow—inside pumpkins, at ground level, and at the step edges
- Textile layers: none required, but a black doormat with a subtle pattern helps ground it
- Natural elements: real pumpkins, dried moss, a few clipped branches for height
- Accent details: antique-brass lanterns, wrought-iron candle stands, matte-black candle sleeves
How To Recreate This Look:
- Start with 6–10 pumpkins in mixed sizes and tones; carve expressive faces with different eye shapes and one silly grin.
- Add battery tea lights inside each pumpkin (2–3 each for brighter faces).
- Layer black pillar candles on the step edges, using heat-safe saucers or small trays.
- Place 1–2 lanterns at the foot of the steps to anchor the composition.
- Style with Spanish moss around candle bases and tuck in a faux crow or two on pumpkin tops.
Why This Looks Expensive: Repetition with variation—the pumpkins feel abundant but not chaotic, and the brass accents introduce a quiet, old-world note that reads custom and curated.
Watch Out: Don’t scatter pumpkins in a straight line. That’s how you flatten the scene. Keep them offset, with a trio clustering at least on one step to create a focal point.
Pro Styling Tip: For photos, light your lanterns five minutes before blue hour so the sky is still navy; that contrast makes the pumpkin faces pop without blowing out highlights.
Scroll for a look that delivers major mood with almost zero cord wrangling…
2) Black Taper Candles With Antique-Brass Lanterns On a Narrow Front Landing
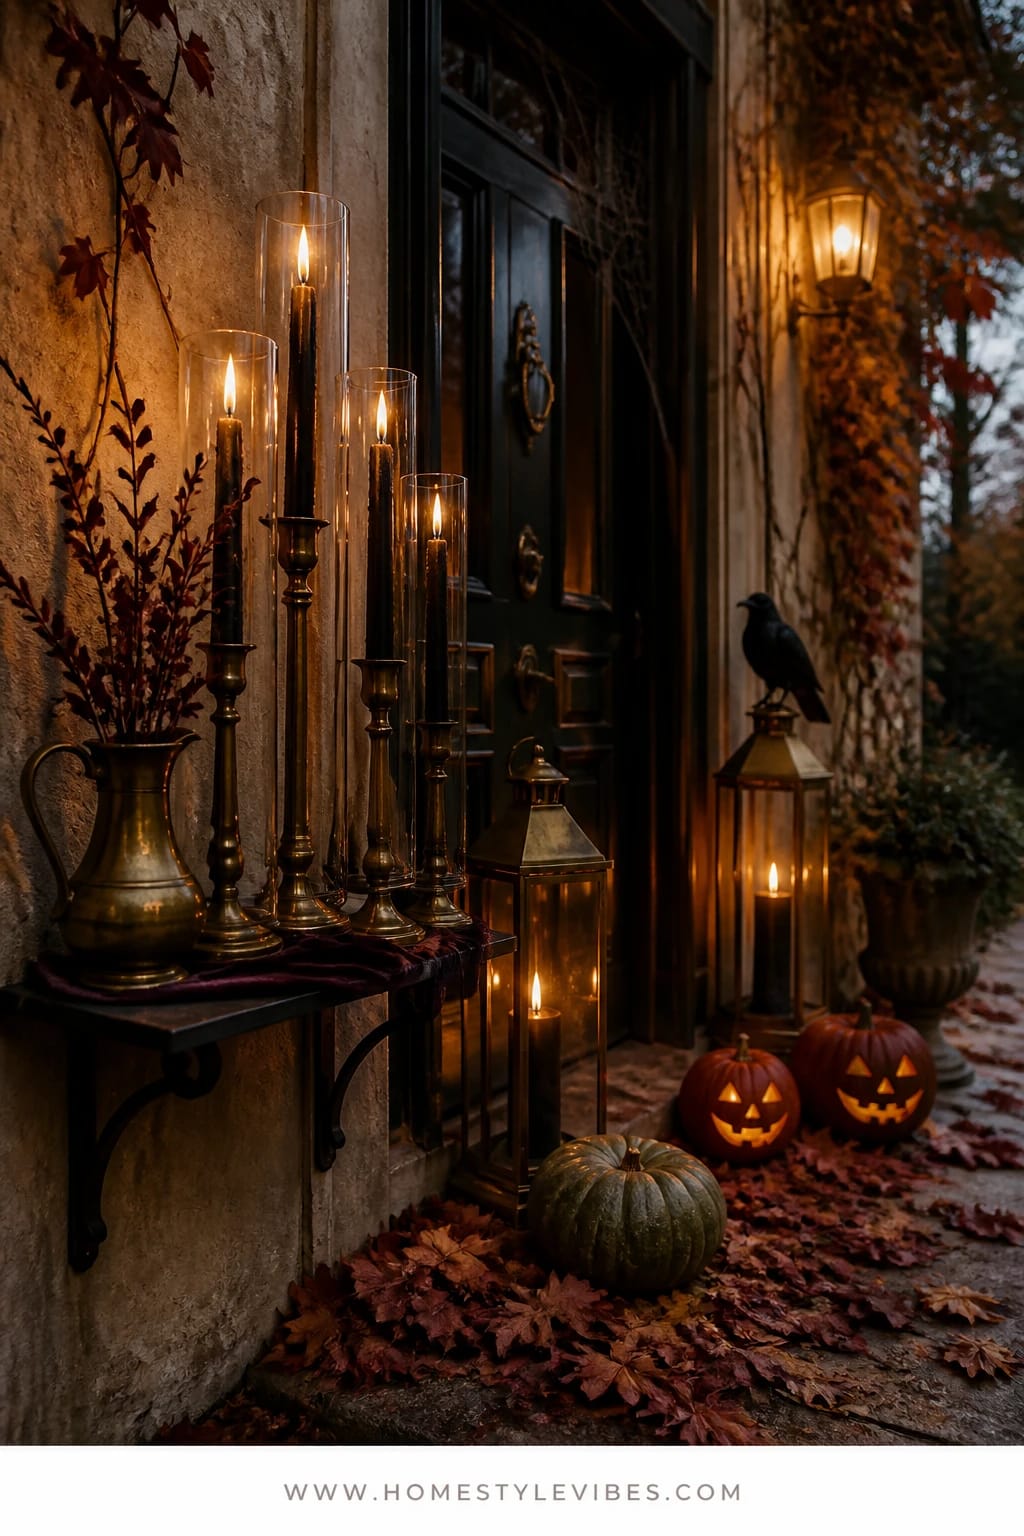
It’s that one corner that always feels off—too slim for pumpkins, too boring without them. A narrow front landing can look underdressed quickly. Instead of cluttering with props, try vertical candlelight. Black tapers in antique-brass holders placed inside glass hurricanes bring serious Halloween drama without taking up floor space. Add two tall lanterns on either side of the door, and suddenly the threshold feels like an antechamber to a haunted townhouse.
The mood is intimate candlelit theater—shadows pooling, reflections bouncing inside glass, the soft crackle of a wick. Why it works: vertical lines draw the eye up to your door, which makes the whole porch feel taller and more intentional. Glass hurricanes keep the wind from stealing the show and add extra reflections so a few candles look like a dozen. This photographs beautifully because candlelight reflected in panes gives you layer on layer of warm points without clutter.
Small-space version? Use a single tall lantern and a trio of slim taper hurricanes in ascending heights. Formal version? Go for weighty brass and thick-walled hurricanes. Budget version? Matte-black candlesticks with thrifted clear vases used as hurricanes (check that they’re heat-safe and tall enough to protect the flame).
Key Design Elements:
- Main seasonal props: black taper candles, antique-brass candlesticks, glass hurricanes
- Color palette: inky black, tarnished brass, soft amber candlelight
- Lighting strategy: tall points of light at eye level and above, plus doorway flanking lanterns
- Textile layers: a simple black coir mat or striped runner to elongate the space
- Natural elements: a bundle of bare branches in a tall urn for height and silhouette
- Accent details: a slim black metal tray to corral candlesticks, small brass bell or key as a nod to “haunted house” lore
Budget Breakdown:
- Black taper candles (12-pack): $12–$24
- Mixed candlestick set (6–8 pieces): $40–$120
- Glass hurricanes (3–5): $45–$150
- Antique-brass lanterns (2): $60–$120
- Bare branch bundle + urn: $20–$60
Total Estimated Cost: $177 – $474
Best For: Slim porches or row homes with narrow landings and anyone who prefers a sophisticated, adult Halloween look that still reads spooky after dark.
How To Recreate This Look:
- Start with a long, narrow mat to visually stretch the landing.
- Add two tall lanterns to flank the door or one lantern and a branch-filled urn for asymmetry.
- Layer a mix of brass candlesticks at varied heights on a slim tray.
- Place glass hurricanes over the tapers to protect the flame and multiply reflections.
- Style with one small brass accent at the tray’s edge—think vintage key—for a sly haunted note.
Why This Feels Designer: The consistent vertical rhythm and material restraint—black, brass, clear glass—reads edited and elegant, as if you planned it with a lighting designer.
One Thing To Avoid: Avoid short stumpy candle groupings. They get lost in the dark and feel squat. Go tall or don’t bother.
Pro Styling Tip: Space your candle heights in a 1-2-3 ratio; your eye will read the pattern subconsciously, and the photo will feel balanced without being symmetrical.
Pause and breathe. If your porch is tiny, this is your cue: tall light beats more stuff every time.
3) Webbed String Lights With Matte-Black Lanterns Along the Railing
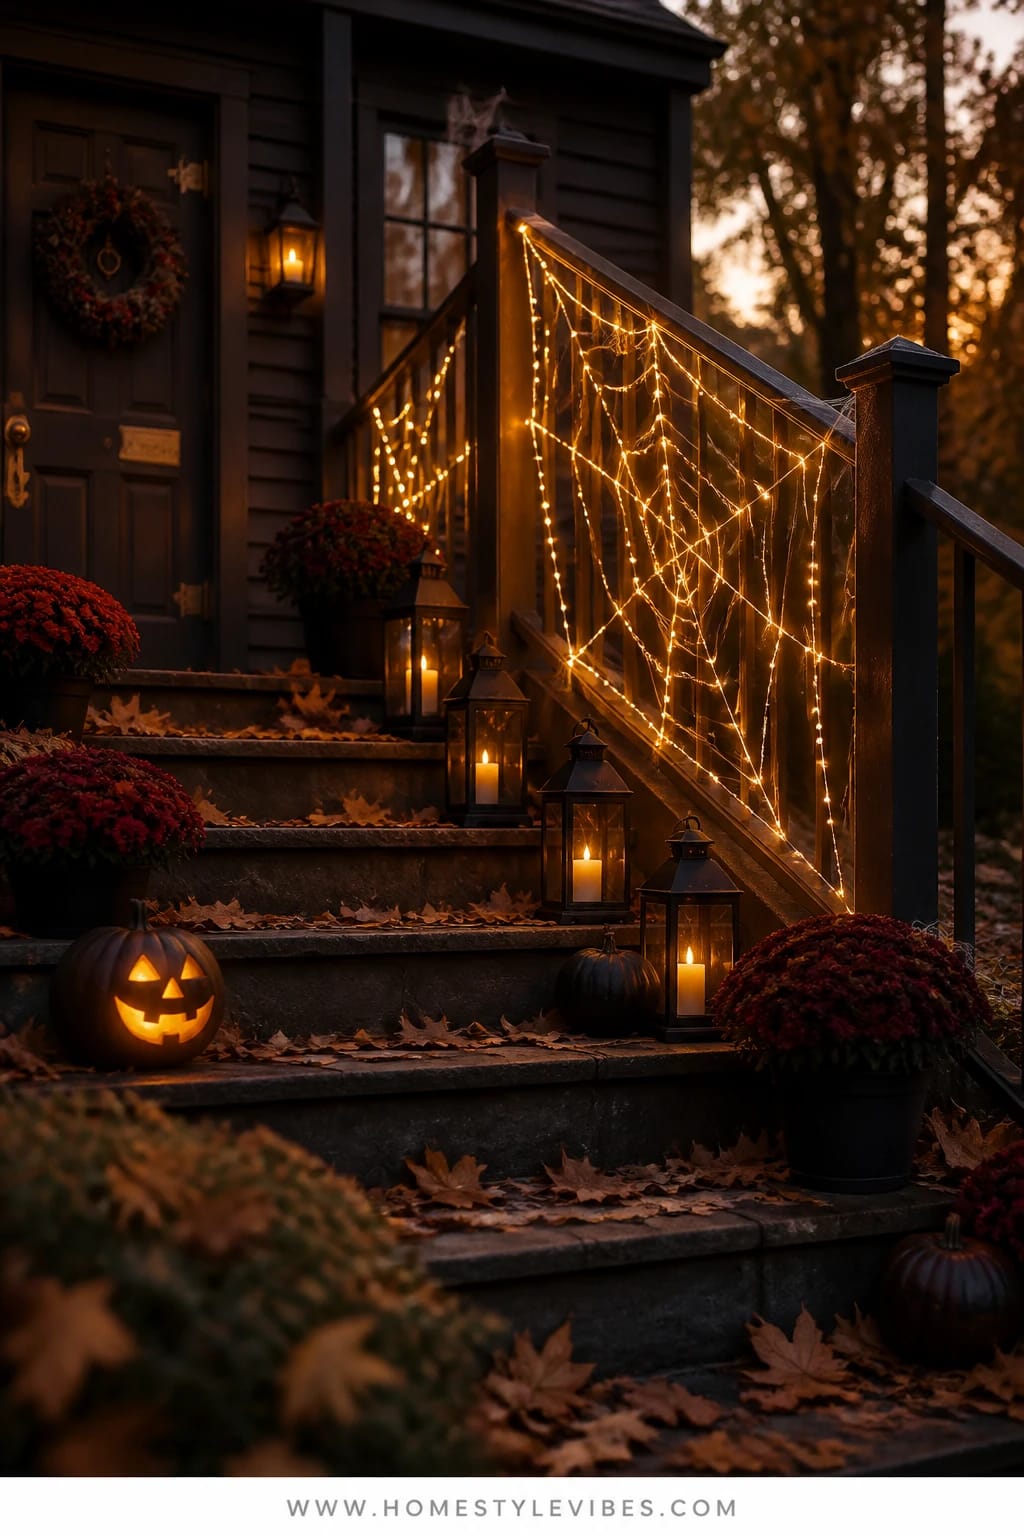
You’ve tried string lights around the railing before, but it still looks like last-minute holiday décor, not Halloween. The secret isn’t just lights—it’s how you stretch and anchor them to create a webbed pattern that nods to a cobweb without being kitschy. Pair that with matte-black lanterns at the railing posts and you’ve got a perimeter glow that feels haunted and safe for little feet.
The mood here is playful spooky with structure. Why it works: webbing the lights across vertical rails creates triangular pockets of glow and shadow that read as pattern at night. It’s family-friendly because the lights sit off the walking path, and lanterns at the posts mark edges for better visibility. Photograph-wise, the geometry sings—diagonal light lines cut the frame, and the black lanterns anchor every vertical, so your porch looks styled, not strung.
Small-porch variation: web a single bay and hang one oversized faux spider as a wink. Budget variation: reuse warm-white outdoor strings you already own; spray-paint inexpensive lanterns matte-black and add battery pillars. Want more drama? Switch to dimmable Edison-style bulbs and dial them low for a vintage hush.
Budget Breakdown:
- Outdoor-rated warm string lights (2–3 strands): $30–$75
- Matte-black lanterns (4): $80–$160
- Battery pillar candles (4): $24–$48
- Subtle cobwebbing (stretchy faux, small amount): $5–$10
- Zip ties and black cup hooks: $8–$15
Total Estimated Cost: $147 – $308
Best For: Porches with railings or balustrades, families who want safe edges lit up, and homes that host neighborhood trick-or-treaters.
Key Design Elements:
- Main seasonal props: warm string lights, matte-black lanterns, delicate faux webbing
- Color palette: black, charcoal, warm white glow, tiny hints of silver in hooks
- Lighting strategy: perimeter glow and webbed diagonals to define space
- Textile layers: none needed; the pattern does the work
- Natural elements: a bundle of dried grasses in a corner urn to soften a hard railing
- Accent details: one small raven on a lantern handle for a sly narrative moment
How To Recreate This Look:
- Start with a clean railing; measure the length for light coverage.
- Add cup hooks under the top rail every 10–14 inches; alternate a high/low placement to create diagonals.
- Layer your string lights, zigzagging from high to low hooks to shape a loose web.
- Place matte-black lanterns at posts and drop in battery pillars for reliable nightly glow.
- Style with minimal cobwebbing at corners and a single raven perched on a lantern handle.
Why This Reads High-End: Purposeful geometry. The webbed light pattern looks designed, not draped, and the repeated black lanterns announce “collected,” not “random.”
The Most Common Mistake: Over-webbing with fake cobwebs. A little wisp at the corners is elegant; coating the railing looks messy and can catch on kids’ costumes.
Pro Styling Tip: Photograph from a 45-degree angle to catch the diagonal light lines and one glowing lantern in the foreground—instant depth.
Remember, this isn’t about recreating a showroom. It’s about building a porch that actually feels like yours at night—spooky, yes, but still welcoming.
4) Raven Perch With Dim Amber Uplights Beside a Weathered Bench
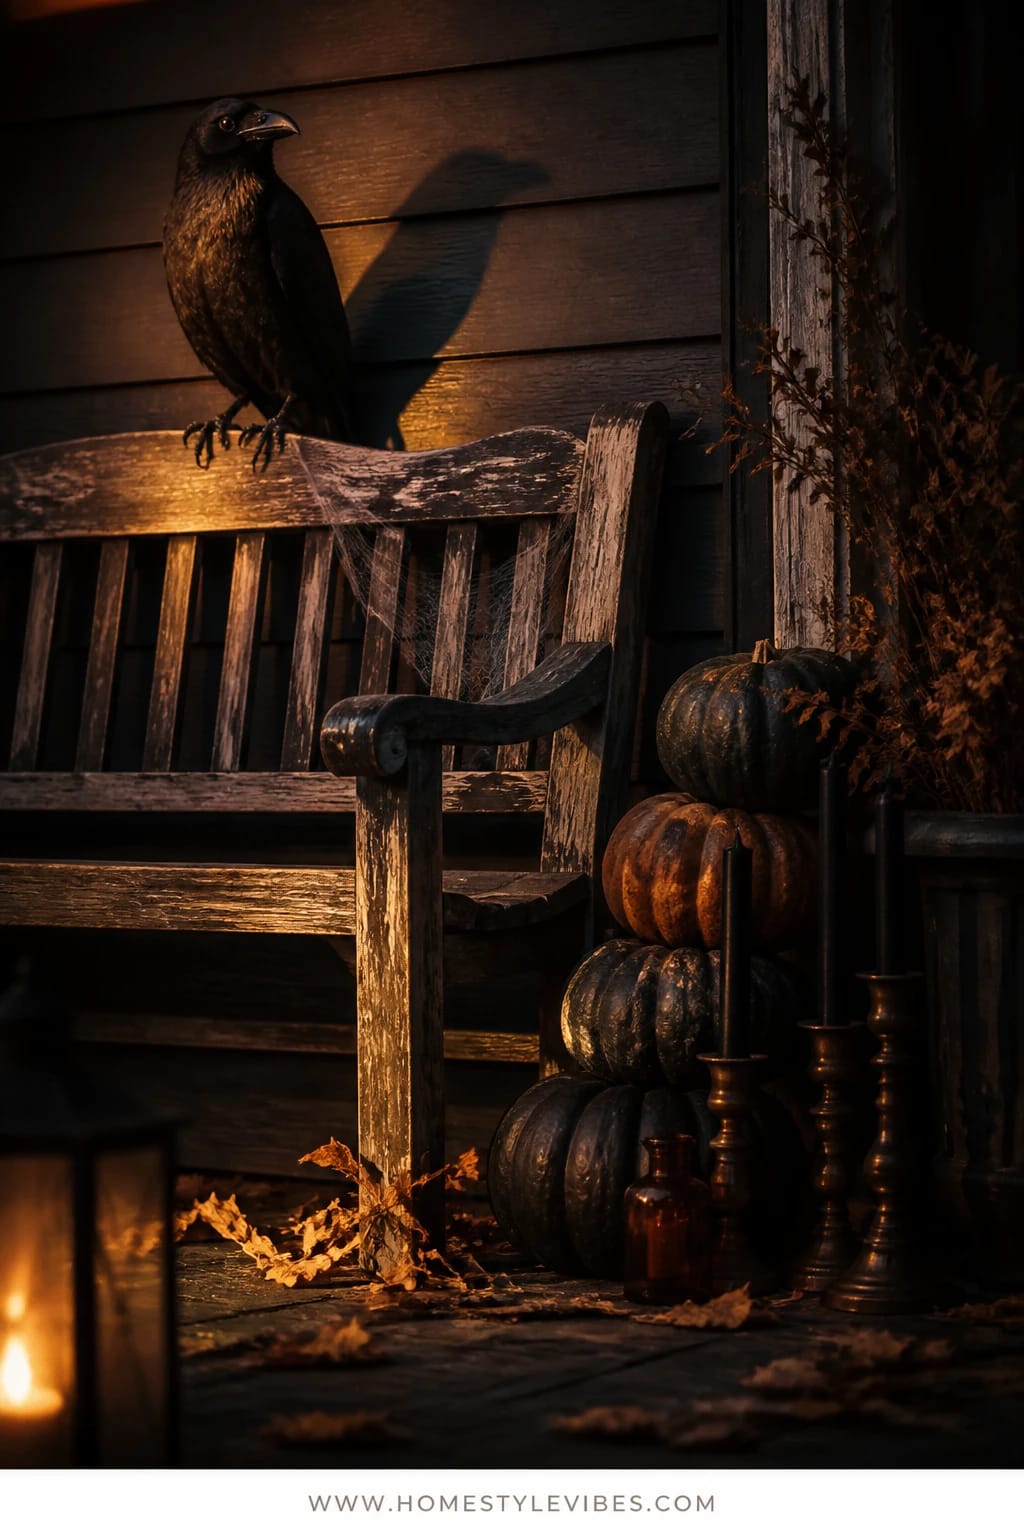
You love the idea of spooky birds and old-house vibes, but every time you set a raven out, it looks like a lonely prop from a party store. The fix is lighting from below. A pair of low-voltage amber uplights trained on a weathered bench turns your raven into a shadow-casting star. Throw in a stack of dark pumpkins at bench level and the whole scene reads like a quiet Victorian mystery right there on your porch.
This mood is mysterious, moody, and grown-up Halloween. Why it works: uplighting creates drama by exaggerating shadows, so simple objects look significant. A bench gives the scene a stage and a place to corral props without blocking the door. It’s wildly photogenic because the bench back slats catch light and create a striped shadow pattern on the wall or siding—pure texture.
Options help it fit your space: If you have siding you don’t want to bathe in light, angle the fixtures slightly outward so the glow hits your raven and pumpkins first. On a tight budget, use small amber spotlights made for pathway lighting and clip a piece of amber film (gel) to warm the tone. If your porch is wide, double the bench effect with a second perch across from the first for a symmetrical entry that feels like a set piece.
Budget Breakdown:
- Weathered outdoor bench or salvaged seat: $60–$180
- Low-voltage amber uplights (2): $40–$120
- Raven props (2–3, varying sizes): $12–$36
- Dark or heirloom pumpkins (3–5): $15–$45
- Amber lighting gel (optional): $10–$15
Total Estimated Cost: $137 – $396
Best For: Medium-to-large porches with a side wall or column to catch shadow play. Great for design lovers who want minimalist objects made dramatic with light.
Key Design Elements:
- Main seasonal props: ravens, dark pumpkins, weathered bench
- Color palette: black, charcoal, iron, dim amber glow
- Lighting strategy: low, angled uplights to cast tall, eerie shadows
- Textile layers: a black-and-cream stripe pillow for a tiny nod to pattern (remove on rainy nights)
- Natural elements: twisted bare branches tucked behind the bench back
- Accent details: iron lantern with an unlit black taper for silhouette only
How To Recreate This Look:
- Start by placing the bench where a wall or column sits behind it.
- Add two uplights on the ground, about 12–18 inches from the bench, angled up at 30–45 degrees.
- Layer 2–3 ravens along the bench back and seat; vary sizes and angles.
- Place a cluster of dark pumpkins at one bench leg to balance the composition.
- Style with a few twisted branches behind the bench for taller, creepier shadows.
Why This Looks Intentional: The bench acts like a frame, so every object has a “home.” The uplights sculpt the scene rather than just illuminating it, which always reads deliberate and refined.
Don’t Do This: Don’t point the uplights straight up at the eaves. You’ll blow out the light and lose the moody layer at eye level.
Pro Styling Tip: Set your lights to the lowest brightness that still reads on camera; dim light gives longer shadows and better photos.
Next up: a classic haunted house trick that actually helps guests find the doorbell.
5) Flickering Sconces With Carved Pumpkin Faces Framing the Front Door
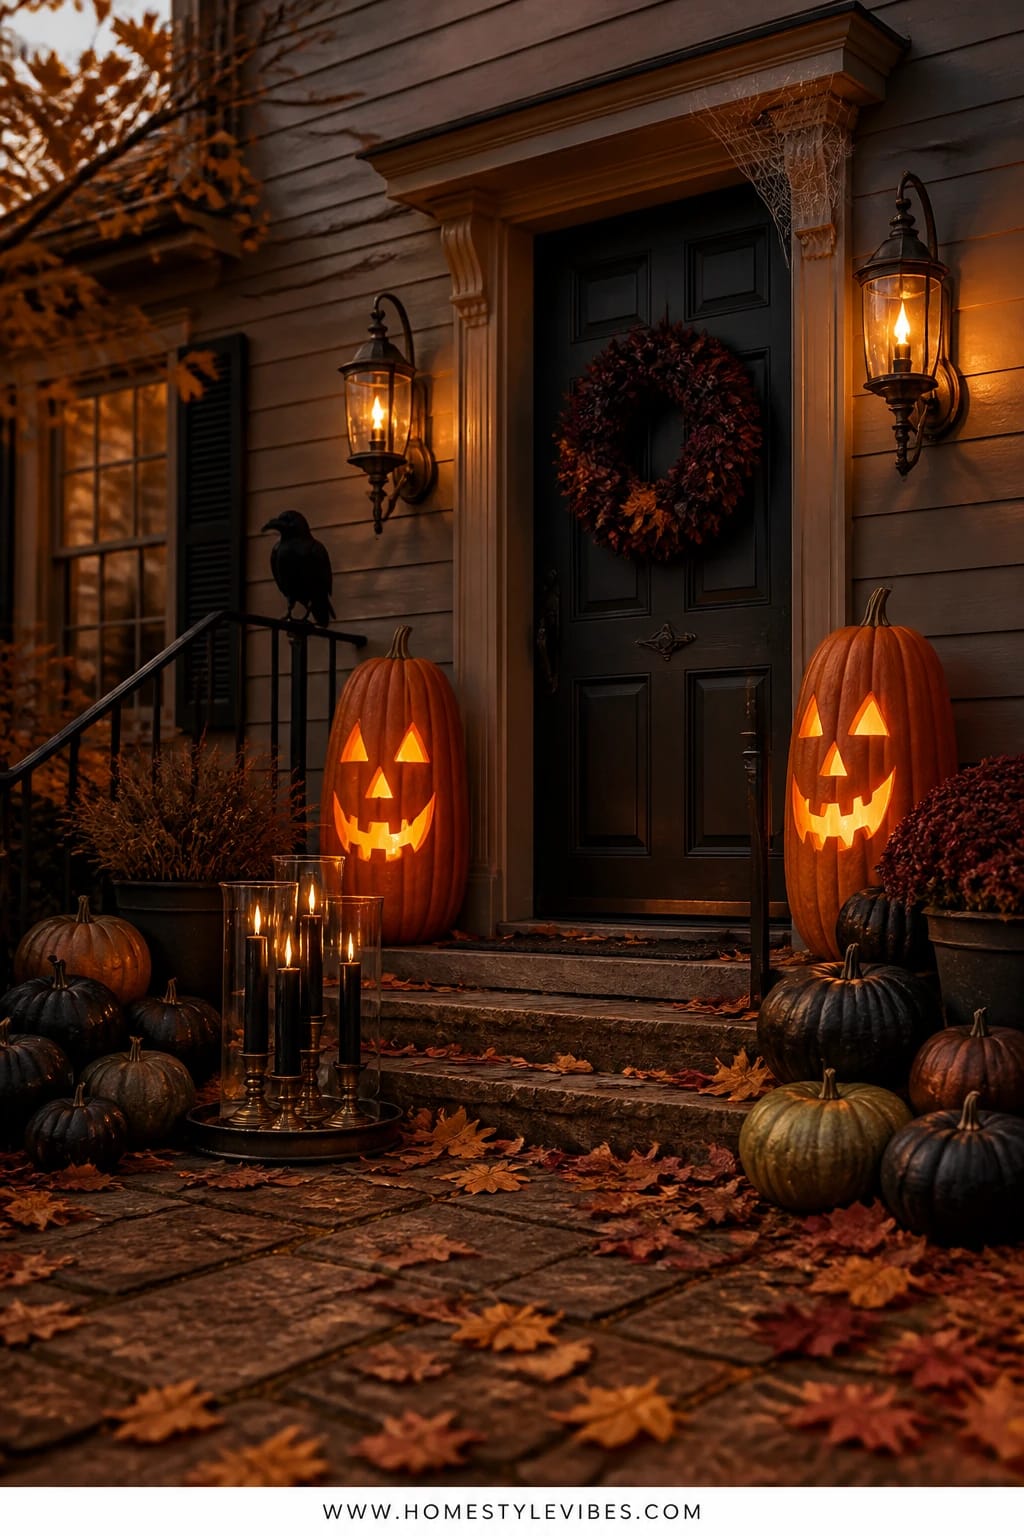
Every Halloween porch needs a front-door star moment, but many doorways fall into the black-hole effect at night—the door disappears and guests can’t find the bell. Solution: faux-flame flicker sconces paired with two tall carved pumpkins that “guard” the threshold. The sconces give you the old-house haunted gaslight vibe; the pumpkins add personality and warm grin. Together, they read as instantly festive and incredibly welcoming.
The mood is classic Halloween—flicker, grin, repeat. It works in real homes because wall-mounted or plug-in faux flame sconces deliver consistent glow every night on a timer, no fuss. Tall pumpkins add height to counterbalance door trim and wreaths. Photograph-wise, the doorway becomes a natural focal point with twin flames on either side, which draws the lens and the eye right where you want them—on your seasonal hello.
Small-space twist: use a single sconce and one commanding pumpkin with a more intricate face. Budget version: clamp-on exterior lights with amber Edison bulbs to mimic flame + one large carved pumpkin set on a crate. Family version: have each child carve one tall pumpkin and line them up like a line of spooky “guards.” I tried this last October on my own entry, and honestly the timer sconces alone solved 80% of my “where did the door go?” problem.
Budget Breakdown:
- Faux-flame outdoor sconces (pair): $80–$200
- Tall carving pumpkins (2): $14–$30
- Amber Edison bulbs (if using clamp lights): $12–$24
- Crates or stands for height: $20–$40
- Simple black wreath or raven-accented swag: $25–$60
Total Estimated Cost: $151 – $354
Best For: Any porch with a recessed door or dark paint color that vanishes at night. Great for frequent visitors, deliveries, and trick-or-treating crowds.
Key Design Elements:
- Main seasonal props: faux-flame sconces, carved tall pumpkins, a raven-touched wreath
- Color palette: black, deep wood tones, warm amber flicker
- Lighting strategy: symmetrical flame at face height plus carved pumpkin glow at knee height
- Textile layers: a black-and-natural coir doormat with a subtle pattern for grounding
- Natural elements: dried seed pods or blackened eucalyptus tucked into the wreath
- Accent details: slender brass door knocker to catch a glint of light
How To Recreate This Look:
- Start by installing or placing your flicker sconces on a dusk-to-dawn or timer setting.
- Add a simple black wreath or swag with a discreet raven near the top edge.
- Layer two tall pumpkins on either side of the door on crates to bring their faces to knee height.
- Place 2–3 battery tea lights in each pumpkin for a bright, even grin.
- Style with a classic coir mat and, if desired, a thin line of subtle cobweb along the door trim.
Why This Feels Designer: Symmetry at the door with mixed light heights (eye and knee level) looks considered and practical. The faux-flame read whispers vintage gaslight—instant story, zero cords.
Watch Out: Avoid overly ornate wreaths that compete with the sconces. You want the flame to lead; the wreath should play backup singer.
Pro Styling Tip: Photograph straight on, centered on the door, and let the sconces bracket the frame—this gives you a clean, cover-worthy shot for your October album.
If one idea resonates more than the others, that’s your starting point. You don’t need all of them—one thoughtful lighting move can make your whole porch feel finished.
Quick Checklist
- Decide on one lighting strategy: steps, landing, railing, bench, or doorway
- Choose a warm light temperature (2200K–2700K) for authentic spooky glow
- Gather 6–10 pumpkins in mixed sizes for depth
- Pick 2–4 black lanterns in one finish for cohesion
- Stock up on battery tea lights and extra AA/AAA batteries
- Add at least one height element (bench, crate, or tall lantern)
- Use glass hurricanes outdoors to protect tapers from wind
- Zip-tie cords neatly along rails or behind planters
- Place at least one light source at ground level for layered glow
- Time your lights with dusk-to-dawn sensors or simple outlet timers
- Keep cobwebbing minimal at corners only
- Tuck in one odd detail (vintage key, raven, branch) for personality
Frequently Asked Questions
How can I keep costs down while still getting that spooky glow after dark?
Prioritize lighting over props. One or two lanterns, a 50-pack of battery tea lights, and a handful of real pumpkins beats a cart of random décor. Reuse warm-white string lights you already own and focus them into a webbed pattern—design beats quantity every time.
Real or faux pumpkins—what’s best for porch lighting looks?
IMO, real pumpkins win on texture and color. They photograph richer and feel authentic. If you live somewhere warm, mix in a few faux heirloom pumpkins to hold shape after week three, when real ones can slump. Keep real pumpkins shaded and off hot concrete to extend their life.
My porch is tiny. Which idea works without making it crowded?
Go with Section 2: vertical tapers in hurricanes and one tall lantern. Vertical light reads dramatic without eating floor space. If you can fit one medium pumpkin, perch it on a crate to get it out of the walkway.
How do I store all this after Halloween without a storage room?
Invest in collapsible lanterns or ones you love year-round (use them in winter, too). Keep a single bin labeled “Porch Halloween Lighting” with your tea lights, faux crows, zip ties, and bulbs. Donate or compost real pumpkins post-season; don’t store them, obviously.
Are candles safe with kids and pets on the porch?
Use battery tea lights inside pumpkins and save real flame for hurricanes and lanterns in low-traffic zones. Place real candles behind railings or on high shelves. If you host a crowd, switch everything to battery for that night—no stress, same vibe.
When should I start decorating my porch for Halloween lighting?
Start with lanterns and string lights in late September. Add carved pumpkins mid-October so they last through Halloween night. If you crave early spooky, use uncarved heirlooms first, then carve the week of.
What if I rent and can’t install sconces or add hooks to my railing?
Use heavy lanterns, floor-standing hurricanes, and removable adhesive hooks designed for outdoor use. For “sconces,” place two tall lanterns on crates flanking the door—same symmetrical glow, zero holes.
Conclusion
Pick one idea tonight. Maybe it’s the jack-o’-lantern steps that make your walkway look like a mischievous runway after dusk, or the raven bench with shadowy uplight that tells a whole haunted story with three props and two spotlights. Start there, get it glowing, and live with it for a few nights. You’ll be surprised how one good lighting decision suddenly makes the rest of your porch make sense.
The truth is, Halloween magic lives in contrast—warm flicker against cool air, black silhouettes against amber light, playful grins tucked into real shadows. Layer a few points of glow at different heights, repeat materials in a tight palette, and let the darkness do half the styling. I still laugh about the year I bought three different garlands before realizing the problem wasn’t décor at all—it was flat light. Once I fixed the lighting, everything looked intentional, and the photos finally matched the vibe in my head.
You’ve got this. Choose your scene, light it thoughtfully, and let spooky do the rest. When the porch hums at blue hour and the first trick-or-treater whispers “Whoa,” you’ll know you nailed it. Happy haunting.

About the Author

Krisztina P.Rendes, Founder of Home Style Vibes
Founder of Home Style Vibes
Krisztina Puskásné Rendes created Home Style Vibes as a cozy-modern lifestyle space where homemaking meets inspiration. Her goal is to help women create beautiful, organized, and peaceful homes they truly love — without overwhelm. You’ll find here heart-driven content on home decor, cleaning tips, easy family recipes, organization and decluttering, DIY home projects, plants, and seasonal ideas — all designed to bring more calm, comfort, and style into everyday life.