6 Elegant Garden Party Food And Drink Ideas That Impress Every Guest
You want the kind of garden party that looks like a magazine cover—sunlit glassware, linen ripples, petals floating in coupe glasses. You hate the scramble: lukewarm drinks, droopy salads, that one ugly cooler in every photo. Imagine dusky gold light, a whisper of citrus in the air, and a table where the food and drink styling does half the hosting for you. These 6 elegant garden party food and drink ideas fix the fussy parts—serve-ware, timing, and easy prep—so you can cap your spend under $300 and still make the whole scene Pinterest-famous by Saturday at five.
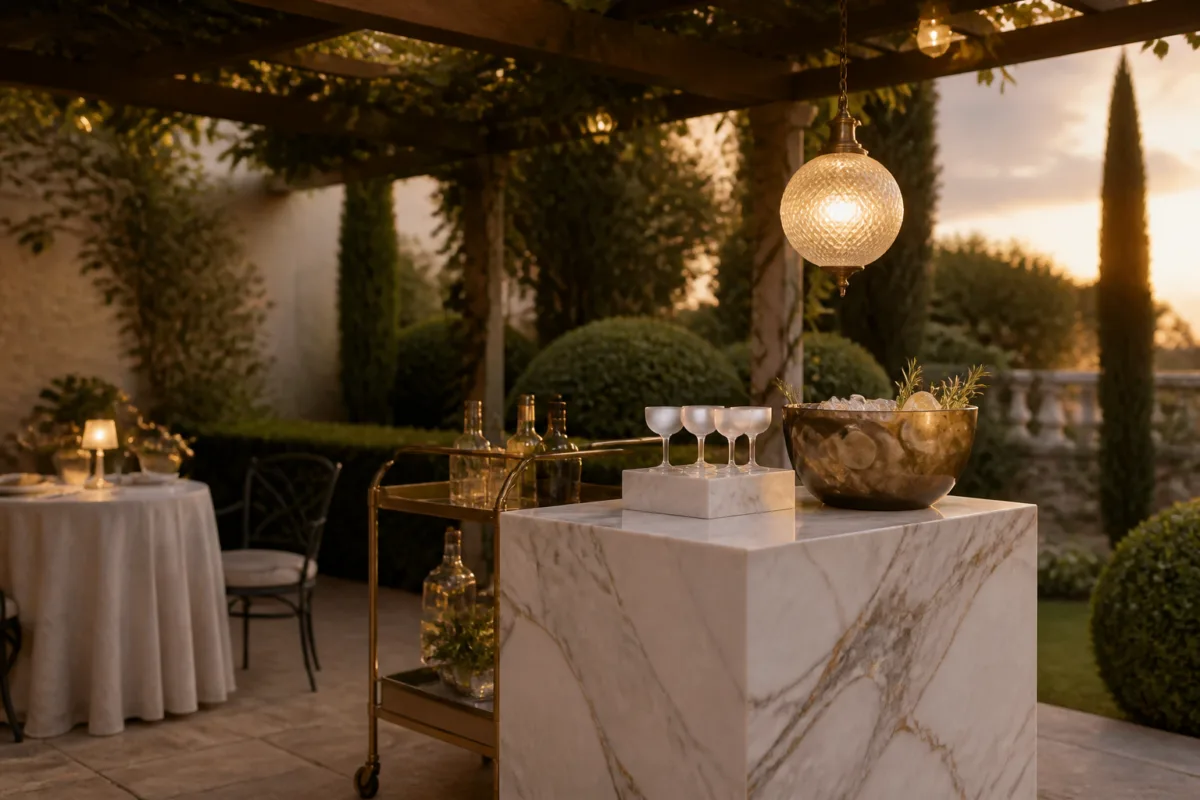
This isn’t just about feeding friends. It’s about curating a mood: cool marble platters, frosted glass, fresh herbs, and unexpected color pairings that swing your party from “nice” to “we should do this every month.” In each idea, you’ll find concrete steps, smart swaps, and a design-forward approach to plating and pouring that flatters any backyard. Use these when you want understated glam and effortless flow—date nights that expand into ten people, a birthday brunch, or just because your hydrangeas decided to show off.
1. Polished Marble Chiller Station with Golden-Hour Sparkle and a Vintage Drinks Trolley
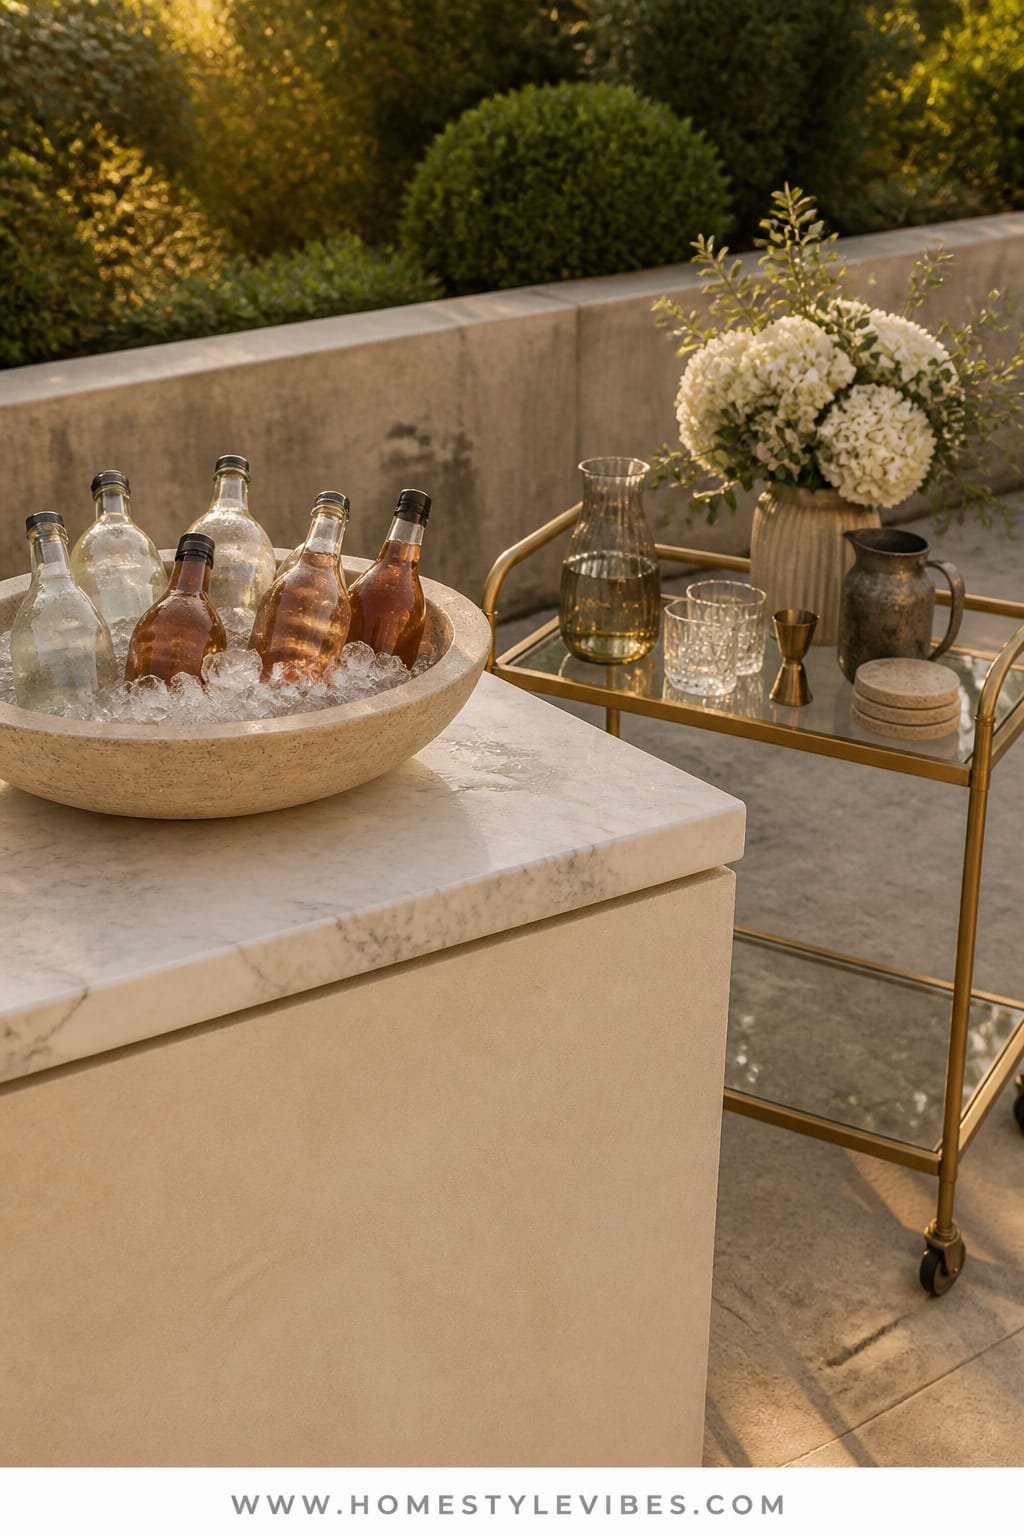
We’ve all been there: you plan gorgeous cocktails, then everybody crowds the kitchen because the drink zone outside is a sad folding table with a sweating plastic cooler. The mood? Chaotic. This design creates a luxe, hotel-bar moment right in the garden—cool, minimal, and photogenic—by turning a vintage trolley into the heart of your beverage service. Sunlight does the finishing work for you here; it hits the metal and glass and turns your set-up into a highlight reel.
It works in real homes because a drinks trolley glides between zones and serves as both bar and sculpture. Marble pastry slabs or boards chill bottles and garnish trays without the constant ice melt. The dominant materials—polished marble, aged brass, and clear glass—stay neutral so your fruits and herbs pop. Every drink instantly looks editorial against a pale stone slab. And if you’re tight on space, the trolley tucks next to a bench or under a pergola when the music gets louder and the conversation stretches late.
Photographs love this: high contrast between white marble and amber liquors, condensation beads caught by the sun, and shadow patterns from nearby leaves. Play with height using coupe glasses up top, bottles mid-shelf, and a deep basket of linens on the base. Expect those nice, soft reflections that make things feel expensive without trying.
Variations? For a budget-friendly version, use a wood cutting board wrapped with parchment over a baking sheet of ice to mimic a marble chill surface. Renter-friendly tweak: add a peel-and-stick faux marble contact sheet to an existing cart, and swap the heavy ice bucket for a double-walled stainless wine chiller. Small-space version: a tray perched on a garden stool beside the table—same styling rules, tighter footprint.
Budget Breakdown:
- Vintage or secondhand drinks trolley: $60–$180
- Marble pastry slab or cheese board (large): $30–$80
- Double-walled wine chiller: $25–$50
- Assorted clear glass coupes/highballs: $24–$64 (set of 6–8)
- Brass or gold-toned bar tools (jigger, spoon, strainer): $20–$45
- Linen bar towel set: $12–$30
Total Estimated Cost: $171 – $449
Best For: Small yards or patios where every inch needs to multitask; late-afternoon parties where golden-hour light turns everything cinematic.
Key Design Elements:
- Main materials: polished marble, aged brass, clear glass
- Color palette: white, warm metallics, crisp citrus colors
- Lighting strategy: position cart to catch soft side-light at sunset
- Furniture silhouettes: slim trolley with curved handle and two shelves
- Texture layers: stone chill slab, ribbed glassware, linen towels
- Accent details: edible flowers, citrus wheels, a single trailing ivy
How To Recreate This Look:
- Start with a sturdy trolley and clean lines; give it a quick polish.
- Add a marble slab on the top shelf to keep bottles and garnishes cool.
- Layer glassware by type: coupes on top, tall glasses mid-shelf, backup tucked below.
- Install a small clip-on battery light or solar lantern near the cart for evening glow.
- Style with citrus, herb bundles in a low vase, and a linen towel draped casually.
Why This Looks Expensive: The marble-and-brass combo whispers boutique hotel. Clear glassware and restrained color keep it chic, while the vintage trolley reads intentional—like you planned the scene, not just the drinks.
Watch Out: Don’t crowd the top deck. Leave negative space around the chiller and a single garnish bowl so it photographs clean. Overstuffed trays look messy fast.
Pro Styling Tip: Slice citrus into a mix of coins and long peels—the shape contrast creates tiny highlights in photos.
2. Textured Rattan Grazing Table with Cool Shade Light and a Monochrome Footed Platter
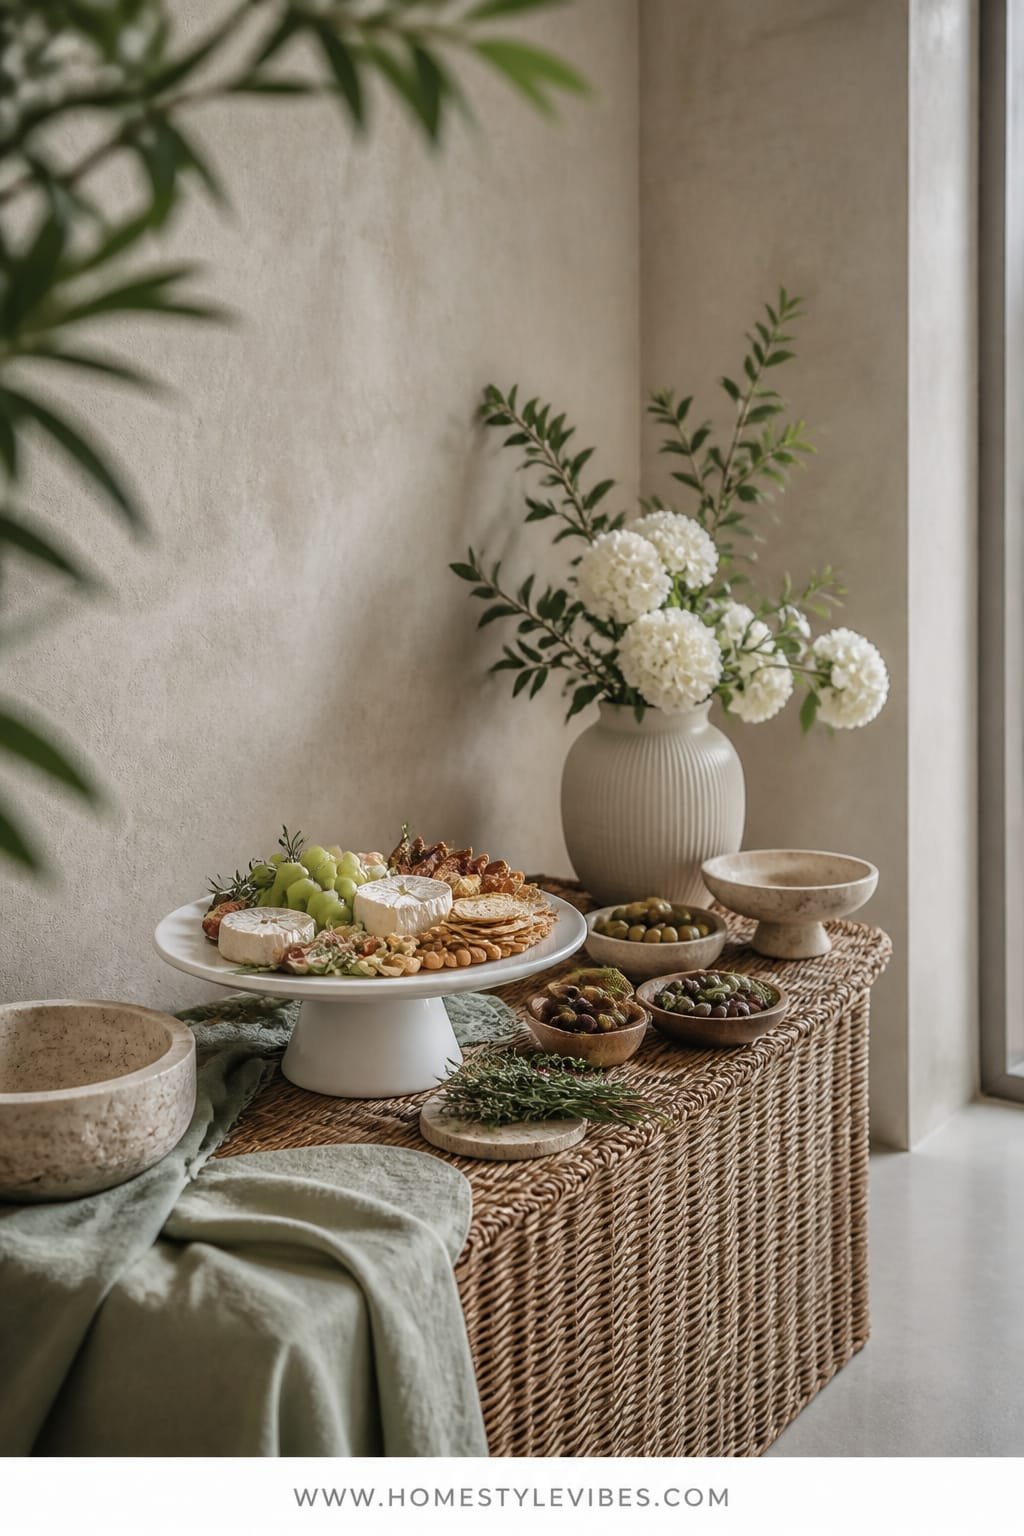
It’s that one corner that always feels off—food laid flat, everything the same height, crackers sliding into grapes. You’ve tried larger boards, but the spread still reads “buffet line,” not “garden feast.” This design turns a standard table into a sculptural grazing station. The mood lands in airy Mediterranean: light, woven textures; cool shade tones; whites and herbs punctuating the layout like brushstrokes.
Rattan excels because it welcomes crumbs and wipes clean. A monochrome footed platter adds stature, pulling eyes upward and creating a visual anchor for cheese or fruit. When you layer textures—linen runner, rattan mats, ceramic bowls—you create depth. Shade lighting keeps greens and cheeses fresh longer and avoids the sweaty food look. In small yards, this reads intentional and contained: one table, several heights, a calm palette.
Why it photographs beautifully: contrast between the woven base and glossy fruit skin; matte cheeses beside translucent grapes; footed platter giving a strong focal point. For a family-friendly twist, corral dips in ceramic ramekins and pre-skewer berries and bocconcini. For a darker version, choose espresso-stained rattan and charcoal ceramics with figs and black grapes—moody and elegant.
Budget-friendly? Swap the footed platter for an inverted ceramic bowl topped with a flat plate. Renter-friendly? Use removable, non-slip mats under everything so you can style over a less-than-lovely patio table.
Budget Breakdown:
- Rattan or woven table runner/mats: $20–$60
- Monochrome footed platter (ceramic or melamine): $25–$70
- Assorted ceramic bowls (3–5): $15–$45
- Neutral linen napkins: $16–$40
- Seasonal fruit, cheese, charcuterie: $45–$120
- Fresh herbs for garnish: $6–$12
Total Estimated Cost: $127 – $347
Best For: Medium patios and shady pergolas; ideal when you want guests to graze slowly and chat without crowding.
How To Recreate This Look:
- Start with a rattan runner across the table for texture continuity.
- Add a footed platter as your anchor; place it slightly off-center.
- Layer 2–3 low bowls in a gentle triangle for spreads and olives.
- Install cool shade: a market umbrella or a sail to prevent melted cheeses.
- Style with herbs on top of creamy elements and cluster fruit in odd numbers.
Key Design Elements:
- Main materials: rattan weave, matte ceramics, linen
- Color palette: warm neutrals, soft whites, green herbs
- Lighting strategy: consistent shade to preserve food and color accuracy
- Furniture silhouettes: low, wide table; one elevated platter; shallow bowls
- Texture layers: woven runner, knobby grapes, smooth cheese rinds
- Accent details: small olive-wood knives, a sprig of rosemary tied with twine
Why This Feels Designer: Elevation changes make even simple foods look curated, while the tonal palette keeps the scene harmonious. Your eye reads a story: woven base, sculptural peak, then soft landings in bowls and napkins.
One Thing To Avoid: A rainbow of plates. Keep serving pieces monochrome or tonal so the food provides the color. Too many dish colors kill the mood fast.
Pro Styling Tip: Snip herb ends right before guests arrive so the edges look dewy and alive in photos.
Pause and breathe. This isn’t about owning everything on the internet. Choose one idea that makes your shoulders drop in relief—that’s your anchor. Then layer in just one more detail for polish.
3. Hand-Blown Glass Spritz Bar with Soft Amber Twilight and a Carved Stone Basin
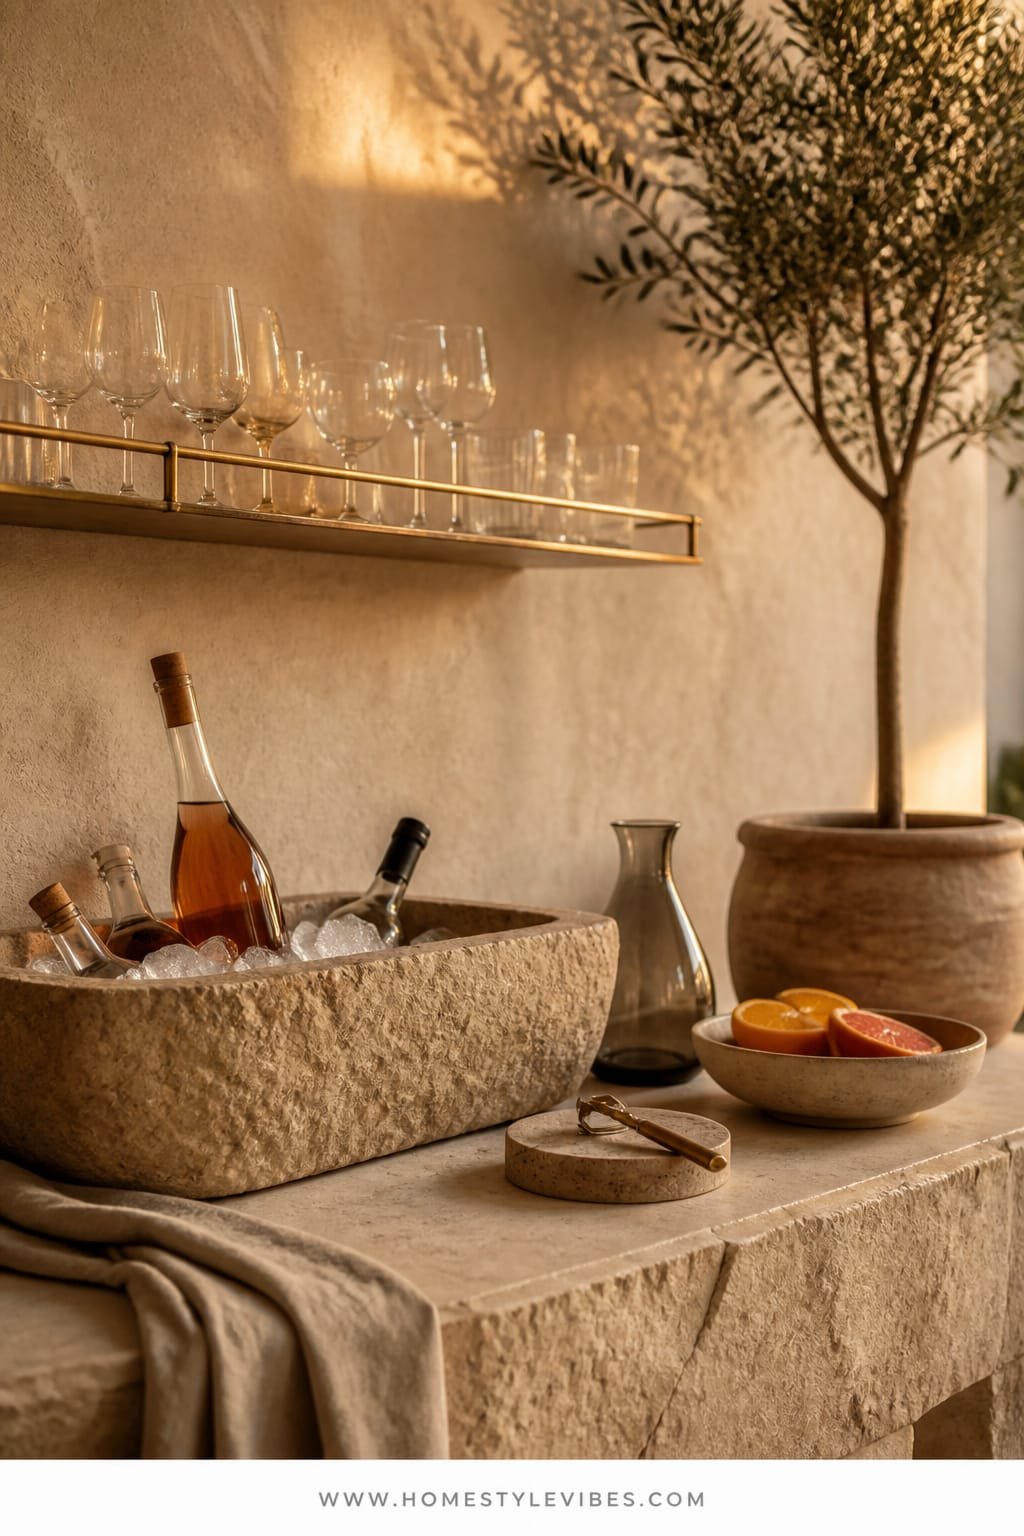
You want breezy cocktails that look couture, but the math of syrups, garnishes, and glassware racks keeps you pouring in the kitchen. Meanwhile, guests miss the fun and you miss the gossip. This spritz bar is a set-and-sip situation, crafted with a carved stone basin as the centerpiece to hold ice and bottles. The vibe? Modern European terrace: effervescent, citrus-forward, glow-kissed.
In practice, the stone basin stays cold longer and anchors your scene. Hand-blown glasses bring delicate sparkle even in low light, and the amber hue at twilight gives everything a honeyed filter. Pre-batch one spritz recipe; leave seltzer and bitters nearby for custom tweaks. Guests get autonomy; you get your evening back.
Why it works: The material contrast—textured stone against gleaming glass—turns a simple drink into a photo moment. The light doesn’t need to be bright; soft twilight makes bubbles look luxurious without glare. Keep color limited: pale citrus, green herbs, clear bottles. It photographs like a still life, and cleanup minimizes to one basin and a handful of glasses.
Small space? Use a compact 12-inch bowl atop a side table. Budget version? A cement planter (sealed) lined with a food-safe bowl. Renter-friendly? Style everything on a rolling cart so it parks discreetly by the door after last call.
Budget Breakdown:
- Carved stone or marble basin: $60–$180
- Hand-blown spritz glasses (set of 6–8): $32–$96
- Citrus (grapefruit, orange, lemon): $10–$18
- Prosecco/aperitif liqueur/soda: $35–$85
- Bitters + fresh herbs: $12–$20
Total Estimated Cost: $149 – $399
Best For: Early evening drinks, pop-in neighbors, and anyone who loves low-proof cocktails that stretch.
Key Design Elements:
- Main materials: carved stone, hand-blown glass, fresh herbs
- Color palette: clear, green, soft citrus, hint of amber
- Lighting strategy: face the basin toward fading light for sparkle; add a candle nearby
- Furniture silhouettes: wide basin on a narrow stand or cart
- Texture layers: rough stone, smooth bubbles, silky herb leaves
- Accent details: slender glass stirrers, thin citrus peels draped on rims
Why This Reads High-End: A single sculptural object (the stone basin) does the heavy design lifting. Hand-blown glass adds irregularity—the kind that feels human and special.
How To Recreate This Look:
- Start with your basin; wash and chill it for 20 minutes if possible.
- Add large-format ice; tuck bottles at angles for visibility.
- Layer a low tray with thin citrus wheels and herb sprigs.
- Install subtle light: a lantern behind the basin to backlight the bubbles.
- Style a printed spritz card so guests self-serve confidently.
The Most Common Mistake: Overfilling with ice and bottles. Leave negative space or it will look like a grocery bin. Aim for a 60/40 ice-to-bottle ratio.
Pro Styling Tip: Use a microplane to zest a little citrus over the station right before guests arrive—the oils scent the air and catch the light on the ice.
4. Linen-Draped Oyster & Caviar Nook with Dappled Shade and a Sculptural Ice Dome
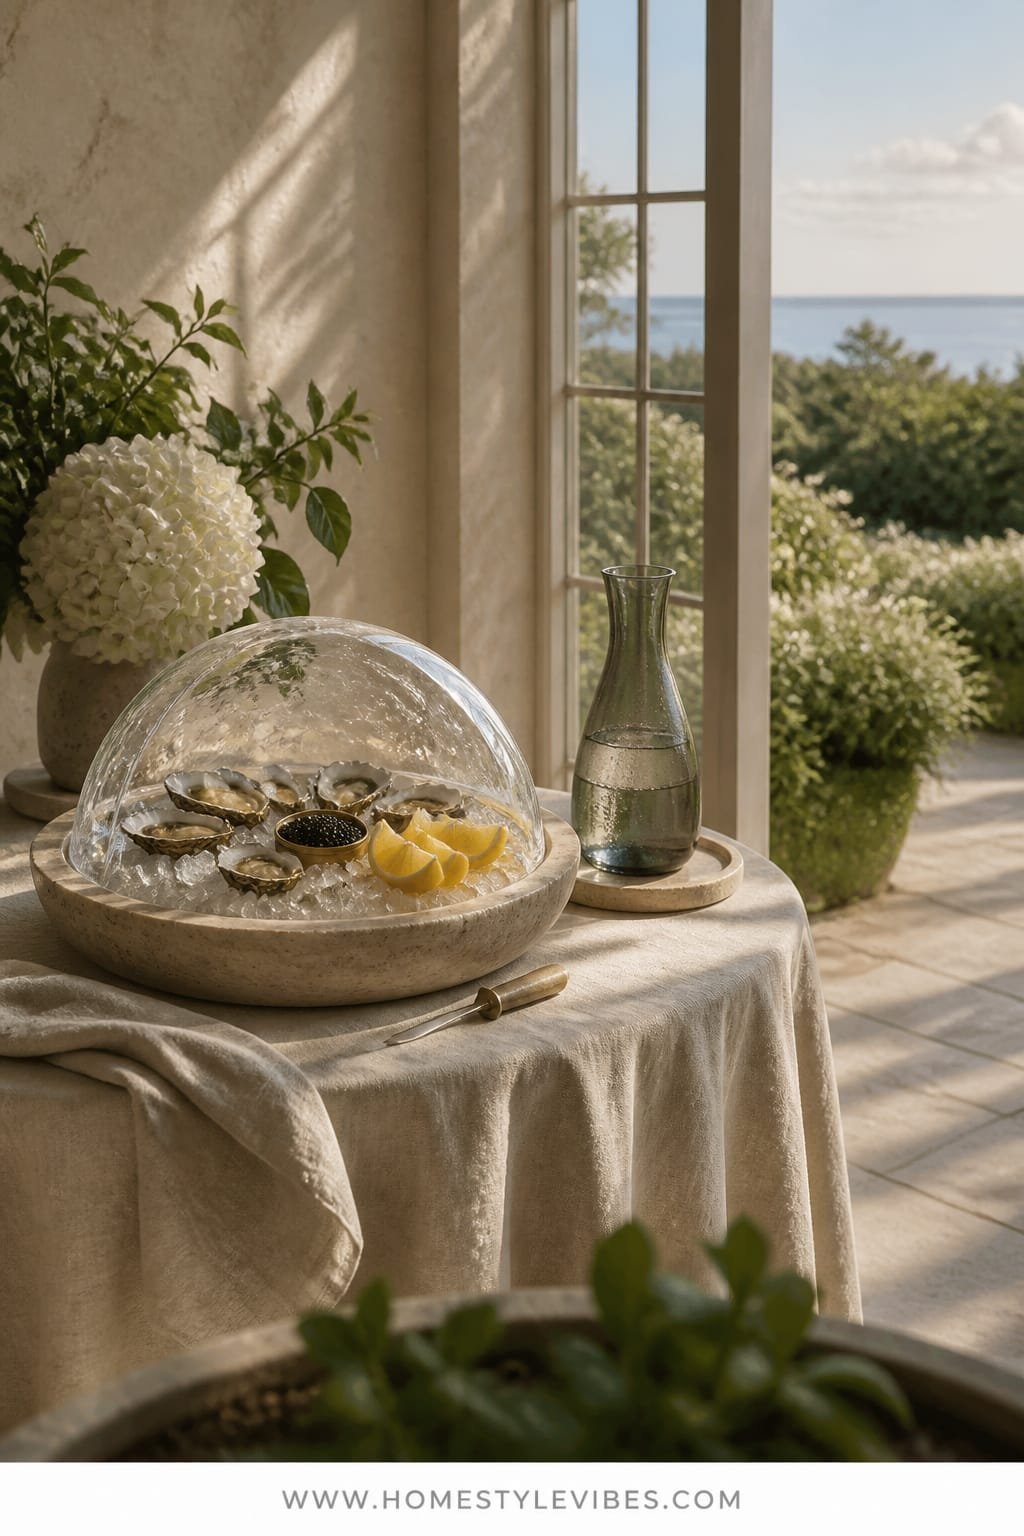
You crave that bougie moment. Oysters, caviar, the collective hush as a tin opens. But you picture the mess: melting ice, tipping trays, and someone asking for twelve lemon wedges at once. This nook solves the logistics with a single sculptural focal point—the ice dome—perched on a linen-draped bistro table in dappled shade. The mood lands in quiet coastal luxury with just enough drama to earn its own Group Chat thread.
Here’s why it works at home: a small, designated station prevents crowding and keeps cold things cold. The ice dome holds oyster shells upright like nature’s jewelry, while a shaded spot slows melt. Choose a soft flax linen and let the wrinkles live—a relaxed fabric keeps the scene grounded so it never tips into stuffy. For renters, a simple bistro table folds away later and the dome forms in your freezer overnight. FYI, I tried this last fall. I expected chaos, but the structure of the dome actually made service smoother than my “practical” trays ever did.
Photographs go wild for this: glossy shells nested in crystal ice, black pearls of caviar beside pale lemon. Shadows from leaves create texture without adding visual clutter. Minimal color means the food does all the talking. For a budget-friendly riff, skip caviar and top blini with smoked trout roe—still luxe, half the cost. Small-space version? Use a large bowl filled with pebbled ice and nestle 6–8 oysters, then tuck a single votive behind for glow.
Budget Breakdown:
- Linen tablecloth or oversized linen throw: $30–$90
- Ice dome mold or large stainless bowl for DIY: $12–$24
- Oysters (2–4 per guest): $36–$120
- Caviar or trout roe: $25–$150
- Blini/crackers + lemon + mignonette: $14–$32
- Small mother-of-pearl spoon: $8–$20
Total Estimated Cost: $125 – $436
Best For: Special birthdays, anniversaries, or whenever you want a jaw-drop moment with low prep and a tight footprint.
How To Recreate This Look:
- Start with the ice dome: freeze water in a metal bowl with a smaller bowl inside to form a cavity.
- Add a linen-draped table in dappled shade; secure corners with clips if windy.
- Layer a shallow tray under the dome to catch melt; tuck folded linen underneath for height.
- Install subtle accent light behind the dome near sunset for rim highlights.
- Style garnishes in tiny bowls, keeping spoons dedicated (no cross-dipping).
Key Design Elements:
- Main materials: linen, sculpted ice, shell
- Color palette: flax, white, pearl, pale lemon
- Lighting strategy: soft shade with backlight at dusk for sparkle
- Furniture silhouettes: small round bistro with generous drape
- Texture layers: crisp linen, smooth shell, crystalline ice
- Accent details: pearl spoon, a single small fern in a bud vase
Why This Looks Intentional: One strong focal element (the dome) simplifies everything else. When one piece is sculptural, the rest can be understated and still read “special.”
Don’t Do This: Skip bright-colored plates under oysters—they cast weird hues on the shell and skin. Stick to clear, white, or linen.
Pro Styling Tip: Wipe water drips quickly and shoot while the ice still crackles; those tiny fractures catch light like glitter.
Remember, this isn’t about recreating a showroom. It’s about building a garden party that feels like yours—your pace, your people, your quirks. If oysters aren’t your thing, that’s data, not failure. Move on to the next idea that makes you grin.
5. Charred Cedar Skewer Bar with Warm Firelight and a Low Cast-Iron Plancha
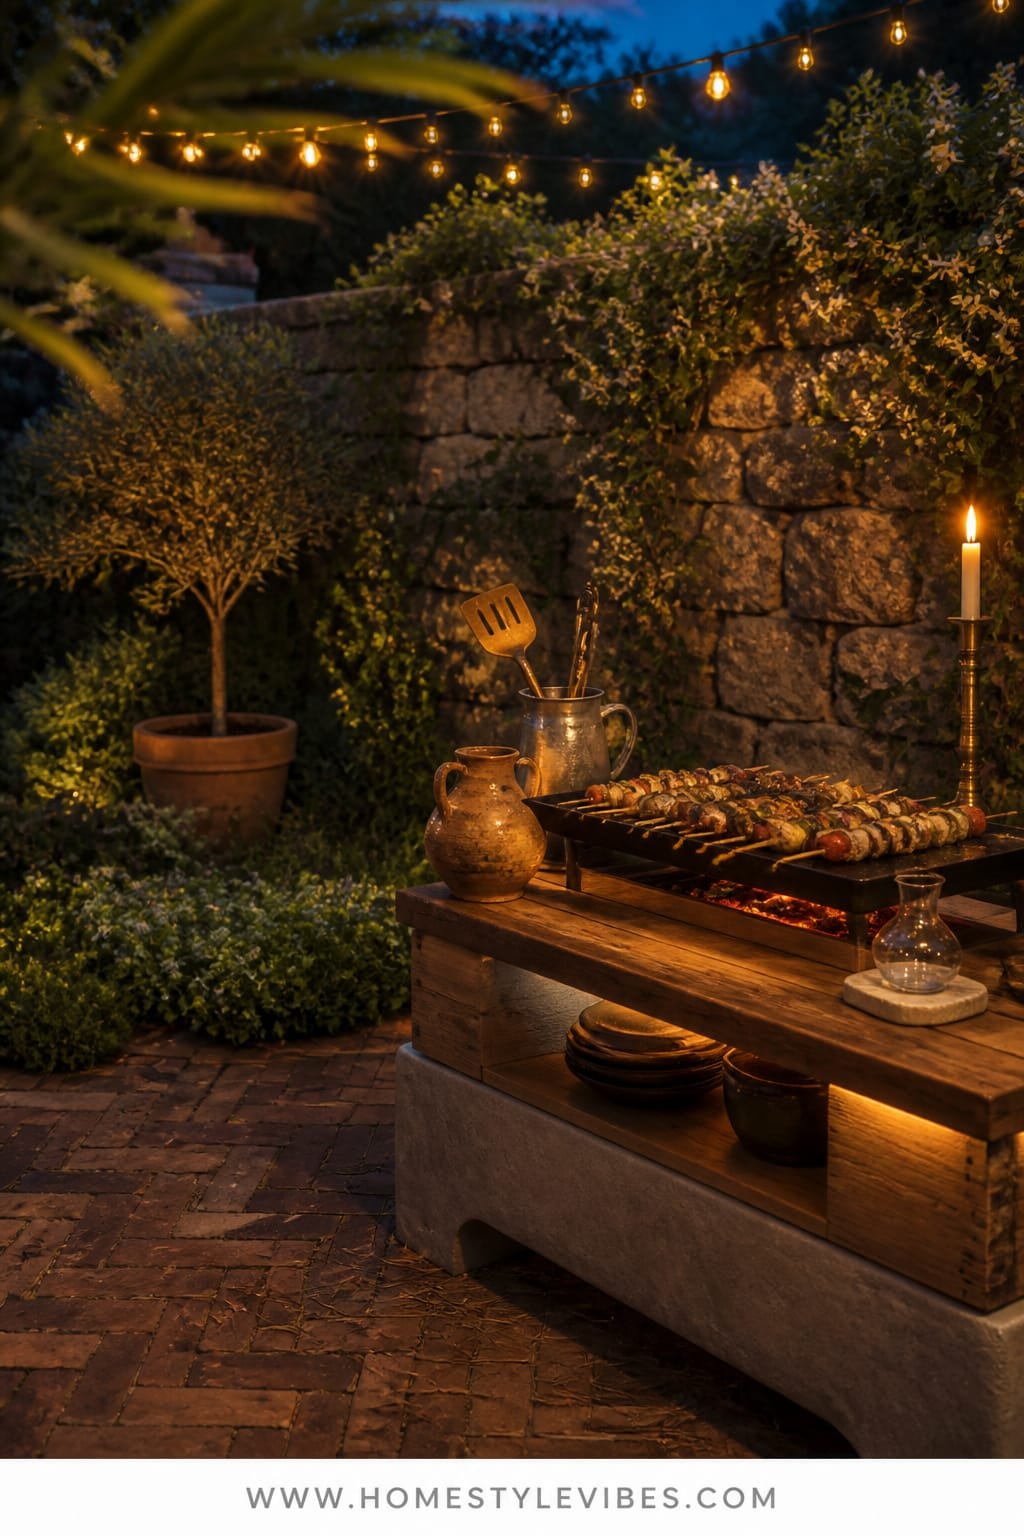
You love the smell of smoke curling through jasmine, but the grill line turns into a traffic jam. Skewers fix the queue. This design turns cooking into a serve-yourself parade with a low cast-iron plancha and cedar planks for gentle char. The mood is relaxed backyard izakaya: flicker, sizzle, laughter, and a table that looks styled even while you cook.
Real-life win: skewers cook evenly and fast, and people can grab exactly one or three. Cedar adds cozy aroma without dripping fat flare-ups. The plancha anchors your layout at coffee-table height, so guests can gather comfortably on poufs and benches while you manage heat with a spatula and a smile. Photographing this is pure joy—contrast between matte black iron and glossy glaze, smoke ribbons against firelight, and the stacked skewers like graphic lines.
Materials matter: cedar, cast iron, matte pottery, and linen. Keep colors earthy—terracotta ramekins for sauces, green onions, sesame, lime. Small-space version? Use an electric griddle on a heat-safe outdoor surface, and char cedar skewers on the stovetop ahead of time. Budget-friendly? Chicken thighs and mushrooms marinated with soy and honey shine just as bright as pricier cuts. Renter-friendly? Place heat pads under the plancha, and keep a misting bottle on hand for sizzles.
Confession: I once tried to do this with shiny stainless everything. It looked cafeteria. Swapping to matte ceramics and cedar made the whole thing feel like a secret garden bistro. The truth is, finish matters more than the recipe.
Budget Breakdown:
- Cast-iron plancha or griddle: $30–$70
- Cedar planks/skewers: $12–$25
- Assorted proteins/veg: $30–$80
- Matte ceramic sauce dishes (4–6): $18–$42
- Low table or sturdy bench: $0–$60 (use what you have)
- Outdoor lanterns or string lights: $20–$50
Total Estimated Cost: $110 – $327
Best For: Evenings with eight friends, cooler nights, and hosts who like a little theater without juggling a dozen pans.
Key Design Elements:
- Main materials: cedar, cast iron, matte ceramic
- Color palette: charcoal, cedar brown, sesame gold, lime green
- Lighting strategy: firelight plus warm string lights at 2700K
- Furniture silhouettes: low table, squat ramekins, simple skewers
- Texture layers: rough cedar, smooth glaze, char blister
- Accent details: black sesame, sliced scallions, charred lemon halves
Why This Feels Designer: Matte finishes swallow glare, so the glow reads soft and intentional. Repetition of skewers creates graphic rhythm that looks styled even mid-meal.
How To Recreate This Look:
- Start by soaking cedar skewers/planks for 30 minutes to prevent burning.
- Add a low plancha on a heat-safe table; preheat until shimmering.
- Layer skewers on a rattan tray with parchment separators for airflow.
- Install lighting: string lights overhead and one lantern at table edge for shadows.
- Style sauces in small matte bowls; finish skewers with sesame and lime to plate.
Watch Out: Don’t overload the griddle—steam kills char. Leave gaps between skewers so the heat can caramelize properly.
Pro Styling Tip: Tilt a few skewers at 45 degrees on the platter; the diagonal gives instant movement in photos and keeps juices from puddling.
6. Frosted Acrylic Dessert Cloud with Cool Moonlight and a Tiered Patisserie Stand
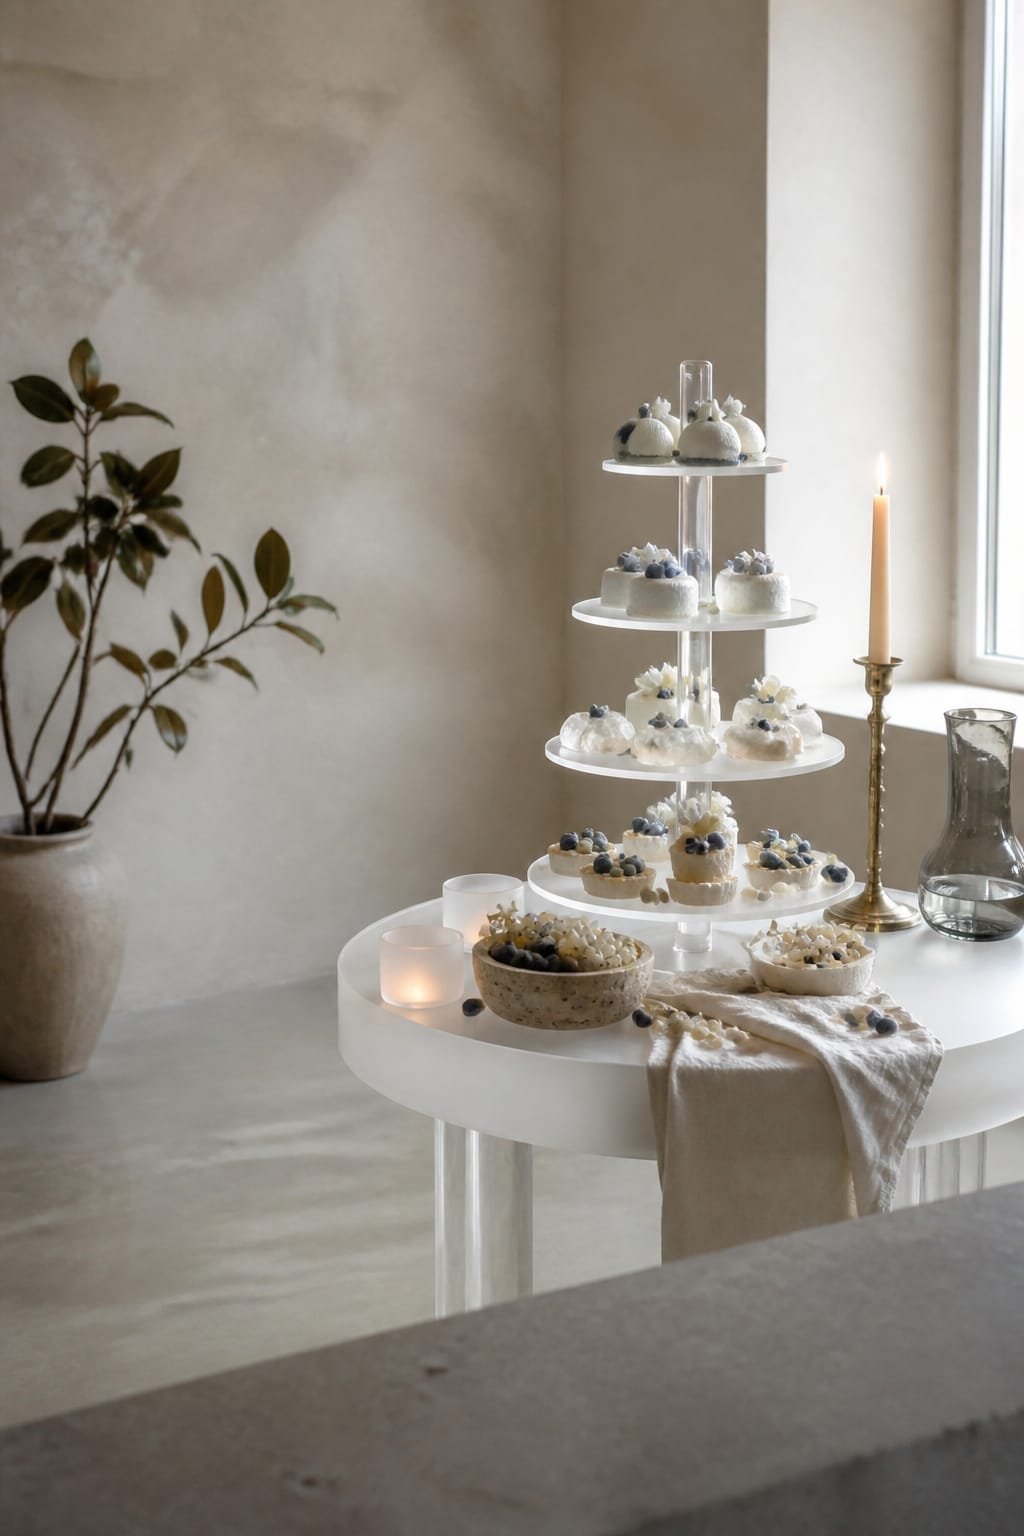
Here’s the late-party slump: coffee mugs, half-melted ice cream, and that brownie plate nobody styled. You want dessert to land like a finale—light, ethereal, unforgettable. Enter the frosted acrylic “cloud” table: a simple acrylic panel perched on clear risers with a tiered patisserie stand for height. The light reads cool lunar—gleamy whites, pale berries, and glassy glazes—so your sweets feel airy, not heavy.
This works because frosted acrylic diffuses candlelight and hides crumbs while making delicate desserts glow. Small spaces get a bonus: the transparency keeps things from looking cluttered. Choose a limited palette—vanilla tones, blush berries, green mint—and repeat it. I did this with store-bought pavlovas and honestly, no one cared where they came from. They cared that the table looked like a cloud in the garden and the photos made them gasp.
Photogenic secrets: repeat circles (macarons, mini tarts, meringues) and use one vertical anchor—the tiered stand. Cool-toned fairy lights under the acrylic create a hovering effect. Renter-friendly? The whole setup packs into a closet. Budget tweak? Use a simple cake stand and two clear storage bins with a cutting board on top for the “floating” panel—just keep proportions balanced.
Budget Breakdown:
- Frosted acrylic panel (24×36 inches): $28–$60
- Clear risers or inverted glass blocks: $18–$42
- Tiered patisserie stand: $25–$80
- Assorted mini desserts (store-bought okay): $30–$90
- Cool fairy lights/LED candles: $12–$28
- Mint, edible flowers: $6–$14
Total Estimated Cost: $119 – $314
Best For: Late-night reveals, birthdays, or summer weddings at home where the finale should feel light and a little dreamy.
How To Recreate This Look:
- Start with the acrylic “cloud” supported on two clear risers.
- Add a tiered stand slightly off-center for height variety.
- Layer desserts by size: biggest at base, delicate up top.
- Install cool fairy lights underneath; hide battery packs behind foliage.
- Style with mint tips and a light dusting of powdered sugar just before serving.
Key Design Elements:
- Main materials: frosted acrylic, porcelain, glass
- Color palette: vanilla, blush, pale green
- Lighting strategy: cool moonlight with underlit glow
- Furniture silhouettes: floating plane, single vertical tiered stand
- Texture layers: satin glaze, meringue crunch, soft berries
- Accent details: glass domes, tiny silver tongs, a cloud of powdered sugar
Why This Looks Expensive: Transparency and restraint. When most of what you see is air and glow, the eye assigns value. Negative space is your luxury budget here.
The Most Common Mistake: Overcrowding the tiers. Leave breathing room between desserts so each piece reads as intentional. Smushed sweets look frantic in photos.
Pro Styling Tip: Place a single tall taper candle behind the stand—one vertical line against the floating plane adds drama and depth.
Permission slip time: if only one of these ideas feels doable this weekend, that’s enough. Hosting isn’t about perfection; it’s about that warm exhale when people stay ten minutes longer than planned. Choose a focal idea and let the rest be simple.
Quick Checklist
- Choose one hero station: drinks, grazing, oysters, skewers, or dessert
- Pick one dominant material (marble, rattan, stone, linen, cedar, acrylic)
- Lock your lighting strategy (golden-hour, shade, twilight, firelight, moonlight)
- Use one sculptural anchor (trolley, footed platter, basin, ice dome, plancha, tiered stand)
- Limit serving pieces to a tonal palette
- Create height variation with stands, risers, and footed bowls
- Batch one signature drink and print a tiny recipe card
- Prep large-format ice or a chill surface early
- Garnish with fresh herbs and intentional negative space
- Keep napkins and a hidden trash bin within reach but out of frame
Frequently Asked Questions
How do I keep costs down while still making the setup feel luxurious?
Choose one splurge material (like marble or hand-blown glass) and keep everything else simple and tonal. Batch one cocktail and serve a crisp, affordable white alongside. The visual rhythm and restraint read as luxury more than brand names.
My patio is tiny. Which idea works best in a small space?
The drinks trolley or the acrylic dessert cloud both shine in small areas. They bring height and transparency, which keep the space feeling airy. A single sculptural station is better than several small, cluttered setups.
What if I’m not confident with cooking or shucking oysters?
Buy oysters pre-shucked from a reputable fishmonger and plate them over ice. For hot food, pre-skewer marinated chicken or mushrooms and use a griddle. Your styling and materials will carry the presentation—lean on texture and temperature.
I rent and can’t hang lights or install anything permanent. How do I get that vibe?
Use solar lanterns, clip-on rail lights, and battery-powered candles. Position your main station to face the best natural light. The right angle at sunset will outperform any permanent fixture.
Any common styling mistakes to avoid with garden party food and drinks?
Yes: too many colors in serving pieces, overcrowding trays, and ignoring height. Keep a tight palette, build in negative space, and always elevate at least one element to guide the eye.
Your Elegant Finish
Start with one idea that feels like a sigh of relief. Maybe it’s the marble-and-brass drink trolley that finally gets everyone out of the kitchen. Maybe it’s the cedar skewer bar that turns dinner into a slow, smoky rhythm. One choice, well-executed, beats seven half-finished concepts every time.
Here’s the real secret: luxury in the garden comes from texture, lighting, and restraint. Not more things—better surfaces, smarter height, and a little choreography. Soft linen, sculptural ice, a single candle catching the rim of a coupe—these details do the heavy lifting so you can be present.
Pick your hero, set the scene, and trust me: your garden will do the rest. You’ve got this—and your guests are going to talk about it all summer.
About the Author

Krisztina P.Rendes, Founder of Home Style Vibes
Founder of Home Style Vibes
Krisztina Puskásné Rendes created Home Style Vibes as a cozy-modern lifestyle space where homemaking meets inspiration. Her goal is to help women create beautiful, organized, and peaceful homes they truly love — without overwhelm. You’ll find here heart-driven content on home decor, cleaning tips, easy family recipes, organization and decluttering, DIY home projects, plants, and seasonal ideas — all designed to bring more calm, comfort, and style into everyday life.