6 Front Yard Flower Bed Ideas That Boost Curb Appeal Instantly
You want that instant “oh wow” curb appeal—the kind neighbors slow down for and delivery drivers compliment. You hate that your front yard flower beds look flat, patchy, or like a random mix of plants from the clearance rack that never kissed on color or height. Picture this instead: morning light catching glossy leaves, velvety petals layered against crisp edging, and a front path that feels like an intentional welcome. These 6 front yard flower bed ideas fix common frustrations—messy lines, weak color, plants that don’t thrive—and get you an Instagram-ready entry in under one weekend per bed and under $750 per concept if you shop smart.
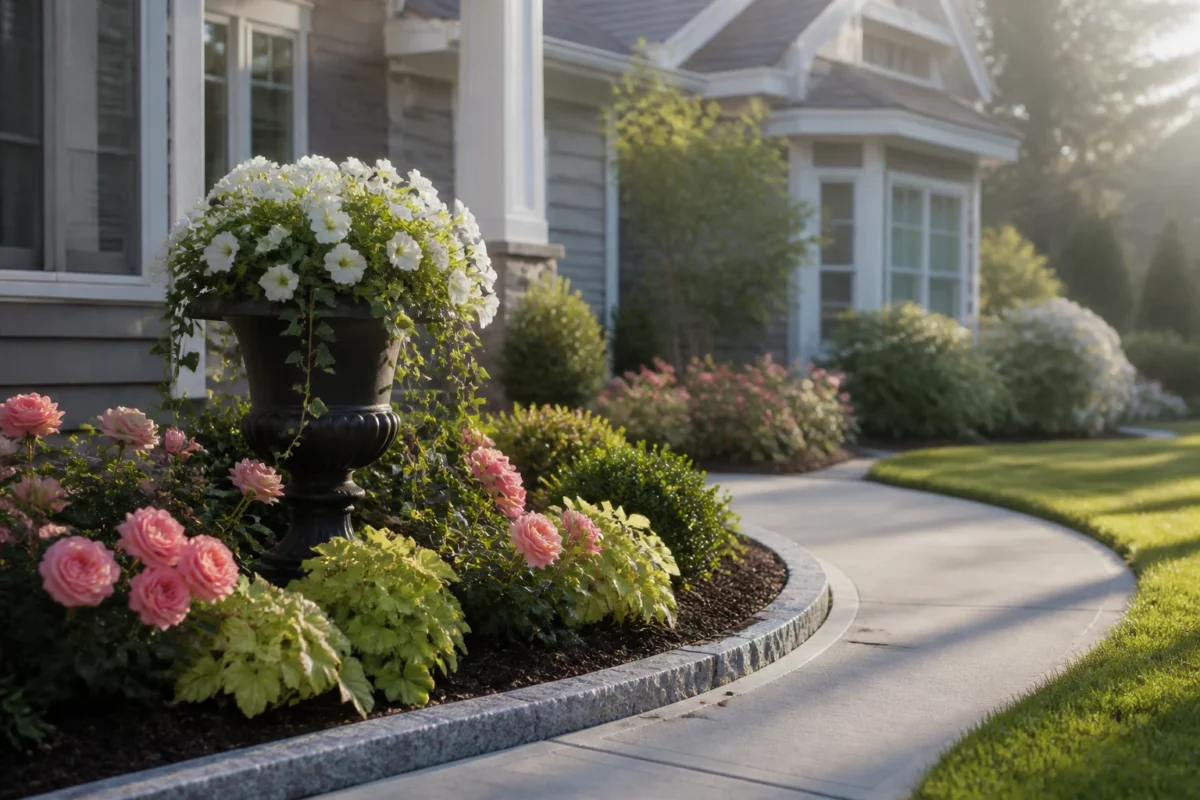
Expect photogenic planting structures, budget-friendly swaps, and mood-forward designs that work in real life. If you love variety but want your yard to look cohesive, these are for you. This lineup is perfect for everyday homes that need an instant, styled look—suburban craftsmans, cozy bungalows, and even modern farmhouses. Let’s get your front yard feeling finished and magazine-worthy.
1. Granite-Edged Crescent Bed With Dappled Morning Light And a Black Urn Focal
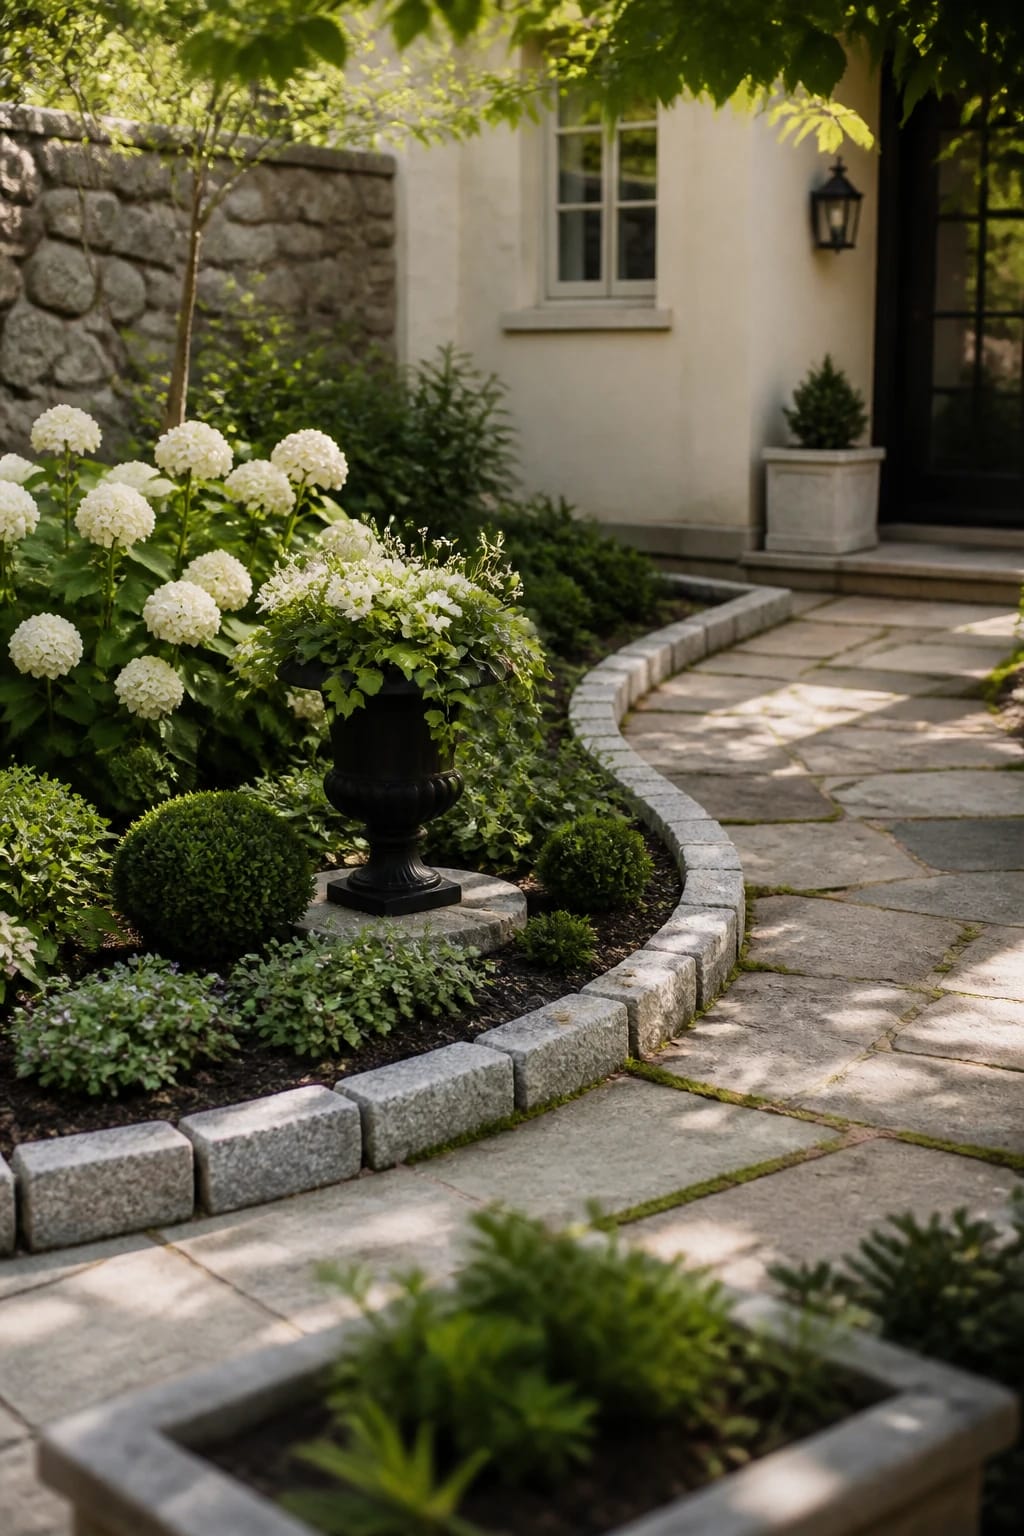
We’ve all been there: the bed by the front walkway never looks intentional. The shapes are wobbly, mulch spills onto the path, and your favorite plants look random because there’s no anchor. This granite-edged crescent bed gives you a clean, sweepy curve that photographs beautifully and sets a black urn as the star. The mood is classic, slightly European, and very “this house knows what it’s doing.”
Here’s why it works in real homes. The granite blocks keep mulch tidy and create a bold outline; the crescent shape flatters most entries and works even on small lots. A black urn adds height, structure, and instant year-round interest—fill it with white petunias in summer, trailing ivy in fall, and a tiny evergreen in winter. Dappled morning light makes leaves glow without frying blooms by noon. The layered planting—boxwood, hydrangea, and catmint—builds soft contrast and reliable bloom cycles so it looks good way beyond May.
Photographs love this: crisp stone edging creates a hard line against soft petals and feathery textures. The black urn reads as a silhouette, adding depth in flat light. You get that high-end snapshot where the shadows define the curve and the white blooms pop like pearls against evergreen.
Variations: On a budget, swap granite for faux-stone scalloped edging or steel edging powder-coated black. For small spaces, use a half-moon bed with a medium urn and one hydrangea flanked by two dwarf boxwoods. For a darker look, use deep purple salvia instead of catmint and black mulch for high contrast. Renter-friendly? Use a freestanding urn on a paver base and create a no-dig bed with landscape fabric plus pea gravel, then nest nursery pots into the gravel so you can relocate later.
Budget Breakdown:
- Granite block edging: $200–$450 (30–40 linear feet)
- Black urn (fiberglass or lightweight resin): $90–$250
- Hydrangeas (3 gallon, 2–3 plants): $60–$120
- Dwarf boxwoods (1–3 gallon, 3–5 plants): $75–$200
- Catmint or salvia (1 gallon, 5–7 plants): $60–$120
- Mulch and soil amendment: $40–$90
- Pre-emergent weed control and landscape fabric (optional): $25–$60
Total Estimated Cost: $550 – $1,290
Best For: Traditional or transitional homes with a 6–12 foot wide front bed, morning sun to partial shade, and anyone who wants strong structure with soft blooms.
Key Design Elements:
- Main materials: Split granite blocks, fiberglass urn, hardwood mulch
- Color palette: Glossy black, evergreen, soft white, lavender-blue
- Lighting strategy: Dappled morning light; avoid harsh western exposure for hydrangeas
- Furniture silhouettes: Statement urn with classical profile
- Texture layers: Boxwood mounds, hydrangea mopheads, airy catmint spires
- Accent details: Moss between stones, discreet drip line, crushed gravel at base of urn
How To Recreate This Look:
- Mark a crescent outline with landscape paint; aim for a gentle 8–12 foot curve.
- Dig a shallow trench and set granite blocks level; backfill and tamp for stability.
- Plant the urn slightly off-center on a level paver base to avoid sinking.
- Place hydrangeas at the back, boxwoods midline, and catmint at the front edge.
- Mulch, then run a drip line around each root ball; top the urn with a trailing annual for movement.
Why This Looks Expensive: The consistent black accent and crisp stone edging deliver a tailored outline, while the layered plant heights build dimension. It reads like a landscape architect touched it—and that urn silhouette is the quiet flex.
Watch Out: Don’t plant hydrangeas where afternoon sun scorches them. And avoid skimping on the curve; a timid, too-tight arc looks awkward and cheap.
Pro Styling Tip: For photos, water the mulch lightly to deepen the color and wipe the urn so it gleams; the contrast makes whites and greens snap.
Keep scrolling—the next idea flips the script with coastal texture and a light, drifted palette you can almost hear.
2. Weathered Cedar Ribbon Bed With Soft Coastal Light And a Stone Birdbath Centerpiece
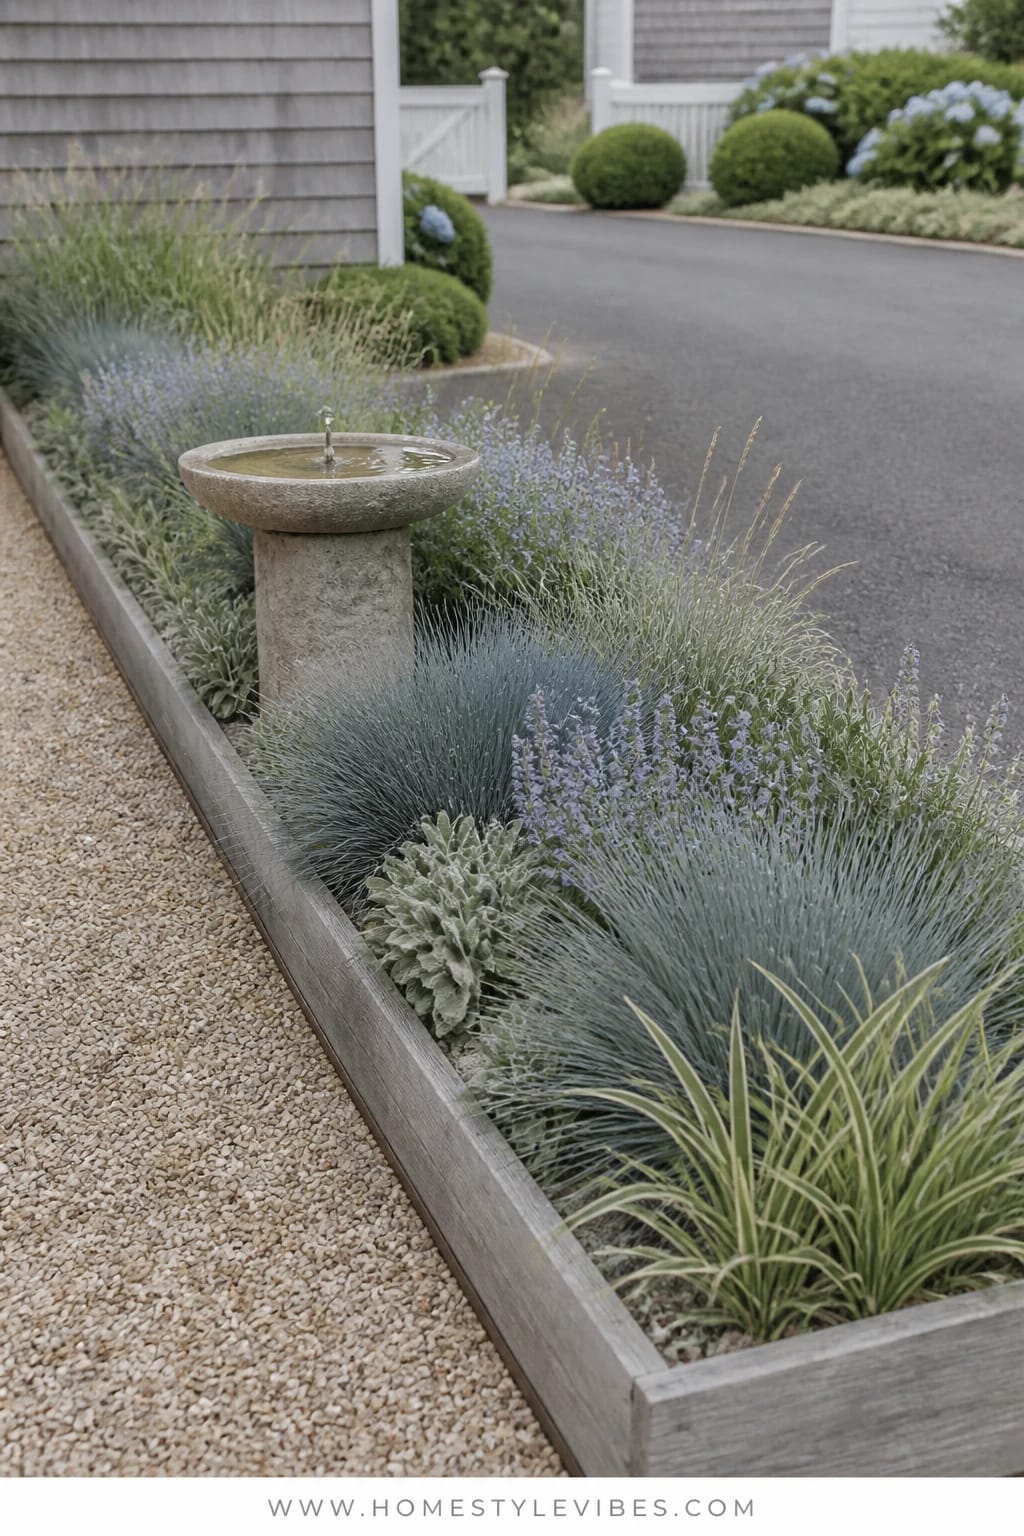
It’s that one strip along the driveway or sidewalk that always feels skimpy. You’ve tried lining it with annuals, but it still reads like “afterthought.” This weathered cedar ribbon bed leans into coastal vibes—think dune grasses, pale blues, and a low stone birdbath that pulls birds and movement into your front yard. The mood is breezy, Hamptons-adjacent, and quietly luxurious without any fuss.
Why it works in real life: Narrow spaces need rhythm more than volume. Using alternating swaths of feather reed grass, lavender, and white alyssum creates a horizontal flow that lengthens the sightline. The birdbath sits at a midpoint to anchor both halves of the run. Cedar edging (installed flush) feels natural, holds back gravel neatly, and fades to silvery gray with sun—aka it gets better as it ages.
Lighting matters here. Soft morning or late-afternoon light skims across grass plumes, throwing long shadows that add drama. The muted palette avoids the “too busy” trap, especially along long borders. Photographs thrive on the tone-on-tone textures: silver foliage, matte cedar, pale stone, and white blooms that glow at dusk.
Variations: Budget-friendly version uses pressure-treated landscape timbers stained light gray and a resin birdbath painted stone. Small-space tweak: shorten segments and reduce to two plant types (grass and lavender). Darker vibe: use black mondo grass in pockets and swap alyssum for white vinca. Renter-friendly: skip digging—use cedar planks pinned with stakes, lay landscape fabric, and top with pea gravel; drop nursery pots into cutouts.
Key Design Elements:
- Main materials: Weathered cedar board edging, pea gravel, natural stone birdbath
- Color palette: Sea grass green, silver-blue, chalky white, gray cedar
- Lighting strategy: Skim light at golden hour; avoid midday glare for best photos
- Furniture silhouettes: Low, wide birdbath with organic bowl form
- Texture layers: Upright plumes, woody lavender, ground-hugging alyssum
- Accent details: Shell fragments as top dressing, discreet solar path lights, smooth river stones
Budget Breakdown:
- Cedar boards and stakes: $120–$240 (20–30 linear feet)
- Stone or resin birdbath: $80–$200
- Feather reed grass or blue oat grass (1 gallon, 8–12 plants): $80–$180
- Lavender (1 gallon, 6–10 plants): $60–$160
- White alyssum flats: $30–$60
- Pea gravel and fabric: $70–$140
Total Estimated Cost: $440 – $980
Best For: Driveway or sidewalk strips 2–4 feet deep; coastal, cottage, or modern farmhouse exteriors; low-maintenance gardeners who like soft movement.
How To Recreate This Look:
- Install cedar edging flush with turf; stake securely every 3–4 feet.
- Lay breathable fabric and add a 2-inch pea gravel layer where you want negative space.
- Set the birdbath off-center—roughly two-thirds down the run.
- Plant grasses in staggered drifts, then tuck lavender behind and alyssum along the front lip.
- Top-dress with a few river stones and tuck in low-profile solar lights for night sparkle.
Why This Feels Designer: The deliberate repetition and negative space make the composition feel artful, not crowded. The weathered cedar acts like a frame, so everything inside looks curated.
One Thing To Avoid: Don’t mix too many bloom colors. Keep it tonal so the texture does the heavy lifting and the sightline stays calm.
Pro Styling Tip: For photos, brush pea gravel smooth in gentle arcs; those subtle lines catch the light and lead the eye.
Little palate cleanser: the next idea is for color lovers who want bold, polished drama—without it tipping into chaos.
Remember, this isn’t about recreating a showroom. It’s about building a front yard that actually greets you back. If one idea resonates more than the others, that’s your starting point. You don’t need all six.
3. Charcoal Steel Border Bed With Sunset Glow and a Sculptural Copper Obelisk
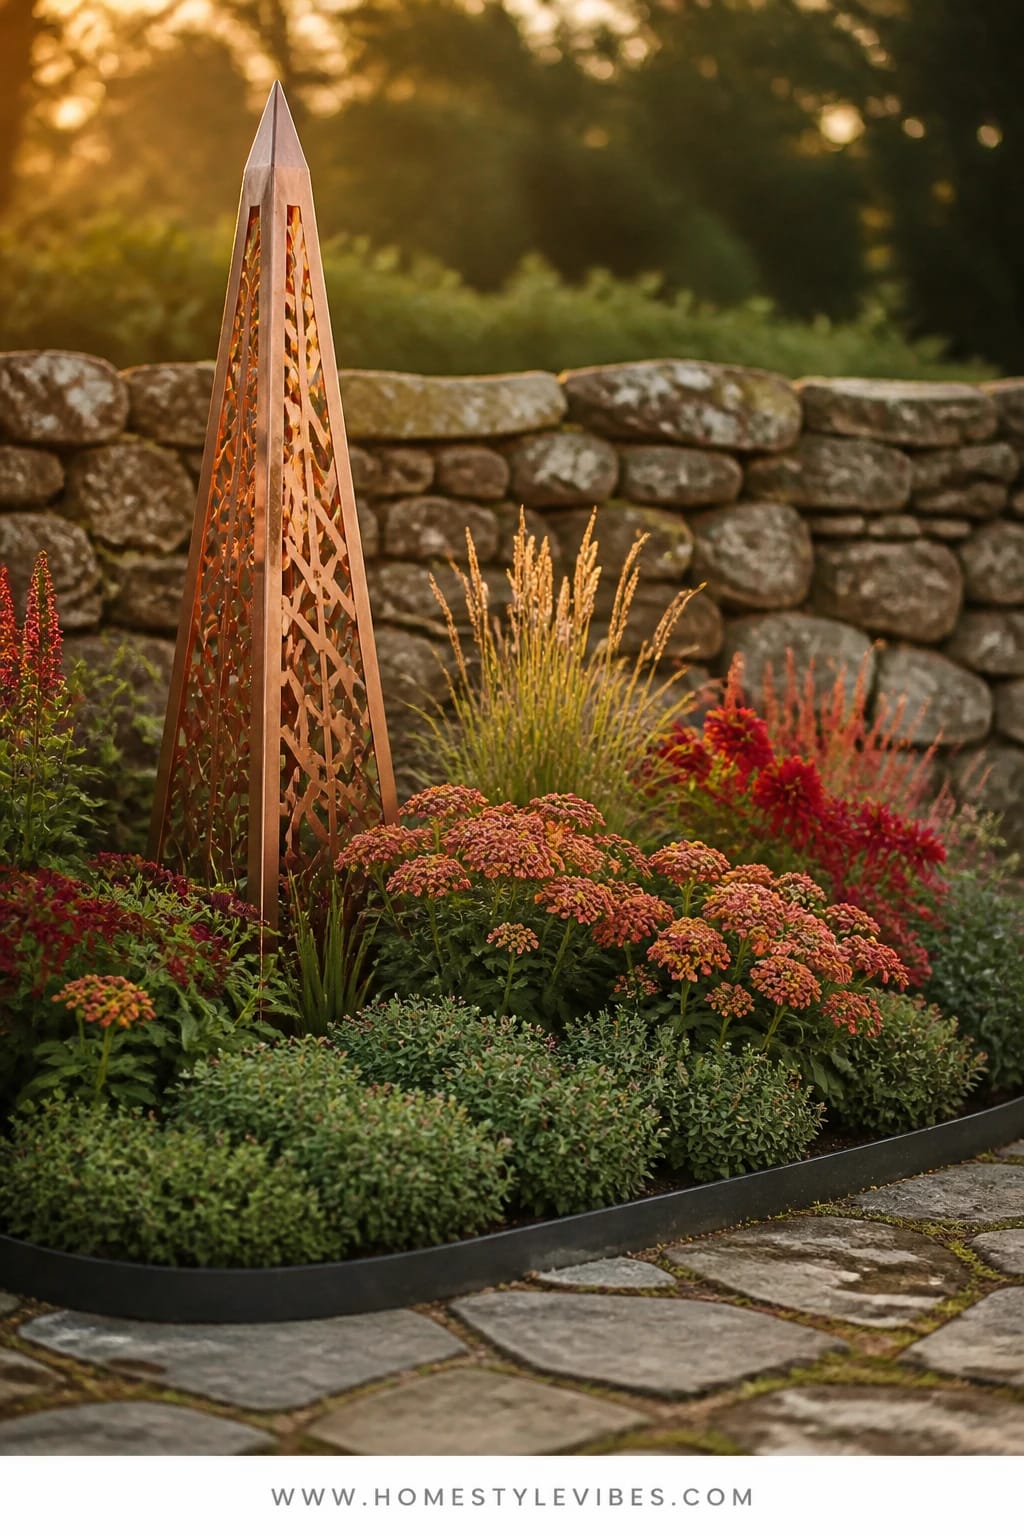
You want color that reads intentional, not chaotic. But every time you buy “one of each,” it turns into a confetti bed that photographs like a yard sale. This charcoal steel border solves the outline, and a copper obelisk gives the bed height and geometry. The vibe is modern classic with a hit of glam at golden hour when copper warms up and the sunset glow washes over reds and corals.
Why it works: The steel edging, set 2 inches proud, creates a razor-sharp line that pairs well with modern and traditional homes alike. The obelisk acts as a sturdy trellis for a climber (think coral climbing rose or black-eyed Susan vine), pulling the eye upward and unifying the palette beneath. Color stays in the warm family—deep reds, oranges, apricots—so it looks cohesive even with multiple species. In late light, warm petals pop and the copper reads like jewelry.
It photographs beautifully thanks to the warm-on-cool contrast: hot blooms inside a cool charcoal frame. Layer foliage textures—glossy salvia leaves against ruffled zinnias, then airy cosmos to soften edges. This is the bed that makes the street stop for a second look.
Variations: On a budget, use black aluminum edging and a DIY copper spray-painted wooden trellis. Small bed? Use a 4-foot obelisk and stick to two bloom types plus a filler like dusty miller. Shadier frontage? Swap heat lovers for coral impatiens and salmon begonias with a clematis on the obelisk. Renter-friendly: Use a freestanding obelisk in a large planter tucked into the bed; remove later without a trace.
Budget Breakdown:
- Powder-coated steel edging: $150–$350 (30–40 linear feet)
- Copper obelisk or metal trellis: $120–$280
- Warm-toned perennials/annuals mix: $120–$240
- Soil and compost: $40–$80
- Black mulch or fine bark: $40–$90
Total Estimated Cost: $470 – $1,040
Best For: Sun-loving front yards; contemporary or brick exteriors; homeowners who want a bold, editorial look that’s still manageable.
Key Design Elements:
- Main materials: Charcoal steel edging, copper trellis, enriched soil
- Color palette: Charcoal, copper, coral, apricot, deep red, velvety green
- Lighting strategy: Capitalize on sunset; backlight blooms for glow
- Furniture silhouettes: Tall obelisk with tapered legs
- Texture layers: Ruffled zinnias, spiky salvia, airy cosmos, trailing verbena
- Accent details: Repeat copper in small path light caps, slim black house numbers
How To Recreate This Look:
- Set steel edging in a clean, slightly convex curve facing the street.
- Install the obelisk near the midpoint, offset toward the door for balance.
- Plant a warm-tone climber at the base and tie early growth.
- Mass plants by color intensity: deepest reds near the obelisk, lighter apricots at the edges.
- Mulch dark, then add a drip line to keep foliage dry and flowers clean.
Why This Reads High-End: Limited hues in a tight temperature family, a single tall structure, and precision edging. The restraint makes the copper feel like a statement, not a gimmick.
The Most Common Mistake: Mixing cool purples and random yellows into the warm palette. Keep it warm and tonal or your copper centerpiece loses its glow-up.
Pro Styling Tip: Snap photos right before sunset; crouch low so the obelisk breaks the sky—instant drama and clean lines.
Now for something calm, earthy, and evergreen-leaning—because color is fun, but year-round structure is the real secret to front yard authority.
4. Limestone-Tiered Shade Bed With Soft North Light and a Fluted Concrete Pedestal
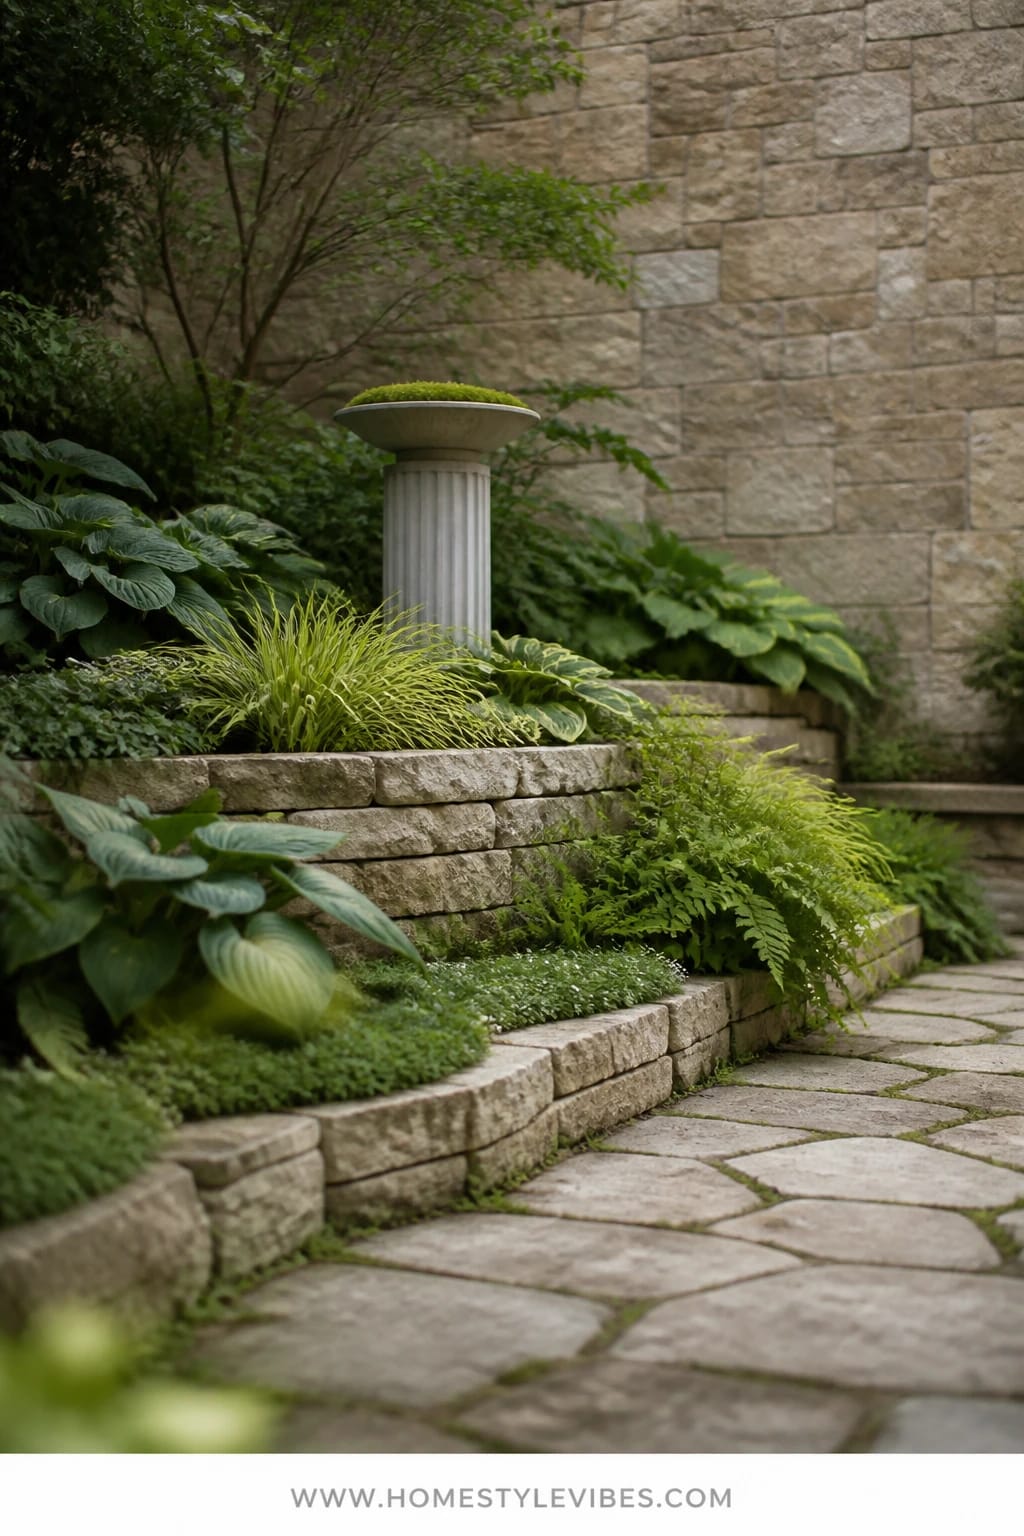
You’ve got a shady front corner that always feels like an apology. Hostas helped, but it still reads like a plant cemetery by August. Enter a limestone-tiered bed with subtle terraces that catch north light just enough to make greens glow. The fluted concrete pedestal becomes your vertical moment—top it with a fern or a simple bowl of moss for sculpture without fuss. The mood leans modern Mediterranean meets woodland—clean, serene, and deeply textural.
This setup thrives in real life because shade plants focus on foliage, not fragile blooms. Limestone keeps things cool-toned and architectural, the tiers add depth in photos, and the fluted pedestal gives classic detail without preciousness. Think layered greens: glossy aspidistra, chartreuse heuchera, variegated hosta, plus textural ferns. You get movement, contrast, and calm in a space that used to frustrate you.
Lighting note: North light is gentle and consistent, which helps leaves look plush instead of scorched. Photograph at midday; flat light loves subtle textures. This bed looks expensive even on rainy days when drops pearl on the leaves and the stone darkens.
Variations: Budget route uses stacked concrete wall blocks instead of limestone and a simple cylinder planter in lieu of the pedestal. Tight footprint? Make one low terrace and skip the bottom tier. Darker mood: add black mondo grass and deep burgundy heuchera. Renter-friendly: build a raised wood planter with a limestone cap and pop a freestanding pedestal planter.
Budget Breakdown:
- Limestone wall stone: $300–$700 (for two shallow tiers, 12–16 feet)
- Fluted concrete pedestal or column: $120–$260
- Shade plants (hosta, heuchera, ferns, aspidistra): $150–$350
- Soil, compost, and pine fines: $60–$120
- Drip irrigation kit: $45–$90
Total Estimated Cost: $675 – $1,520
Best For: North or east-facing entries, mature trees, bungalow or Mediterranean facades, and anyone who wants low bloom maintenance with high texture.
How To Recreate This Look:
- Plan two shallow tiers no higher than 12 inches each; keep the front terrace 24–30 inches deep.
- Dry-stack limestone; step back every 3–4 feet to avoid a straight, stiff wall.
- Backfill with loose, enriched soil; install drip lines as you go.
- Plant large-leaf varieties below and finer textures above to create a natural cascade.
- Center the fluted pedestal on the upper terrace and top with a fern or moss bowl.
Why This Looks Intentional: The stepped stonework creates a built-in stage, and repeating green-on-green tones with micro-contrasts reads calm and curated. The fluted detail nods to classic architecture, linking house and landscape.
Don’t Do This: Avoid scattering small plants evenly like polka dots. Cluster in generous groups so foliage masses read as bold, graphic shapes from the street.
Pro Styling Tip: Before photographing, mist leaves with water; the subtle sheen adds depth and makes greens photograph richer.
Deep breath. You don’t need flowers everywhere. Structure and texture carry curb appeal through every season. Choose one power move per bed and repeat it.
5. Brick Soldier Course Bed With Golden Hour Wash and an Aged Terra Cotta Trough
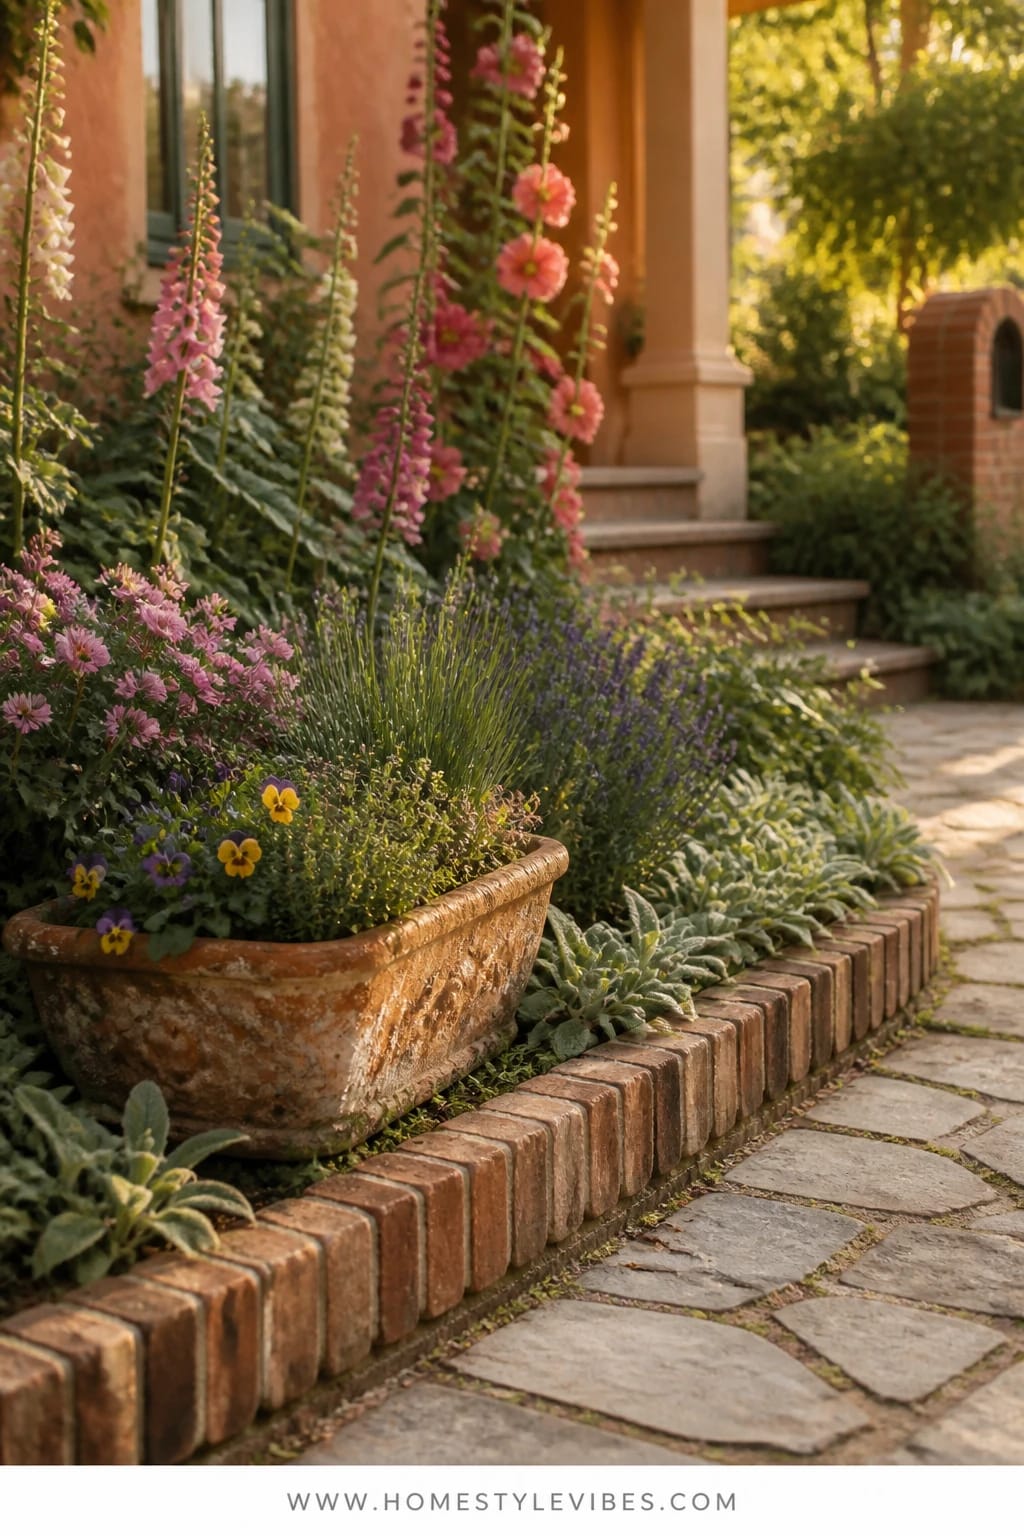
You crave cozy, storybook charm but your front bed feels generic. Maybe you planted a rainbow, but the house still doesn’t feel “complete.” A brick soldier course—a single vertical row of bricks set on edge—frames the bed with heritage detail, while an aged terra cotta trough behaves like a mini raised bed for herbs and seasonal color. The mood is English cottage meets American traditional, timeless and warm.
This works because brick echoes the architecture many homes already have—steps, mailbox, or facade—instantly tying old and new. The terra cotta trough adds a low, linear focal that you can refresh seasonally: tulips and thyme in spring, marigolds and oregano in summer, pansies and rosemary in fall. Golden hour turns brick and terra cotta honey-warm, making creams and soft pinks look expensive and romantic.
In photos, the soldier course gives that perfect edge—no mulch bleeding onto the walk. Layer shrubs (dwarf roses, spirea) with cottage perennials (salvia, penstemon) and a lace of creeping thyme spilling over brick. It’s textural, scented, and very “pull up and exhale.” True story: a friend of mine spent weeks agonizing over plant colors before realizing the real problem was her edges. Once we set a soldier course, the entire bed suddenly felt finished—even before we replanted.
Variations: Small space? Use a half trough and a 6–8 foot soldier course accent just by the entry. Budget version: reclaimed brick with irregular patina—honestly, it’s better. Darker twist: deep burgundy roses and bronze carex with terra cotta black-washed for a timeworn look. Renter-friendly: dry-lay bricks over a compacted sand base and use a freestanding trough on pavers.
Key Design Elements:
- Main materials: Reclaimed brick soldier course, aged terra cotta trough, hardwood mulch
- Color palette: Warm brick, terra cotta, creams, blush pink, sage
- Lighting strategy: Aim for late-afternoon warmth; avoid overhead midday for photos
- Furniture silhouettes: Low rectangular trough with rolled rim
- Texture layers: Shrub mounds, spiky perennials, thyme lace over brick
- Accent details: Copper hose bib, classic brass house numbers, cane-basket door planter
Budget Breakdown:
- Reclaimed brick (100–150): $120–$300
- Terra cotta trough: $90–$220
- Shrubs (3–5): $120–$280
- Perennials and herbs: $80–$180
- Sand and edging base: $40–$90
- Mulch and compost: $50–$100
Total Estimated Cost: $500 – $1,170
Best For: Cottage, Cape Cod, and Colonial homes; sun to part sun; gardeners who love seasonal pot swaps and soft fragrance by the entry.
How To Recreate This Look:
- Excavate a trench for the soldier course, level with compacted sand, and set bricks vertically snugly side by side.
- Position the trough 12–18 inches from the house wall, centered on the door or window.
- Plant shrubs for backbone, then weave perennials in repeating drifts.
- Set creeping thyme between select bricks to spill and soften.
- Mulch, water deeply, and tuck a low-voltage uplight to graze the trough at night.
Why This Looks Expensive: Material continuity. When the edging echoes your architecture, your front bed feels original to the house. Terra cotta’s patina brings in that collected-over-time story.
Watch Out: Don’t let the trough float visually. Ground it with a paver pad or a thyme carpet so it doesn’t look like a random planter plopped in the bed.
Pro Styling Tip: Photograph from an angle that lets the brick soldier course create a leading line right to the door—instant editorial composition.
Almost home. The last design is for modernists who still want softness and movement—minimal, architectural, but never cold.
6. Black Basalt Gravel Bed With Crisp Morning Light and a White Cube Planter Trio
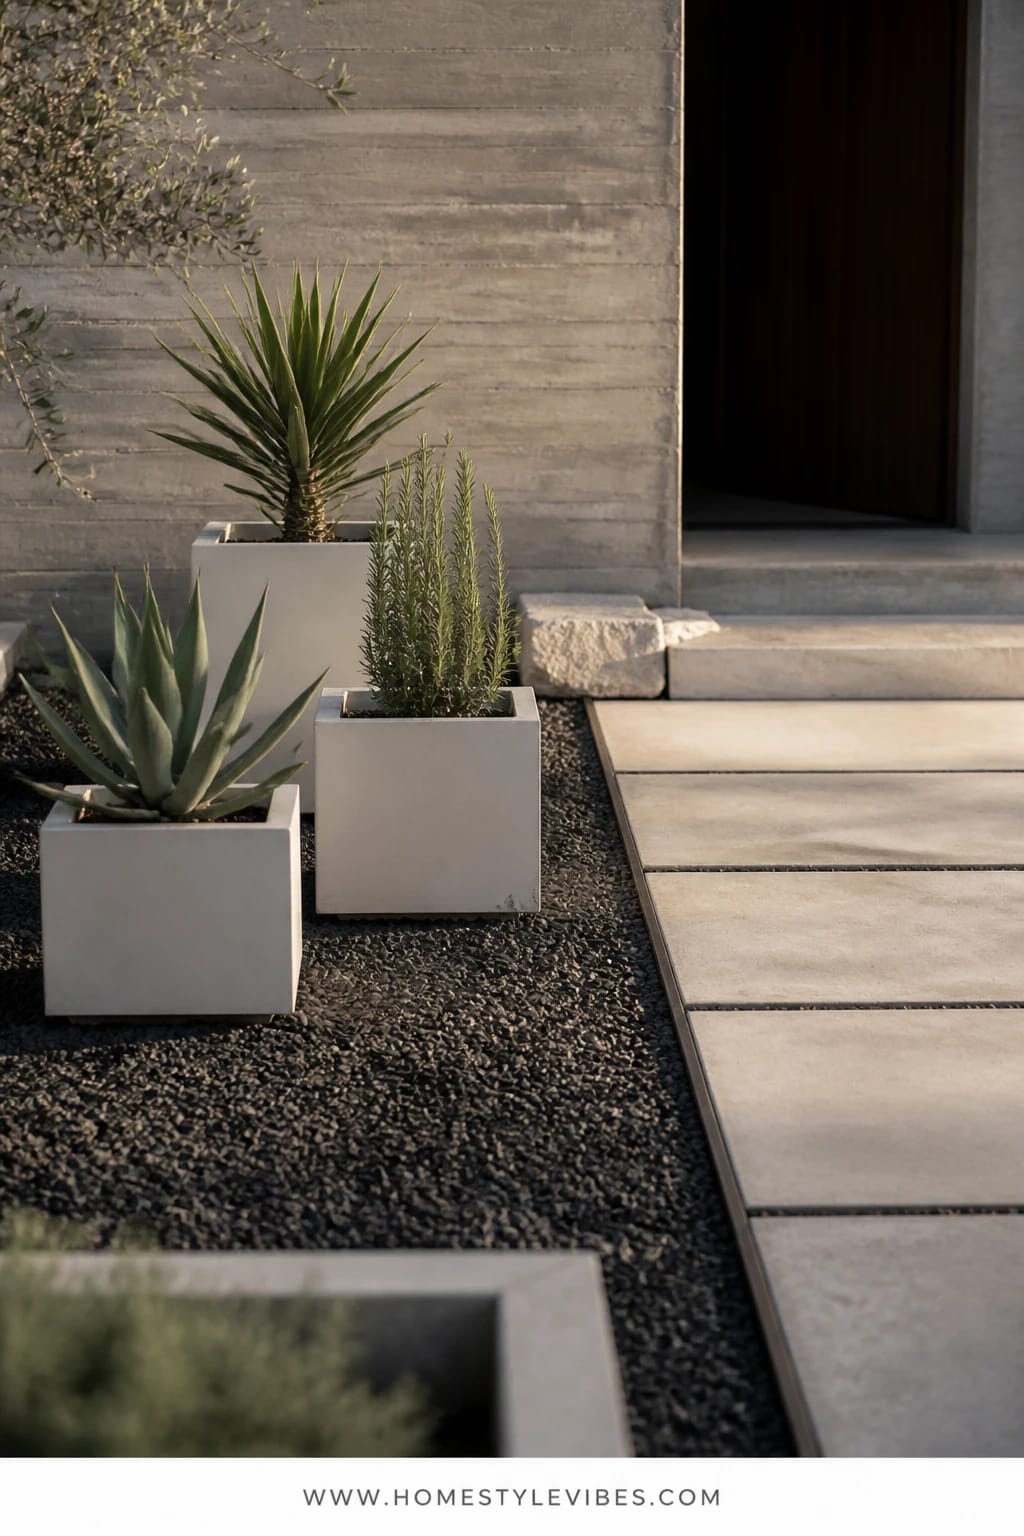
You love a clean, modern look but every time you plant, it gets messy. The bed line feels fuzzy, mulch fades, and perennials topple after one rainstorm. This black basalt gravel bed is your antidote: low, graphic, and almost no maintenance. Three white cube planters act as the sculptural focal—think of them as “furniture” for your front yard—while structural plants like agave, yucca, or upright rosemary punch through the dark base. The mood is modern Mediterranean meets urban courtyard—sharp and serene.
It works because contrast and repetition do the heavy lifting. Basalt’s deep tone makes greens and silvery leaves blaze bright. Morning light throws crisp shadows, which is where minimalism comes alive. Plant sparingly—three to five species max—and let negative space be the star. Any home with black window frames or a dark front door will look instantly more designed.
Why it photographs beautifully: High contrast, clean lines, bold forms. Textures layer from smooth cubes to spiky plant forms to small-scale gravel. One more thing I learned the hard way: cheap solar lights can cast weird “starburst” shadows that ruin that elegant minimal look. Choose low-glare fixtures with frosted lenses or skip lighting entirely and rely on moonlight on the gravel—stunning.
Variations: Budget-friendly uses white-painted fiberclay cubes and crushed black granite instead of basalt. Small facade? Use a single large cube and two smaller flanking cubes in a tight cluster. Softer look: plant white gaura and silver artemisia against the gravel. Renter-friendly: create the bed as a surface application—landscape fabric topped with gravel—then arrange planters only; nothing in-ground.
Budget Breakdown:
- Black basalt or crushed black granite: $180–$420 (for a 10×6 bed, 2–3 inches deep)
- White cube planters (set of 3): $150–$450
- Structural plants (agave/yucca/rosemary/gaura): $80–$220
- Landscape fabric and steel edging: $100–$220
- Low-glare path lights (optional): $70–$160
Total Estimated Cost: $510 – $1,470
Best For: Modern, mid-century, and renovated ranch homes; full sun; homeowners who want minimal upkeep with maximum visual impact.
Key Design Elements:
- Main materials: Black basalt gravel, powder-coated steel edging, white cube planters
- Color palette: Charcoal black, optic white, silver-green, evergreen
- Lighting strategy: Crisp morning light; keep fixtures minimal and low-glare
- Furniture silhouettes: Geometric cubes in a rhythm of tall-medium-short
- Texture layers: Fine gravel, smooth planter walls, architectural foliage
- Accent details: A single travertine step stone, matte black mailbox, clean house numerals
How To Recreate This Look:
- Define the bed with steel edging in a long rectangle or C-shape that hugs the entry path.
- Lay landscape fabric and secure; pour gravel to a consistent 2–3 inch depth and rake smooth.
- Set the three cubes in a triangle—tall in back, medium and small staggered front.
- Plant structural species; keep soil line below rim for a crisp finish.
- Add one accent material only—like a single travertine pad—to avoid visual clutter.
Why This Feels Designer: Discipline. Limited palette, exacting edges, and a clear focal trio. The negative space is intentional, which is the secret sauce of modern landscapes.
One Thing To Avoid: Mixing white gravel with black basalt. It reads spotty and unplanned. Stick to one aggregate and let form do the talking.
Pro Styling Tip: For photos, lightly mist the gravel; it deepens the black and sharpens the contrast with the white cubes.
Quick mindset moment: If you’re feeling overwhelmed, pick your favorite bed line first—the curve, ribbon, or rectangle—and commit to it. The edge becomes your design backbone. Plants are just the wardrobe change.
Quick Checklist
- Choose one clear bed shape: crescent, ribbon, tiered, rectangle
- Install a precise edge: granite, cedar, steel, brick
- Anchor with one statement piece: urn, birdbath, obelisk, pedestal, trough, cube planters
- Limit your color story to one family per bed
- Layer plant heights: tall back, mid, low front
- Repeat plants in clusters of three or five
- Use mulch or gravel that contrasts your plants
- Add discreet drip irrigation for low maintenance
- Photograph in morning or golden hour for soft shadows
- Refresh edges and top-dress seasonally
Frequently Asked Questions
How much should I budget for a front yard flower bed refresh if I’m starting from scratch?
Plan on $350–$1,200 per bed, depending on materials and size. Edging and one statement piece typically take half the budget. Plants and soil make up the rest. Start with the edge and anchor—those two deliver the biggest visual payoff.
My front yard is tiny. Will these ideas make it feel crowded?
Pick one focal (urn, birdbath, or a single cube) and reduce plant species to two or three. Use a crisp edge and leave negative space with gravel or low groundcover. Small yards look bigger with fewer, bolder moves and strong repetition.
I rent my home—can I do any of this without losing my deposit?
Yes. Choose surface-laid edges (staked cedar or steel pins), gravel on fabric instead of digging, and freestanding planters or troughs. Keep plant collections in nursery pots nested into gravel so you can lift and relocate them later.
How do I keep my front bed looking neat all season with minimal maintenance?
Install drip irrigation, mulch or gravel to suppress weeds, and deadhead once a week. Edge trims monthly keep the outline crisp. Choose durable perennials and shrubs so you’re not replanting constantly.
What’s the most common design mistake with front yard flower beds?
Random plant variety without a clear edge or anchor. Decide your bed shape, install a tidy edge, choose one focal piece, and limit your color story. The structure does more for curb appeal than any single flower ever will.
Your Next Step
Pick one of these front yard flower bed ideas and start with the edge and the anchor. That’s your weekend-one win. Next weekend, add the layers—tall, mid, low—and keep your palette tight. Suddenly, passersby will swear you hired a pro.
Luxury out front isn’t about price tags. It’s texture against clean lines, light catching a focal, and the discipline to stop before it gets busy. Choose restraint, repeat forms, and let your materials do the talking.
You’ve got this. One bed, one bold shape, one beautiful moment. By next month, you won’t just like coming home—you’ll linger on the sidewalk to admire your own work. And yes, you should absolutely take that photo. Seriously.

About the Author

Krisztina P.Rendes, Founder of Home Style Vibes
Founder of Home Style Vibes
Krisztina Puskásné Rendes created Home Style Vibes as a cozy-modern lifestyle space where homemaking meets inspiration. Her goal is to help women create beautiful, organized, and peaceful homes they truly love — without overwhelm. You’ll find here heart-driven content on home decor, cleaning tips, easy family recipes, organization and decluttering, DIY home projects, plants, and seasonal ideas — all designed to bring more calm, comfort, and style into everyday life.