7 Summer Garden Aesthetic Ideas That Make Your Outdoor Space Look Magical
You want a summer garden that glows softly at dusk, where the air smells faintly of herbs and the photos you snap look like postcards. You hate the plastic planters, the patchy lawn, and that one corner that never feels finished. Think dappled light on limestone, linen cushions you don’t baby, candles that actually stay lit in the breeze. These seven summer garden aesthetic ideas fix the clutter-and-chaos problem fast, with clear choices and finishes that look luxe on a budget in as little as a weekend.
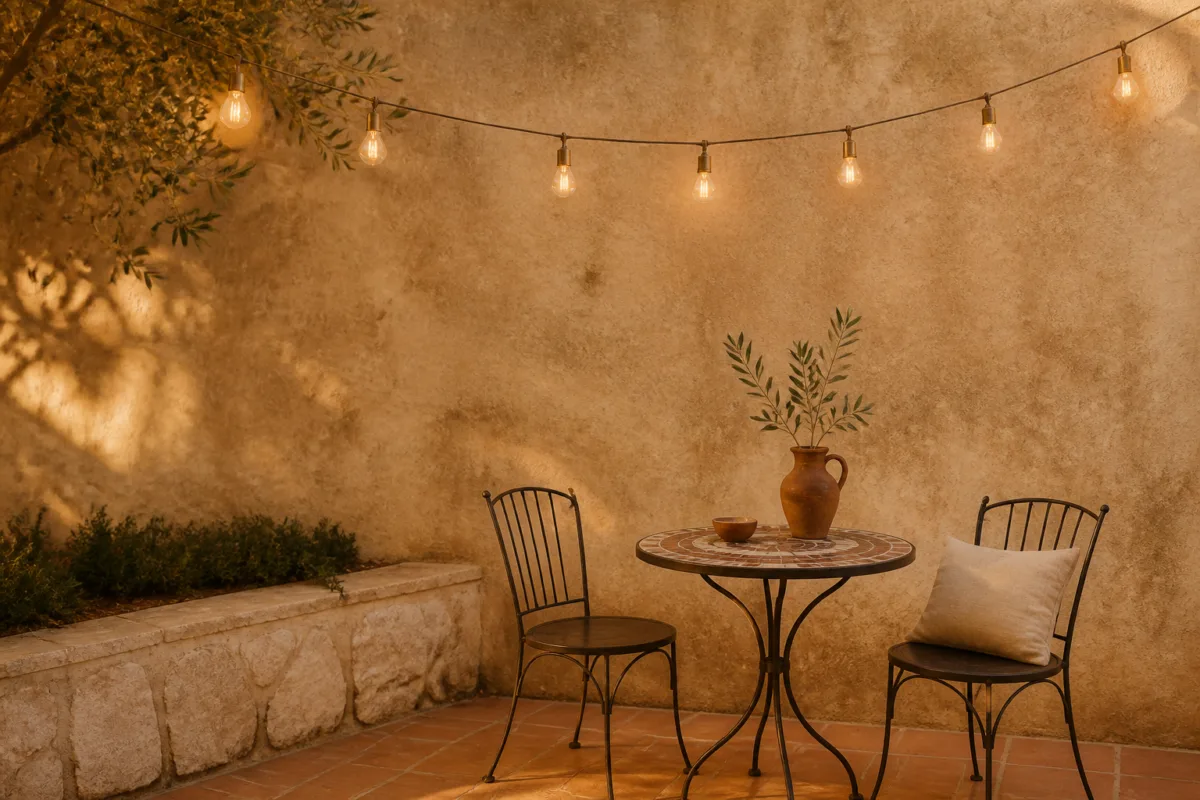
Every concept below is practical, photogenic, and highly specific—no vague “greenery” advice here. Expect color palettes, materials that won’t drive you wild with maintenance, and lighting that flatters faces and flowers alike. Pick one to start and keep your budget under control by using targeted swaps and DIY-level installs. If your vibe is relaxed-but-done, these updates are for you—especially if your camera roll is full of Pinterest screenshots and “someday” folders.
1. Warm Terracotta Courtyard With Golden Hour String Lights and a Mosaic Bistro Set
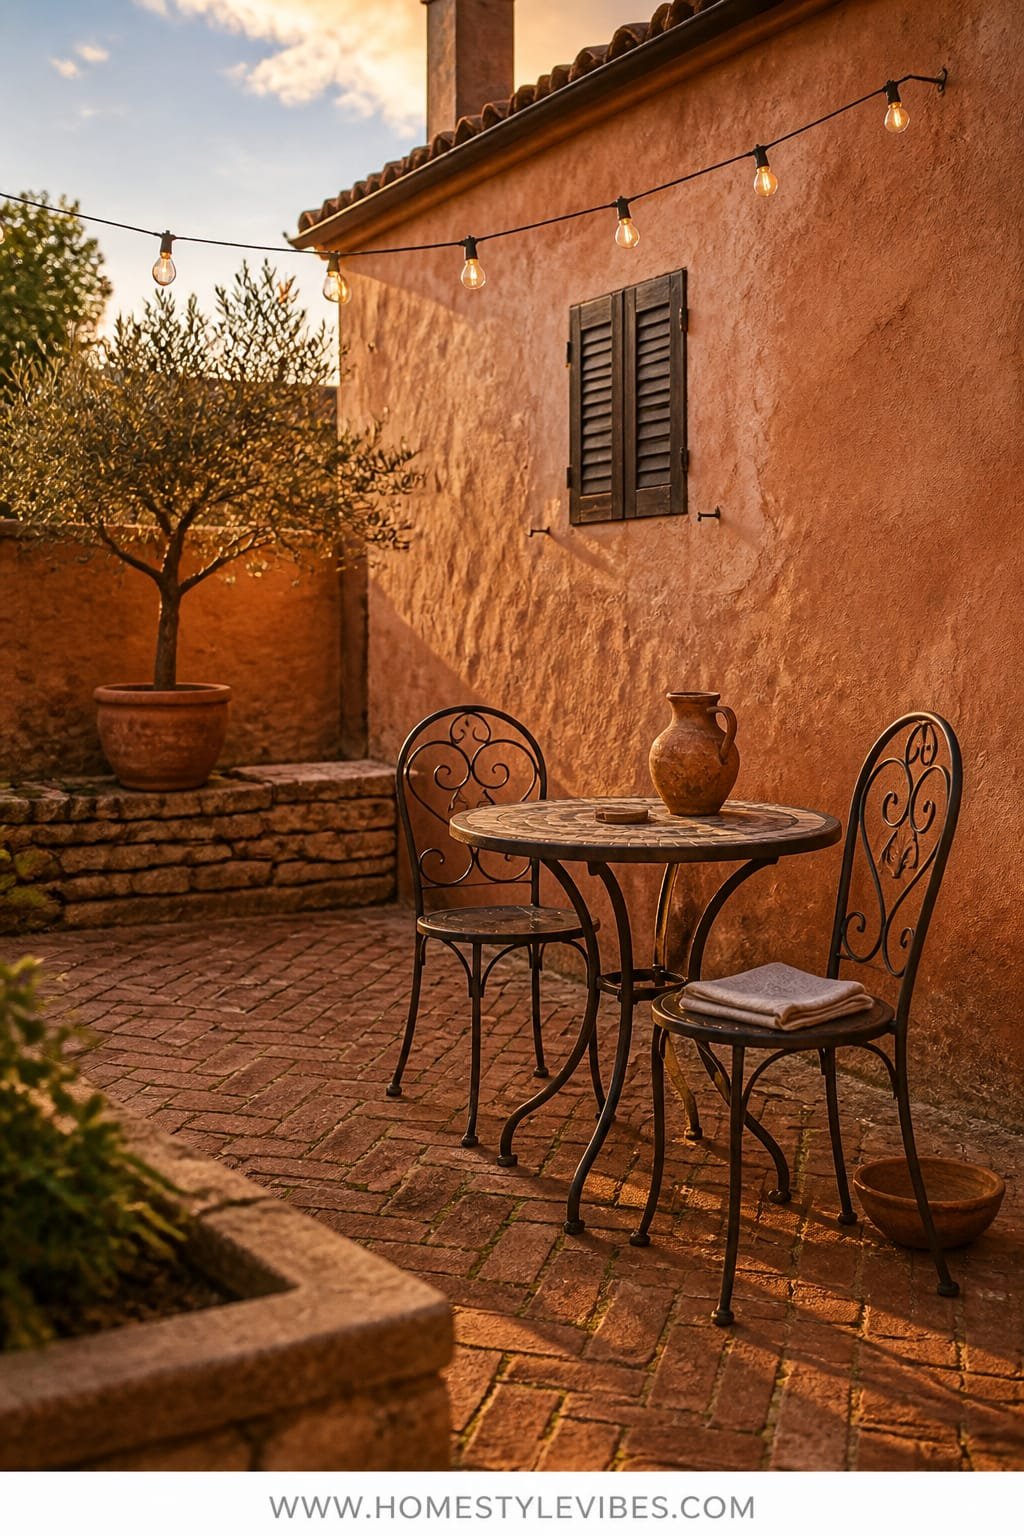
We’ve all been there: the patio looks like a yard-sale staging area by July, and nothing ties together. You want a small, intentional scene that feels like a European side street, where a single espresso feels like a mini-vacation. This look leans into terracotta as the hero material, bathes everything in warm, golden string lights, and anchors the scene with a mosaic bistro set that says “sip here.” The mood is intimate, sun-kissed romantic—like a summer evening in Seville.
It works in real homes because it compresses “garden” into one cohesive vignette that reads beautifully in photos. Terracotta tiles or planters provide natural color variance and texture; even when dusty, they still look charming. String lights create flattering warmth for faces and foliage, while the bistro set offers instant function. These tones photograph well: copper, sienna, cream, and leafy green combine into a palette that looks intentional even in harsh daylight.
Variations make this super doable. On a budget, skip full tile and lay terracotta stepping pavers over leveled sand with pea gravel in between. For small spaces, cluster three sizes of terracotta pots and a foldable bistro set to scale down. Renters can roll out a terracotta-toned outdoor rug and stack planters for layered height. Prefer a darker, moodier take? Add oil-rubbed bronze lanterns and dark green cushions for a sultry, late-night café vibe.
Budget Breakdown:
- Terracotta planters or pavers: $80–$300
- Commercial-grade string lights (warm white): $60–$150
- Mosaic bistro set: $120–$450
- Lanterns/candles: $30–$120
- Outdoor rug (rust/terracotta tone): $70–$250
Total Estimated Cost: $360 – $1,270
Best For: Small patios, balconies, or that awkward side yard you never use. Great for evening entertaining and tiny spaces that need a clear “moment.”
Key Design Elements:
- Main materials: terracotta, wrought iron, ceramic mosaic
- Color palette: cinnamon, rust, cream, olive green
- Lighting strategy: warm string lights hung at two heights for depth
- Furniture silhouettes: curvy iron legs, petite round table
- Texture layers: rough clay, smooth glazed tile, soft cotton cushions
- Accent details: citronella candles, olive branches, linen napkins
How To Recreate This Look:
- Start with the floor: lay terracotta pavers or a terracotta-hued outdoor rug.
- Add the bistro set slightly off-center to avoid symmetry stiffness.
- Layer different pot heights with rosemary, lavender, and thyme for scent.
- Install warm string lights on a diagonal for a café feel.
- Style with linen cushions, small lanterns, and a tray for glasses.
Why This Looks Expensive: Terracotta ages beautifully and develops patina, while a mosaic table adds artisan detail. The warm lighting pulls out the red tones so every photo looks like golden hour. Cohesion beats clutter.
Watch Out: Don’t hang lights too high or too sparse. Low, dense strands create intimacy; high, lonely bulbs feel like a parking lot.
Pro Styling Tip: Place one lantern on the ground under the table to cast upward shadows that photograph as cinematic glow.
Keep scrolling—next up is texture you can literally run your hands across. It’s the shortcut to that magazine look.
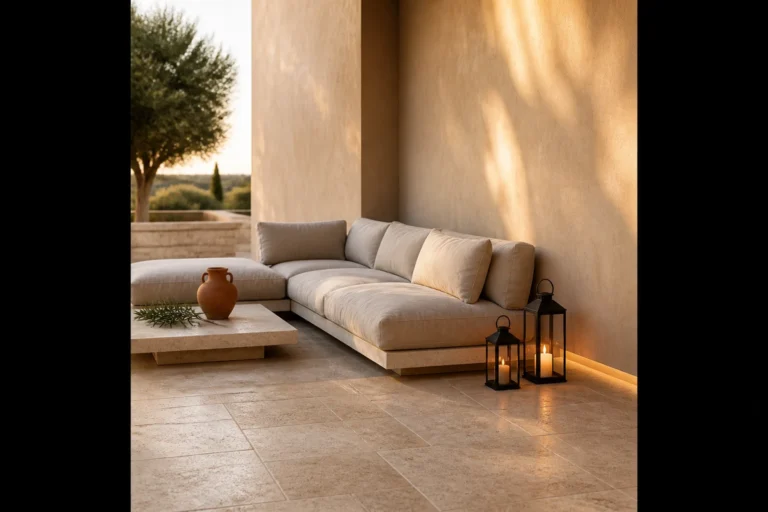
2. Weathered Limestone Terrace With Soft Dappled Shade and a Teak Daybed Lounger
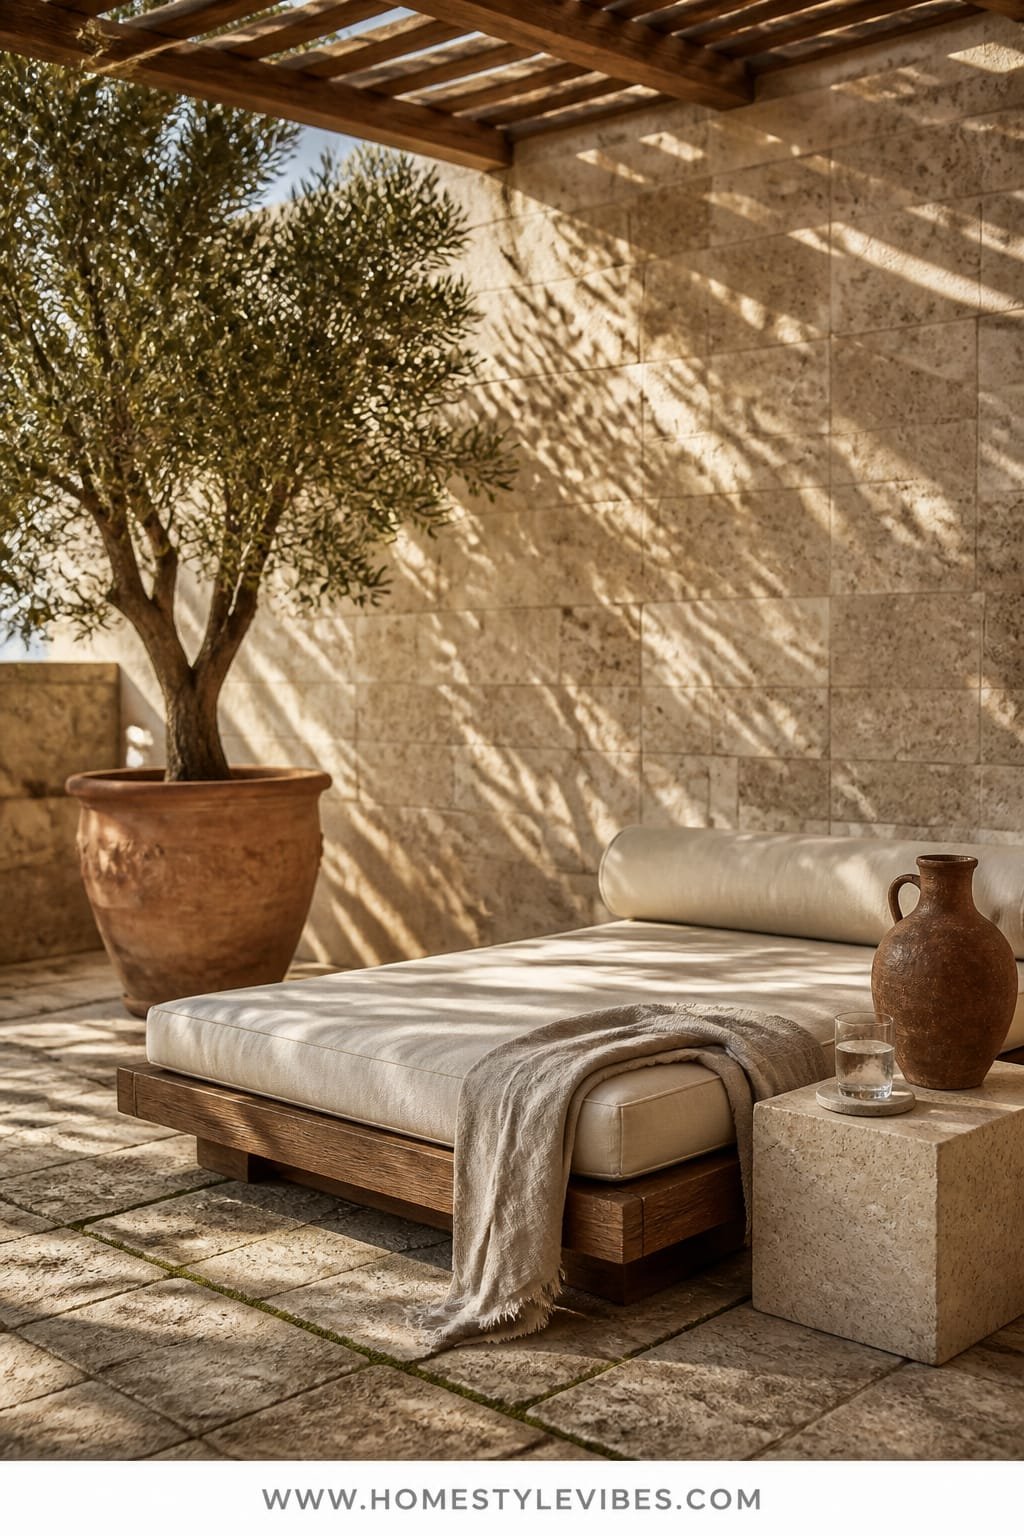
It’s that one corner that always feels off: too bright at noon, barren by evening, and you never quite relax there. A weathered limestone terrace calms everything down with natural tones that don’t glare. Pair it with dappled shade—think a slatted pergola or a light fabric canopy—and a low teak daybed that begs for afternoon naps. The vibe is modern Mediterranean meets hotel-spa.
Why it works? Limestone or a limestone-look paver has soft, chalky variation that hides dust and pollen. The slatted shade controls harsh sunlight so fabrics don’t bleach out and your skin doesn’t feel fried. Teak looks luxe and lasts; it slowly silvers in the sun and honestly looks even better in photos. You get layered textures that photograph like a travel editorial: pale stone, grainy wood, shadow stripes, and a long horizontal anchor.
Try variations: For a budget-friendly version, use limestone-look porcelain pavers and a eucalyptus daybed with outdoor varnish. In small spaces, swap the daybed for a deep armless bench with bolster pillows. Renter move: tension rod canopy with sheer outdoor fabric and a portable deck tile system. Cooler palette person? Use sage cushions, charcoal accents, and stone-gray throws.
Budget Breakdown:
- Limestone or porcelain pavers: $300–$1,200
- Pergola kit or shade sail: $150–$900
- Teak daybed: $450–$1,600
- Outdoor cushions and linens: $80–$300
- Planters with olive or bay trees: $120–$500
Total Estimated Cost: $1,100 – $4,500
Best For: Medium patios that get strong midday sun. Perfect for readers who love uncluttered, tonal spaces and want a “linger here” zone.
Key Design Elements:
- Main materials: limestone (or lookalike porcelain), teak
- Color palette: pale sand, driftwood, sage, soft charcoal
- Lighting strategy: ambient lantern clusters at floor and tabletop levels
- Furniture silhouettes: low, linear daybed with bolster cushions
- Texture layers: stone grain, slatted shade shadows, linen, raw wood
- Accent details: narrow tray table, ceramic jug, striped throw
How To Recreate This Look:
- Define the terrace with pale pavers or a large neutral rug if renting.
- Install a slatted pergola or mount a shade sail for gentle, broken light.
- Set a low teak daybed parallel to your longest sightline.
- Add two tall planters flanking the daybed for scale.
- Layer linen cushions, a throw, and two lanterns (floor + tabletop).
Why This Feels Designer: The repeated horizontal lines—pavers, slats, daybed—create a calm rhythm. Controlled light produces artful shadow play that feels expensive in photos and soothing in person.
One Thing To Avoid: Don’t crowd the daybed with tiny side tables. One long, narrow table or built-in ledge keeps it clean and restful.
Pro Styling Tip: Capture photos in late afternoon when the slats cast crisp stripes; angle the daybed so the cushions show a highlight-shadow gradient.
Quick Tip: Draw your seating layout with chalk on the ground before buying anything. You’ll feel instantly if there’s room to glide past or if you’re about to create a shin-bruising obstacle course.
3. Whitewashed Brick Border With Cool Twilight Lantern Glow and a Slatted Bench Swing
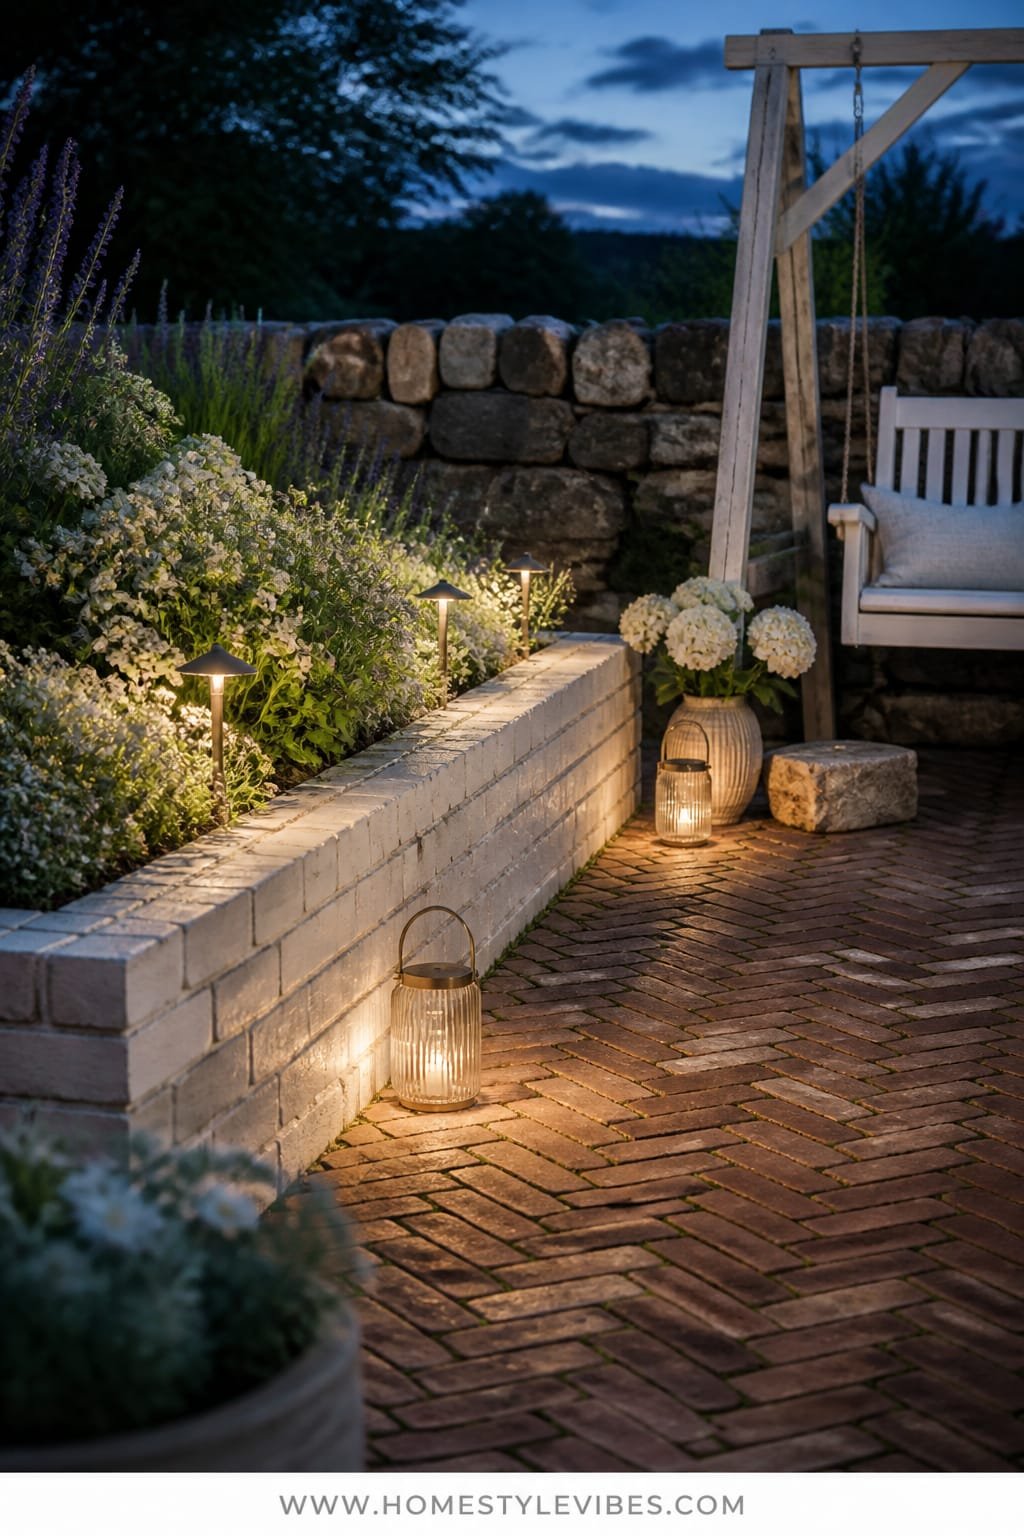
You’ve tried adding more planters, but the garden bed edges still look messy and undefined. A whitewashed brick border sharpens everything while keeping it soft and classic. Add a cool twilight lantern glow (think soft 4000K solar path lights plus a few glass lanterns) and a slatted bench swing that becomes everyone’s favorite spot. The mood blends cottage and crisp coastal—the freshness of white with the romance of evening sway.
Real-home win: Brick is forgiving and stackable, and a light whitewash knocks back the red tone so greenery pops. The swing invites real use—reading, texting, micro-naps—which anchors the space emotionally. Lanterns placed low keep eyes on the plant textures instead of blasting everything from above. Photos thrive on contrast here: white bricks and deep greens make blooms look more saturated.
Variations keep it flexible. Budget version: reclaimed brick with diluted exterior paint for wash. For small yards, build a half-moon border around one statement hydrangea and tuck a single-person swing chair on a tripod stand. Renter-friendly? Use white-painted edging stones and a freestanding swing frame. Prefer warmer light? Swap to 2700K LEDs and bronze lanterns.
Budget Breakdown:
- Brick + exterior paint for wash: $120–$450
- Bench swing + hardware or frame: $200–$800
- Solar path lights: $50–$160
- Lanterns and candles: $40–$150
- Cushions/throw: $40–$120
Total Estimated Cost: $450 – $1,680
Best For: Perimeter beds that need shape and small to medium yards with a hang-out tree or pergola beam.
Key Design Elements:
- Main materials: brick, exterior paint/limewash, galvanized/steel hardware
- Color palette: chalk white, ivy green, navy, soft gray
- Lighting strategy: cool white path lights plus soft candlelight clusters
- Furniture silhouettes: slatted backless or high-back swing bench
- Texture layers: chalky brick, glossy leaves, woven throw, glass lanterns
- Accent details: striped cushion, rope ties, enamel side table
How To Recreate This Look:
- Edge your bed with brick; secure with compacted sand or mortar if needed.
- Whitewash bricks with a 1:1 paint-water mix, wipe back for texture.
- Install a swing safely—lag bolts into a sturdy beam or use a rated frame.
- Place path lights along the brick curve and lanterns near plant clusters.
- Style the swing with two pillows and a durable outdoor throw.
Why This Reads High-End: A defined edge makes plantings look intentional. Whitewash adds historic charm without feeling new-build sterile, and the swing is a single “wow” element that invites use.
The Most Common Mistake: Hanging the swing too low—your knees bump the ground and it feels cramped. Aim for 16–18 inches seat height with a comfortable back clearance.
Pro Styling Tip: Photograph the border at dusk when the cool path lights catch the brick texture and the lanterns add warm sparkle—it’s layered light that looks cinematic.
Mindset moment: Remember, this isn’t about recreating a showroom. It’s about building an outdoor space that supports how you actually spend summer evenings—bare feet, unplanned chats, late fruit bowls on a swing.
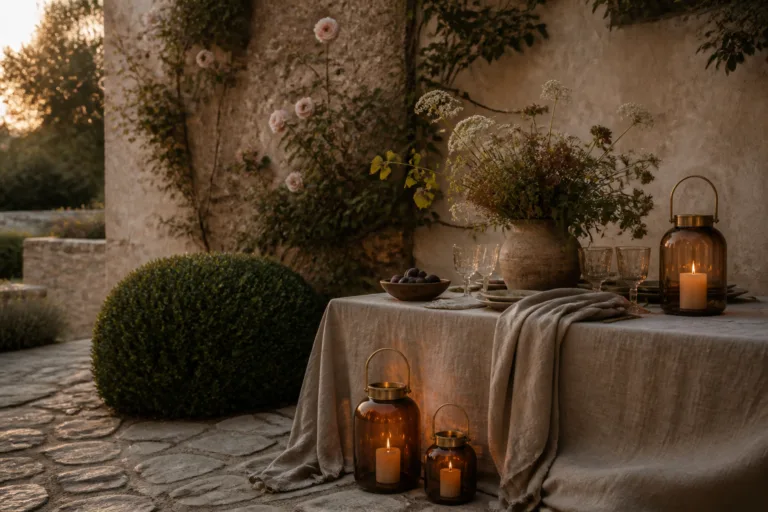
4. Raw Cedar Dining Deck With Honeyed Uplighting and a Farmhouse Extension Table
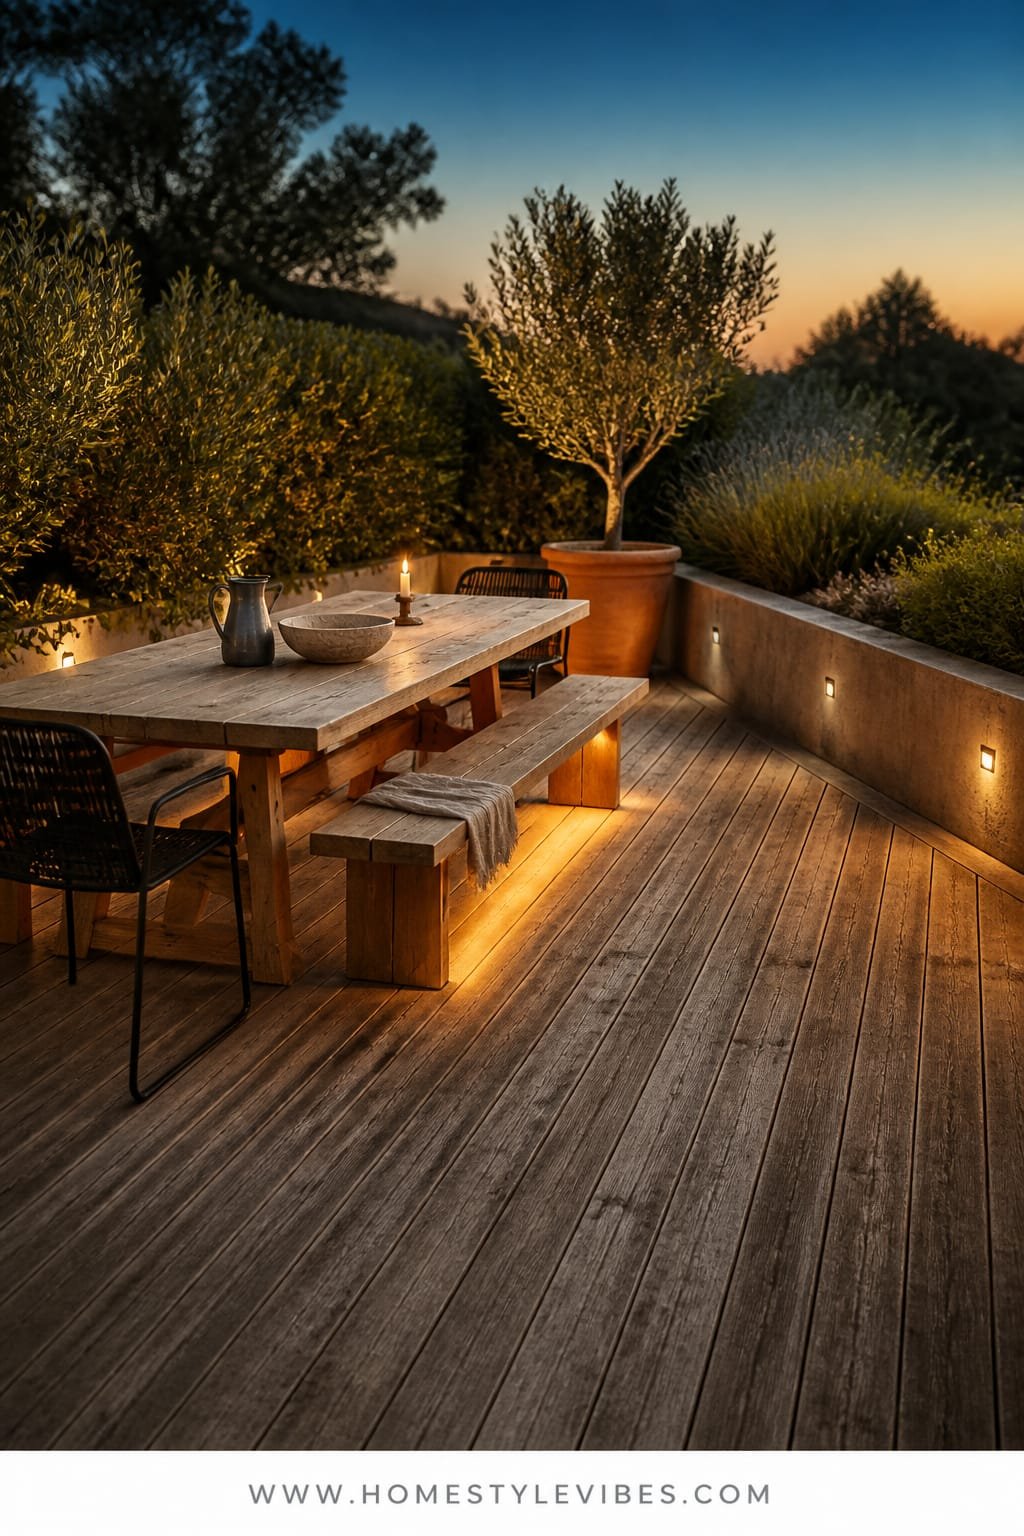
You love dinner outside. You hate the wobbly table, the mismatched chairs, and flying napkins. A raw cedar deck (or cedar-toned platform) instantly organizes your dining zone. Honeyed uplighting under the bench edges creates warmth without mosquito-attracting glare, while a farmhouse extension table handles two or ten without fuss. The mood hits rustic-meets-modern-lodge—approachable, sturdy, quietly dramatic after sunset.
In practice, cedar weathers into a cool silver that still pairs beautifully with warm light. Hidden uplights cast a romantic edge glow and keep faces out of shadow. The long table solves “where do we put everything?”—platters, pitchers, board games. Photos benefit from clear lines and a big hero table; overhead string lights would work here too, but the underglow is the signature detail most people miss.
Variation ideas: Use modular cedar deck tiles over concrete for a renter-friendly version. If budget is tight, stain an existing deck a warm cedar tone and build simple box benches. For small patios, choose a drop-leaf farmhouse table that expands only when needed. For a darker palette, pick espresso-stained cedar and matte black chairs.
Budget Breakdown:
- Cedar decking or deck tiles: $400–$2,000
- Low-voltage uplighting kit: $120–$450
- Farmhouse extension table: $350–$1,300
- Mixed outdoor chairs or benches: $200–$800
- Outdoor runner/placemats/weighted napkins: $60–$200
Total Estimated Cost: $1,130 – $4,750
Best For: Families who host often, or anyone who wants one clear, hardworking dining area that feels “done” even with simple food.
Key Design Elements:
- Main materials: raw cedar, powder-coated steel, outdoor cotton
- Color palette: honey, flax, black, olive
- Lighting strategy: under-bench uplights + a single dimmable pendant or string light
- Furniture silhouettes: long plank table, spindle or slat-back chairs
- Texture layers: wood grain, matte metal, nubby linen, leafy centerpiece
- Accent details: hurricane lanterns, weighty napkin rings, terracotta pitcher
How To Recreate This Look:
- Define a dining platform with cedar or cedar-look tiles.
- Run low-voltage lights under bench edges; test spacing at night.
- Place the extension table down the center with chairs on long sides.
- Use a simple runner and one big leafy branch in a jug as centerpiece.
- Keep surfaces clear; add one side console for platters and drinks.
Why This Looks Intentional: A single-level platform and long table create a clear focal axis. Warm uplight adds theater without feeling fussy, and the restrained palette keeps it timeless.
Don’t Do This: Avoid a clutter of tiny lanterns and tchotchkes. They read busy and make cleanup annoying. Choose fewer, bigger pieces for calm energy.
Pro Styling Tip: For photos, mist the tabletop lightly so the grain catches highlights; stack plates in a tidy column for a subtle “editorial” moment.
Did You Know? The temperature of your lighting affects how food looks. Warmer 2700K makes tomatoes richer and greens deeper, while cool 4000K flattens color—great for pathways, not for dinner mood.
5. Charcoal Gravel Path With Moonlit Silver Foliage and a Sculptural Concrete Water Bowl
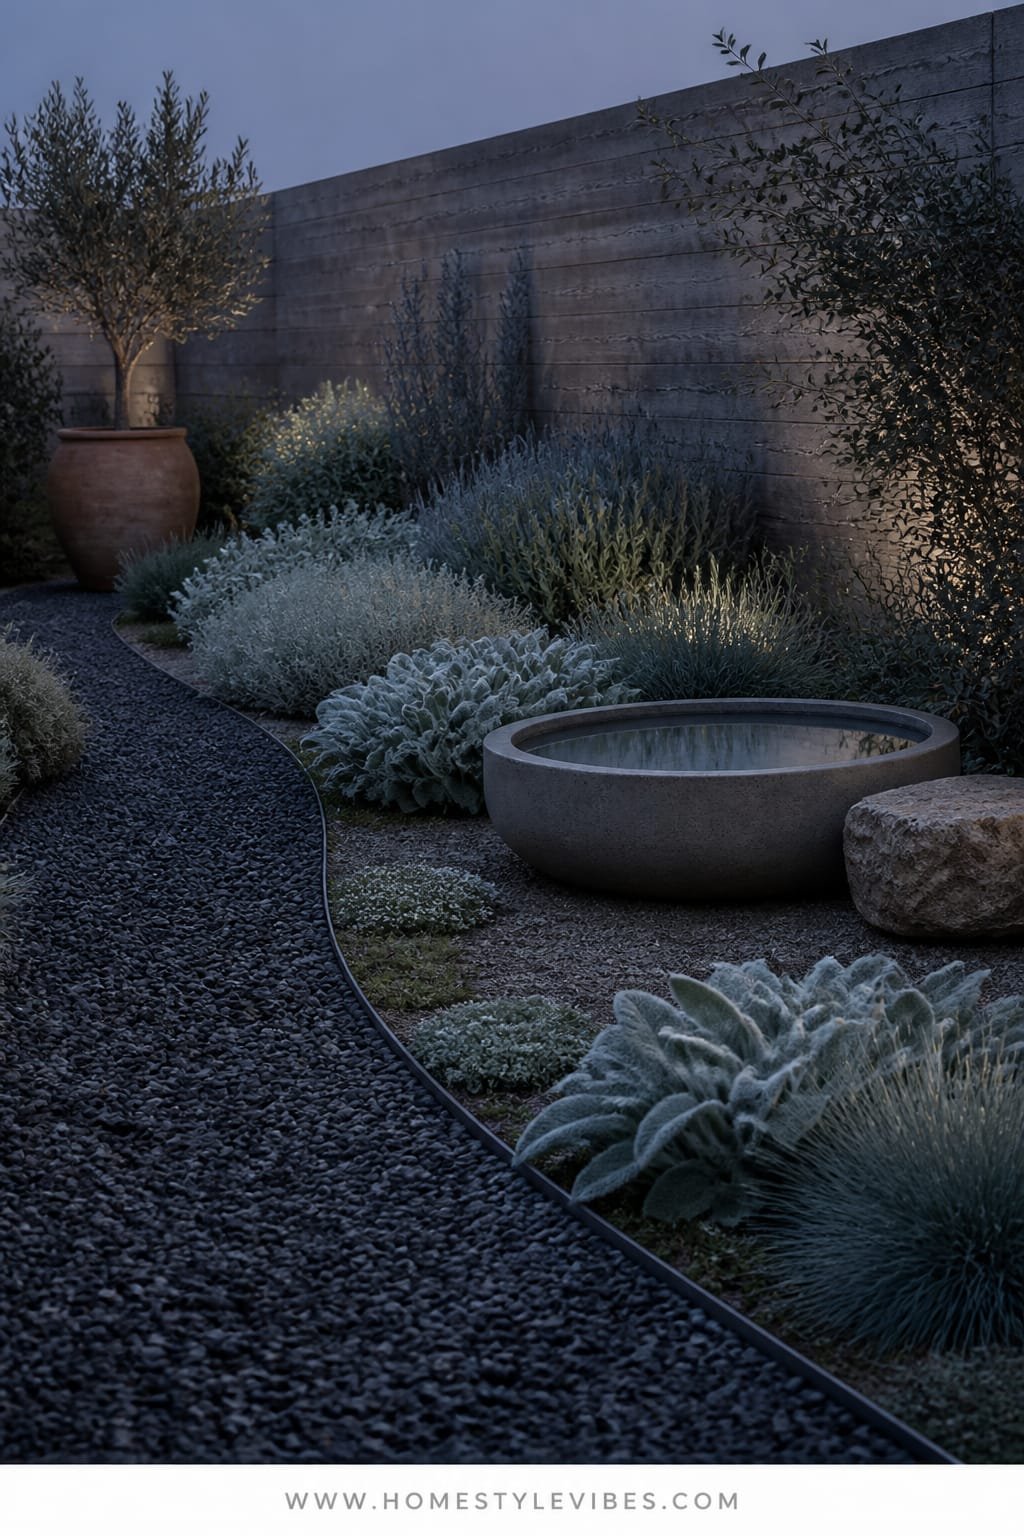
That patchy grass you keep re-seeding each spring? It’s time to retire the headache. A charcoal gravel path slices through with clarity, silver-leaf plants shimmer under moonlight, and a sculptural concrete water bowl becomes the calm, reflective heart. The atmosphere feels serene, a little zen, like modern courtyard meets lunar garden.
Why it works: Gravel is budget-friendly, drains beautifully, and makes sound—footsteps feel purposeful. Charcoal adds contrast so greens and silvers pop, even at night. The water bowl adds motion and reflection without the maintenance of a full pond. Photos sing because the tonal contrast reads graphic: dark path, luminous plants, glassy water surface. If you’ve ever cursed at muddy shoes or yellowing turf, this is your forgiveness plan.
Variations make it versatile. Budget path: compacted crushed granite with metal edging. Small yards can do a single loop or a destination slice that leads to a chair. Renter idea: freestanding water bowl on a laurel of gravel in a large tray. For a wilder version, mix in stepping stones and seed the edges with creeping thyme to soften lines.
Budget Breakdown:
- Charcoal gravel + metal edging: $180–$650
- Concrete water bowl or fiberglass lookalike: $180–$700
- Silver plants (lamb’s ear, dusty miller, artemisia): $60–$200
- Low-voltage spotlights (cooler 3000–3500K): $90–$250
- Weed barrier + base material: $60–$180
Total Estimated Cost: $570 – $1,980
Best For: Low-maintenance gardeners, side yards that stay damp, and night owls who love late strolls with a drink in hand.
Key Design Elements:
- Main materials: charcoal gravel, concrete, steel edging
- Color palette: black, slate, silver, white bloom accents
- Lighting strategy: cool-toned, low uplights on silver foliage; subtle rim light on water bowl
- Furniture silhouettes: minimal stool or stone perch near the bowl
- Texture layers: rough gravel, soft fuzzy leaves, smooth water surface
- Accent details: white pebbles under bowl, single sculptural grass
How To Recreate This Look:
- Map your path with a hose; mark curves and measure width.
- Install steel edging, lay base, compact, then spread charcoal gravel.
- Set the water bowl on a level pad; check reflection line from main viewpoint.
- Plant silver foliage in loose groups along the edges.
- Add cool uplights aiming up the leaves, not in eyes.
Why This Looks Expensive: Minimalism with perfect contrast feels tailored. The reflective water surface adds a “designed feature” without a contractor-level install.
Watch Out: Don’t skimp on edging or base prep. Gravel without boundaries migrates and screams “DIY weekend that quit at 3 p.m.”
Pro Styling Tip: For night photos, wet the gravel; it deepens to near-black and makes silver foliage glow like mercury.
Micro-story: A friend of mine spent weeks agonizing over plant colors before realizing the real issue was the path. Once we installed a charcoal run with a single water bowl, every plant looked intentional—even the random volunteer oregano.
6. Cane-Wrapped Lounge Nook With Dappled Sunlight and a Curved Outdoor Sofa
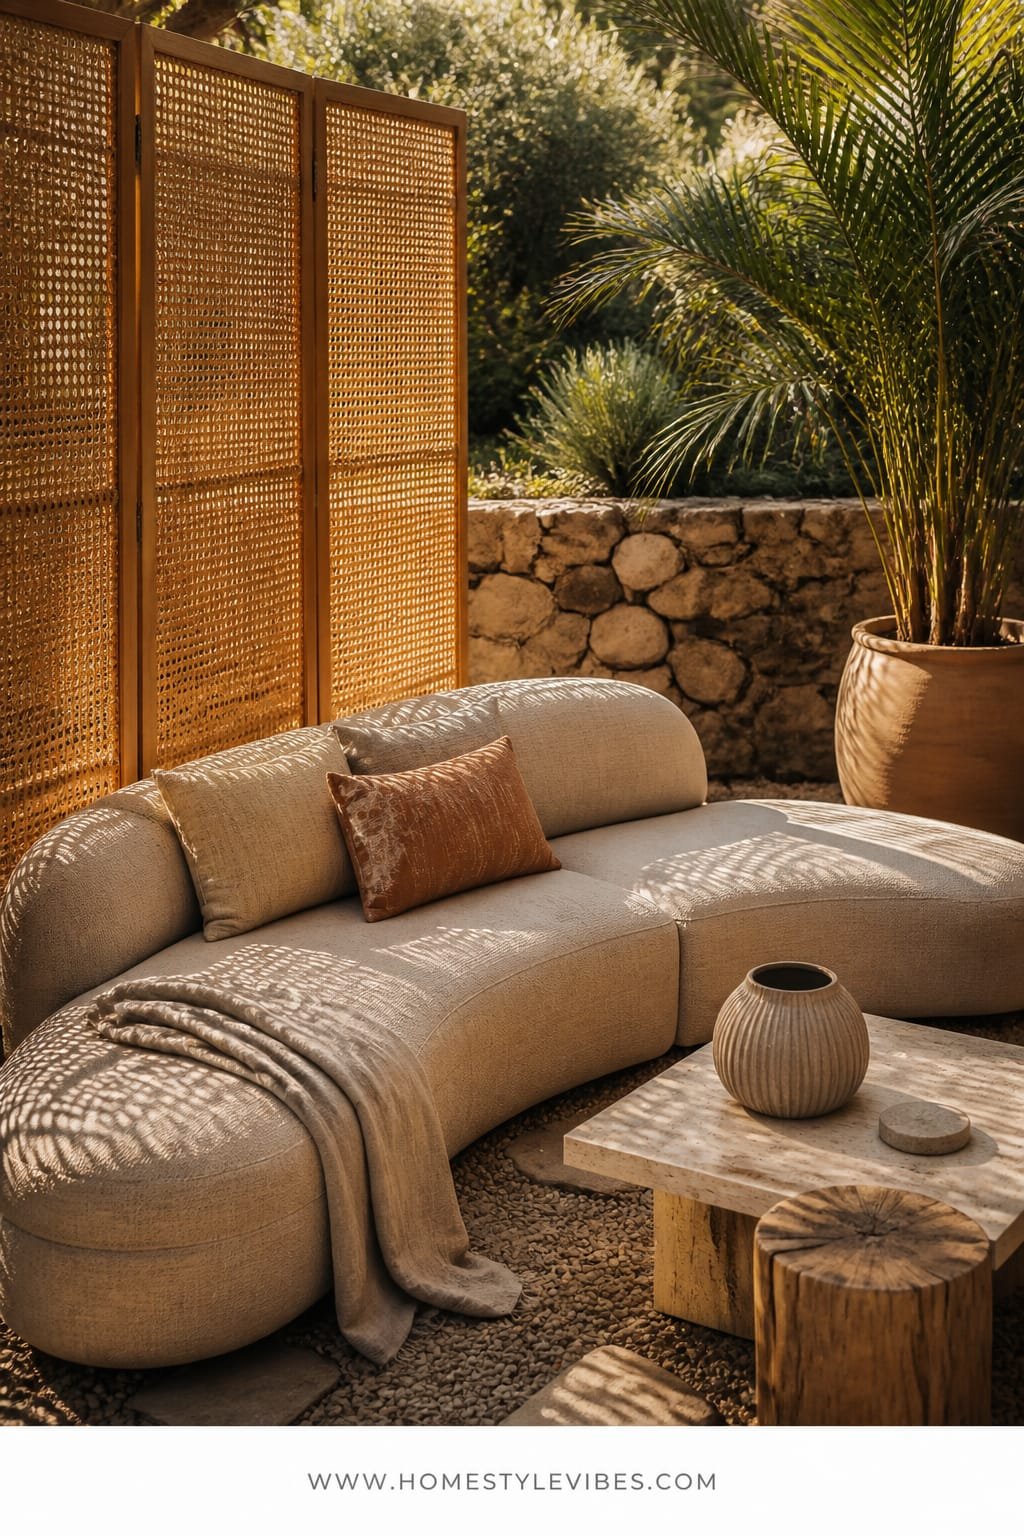
You’ve got a suntrap corner that roasts you at noon and blinds you at 4 p.m. You keep dragging chairs there, but it still feels uncomfortable and glare-y. Try a cane-wrapped privacy screen that filters light into a honeycomb pattern, paired with a curved outdoor sofa that lets everyone pile in. This reads boho-sophisticated with a little Palm Springs cocktail energy.
It’s renter-friendly and family-proof: cane or synthetic rattan panels attached to a freestanding frame soften wind and create that all-important backdrop that makes photos look editorial. Curved seating handles groups and looks chic from every angle. The filtered light makes skin tones look effortless and rosy—trust me, you’ll stop squinting in selfies. Materials like resin cane and performance fabrics take spills without drama.
Variations span budgets. Go affordable with lattice panels painted a warm sand and a secondhand curved sectional updated with custom cushion covers. Tiny balcony? Use a two-panel screen and a half-moon loveseat. For a luxe twist, add a single marble-topped pedestal table and brass-accent lanterns. Darker version: charcoal screen, taupe cushions, olive pillows.
Budget Breakdown:
- Cane or rattan-look panels + frame: $180–$700
- Curved outdoor sofa or sectional: $500–$2,400
- Low side tables (2): $90–$300
- Outdoor cushions/pillows: $120–$380
- Floor lanterns or plug-in sconces: $60–$240
Total Estimated Cost: $950 – $4,020
Best For: Corners that need privacy or wind control; social sit-and-chat zones; renters who want impact with minimal drilling.
Key Design Elements:
- Main materials: cane/rattan, powder-coated frames, performance fabric
- Color palette: sand, caramel, oat, eucalyptus
- Lighting strategy: filtered daylight by day; warm portable lamps by night
- Furniture silhouettes: curved sofa, drum side tables, low ottoman
- Texture layers: woven screen, slubbed pillows, smooth tabletops
- Accent details: tassel throw, ceramic ashtray, potted monstera
How To Recreate This Look:
- Build or buy a freestanding cane screen; position to filter harsh sun.
- Set a curved sofa about 8–12 inches from the screen to show texture.
- Add two low tables so drinks stay stable and reachable.
- Layer pillows in two sizes and one patterned lumbar for movement.
- Bring in portable lanterns; keep cords hidden behind the screen feet.
Why This Feels Designer: Curves plus woven texture add depth without clutter. The screen delivers a clean background that makes every snapshot look styled.
One Thing To Avoid: Pushing the sofa flat against the screen. Give it breathing room so shadows fall and the cane pattern doesn’t imprint on cushions.
Pro Styling Tip: Place one leafed plant half in front of the screen to break the line—a small overlap makes photos feel layered and real.
Quick Tip: Before buying big furniture, sit on folded blankets to test seat depth outdoors. Too shallow, and you’ll never sink in; too deep, and guests sit bolt upright like meeting-room posture.
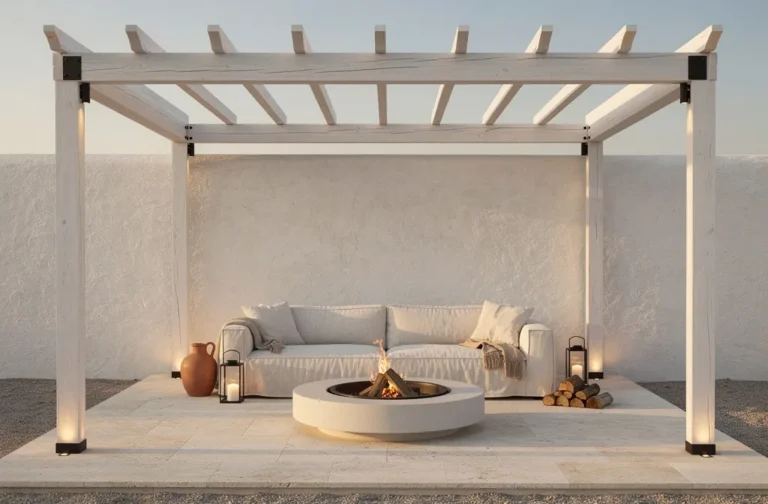
7. Limewashed Garden Wall With Sunset-Peach Uplights and a Black Metal Fire Bowl
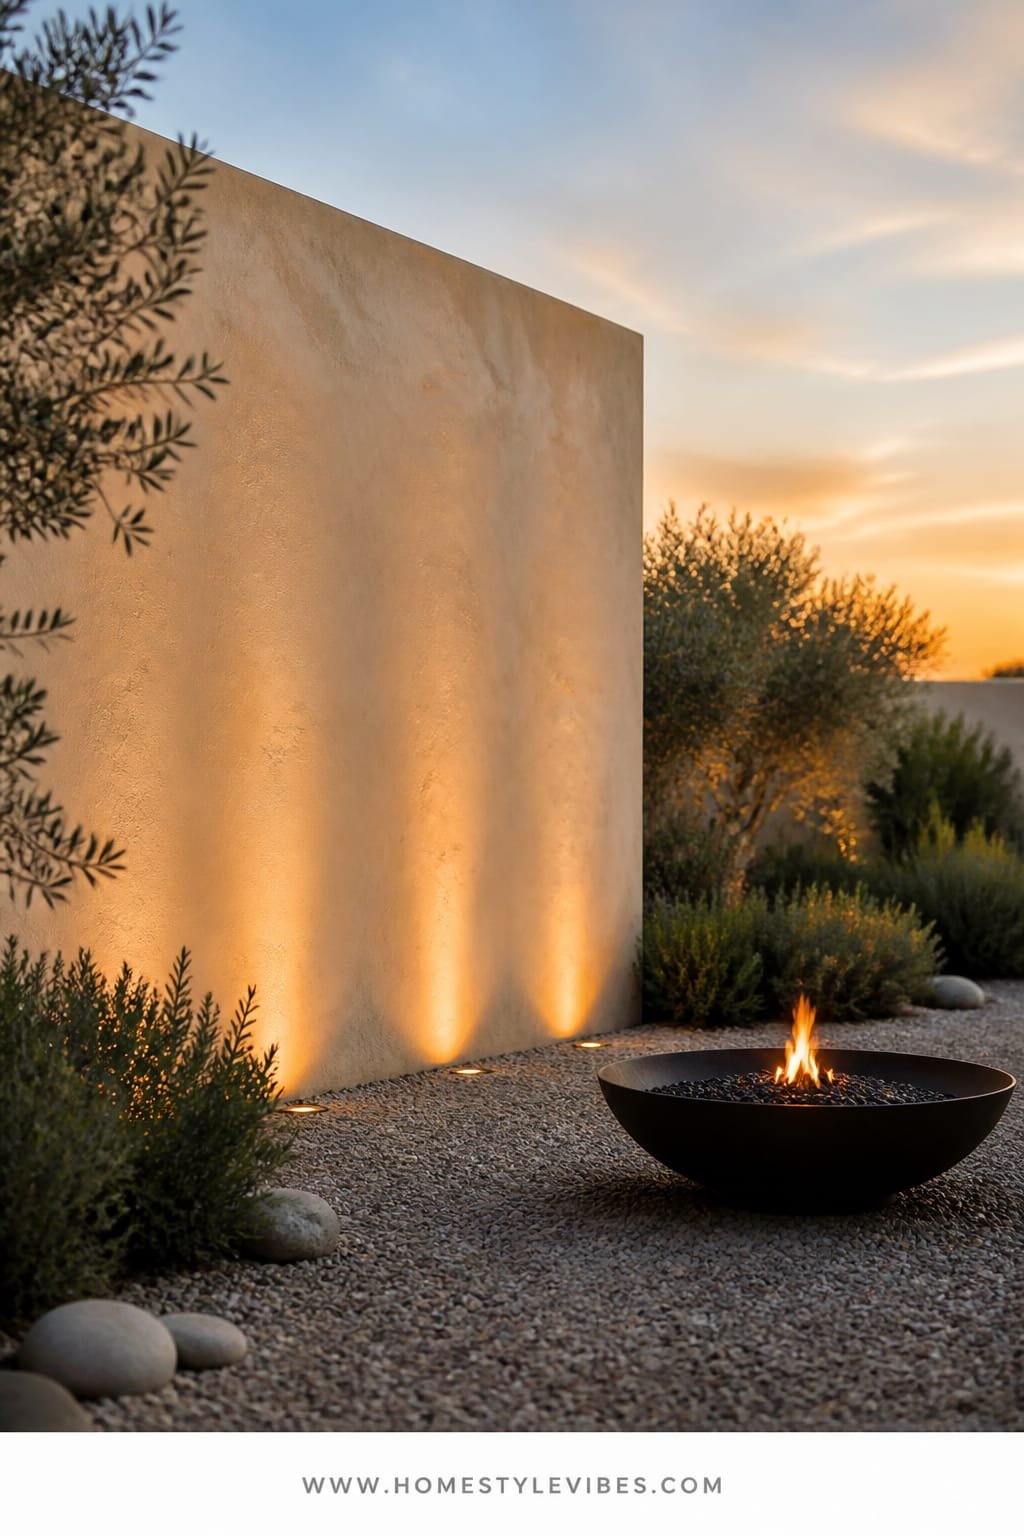
You want drama. You hate the feeling that your yard fades to black at night, with no focal point after dinner. A limewashed garden wall painted in a soft, chalky tone becomes your canvas, sunset-peach uplights warm the scene, and a black metal fire bowl anchors the foreground like a piece of sculpture. Think modern hacienda, with color that flatters everyone and photographs with a cinematic glow.
Here’s why it works: Limewash eats light in a gentle way, so you get soft gradients instead of glare. Warm 2200–2400K uplights bounce off the wall and tint the air just enough to feel like sundown, even at 10 p.m. The fire bowl adds movement and a reason to gather. You can keep the rest minimal—one bench, a few grasses, done. This setup also makes mediocre plantings look intentional; the wall becomes your star.
Variations unlock every yard. On a budget, paint an existing fence or freestanding panel with limewash or mineral paint. Renters can use a large limewashed screen on casters as a backdrop. If open flames are a no-go, use an ethanol burner or large LED flame lamp in a matte black bowl. Prefer a cooler palette? Swap uplights to 2700K and add slate planters.
Budget Breakdown:
- Limewash or mineral paint + brushes: $80–$220
- Uplights (very warm LEDs): $100–$320
- Black metal fire bowl: $150–$700
- Simple bench or low chairs: $120–$500
- Grasses or agaves for silhouette: $60–$220
Total Estimated Cost: $510 – $1,960
Best For: Yards that feel flat after dark; walls or fences that need charm; hosts who love late-night marshmallow energy without camp vibes.
Key Design Elements:
- Main materials: limewash, blackened steel, natural stone/gravel
- Color palette: chalk white, peach light, black, sage-green accents
- Lighting strategy: low warm uplights grazing the wall; fire glow as focal
- Furniture silhouettes: simple linear bench, tripod chairs
- Texture layers: chalky wall, matte metal, coarse gravel
- Accent details: terra grasses, stacked stone, hefty match striker
How To Recreate This Look:
- Prep the wall; apply two coats limewash with uneven strokes for depth.
- Set uplights 12–18 inches from the wall; angle to graze, not blast.
- Place the fire bowl 6–8 feet in front; center on the brightest wash area.
- Add a bench opposite the bowl for balanced sightlines.
- Plant tall grasses at edges to frame the light scene.
Why This Reads High-End: Monochrome wall + controlled warm light = gallery backdrop. The restrained palette looks curated; the fire bowl adds sculptural mass without clutter.
The Most Common Mistake: Too many colors fighting the glow. Keep cushions and planters neutral so the light color does the storytelling.
Pro Styling Tip: For photos, light the fire first, then dial uplights until the wall sits one stop brighter than faces—instant editorial drama.
Mindset reset: If one idea resonates more than the others, that’s your starting point. You don’t need all seven; you need one strong move that solves a real annoyance and sets your garden’s tone.
Quick Checklist
- Choose a single hero material: terracotta, limestone, cedar, brick, gravel, cane, or limewash
- Pick one dominant light quality: golden string lights, dappled shade, cool path lights, honeyed uplight, moonlit silver, filtered lanterns, or sunset-peach glow
- Anchor with one statement piece: mosaic bistro set, teak daybed, bench swing, extension table, water bowl, curved sofa, or fire bowl
- Define edges: brick border, steel path edging, or deck platform
- Limit your palette to 3–4 colors plus greenery
- Layer textures: rough + smooth + soft + reflective
- Control scale: one oversized element beats five small ones
- Place lights at multiple heights for depth
- Create a clear axis or vignette for photography
- Test night lighting before final install
Frequently Asked Questions
How can I get a “magical” summer garden look on a tight budget?
Choose one zone and one hero material. For example, do a terracotta vignette with three pot sizes, a foldable bistro set, and one strand of warm string lights. Keep everything else simple. Focus spending on the item that anchors the photo and the memory—usually seating or lighting.
My patio is tiny. Which idea works best without feeling crammed?
Go with the terracotta bistro scene or the cane lounge with a half-moon loveseat. Curved or round furniture reads softer in small spaces. Hang lights closer and lower for intimacy and use vertical screens to create a backdrop without stealing floor space.
I’m a renter. What can I realistically install without losing my deposit?
Freestanding elements are your friends: deck tiles, tension-rod canopies, portable lanterns, screen panels on stands, and gravel in planters or trays. Limewash a removable screen instead of a wall. Keep screws out of building surfaces and opt for clips or adhesive hooks rated for outdoor use.
How do I maintain these looks through the season?
Brush dust off cushions weekly, rinse planters monthly, and replace any flickering bulbs immediately. Add a coat of outdoor oil to teak once or twice a season if you prefer the golden tone; otherwise, let it silver naturally. Sweep gravel paths regularly and top up thin spots.
What’s the biggest mistake people make with outdoor lighting?
Using one type of harsh light everywhere. Mix sources and heights: path lights low, lanterns at mid-level, and a soft overhead or wall wash. Always test color temperature at night with real people in the space to avoid unflattering tones.
Closing Thoughts
Pick one idea. Don’t overthink the whole yard—choose a corner and give it a hero material, a single light story, and one statement piece you genuinely want to use. You’ll feel the shift the first evening you sit down and forget about your phone for twenty minutes.
The truth is, outdoor luxury comes from texture, lighting, and restraint. Terracotta + warm bulbs. Cedar + honeyed uplight. Limewash + peach glow. When you edit down and commit to a clear vibe, everything starts to look intentional—and that’s what reads as “finished.”
You’ve got this. Start with the string lights or the bench swing or the water bowl—whatever solves your daily frustration. By next weekend, your summer garden aesthetic won’t just look magical; it’ll feel like the place you’ve been craving all year.
About the Author

Krisztina P.Rendes, Founder of Home Style Vibes
Founder of Home Style Vibes
Krisztina Puskásné Rendes created Home Style Vibes as a cozy-modern lifestyle space where homemaking meets inspiration. Her goal is to help women create beautiful, organized, and peaceful homes they truly love — without overwhelm. You’ll find here heart-driven content on home decor, cleaning tips, easy family recipes, organization and decluttering, DIY home projects, plants, and seasonal ideas — all designed to bring more calm, comfort, and style into everyday life.