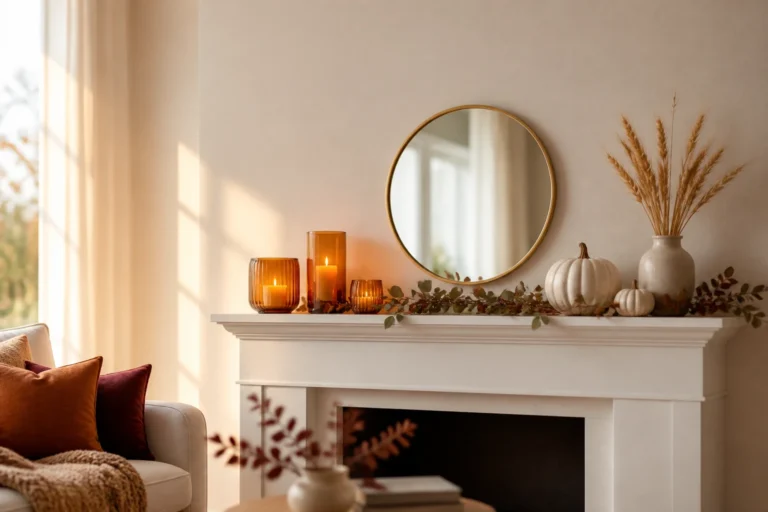
6 Front Porch Flower Bed Ideas That Make Your Entrance Feel Welcoming
You want that “Oh wow, can I come in?” feeling when someone walks up to your home. You hate the tired mulch islands, the random hosta army, and those petunias that ghost you by July. You’re dreaming of a front porch that smells like herbs after rain, catches golden hour like a movie scene, and looks peaceful even when the rest of life feels chaotic. These 6 front porch flower bed ideas trade guesswork for a plan—simple moves you can finish in a weekend or two, under $1,200 for most options, that actually make your entrance feel welcoming and camera-ready.
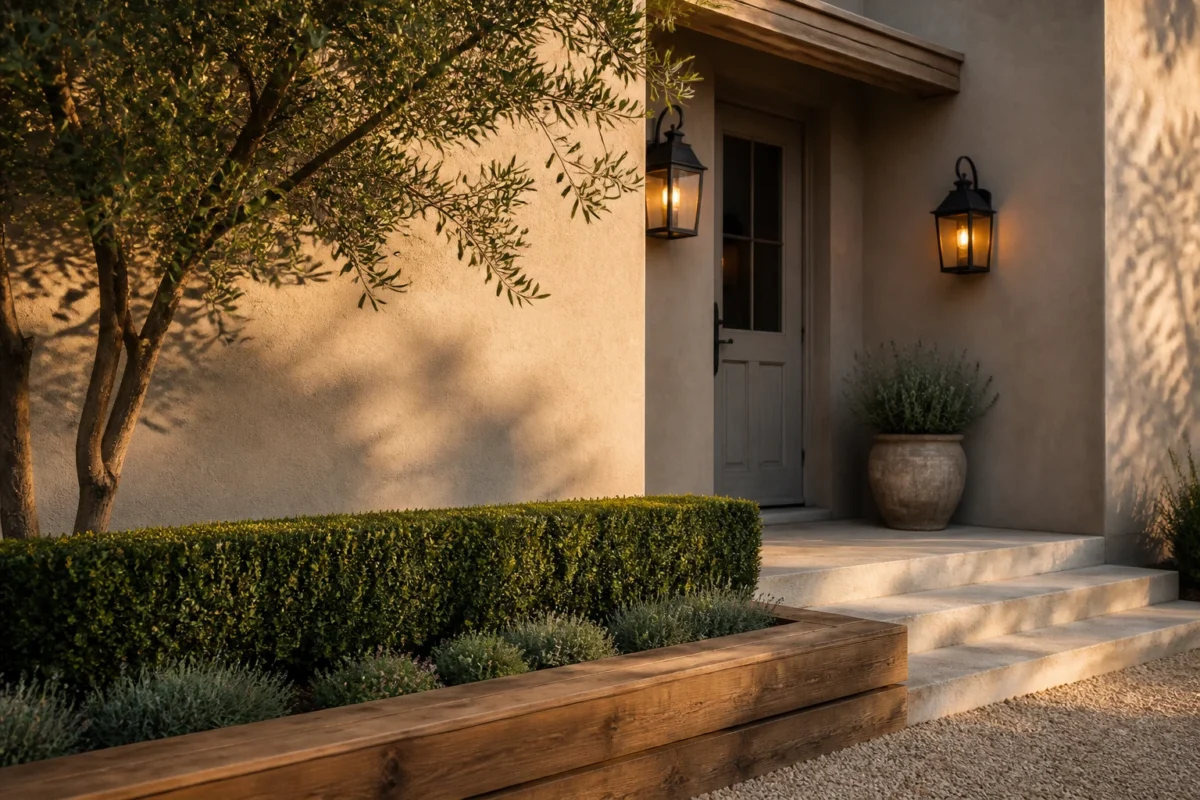
We’ll solve real frustrations: shade vs. sun, awkward steps, narrow porches, budget realities, and plants that don’t last. Expect color palettes that flatter your exterior, materials that age gracefully, and layouts that look expensive because they’re intentional. These are photogenic, Pinterest-worthy front porch flower bed ideas that make daily arrivals feel good. If you love polished simplicity, layered texture, and that “neighbors slow down to peek” charm—this is for you.
1. Cedar L-Edge Framing With Warm Lantern Glow And A Low Boxwood Bench
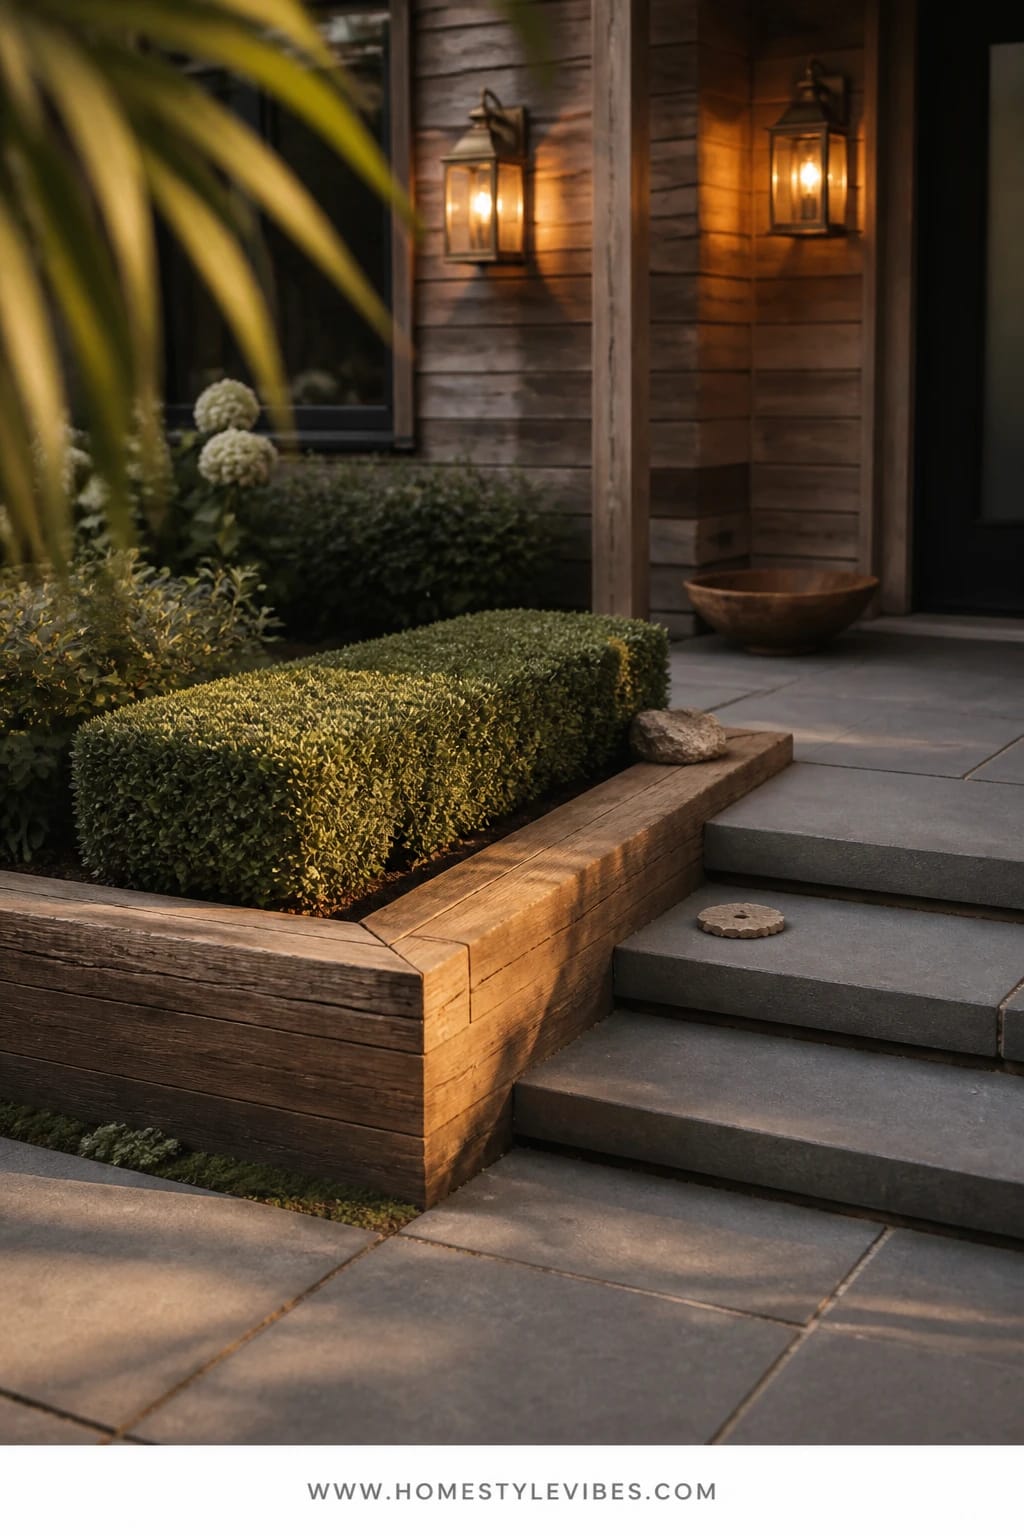
We’ve all been there: the walkway feels disconnected from the porch, and no matter how many marigolds you toss in, the entrance still reads “unfinished.” This design wraps your porch in a quiet architectural hug. Imagine a clean cedar L-shaped edge that frames two sides of your steps, underscored by a low boxwood hedge acting like a living bench. A pair of warm-brass lanterns throw honeyed light in the evening, and suddenly your front porch flower bed looks tailored, not tired.
The mood leans modern classic—think crisp lines meets timeless greenery. It works in real homes because the layout is simple to maintain and forgiving of seasonal changes; boxwoods hold structure year-round while a few in-season blooms do the personality lift. Lighting is the secret hero. Soft, 2700K warm lantern glow creates depth across the cedar grain and the glossy boxwood leaves, making your entry look cohesive day to night.
Materials stay honest: cedar edging, crushed gravel or dark mulch, and evergreen structure. This bed photographs beautifully because you get contrast—warm wood against glossy green, matte gravel beside metallic lanterns, plus the rhythm of low hedging stepping around the stoop. For variations, try a budget-friendly swap with pressure-treated lumber stained a natural tone. Small porch? Downsize to a half-L along just one side of the steps. Shade-heavy façade? Replace boxwood with Japanese holly or yew. Renter-friendly? Use rectangular cedar planters lined along the step edges to mimic built-in framing without digging.
Budget Breakdown:
- Cedar boards for edging: $90–$180
- Boxwood (small 1-gal): $12–$25 each, 6–12 plants
- Crushed gravel or mulch: $60–$120
- Two brass-look lanterns (hardwired or solar): $120–$350
- Landscape fabric + stakes: $35–$60
- Soil amendment/compost: $40–$80
Total Estimated Cost: $500 – $1,200
Best For: Traditional to transitional homes with a defined stoop; anyone who wants year-round structure with low fuss; great for early evening curb appeal in spring through winter.
Key Design Elements:
- Main materials: Cedar edging, evergreen boxwood hedge, gravel or dark mulch
- Color palette: Warm wood, glossy deep green, charcoal ground, soft brass
- Lighting strategy: Two lanterns, warm 2700K, placed to rake light across foliage
- Furniture silhouettes: A “living bench” effect with low, clipped hedges
- Texture layers: Smooth cedar, shiny leaves, gritty gravel, soft light
- Accent details: Narrow copper address numbers, a charcoal coir doormat, one urn with seasonal flowers near the door
How To Recreate This Look:
- Start with a clean edge: mark your L-shape along the steps and remove grass 6–12 inches deep.
- Add cedar edging: anchor boards with stakes flush to the walkway for a custom built-in look.
- Build structure: plant a straight low hedge line of boxwoods at consistent spacing (12–18 inches apart).
- Topdress smart: lay landscape fabric, then gravel or mulch, keeping it even with the cedar edge.
- Layer light: install or set lanterns so they highlight the cedar edge and skim the hedge tops.
Why This Looks Expensive: The “living bench” line makes the space feel designed, not decorated. Straight geometry plus restrained materials telegraph custom work even if it took one Saturday.
Watch Out: Don’t plant boxwoods too close to the step overhang. Leave 6–8 inches so they don’t brush visitors’ ankles or block mailbox access.
Pro Styling Tip: For photos at dusk, angle the lanterns so you catch a subtle highlight along the cedar grain and a soft shadow at the hedge base—instant depth.
Keep scrolling—next up is a softer, more romantic vibe that still behaves on busy weekdays.
2. Limewashed Brick Border With Morning Light Drift And A Black Metal Urn Focal
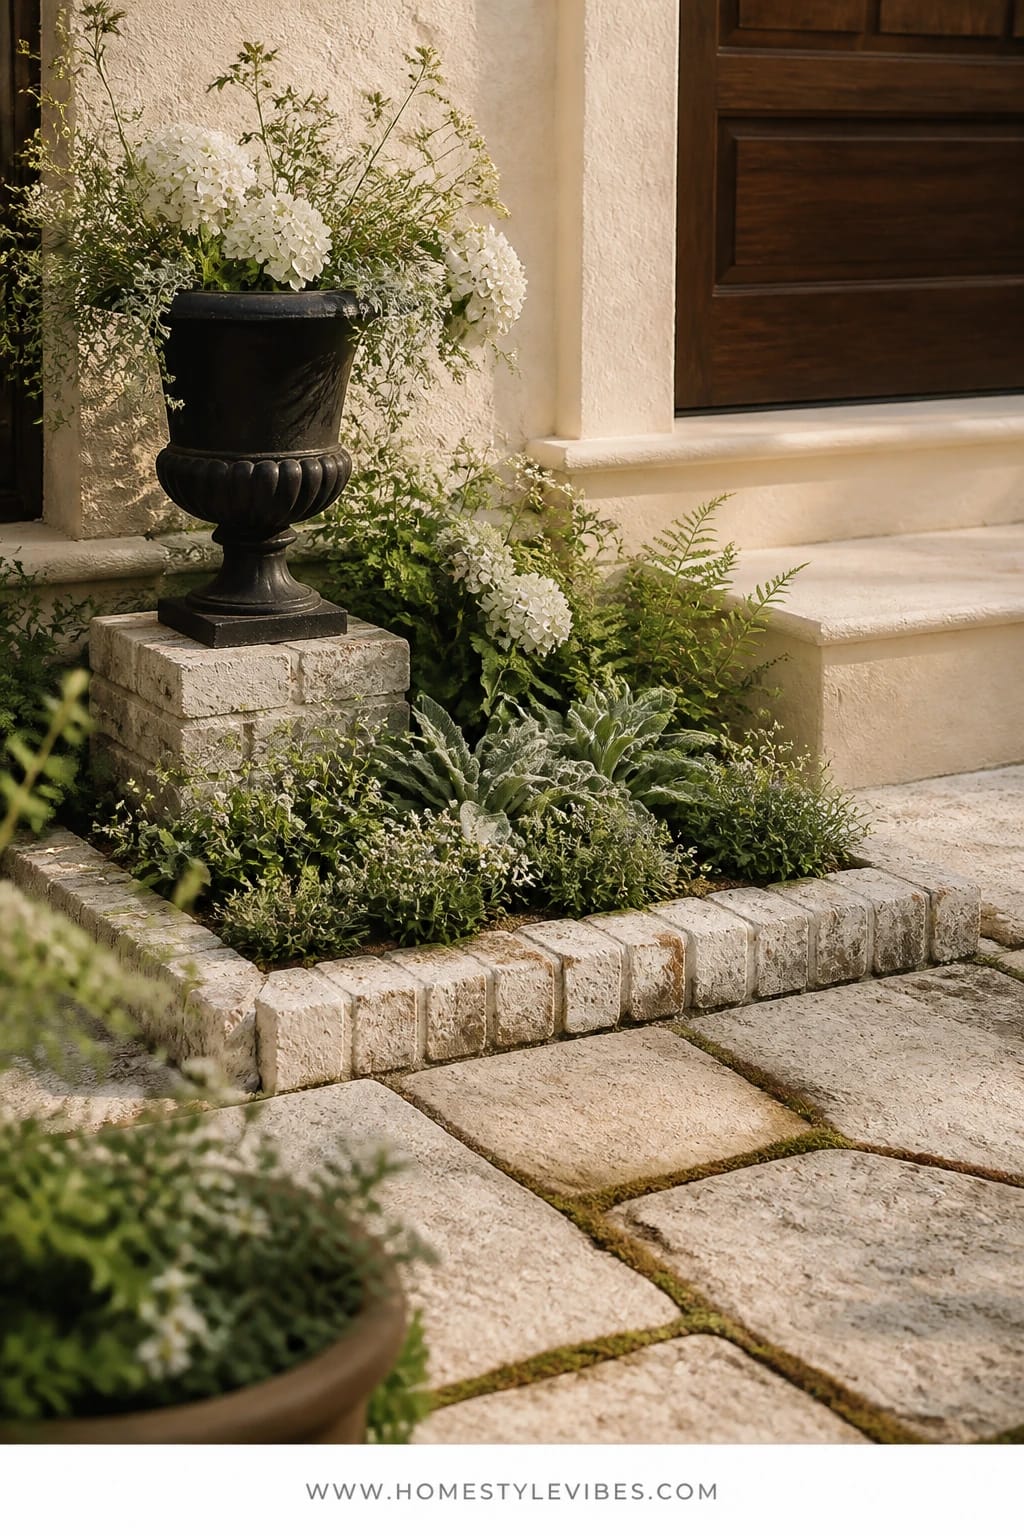
It’s that one corner that always feels off—the step-to-bed transition where mulch slumps, and the plants seem to float with no anchor. This approach solves it by giving you a tangible frame: a shallow limewashed brick border that feels European and settled. The light, chalky brick makes morning light feel dreamy, and a single black metal urn punctuates the bed with confidence. Your front porch flower bed reads “collected” instead of “random.”
The mood is vintage-romantic with a curated edge. Why it works? Limewash softens brick texture, adds chalky dimension, and flatters both red and taupe exteriors. The urn acts as a vertical exclamation point, giving you a place to switch seasonal color without reworking the bed. Light bounces off pale brick, warming the foliage from below and creating photography-friendly highlights.
Focus on texture here. Mix airy perennials (salvia, catmint) with low groundcovers (thyme, woolly lamb’s ear) around the brick border. That play between furry silver leaves and glossy deep green makes the border textural art. Variations: For a budget-friendly take, paint existing brick with masonry paint thinned for a limewash look. Shady porch? Use hellebores and heuchera with silvery variegation. Renter-friendly? Create a faux border with limestone pavers laid dry and lift them when you move. For a bolder look, swap the black urn for a patinated copper pot—still classic, just moodier.
Key Design Elements:
- Main materials: Limewashed brick border, matte black metal urn, mixed perennials
- Color palette: Chalky white, charcoal-black, silver-green, lavender-blue
- Lighting strategy: Morning light drift; choose plants with pale blooms for extra glow
- Furniture silhouettes: A single tall urn as sculptural anchor
- Texture layers: Chalky brick, feathery blooms, furry foliage, matte metal
- Accent details: Twisted jute doormat, black house numbers, a thin brass mail slot
Budget Breakdown:
- Brick + limewash or masonry paint: $150–$350
- Metal urn: $120–$400
- Perennials (1-gal): $12–$20 each, 6–10 plants
- Soil + compost: $40–$80
- Gravel or mulch topdress: $60–$120
Total Estimated Cost: $450 – $1,000
Best For: Cottage, Tudor, and traditional façades; east-facing porches that glow in the morning; homeowners who love a controlled, floral-luxe look with seasonal swaps.
How To Recreate This Look:
- Define the bed: dig a shallow trench and dry-fit brick soldiers to create the border shape.
- Apply limewash: thin your limewash or masonry paint and brush irregularly for a lived-in patina.
- Place your urn: center or offset it near the step corner; ensure it’s level and stable.
- Plant for rhythm: alternate two textures—airy bloomers with low silver groundcover.
- Topdress and tidy: mulch lightly and brush loose lime residue from the bricks for crisp edges.
Why This Feels Designer: The high-contrast urn against a soft, chalky border creates a vignette, not just a plant bed. Designers anchor the eye first, then layer softness—this nails that formula.
One Thing To Avoid: Don’t overfill the urn. Leave 2 inches from the rim for a clean line. Overstuffed reads chaotic, and water will sheet dirt down the sides after rain.
Pro Styling Tip: Photograph in early morning—silver leaves and limewashed brick catch that pearly glow that flatters every plant and every paint color.
Pausing for a quick mindset reset.
Remember, this isn’t about recreating a showroom. It’s about building a space that actually feels like yours. If one idea resonates more than the others, that’s your starting point. You don’t need all of them.
3. Flagstone Ribbon Bed With Soft Amber Sconce Light And A Slatted Teak Planter Bench
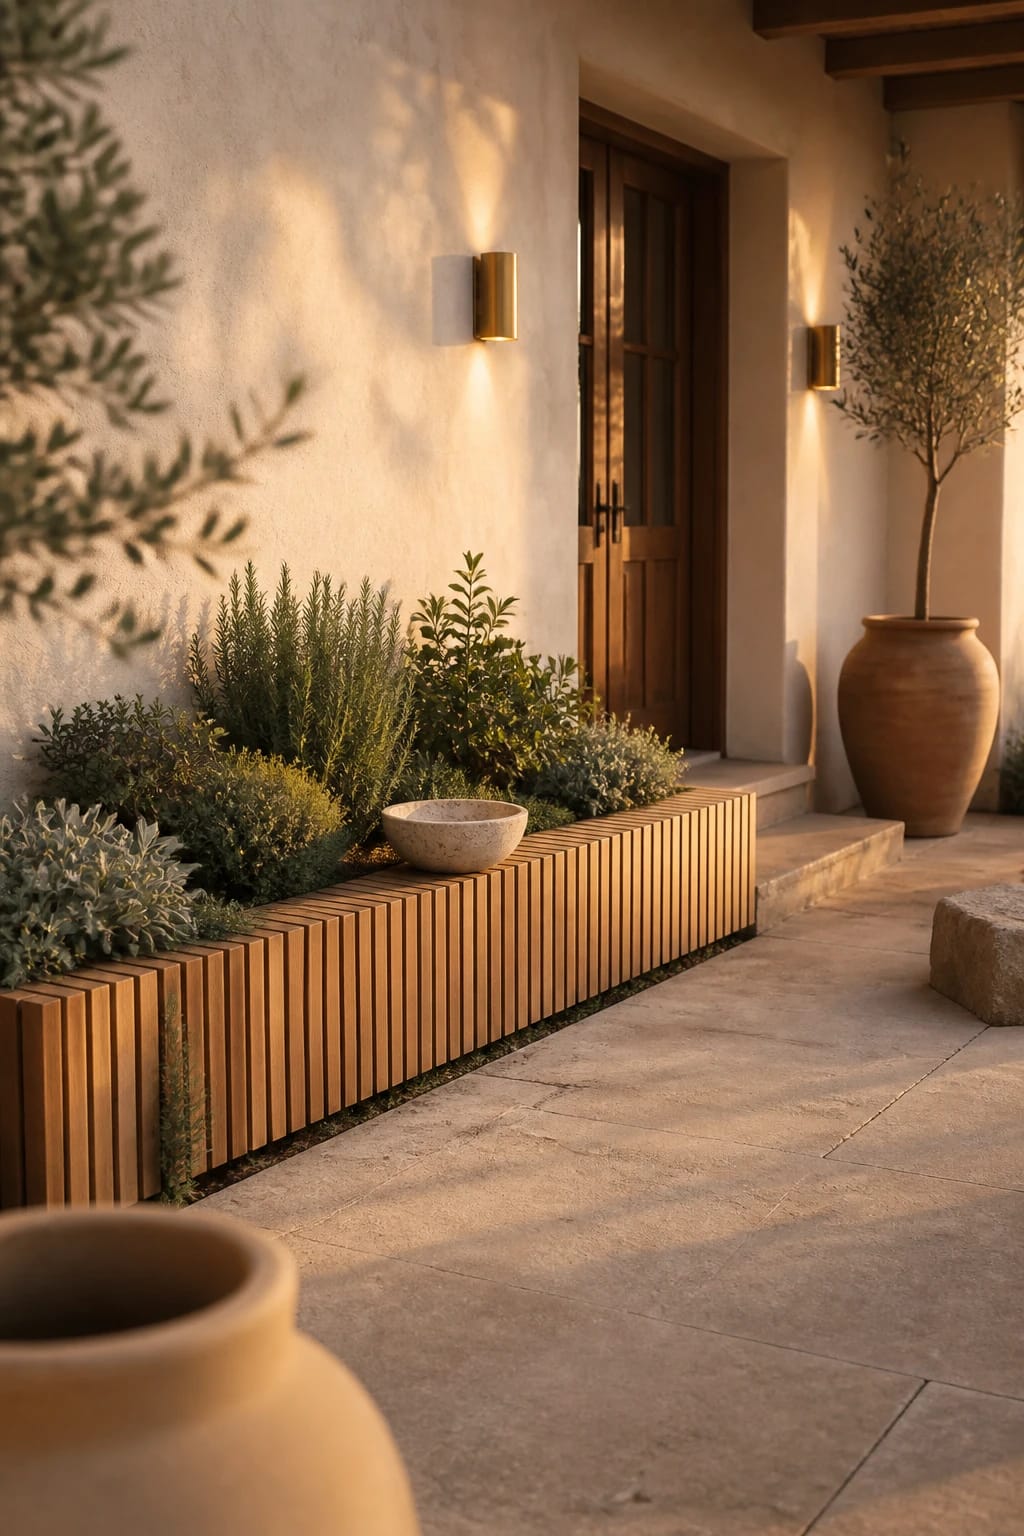
You’ve tried random potted plants on either side of the door, but it still looks like items, not a composition. The fix? A slim flagstone ribbon bed that runs parallel to the porch, punctuated by a slatted teak planter bench that doubles as seating and structure. Soft amber sconces make the textures glow at night. Your front porch flower bed becomes a grounded line that visually widens the entrance and says, “We planned this.”
The mood reads modern Mediterranean meets Japandi—calm, sun-kissed, natural. It’s brilliant for narrow or townhouse porches because the ribbon bed only needs 12–18 inches of depth. Light is crucial here: a diffused amber sconce (2000–2200K) adds the warm note that turns stone and teak into a cozy welcome rather than a stark, modern statement. Plants stay low and architectural: dwarf Mediterranean herbs, feather reed grass, and compact agave or blue fescue for structure.
Why it works in real life? Minimal maintenance, maximum material beauty. Stone + wood + restrained planting create rhythm that photographs like a magazine spread. Variations: Budget option—use concrete pavers in mixed widths to mimic flagstone. Shadier façades can lean into carex grasses and heuchera instead of sun-lovers. Renter-friendly swap: line the bed with long, narrow trough planters placed tightly edge-to-edge and cap with river stones for the flagstone vibe.
Budget Breakdown:
- Flagstone or mixed-width pavers: $180–$450
- Teak planter bench: $180–$600 (or DIY with outdoor-rated wood for $120–$220)
- Plants: $8–$25 each, 8–12 plants
- Amber sconces: $100–$280 each
- Gravel base + sand: $60–$120
Total Estimated Cost: $620 – $1,600
Best For: Narrow porches, modern or Mediterranean exteriors, row homes craving a streamlined entry that still feels warm.
Key Design Elements:
- Main materials: Flagstone ribbon, teak bench-planter, low-contrast gravel
- Color palette: Warm taupe stone, honey teak, sage greens, soft amber light
- Lighting strategy: Diffused sconces at eye level to graze texture and avoid harsh shadows
- Furniture silhouettes: Slatted, linear bench to echo the long bed line
- Texture layers: Rough stone, smooth slats, fine-textured grasses, matte metal fixture
- Accent details: A single oversized terra-cotta pot at one end for balance
How To Recreate This Look:
- Mark a 12–18 inch strip along the porch and remove sod to 3–4 inches deep.
- Lay gravel and sand base, then fit flagstone or pavers flush with the porch height.
- Set the teak planter bench directly on the stone for a clean edge alignment.
- Plant simple: cluster grasses and herbs in groups of 3 for rhythm.
- Mount amber sconces; choose frosted glass to soften hot spots on walls.
Why This Reads High-End: Long lines and repeating materials suggest custom design. The bench-planter hybrid looks like built-in millwork even when it’s not.
The Most Common Mistake: Mixing too many plant types. Cap yourself at three species here. The linework stays powerful when the planting stays quiet.
Pro Styling Tip: For that “architect’s portfolio” shot, sweep any stray gravel off the paver edges and center the bench legs with a stone seam. Alignment = instant polish.
Ready to go softer and wilder? The next idea brings in movement and pollinators without the chaos.
4. Crushed Marble Strip With Cool Twilight Uplighting And A Curved Corten Planter Arc
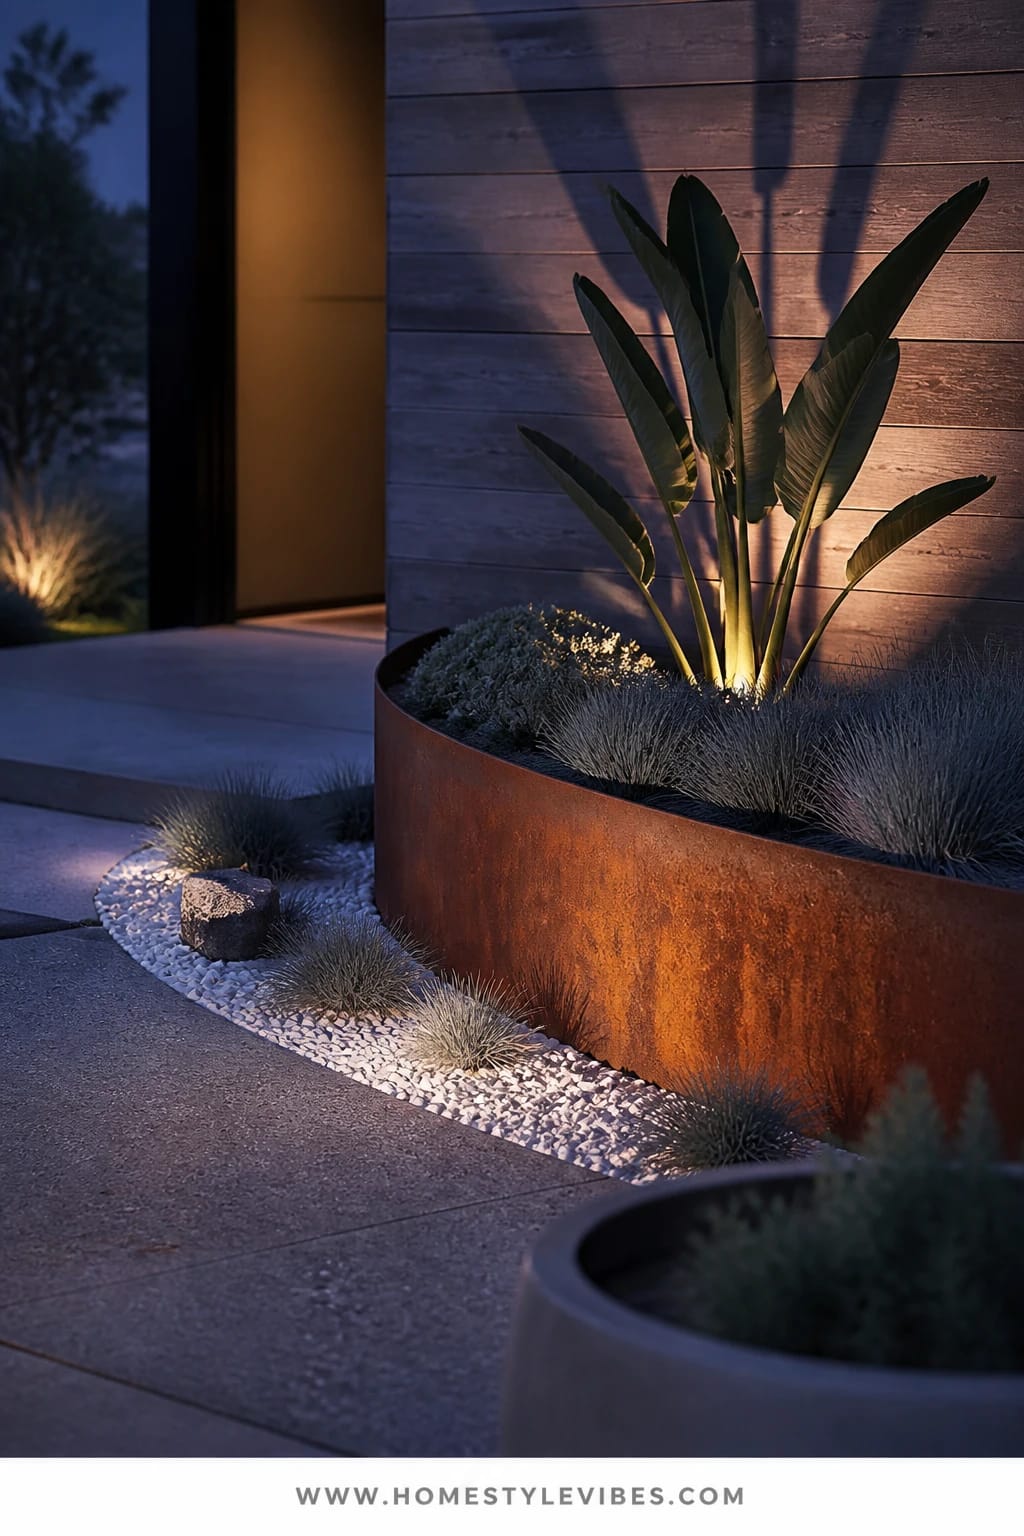
Sometimes your front bed feels flat by day and disappears at night. You’ve added solar stakes that blink sadly after dusk, but it still reads dull. Let’s flip the script: a slender strip of crushed marble brightens the bed even in shade, while cool twilight uplighting slices dramatic shadows across a curved Corten steel planter arc. Your front porch flower bed goes from “there” to theatrical, in the best way.
The vibe is urban sculptural with a garden soul. It’s great for contemporary homes and mid-century façades, and surprisingly easy to maintain: the marble brightens and drains well, and the steel naturally patinas into a warm, leathery color that loves cool-toned LED light. Plant palette stays controlled—think sculptural alliums, blue fescue, and one statement grass like Karl Foerster for movement. At night, uplighting turns those seed heads into floating orbs. It photographs like a light art installation.
Variations include a budget approach using white pea gravel instead of crushed marble. For small spaces, tighten the arc to a half-moon anchored at one step corner. If you need softer edges, use a curved cedar or black composite planter with a powder-coated metal finish. Renters can use modular Corten-look troughs set in an arc on top of landscape fabric, then pour marble stone inside for weight without digging.
Budget Breakdown:
- Crushed marble or white gravel: $120–$280
- Corten steel curved planter or edging: $200–$700
- Low-voltage uplights (2–3 fixtures): $150–$350
- Plants: $10–$25 each, 6–10 plants
- Transformer + wire (if not solar): $120–$220
Total Estimated Cost: $600 – $1,600
Best For: Modern or mid-century entries, shaded porches needing daytime brightness and nighttime drama, anyone who entertains outdoors in the evening.
How To Recreate This Look:
- Sketch the arc: lay a garden hose to test curve placement from curb view.
- Install the curved Corten edge or planter, anchored solidly at both ends.
- Set the uplights aiming across foliage, not directly upward into eyes.
- Plant sculptural varieties in odd-number clusters with negative space between.
- Fill with crushed marble and rake smooth; keep stones 1 inch below the top edge.
Why This Looks Intentional: Cool-leaning light against a warm patina creates cinematic contrast. The curve organizes the scene, and the marble base reflects just enough light to define edges after sunset.
Don’t Do This: Avoid mixing warm and cool lighting temperatures. Pick one. Mixed color temps make the bed look cheap and patchy at night.
Pro Styling Tip: After dusk, turn off porch overheads for a minute and let the uplights do the work—photograph from a low angle to capture graphic shadows on the wall.
Quick sanity check as we head into the last two ideas.
If you’re feeling overwhelmed, pick the one material you can commit to—wood, stone, or metal—and let that choose the design for you. The rest falls in place faster than you think.
5. Terracotta Layered Bed With Honey Sunwash And A Wrought-Iron Rail Planter Cascade
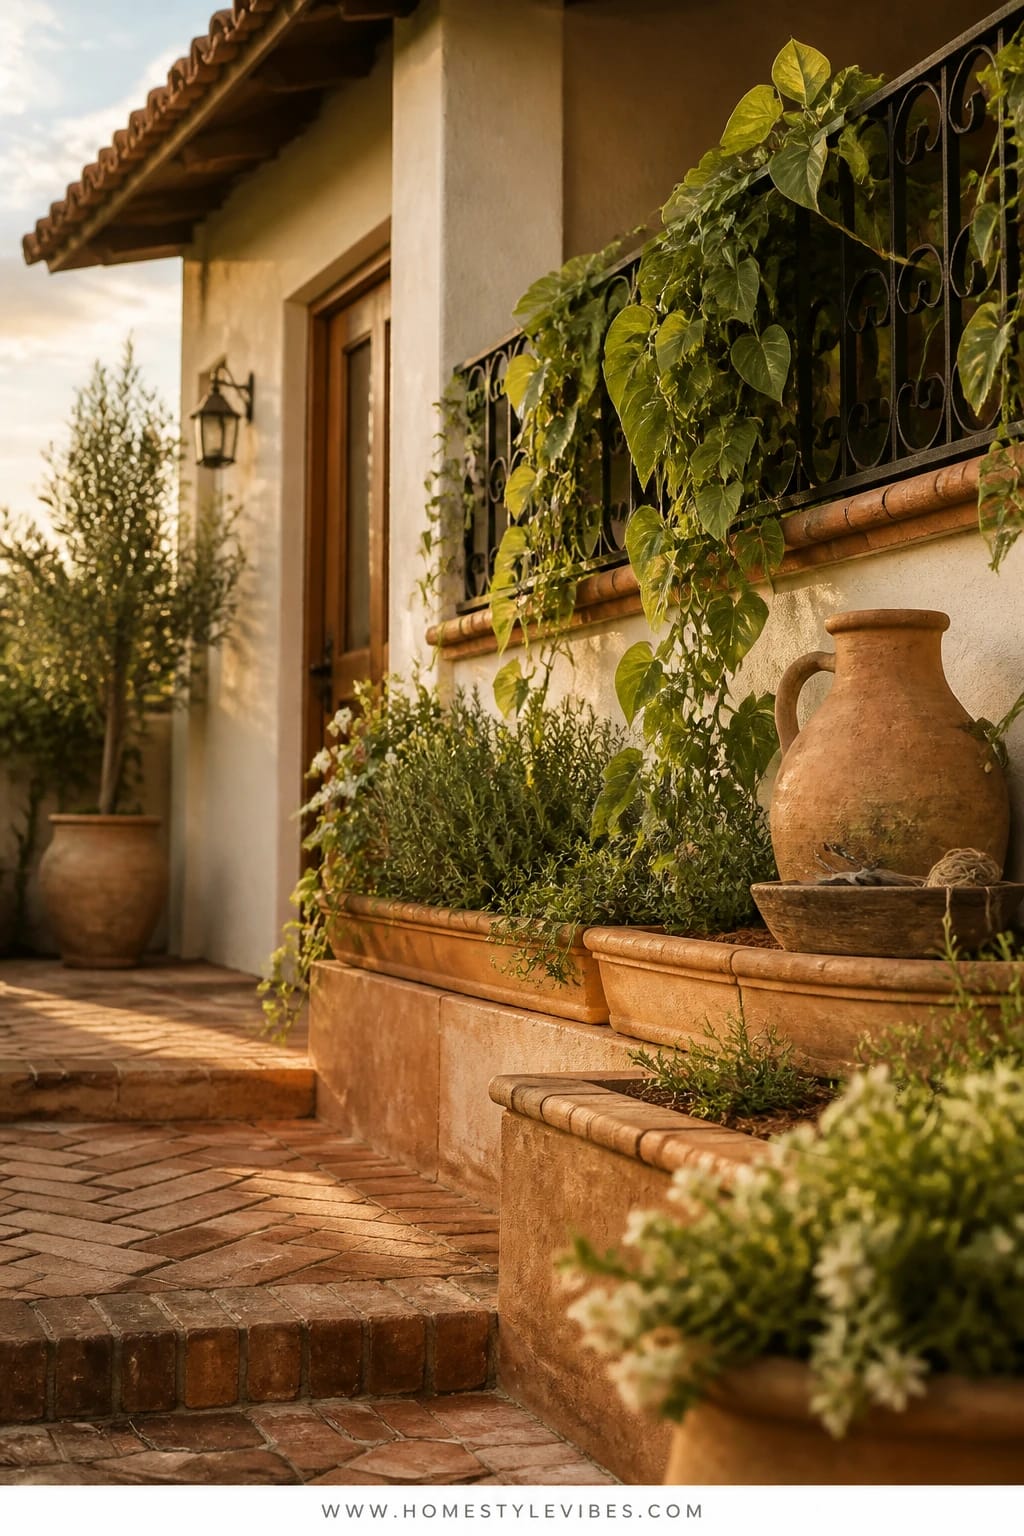
You want warmth and life, but your porch reads flat beige and practical. I get it. I once spent weeks fussing with paint chips only to realize my entry needed soul, not new trim. This design stacks terracotta tones—planters, tiles, and clay-colored mulch—so your front porch flower bed feels sun-baked and happy even on a cloudy day. A wrought-iron rail planter cascade drips flowers at eye level, and the entire entrance hums with honeyed energy.
The mood is Mediterranean cottage—relaxed, slightly rustic, wildly charming. It works anywhere that needs color without paint because terracotta acts like a filter that warms your entire façade. Sunlight bounces off those clay surfaces, giving you a “sunwash” effect across stucco, brick, or siding. Plants that thrive here: rosemary, trailing thyme, pelargonium (zonal geraniums), trailing lobelia, and bronze fennel for wispy height. The star? A set of slender wrought-iron rail planters that turn your porch railing into a living balcony.
For small spaces, go vertical: three rail planters + one narrow terracotta trough at the base. On a budget, use plastic terracotta-look planters and paint your existing mulch a warm bark color to harmonize. Shade-leaning variation: swap rosemary for oregano and use impatiens or tuberous begonias in spicy coral and pink. Renter-friendly move: detachable railing brackets that won’t scratch the finish—check the gap so the brackets clamp tight and don’t wiggle in the wind.
Budget Breakdown:
- Terracotta planters (mix of sizes): $80–$220
- Wrought-iron rail planters + brackets: $120–$320
- Clay-toned mulch or pine fines: $60–$120
- Plants: $6–$18 each, 10–18 plants
- Narrow terracotta tiles or stepping pads (optional): $80–$180
Total Estimated Cost: $340 – $860
Best For: Porches that feel color-starved; anyone craving a cheerful, fragrance-forward entrance from spring through fall; renters who want maximum style with minimal digging.
Key Design Elements:
- Main materials: Terracotta planters, warm clay mulch, wrought-iron railing hardware
- Color palette: Honey, russet, coral, olive green, pops of cobalt
- Lighting strategy: Natural “sunwash”; add a single amber bulb in an existing pendant for evening glow
- Furniture silhouettes: Rounded pots; slim, linear rail planters
- Texture layers: Clay grit, glossy leaves, airy blooms, matte iron
- Accent details: Striped outdoor pillow on a chair, clay saucers stacked neatly, a small citrus tree in a half-barrel if space allows
How To Recreate This Look:
- Cluster three terracotta pots in a triangle at the step base—largest at back.
- Fill rail planters with a thriller, filler, spiller combo; repeat colors for cohesion.
- Top the bed with clay-toned mulch to extend the terracotta color across the ground.
- Add one narrow tile stepping pad to create a styled “maintenance path.”
- Water with a drip line on a timer if possible; terracotta wicks moisture fast.
Why This Looks Expensive: Repeating one material family (terracotta) across scales reads collected and intentional. The rail planters add vertical greenery that stylists love because it frames faces in photos and softens rail lines.
Watch Out: Don’t mix too many pot shapes. Stick to two silhouettes—classic round and a single trough—to avoid visual noise.
Pro Styling Tip: For photos, tuck a few fallen petals around the base pots (seriously). That tiny imperfection reads romantic and lived-in, not messy.
One more idea left—the low-maintenance, four-season solution I recommend to clients who travel or forget to water. Ahem, hi, me last August.
6. River Rock Drifts With Soft Overcast Glow And A Matte Black Trough Fountain
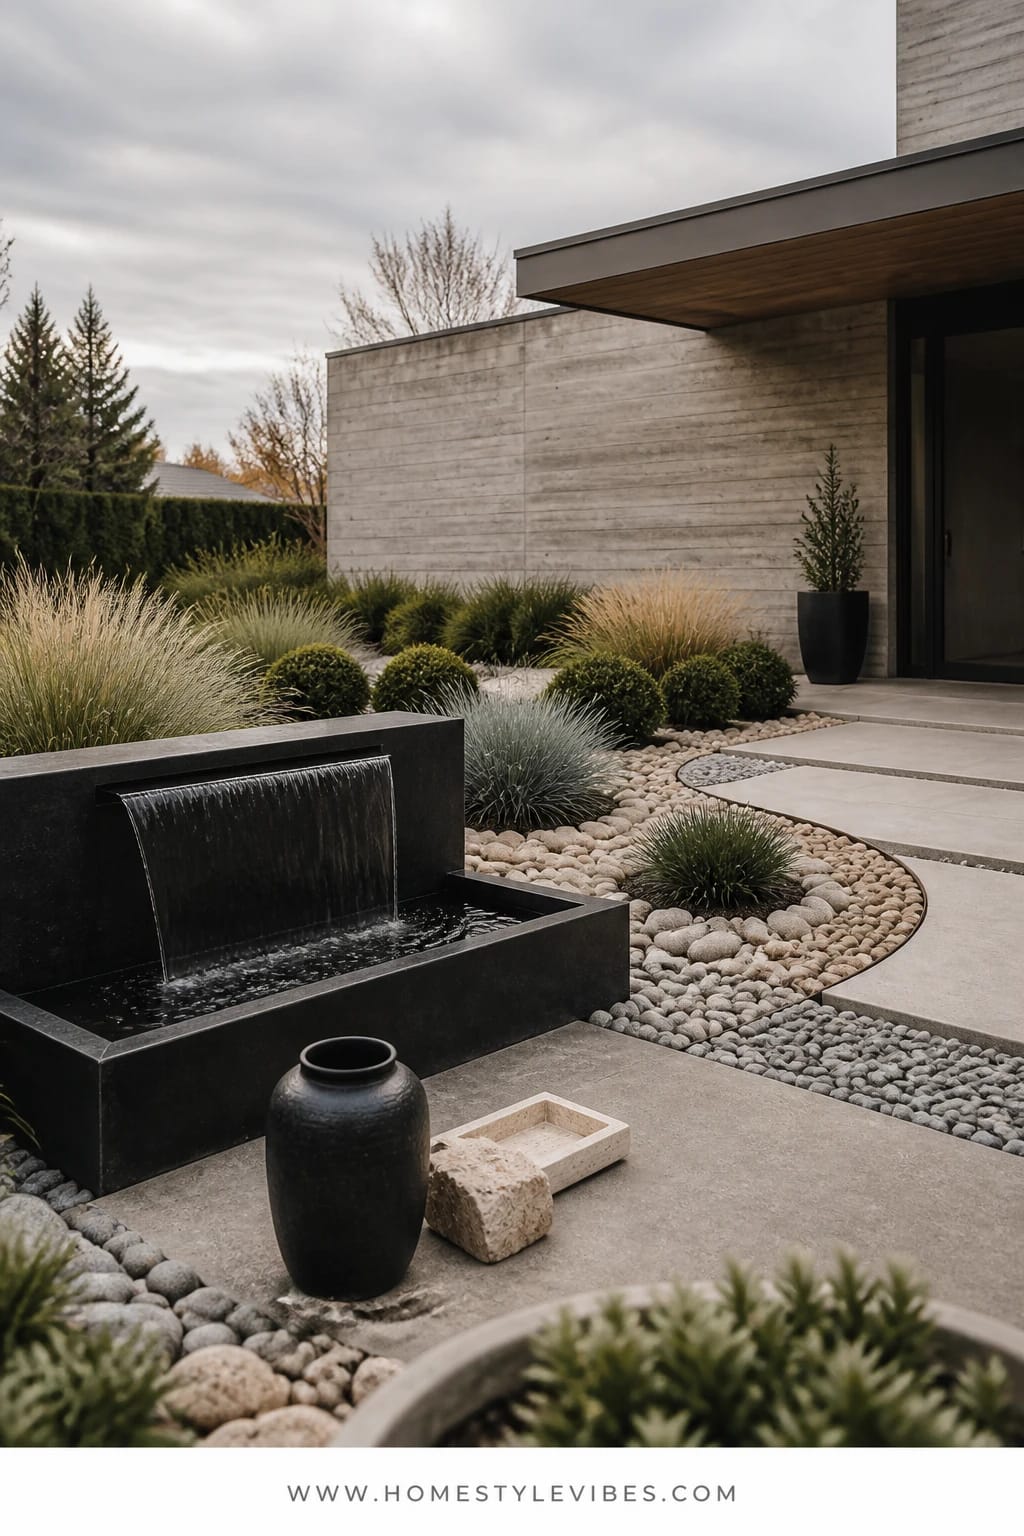
Some porches need calm more than color. You’ve tried bright blooms, but it all feels busy against your siding, and by late summer it looks thirsty. This design turns your front porch flower bed into a serene composition: river rock drifts in three sizes, punctuated with evergreen mounds and feathered grasses, anchored by a matte black trough fountain that whispers instead of roars. Overcast days become your best friend—the stones and water pick up the soft sky and glow.
The mood is hotel-spa meets modern woodland. It thrives on minimal upkeep: no heavy deadheading, just seasonal grooming and an occasional rinse. Lighting can be gentle here—a single low bollard light or an under-fountain LED that gives a moonlit shimmer. Materials dominate: round river stone in mixed sizes, darkened steel or composite for the fountain, and evergreen structure like dwarf mondo grass, Japanese forest grass (in part shade), and low-growing junipers for year-round interest.
This photographs beautifully because you get natural negative space from the stones, crisp shadows from mounds, and a soft highlight on the water surface. Variations: Budget version uses a pre-formed black plastic trough with a small pump. For tiny porches, scale to a tabletop fountain on a short plinth set into the bed. If you need more green, add ferns in the shadier pockets. Renter-friendly? Assemble the bed on top of landscape fabric with flexible edging so you can reclaim the stones later.
Budget Breakdown:
- River rock (mix of pea, medium, and cobble): $180–$420
- Trough fountain + pump: $180–$650
- Evergreen mounds/grasses: $10–$25 each, 8–12 plants
- Low-voltage bollard or under-fountain light: $80–$220
- Landscape fabric + steel edging: $70–$160
Total Estimated Cost: $520 – $1,450
Best For: Busy households, travel-heavy lifestyles, and north-facing porches that never see harsh light; year-round curb appeal with minimal work.
Key Design Elements:
- Main materials: River stones in three sizes, matte black fountain, evergreen grasses
- Color palette: Charcoal, slate, moss, soft cream stones
- Lighting strategy: Low, cool-white accent to catch water movement after dusk
- Furniture silhouettes: None needed—let the fountain be the statement
- Texture layers: Smooth stones, fine blades of grass, reflective water surface
- Accent details: Black mailbox, charcoal doormat, a single limestone step riser
How To Recreate This Look:
- Edge the bed with flexible steel; lay fabric to block weeds.
- Set the fountain first, confirm level, and run the cord discreetly.
- Place plants in mounded clusters, leaving generous stone “drifts” between.
- Pour stones by size: larger cobbles first for structure, then medium, then pea to fill.
- Install one subtle light to kiss the fountain or a nearby mound—less is more.
Why This Feels Designer: The restraint. Negative space and limited plant species read calm and expensive. The matte black fountain’s clean silhouette against soft stones looks like a landscape architect drew it.
The Most Common Mistake: Overplanting. Leave at least 30 percent visible stone. It’s the breathing room that makes the composition sing long-term.
Pro Styling Tip: Dampen the stones lightly before photos; the deeper color variation adds dimension and makes foliage pop.
Quick mindset note before we wrap.
Perfection isn’t the goal; feeling good when you step onto your porch is. Start small, notice what you love living with (scent? sound? structure?), and let that lead the next tweak.
Quick Checklist
- Choose one dominant material per design (wood, stone, metal, or terracotta)
- Commit to a clear bed edge (cedar, brick, steel, or stone)
- Limit plant species to 3–5 for cohesion
- Match lighting color temperature across all fixtures
- Scale one statement piece (urn, bench, arc, fountain) to your porch width
- Use groundcover tone to tie the bed to the house color
- Leave negative space for the eye to rest
- Repeat shapes or colors at least three times
- Photograph in morning or golden hour for flattering highlights
- Add a single seasonal swap point (urn, rail planter, or bench planter)
Frequently Asked Questions
How much should I budget to refresh a small front porch flower bed?
For a 6–10 foot bed, plan $350–$900 depending on materials and lighting. Wood or terracotta concepts usually land lower; stone, metal edging, and wired lighting push higher. Start with structure (edging + one statement piece), then add plants.
My porch is deep shade. Which of these ideas still works?
The river rock drifts with a matte black fountain (Design 6) shines in shade. Swap in shade lovers like hellebores, ferns, and Japanese forest grass. The limewashed brick border (Design 2) also brightens shade by reflecting light.
I’m a renter—can I try any of these without digging?
Yes. Use freestanding planters to simulate edges (Design 1 and 3), railing planters for height (Design 5), and modular troughs for a faux arc (Design 4). Place landscape fabric under stones so cleanup is easy when you move.
What’s the most common mistake with front porch flower beds?
Too many plant species and wavy, undefined edges. Pick 3–5 plants max, repeat them, and use a clear edge material. That alone will make the entrance feel finished.
How do I keep these beds looking good through summer heat?
Mulch or stone topdress to regulate soil temps, drip irrigation on a timer for containers and herbs, and choose tougher species (boxwood, rosemary, grasses). Terracotta dries fast—line pots or water twice weekly in peak heat.
Closing Thoughts
Let’s be honest: most of us don’t need “more” at our front door—we need the right few things placed with intention. A defined edge, one statement piece, and plants with shape, not just color, will pull your entry together faster than any impulse flat of flowers.
The truth is, luxury at the front porch comes from texture, lighting, and restraint. Pick one of these front porch flower bed ideas, set a weekend on your calendar, and keep your cart focused on materials that repeat. In two weeks, you’ll step onto your porch and feel that exhale you’ve been chasing—soft light on cedar grain, a tidy hedge line, or the quiet shimmer of water on stone.
You’ve got this. Choose the design that makes your shoulders drop, grab your gloves, and start with the edge. The welcome you want is just a few clean lines and thoughtful layers away.

About the Author

Krisztina P.Rendes, Founder of Home Style Vibes
Founder of Home Style Vibes
Krisztina Puskásné Rendes created Home Style Vibes as a cozy-modern lifestyle space where homemaking meets inspiration. Her goal is to help women create beautiful, organized, and peaceful homes they truly love — without overwhelm. You’ll find here heart-driven content on home decor, cleaning tips, easy family recipes, organization and decluttering, DIY home projects, plants, and seasonal ideas — all designed to bring more calm, comfort, and style into everyday life.