5 DIY Christmas Yard Decorations That Look Store-Bought
You want a yard that stops cars, glows with warm white lights and true red bows, and makes the whole block whisper “wow.” You hate that store-bought yard decor either feels flimsy, costs way more than it should, or looks identical to your neighbor’s. Consider this your fix: five DIY Christmas yard decorations that look store-bought—rooted in classic outdoor red and green—built from solid materials, clean lines, and that crisp, warm glow that photographs beautifully at blue hour. Each project is achievable, budget-conscious, and sized for a real front lawn with kids running through it and packages arriving by 5 p.m.
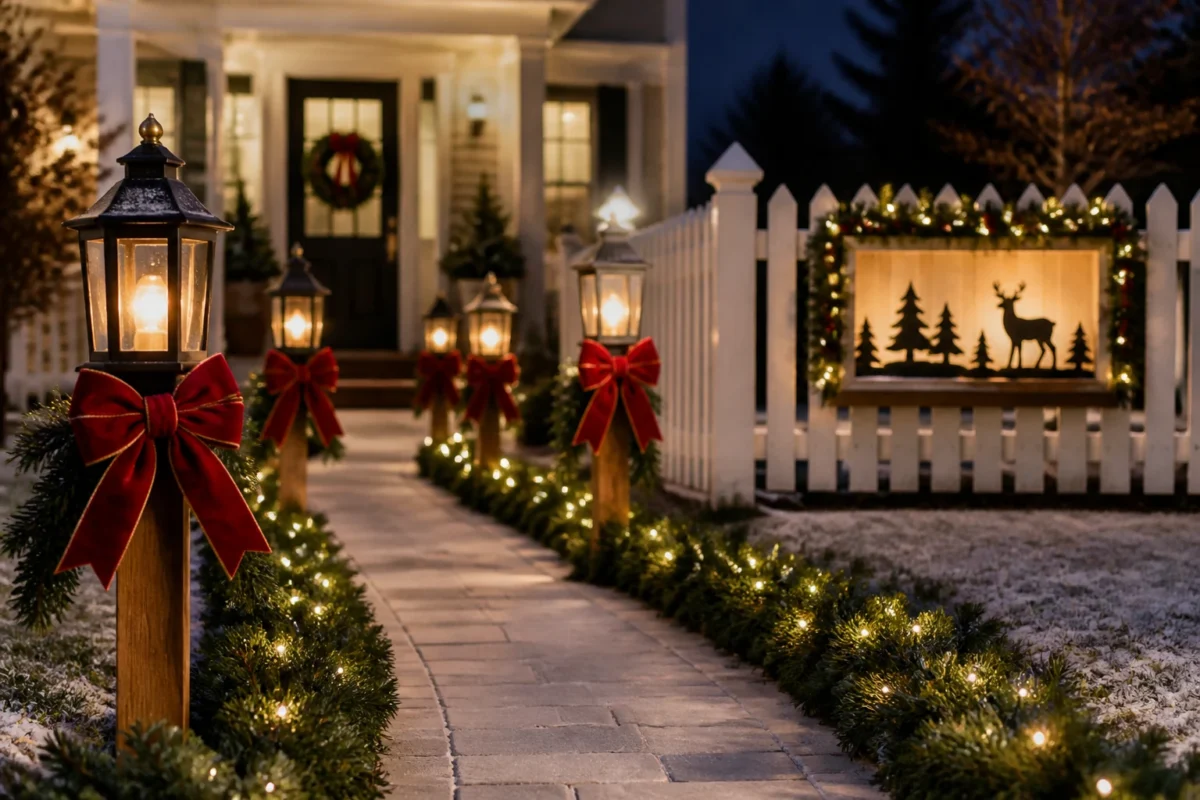
We’ll create curb-hugging greens, lantern light that reads high-end, a “shop window” moment for your fence, and a few clever silhouettes that shine under snow or stay crisp on dry nights. Expect evergreen, cedar, deep red velvet, black lantern metal, brass accents, and warm white lights. You’ll get five full ideas, each with supplies, how-to steps, pro styling tips, and real-life timing notes—so your yard feels intentional, not cluttered, from Thanksgiving weekend through New Year’s. Ready for Pinterest-level photos from your own driveway?
1) Cedar-Framed Lantern Stakes With Warm White Lights Along the Front Walk
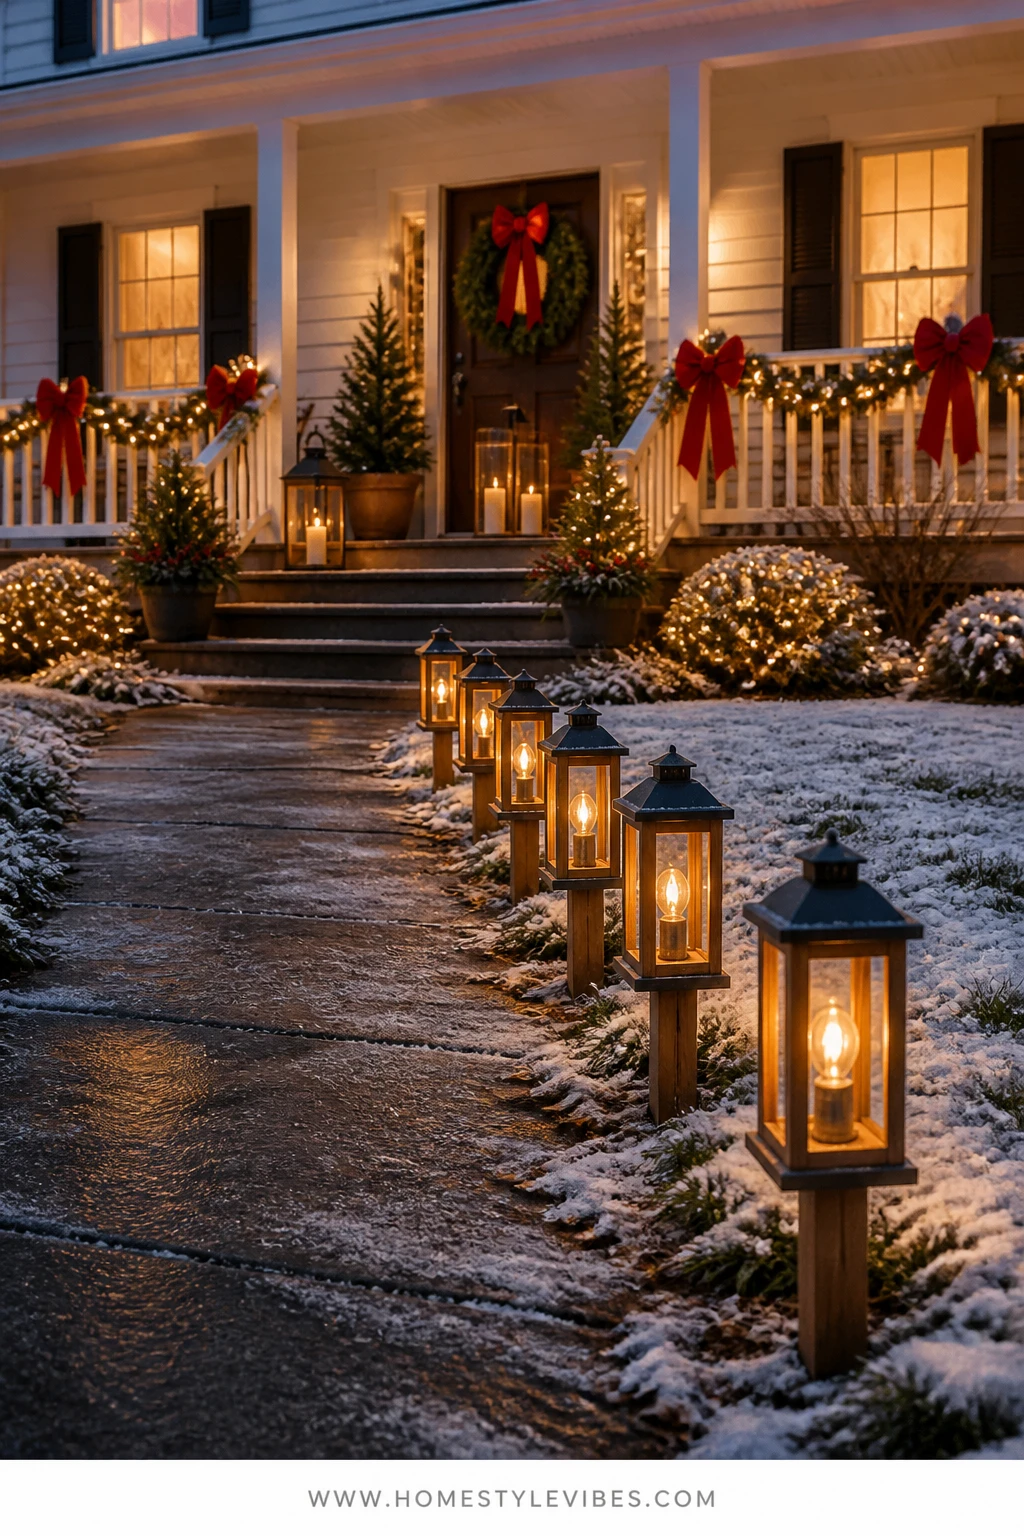
We’ve all been there—stringing lights around the front beds and somehow it still feels messy. The path needs structure, but the store-bought plastic stakes scream “temporary.” This cedar-framed lantern line looks like you hired a landscape designer. It brings that classic red-and-green curb appeal with crisp lantern glow and natural wood you can actually stain to match your house. The look is clean, low to the ground, and incredibly durable—no more wobbly path markers that blow over in the first wind.
Here’s why it works: structure first, sparkle second. The lanterns give you focal points every few feet, while the slender cedar frames and evergreen clippings soften everything. Warm white battery candles or solar lantern inserts cast a steady glow that feels expensive, especially at blue hour. And because these are staked, they’ll sit above light snow and still show off their shape—no more disappearing décor after the first flurry.
Variations you’ll love: Go budget-friendly by using matte-black plastic lanterns (the finish still reads high-end at night). For a small yard, make just three and center them by the steps with generous cedar at the base. If you often get wind, skip bows and use a single red velvet tail secured with floral wire—movement without the tangle.
Timing notes: Install the frames Thanksgiving weekend and layer the greens the first two weeks of December. Replace any dried sprigs mid-month. After New Year’s, pop off the red bows and keep the lanterns through January as winter lighting.
Supplies and Cost:
- Cedar 1x2s (eight-foot lengths): $3–$5 each, 4–8 pieces depending on quantity
- Wood screws + exterior wood glue: $8–$12 total
- Ground stakes/rebar (12–18 inches): $10–$20
- Lanterns (metal or heavy plastic, 9–12 inches): $10–$25 each
- Battery flameless candles or solar inserts: $6–$15 each
- Fresh cedar clippings and fir sprigs (or faux): $0–$25
- Red velvet ribbon (2.5 inches wide): $8–$12
- Exterior wood stain (optional): $8–$15
Total Estimated Cost: $85–$220 depending on quantity (set of 4–8)
Time and Skill Level: 90 minutes active time for four stakes, plus stain drying if used · Easy
Best For: Front walks that feel flat after dark, homes with kids and pets where open flame isn’t an option, and anyone who wants a steady, elegant glow without climbing a ladder.
Key Design Elements:
- Main holiday props: black lanterns, red velvet tails, fresh cedar and fir
- Color palette: deep evergreen, true red, black metal, warm white light
- Lighting strategy: warm flameless candles or solar; consistent color temperature
- Textile and ribbon layers: single velvet tails or tight bows for wind resistance
- Greenery and natural elements: cedar collars wired to lantern bases
- Accent details: brass screw heads or small brass bell tied to ribbon tails
How To Make It:
- Cut cedar 1x2s into four equal lengths per frame (two longer verticals, two shorter horizontals) to create a simple rectangle just taller than your lantern plus 6 inches.
- Assemble with exterior wood glue and screws; pre-drill to prevent splitting. Stain or seal if desired and let dry.
- Hammer rebar stakes into the ground at your chosen intervals along the walk, leaving 8–10 inches above ground.
- Slide each cedar frame over the rebar and secure from the back with a single screw into the rebar or with galvanized pipe clamps.
- Attach the lantern to the bottom crossbar with heavy-duty zip ties or short screws through the lantern base if wood-backed.
- Add battery candles or solar inserts. Check that all lights match in warmth (2700–3000K looks best).
- Create a cedar collar: wrap small fir and cedar sprigs with floral wire into a ring and set at the lantern base.
- Tie a short velvet ribbon tail or bow at the top corner of each frame; secure with wire to prevent spinning.
- At dusk, step back and adjust spacing for an even runway effect.
Why This Looks Expensive: The geometry. Clean cedar rectangles with consistent lantern sizing feel custom. The warm white glow and restrained ribbon keep it classic, not cluttered.
Watch Out: Mismatched light temperatures kill the vibe. One cool-white lantern in the lineup will read “garage find.” Replace bulbs or candles to match.
Pro Styling Tip: Angle the two end lanterns slightly inward; that subtle convergence photographs like a boutique entrance.
2) Oversized Evergreen Gift Boxes With Red Velvet Bows for the Front Lawn
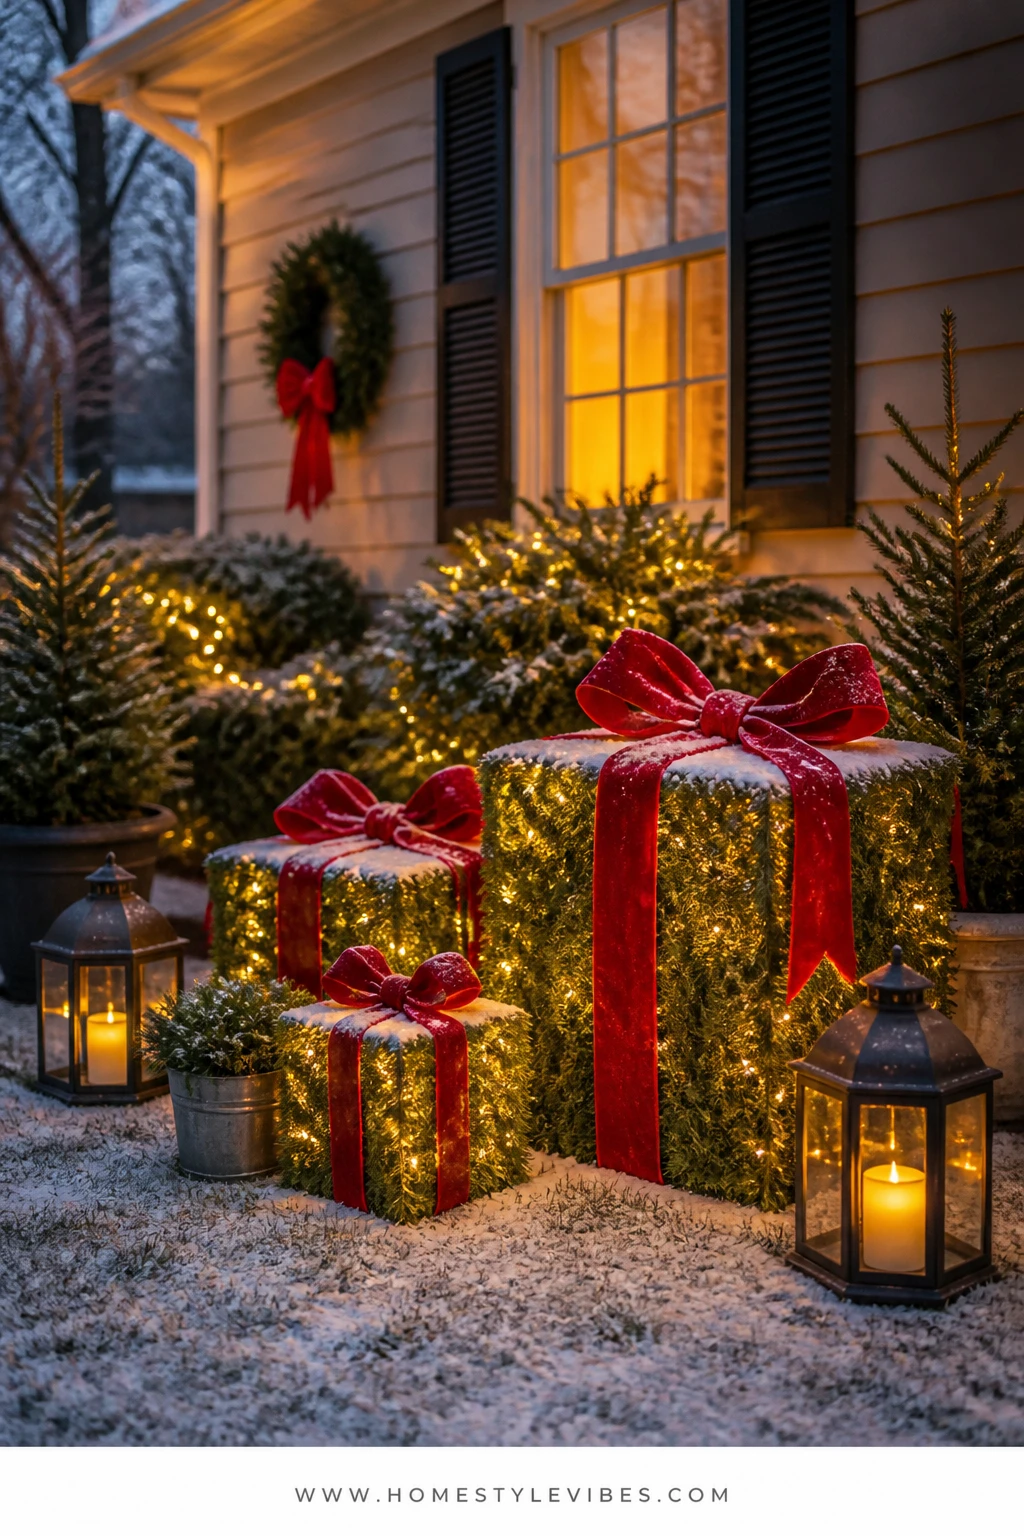
It’s that one wide patch of lawn that always feels empty. You’ve tried inflatables, but they wrinkle by day and feel cheap up close. Build oversized “gift boxes” wrapped in evergreen with lush velvet bows—sculptural during the day, softly twinkly at night. They read like high-end store windows plucked from a city sidewalk and set on your grass.
These boxes use simple wire cubes wrapped in faux garland for longevity, or fresh cedar for fragrance and movement. Add warm white micro-lights so the “wrap” glows from within. The shape is graphic, the palette is classic, and the scale is what sells it. One large, one medium, one small stacked slightly askew—instant focal point that holds even under frost.
Variations: If your lawn is tiny, make one statement cube and set it near a lamp post with a single giant bow. For a budget version, use chicken wire frames and thrifted garland; double it up for density. If you get heavy snow, switch to PVC frames for strength.
Timing: Build the frames in November on a dry afternoon. Wrap with greens and lights the first week of December. Refresh real greens by misting weekly; swap to faux if you want zero maintenance.
Supplies and Cost:
- Wire storage cubes or PVC to form cubes (12–24 inches): $15–$45
- Faux garland (thick, 9–12” wide) or fresh cedar: $20–$60 depending on size
- Warm white micro LED light strands (battery or plug-in): $6–$15 per box
- Red velvet ribbon, 2.5–4 inches wide: $10–$15
- Green floral wire and zip ties: $6–$10
- Landscape staples or tent stakes: $6–$10
Total Estimated Cost: $60–$160 for a trio
Time and Skill Level: 75–120 minutes active time for three boxes · Easy
Best For: Open lawns, corner lots that need a bold focal point, and families who want daytime curb appeal that also glows at night.
Key Design Elements:
- Main holiday props: oversized “gifts,” velvet bows, micro-lights
- Color palette: evergreen, true red, warm white lights, subtle black wires
- Lighting strategy: light from within the box for an ethereal glow
- Textile and ribbon layers: wide velvet ribbon with long tails for drama
- Greenery and natural elements: cedar/fir garland wrapped densely
- Accent details: small brass bells at the bow centers
How To Make It:
- Build or assemble your cube frames: wire cubes snap together fast; PVC frames get glued at the corners for sturdiness.
- Wrap the frame with garland, securing every 8–10 inches with zip ties for a dense, “store display” look.
- Weave a warm white micro-light strand inside the garland wrap so bulbs peek subtly through the greens.
- Create “ribbon” by running 2–3 bands of velvet around each cube and crossing them on top like a present. Secure with floral wire.
- Make a generous bow for each box—double loops look luxe—and wire it to the top center. Add a small brass bell to the knot.
- Stake the boxes into the ground at the back corners with landscape staples to prevent movement.
- Arrange your trio in a tight cluster, tallest at the back, slightly offset, like a still life.
- Turn on lights at dusk and adjust bow tails so they drape cleanly.
Why This Feels Designer: Scale and restraint. By keeping the palette to evergreen, red velvet, and warm lights, the form does the talking. Up close, the dense greenery sells it.
One Thing To Avoid: Sparse garland. If you can see the frame through the greens, it will read “craft project.” Double-wrap thin garland, no exceptions.
Pro Styling Tip: Angle your smallest box 15 degrees. That tiny twist adds dimension and photographs beautifully from the street.
Pause and breathe. If one idea just clicked for you, that’s your sign. You don’t have to do everything—choose the one corner that bugs you most and give it a complete story.
3) Red Velvet-Banded Wreath Stakes With Fresh Fir Along the Driveway Edge
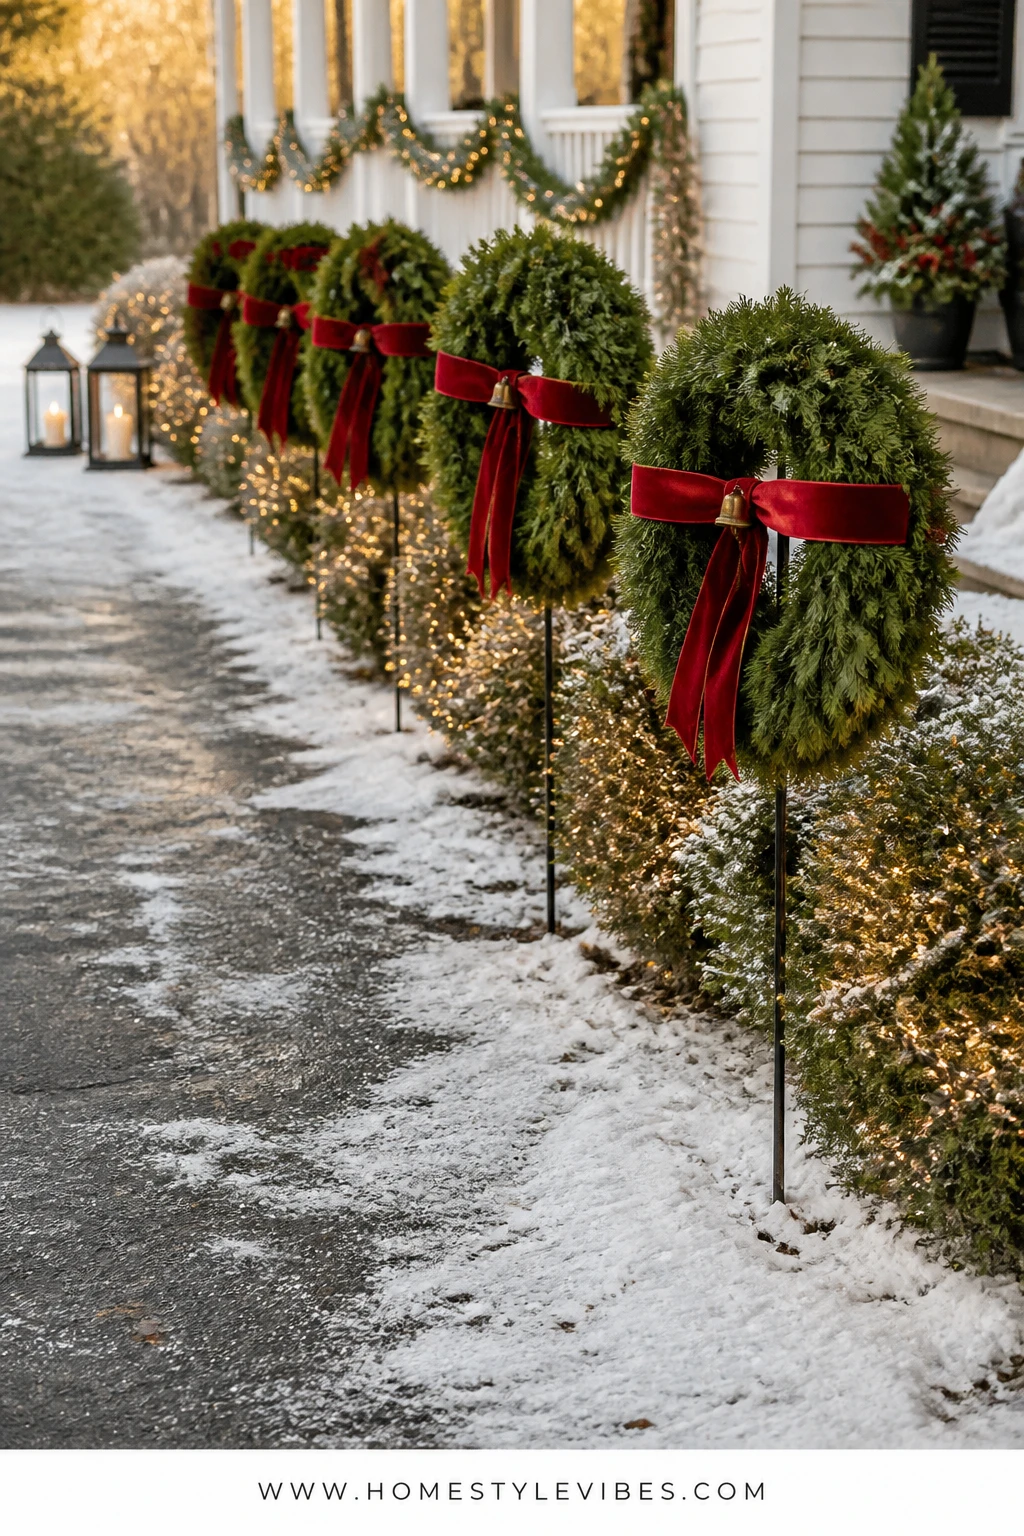
You’ve lined the driveway with solar lights, and it still feels… unfinished. Too many tiny points of light with no anchor. Staked wreaths fix the proportion issue in one move. Picture elegant 18–24 inch wreaths mounted on simple black rods, each cinched with a red velvet band and a single brass bell. They mark the drive like boutique valet posts, and they look incredible even without snow.
Why it works: repeating elements at even spacing feel polished. The fresh fir adds movement and scent, while the velvet band and bell deliver that classic red-green-brass trio in an understated way. At dusk, add a hidden micro-light strand per wreath for a soft halo. This is minimal effort for maximum payoff—and it stores flat if you use faux bases.
Variations: Short driveway? Use three large wreaths at the entrance only. Windy site? Choose wired velvet ribbon and add a second discreet tie to prevent spinning. Pet-friendly yard? Keep bells high and secure so they don’t become toys.
Timeline: Build the first weekend of December. Refresh any fresh greens mid-month. Remove the red band and leave the simple greenery on stakes for January as winter décor.
Supplies and Cost:
- Wreath bases (18–24 inches, faux or real): $15–$40 each
- Fresh fir or cedar sprigs to thicken: $10–$20
- Black metal garden stakes or painted wooden dowels (36–48 inches): $3–$10 each
- Red velvet ribbon (2–3 inches): $8–$12
- Brass bells (2–3 inches): $3–$6 each
- Micro-light strands (optional): $6–$10 each
- Zip ties and floral wire: $6–$10
Total Estimated Cost: $70–$220 depending on quantity
Time and Skill Level: 45–90 minutes active time for 4–6 wreaths · Easy
Best For: Homes with long or curved driveways that need rhythm and definition after sunset.
Key Design Elements:
- Main holiday props: full wreaths, velvet bands, brass bells
- Color palette: evergreen, true red, brass, black metal stakes
- Lighting strategy: optional halo with micro-lights tucked inside greenery
- Textile and ribbon layers: tight velvet bands instead of floppy bows
- Greenery and natural elements: fir or cedar thickened for depth
- Accent details: bell centered at the band’s overlap
Why This Reads High-End: Repetition and proportion. Identical wreaths at tidy intervals feel like a curated install rather than scattered décor.
How To Make It:
- Attach each wreath to a stake: zip tie through the wreath frame to the stake at two points for stability.
- Fluff and thicken the wreath with fresh sprigs, wiring them into sparse spots to create an even, plush ring.
- Wrap a 6–8 inch section of velvet ribbon around the lower third of the wreath, overlapping at the back; secure with wire.
- Tie or wire a brass bell at the center of the band so it faces forward.
- Optional: Weave a micro-light strand through the inner edge of each wreath; secure the battery pack at the back.
- Hammer stakes into the ground along the driveway every 6–8 feet, ensuring consistent height.
- Switch on at dusk and adjust so each wreath faces the street squarely.
Don’t Do This: Mixing wreath sizes. It looks accidental, not artistic. Choose one size and stick to it for a refined line.
Pro Styling Tip: Start and end your run of stakes with the wreaths closer together by 1 foot—your eye reads it as an intentional “entry.”
4) Classic Candy-Cane Stanchions and Fir Garland for the Curb
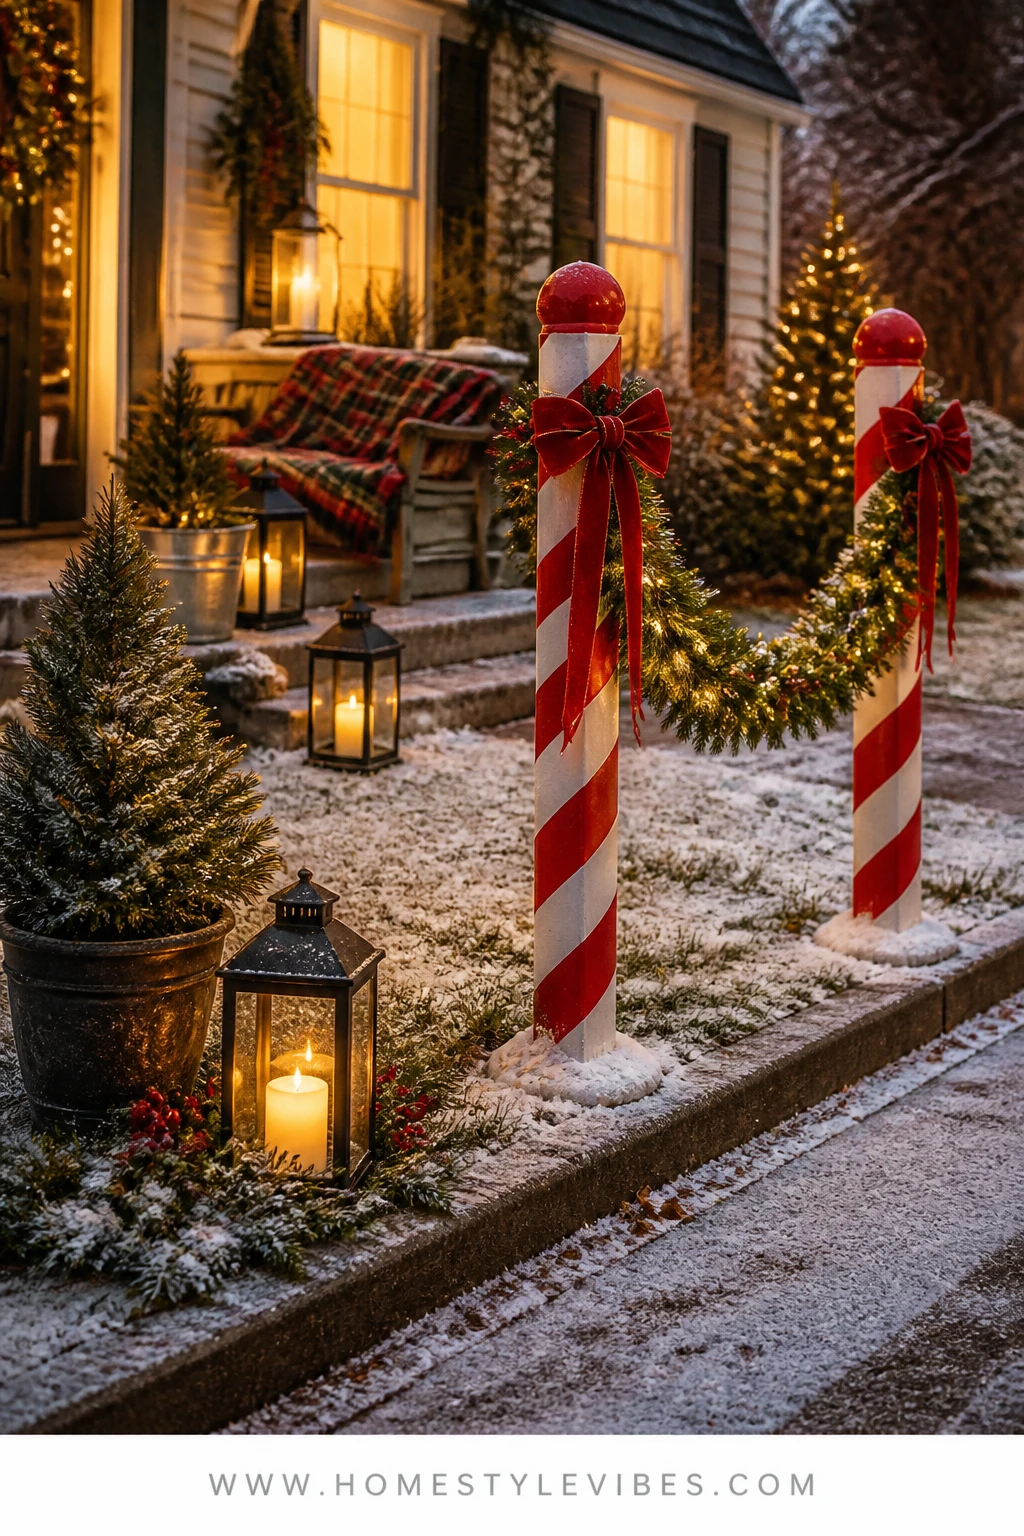
Maybe you’ve tried those plastic candy canes from the hardware store. Cute in the cart, underwhelming on the curb. This DIY creates substantial candy-cane “stanchions” using PVC pipe you stripe yourself, topped with glossy caps, connected by thick fir garland swagged between them. It’s classic, cheeky, and—when made at proper scale—surprisingly elegant.
Here’s the secret: size matters. Go for 3–4 inch diameter PVC and 36–42 inches tall so the canes feel architectural. Add a single strand of warm white mini lights along the garland swag. The red stripes are crisp, the evergreen is full, and the rhythm across the curb reads like a holiday parade route. Kids love it, but it still feels grown-up.
Variations: If you want subtle, paint stripes in a deeper cranberry red and use a narrow velvet band on the garland instead of bows. For a tiny frontage, make just two canes flanking your address stone.
Timeline: Paint and cure PVC in November while it’s warm enough for the paint to set. Assemble outdoors the first weekend of December. After New Year’s, remove the red accents and leave the fir swag with lights for a calm winter look.
Supplies and Cost:
- PVC pipe (3–4 inch diameter), cut to 36–42 inches: $8–$14 each
- PVC caps or ball tops: $2–$5 each
- Heat gun for gentle bend or 90-degree elbow fittings: $0 if borrowed–$25
- White spray paint (outdoor) + red outdoor enamel or tape: $6–$14
- Ground rebar or metal fence posts: $3–$8 each
- Thick faux or fresh fir garland (9–12” width): $20–$50
- Warm white mini lights: $8–$15
- Zip ties, floral wire: $6–$10
Total Estimated Cost: $75–$180 depending on length
Time and Skill Level: 2–3 hours active time (includes painting) · Intermediate if bending PVC; Easy if using elbows
Best For: Street-facing frontages that need bold, cheerful definition; families who want festive without inflatables.
Key Design Elements:
- Main holiday props: large candy-cane posts, thick fir garland, warm mini lights
- Color palette: candy red, crisp white, deep evergreen, warm white lights
- Lighting strategy: single light strand woven through the garland only
- Textile and ribbon layers: optional velvet bows at each post for extra cheer
- Greenery and natural elements: full fir swags between posts
- Accent details: glossy caps on candy canes for a finished top
How To Make It:
- Cut PVC to height. Either heat and bend the top 6–8 inches into a hook shape with a heat gun (work slowly), or use a 90-degree elbow fitting to create the curve.
- Prime and spray paint the pipes white. Let dry per can directions.
- Mask diagonal stripes with painter’s tape or wrap with red vinyl tape at a steady angle for perfect candy stripes.
- Insert rebar into the ground where each post will live, leaving 12–18 inches above grade. Slide PVC over rebar for stability.
- Cap each post with a glossy ball top or PVC cap painted to match.
- Attach garland between canes with zip ties at 3 points per span. Create a gentle swag, not a droop—think museum rope.
- Weave one strand of warm mini lights through the garland. Hide the plug at a post foot, secured with a weatherproof cord cover.
- Add small velvet bows at the base of each cane if desired. Step back and ensure even swag depth across all spans.
Why This Looks Intentional: The larger diameter pipe and consistent stripe angle mimic commercial installs. The garland’s generous thickness balances the bold posts.
The Most Common Mistake: Skinny garland between large canes. It throws the ratio off. If your garland is thin, double it—and fluff.
Pro Styling Tip: For photos, shoot just after sunset so the white pipes still read crisp while the garland lights glow; this keeps detail and bokeh.
Remember, this isn’t about recreating a showroom. It’s about telling a clear story from the curb: structure, greenery, and glow. Pick your headline piece first, then add only what supports it.
5) Silhouette Reindeer in Matte Black With Fir Collars on the Lawn
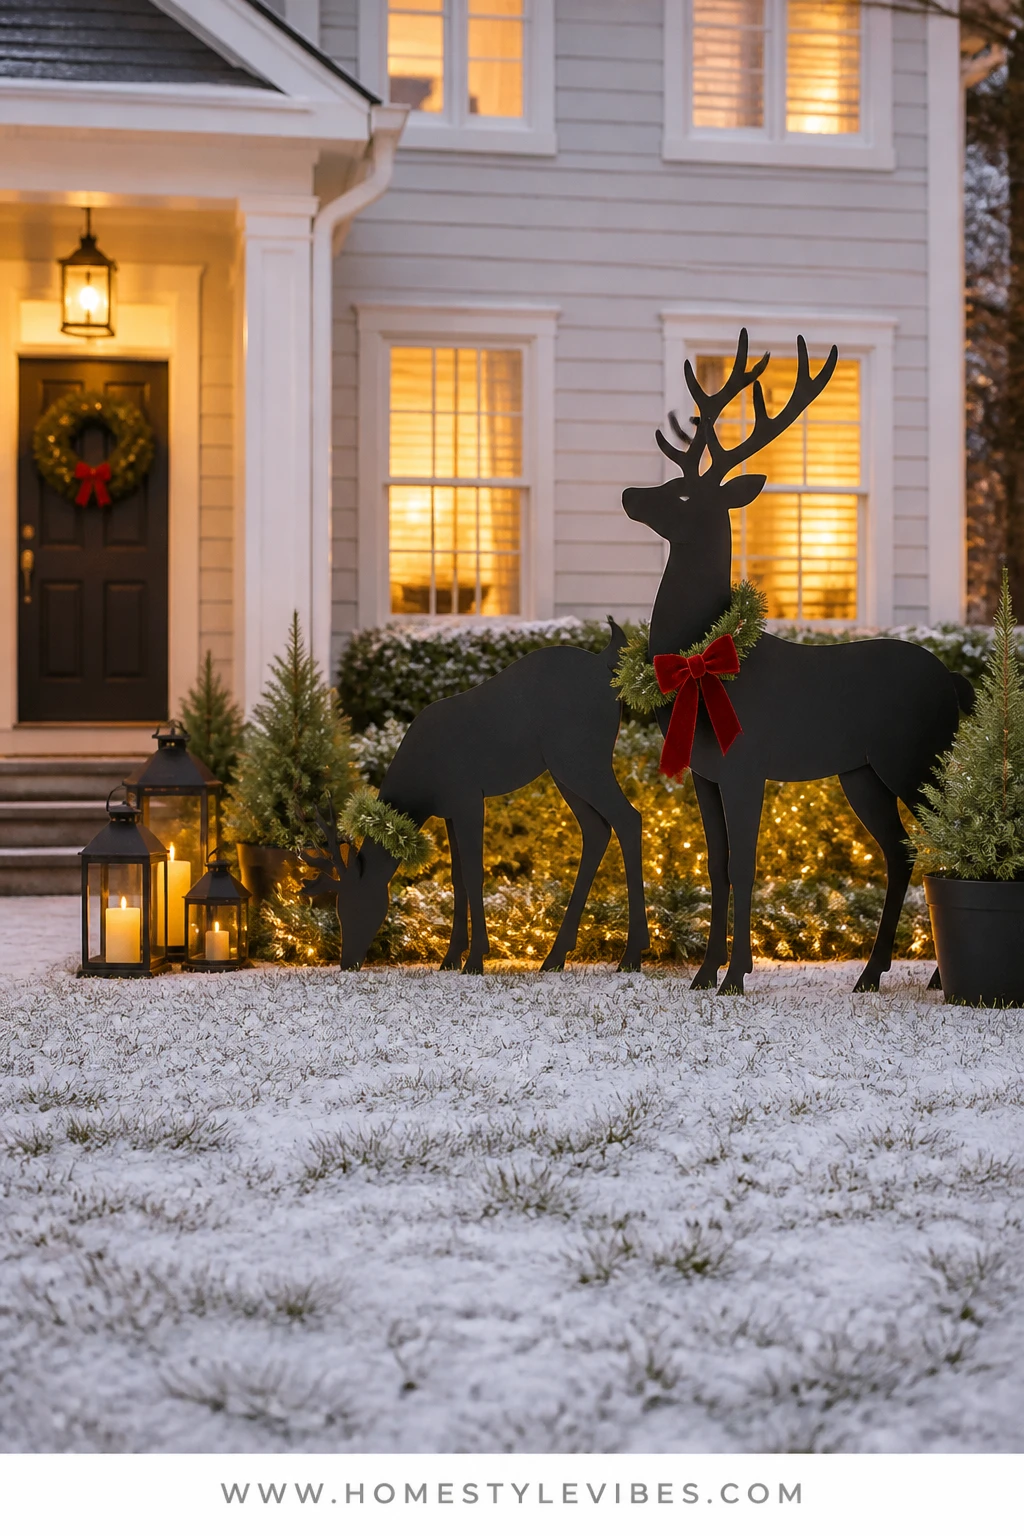
You’ve wanted those sculptural reindeer for years, but the aluminum sets are pricey. Here’s the DIY that looks store-bought from the street: matte-black reindeer silhouettes with fir collars and a single red velvet bow. From a distance they read like high-end metal art; up close they’re sturdy plywood with crisp edges. They stake into the yard, withstand snow, and look incredible against fresh white or dormant grass.
Why it works: silhouette art is all about negative space and confidence. The black gives graphic contrast, the fir collar adds texture, and the bow ties the classic palette back into the scene. Add a narrow spotlight or two with warm lighting to rake across the surface—you’ll get shadow drama that feels professional.
Variations: Short on tools? Buy pre-cut deer shapes online and simply finish them. Small yard? Do one large stag only, centered. Prefer a softer look? Paint a deep charcoal instead of true black and use cedar bark twine instead of velvet.
Timeline: Cut and prime shapes in late November on a dry day. Paint and cure fully before staking. Collars and bows go on the first weekend of December and can be refreshed as needed.
Supplies and Cost:
- Exterior-grade plywood (1/2 inch), enough for 1–3 deer: $35–$70
- Jigsaw + fine-tooth blades: $10 for blades (tool cost excluded)
- Exterior primer + matte black exterior paint: $20–$35
- Metal stakes or U-shaped rebar + pipe clamps: $10–$20
- Fresh fir for collars: $10
- Red velvet ribbon (1–2 inches): $6–$10
- Outdoor-rated spotlights (warm): $15–$25 each (optional)
- Sandpaper, screws, wood filler: $10
Total Estimated Cost: $80–$190 depending on quantity and lighting
Time and Skill Level: 3–4 hours active time for a set of two · Intermediate (cutting curves)
Best For: Mid-to-large lawns where a sculptural focal point anchors the scene, and anyone who loves a modern classic twist within a red-and-green palette.
Key Design Elements:
- Main holiday props: stag and doe silhouettes, fir collars, velvet bows
- Color palette: matte black, evergreen, true red, warm spotlight glow
- Lighting strategy: low, angled warm spotlights to cast long shadows
- Textile and ribbon layers: narrow velvet bow at the collar for restraint
- Greenery and natural elements: fresh fir wired into short garlands
- Accent details: tiny brass bell at one collar for a “found” touch
How To Make It:
- Print or project a reindeer silhouette onto plywood. Trace clean lines; simplify antlers for easier cutting if needed.
- Cut with a jigsaw using slow, steady passes. Sand edges smooth and fill any chips.
- Prime all sides and edges; let dry. Paint matte black with two coats, letting each coat cure thoroughly.
- Attach stakes to the back with pipe clamps or screw L-brackets; ensure they reach 12–18 inches into the ground.
- Drive stakes into the lawn and slide the deer onto them. Adjust until plumb and secure clamp screws.
- Create a short fir collar by wiring sprigs into a small crescent and fastening at the neck.
- Tie a restrained red velvet bow on one side of the collar; add a small brass bell if you like.
- Place one or two warm spotlights at low angle in front to graze light across the silhouette; hide cords discreetly.
Why This Looks Expensive: The matte finish and bold silhouette echo high-end metal art. Add the right lighting and it reads custom, not crafty.
Watch Out: Glossy paint shows every imperfection, especially in photos. Stick to matte or satin and sand carefully.
Pro Styling Tip: Position the stag slightly forward and the doe turned 10–15 degrees—overlap for depth that photographs beautifully.
Real talk: adhesives and cold weather? Not friends. I’ve had command hooks pop off a porch column on the first 20-degree night and spend the rest of December chasing a wreath across the yard. Use wire, screws, and stakes outdoors—mechanical connections win winter.
Quick Checklist
- Warm-white lights in one consistent color temperature
- True red velvet ribbon for bows and bands
- Fresh or faux cedar and fir for dense greenery
- Black lanterns and matte black silhouettes for contrast
- Sturdy stakes, rebar, and clamps for secure installs
- Brass bells as subtle accents
- Exterior-rated paints, primers, and clear coats
- Landscape staples for windproofing lawn pieces
- Timers or smart plugs to automate lighting
- Matte finishes to hide winter scuffs in photos
Frequently Asked Questions
How do I keep outdoor ribbons and bows from getting ruined in rain and snow?
Choose wired velvet or outdoor polyester velvet and lightly spray with a fabric protector. Secure bows with floral wire at two points so they don’t flip. If storms hit, tuck long tails under with a discreet zip tie to stop tangling.
Fresh vs. faux greenery for yard decorations—what lasts longer and still looks good?
Faux lasts the entire season and handles freeze-thaw cycles best. Fresh looks and smells incredible for 2–3 weeks, then needs refreshing. IMO, use faux for structural pieces (garlands and wreath bases) and add fresh sprigs where you want movement and scent.
When is the best time to set up these DIY Christmas yard decorations?
Build frames and paint pieces in November while it’s still mild. Install greenery and lights Thanksgiving weekend or the first week of December. If you use fresh greens, plan a quick refresh around mid-December for Christmas week.
Are these outdoor projects safe around kids and pets?
Yes—use flameless candles in lanterns, secure all stakes deeply, and keep bells and small parts wired securely at adult height. Avoid glass within reach. Check cords and plugs daily after heavy weather.
How should I store these pieces after the holidays?
Detach greens, coil lights separately, and stack frames upright with cardboard between. Wreaths store flat under beds or in garment bags. Label bins by zone (walk, lawn cluster, driveway) so next year’s setup takes half the time.
Bring It Home
Pick one. That’s the move. Maybe it’s the cedar-framed lantern stakes that finally make your walkway feel finished, or those oversized evergreen gift boxes you’ve secretly wanted in your front lawn since you saw them in a department-store window years ago. Whichever idea you choose, commit to the classic outdoor red-and-green palette: lush greenery, true red velvet, warm white glow, and a touch of black or brass for definition.
The truth is, curb appeal lives in structure, not stuff. When you give your yard a few strong lines—staked wreaths, candy-cane posts, a quiet pair of matte-black reindeer—everything else falls into place. You get that layered greenery, that cozy light, that crisp ribbon detail that photographs beautifully from the sidewalk and still makes you smile when you pull in with groceries at 6 p.m.
You’ve got this. A Saturday afternoon, a handful of supplies, and a clear plan can turn your front yard into the holiday moment you’ve wanted for years—store-bought looks, made by you.

About the Author

Krisztina P.Rendes, Founder of Home Style Vibes
Founder of Home Style Vibes
Krisztina Puskásné Rendes created Home Style Vibes as a cozy-modern lifestyle space where homemaking meets inspiration. Her goal is to help women create beautiful, organized, and peaceful homes they truly love — without overwhelm. You’ll find here heart-driven content on home decor, cleaning tips, easy family recipes, organization and decluttering, DIY home projects, plants, and seasonal ideas — all designed to bring more calm, comfort, and style into everyday life.