5 Entryway Christmas Decor Ideas for a Warm Welcome the Moment Guests Walk In
You want your entryway to hum with Christmas cheer the instant the door swings open. You hate that it currently looks like a coat drop zone with a random wreath tossed in for good measure. If you’re craving a crisp red-and-white holiday moment with fresh green accents that feels intentional and photo-ready, these 5 entryway Christmas decor ideas will fix the frustration fast. We’re talking candy-red ribbons, bright white ceramics, warm white lights, evergreen garlands, and cheerful stripes—styled in ways that make guests smile before they’ve kicked off their boots.
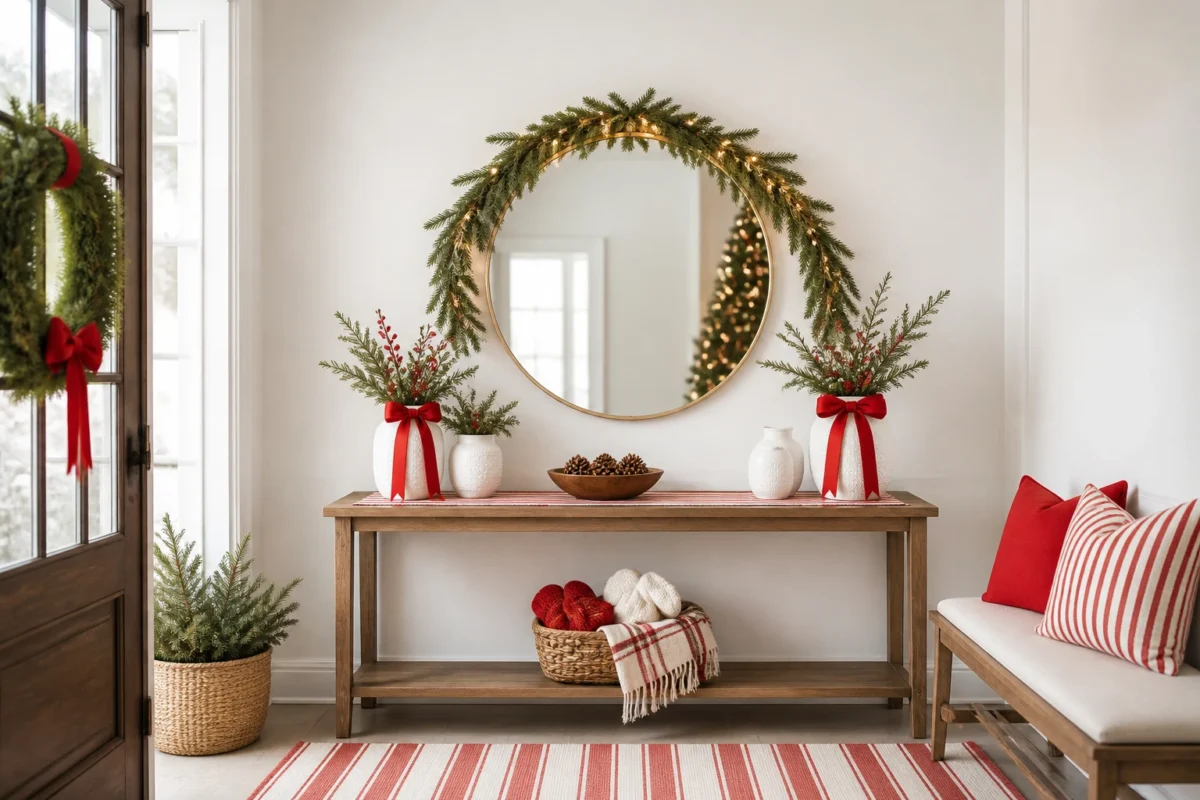
Each idea can be set up in under an afternoon, most for under $250 all-in, and all with smart swaps to fit tight spaces and busy families. Imagine a console table that actually looks finished, a bench that says “stay a while,” and a mirror that sparkles back every twinkle light in the room. Every setup is Instagram-friendly and real-life practical. If you love a classic Christmas entryway—red and white with a fresh, timeless vibe—this guide is your new best friend. Set these up the weekend after Thanksgiving and keep the greenery glow rolling right through New Year’s.
1. Candy-Red Ribbon Bows And Warm White Fairy Lights On The Console Table
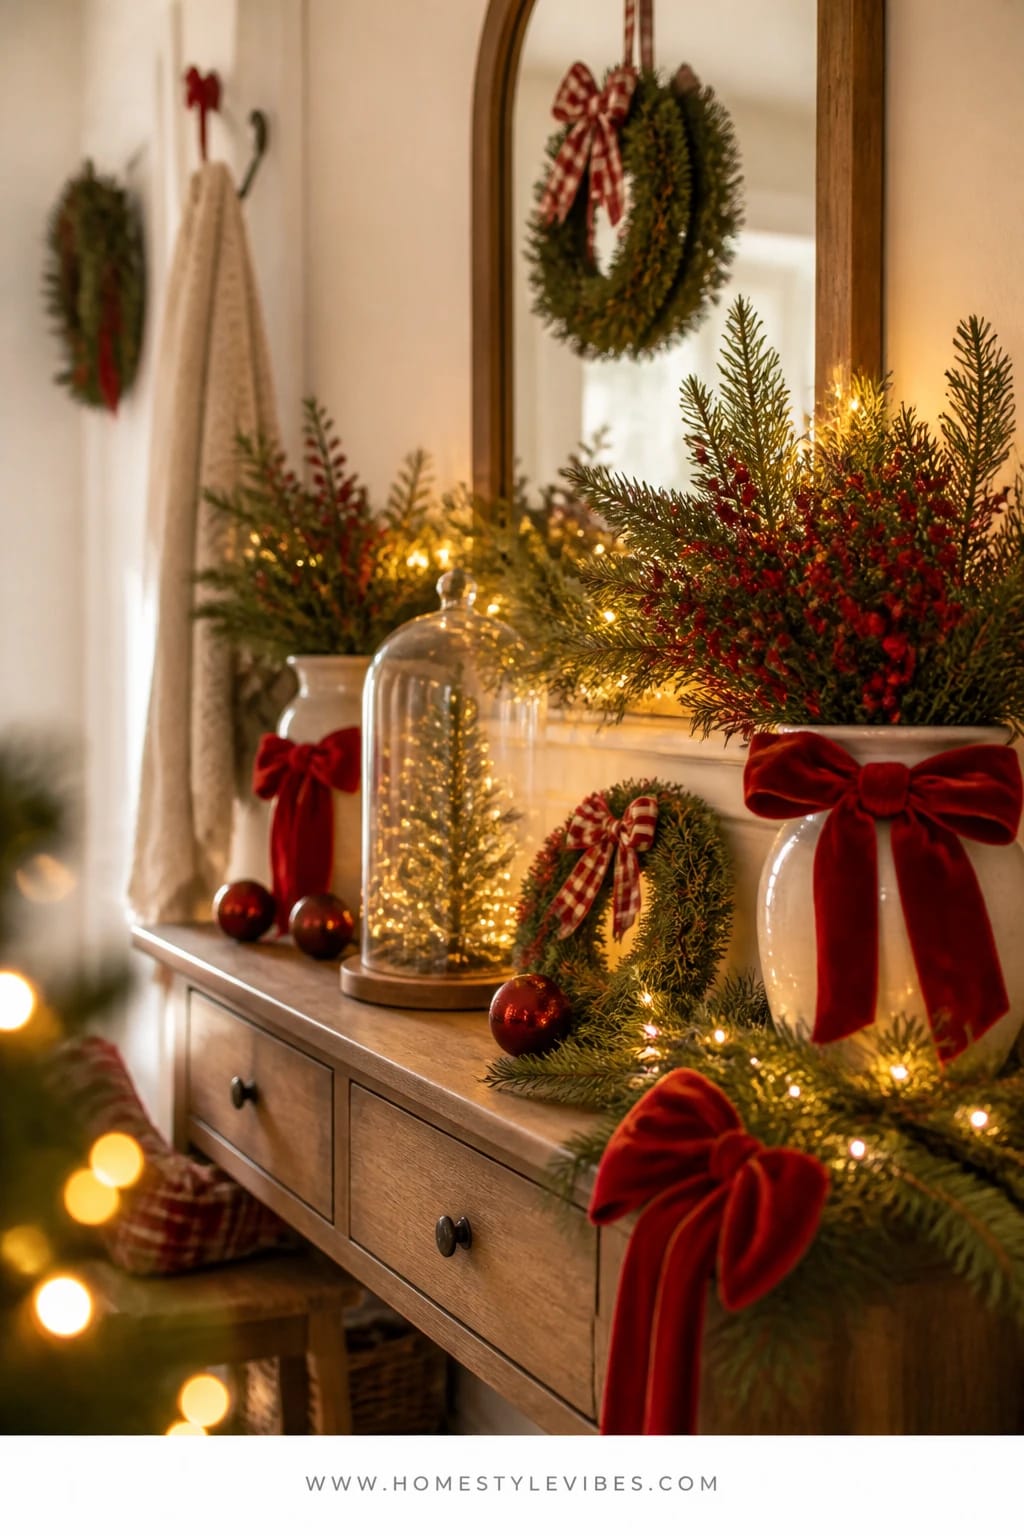
It’s that one surface that collects keys, permission slips, and an emergency snack from October. You’ve tried putting a mini tree there, but it still looks like a random island. The solution? Turn your console into a red-and-white ribbon story with warm white fairy lights threading through greenery. The mood reads classic, crisp, and cheerful—instant entryway Christmas decor that looks styled, not stuffed.
This works in real homes because it corrals clutter and adds structure. A wide, low vessel of fresh cedar or faux pine becomes your base. Layer in white ceramic houses or white pitchers for height, then tie candy-red velvet bows to subtly repeat the color. Warm white lights create depth and the prettiest bokeh when they bounce off the ceramic whites and the mirror behind your console. The effect is clean, timeless, and easy to tweak if you add a holiday card or two as they arrive.
Photographs beautifully? Absolutely. That light-green cedar against bright white ceramics with ribbon-red accents pops on camera. The fairy light twinkle adds movement, while layered heights keep the eye traveling. Pro tip: the mirror above your console doubles the glow—don’t skip it.
Variations you’ll appreciate:
- Budget-friendly: Use clippings from your tree stand and a strand of plug-in warm white minis you already own. Swap ceramic houses for simple white frames with a red gingham ribbon bow taped to the corner.
- Small-space: Try a single long white tray with a narrow run of greenery, one ribboned candle, and a strand of battery lights. Keep it under 8 inches deep so keys still have a landing spot.
- Kid-friendly: Anchor everything with removable museum putty so little hands can’t tip it forward. Use flameless candles only.
Timing: Set it up right after Thanksgiving. Refresh fresh cedar around week two if it’s near a heat vent. The white ceramics and lights can transition into January with plain cedar (remove the red bows for a soft winter vignette).
Budget Breakdown:
- Faux or fresh cedar garland or stems: $20–$70
- Battery-operated warm white fairy lights: $10–$20
- White ceramic houses or pitchers: $25–$80 (set or mix)
- Red velvet or grosgrain ribbon: $8–$18
- Low tray or vessel: $20–$40
- Museum putty and command strips: $8–$15
Total Estimated Cost: $91 – $243
Best For: Households that need a hardworking console to still function; styles ranging from traditional to modern farmhouse; early-season through New Year’s with quick refreshes.
Key Design Elements:
- Main holiday props: white ceramics, red velvet bows, evergreen clippings
- Color palette: candy red, crisp white, fresh green
- Lighting strategy: one strand warm white fairy lights woven low for glow
- Textile and ribbon layers: velvet or grosgrain in true red for richness
- Greenery and natural elements: cedar or pine for a soft drape
- Accent details: slim white tray, brass key bowl, small jingle bells
How To Recreate This Look:
- Start with a clean console and place a long, low white tray as your base.
- Add a loose run of cedar or pine across the tray, keeping the tails natural and slightly asymmetrical.
- Layer fairy lights through the greenery, tucking the battery pack behind a vase.
- Place two to three white ceramic houses or pitchers in staggered heights.
- Style with candy-red velvet bows tied around one vessel and the tray corners; add a small brass bowl for keys.
Why This Looks Expensive: Limited palette, consistent materials, and repetition of ribbon makes it look intentional. The mirror glow and ceramic sheen read high-end without needing designer brands.
Watch Out: Don’t overload the greenery. A dense mass looks messy. Keep it low and airy so the white elements breathe and the lights aren’t buried.
Pro Styling Tip: Place the brightest light cluster just off center beneath the tallest ceramic piece for a glow that photographs like a soft halo.
2. White Ceramic Bells And Candy Stripe Ribbon On The Mirror Above The Console
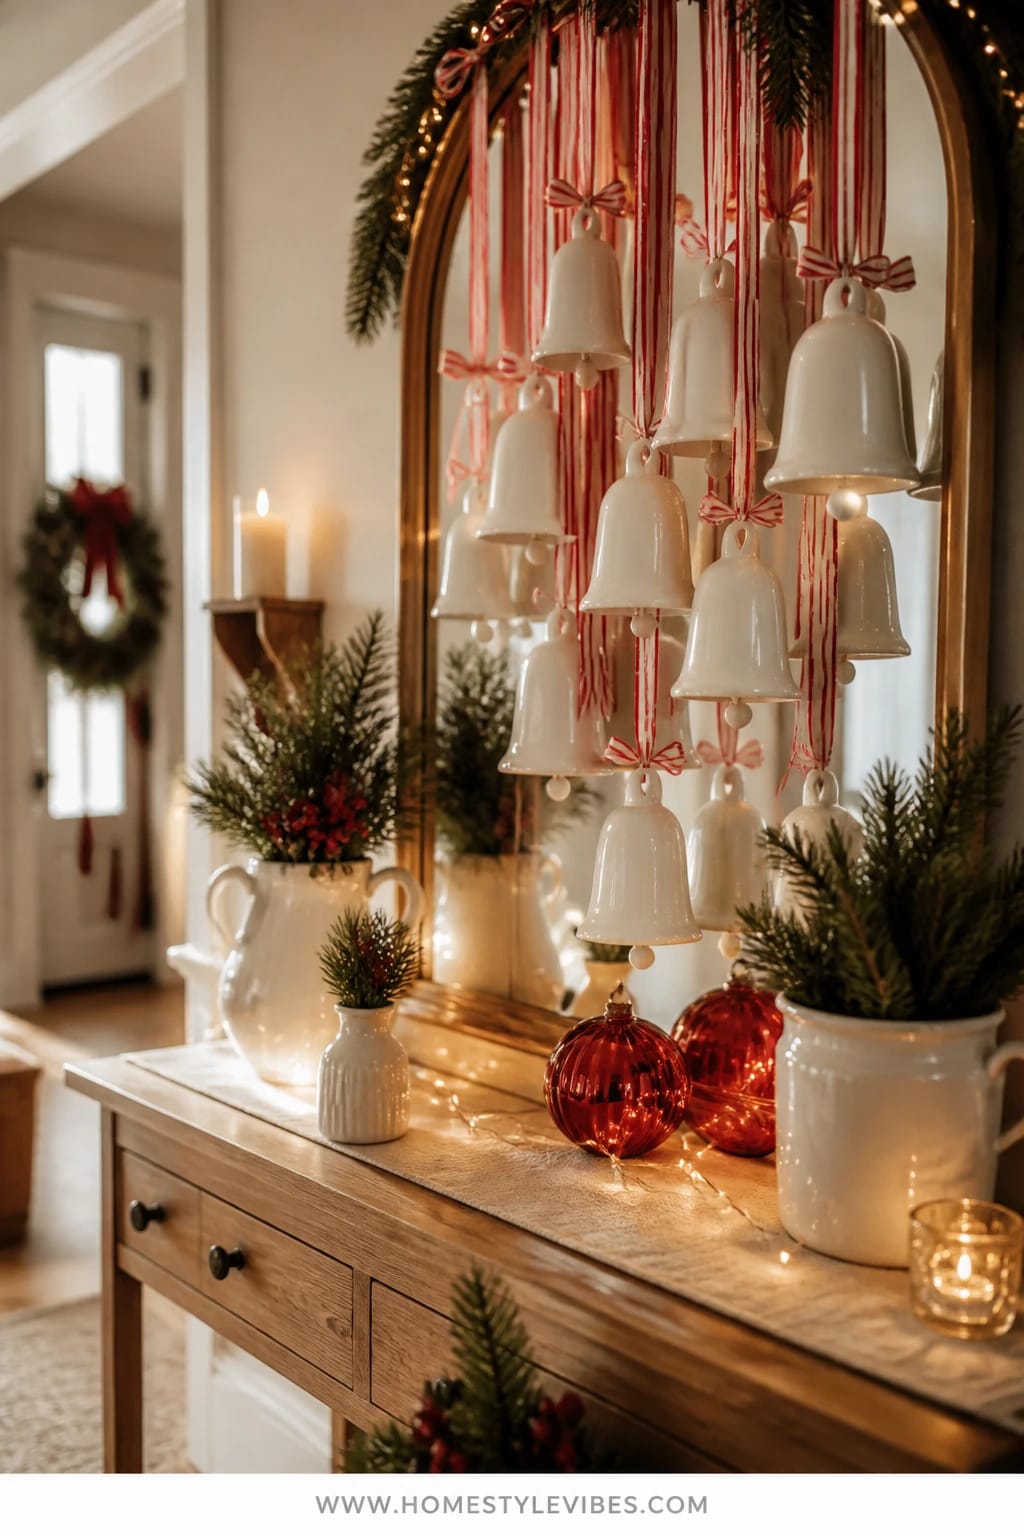
Mirrors love a moment—but the wrong scale looks like an afterthought. You’ve probably tried a mini wreath on the mirror and felt… underwhelmed. This idea shifts the focus: suspend white ceramic bells from the top edge on candy-striped red-and-white ribbon. The look is crisp and rhythmic, and the bells sway just enough when the door opens to feel delightfully alive.
The mood is classic and bright. Ceramic bells bring that soft clink and glossy white surface that catches fairy lights from the console below. It’s practical because it stays vertical—no lost surface space—so small entryways still breathe. And it stores flat in one shallow bin.
Lighting here relies on the reflection of the mirror. When warm white lights twinkle below or to the side, you get double impact without adding more cords. Photographically, the striped ribbon becomes a strong graphic line, and the bells give clean white highlights that pop against the mirror’s depth.
Variations worth trying:
- Minimalist version: Hang a single oversized white bell with one wide candy-stripe ribbon for a bold, clean statement.
- Vintage nod: Mix in one aged brass bell among the whites for subtle warmth that still reads classic red and white.
- Small mirror: Use three small bells in a tight cluster to avoid overwhelming the frame.
Timing: Bells can go up early—think mid-November—and feel festive without screaming December. Remove the striped ribbon in January and keep one plain white bell with oatmeal ribbon for a winter carryover.
Key Design Elements:
- Main holiday props: white ceramic bells, candy-stripe ribbon
- Color palette: red and white with a whisper of green below
- Lighting strategy: reflect console lights in the mirror for extra glow
- Textile and ribbon layers: striped ribbon in 1–2 widths
- Greenery and natural elements: optional small sprig of cedar tied at the knot
- Accent details: discreet clear hooks at the top of the frame
Budget Breakdown:
- Set of white ceramic bells (3–5): $25–$60
- Candy-stripe ribbon (2–3 yards): $6–$15
- Clear adhesive frame hooks: $7–$12
- Optional brass bell: $10–$25
Total Estimated Cost: $38 – $112
Best For: Entryways with a mirror already in place; tight spaces where surface clutter is a concern; anyone who prefers a polished, graphic moment over a full wreath.
How To Recreate This Look:
- Start with a clean mirror and measure the center top edge.
- Add two clear hooks at the top frame—one at center, one 6–8 inches to the side for balance.
- Cut ribbon lengths so bells hang at varied heights, the lowest hitting about one-third down the mirror.
- Tie secure knots through bell loops, add a tiny cedar sprig if you like, and secure the ribbon ends to the hooks.
- Step back and adjust spacing so the cluster feels intentional, not crowded.
Why This Feels Designer: Bells instead of a wreath are a considered choice; the scale, negative space, and ribbon repetition make it read bespoke rather than store-bought.
One Thing To Avoid: Don’t hang bells so low they cover your face when you check your hair on the way out. Keep them grouped in the upper third.
Pro Styling Tip: Angle one bell slightly outward so it catches the fairy light reflection for a perfect highlight in photos.
Ready to keep going? The next idea solves the bench-and-hooks zone—the spot that loves clutter a little too much.
3. Fresh Pine Garland And Red Knit Pillows Along The Entry Bench And Hooks
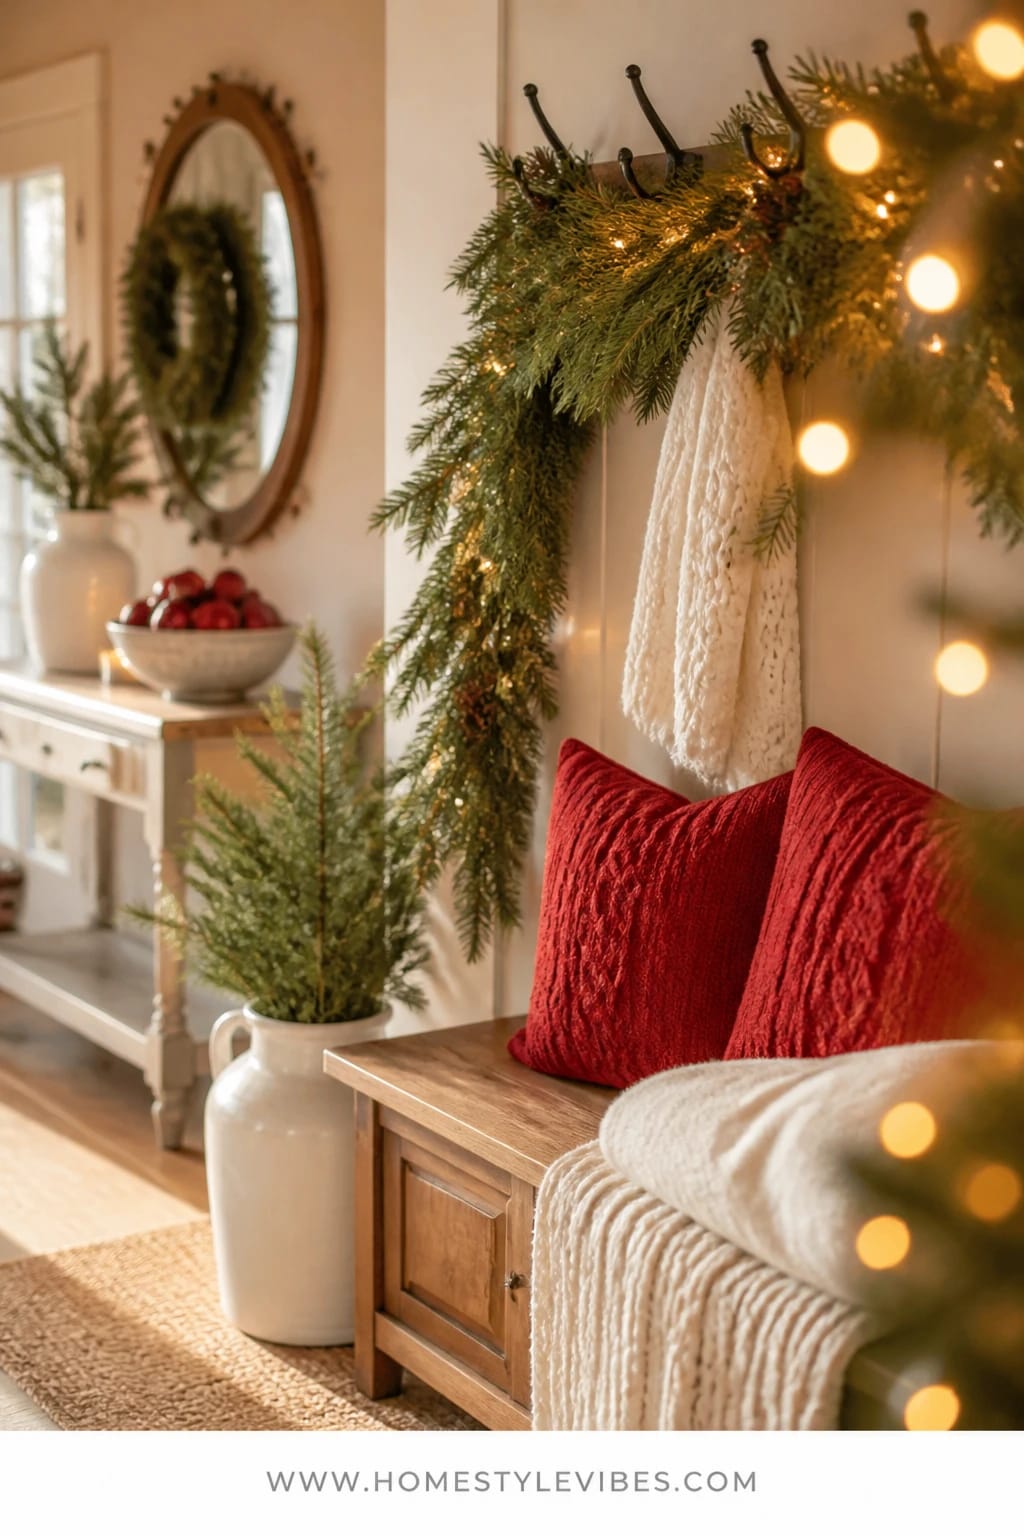
Benches become black holes for bags and half-worn scarves. We’ve all been there—no matter how much you tidy, it looks like a yard sale by 5 p.m. Lean into structure: hang a fresh pine garland along the hooks, use two red knit pillows on the bench, and add a white wool throw folded neatly over one side. The palette stays strict—red, white, green—so even with backpacks, it still reads cohesive.
The mood lands warm and familiar. Wool textures and cable knit nod to fireside coziness without actually needing a fireplace by the door. It’s practical because you’re not blocking function—you’re framing it. The hooks still work, the bench still seats. And if kids toss mittens everywhere, the red pillows give a bright anchor so the whole area looks styled, not chaotic.
Lighting here can be subtle. Try one slim battery-operated light strand woven through the garland, or a pair of flameless lanterns under the bench. The glow reflected in boot leather and the bench’s finish adds life without cords running underfoot. On camera, the high texture of knits plus the glossy needles of pine create beautiful contrast that feels tactile and inviting.
Variations for real life:
- Small-space: Use a skinny half-garland centered above two hooks; pick one red lumbar pillow instead of two squares.
- Highly functional: Add a labeled white basket under the bench for each family member—tie on red ribbon labels for a festive look that hides the chaos.
- Allergy-friendly: Swap fresh pine for a high-quality faux cedar; tuck in a few real eucalyptus sprigs for hint of scent.
Personal note: I styled this in my own house last December, and the red pillows were the hero. Even after a snowy boot explosion, the bench still looked pulled together because your eye goes straight to the red-and-white anchor and the greenery line above.
Budget Breakdown:
- Fresh pine or faux cedar garland: $25–$80
- Battery micro-lights: $10–$20
- Red knit pillows (2) with inserts: $30–$90
- White wool or sherpa throw: $25–$60
- Flameless lanterns (pair): $30–$70
- Storage baskets (optional): $10–$25 each
Total Estimated Cost: $120 – $345 (choose fewer elements for a tighter budget)
Best For: Busy families who need function to stay intact; farmhouse, traditional, or transitional homes where texture matters; from early December through New Year’s, with textiles carrying into deep winter.
Key Design Elements:
- Main holiday props: fresh pine garland, red knit pillows, white throw
- Color palette: red, white, green only
- Lighting strategy: micro-lights in garland or flameless lanterns under bench
- Textile and ribbon layers: cable knits, sherpa, or wool with red ribbons on baskets
- Greenery and natural elements: pine with optional eucalyptus
- Accent details: labeled baskets, black metal or wood lanterns
How To Recreate This Look:
- Start by clearing the bench and hooks. Edit to no more than one coat per person on display.
- Add the garland along the hook rail with discreet hooks or twist ties, letting tails drape at the ends.
- Weave in micro-lights, keeping the battery pack near the last hook for easy access.
- Place two red knit pillows on the bench and fold a white throw over one end for a crisp fold.
- Style with labeled white baskets under the bench and a pair of flameless lanterns to one side.
Why This Reads High-End: Tight color discipline plus high-texture textiles always look considered. Matching pillows and a neatly folded throw say “intentional,” even on a busy day.
Don’t Do This: Avoid tiny pillows that get swallowed by the bench. Go 20-inch square or a long lumbar to hold visual weight against coats.
Pro Styling Tip: Angle one pillow slightly and let the throw’s fringe spill to the floor by an inch for a casual, magazine-ready touch.
Pause and breathe. You don’t need to do everything. If one idea is singing to you, that’s your green light. Choose it, and let the rest simmer for next weekend.
4. Silver Bells And White Faux Fur At The Newel Post And First Stair
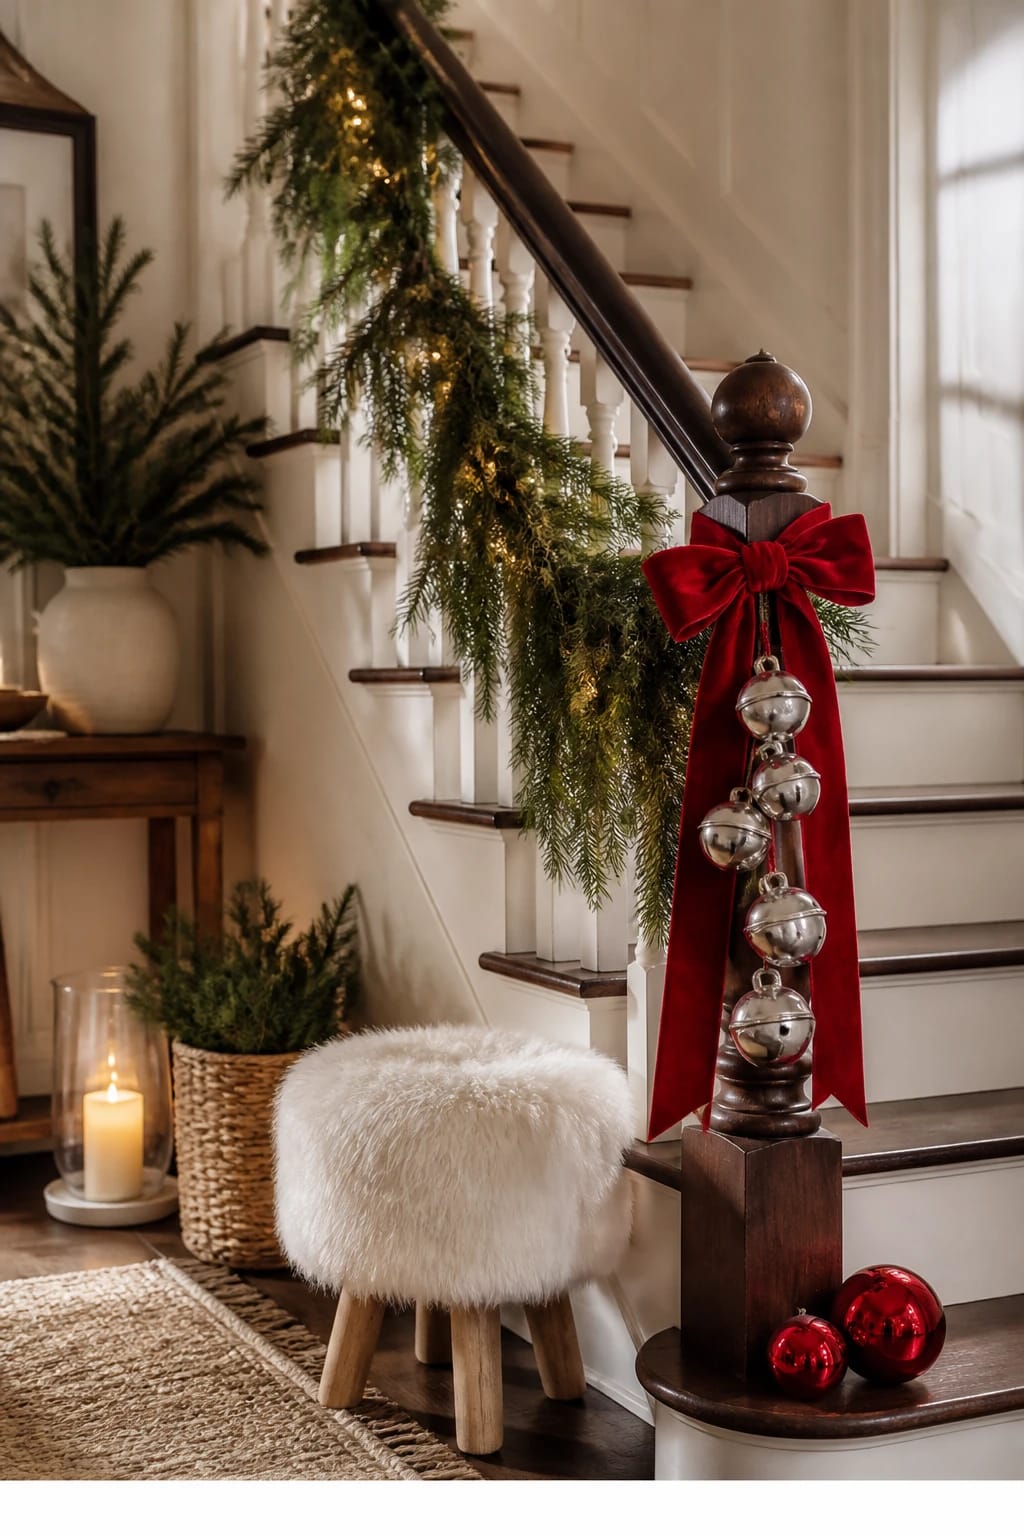
That first stair and newel post area is often ignored or crammed with a too-big garland that blocks the handrail. You’ve tried looping a heavy swag, but it either droops or scratches your banister. Here’s a cleaner take: tie a cluster of silver bells to the newel with a red velvet bow, drape a slim cedar strand along the outside of the banister only, and layer a white faux fur stool or small rug at the first step for softness. It’s a little bit sparkle, a lot of texture, and very safe for daily use.
The mood is bright and classic, with a subtle metallic gleam that catches warm white lights from nearby zones. Because you’re keeping the greenery slim and only on the outside of the banister, the handrail stays fully usable for kids, grandparents, and everyone hauling in gifts. It stores easily since the bells and bow tuck into one small box and the faux fur folds flat.
Lighting: If your console is nearby, you can rely on that glow. Otherwise, add a single strand of warm white minis run under the cedar using clear clips—keep wires tidy. The bounce of light on silver bells gives tiny highlights that read beautifully on camera, especially during blue hour when outdoor dusk meets indoor coziness.
Variations that help:
- Subtle version: Swap red velvet bow for a red-and-white ticking stripe ribbon. Keep the bells smaller for a light jingle.
- Small stair: Skip the garland altogether and focus on the bell cluster and a single sprig of cedar tucked behind the ribbon knot.
- Pet household: Replace the fur stool with a white woven basket for leashes, tied with a red bow.
Anecdote time: A friend of mine bought three different garlands before realizing the real problem was her lighting and bell scale. Once we added a larger bell cluster and a tighter, slimmer cedar piece, the whole stair suddenly looked like a styled photo instead of a tangle of greenery.
Budget Breakdown:
- Silver bell cluster (3–5 bells): $20–$45
- Red velvet ribbon (2–3 yards): $8–$18
- Slim faux cedar garland or fresh: $20–$60
- Warm white mini lights: $7–$15
- White faux fur stool or small rug: $30–$80
- Clear cable clips and zip ties: $6–$12
Total Estimated Cost: $91 – $230
Best For: Homes with a stair visible from the entry; families who need a safe, usable handrail; late November installs that still look fresh on New Year’s Eve.
Key Design Elements:
- Main holiday props: silver bell cluster, red bow, slim cedar
- Color palette: red, white, green with silver accents
- Lighting strategy: one strand of warm minis clipped under the greenery
- Textile and ribbon layers: white faux fur, velvet ribbon for depth
- Greenery and natural elements: minimal cedar drape along the outside
- Accent details: discreet zip ties, clear clips, white leash basket
How To Recreate This Look:
- Start by attaching clear clips along the outside of the banister where the greenery will sit.
- Add a slim cedar garland, securing with zip ties and trimming excess for a clean profile.
- Layer a single warm white light strand under the greenery, hiding wires behind spines.
- Place a silver bell cluster at the newel post and tie with a generous red velvet bow.
- Style a small white faux fur stool or rug at the first step, and add a white basket if needed.
Why This Looks Intentional: Clean lines, restrained greenery, and one bold focal bow signal you edited with purpose. The bells’ shine punctuates the scene like jewelry.
The Most Common Mistake: Overstuffing the banister. Thick garlands swallow the space and make the handrail useless. Keep it slim and supportive.
Pro Styling Tip: Angle the bow tails diagonally across the newel so they catch light and lead the eye up the staircase in photos.
5. Red Velvet Stockings And White Wooden Bead Garland On The Inside Of The Front Door
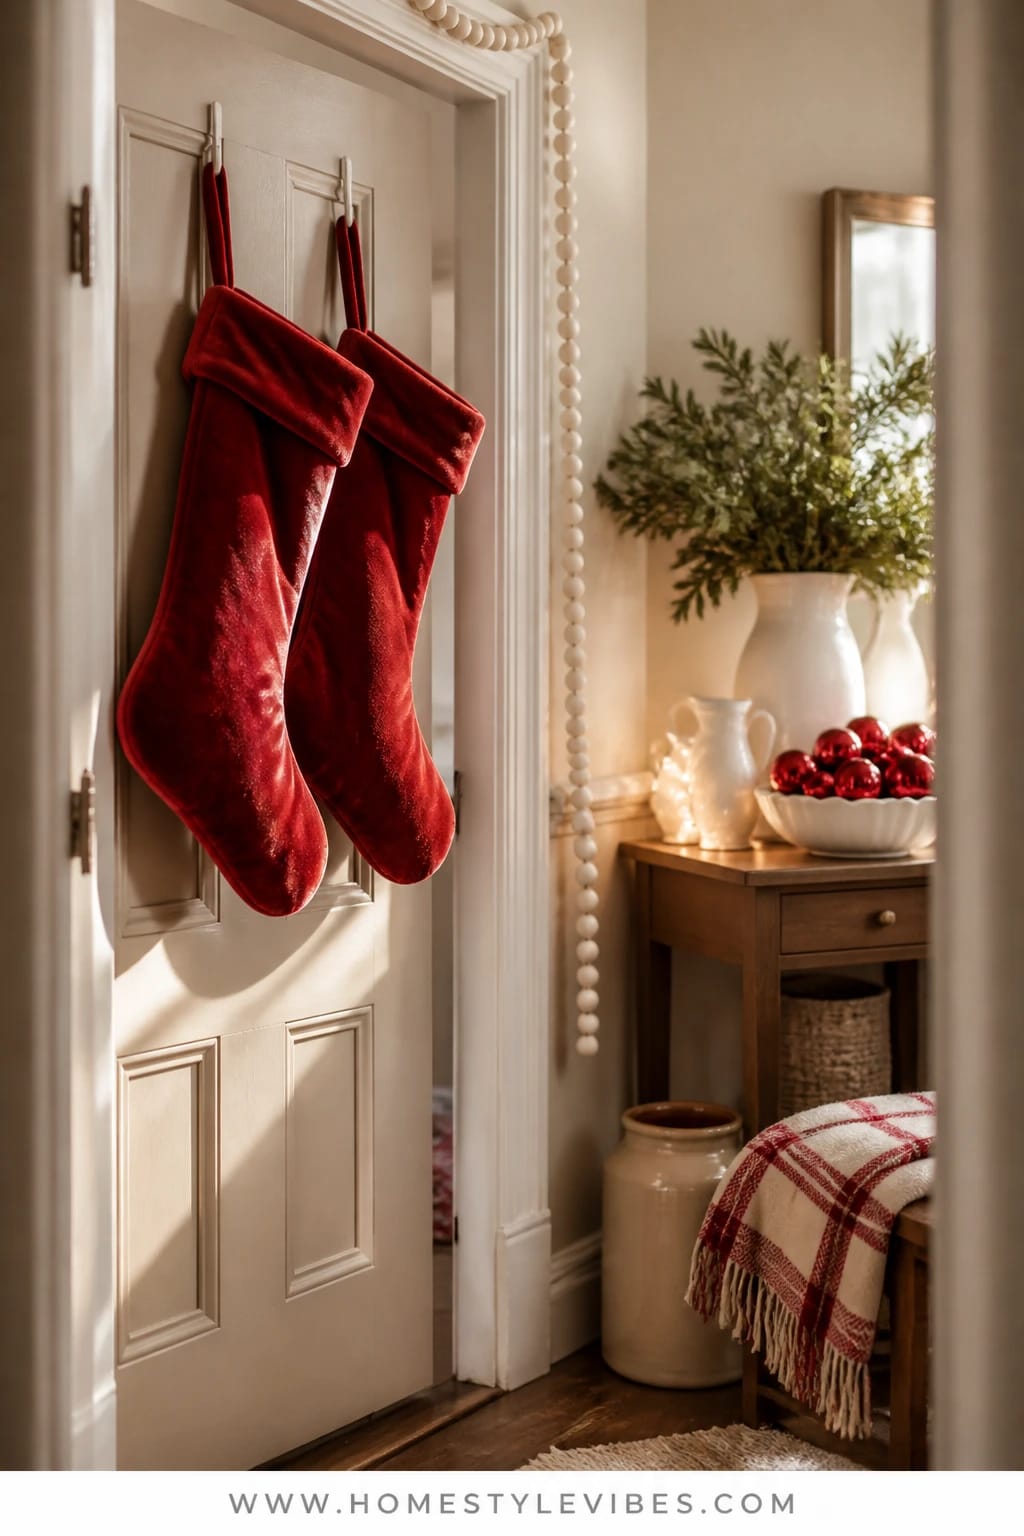
The inside of the front door is forgotten real estate. You’ve probably hung a wreath there before, but it fought the door swing or rubbed paint. Instead, use two red velvet stockings hung side-by-side on the hinge side of the door (so they don’t smack the wall), and frame the door with a white wooden bead garland hung on the surrounding wall—not the door itself. It’s bold, graphic, and pure classic Christmas entryway decor that guests see at eye level as soon as they step in.
The vibe is playful but polished. Stockings at the door reframe holiday hospitality as “you’re welcome here”—a literal welcome stocking moment—while the white beads add texture and rhythm without heaviness. It’s practical for rentals or painted doors because everything attaches to the wall frame, not the door panel, and it removes cleanly in January.
Lighting matters less here; color and texture do the heavy lifting. If you crave glow, tuck a micro-light strand around the bead garland and hide the battery pack behind the trim. Photographically, the stark contrast of red velvet against a white or neutral door frame packs visual punch, and the repeating beads give depth in close-ups.
Variations to consider:
- Small entry: One stocking instead of two, paired with a slim bead run only across the top trim.
- High-contrast modern: Use matte black hooks for the stockings to echo black door hardware.
- January-friendly: Swap red stockings for white knit stockings after New Year’s if you like a gentle winter transition.
True story: I once hung a gorgeous wreath inside, only to realize it banged the wall every time the kids slammed the door (which is… always). Stockings on the hinge side solved it and looked far more intentional.
Budget Breakdown:
- Two red velvet stockings: $30–$80
- White wooden bead garland (6–9 feet): $15–$35
- Low-profile hooks or nails for trim: $6–$12
- Optional micro-lights: $8–$15
- Matte black or brass S-hooks: $6–$12
Total Estimated Cost: $65 – $154
Best For: Homes with a standard front door and surrounding wall space; families who want a bold red statement with minimal fuss; set up mid-December and keep through New Year’s.
Key Design Elements:
- Main holiday props: red velvet stockings, white wooden bead garland
- Color palette: candy red, crisp white, touches of black or brass hardware
- Lighting strategy: optional micro-lights tucked around the beads
- Textile and ribbon layers: velvet stocking cuffs, possible gingham name tags
- Greenery and natural elements: optional small cedar sprigs tucked into stocking cuff
- Accent details: matte black or brass hooks echoing door hardware
How To Recreate This Look:
- Start by measuring the inside door frame and decide where the bead garland should run—across the top and down one side looks balanced.
- Add tiny nails or clear hooks along the trim and hang the bead strand with small gaps for drape.
- Attach two low-profile hooks on the hinge side of the door and hang stockings so they clear the wall when the door opens.
- Layer optional micro-lights around the bead garland and hide the battery pack behind the top trim.
- Style with small cedar sprigs and name tags at each stocking cuff for charm.
Why This Looks Expensive: Velvet always reads luxe, and white beads mimic high-end millwork detail. The repetition looks custom, like you planned that doorscape during a remodel.
Watch Out: Don’t overload stockings with heavy items; they’ll swing and scuff the paint. Keep them mostly for show in this spot.
Pro Styling Tip: Angle the bead garland tails slightly asymmetrical for a dynamic line that photographs less stiff and more styled.
One more mindset moment: You’re not trying to recreate a department store window. You’re building a warm, classic welcome that fits your life—muddy boots, mail pile, and all. Choose details that make the room feel finished and easy to live in.
Quick Checklist
- Warm white fairy lights for console glow
- White ceramic houses or pitchers for height
- Candy-red velvet ribbon and candy-stripe ribbon
- Fresh or faux cedar/pine garland
- White ceramic bells or silver bell cluster
- Red knit pillows and a white throw for the bench
- Flameless lanterns for safe, low light
- White wooden bead garland for door framing
- Red velvet stockings for the hinge side of the door
- Clear adhesive hooks, zip ties, and museum putty
Frequently Asked Questions
How much should I budget to decorate just the entryway for Christmas in this classic red and white style?
Plan on $100–$350 depending on what you already own. Prioritize one “hero” area—console or bench—and build from there. Lights and ribbon stretch the farthest visually for the cost.
Should I use real or faux greenery in a busy entryway?
IMO, fresh cedar wins on scent, faux wins on staying power. In warm or high-traffic entries, use faux for the main garlands and add a few fresh clippings in water-filled bud vases for scent and authenticity.
How early can I decorate the entryway without the greens drying out?
Right after Thanksgiving is ideal. If you go earlier, choose faux for garlands and add fresh sprigs closer to mid-December. Keep greenery away from vents and direct sun to slow drying.
Are lights and candles safe near coats and greenery?
Stick to LED string lights—they run cool. Use flameless candles in lanterns only. Keep cords tidy with clear clips, and never weave hot bulbs into dense greenery.
What’s the smartest way to store these pieces after the holidays?
Coil lights around a cardboard sleeve, roll ribbon on wooden clothespins, and store bells and ceramics in a small bin with tissue. Label a shallow “Entry” box so next year’s setup is grab-and-go in 20 minutes.
Wrapping It Up—Your Entry, Your Classic Christmas Welcome
Pick one zone. That’s your starting line. Maybe it’s the console with white ceramics and a ribbon glow, or the bench that finally looks intentional with red knits and slim greenery. Anchor the look with the classic red-and-white palette, add fresh green for life, and let warm lights do the quiet heavy lifting.
The secret isn’t buying more stuff—it’s choosing repetition and restraint: red velvet bows, bright white moments, and evergreen lines that guide the eye. When your entryway Christmas decor hits that balance, you feel it every time you come home. Door swings open, glow greets you, and it smells faintly of pine. That’s the welcome you’ve been craving.
You’ve got this. Start with the idea that made your shoulders drop in relief, turn on the twinkle, and let the season in—one finished, happy entryway at a time.

About the Author

Krisztina P.Rendes, Founder of Home Style Vibes
Founder of Home Style Vibes
Krisztina Puskásné Rendes created Home Style Vibes as a cozy-modern lifestyle space where homemaking meets inspiration. Her goal is to help women create beautiful, organized, and peaceful homes they truly love — without overwhelm. You’ll find here heart-driven content on home decor, cleaning tips, easy family recipes, organization and decluttering, DIY home projects, plants, and seasonal ideas — all designed to bring more calm, comfort, and style into everyday life.