6 Fall Coffee Bar And Coffee Station Ideas For Café Mornings At Home
You want café-level mornings at home—rich, aromatic, mood-lifting sips while the house feels extra warm and alive with fall. But your reality? A cluttered counter, a tired mug rack, and coffee that tastes fine but never quite delivers that golden, cozy glow you crave. This guide gives you six fall coffee bar and coffee station ideas that bring saturated rust and burgundy, amber candlelight, plaid textures, and harvest abundance straight into your kitchen or dining nook—without a remodel, a massive budget, or a three-hour styling session. In two afternoons and under $250 per setup, you can create a café-worthy corner that photographs like a dream and feels even better in person.
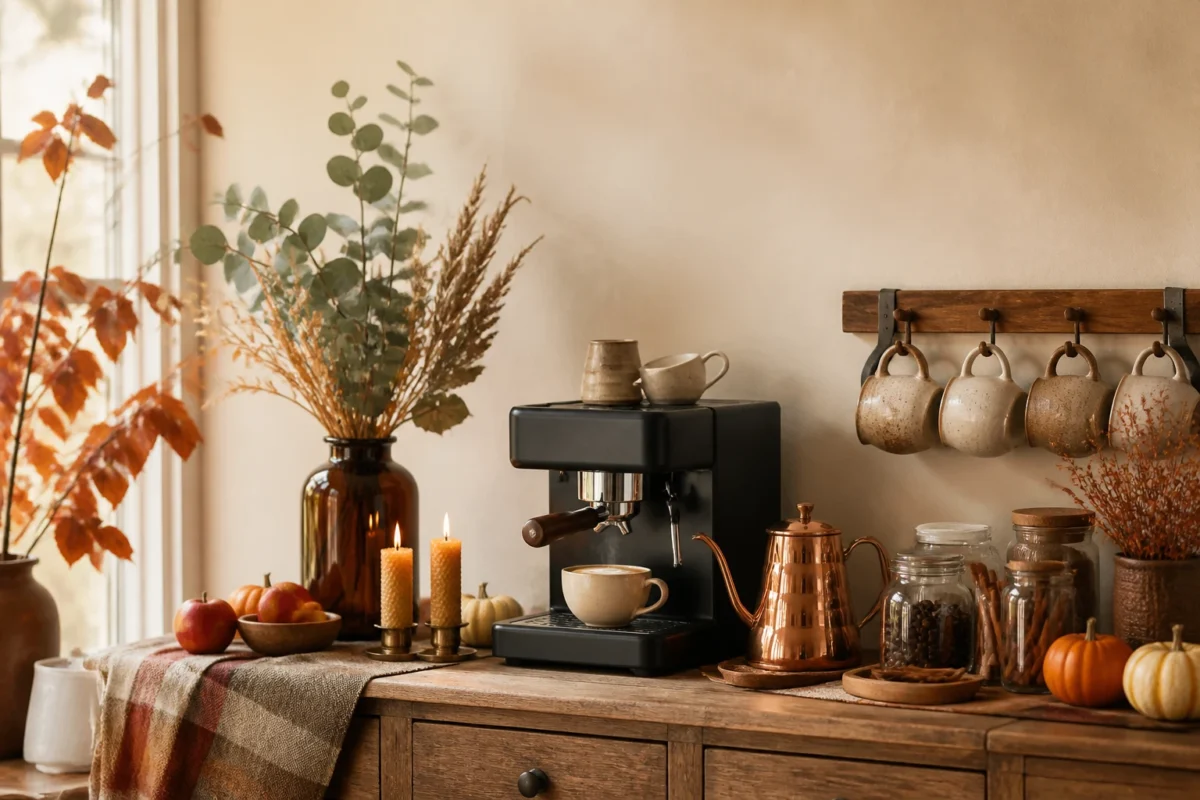
Expect layers of ripe autumn color, natural wood, copper, creamy stoneware, and scent cues that whisper cinnamon and maple. These ideas fix the exact frustrations most of us have in real homes—awkward corners, limited counter space, no storage, bland lighting—by turning your coffee station into a seasonal ritual. Highly Instagrammable? Yep. But more importantly: practical, tidy, and easy to maintain from September to Thanksgiving. If you’re a fall person to your core, this is your moment.
1) Cider-Spiced Pumpkin Accents, Amber Light, and a Wooden Sideboard Coffee Station
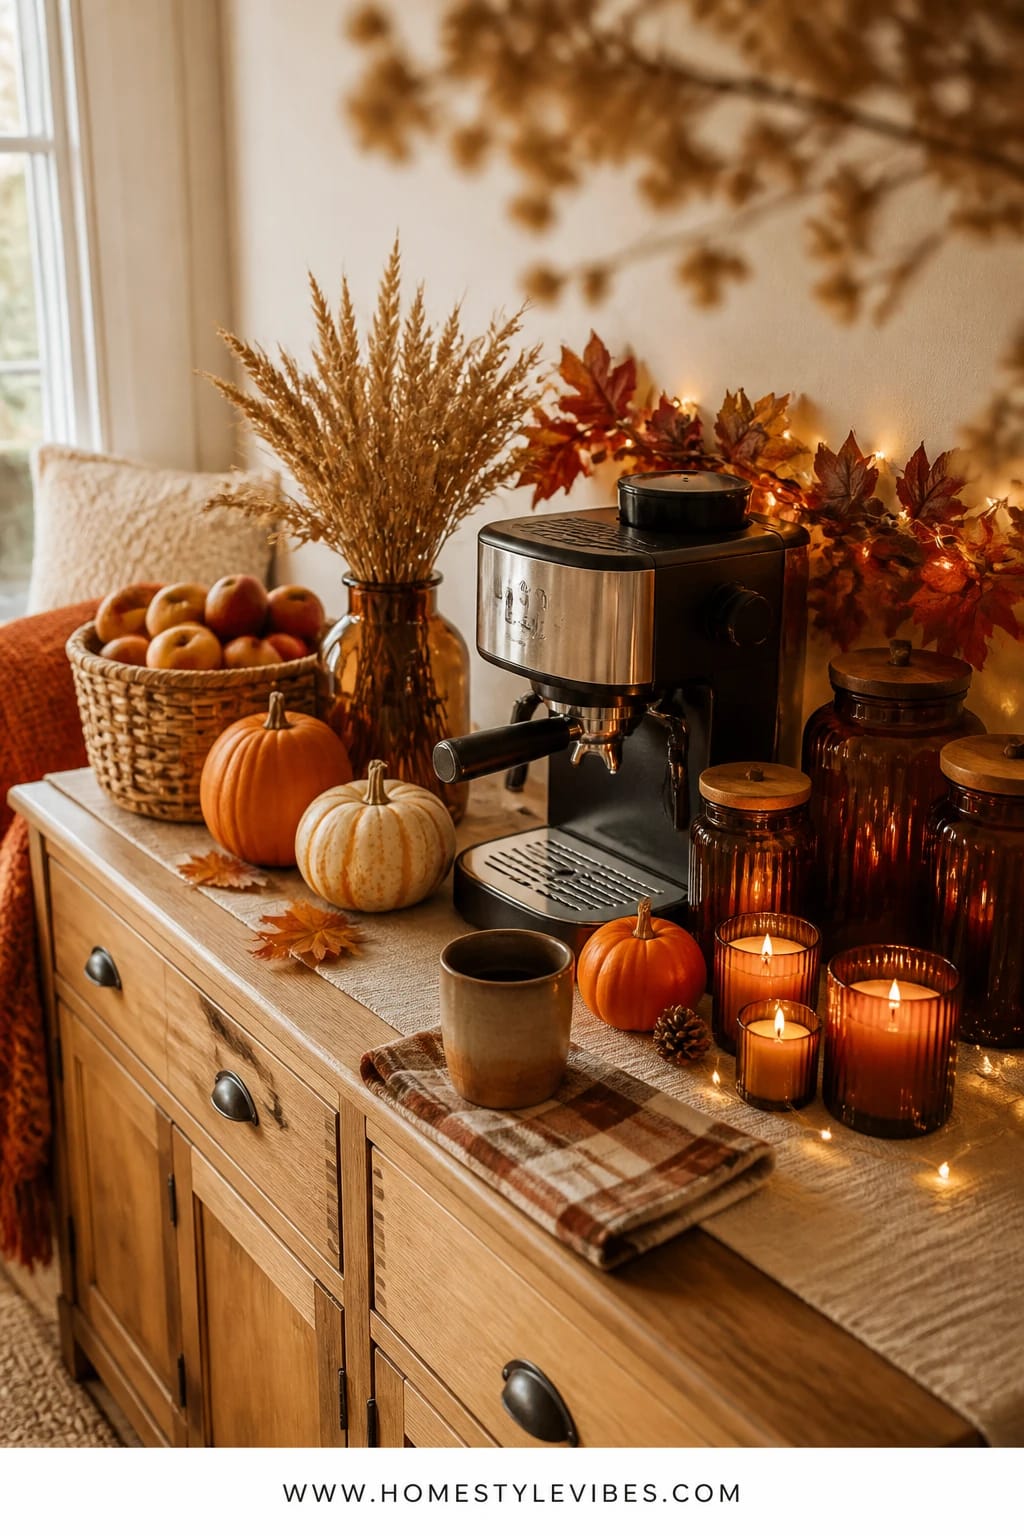
We’ve all been there: you’ve got a decent espresso machine, but the coffee corner reads “appliance graveyard” instead of “fall café.” This wooden sideboard setup changes that by leaning fully into cozy bright autumn—think amber glass, cider-spiced candles, small real pumpkins, a gingham tea towel, and a cluster of warm woods. The mood is rustic-but-refined, with enough glow to make weekday mornings feel like a weekend cabin day.
Why it works in real homes: a sideboard gives you a clear boundary for your coffee station so mugs, syrups, and extras don’t migrate. The amber light from a small lamp or battery candle adds depth and warmth that flat overhead lighting can’t touch. Style-wise, tiny orange pumpkins and a cinnamon broom bring fragrance and color without needing constant maintenance. The whole scene photographs beautifully because you’re creating a soft halo of light against wood grain and layered shapes—mugs, jars, pumpkins—giving you foreground interest and a rich, saturated fall palette.
Variations you’ll love: 1) Budget-friendly: use thrifted amber bottles, a cutting board as a tray, and grocery-store mini pumpkins. 2) Small-space: compress the idea onto a narrow console with a single-stack mug tree and a floating shelf above for syrups and jars. Save your sideboard drawers for pods, filters, and napkins—easy to restock and hide away.
Budget Breakdown:
- Thrifted wooden sideboard: $80–$250 (or use one you already own)
- Amber glass lamp or battery candle lantern: $18–$45
- Mini pumpkins (real): $6–$12
- Gingham or plaid towel set: $10–$20
- Glass jars for beans/sugar: $12–$30
- Cinnamon broom or spiced candle: $5–$20
Total Estimated Cost: $55 – $175 (assuming you already have the coffee maker)
Best For: Classic family kitchens or dining rooms with a warm wood moment; perfect for early September through peak pumpkin season in late October.
Key Design Elements:
- Main seasonal props: mini pumpkins, cinnamon broom, plaid towel
- Color palette: amber, rust, warm wood, cream
- Lighting strategy: one warm lamp or flameless candle cluster for localized glow
- Textile layers: plaid towel, soft-edge runner on sideboard
- Natural elements: small pumpkins, eucalyptus sprigs
- Accent details: amber glass bottle, wooden tray, copper scoop
How To Recreate This Look:
- Start with a wooden sideboard and place your coffee machine on one end for balance.
- Add a small amber-glass lamp or flameless candle on the opposite side to warm the whole vignette.
- Layer a wooden tray with beans, sugar, and a copper scoop in glass jars.
- Place 3–5 mini pumpkins in a casual cluster; tuck in a eucalyptus sprig for softness.
- Style with a plaid towel draped under your mug stack; sprinkle cinnamon sticks in a dish.
Why This Looks Expensive: Cohesive wood tones and amber glass read collected and intentional. The controlled palette (wood, cream, amber) feels curated, not thrown together.
Watch Out: Don’t scatter pumpkins across the entire surface. Keep them in one contained cluster so your station stays functional and doesn’t turn into an obstacle course.
Pro Styling Tip: Angle the lamp so it casts light across the pumpkins and jars—side lighting adds shadow play that looks incredible in photos.
Keep scrolling—next we anchor warmth with plaid and copper for that ultra-inviting café vibe.
2) Copper Mugs, Golden Glow, and a Plaid-Lined Bar Cart
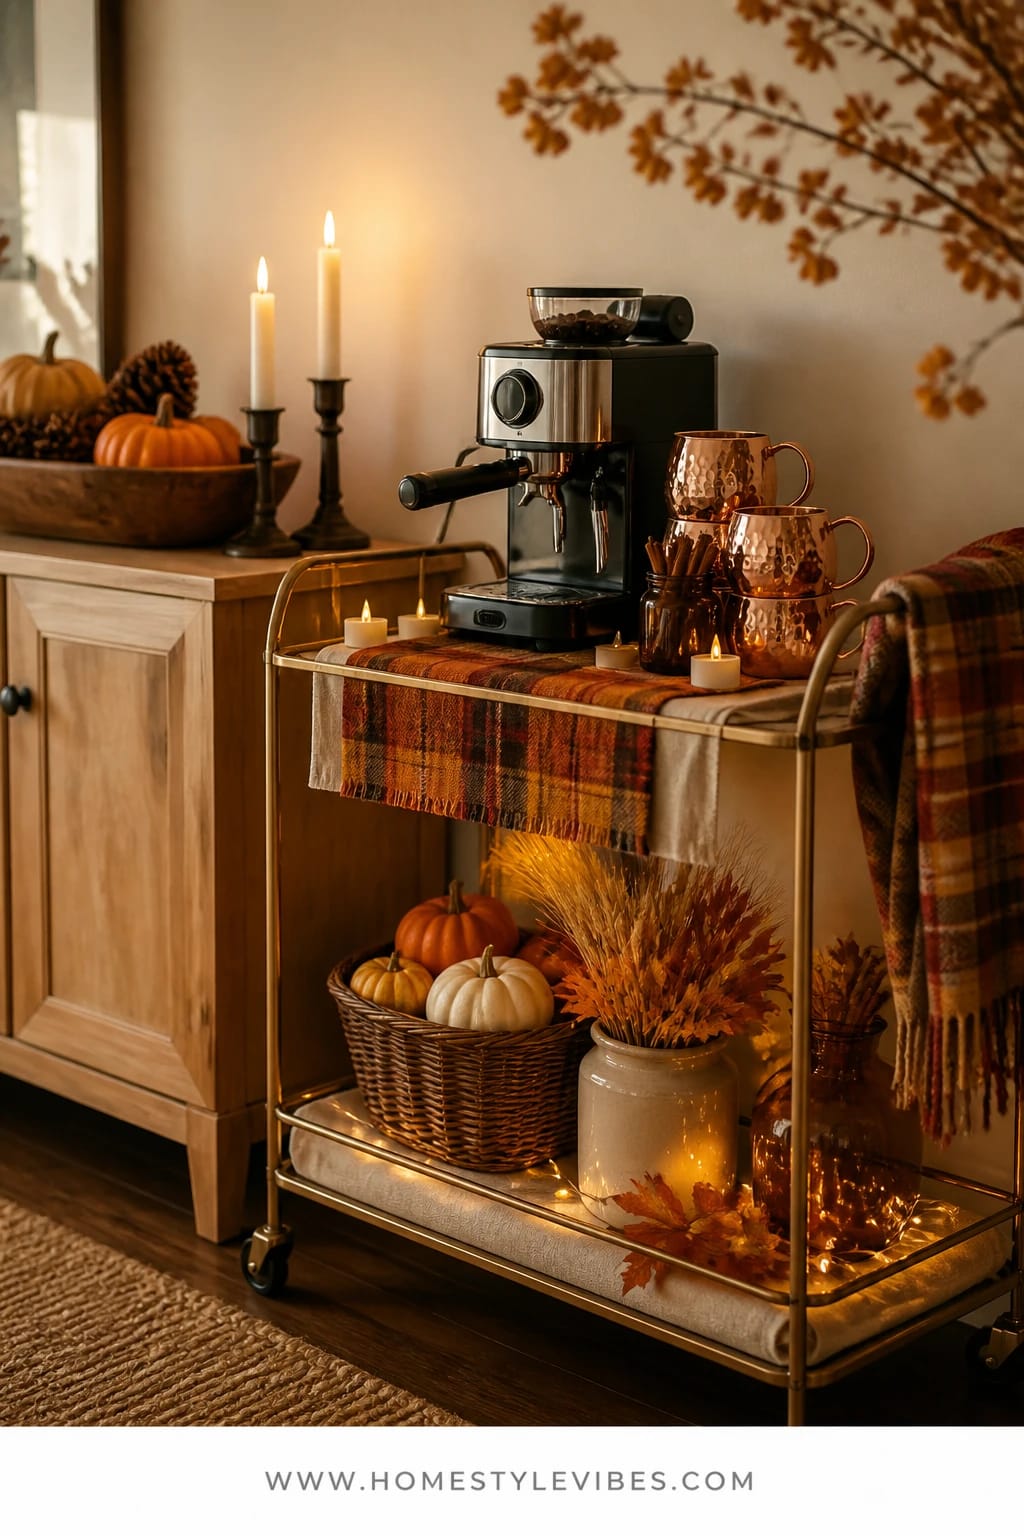
It’s that one corner that always feels off: the cart looks busy, your mugs clash, and nothing feels seasonal. Enter copper and plaid. A bar cart turns into a mobile café when you dress it in a tartan runner, stack copper mugs, and mix in golden light from tiny battery tea lights. The vibe is cheerful and incredibly inviting—like a little fall party on wheels that rolls out exactly when you need it.
Here’s why this works: bar carts have clear tiers. Use the top for daily use items (machine, mugs, spoons), the lower shelf for seasonal flair (extra cups, pumpkin syrup, marshmallows, cider packets). Copper catches and reflects warm tones so even under cool kitchen lights, you’ll still get that glow. Plaid adds visual order that tames clutter. When you photograph it, the metallic highlights and gridded textile create a crisp, magazine-ready frame.
Variations: 1) Neutral-leaning: go for cream plaid and brushed brass instead of high-shine copper. 2) Budget swap: thrift copper-look Moscow mule mugs and line the cart with a folded scarf in a fall pattern; add a stick-on LED puck light under the top shelf for downlighting magic.
Budget Breakdown:
- Basic bar cart: $70–$150
- Copper mugs (set of 4): $25–$45
- Plaid runner or scarf: $12–$30
- Battery tea lights or puck lights: $8–$25
- Glass syrup bottles with labels: $10–$20
Total Estimated Cost: $125 – $270
Best For: Open concept living-dining areas or kitchens without spare counters; great for weekend hosting and weekday ease.
Key Design Elements:
- Main seasonal props: copper mugs, cinnamon sticks, maple syrup bottle
- Color palette: copper, gold, cranberry, forest green plaid
- Lighting strategy: layered—tiny tea lights and one under-shelf puck
- Textile layers: plaid runner, linen napkins
- Natural elements: dried orange slices, pinecones in a bowl
- Accent details: labeled glass syrups, brass spoon rest, maple leaf stirrers
How To Recreate This Look:
- Start with a bar cart and line the top shelf with a plaid runner or scarf.
- Add your coffee machine or electric kettle off-center; stack copper mugs to the side.
- Layer glass syrup bottles and a brass spoon rest on a small tray to keep it tidy.
- Place tea lights around the back rim and add an LED puck under the top shelf for glow.
- Style the bottom tier with a bowl of pinecones, extra mugs, and a jar of cocoa or cider mix.
Why This Feels Designer: Repeating finishes (copper + brass) and gridded textile structure calm the eye. The cart’s negative space is left intact, so everything breathes.
One Thing To Avoid: Don’t clutter both tiers with small items. Top for essentials, bottom for backup and a single seasonal vignette—less visual noise, more mood.
Pro Styling Tip: Shoot from a slight side angle so the copper catches the light and the plaid pattern leads your eye right to the mugs.
Quick Tip: If your coffee tastes “meh,” clean your machine monthly and grind beans fresh. Style helps, but flavor is the soul of the ritual.
Pause and breathe. Remember, this isn’t about recreating a showroom. It’s about designing a tiny daily ritual you’ll actually use. If one idea resonates, that’s your starting point. You don’t need all six.
3) Maple Syrup Bar, Honeyed Window Light, and a Narrow Counter Niche
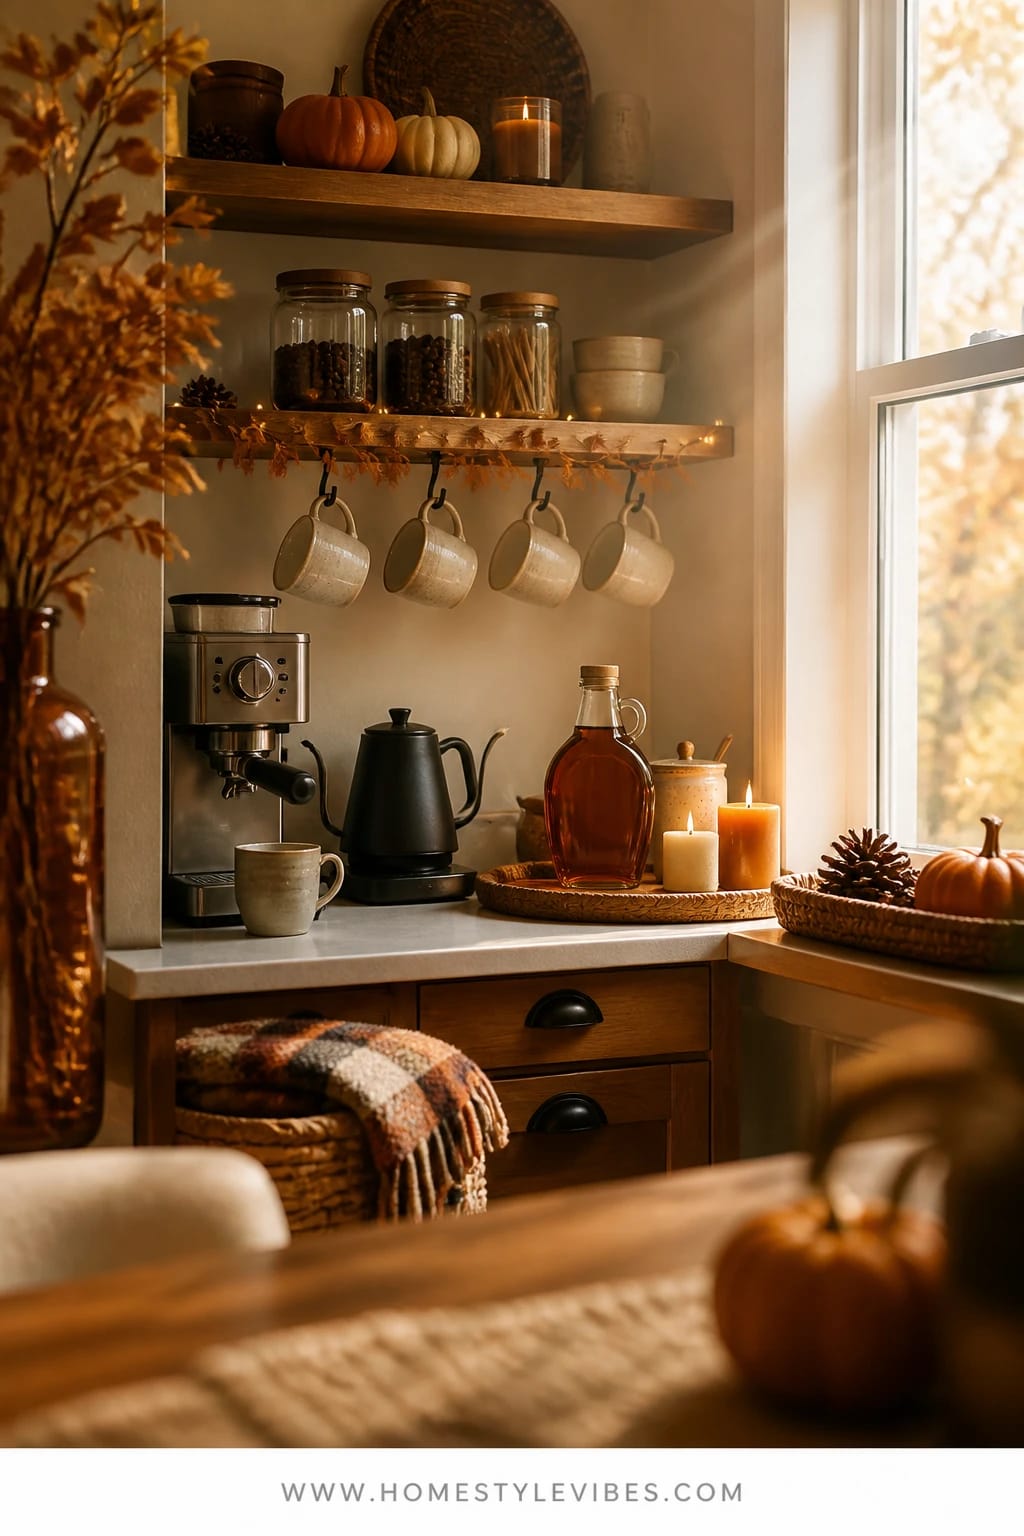
You’ve tried the tiered tray on your counter, but it still looks like a clutter mountain. This idea pares everything back and makes the light the hero. Tuck your coffee bar into a narrow counter niche—right under a window if you can—and organize vertically with two staggered shelves. Keep the color story warm and simple: cream stoneware, honey wood, clear glass, and a single maple-syrup moment for autumn sweetness.
The mood is golden-hour calm even at 7 a.m. Shelves pull the eye up, which is especially good in small kitchens, and the warm wood plus cream palette keeps it cohesive. A single maple leaf trivet or a tiny maple syrup bottle becomes your seasonal signature. When the sun hits, you’ll get that honeyed glow through glass jars—highly photogenic without trying.
Variations: 1) Small-space version: one floating shelf plus a narrow spice rack for syrups. 2) For a deeper fall moment, add a muted rust linen runner on the counter and one white pumpkin—done.
Budget Breakdown:
- Two floating shelves: $25–$50
- Glass canisters (beans, sugar): $15–$30
- Cream stoneware mugs (set of 4): $18–$40
- Maple syrup bottle and pourer: $8–$18
- Rust linen runner: $12–$25
Total Estimated Cost: $78 – $163
Best For: Galley kitchens or tight counters; ideal from early fall through Thanksgiving with minimal swaps.
Key Design Elements:
- Main seasonal props: maple syrup bottle, white pumpkin, rust linen runner
- Color palette: cream, honey wood, soft rust, clear glass
- Lighting strategy: natural morning light as key; add one warm under-cabinet strip
- Textile layers: simple linen runner and one tea towel
- Natural elements: dried wheat or oat stems in a bud vase
- Accent details: wooden scoop, maple leaf trivet, clear labels
How To Recreate This Look:
- Start with a narrow counter niche; clear everything that isn’t coffee-related.
- Add one or two floating shelves; keep 8–10 inches between them for mugs and jars.
- Layer glass canisters with beans and sugar; add a wooden scoop for texture.
- Place a maple syrup bottle on a small maple-leaf trivet; flank with cream mugs.
- Style with a rust runner under your machine and a single white pumpkin for balance.
Why This Reads High-End: Limited color palette, clear glass repetition, and vertical lines give structure and calm. The restraint is what feels luxurious.
The Most Common Mistake: Over-labeling everything. One or two neat labels are helpful; twenty look chaotic. Let the materials do the talking.
Pro Styling Tip: Shoot when the window light is soft—morning or late afternoon—to catch that honey glow in the glass without harsh shadows.
Did You Know? Warm-toned under-cabinet LEDs (2700–3000K) make coffee look richer and skin tones softer in photos. Cool light flattens all those cozy browns.
4) Apple-Cranberry Garnishes, Warm Pendant Glow, and a Kitchen Island Tray Station
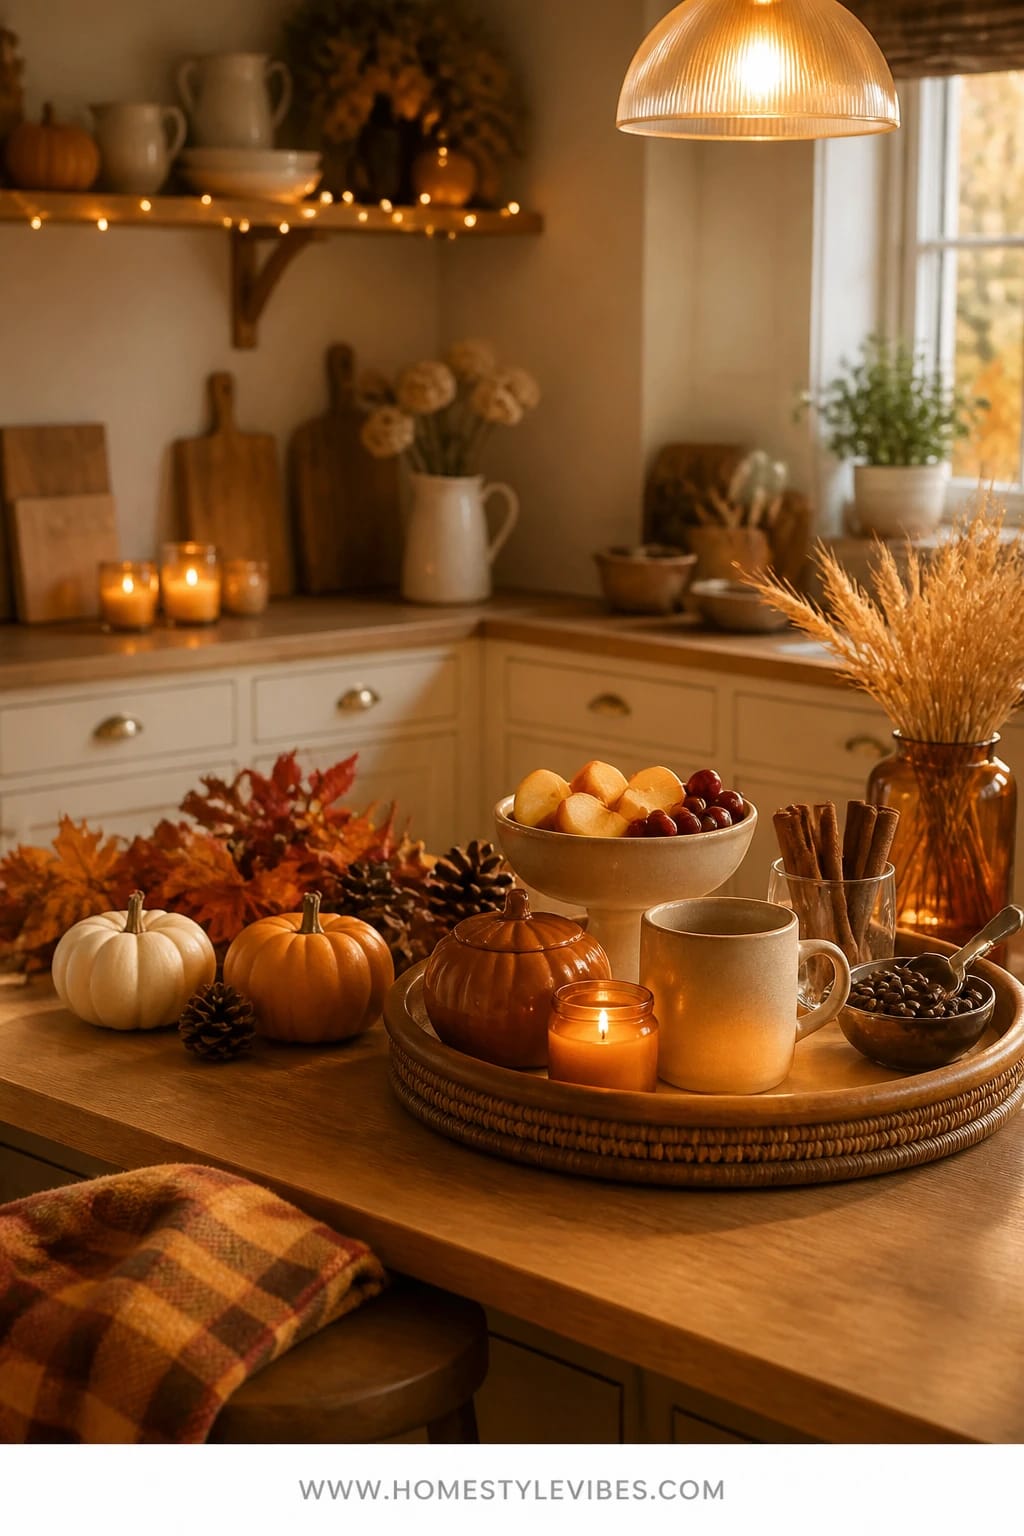
Hosting season hits and suddenly your island becomes a drop-zone for everything. Your coffee setup doesn’t stand a chance. This design corrals the chaos with a large round tray that lives on your kitchen island and only holds beautiful, functional pieces. Think: a small pedestal bowl with apple slices and cranberries for garnish, cinnamon sticks in a tumbler, and a warm pendant glow overhead. The result feels like a café counter where the barista actually knows your name.
It works because the tray establishes a clear boundary. Guests can help themselves without rummaging, and the island still looks intentional between uses. The warm pendant above creates a spotlight effect—like a stage for your daily ritual—while the rounded shapes keep everything soft and inviting. For photos, the circle tray anchors the frame and the red apples pop against neutrals—high contrast, high charm.
Variations: 1) For families, swap the cranberries for caramel drizzle and mini marshmallows in lidded jars. 2) If your island is tiny, use a lazy Susan to maximize access and keep everything within reach.
Budget Breakdown:
- Large round wooden tray or lazy Susan: $25–$60
- Pedestal bowl for fruit: $15–$35
- Glass tumbler for cinnamon sticks: $6–$12
- Warm pendant bulb (2700K): $6–$10
- Small bud vase with seasonal sprig: $5–$12
Total Estimated Cost: $57 – $129
Best For: Busy family kitchens, big islands, or open-plan spaces; perfect for October gatherings and cozy brunches.
Key Design Elements:
- Main seasonal props: apples, cranberries, cinnamon sticks
- Color palette: warm wood, cream, pops of apple red and deep cranberry
- Lighting strategy: pendant with warm bulb as a spotlight; optional candle for glow
- Textile layers: simple striped towel under the tray
- Natural elements: herb sprig (rosemary or thyme) in a mini vase
- Accent details: amber bottle with homemade syrup, gold tongs for garnish
How To Recreate This Look:
- Start with a round tray at center or off-center on your island to create a focal zone.
- Add your daily-use items first: machine or kettle, mug stack, spoon rest.
- Layer a pedestal bowl with apple slices and a small dish of cranberries.
- Place cinnamon sticks in a tumbler; add gold tongs and an amber syrup bottle.
- Style with one bud vase and a soft towel under the tray for texture.
Why This Looks Intentional: The circular tray acts like a frame. Contain your items and the station reads styled, not scattered.
Don’t Do This: Avoid overly tall decor that blocks sightlines across your island. Keep everything under 10 inches tall for daily flow and easy conversation.
Pro Styling Tip: If your pendant casts a harsh spot, raise the tray onto a thin cutting board to soften the glare and create a subtle double-layer for extra depth in photos.
Quick Tip: Pre-slice apples and store with lemon water in the fridge. Morning-you will be so smug about it tomorrow.
Real talk: I tried a version of this last October and discovered my “cute” syrup labels peeled the second steam hit them. Lesson learned—choose waterproof labels or glass paint pens.
5) Harvest Spice Jars, Soft Lantern Light, and a Built-In Pantry Nook
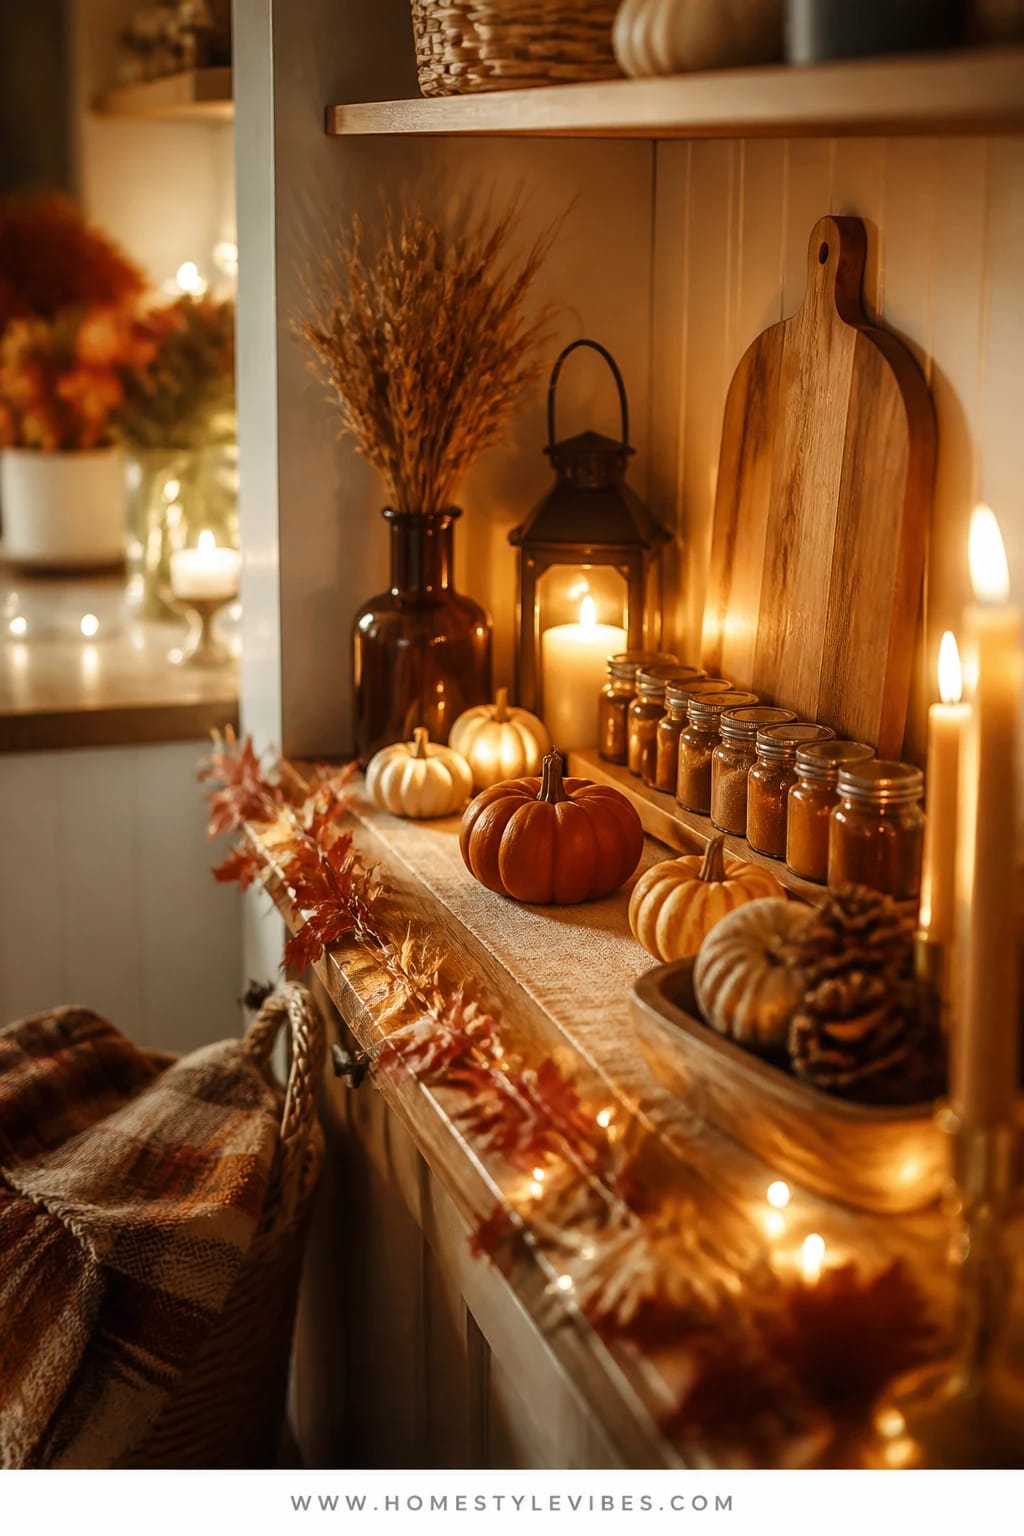
Your pantry door hides a secret: it’s the best-kept storage in the house, but it never feels charming. This idea turns a built-in pantry nook into a fall coffee corridor—clean, organized, and quietly rich with seasonal detail. Line the back with a narrow mirror or wood cutting board to reflect light, stage a row of harvest spice jars (nutmeg, clove, pumpkin spice), and nestle a soft lantern in the corner for evening glow. It’s peaceful, practical, and wildly satisfying to use.
What it does for real life: contained storage means you can have variety without visual chaos. The lantern light creates a pocket of warmth even if your kitchen lights are bright overhead, and the spice jars deliver scent and ritual without constant décor swaps. Photography-wise, the repeated jar shapes and the reflected lantern light add depth so your pantry nook doesn’t read flat.
Variations: 1) If shelves are deep, use tiered risers so the back row is visible. 2) For a muted look, choose frosted glass jars and wooden lids, then add a single white pumpkin on the lowest shelf for a quiet nod to fall.
Budget Breakdown:
- Set of spice jars with wooden lids: $18–$35
- Narrow mirror or wood cutting board backdrop: $20–$45
- Battery lantern or flameless candle: $12–$30
- Tiered shelf riser: $12–$25
- Small white pumpkin: $4–$8
Total Estimated Cost: $66 – $143
Best For: Homes with a pantry or alcove; ideal for folks who love variety (herbal teas, syrups, seasonal cocoa) but need it all out of sight between uses.
Key Design Elements:
- Main seasonal props: harvest spice jars, white pumpkin, wood backdrop
- Color palette: warm wood, cream, caramel, soft gold
- Lighting strategy: lantern for low, cozy light; under-shelf battery strip as needed
- Textile layers: a slim runner on the lowest shelf to soften edges
- Natural elements: bay leaves or star anise in a shallow bowl
- Accent details: brass scoops, labeled jar tops, glass canisters for beans
Why This Feels Designer: Repetition is power. Matching jars and consistent labels turn chaos into a curated display, and that mirror sliver doubles the glow.
How To Recreate This Look:
- Start by clearing one pantry section; wipe the shelves so they’re spotless.
- Add a narrow mirror or wood cutting board to the back wall for reflection and texture.
- Layer in matching spice jars and label just the lids for a clean front view.
- Place a battery lantern in the corner; test it at night to check the glow.
- Style with a small white pumpkin and a shallow bowl of star anise for scent.
One Thing To Avoid: Don’t mix jar shapes or lid finishes here. Keep them consistent or the charm falls apart fast.
Pro Styling Tip: For photos, crack the pantry door and let warm light spill onto the kitchen floor—it adds story and instant fall mood.
Did You Know? Whole spices last longer than pre-ground and release the most fragrance when you warm them slightly—set a jar near your machine while it heats for a subtle scent lift.
Expect some trial and error. The first time I styled a pantry nook, I overdid the jars and forgot the scoops. Reaching into every jar with a spoon isn’t the cozy fantasy. Add the scoops. You’ll use them constantly.
6) Cinnamon-Maple Syrup Caddy, Golden Sconce Glow, and a Dining Hutch Coffee Atelier
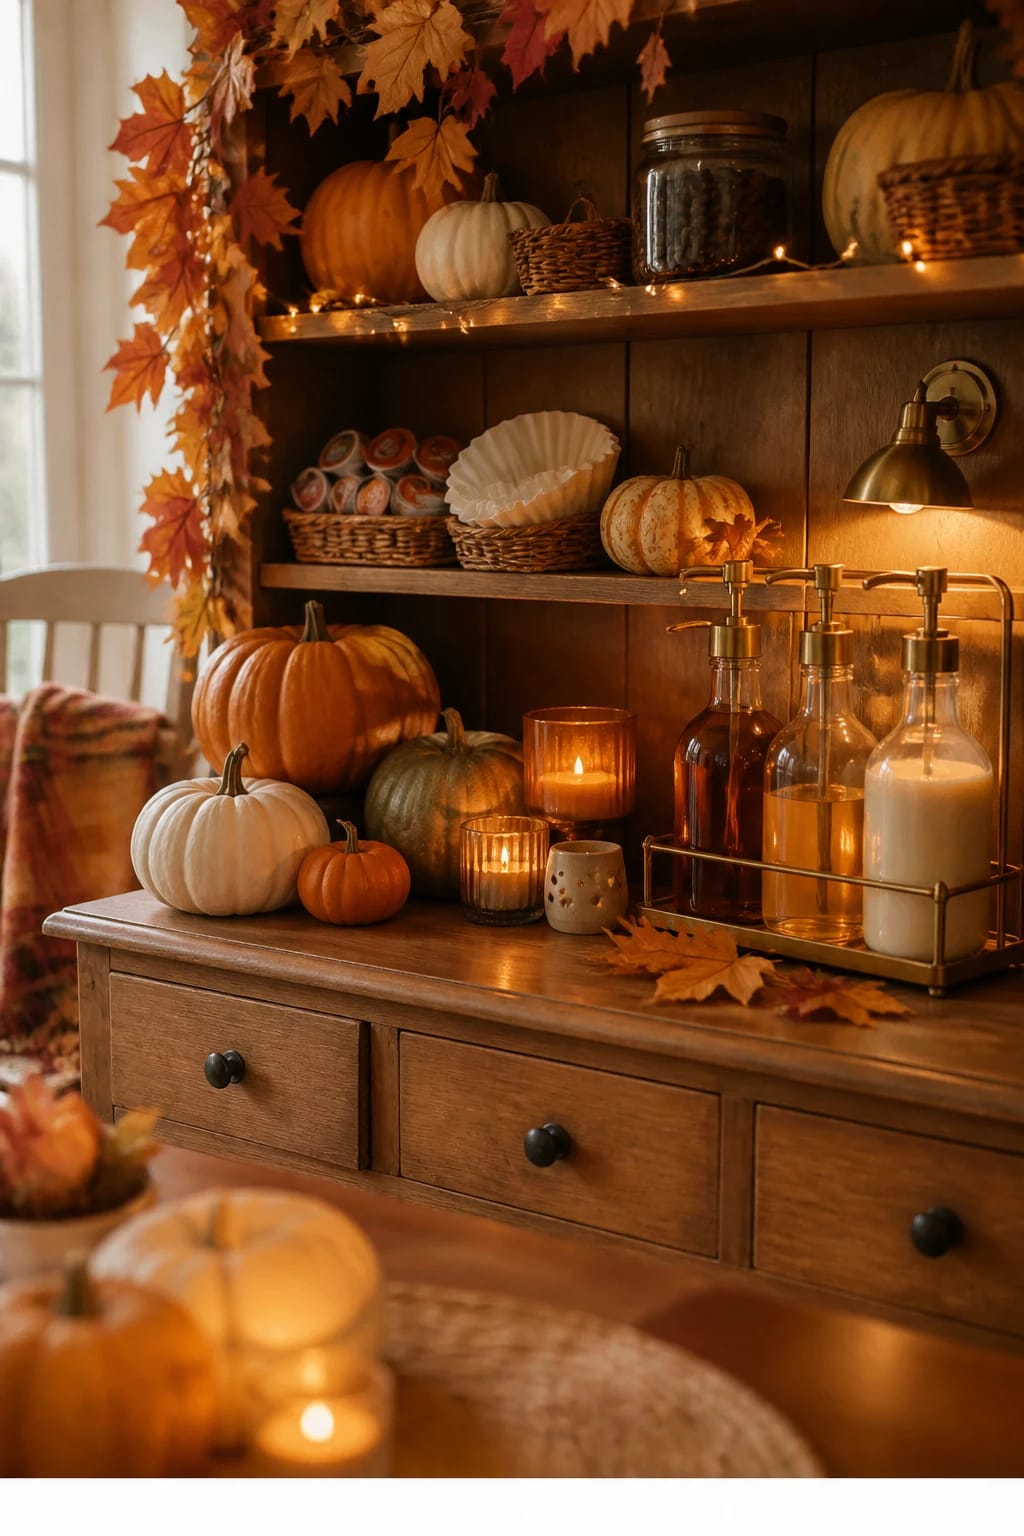
Not every kitchen can hold a full station. Enter the dining hutch—a surprising hero for fall coffee bar ideas. You take that display space and make it work, with a syrup caddy on the shelf, baskets for pods and filters, and a golden sconce mounted inside or clipped to the edge for warm light. The seasonal star is the syrup caddy—cinnamon, maple, vanilla—ready to pour, with pretty glass droppers or pump tops that feel boutique-level.
The mood? Boutique café meets harvest dinner party. It’s intimate, practical, and incredibly photogenic thanks to the backdrop of dishes and wood. Strategically, hutches hide cords and stash bulk items in the cabinets below. You get a fast morning routine and an elegant backdrop for after-dinner coffees. The warm sconce brings that amber glow right where you want it, no outlet shuffle required if you choose a rechargeable puck sconce.
Variations: 1) If your hutch is vintage, keep the patina and add cream stoneware mugs for a fresh contrast. 2) For a colorful nod, tuck a burgundy linen napkin under the syrup caddy and keep everything else neutral.
Budget Breakdown:
- Wooden syrup caddy or handled tray: $18–$35
- Glass syrup bottles with pumps/droppers: $12–$28
- Rechargeable or plug-in sconce/clip lamp: $25–$60
- Two baskets for pods/filters: $16–$30
- Burgundy linen napkin: $8–$16
Total Estimated Cost: $79 – $169
Best For: Dining rooms that double as morning stations; perfect for households that love slow brunches and post-dinner cappuccinos.
Key Design Elements:
- Main seasonal props: cinnamon-maple syrup caddy, burgundy napkin, cream mugs
- Color palette: warm wood, cream, burgundy, soft gold
- Lighting strategy: golden sconce glow focused on the caddy
- Textile layers: one bold napkin and a linen runner inside the hutch
- Natural elements: dried hydrangea stem in a bottle
- Accent details: brass teaspoon rest, labeled pumps, small sugar bowl
How To Recreate This Look:
- Start by clearing one hutch shelf and adding a linen runner for softness.
- Add a rechargeable sconce or clip lamp to create a golden pool of light.
- Layer the syrup caddy with labeled glass bottles—cinnamon, maple, vanilla.
- Place cream mugs to one side and tuck baskets for pods/filters in the cabinet below.
- Style with a burgundy napkin under the caddy and a single dried hydrangea stem.
Why This Looks Expensive: The hutch backdrop frames your station like built-in cabinetry. Controlled color and precise lighting make it feel bespoke.
Watch Out: Don’t overfill the caddy with mismatched bottles. Three syrups, max. Anything more turns boutique into clutter very fast.
Pro Styling Tip: Angle the sconce slightly toward the back panel so light bounces forward and wraps around the bottles—instant warm halo in photos.
Quick Tip: Decant syrups into uniform bottles and use the same label font. Consistency is the secret—not more stuff.
Zoom out for a second. You don’t have to perfect this on day one. Build the bones, live with it a week, then add one more layer—an amber bottle here, a better towel there. The best coffee corners evolve with your mornings.
Quick Checklist
- Pick one location: sideboard, bar cart, counter niche, island, pantry nook, or hutch
- Choose a warm light source: lamp, lantern, sconce, or puck lights
- Commit to a tight palette: wood + cream + one or two fall colors
- Contain with a tray, caddy, or runner
- Add one signature seasonal element: pumpkins, apples, maple syrup, spice jars
- Decant essentials into matching jars or bottles
- Include one textile: plaid towel, linen runner, or napkin
- Stock daily-use items within arm’s reach
- Hide extras: pods, filters, spoons in drawers or baskets
- Finish with scent: cinnamon sticks, clove, or a spiced candle (flameless if needed)
Frequently Asked Questions
How do I keep the budget in check while making a coffee station feel seasonal?
Choose one anchor purchase (tray, lamp, or set of jars) and thrift the rest. Real mini pumpkins, a plaid tea towel, and uniform labels go a long way. Keep the palette tight and reuse your everyday mugs—cohesion beats quantity every time.
Are real or faux pumpkins and florals better for a coffee bar?
IMO, real mini pumpkins win for a month-long display and smell slightly earthy in a good way. If your station runs hot (near a vent or under-cabinet lighting), choose faux to avoid the sad half-deflated look by week three. Dried stems (wheat, eucalyptus) are a great middle ground—long-lasting and textural.
What if I only have a tiny counter corner—can I still do this?
Yes. Use vertical storage: one floating shelf plus a narrow spice rack for syrups. Choose a single seasonal focal point (maple syrup bottle or one pumpkin) and keep everything else ultra-functional. A small puck light adds instant mood without taking space.
How do I store everything after fall without creating clutter?
Decant into containers you’ll use year-round (glass jars, cream mugs). Seasonal elements should be the only items to pack away: napkins, pumpkins, faux stems. Keep a labeled bin for “Coffee Bar—Fall” so next year takes 10 minutes to reset.
What about candles—are they safe around pets and kids?
Go flameless near busy prep zones or wagging tails. Battery lanterns and LED tea lights give the amber glow without risk. If you burn a real candle, place it high and away from sleeves and stacked towels, and trim the wick to reduce flare.
When should I start decorating my coffee bar for fall?
Early September is perfect for a subtle look (wheat stems, a rust towel). Bring in pumpkins, apples, and bolder plaid mid-September to October. Transition to deeper tones and more candlelight in November.
Closing Notes
Pick one idea, claim a surface, and start with light. Then add a fall signature—pumpkin, plaid, maple, or spice. You’ll be shocked how quickly your mornings shift from rushed to ritual once your coffee bar actually supports the way you live.
Cozy bright autumn styling loves layers, warmth, and little moments of abundance. A lamp washing over copper mugs, a syrup caddy on a burgundy napkin, a bowl of apples catching the sun—these simple choices create that café feel at home. You don’t need a new kitchen. You need a small place that glows.
Trust me: you can do this in an afternoon. Tomorrow morning, when steam curls up past amber light and your favorite mug feels just right in your hands, you’ll know it was worth it. Café mornings at home are officially in season.

About the Author

Krisztina P.Rendes, Founder of Home Style Vibes
Founder of Home Style Vibes
Krisztina Puskásné Rendes created Home Style Vibes as a cozy-modern lifestyle space where homemaking meets inspiration. Her goal is to help women create beautiful, organized, and peaceful homes they truly love — without overwhelm. You’ll find here heart-driven content on home decor, cleaning tips, easy family recipes, organization and decluttering, DIY home projects, plants, and seasonal ideas — all designed to bring more calm, comfort, and style into everyday life.