7 Easy Thanksgiving Crafts & DIY Projects to Entertain Kids
You want a warm, bustling Thanksgiving where the kitchen smells like cinnamon, the table glows in amber candlelight, and the kids are happily busy making something adorable. You don’t want glitter in the mashed potatoes, tears over dried glue, or that unmistakable “we’re bored” chorus five minutes after everyone arrives. These 7 easy Thanksgiving crafts and DIY projects to entertain kids bring cozy bright autumn energy into the living and dining areas you’re actually using—think pumpkins, plaid, leaf garlands, and a soft, golden glow—while freeing you up to sip cider and finish the gravy. Every idea is simple, safe, and totally photogenic, with a spending cap you can keep under $30 per project, and a setup that works in real family homes.
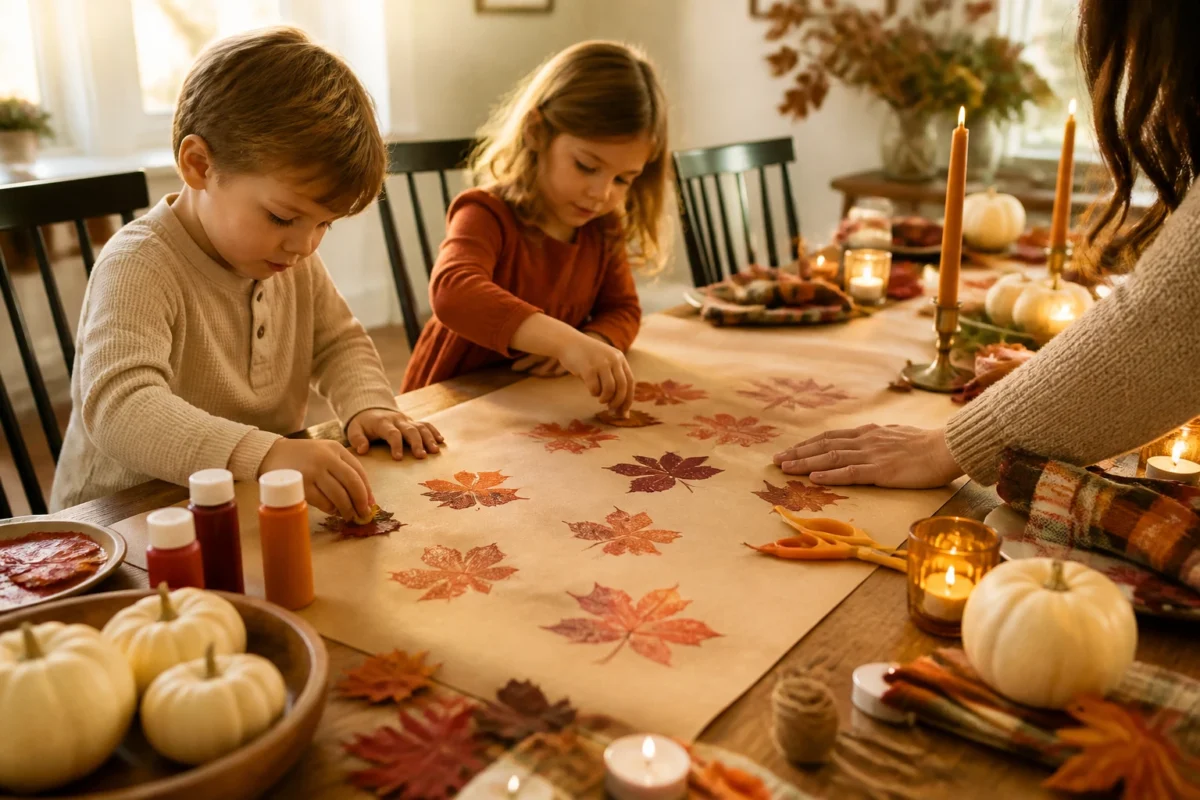
We’ll work the rooms you already have: dining table, kitchen island, living room coffee table, entry console, bookshelves, and even a window ledge. Expect rich rusts and burgundies, warm woods, tactile textiles, and projects that double as décor when the pies come out. If you love a cozy bright autumn vibe—abundant, golden, and Pinterest-ready—this is your moment. These are the ideas that keep small hands busy and your home looking gorgeous right through dessert.
1) Leaf-Stamped Kraft Paper Runner With Amber Candle Glow On The Dining Table
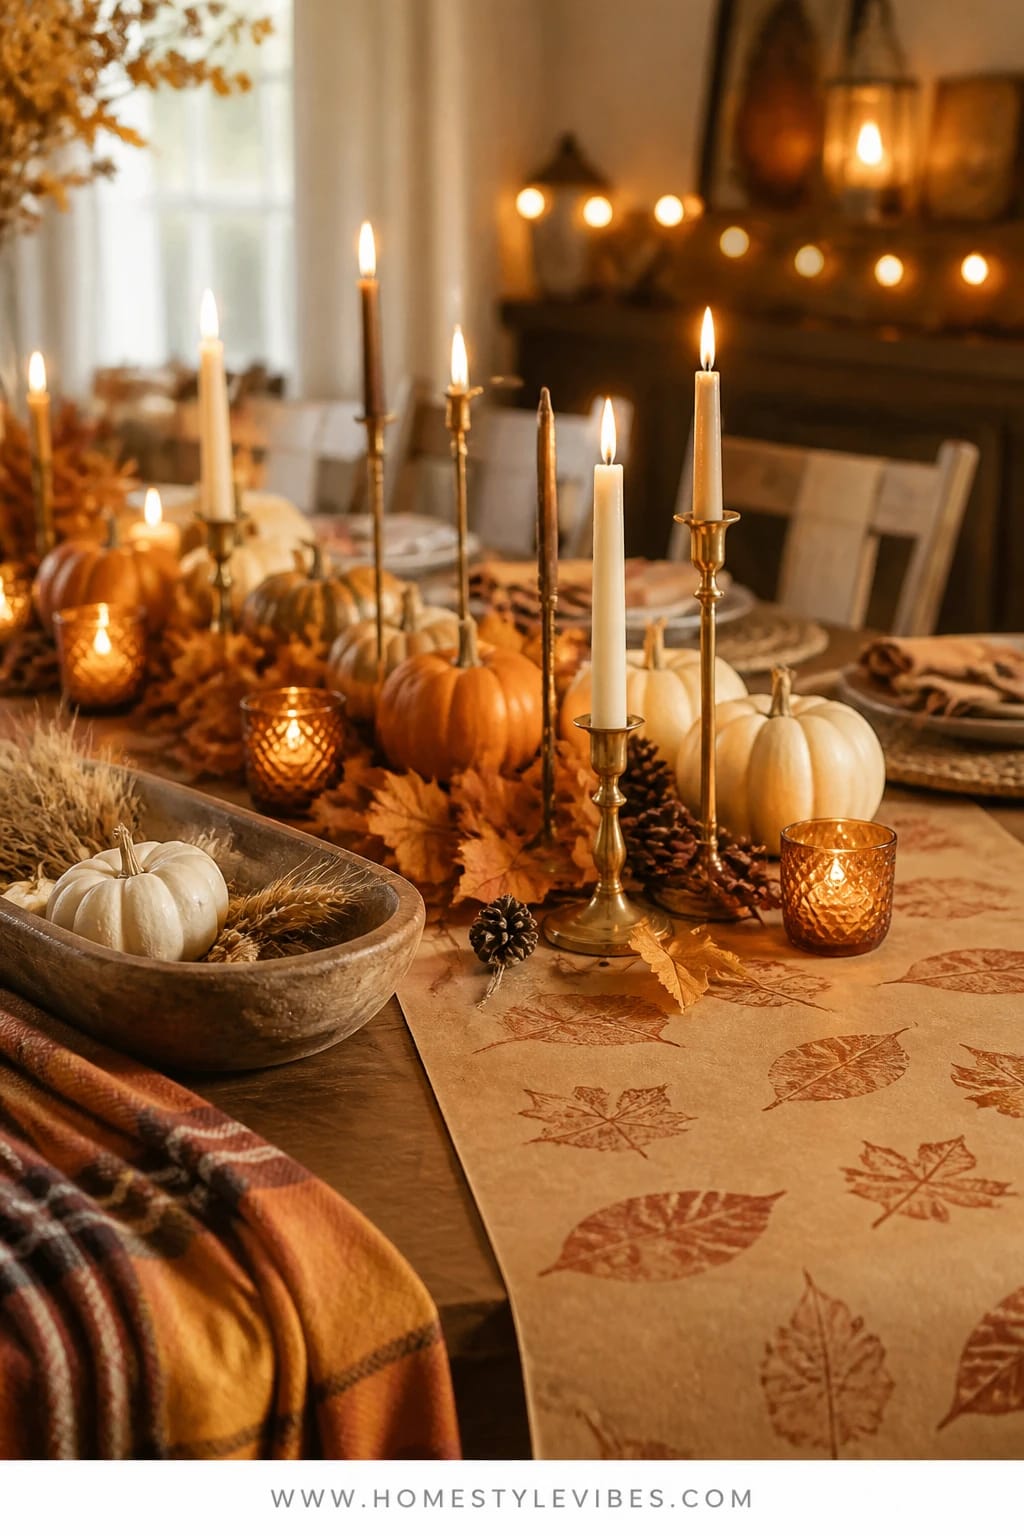
We’ve all been there: you set the table early, it looks great, and then the kids barrel in with markers and “help.” Enter the leaf-stamped kraft paper runner—a craft station that becomes your tablescape centerpiece. The mood reads warm and bustling: golden window light in the afternoon, amber candle glow as the sun dips, a generous roll of kraft paper running down the table like a canvas for little hands. It works in real homes because it replaces fragile linens with a stylish, rustic runner the kids can decorate in real time.
Here’s why it lands: kraft paper is forgiving, leaf stamps feel iconic fall, and the candlelight pulls the whole look together. Use real leaves as stamps with washable paint in rust, burgundy, and marigold. Line the center with votives inside glass hurricanes so little artists can’t reach the flame, and you’ve got a cozy bright autumn centerpiece you’ll actually want to photograph. Bonus: roll up the “art” after dinner and save a slice as a keepsake. I tried this last year, and my daughter stamped a tiny turkey that looked like a surprised potato—we framed it and now it’s a family legend.
Variations: Create mini placemat versions for a smaller table or a kids’ card table. For a neutral look, swap saturated paints for oatmeal, pale wheat, and soft sage. Make-ahead option: pre-stamp a few leaf clusters so the runner looks styled even before the kids arrive.
Budget Breakdown:
- Kraft paper roll: $8–$15
- Washable craft paints (fall palette): $6–$12
- Sponge brushes or foam stamps: $4–$8
- Glass hurricanes or vase sleeves: $10–$20 (reuse yearly)
- Tea lights or LED votives: $6–$12
Total Estimated Cost: $34 – $67
Best For: Open-plan dining spaces and family-style Thanksgivings. Perfect from early November through the long weekend when you want décor that does double duty as entertainment.
Key Design Elements:
- Main seasonal props: Real leaves, acorns or seed pods for scatter, mini pumpkins
- Color palette: Rust, burgundy, marigold, walnut brown
- Lighting strategy: Afternoon sunlight plus amber votives in glass
- Textile layers: Plaid napkins, woven chargers, soft cotton runners under the kraft layer
- Natural elements: Pressed leaves, twine-tied napkins, dried wheat
- Accent details: Brass napkin rings, ceramic paint palettes, a wooden tray for supplies
How To Recreate This Look:
- Start with a full-width run of kraft paper down your dining table and tape the underside to secure.
- Add paint trays, foam stamps, and a small stack of leaves for kids to use as printing tools.
- Layer in glass hurricane sleeves with tea lights along the center, spaced safely between work zones.
- Place a few mini pumpkins and a dish of acorns for texture and quick still-life moments.
- Style with plaid napkins and simple white plates so the stamped runner becomes the art.
Why This Looks Expensive: The glass hurricanes add height and polish, and the restrained color palette makes the kid-made art look curated rather than chaotic.
Watch Out: Don’t choose highly pigmented, permanent paints. Washable paints save your table from “creative exuberance.”
Pro Styling Tip: Photograph at golden hour with candles lit; angle your shot so the stamped pattern leads the eye down the table for that magazine-worthy depth.
2) Pumpkin Pie Felt Garland In Warm Window Light On The Kitchen Island
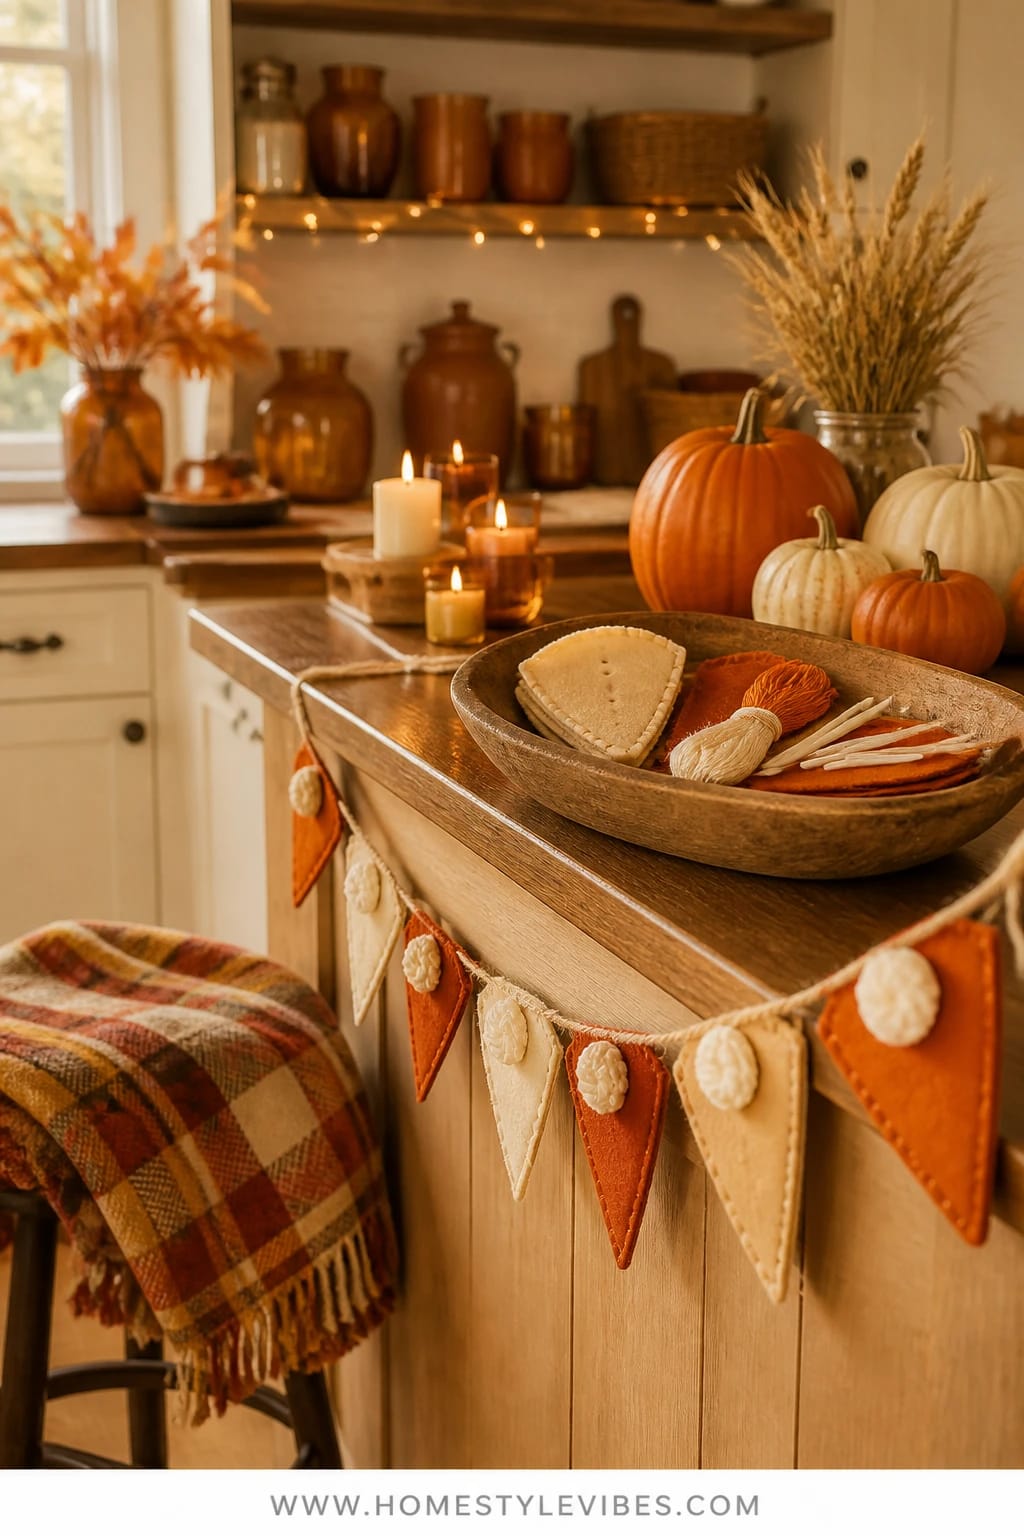
It’s that one spot: the kitchen island where everyone gathers, snacks, crafts, and sneaks an olive. You’ve tried setting out coloring sheets, but it still turns into a paper avalanche. A pumpkin pie felt garland turns the island edge into a soft, cheerful perch for little hands, while the top hosts a tiny “sewing” craft with kid-friendly, pre-punched felt slices. The mood is cozy bright and tactile—felt triangles in pumpkin and cream, tiny “whipped cream” pompoms, and a warm light wash from the nearest window.
This project works because it’s low-mess and repetitive in the best way. Kids thread yarn through pre-punched holes, add a pompom “dollop,” and clip it to a line. It photographs beautifully—the layered texture of felt, the soft shadows across a butcher-block counter, and those little hands so focused you can finish basting the turkey. Keep the palette cinnamon, rust, and soft wheat for harmony with wood cutting boards and copper pots.
Variations: If your island is small, make mini garlands for cabinet pulls or the stove hood (away from heat). For toddlers, skip threading and let them stick adhesive felt “whip” on top of the pie slices. For a neutral kitchen, use oatmeal and taupe felt with white pompoms.
Key Design Elements:
- Main seasonal props: Felt triangles, white pompoms, twine or yarn
- Color palette: Pumpkin orange, cream, cinnamon brown
- Lighting strategy: Morning window light; add one warm under-cabinet strip for evening
- Textile layers: Felt, cotton tea towels, softly wrinkled linen for craft mats
- Natural elements: Wooden bead spacers, cinnamon sticks in a jar for scent
- Accent details: Mini clothespins, copper measuring cups as supply holders
Budget Breakdown:
- Pre-cut felt sheets: $5–$10
- White pompoms: $3–$6
- Yarn or twine: $3–$7
- Mini clothespins: $4–$8
- Hole punch for felt (or buy pre-punched): $6–$12
Total Estimated Cost: $21 – $43
Best For: Busy kitchens with an island or peninsula. Perfect for Thanksgiving morning while you prep and pour coffee.
How To Recreate This Look:
- Cut felt into isosceles triangles (pie slices) and a thin “crust” strip; pre-punch holes along the top.
- Thread yarn through crust holes, tie off, and add a white pompom at the point as whipped cream.
- Clip finished slices onto a twine line draped along the island edge with removable hooks.
- Lay tea towels as work mats and keep supplies corralled in small bowls.
- Finish with a jar of cinnamon sticks and a few white mini pumpkins near the corner.
Why This Feels Designer: The consistency of materials—felt, wood, and soft metals—keeps the visual story tight so the craft reads as décor, not clutter.
One Thing To Avoid: Don’t use neon brights that fight your warm kitchen palette; stick to soft, spiced tones.
Pro Styling Tip: Snap photos from kid-height with the garland slightly out of focus in the foreground—instant depth and warmth.
Ready for a calm living room project that keeps little hands busy while you catch up with cousins? Let’s move from the kitchen’s hum to the sofa’s soft landing.
3) Plaid Paper-Turkey Puppets Under Golden Lamp Light On The Living Room Coffee Table
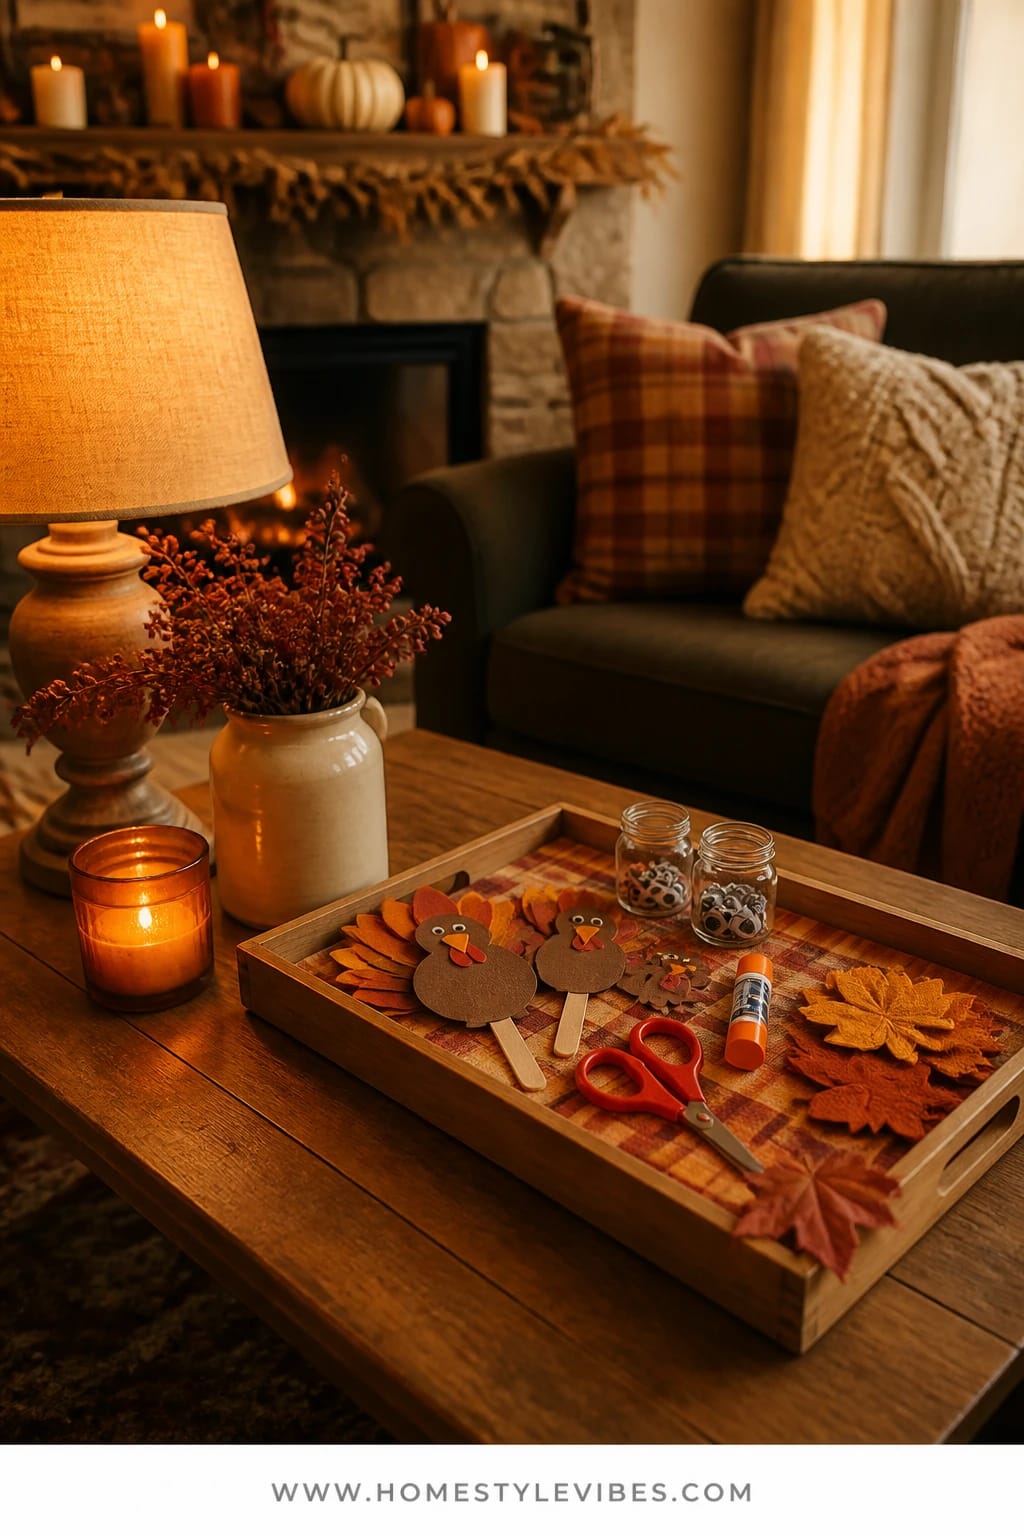
Living rooms get overrun fast. Scissors disappear in couch cushions, googly eyes escape, and someone always steps on a rogue pompom. The fix: a defined puppet-making station on a tray right on your coffee table. The vibe feels like a craft nook set inside a cozy den—plaid paper, turkey shapes on popsicle sticks, and a warm table lamp casting that late-afternoon glow that makes the room feel safe and festive.
This setup wins for real homes because it’s tray-contained and couch-friendly. Kids choose a plaid paper “feather,” glue it behind a turkey body cutout, and add eyes and beaks. Stage a cardboard “theater” by cutting a window in a shoebox lid and taping plaid scraps along the frame—instant showtime while grownups chat. It photographs beautifully: saturated plaid against a soft wool throw, a candle flickering on the mantel, and little puppets peeking out of the shoebox stage.
Variations: Small space? Use a narrow tray and mini craft sticks. Low-mess version: peel-and-stick foam shapes. For a more neutral living room, choose subtle herringbone and cream plaids instead of high-contrast patterns.
Budget Breakdown:
- Assorted plaid scrapbook paper: $5–$10
- Popsicle sticks: $3–$6
- Googly eyes and foam beaks: $4–$8
- Glue sticks: $3–$6
- Repurposed shoebox for “stage”: free
Total Estimated Cost: $15 – $30
Best For: Family rooms with a central coffee table, especially during the pre-dinner lull.
Key Design Elements:
- Main seasonal props: Plaid paper, turkey cutouts, shoebox stage
- Color palette: Burgundy, amber, hunter green accents
- Lighting strategy: Table lamp with warm bulb; optional single pillar candle on mantel
- Textile layers: Wool throw, plaid pillow, knit pouf for seating
- Natural elements: Pinecones in a bowl, a small vase of dried wheat
- Accent details: Brass scissors, wooden tray to corral supplies
How To Recreate This Look:
- Pre-cut simple turkey body shapes from brown cardstock and lay out plaid paper strips for “feathers.”
- Glue feathers behind the body, add eyes and beaks, and attach to a popsicle stick.
- Cut a rectangle window in a shoebox lid, decorate with plaid strips and a scalloped paper “valance.”
- Arrange finished puppets in a low cup like a bouquet for display.
- Set a lamp nearby with a warm 2700K bulb for that golden glow on little faces.
Why This Reads High-End: The uniform plaid palette makes the puppets look coordinated, and the use of one or two luxe materials—a brass pair of scissors or a heavy wooden tray—adds gravitas.
The Most Common Mistake: Overfilling the tray with too many options. Keep to 3–4 paper patterns so kids don’t freeze from choice overload.
Pro Styling Tip: Photograph across the table with the shoebox “theater” angled; let a plaid pillow blur in the background for a cozy frame.
Feeling the momentum? Keep scrolling. The next idea turns your entry console into a kids’ gratitude zone that doubles as meaningful décor.
4) Wheat & Wood Gratitude Tree With Soft Amber Fairy Lights On The Entry Console
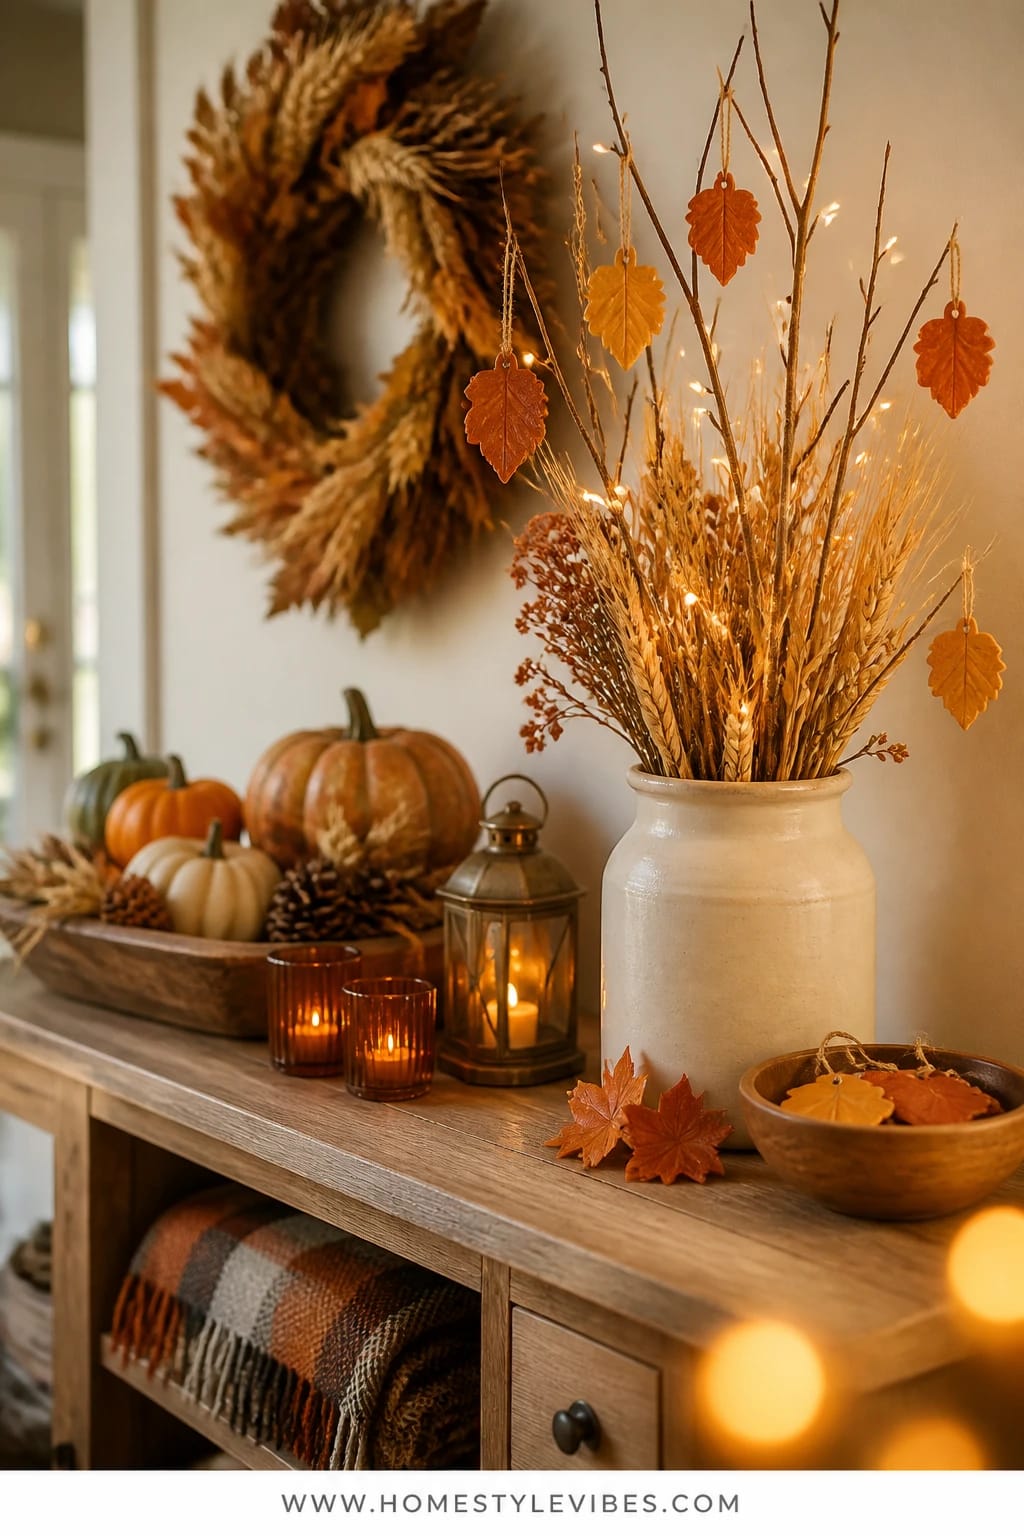
Your entry console looks cute until the moment everyone arrives with bags, coats, and excitement. Suddenly it’s chaos. A gratitude tree creates a single, grounded focal point that’s interactive and heartfelt. Picture a wooden branch “tree” anchored in a ceramic vase, wrapped in a short string of amber fairy lights. Nearby, leaf-shaped tags in marigold and rust wait for small hands to write (or draw) what they’re thankful for. It reads like a soft beacon in the foyer—warm, welcoming, very Pinterest on purpose.
It fits real life because it’s compact, tidy, and seasonal without being fragile. Kids write, thread a leaf onto twine, and hang it on the lit branches. As the day goes on, the tree fills up with color and family stories. It photographs incredibly well: the glow catches the edges of the paper leaves; the wheat bundle on the console adds height and shadow; the bowl of pens looks like part of the styling.
Variations: For very young writers, use stickers with icons (pie, pumpkin, family). Minimalist look? White leaves on a natural branch with soft taupe ribbon. For a smaller entry, hang the tree branch horizontally on removable hooks above the console.
Budget Breakdown:
- Branch bundle or faux branch “tree”: $10–$25
- Short amber fairy lights (battery): $6–$12
- Leaf tags (pre-cut or DIY): $5–$10
- Twine or ribbon: $3–$6
- Ceramic vase or weighted base: $10–$20
Total Estimated Cost: $34 – $73
Best For: Busy entries or hallway consoles where you want guests to pause for something meaningful on the way in.
Key Design Elements:
- Main seasonal props: Branch “tree,” paper leaves, wheat bundle
- Color palette: Marigold, rust, walnut, cream
- Lighting strategy: Amber fairy lights and a nearby sconce or table lamp
- Textile layers: Woven runner on the console, small plaid ribbon ties
- Natural elements: Dried wheat, real branch with gnarly texture
- Accent details: Lidded jar for pens, ceramic catchall for finished leaves
How To Recreate This Look:
- Anchor a branch in a heavy vase with pebbles or floral foam.
- Wrap a short strand of amber fairy lights around the branches, hiding the battery pack behind the vase.
- Cut or buy leaf tags in fall colors; punch holes for twine.
- Set out fine-tip markers and ribbon segments for tying.
- Place a wheat bundle and a small pumpkin cluster to finish the vignette.
Why This Looks Intentional: The single lit focal point draws the eye, and repeating colors from the leaf tags in your runner and ribbon creates visual rhythm.
Don’t Do This: Avoid long string lights that dangle; excess wire kills the clean entry look and invites little tugs.
Pro Styling Tip: Shoot from the side so the lights halo the branch edges and the leaf colors layer in soft bokeh.
Pause for a breath. Remember, this isn’t about crafting perfection. It’s about hosting with heart, using projects that settle the room and keep small hands meaningfully busy.
5) Apple-Stamped Tea Towels In Afternoon Sun On The Kitchen Table
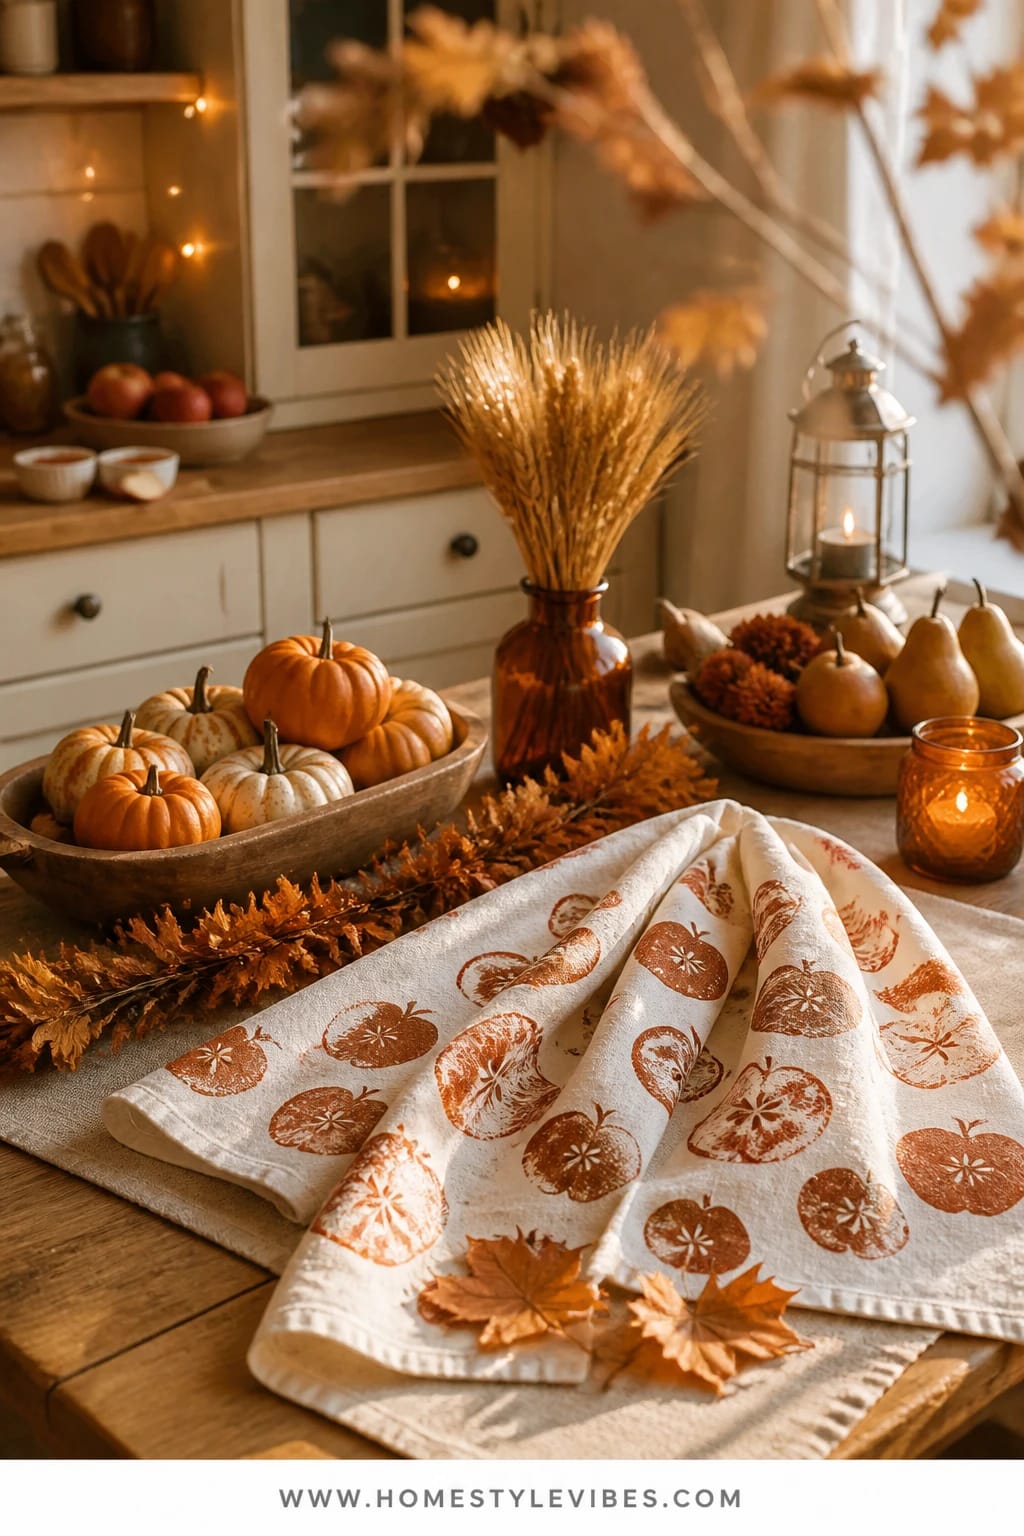
Kids in the kitchen can be joyful and… splashy. Sticky counters. Flour mustaches. You’ve tried assigning “helpers,” but it still gets wild. Apple-stamped tea towels channel that energy into a satisfyingly rhythmic craft at the kitchen table that also gives you something useful at the end. Slice apples, dab into non-toxic fabric paint in warm cinnamon and rust, and stamp onto cotton towels. The afternoon sun warms the colors while you proof rolls or stir cranberry sauce nearby.
Why it works: it’s repetitive and sensory. Kids love the satisfying press-and-lift of the stamp, and fabric absorbs paint in a way that looks intentionally imperfect. Hang the finished towels from a drying rack or along the back of dining chairs—instant décor. Photographing them is a dream: soft wrinkles, saturated stamps, and the light catching the grain of your table.
Variations: Use pear halves for a taller motif. Prefer low-contrast? Go tone-on-tone with wheat-colored paint on oatmeal towels. Make-ahead: pre-wash towels and prep a few practice papers so kids get the pressure right before committing to fabric.
Budget Breakdown:
- Plain cotton tea towels (4-pack): $10–$18
- Non-toxic fabric paint: $6–$12
- Disposable plates for paint and paper for testing: $2–$5
- Apples and a small paring knife: on hand or $2–$4
- Painter’s tape to secure towels: $3–$6
Total Estimated Cost: $23 – $45
Best For: Families who love the kitchen hum and want useful keepsakes for Thanksgiving and beyond.
Key Design Elements:
- Main seasonal props: Apples, cotton towels, fabric paint
- Color palette: Cinnamon, rust, deep berry
- Lighting strategy: Bright afternoon sun; add a single candle in the corner for warmth
- Textile layers: Tea towels, linen runner under the craft area
- Natural elements: Wooden drying rack, small bowl of apples as décor
- Accent details: Copper measuring spoons, terracotta utensil jar
How To Recreate This Look:
- Pre-wash and iron towels for better paint adherence.
- Cut apples in half, pat dry so the stamp isn’t watery.
- Tape towel edges to the table to prevent slipping.
- Pour a shallow pool of paint, dip the apple, and practice on paper.
- Stamp towels in a simple grid or random scatter; let dry flat.
Why This Looks Expensive: Simple patterns on natural fibers read boutique—especially when you photograph them draped casually near warm wood and ceramic.
Watch Out: Too much paint pools and smudges. Blot the apple before stamping for crisp edges.
Pro Styling Tip: Roll a few finished towels and tie with twine; stage beside a bowl of apples to get that cozy product-shot vibe.
Time to cozy up the shelves. Next, we turn your built-ins into a storytime theater the cousins will talk about until next year.
6) Storybook Leaf Garland With Soft Wheat Ribbon On The Living Room Bookshelf
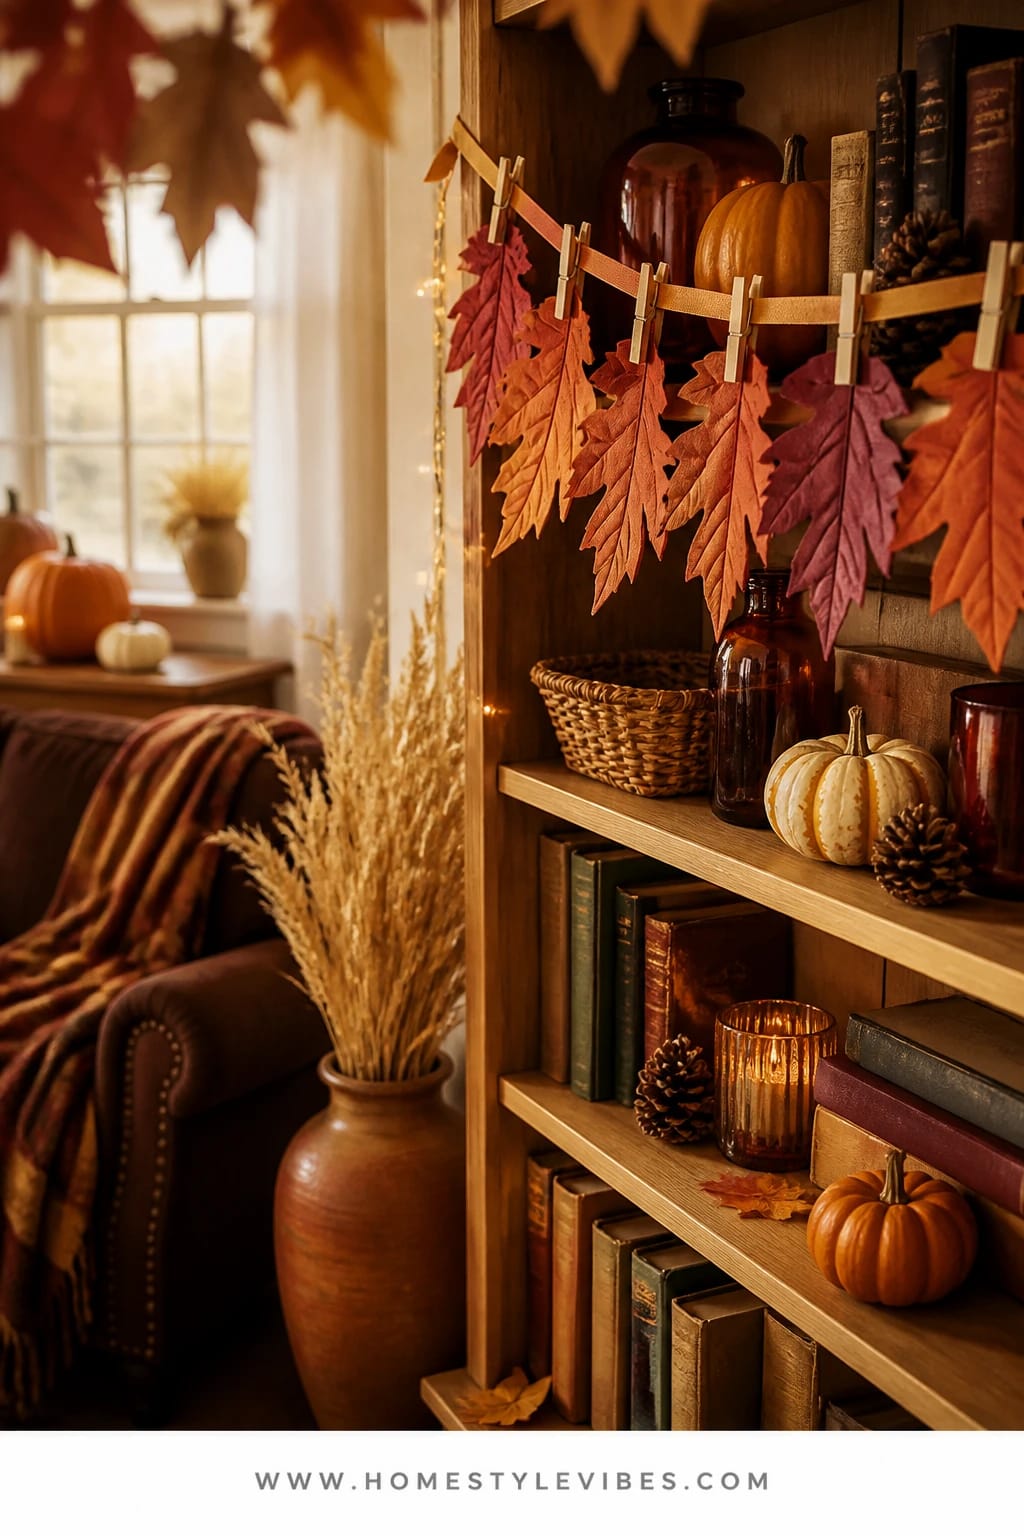
Bookshelves can feel like a design bully—lots of lines, lots of stuff, and nowhere soft to land. You’ve tried propping pumpkins between novels, but it still looks like Halloween leftovers. A storybook leaf garland, strung with wheat-colored ribbon, adds movement and a playful reading ritual to your shelves. Kids decorate paper leaves with “chapter titles” of the day—Turkey Trot, Pie Patrol, Cousin Club—and clip them along a garland like a living timeline. Warm lamplight catches the papers and turns your shelf into an autumn narrative.
It’s practical: you’re not rearranging the entire shelf, just adding a light layer. It’s gorgeous: papery leaves with rust and amber watercolor swirls, linen ribbon tails, a couple of white pumpkins grounding the scene. And kids love owning storytime. My friend Meg tried this last year and realized her “cluttered bookshelf” wasn’t the problem—her lighting was. A single picture light over the shelf made every leaf glow, and suddenly the whole wall felt intentional.
Variations: For a muted look, use white and pale sage leaves with thin cocoa ink lines. Small shelf? Do a short swag on one section, not the whole thing. Make-ahead: pre-watercolor a few leaves so the garland has color from the start.
Budget Breakdown:
- Cardstock leaves or die-cuts: $5–$10
- Watercolor set and brushes: $8–$15
- Wheat-colored linen or cotton ribbon: $6–$12
- Mini clothespins or paper clips: $3–$6
- Removable hooks for bookshelves: $4–$8
Total Estimated Cost: $26 – $51
Best For: Living rooms with built-in or freestanding shelves and a family who loves reading a “chapter” before pie.
Key Design Elements:
- Main seasonal props: Paper leaves, ribbon, mini pumpkins
- Color palette: Amber, rust, wheat, cream
- Lighting strategy: Picture light or a lamp aimed toward the garland
- Textile layers: Linen ribbon, throw blanket on a nearby chair
- Natural elements: Dried leaves tucked behind book spines
- Accent details: Brass bookends, ceramic book stacker
How To Recreate This Look:
- Cut or buy leaf shapes; pre-paint a few with loose watercolor washes.
- Tie a soft wheat ribbon across the shelf front using removable hooks.
- Clip leaves along the ribbon, leaving room for kids to add more.
- Add 2–3 mini pumpkins on different shelves to balance color.
- Place a warm bulb lamp nearby and angle the shade toward the garland.
Why This Feels Designer: Movement plus restraint—the ribbon’s soft curve and the limited palette make shelves look styled, not stuffed.
One Thing To Avoid: Don’t hang the garland too low where it blocks books you’ll grab. Keep it taut and high across one shelf line.
Pro Styling Tip: Take a photo from the side so book spines create soft lines behind the garland; let one leaf hang closer to the lens for depth.
Quick mindset reset: If one idea sings, start there. Holiday magic thrives on one or two strong moments, not fifteen half-finished ones. Your home doesn’t need to look like a store window to feel cinematic.
7) Cinnamon-Scented Salt Dough Ornaments With Brass Bowls On The Dining Sideboard
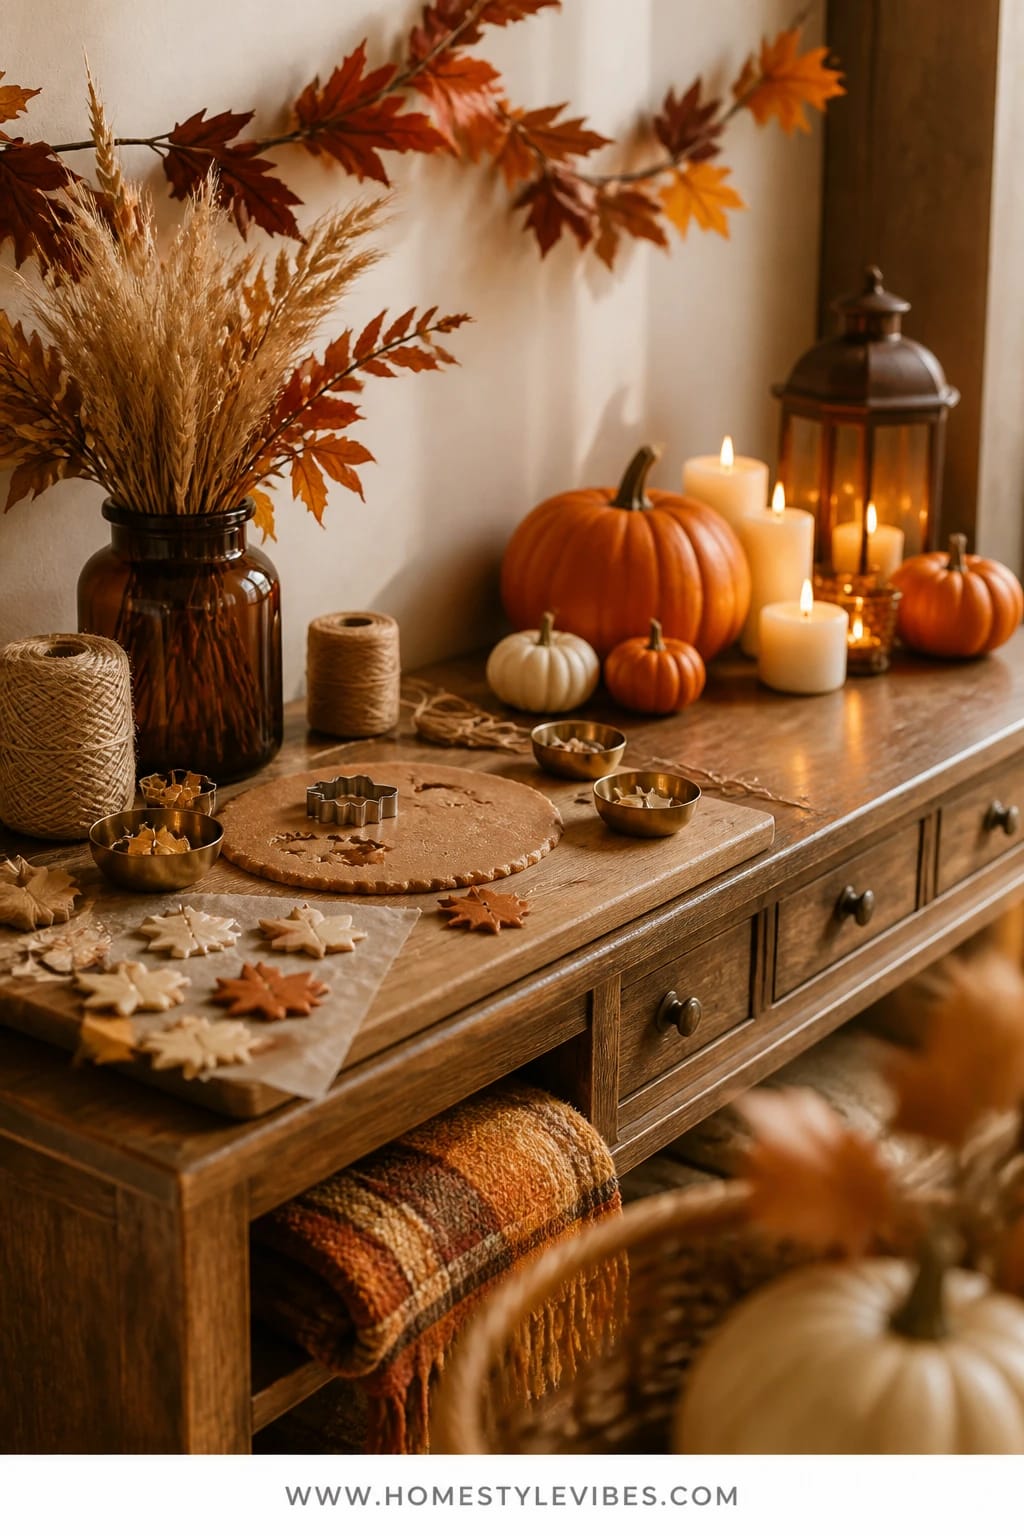
Sideboards are multitask central on Thanksgiving—drinks, pie parking, napkin overflow. You’ve tried a snack tray for kids, but it turns into a crumb zone. Salt dough ornaments bring the chill: a make-and-bake craft that smells like cinnamon and turns into keepsake tags for gifts, place settings, or the next day’s hot cocoa bar. Set the crafting on one side of the sideboard and keep serving space on the other. The look is warm and earthy: brass bowls for cutters and twine, a wooden board as the work surface, and finished ornaments drying on parchment like tiny cookies.
This works because the dough is forgiving and tactile. Kids roll, stamp with leaf or turkey cookie cutters, poke a straw hole, and sprinkle a touch of cinnamon on top. After a low-and-slow bake, they can paint details or leave the natural, spiced finish. Under candlelight, those little discs and hearts read like boutique ceramic tags. FYI: the dough isn’t for eating—tell curious little nibblers twice.
Variations: Add clove or pumpkin spice to the dough for scent. Use alphabet stamps for names and later tie them to glasses or napkins as place markers. For a softer palette, paint a few with diluted white acrylic for a limed look.
Budget Breakdown:
- Flour, salt, water: $3–$6
- Ground cinnamon: $2–$5
- Cookie cutters (leaf, turkey, heart): $6–$12
- Twine or ribbon: $3–$7
- Parchment paper and straw for holes: $2–$4
Total Estimated Cost: $16 – $34
Best For: Dining rooms with a sideboard or buffet; great for late afternoon when the oven’s still warm and attention spans are short.
Key Design Elements:
- Main seasonal props: Salt dough shapes, cookie cutters, twine
- Color palette: Wheat, cinnamon, cream, brass
- Lighting strategy: A cluster of pillar candles in glass hurricanes on the sideboard
- Textile layers: Linen towel under the rolling pin, burlap runner
- Natural elements: Star anise scattered in a dish, dried orange slices nearby
- Accent details: Brass bowls, wooden board, ceramic ramekins for spices
How To Recreate This Look:
- Mix 2 cups flour, 1 cup salt, 1 cup water, and 1–2 tablespoons cinnamon into a workable dough.
- Roll to 1/4 inch on parchment; cut shapes and poke a hole with a straw.
- Dust lightly with cinnamon for a speckled finish.
- Bake at 200°F for 2–3 hours until fully dry, flipping halfway.
- Thread with twine, paint details if desired, and style in a brass bowl to display.
Why This Reads High-End: The natural matte finish, uniform shape sizes, and brass accents mimic artisan ceramics—especially under candle glow.
The Most Common Mistake: Rolling too thick. Thick ornaments crack as they dry and look clunky. Keep them thin and even.
Pro Styling Tip: Group finished ornaments with a few star anise pods and one dried orange slice for texture that photographs like a lifestyle spread.
Honest moment: crafts can get messy. That’s okay. Keep a warm dish towel nearby, a small trash bowl on each station, and remember that you’re making memories, not museum pieces. The perfection is in the glow, the colors, and the laughter at the table.
Quick Checklist
- Kraft paper roll for a leaf-stamped table runner
- Washable paints in rust, burgundy, and marigold
- Glass hurricanes and amber votives
- Pre-cut felt, white pompoms, and twine for pie garlands
- Mini clothespins and removable hooks
- Plaid scrapbook paper and popsicle sticks for turkey puppets
- Branch “tree,” leaf tags, and fairy lights for the entry
- Cotton tea towels and fabric paint for apple stamping
- Watercolor set and wheat ribbon for bookshelf garlands
- Flour, salt, cinnamon, and cutters for salt dough ornaments
- Wooden trays and bowls to corral supplies
- Warm bulbs (2700K–3000K) for cozy evening light
- Extra tea towels, parchment, and painter’s tape for quick cleanups
Frequently Asked Questions
How do I keep costs down when setting up multiple Thanksgiving crafts for kids?
Pick one color palette and share supplies across projects—rust, burgundy, and wheat work everywhere. Reuse tools (scissors, trays, clothespins) and invest in one set of glass hurricanes or a picture light that you’ll bring out every fall. Keep each craft under $30 by using pantry items (salt dough), scrap ribbon, and leaves from your yard.
Are real pumpkins, leaves, and wheat better than faux for these indoor projects?
IMO, real wins for scent and texture—especially wheat bundles, apples for stamping, and a few mini pumpkins. If you have a hot vent nearby, go faux for pumpkins to avoid the sad, half-deflated look by week three. Dried leaves make better stamps than faux because they press flatter and absorb paint predictably.
What if I live in a small home—where do these setups actually fit?
Use vertical surfaces and edges: hang the gratitude tree branch above an entry console, clip the pie garland to cabinet pulls, and corral puppet-making on a single tray you can move to the sofa or floor. A window ledge can host the salt dough display while the sideboard handles drying. Think stations, not sprawls.
How do I store kid-made décor after Thanksgiving without cluttering my life?
Label a single flat under-bed bin “Autumn Keepsakes.” Save 3–5 favorites from each year: a slice of the stamped runner, two salt dough ornaments with names and dates, and a leaf or two from the garland. Photograph the rest and print a mini collage—memory kept, clutter avoided.
Are candles safe around these crafts and kids?
Use glass hurricanes for any open flame and keep them at adult-only stations like the sideboard or mantel. For kid tables, swap to LED tea lights with a warm hue. The glow matters, not the fire.
When should I start these projects so they last through Thanksgiving weekend?
Begin with the bookshelf garland and gratitude tree the weekend before. Do the leaf-stamped runner and puppet station Thanksgiving morning. Save apple stamping and salt dough for the day-of lull or the next morning when everyone needs a calm reset.
Your Cozy Finish
Pick one idea that made you smile. That’s your starting line. Maybe it’s the kraft paper runner with leaf stamps while you light the first candle, or the cinnamon-scented ornaments cooling on the sideboard as cousins drift in from the living room. Keep the palette warm, the textures tactile, and the light soft—rich rusts, wheat ribbon tails, and that amber glow that makes everything (and everyone) look like they belong here.
The truth is, hosting kids on Thanksgiving isn’t about perfect place settings. It’s about giving them a seat at the creative table. Layer a few simple stations where little hands can make, tie, stamp, and hang. You’ll get color that feels abundant, light that looks honeyed in photos, and a home that hums with the kind of cozy bright autumn energy we wait all year to feel.
You’ve got this. Start with one craft, set out the warm bulbs and a wooden tray, and let the day fill in the rest. Seriously—your future self (and your photo roll) will thank you.

About the Author

Krisztina P.Rendes, Founder of Home Style Vibes
Founder of Home Style Vibes
Krisztina Puskásné Rendes created Home Style Vibes as a cozy-modern lifestyle space where homemaking meets inspiration. Her goal is to help women create beautiful, organized, and peaceful homes they truly love — without overwhelm. You’ll find here heart-driven content on home decor, cleaning tips, easy family recipes, organization and decluttering, DIY home projects, plants, and seasonal ideas — all designed to bring more calm, comfort, and style into everyday life.