6 Fall Tiered Tray Decor Ideas For Kitchens And Coffee Bars
You want a kitchen that hums with warm, saturated fall energy every time you walk in for coffee. You hate that your counters feel cluttered, your tiered tray looks like a random pile of stuff, and the whole scene never photographs as beautifully as it does in your head. Picture this instead: cozy bright autumn colors—rust, burgundy, amber—layered with pumpkins and plaid, candle glow bouncing off your favorite mugs, and a coffee bar that looks ready for a close-up. These 6 fall tiered tray decor ideas for kitchens and coffee bars will solve the “looks messy, not magical” problem in under an afternoon, on a family-friendly budget, with pieces you’ll reuse next year.
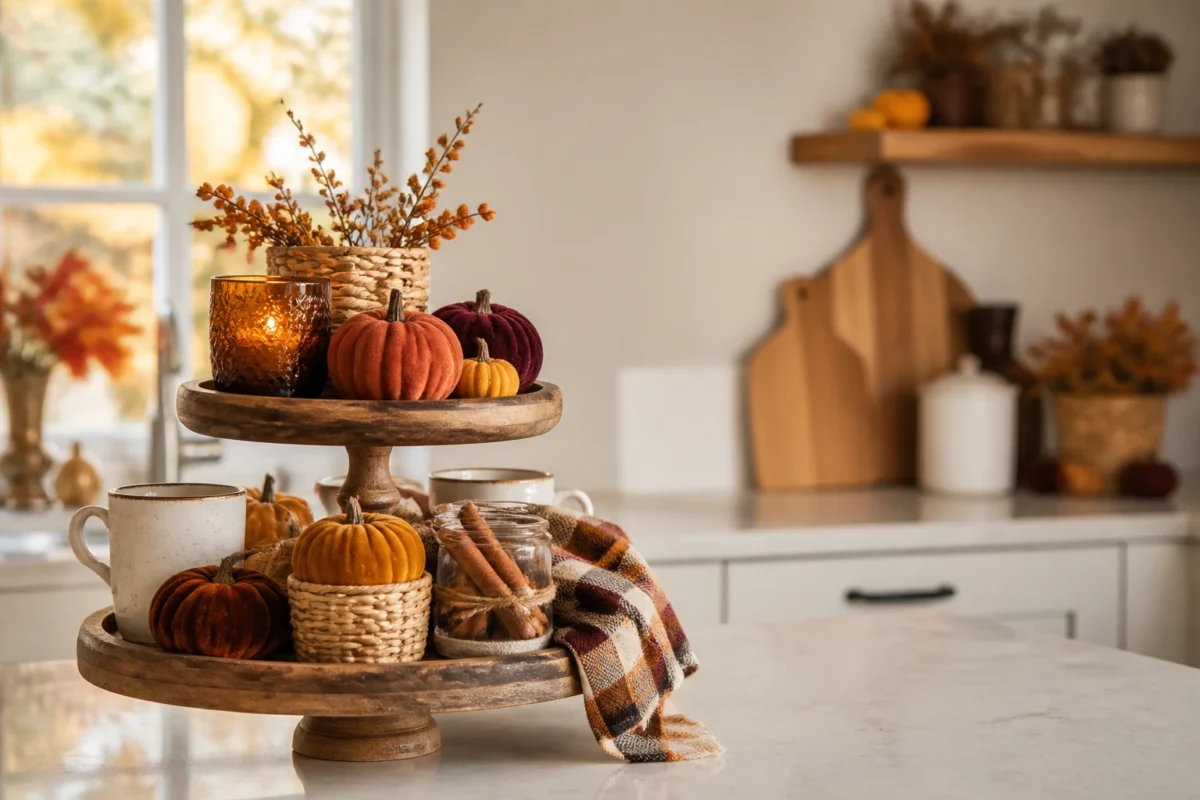
We’re talking tactile textures: wood trays, mini woven baskets, ceramic mugs, twine-wrapped jars, and cinnamon sticks. We’re layering real and faux pumpkins, warm candlelight, and cheerful signs that feel like a hug on a brisk October morning. Expect Instagram-worthy vignettes that actually function, so you can make espresso at 7 a.m. without knocking over a tiny pumpkin stack. If you love a cozy bright, harvest-abundant vibe, or you’re hosting a casual chili night soon, this is your moment to make it feel finished—fast.
1) Spiced Pumpkin Stack With Amber Candle Glow On A Kitchen Island Tray
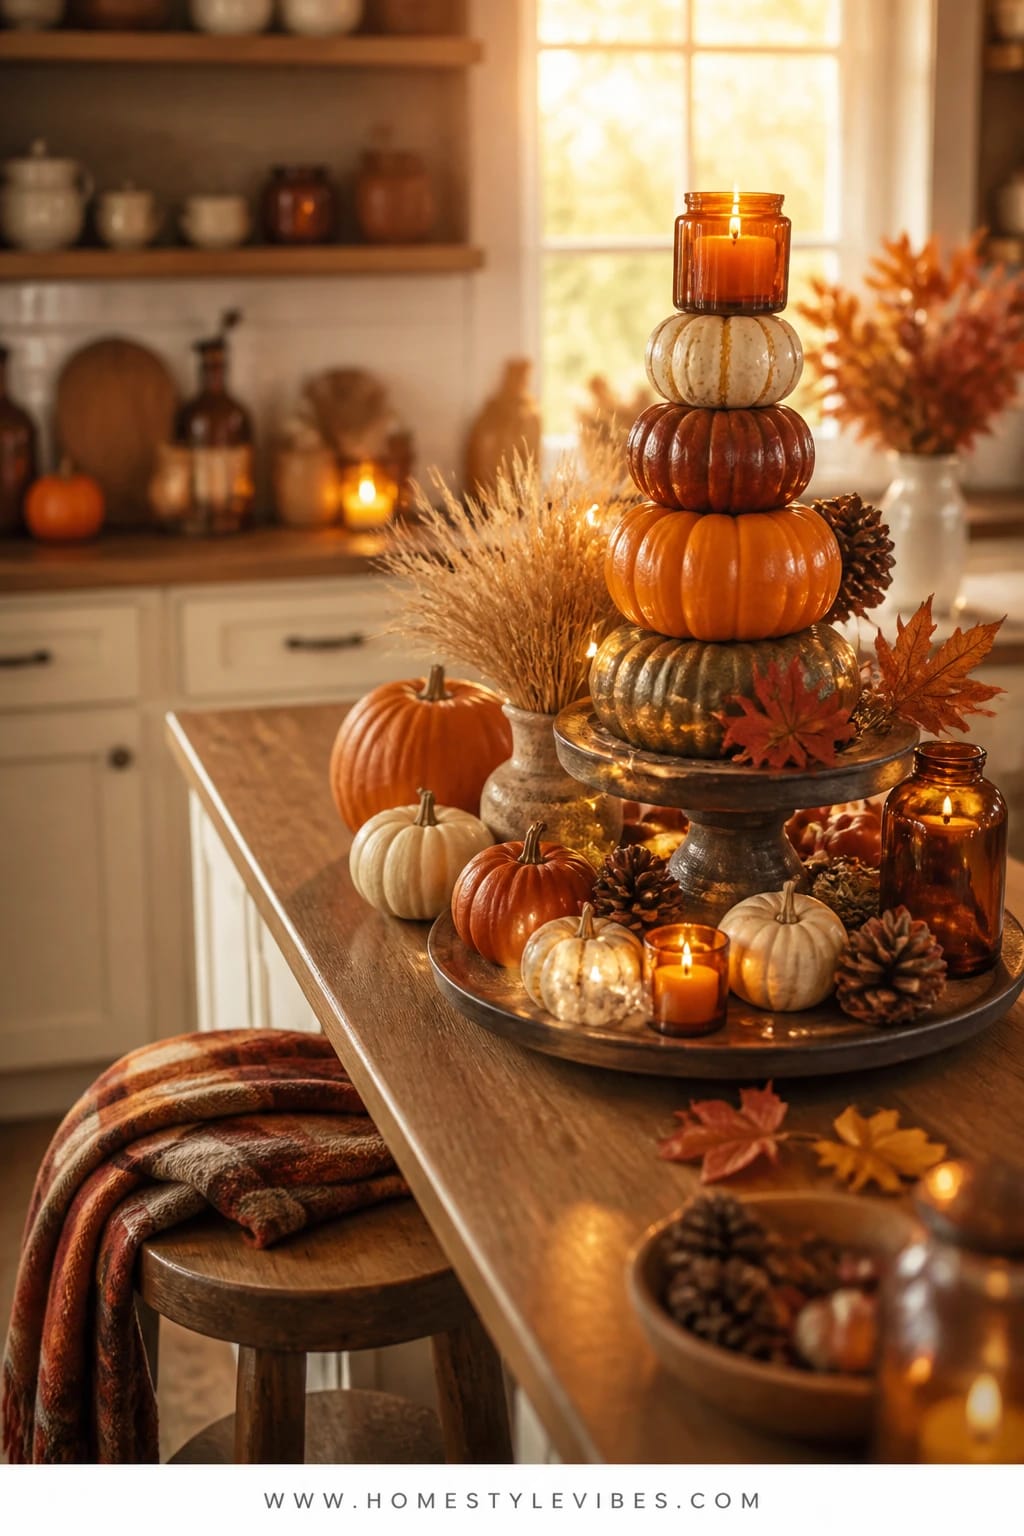
We’ve all been there: your island is the heart of the kitchen, but your tiered tray either swallows it or disappears into the chaos. You’ve tried piling pumpkins, a cute sign, maybe a candle—but it still looks noisy. This idea centers everything around a pumpkin stack in saturated cozy-bright colors and controls the glow so it feels like golden-hour warmth anytime you flip on the lights.
The mood: golden and inviting, like cinnamon rolls in the oven on a Sunday morning. Why it works: focused height. A single stacked element—mini pumpkins in rust, mustard, and deep burgundy—draws the eye up and keeps the rest of the tray calmer. It photographs beautifully because the amber candle glow filters through glass and reflects off metallic accents, giving you that rich depth without dark shadows. Use wood and ceramic as your base materials, and weave in brass spoons or a small honey dipper for these delicious warm highlights.
Light matters here. Position one flameless amber candle on the top tier, and one short votive inside a translucent glass on the lower tier. The double glow makes your pumpkin colors read richer and helps your tray look styled, not stuffed. Add a few dried orange slices—their leathery, translucent edges catch the light like tiny stained glass.
Variations to try:
- Budget-friendly: Faux pumpkin multipacks, thrifted amber glass, and a single battery candle. Skip the brass; use a wooden spoon or a cinnamon bundle tied with twine.
- Small kitchen: Use a 2-tier tray no wider than 12 inches and keep the pumpkin stack to three total. Edit mercilessly—one sign, two mugs, done.
- September-to-Thanksgiving transition: Start with softer oranges and greens in early fall. In November, add a linen ribbon in deep rust and swap in a “Grateful” tag.
Budget Breakdown:
- 2-tier wood tray: $25–$60
- Faux mini pumpkins (set of 8–12): $10–$25
- Flameless candles (2): $12–$30
- Amber glass votive or tumbler: $5–$12
- Small brass or gold-tone spoon: $6–$15
- Dried orange slices (pre-made or DIY): $5–$10
Total Estimated Cost: $63–$152
Best For: Open kitchens with a central island or peninsula; families who love a warm coffee moment; ideal for early October through Thanksgiving thanks to its classic harvest palette.
Key Design Elements:
- Main seasonal props: layered faux pumpkins, dried oranges, cinnamon bundles
- Color palette: rust, mustard, amber, warm wood
- Lighting strategy: two points of soft amber candlelight
- Textile layers: a plaid napkin tucked under mugs for softness
- Natural elements: dried orange slices, cinnamon sticks, a sprig of eucalyptus
- Accent details: brass spoon, mini honey jar, small wood sign
How To Recreate This Look:
- Start with a neutral 2-tier wood tray on your island and wipe the surface so the wood grain reads clean.
- Add a plaid napkin or small runner under the bottom tier for warmth and contrast.
- Layer a three-high mini pumpkin stack on the top tier, securing with removable putty if needed.
- Place an amber glass with a battery votive on the lower tier toward the front-left for photo-friendly glow.
- Style with a small sign, two favorite mugs, brass spoon, and a few dried orange slices scattered like confetti.
Why This Looks Expensive: Balanced height and controlled glow read intentional. The brass accent and glass reflect light like jewelry for your tray—small details that feel curated, not big-box.
Watch Out: Overcrowding kills the effect. Leave breathing room between pumpkins and mugs so the light can bounce and shadows stay soft.
Pro Styling Tip: Turn the top pumpkin’s stem slightly toward the light source—it photographs like a tiny sculpture and instantly looks styled.
Quick Tip: Create a “tray kit” box you can pull out each September—keep mini pumpkins, a short garland, and your favorite small mugs together so set-up takes 10 minutes, not an hour.
2) Cinnamon-Stick Mugs And Golden Maple Leaves On A Coffee Bar Tiered Stand
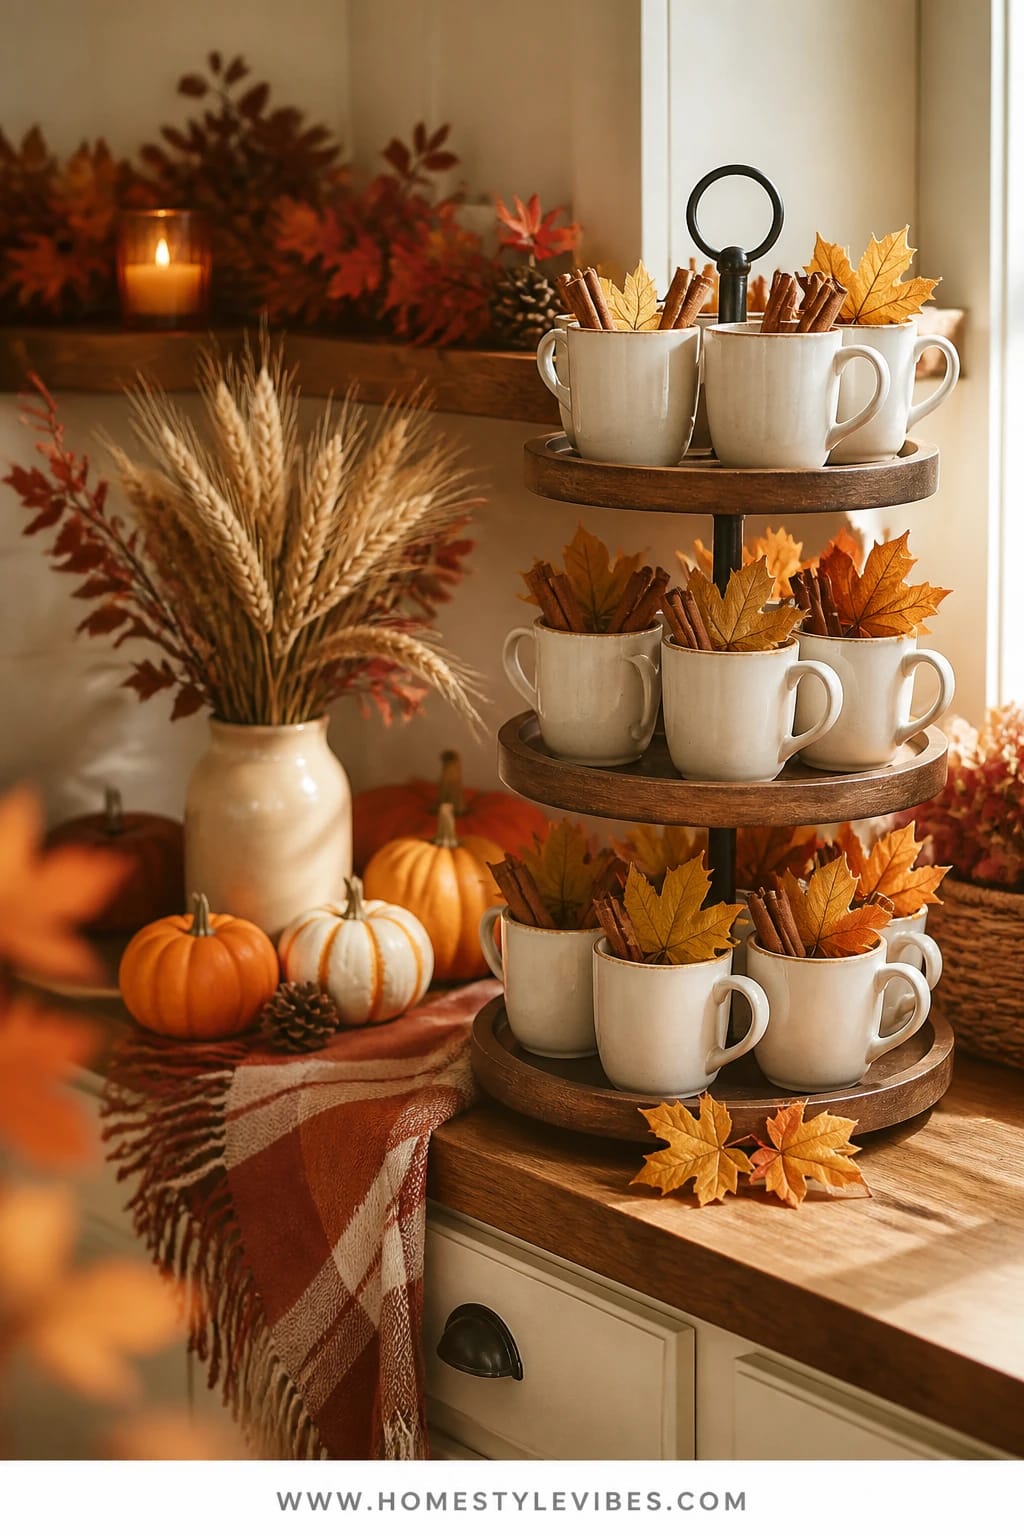
It’s that one corner that always feels off: your coffee bar has all the pieces, but nothing feels connected. You’ve got pods, mugs, syrups—practical, yes. Pretty? Not really. This setup turns utility into a styled story with maple leaves, cinnamon sticks, and golden accents that make your daily latte feel like an autumn ritual.
The mood leans cheerful and harvest-forward. Why it works: repetition. Pair your mugs with cinnamon sticks in each cup and repeat a golden element—like leaf-shaped cutouts or a short strand of maple leaf garland—across both tiers. That repeated color reads cohesive from across the room and photographs beautifully thanks to the warm whites and golden tones. It’s easy to store, too; garlands coil, cinnamon sticks keep in a jar for months, and the mugs obviously stay useful.
Lighting plays backup here. If your coffee bar sits under cabinets, add a small puck light under the shelf above the tray. The downward glow brings out the gold and keeps your syrups from stealing the spotlight. I tried this in my own kitchen last October, and I couldn’t believe how “finished” it felt once that tiny light came on—my least photogenic corner turned into the spot guests kept complimenting.
Variations to try:
- Small-space: Choose a narrow 2-tier metal stand and limit mugs to two. Store pods in a small lidded jar on the top tier to avoid visual noise.
- Budget: Paper maple leaves in golden tones cost a few dollars and look shockingly good tucked behind mugs and labels.
- November tweak: Replace bright oranges with deeper marigold or muted mustard leaves and add a “Give Thanks” wood tag to a syrup bottle.
Budget Breakdown:
- Tiered metal stand: $20–$45
- Maple leaf garland or paper leaves: $6–$18
- Cinnamon sticks (jar): $4–$12
- Under-cabinet puck light: $10–$20
- Label set for syrups: $6–$15
Total Estimated Cost: $46–$110
Best For: Coffee bars along a wall or in a breakfast nook; morning people who crave a cheerful, ready-to-go station with built-in fall scent and color.
Key Design Elements:
- Main seasonal props: cinnamon sticks, maple leaves, labeled syrup bottles
- Color palette: golden yellow, warm white, honey-brown
- Lighting strategy: discreet puck light to spotlight the tray
- Textile layers: a small cream placemat or coaster stack
- Natural elements: dried wheat sprigs tucked into a jar
- Accent details: gold-tone teaspoons, tiny clip-on leaf charms
How To Recreate This Look:
- Start with your stand placed near the coffee machine but not blocking buttons or doors.
- Add a neutral placemat under the stand to frame it and catch spills.
- Layer maple leaves behind mugs and jars to create a soft, leafy backdrop.
- Place two mugs on the bottom tier, each with two cinnamon sticks like stirrers.
- Style the top tier with a labeled syrup bottle, gold teaspoon, and a wheat sprig in a mini bud vase.
Why This Feels Designer: The trick is restraint plus repetition—matching cinnamon sticks, consistent labels, and one color story to bind everything together.
One Thing To Avoid: Mixing too many label styles. Handwritten plus printed plus chalkboard reads chaotic; pick one vibe and stick to it.
Pro Styling Tip: Angle one mug slightly to the side so you catch the profile handle—it gives your photo a dynamic line and shows off the cinnamon sticks.
Remember, this isn’t about copying a showroom. It’s about a kitchen that works for your mornings and still gives you that autumn jolt of happy every time you walk by. If one idea resonates more than the others, that’s your starting point.
3) Harvest Apple Crate Accents With Warm Plaid On A Breakfast Nook Tray
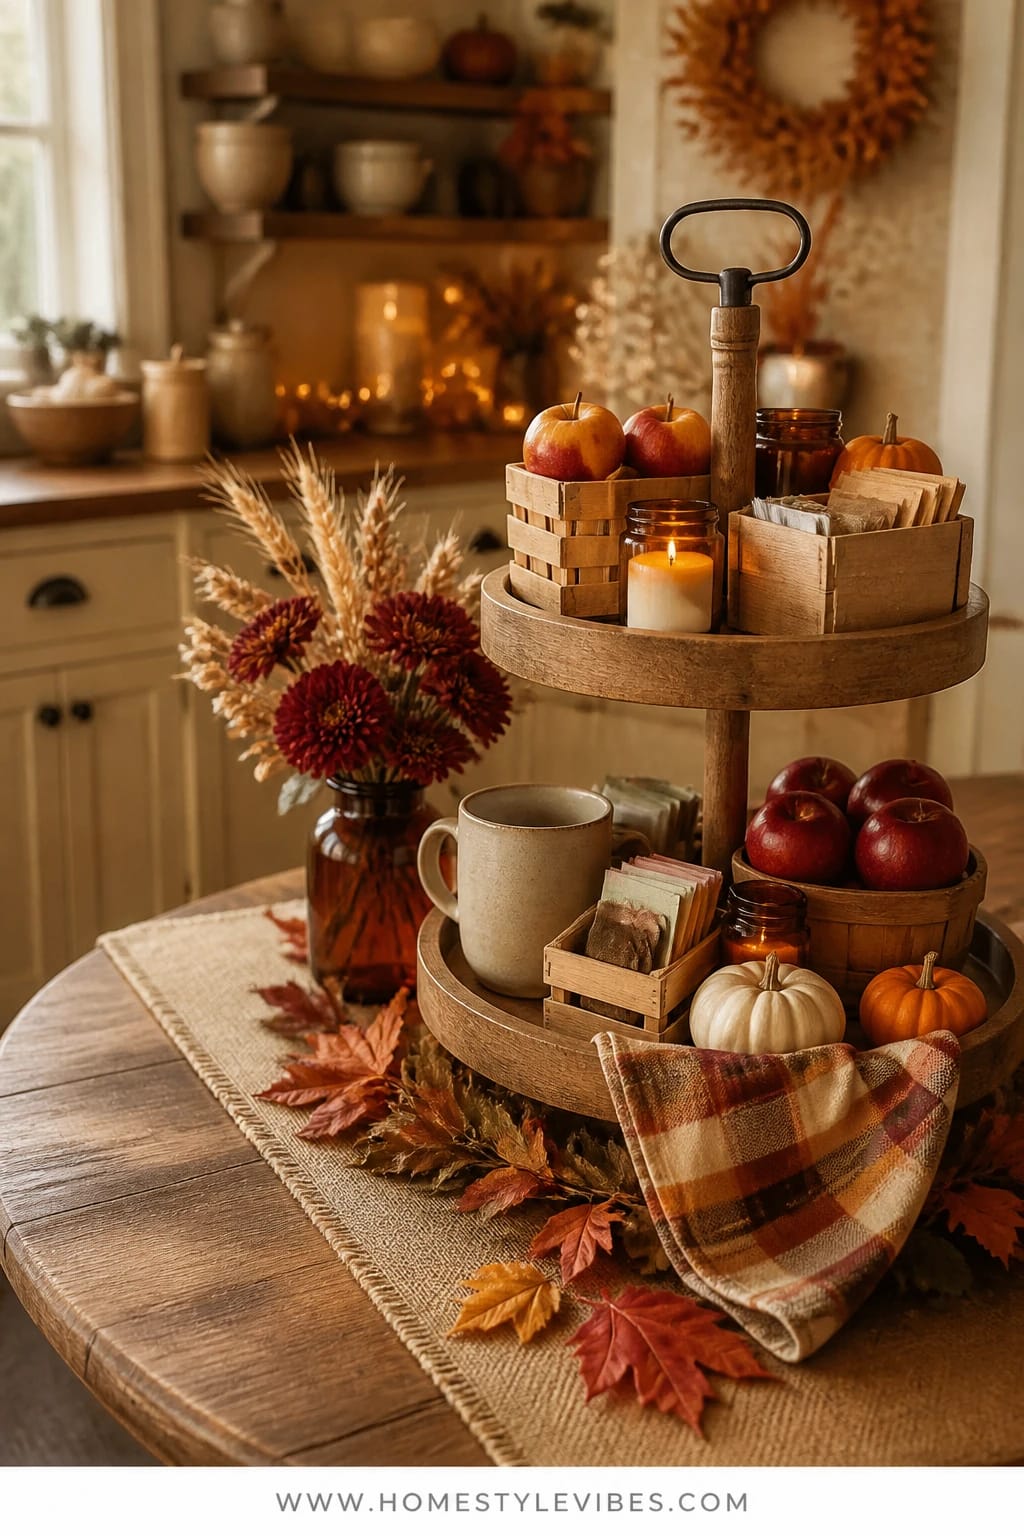
Maybe your breakfast nook feels bland in fall. You’ve got the table, the chairs, the light—yet every attempt at styling the tray ends up too orange or too kitschy. This concept leans into cozy bright autumn with a mini apple-crate vibe, warm plaid, and tiny market moments that look straight out of a Saturday farmers’ stand—but scaled for a tiered tray.
The mood is harvest abundance without clutter. Small wooden crates or berry baskets wrangle the bits that usually float around: tea bags, sugar packets, napkins. It works for real homes because the structure keeps family clutter contained and easy to reach. The lighting is all about catching that morning sun; position the tray near a window so the plaid reads rich and the apples look juicy, even if they’re faux.
Photographs love this look. The red-to-burgundy apple tones pop against neutrals and wood, while plaid gives a soft pattern that brings everything to life. Add one tiny chalkboard price sign (“Apples 5¢”) for a wink of nostalgia. Is it corny? A little. Is it charming? Absolutely. And if it makes you smile at 7 a.m., it’s worth it.
Variations to try:
- Budget-friendly: Skip crates and use two clean tuna cans wrapped in jute twine as mini “baskets.” No one will notice; trust me.
- Small-family version: Only fill one mini crate with apples and one with tea. Keep the top tier for decorative items like a plaid-wrapped jar candle.
- Late-fall switch: Swap bright apples for deeper burgundy ones and add a sprig of cedar when November hits.
Budget Breakdown:
- 2-tier tray: $25–$60
- Mini wood crates or berry baskets (2–3): $6–$18
- Faux apples (set): $10–$24
- Small chalkboard sign: $4–$10
- Plaid napkin set: $8–$20
- Jar candle (cinnamon or apple): $8–$16
Total Estimated Cost: $61–$148
Best For: Breakfast nooks or small eat-in kitchens; families who like a cheerful harvest look that doubles as light storage for tea and sweeteners.
Key Design Elements:
- Main seasonal props: mini crates, faux apples, chalkboard sign
- Color palette: burgundy, apple red, oatmeal, walnut wood
- Lighting strategy: natural morning light; add a jar candle for evening
- Textile layers: plaid napkins or a tea towel wrapped around the base
- Natural elements: dried bay leaves or a sprig of rosemary
- Accent details: tiny metal clip, wooden tongs, enamel-style mugs
Why This Reads High-End: Repetition of apple tones in different scales (full apple, tiny apple print, apple-red stitching) gives depth. The mini crates feel boutique, even if they’re a few dollars.
How To Recreate This Look:
- Start with a wood or white tray and place a folded plaid napkin on the bottom tier to soften edges.
- Add one mini crate filled with apples to the lower tier; angle it slightly toward your seating area.
- Layer a second crate on the top tier with tea bags or sweetener packets.
- Place a small chalkboard sign at the front and a jar candle behind it for backlit warmth.
- Style with a sprig of rosemary tucked into a mug handle and a tiny clip on the sign for texture.
The Most Common Mistake: Too many apples. Cap it at 5–7 total so your tray looks styled, not like produce storage.
Pro Styling Tip: Position one apple partially off the napkin edge—just enough to break the straight line. It looks casual and intentionally layered in photos.
Did You Know? A single folded tea towel under your tray acts like a frame, prevents micro-scratches on counters, and adds that soft, layered look you see in magazine kitchens.
4) Caramel Latte Bottles With Burnished Copper On A Coffee Cart Tiered Tray
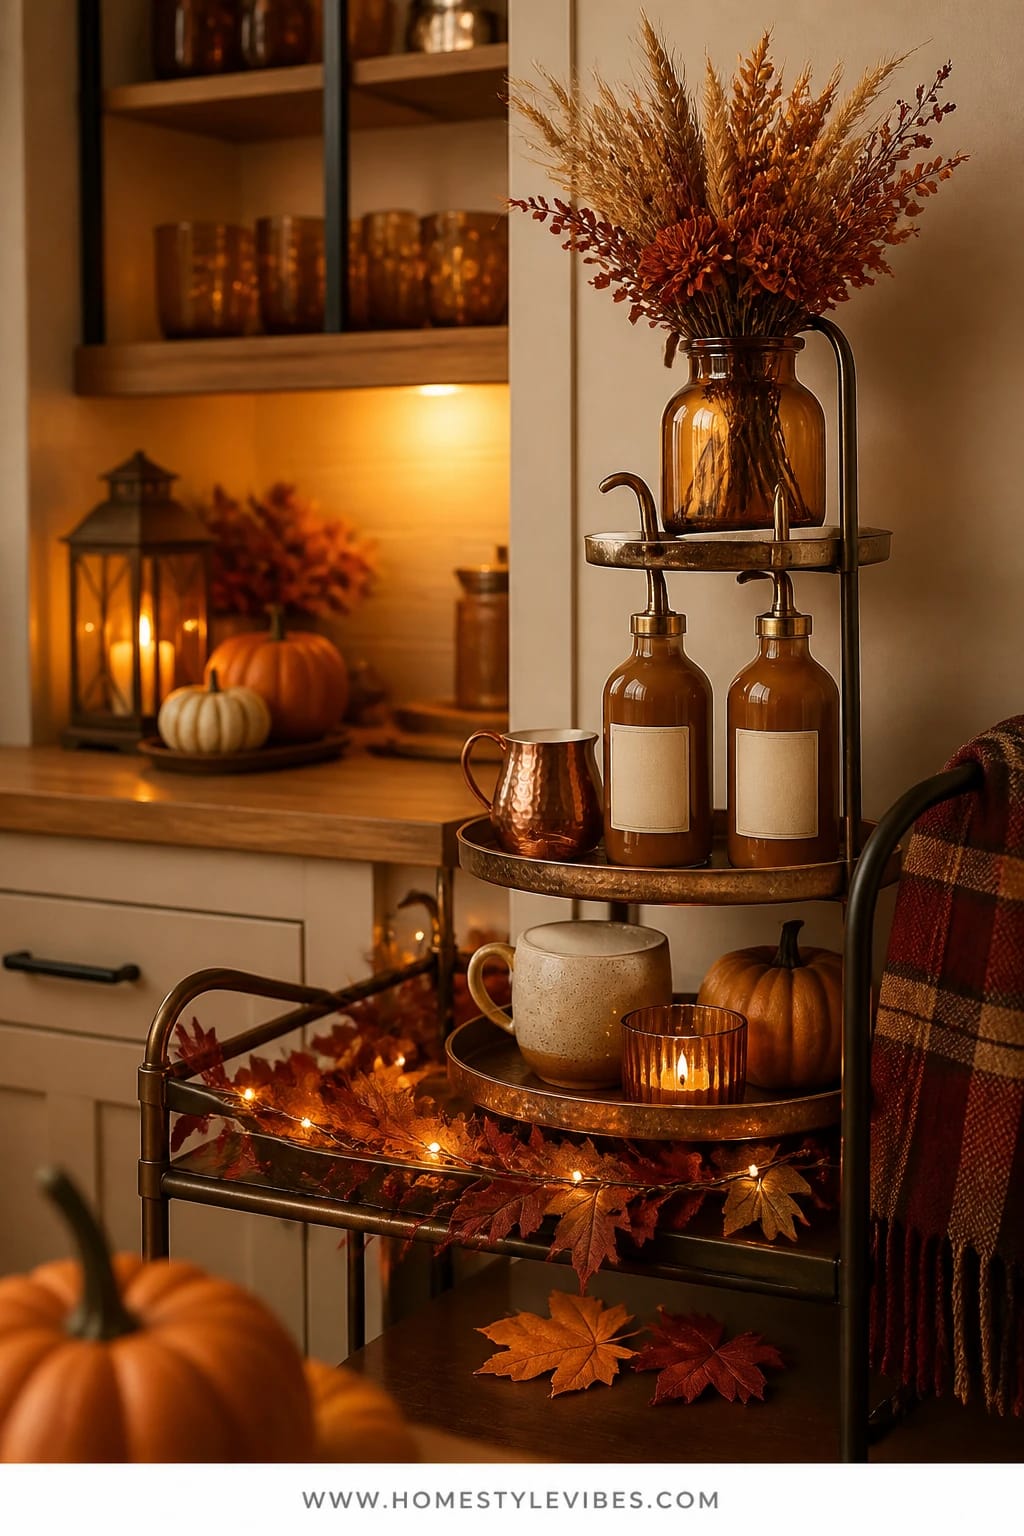
You’ve tried syrups on the counter, but the labels blink at you like neon signs. Nothing about it reads cozy. This idea corrals caramel and vanilla syrups into amber-toned bottles with uniform labels, then pairs them with burnished copper accents so your coffee cart feels like a mini café in late October.
The vibe is rich and café-warm. It works in real homes because clear bottles mean you can see syrup levels at a glance, and copper brings seasonal warmth without adding clutter. Under-cabinet light not an option? No problem. Use one tiny clip-on lamp or a rechargeable mini lamp on the cart shelf to create that amber hour glow that flatters everything—a literal filter for your coffee bar.
Photographically, this sings. The bottles line up like little stained-glass windows. Copper reflects, the caramel tones deepen the palette, and a single upholstered coaster stack softens the hardware. Full disclosure: aligning labels perfectly is tedious—worth it, but tedious. I queue up a podcast, clean the bottles, and apply labels slowly while my latte cools.
Variations to try:
- Budget swap: Keep original syrup bottles and add kraft paper tags with twine. Consistent handwriting creates the same uniform look.
- Small-space: Use mini 8 oz bottles and two flavors only. Add a tiny copper measuring spoon for charm.
- Thanksgiving-ready tweak: Add a cinnamon dolce bottle and a dark burgundy ribbon around the top tier post.
Budget Breakdown:
- Tiered tray (metal or wood/metal): $30–$70
- Amber glass bottles with pourers (set of 3–4): $18–$40
- Printable or pre-made labels: $6–$14
- Copper accents (measuring spoon, coaster rim): $10–$28
- Mini rechargeable lamp or clip-on light: $15–$45
Total Estimated Cost: $79–$197
Best For: Dedicated coffee carts or butler’s pantry nooks; hosts who want a sleek but warm coffee station for casual gatherings.
Key Design Elements:
- Main seasonal props: amber bottles, caramel/vanilla syrups, cinnamon sticks
- Color palette: caramel, copper, espresso brown, cream
- Lighting strategy: mini lamp or clip-on for amber glow
- Textile layers: a leather or felt coaster stack
- Natural elements: dried wheat tuft in a slim bud vase
- Accent details: copper measuring spoon, twine-wrapped tags
How To Recreate This Look:
- Start with a stable tiered tray on your cart, slightly off-center for an asymmetrical look.
- Add your amber bottles to the bottom tier, labels facing forward and aligned at the same height.
- Layer a coaster stack and copper spoon on the lower right for balance.
- Place a mini lamp or clip-on light so it grazes across the bottle fronts.
- Style the top tier with a mug, cinnamon sticks in a small jar, and a wheat tuft in a bud vase.
Why This Looks Intentional: Unified bottles and matching metal accents trick the eye into seeing one curated set rather than random pieces. It’s the discipline that makes a small corner feel finished.
Don’t Do This: Mixing silvery chrome with warm copper and brass in the same tiny vignette. Pick one warm metal family so the glow reads consistent.
Pro Styling Tip: Angle the lamp so it creates a gentle highlight on the bottle shoulders—those curved reflections photograph like liquid gold.
Quick Tip: Keep a microfiber cloth in the cart drawer. Fingerprints on amber glass and metal show up fast under warm lighting; a 5-second swipe keeps the glow pristine.
5) White Pumpkin Trio With Honeyed Fairy Lights On A Sink-Side Corner Tray
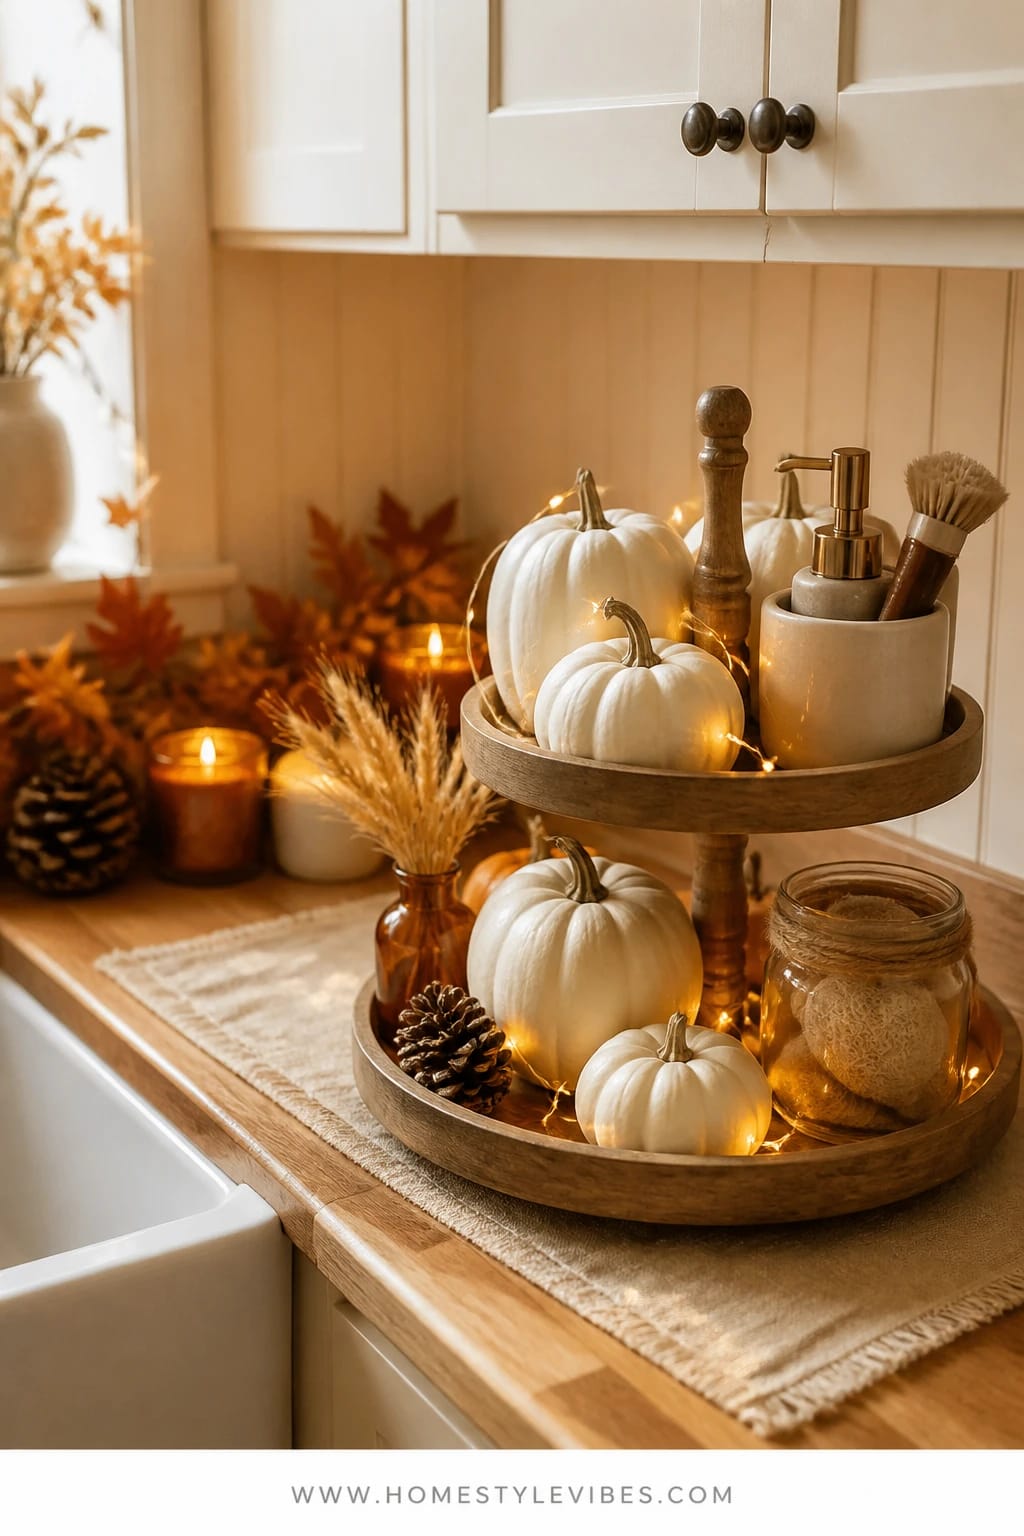
That sink-side corner is the Bermuda Triangle of fall decor—soap bottles, a random scrub brush, and a tiny gourd that always ends up soggy. You’ve tried placing a single pumpkin there and called it a day, but it never feels joyful. This tiered tray uses white pumpkins, honey-toned fairy lights, and practical containers to make the hard-working corner pretty and functional.
The mood: serene but cozy-bright. White pumpkins calm the eye, while honeyed twinkle adds gentle warmth. It works in a real kitchen because you’ll actually use what’s on the tray: a soap pump, brush jar, dishcloth neatly folded. The trick: elevate those utilitarian items to “styled object” status by grouping them and giving them a color story.
Light makes the difference. Battery fairy lights in a warm 2200–2700K hue thread through the lower tier and reflect off the soap pump. It’s subtle, but at dusk, the whole corner glows like a quiet candle. Bonus: no flame near towels. For anyone with pets or kids, this look nails that safe-but-charming balance.
Variations to try:
- Budget: Use a glass jar you already own for the brush holder, tie a rust ribbon around the neck, and call it done.
- Small sink: Pick a micro 2-tier tray (8–10 inches). One white pumpkin up top, soap and scrubber below, fairy lights tucked behind.
- Late November: Add a cinnamon-scented sachet to the top tier for invisible coziness.
Budget Breakdown:
- Small 2-tier tray (water-resistant finish): $18–$40
- Faux white pumpkins (3): $8–$18
- Warm fairy lights (battery, timer): $8–$16
- Refillable soap pump: $10–$20
- Brush jar or crock: $6–$16
- Rust ribbon or twine: $3–$8
Total Estimated Cost: $53–$118
Best For: Kitchens with limited counter space and busy family rhythms; perfect for mid-season when you crave calm during nightly cleanup.
Key Design Elements:
- Main seasonal props: white pumpkins, warm fairy lights
- Color palette: cream, honey gold, soft sage, light wood
- Lighting strategy: battery lights with a 6-hour timer
- Textile layers: folded dishcloth in soft sage or oatmeal
- Natural elements: a sprig of dried olive or eucalyptus
- Accent details: ceramic soap pump, glass jar with ribbon
Why This Looks Expensive: Controlled neutrals and clean lines. When your practical items match the palette, the whole corner reads custom, like a boutique sink vignette.
How To Recreate This Look:
- Start with a small, water-friendly tiered tray and place it just outside your splash zone.
- Add the soap pump and brush jar to the bottom tier; tuck fairy lights around their bases.
- Layer a folded dishcloth on the top tier for softness.
- Place a single white pumpkin on top and two on the lower tier to create a gentle triangle.
- Style with a small sprig of eucalyptus and a ribbon-tied jar for polish.
One Thing To Avoid: Cool-blue fairy lights. They clash with warm autumn tones and make everything feel sterile.
Pro Styling Tip: Hide the battery pack behind the tray post and pull one tiny light out to kiss the pumpkin stem—tiny highlight, big payoff in photos.
Micro-moment: It’s Tuesday, dinner dishes are stacked, and you’re scrubbing a pan. The fairy lights click on and suddenly it’s not a slog—it’s a tiny ritual. Warm, pretty, done.
6) Butterscotch Pears And Plaid With Brass Spoons On A Stove-Side Coffee Corner Tray
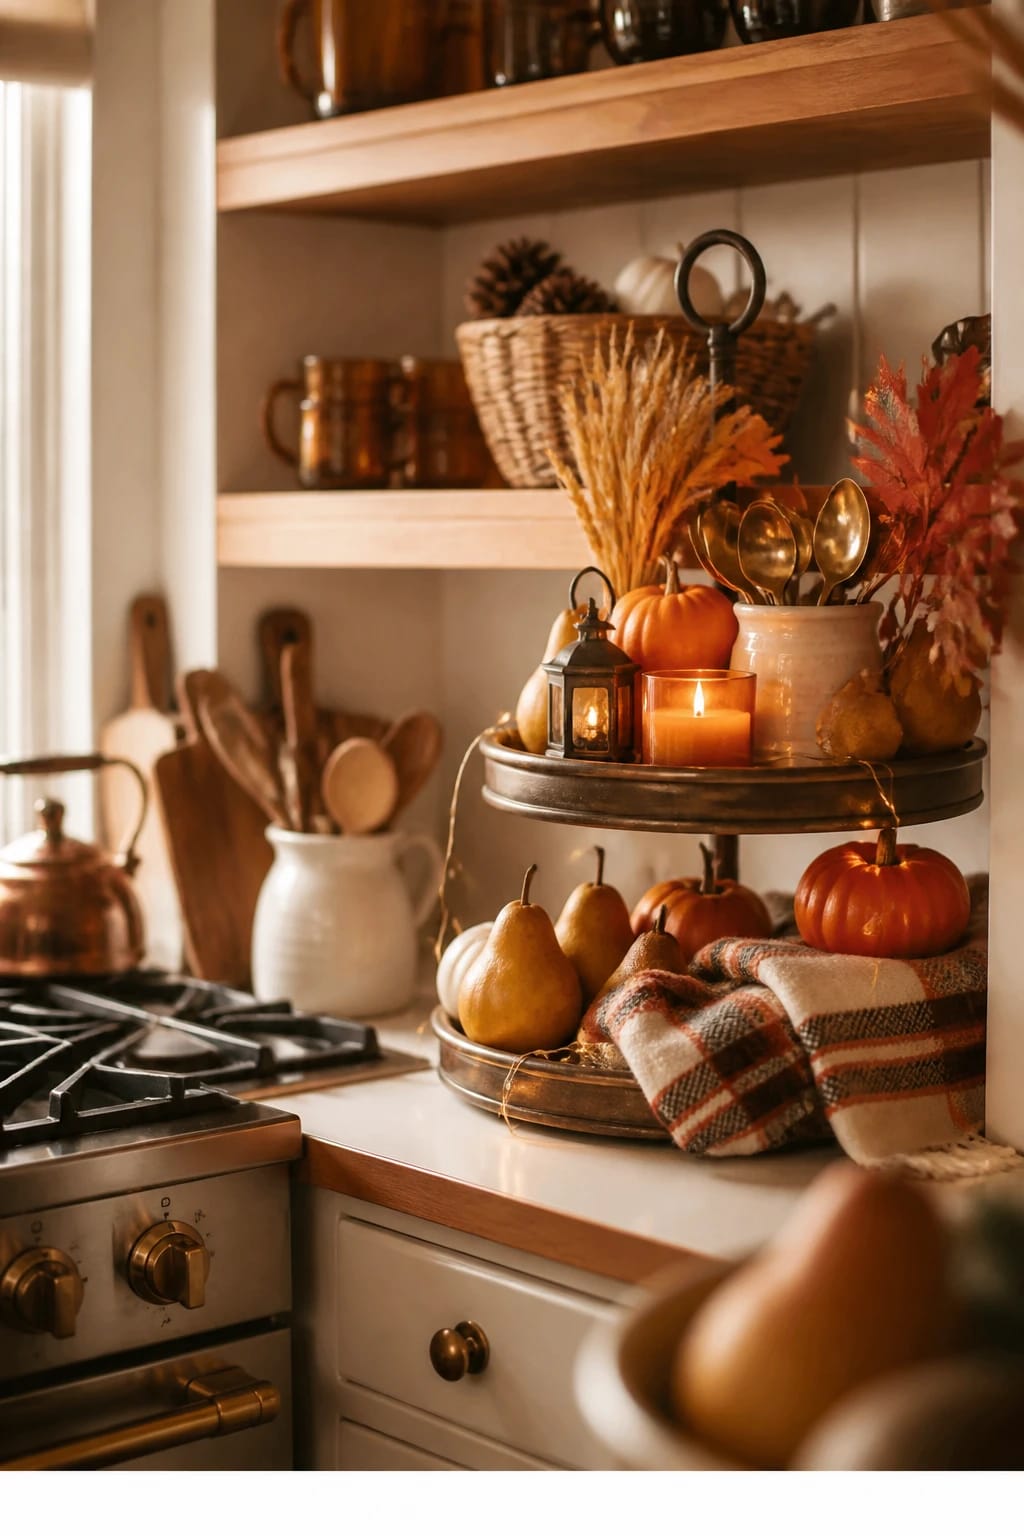
Stove-side styling can look chaotic fast—salt, pepper, oil, utensils, then your fall tray piles on and steals your elbow space. You’ve probably tried a tray there before and moved it after one dinner. This approach is compact and vertical: a 2-tier tray dedicated to a mini coffee corner, butterscotch pears, plaid, and brass spoons that lives to the side of the stove—close enough for morning convenience, out of the cooking zone.
The mood is cheerful and slightly nostalgic, like the first sweater you pull out in October. Butterscotch and pear green feel fresh if you’re pumpkin-ed out, and they still live firmly in cozy bright autumn. Real homes will love that this vignette stays narrow and uses only essentials: a couple of mugs, a jar of instant espresso or pods, a sugar tin, and a spoon rest if you’ve got the space.
Lighting here relies on bounce. If your range hood has a warm setting, click it on low during mornings. That soft top-down light makes brass sparkle and gives pears a delicious glow. For nighttime, a tiny battery tea light in a frosted holder keeps the mood gentle without a flame near the stove, obviously.
Variations to try:
- Budget: Use faux pears and thrift a plaid scarf to cut into napkins. One scarf, three napkins, endless autumn texture.
- Neutral lover: Keep pears pale and use a taupe plaid; add a natural wood spoon instead of brass.
- Hosting mode: Swap the sugar tin for a small jar of pumpkin pie spice and a mini whisk for at-home lattes.
Budget Breakdown:
- Narrow 2-tier tray: $20–$45
- Faux pears (set of 5–6): $10–$22
- Plaid napkin or scarf remnant: $6–$15
- Brass teaspoons (set): $8–$18
- Frosted tea light holder + battery tea light: $6–$12
- Small sugar tin or pod jar: $8–$16
Total Estimated Cost: $58–$128
Best For: Galley kitchens or anyone who wants a coffee shortcut near the stove without sacrificing cooking space; great for mid- to late-fall when routines are full and you need quick, happy rituals.
Key Design Elements:
- Main seasonal props: faux pears, plaid cloth, brass spoons
- Color palette: butterscotch, pear green, cream, warm brass
- Lighting strategy: warm range hood light or soft tea light
- Textile layers: plaid square draped from the top tier
- Natural elements: small sprig of dried thyme for a subtle herb note
- Accent details: sugar tin, spoon rest, frosted glass holder
How To Recreate This Look:
- Start with a narrow tray placed at least 8–10 inches from the stove edge.
- Add a folded plaid square on the top tier, letting a corner drape for softness.
- Layer pears on both tiers, clustered in odd numbers for a natural look.
- Place two mugs and a sugar tin on the bottom tier; tuck brass spoons into one mug.
- Style with a frosted tea light holder tucked behind the pears for honeyed evening glow.
Why This Feels Designer: The unexpected fruit choice feels fresh, and the brass spoons act like tiny jewelry against plaid—simple, stylish, and very intentional.
Watch Out: Keep it tight. If you add oils, spices, utensils, and coffee gear to this one tray, it turns into a catch-all. Reserve it for the coffee ritual only.
Pro Styling Tip: Turn one pear so you see the stem and a little dimple—those organic details read beautifully on camera and keep faux fruit from feeling flat.
Perspective shift: You don’t need six trays or a perfect kitchen to love fall decorating. Pick one corner you see a dozen times a day and make it sing—your whole space will feel more intentional.
Quick Checklist
- Choose one strong color story (rust/amber, apple red, butterscotch) and repeat it
- Anchor each tray with a single tall element for height
- Use 1–2 light sources per tray (warm only)
- Corral practical items in mini crates, jars, or tins
- Add one textile layer (plaid napkin, tea towel, felt coaster)
- Repeat one metal finish (brass or copper)
- Limit props per tier: 3–5 on bottom, 2–3 on top
- Tuck in a natural touch (dried orange, wheat, rosemary)
- Hide battery packs and cords behind posts or jars
- Check how it photographs—adjust angles, spacing, and glow
Frequently Asked Questions
How can I do fall tiered tray decor on a tight budget?
Pick one theme and shop your home first—mugs, jars, spoons, and a scarf-turned-napkin go a long way. Spend on one or two seasonal anchors (a multipack of mini pumpkins or faux pears) and one light source. Thrift stores are gold for amber glass and tiny crates.
Real or faux pumpkins and florals—what works best on a kitchen tray?
For busy kitchens, faux wins for longevity and consistency. Real mini pumpkins look amazing for the first two weeks but can spot and soften, especially near heat vents. If you love real, place them on the top tier away from heat and rotate weekly.
My kitchen is small. Will a tiered tray make it feel cluttered?
Go narrow and vertical—8–12 inches wide—and limit your palette to 2–3 colors. Keep only what you use daily on the tray and stash the rest in a drawer. A micro tray by the coffee machine looks intentional and saves counter space.
How do I store fall tray decor when the season ends?
Use a shallow bin to hold all fall-specific items: mini pumpkins, garland, labels, ribbons, and faux fruit. Wrap delicate pieces in dish towels. Label the bin “Fall Tray Kit” so next year’s setup takes minutes.
Are candles on a kitchen tray safe with kids and pets around?
Use flameless candles and battery tea lights—look for warm 2200–2700K color tones. They give you the glow without the worry, especially near textiles and busy hands.
When should I start decorating my coffee bar for fall?
Late August to early September for a subtle start—think whites, soft greens, and wheat. Add deeper rusts, burgundies, and cinnamon elements by mid-October and carry through Thanksgiving with gratitude-forward accents.
Your Cozy-Bright Finish
Start small and start where you live your life. One tiered tray on the island or by the coffee machine can shift your entire kitchen’s mood. When you layer warm amber light, harvest textures, and a few well-chosen props, that everyday corner stops feeling random and starts feeling like fall found a home.
The secret isn’t buying more—it’s editing to a color story, repeating textures, and inviting in gentle glow. Cozy bright autumn is all about warmth, abundance, and a little wink of cheer. Once you style your first fall tiered tray decor idea, you’ll see how quickly the whole room softens and how much joy those tiny details bring to ordinary mornings.
Pick one concept from above, give yourself 30 minutes, and trust your eye. You’ve got this—and your coffee’s about to taste even better surrounded by all that golden, happy fall goodness.

About the Author

Krisztina P.Rendes, Founder of Home Style Vibes
Founder of Home Style Vibes
Krisztina Puskásné Rendes created Home Style Vibes as a cozy-modern lifestyle space where homemaking meets inspiration. Her goal is to help women create beautiful, organized, and peaceful homes they truly love — without overwhelm. You’ll find here heart-driven content on home decor, cleaning tips, easy family recipes, organization and decluttering, DIY home projects, plants, and seasonal ideas — all designed to bring more calm, comfort, and style into everyday life.