5 Creative Pumpkin Painting And Design Ideas Beyond The Basic Jack-O-Lantern
You want that rich, cozy-bright autumn feeling at home — the golden candle glow on your dining table, the plaid throw casually tossed on the sofa, a bowl of cinnamon apples on the counter. You hate that every pumpkin idea you find looks either too kiddish or like it belongs in a craft store. Consider this your fix: five creative, photogenic pumpkin painting and design ideas that go far beyond the basic jack-o’-lantern — all designed for real rooms, realistic budgets, and a weekend’s worth of time. We’ll use saturated rusts, burnished brass, layered textures, and candlelight that warms the whole room to make everything feel finished, for under $150 per vignette, often far less.
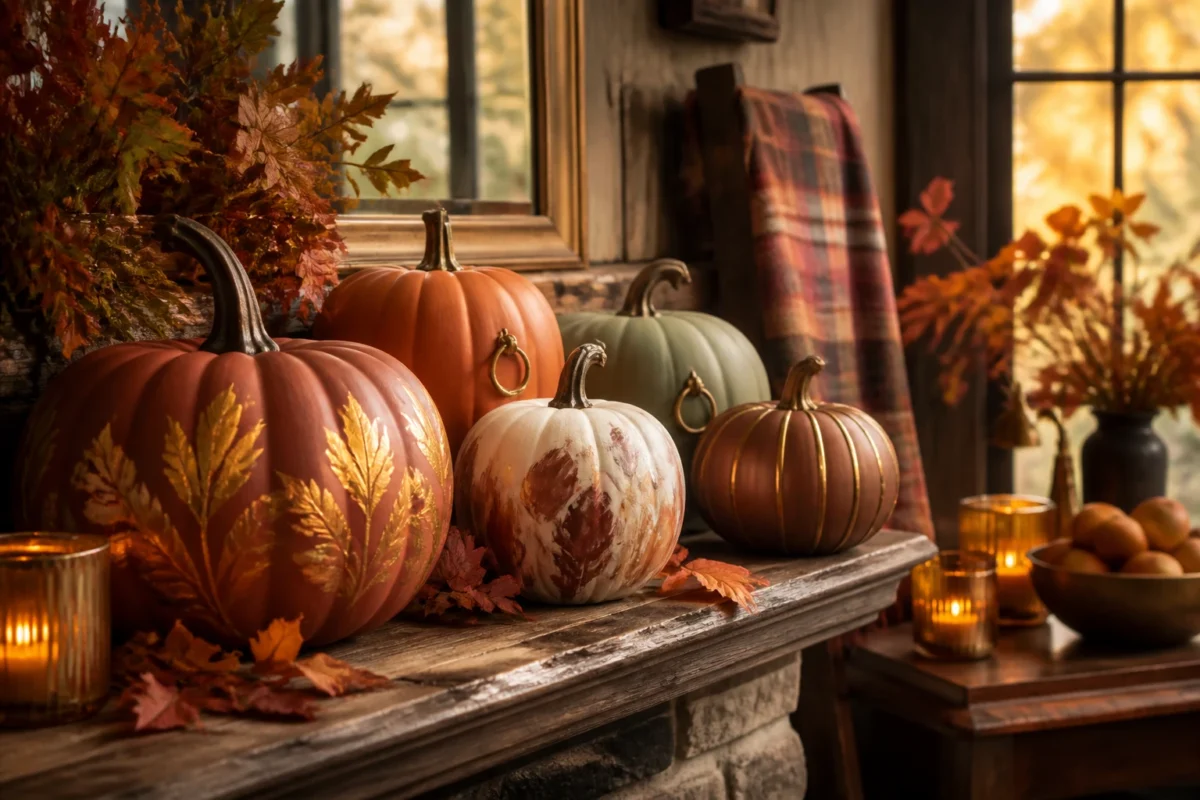
These ideas will help you build a cozy-bright autumn look that actually works in living rooms, dining nooks, mantels, entry tables, kitchen islands, and bookshelves. Expect saturated color, warm glow, and approachable styling that looks great in person and even better in photos. If you host book club or family chili night, you’ll love how these painted pumpkins pull the whole scene together from early September through Thanksgiving. Ready to make your fall decor sing?
1) Gilded Leaf Pumpkins With Amber Candle Glow on the Mantel
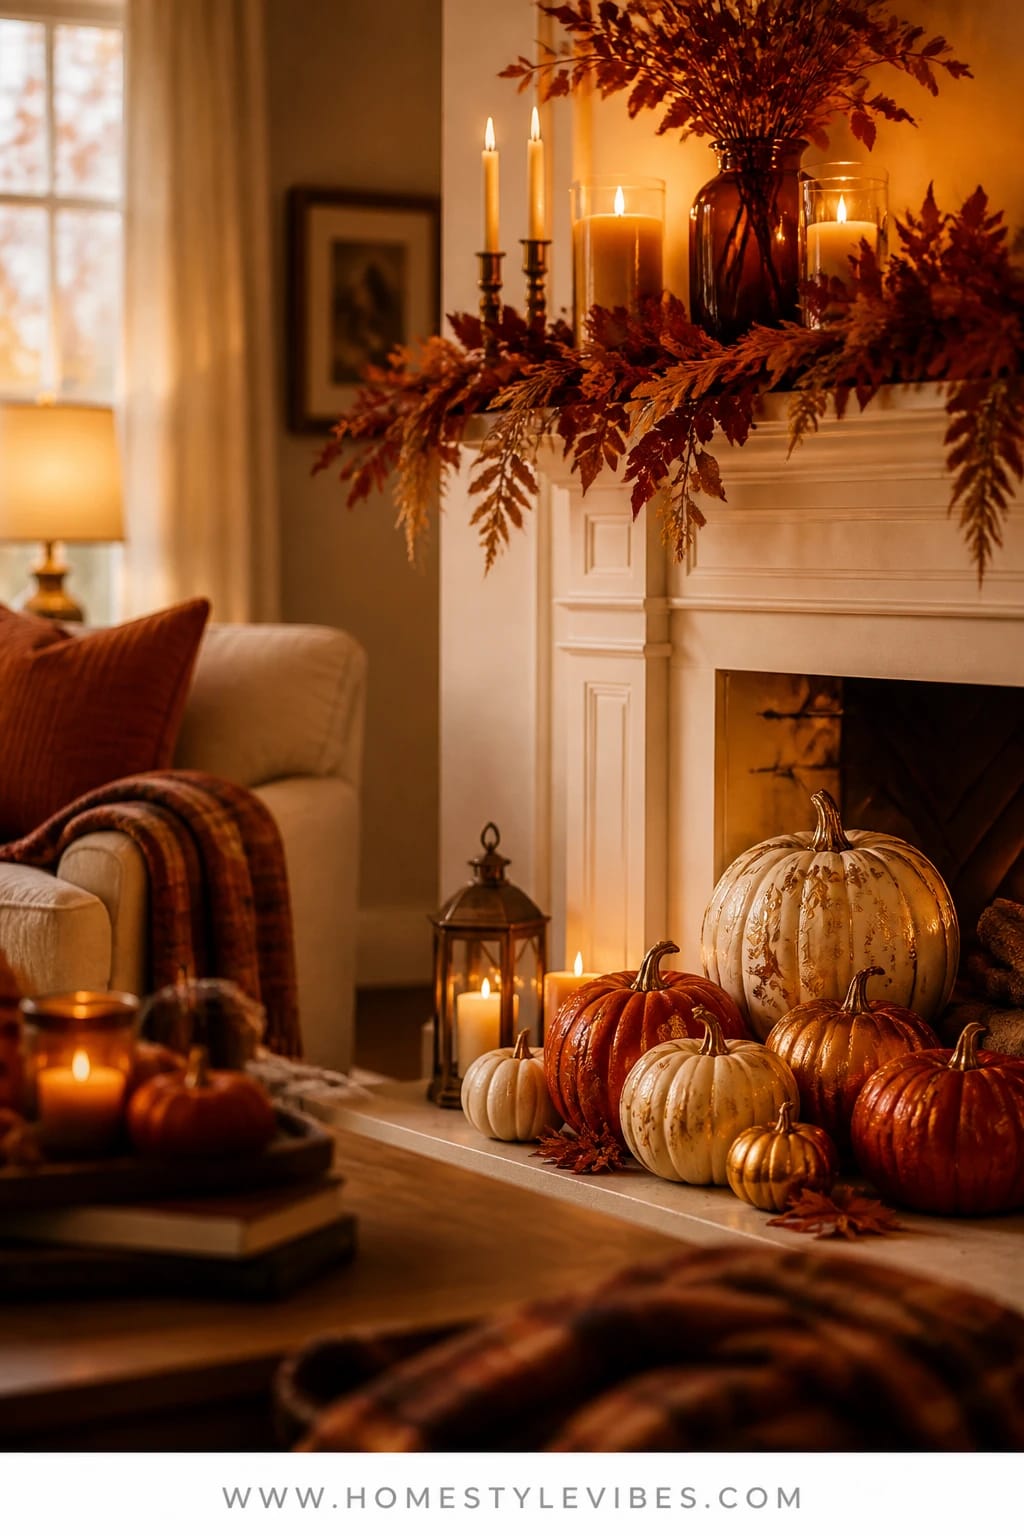
We’ve all been there: the mantel looks “fine” but not special. You’ve tried lining it with identical pumpkins, but it still reads flat and a little awkward — like it’s missing the sparkle that makes the room feel complete. This idea solves that with gleam and warmth: cream or rust-painted pumpkins brushed with metallic leaf (gold or warm brass), set against amber candle glow and a few softly draping autumn branches.
The mood is classic cozy-bright autumn — think golden hour light even after sunset. It works in real homes because it’s easy to scale: a small mantel can handle three pumpkins and two candles; a larger fireplace can take a loose collection. Clustered candlelight and the reflective leaf wrap the wall in a friendly, flattering glow, and the pumpkins photograph beautifully thanks to the contrast between matte paint and broken metallic shine. It’s also surprisingly kid-friendly if you use battery tapers in brass holders, and you can store the painted pumpkins for next year wrapped in tissue.
Styling variations? Go budget with craft-store foam pumpkins painted in chalky cream, then apply rub-on metallic leaf flakes. If you prefer a more subtle look, switch to matte champagne leaf for a soft glimmer. Small-space version: do a mini row on a bookshelf instead of the mantel, keeping the same candle color story for cohesion. Pro tip: layering in one short stack of vintage books warms up the palette and creates a handy height difference without adding visual weight.
Budget Breakdown:
- Faux pumpkins (3–5 sizes): $18–$45
- Acrylic paints in cream, rust, and warm brown: $8–$15
- Metallic leaf kit (gold/brass), adhesive, sealer: $12–$25
- Brass taper holders (set of 3): $22–$40
- Amber or beeswax tapers (or warm LED): $10–$18
- Foraged or faux autumn branches: $0–$20
Total Estimated Cost: $70 – $160
Best For: Mantels in living rooms that need a warm focal point from September through Thanksgiving; traditional and transitional homes where a touch of gleam adds polish without feeling precious.
Key Design Elements:
- Main seasonal props: painted pumpkins with metallic leaf, beeswax or amber-hued tapers
- Color palette: cream, rust, warm brown, polished brass
- Lighting strategy: grouped candles to create a soft, even amber glow across the mantel
- Textile layers: plaid throw on nearby chair, wool pillow in rust or burgundy
- Natural elements: foraged maple or oak branches in a ceramic vase
- Accent details: vintage books, brass picture frame with a harvest-themed print
How To Recreate This Look:
- Start with a base of 3–5 pumpkins in varying sizes; paint them cream and rust, leaving a few bare if the faux finish looks realistic.
- Add metallic leaf to the top quarter or along vertical “veins” for a broken, organic shimmer.
- Layer brass taper holders at different heights; light beeswax or LED tapers for warm, steady glow.
- Place a tall vase with branches on one side to create an anchor, and a small stack of books on the other.
- Style with one small framed print and a scatter of acorns to bridge the heights between pieces.
Why This Looks Expensive: It’s the restrained gleam. By limiting metallic leaf to partial areas, you get luxury without glare. The palette feels curated, the candles add depth, and the layered heights mimic pro styling.
Watch Out: Don’t coat the entire pumpkin in leaf. It can read brassy and one-note, especially in evening light. Keep 50–70% matte for balance.
Pro Styling Tip: Angle one taper slightly behind a pumpkin to backlight the metallic leaf — the camera reads it as a soft halo that looks straight out of a magazine.
2) Harvest Herb Stencil Pumpkins in Warm Whites on the Kitchen Island
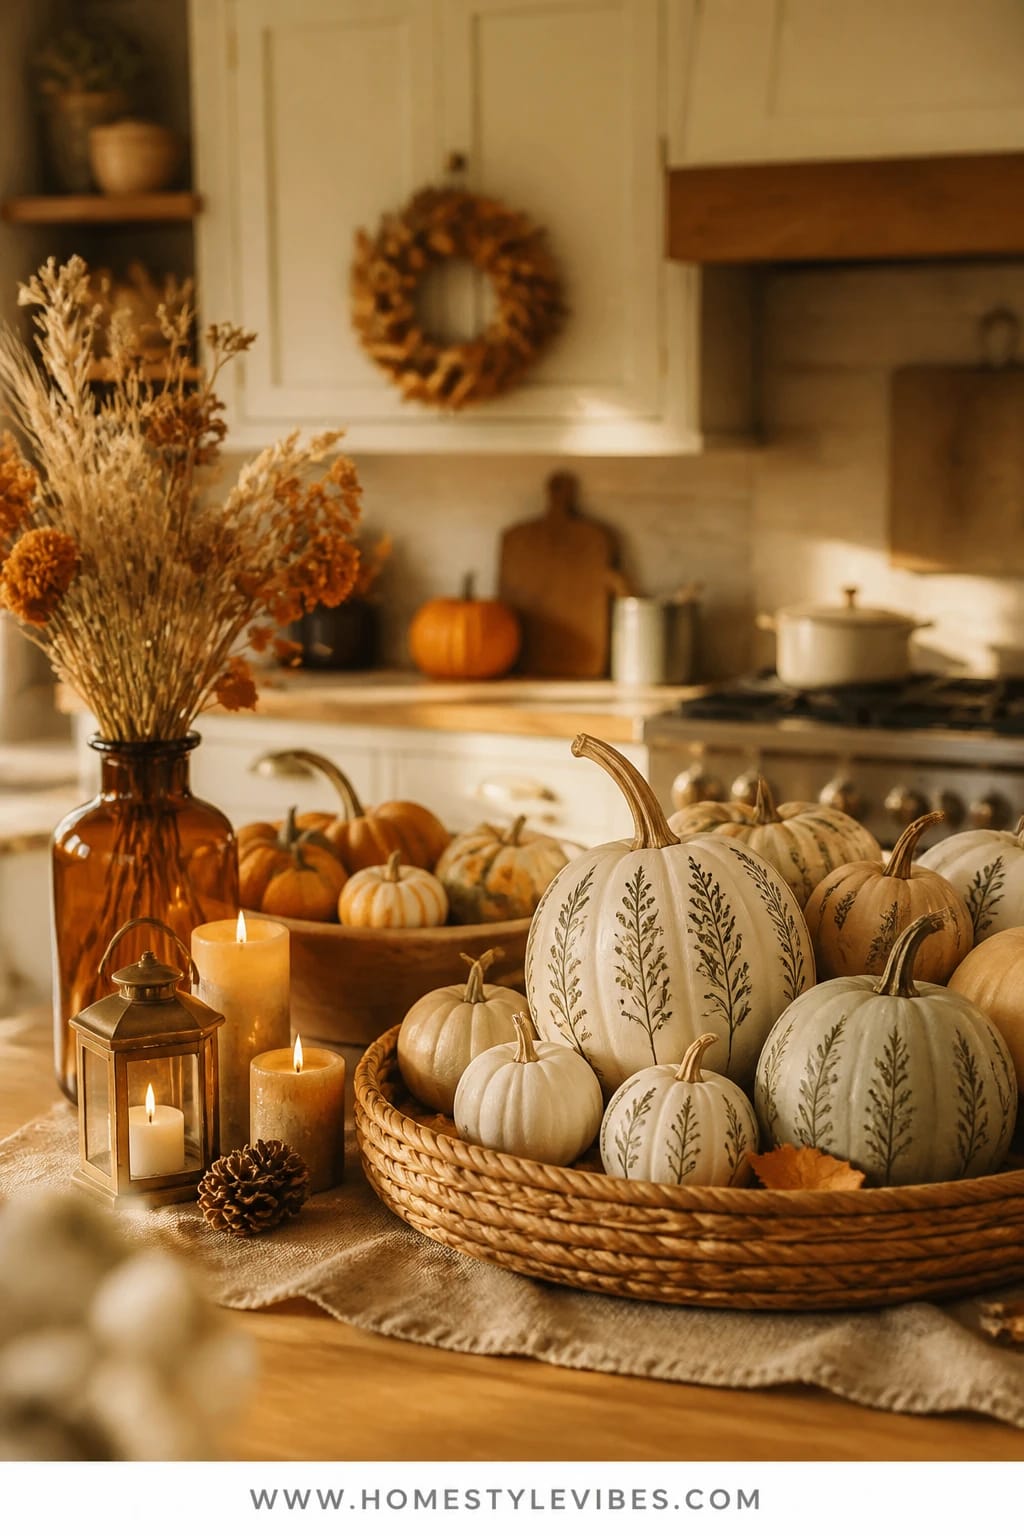
It’s that one kitchen island that always feels utilitarian — great for chopping apples, not so great for feeling seasonal. You’ve tried a big bowl of pumpkins and it still looks like a produce stand. A more considered approach: paint real or faux pumpkins in layered warm whites (oatmeal, cream, pale wheat) and stencil them with herb silhouettes (sage, rosemary, thyme) in soft charcoal or olive. Add a low, wide basket and a linen runner underneath to make the whole thing feel intentional.
The mood? Fresh and cozy at once — the heart of the home, but with a harvest vibe. This works because the colors are calm and kitchen-friendly, the stencils add detail without clutter, and the low arrangement doesn’t block conversation or cooking lines. Natural morning light glances off the creamy surfaces, and in the evening, under-cabinet lighting throws subtle shadows that make the stencil shapes pop. It photographs beautifully: creamy tones let your camera find definition in the herb outlines, and the woven basket adds texture that reads high quality.
For a small-space version, use two medium pumpkins and a mini tuck of fresh herb sprigs in a bud vase. Budget-friendly? Use free printable herb outlines; transfer with graphite paper, then fill with paint pen. Make-ahead: paint and stencil on a Sunday; let them cure, and you’re done for the season. I tried this on my own island last October and couldn’t believe how much calmer the kitchen felt — like I’d cleaned the whole room, even though I definitely had not.
Key Design Elements:
- Main seasonal props: warm white painted pumpkins, herb silhouette stencils
- Color palette: cream, oatmeal, pale wheat, olive, soft charcoal
- Lighting strategy: low arrangement under warm kitchen pendants; rely on soft task lighting to cast gentle shadows
- Textile layers: natural linen runner, small plaid tea towel tucked in the basket
- Natural elements: fresh sage, rosemary, or thyme sprigs in a small vase
- Accent details: low, wide seagrass or rattan basket; ceramic salt cellar to echo the color
Budget Breakdown:
- 3–5 real or faux pumpkins: $9–$35
- Acrylic paints in cream/oatmeal: $8–$15
- Stencil sheets or printouts + transfer paper: $0–$12
- Paint pens (olive, charcoal): $6–$10
- Linen runner: $15–$30
- Seagrass basket (low, wide): $15–$30
Total Estimated Cost: $53 – $132
Best For: Busy kitchens that need seasonal style without clutter; open-concept homes where a subtle centerpiece keeps visual flow smooth from September through Thanksgiving.
How To Recreate This Look:
- Start with a low, wide basket and a natural linen runner on your island.
- Add 3–5 pumpkins in warm whites; mix sizes, keeping them under 8 inches tall for sightline clarity.
- Layer herb stencils: tape the outline, transfer, then fill with olive or charcoal paint pen.
- Place a mini vase with fresh herbs off-center to break symmetry.
- Style with a plaid tea towel partially tucked into the basket for an easy, casual note.
Why This Feels Designer: The consistent neutral palette with a single graphic motif (herbs) reads intentionally cohesive, and the low silhouette respects kitchen functionality — a detail pros never skip.
One Thing To Avoid: Don’t crowd the basket. Leave negative space between pumpkins so the stencils can breathe. Overfilling flattens the look and makes cleanup feel daunting.
Pro Styling Tip: Wipe a tiny bit of brown glaze along a few pumpkin ribs and blend it out; the subtle aging effect gives depth that photographs like real heirloom gourds.
If your kitchen is handled, you’ll love how the next idea adds layered color and friendly drama to the dining table — no carving, just texture and glow.
3) Plaid-Banded Color-Dipped Pumpkins with Golden Candlelight on the Dining Table
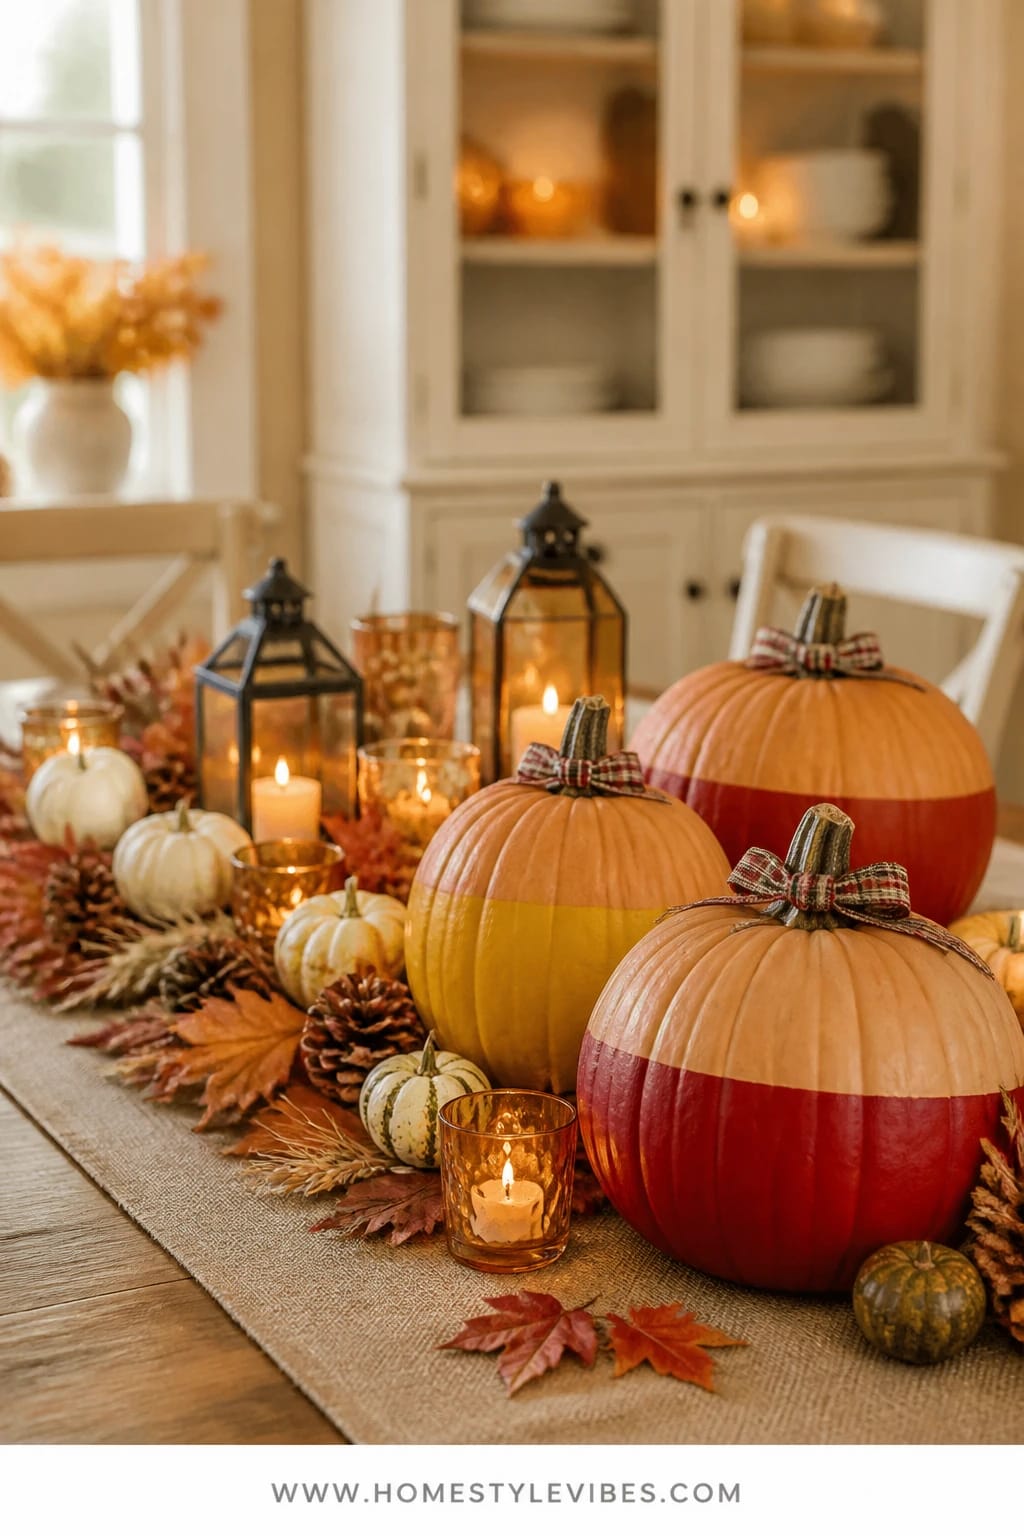
You want a dining table that feels festive for Tuesday pasta and Saturday chili night, but you don’t want to commit to an elaborate centerpiece that hogs the surface or sheds leaves into the marinara. Color-dipped pumpkins are the shortcut — half-painted in saturated autumn hues (rust, cranberry, mustard) with a crisp line where the natural pumpkin meets paint. Add a slim plaid ribbon “band” and thread in golden candlelight for warmth.
This creates that cozy-bright autumn energy: saturated color, easy warmth, and casual polish. It works because the pumpkins sit low, the ribbon adds texture and pattern in minutes, and the colors look rich even under basic dining pendants. Candle clusters cast soft shadows across the paint line, which gives your table depth instead of a single flat layer. For family dinners, swap real tapers for enclosed amber glass votives — still glowy, not a tipping hazard.
Small table? Three medium pumpkins down a runner, spaced to leave room for plates and elbows. Budget? Use craft paint and plain cotton ribbon; cut ribbon tails short so they don’t dip into any sauce. Subtle version: dip in warm taupe and band with a thin leather cord for a modern rustic vibe. I used this setup for a last-minute pot roast night and my sister asked if I hired a stylist. I hadn’t — I barely remembered the gravy.
Budget Breakdown:
- Real or faux pumpkins (3–7): $12–$50
- Acrylic craft paints in rust, cranberry, mustard: $9–$18
- Plaid ribbon spools: $8–$20
- Amber glass votives or small brass holders: $12–$28
- Simple natural runner: $12–$25
Total Estimated Cost: $53 – $141
Best For: Everyday dining tables or breakfast nooks where a low, colorful centerpiece adds warmth without blocking conversation; great from late September into mid-November.
Key Design Elements:
- Main seasonal props: color-dipped pumpkins, plaid ribbon bands
- Color palette: rust, cranberry, mustard, natural pumpkin orange
- Lighting strategy: warm pendants overhead, with dotting of amber votives for a soft, intimate glow
- Textile layers: neutral runner, plaid napkins on weeknights for instant “set” feeling
- Natural elements: a small bowl of apples or pears for texture and a just-picked vibe
- Accent details: slim brass salt and pepper mills, small wood board as a riser for one pumpkin
How To Recreate This Look:
- Start by masking a straight line around each pumpkin with painter’s tape; paint the bottom half in your chosen autumn hue.
- Add a plaid ribbon band around the “waist,” securing with discreet dots of hot glue at the back.
- Layer the pumpkins down a natural runner with enough negative space to set serving dishes.
- Place amber votives in a staggered rhythm — think 2-1-2 — to create visual flow.
- Style with a small produce bowl or two and one low branch clipping for movement.
Why This Reads High-End: The color blocking and ribbon detail look tailored. Your palette looks chosen, not random, and the brass or amber accents echo the warm tones — a designer trick for cohesion.
Don’t Do This: Avoid mixing too many ribbon patterns. Choose one plaid and stick with it; competing stripes feel chaotic at eye level.
Pro Styling Tip: Photograph from chair height so the painted line and ribbon band align across the composition — it creates a crisp horizon that looks editorial.
Halfway through and already picturing where each idea fits? Good. The next one is for that “nothing spot” near your entry that needs to say hello in a warm, seasonal voice.
4) Botanical Silhouette Pumpkins with Soft Rust Accents on the Entry Console
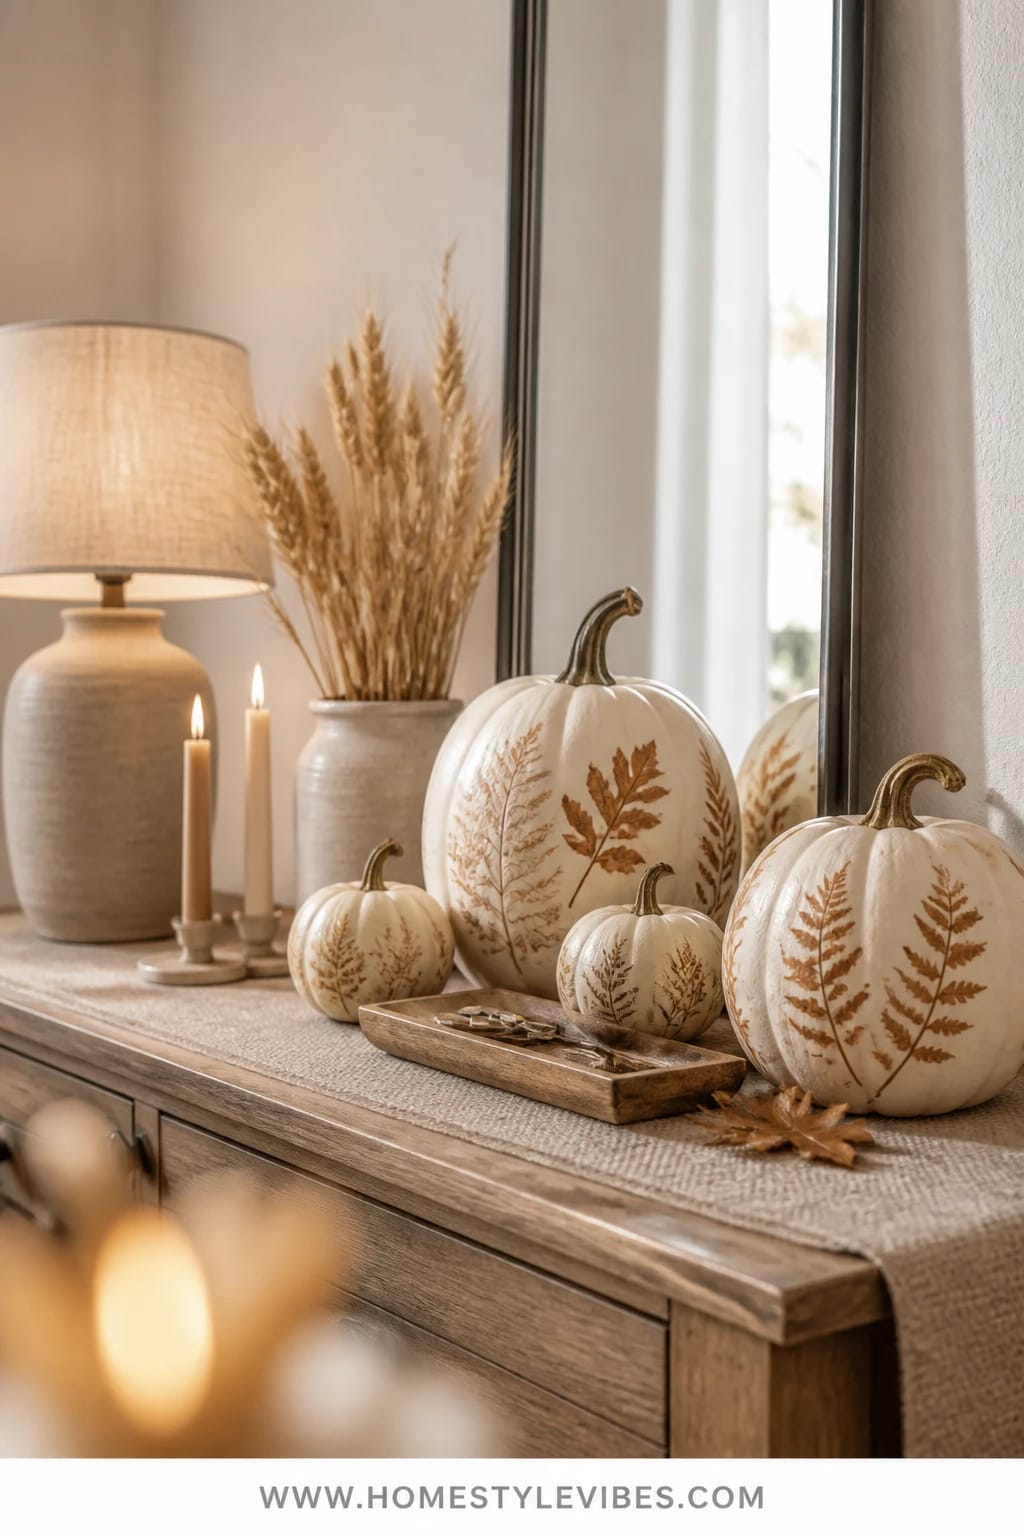
It’s that one corner that always feels off — the entry console where keys land, mail piles up, and nothing you place there looks intentional. You’ve tried a bowl and a pumpkin, but it still looks like a half-finished thought. Time to give this zone structure and charm: paint pumpkins in gentle neutrals, then hand-draw or stencil botanical silhouettes (ferns, oak leaves, seed pods) in soft rust or sepia. Add a shallow tray for keys, a ceramic lamp with a warm linen shade, and a slender mirror to bounce light.
The vibe is thought-out but friendly, with a nod to harvest abundance without clutter. In daylight, the mirror amplifies soft neutrals; at night, the lamp pools warm light over the pumpkins, creating a glow that pulls you right in. This set-up is practical — the tray corrals daily life, and the shallow pumpkin arrangement leaves space for mail sorting. It photographs like a dream because of the layered heights: lamp, mirror, pumpkins, plus a leafy clip in a bud vase for movement.
Two variations: keep it deeply simple with line-drawn silhouettes in a single rust paint pen, or go painterly with ombré leaves. Small-space tweak: use one medium pumpkin and one mini on a stack of books to lift the scene. FYI, botanical lines are forgiving — even wobbly lines look charming, which is good news if you’re drawing after your second cup of cider.
Why This Looks Intentional: The repeated botanical theme ties loose objects (keys, mail, pen cup) into one visual story. The mirror and lamp create a light triangle that designers rely on to make small vignettes read complete.
Budget Breakdown:
- 2–3 pumpkins (real or faux): $6–$20
- Paint pens in rust/sepia: $6–$10
- Shallow tray: $12–$25
- Small ceramic lamp with linen shade: $35–$80
- Slender mirror (if needed): $30–$90
- Bud vase and one branch: $5–$12
Total Estimated Cost: $64 – $237
Best For: Entry consoles and hallway landings that need both function and warmth; households that want a welcoming first impression all season.
Key Design Elements:
- Main seasonal props: line-drawn botanical silhouette pumpkins
- Color palette: cream, soft rust, sepia, warm linen
- Lighting strategy: one small lamp for evening glow; mirror to amplify daylight
- Textile layers: small plaid scarf under the tray, if you like a touch of pattern
- Natural elements: a single branch with turning leaves, small oak leaf clipping
- Accent details: shallow tray, pen cup, slim mirror frame in warm wood or brass
How To Recreate This Look:
- Start by clearing your console — leave only the lamp and mirror.
- Add a shallow tray off-center for keys and mail; layer a thin textile underneath if desired.
- Place 1–3 pumpkins and draw or stencil botanical silhouettes with a rust or sepia pen.
- Layer a tiny bud vase with one leafy clipping to add direction and movement.
- Style with a small stack of mail, pen cup, and one framed snapshot to keep it personal.
The Most Common Mistake: Overfilling the console. Leave at least six inches of clear space near the tray so daily life has room to land — otherwise, you’ll resent your own decor.
Pro Styling Tip: Turn the lamp to sit slightly forward of the pumpkins; the forward light skims across the silhouettes and casts soft shadows that read beautifully in photos.
Pause and breathe. Remember, this isn’t about recreating a showroom. It’s about making your rooms feel like the fall you love — warm light, good textures, and small details that make everyday moments sweeter. If one idea resonates more than the others, that’s your starting point. You don’t need all five.
5) Chalk-Painted Storybook Pumpkins with Brass Bookends on the Bookshelf
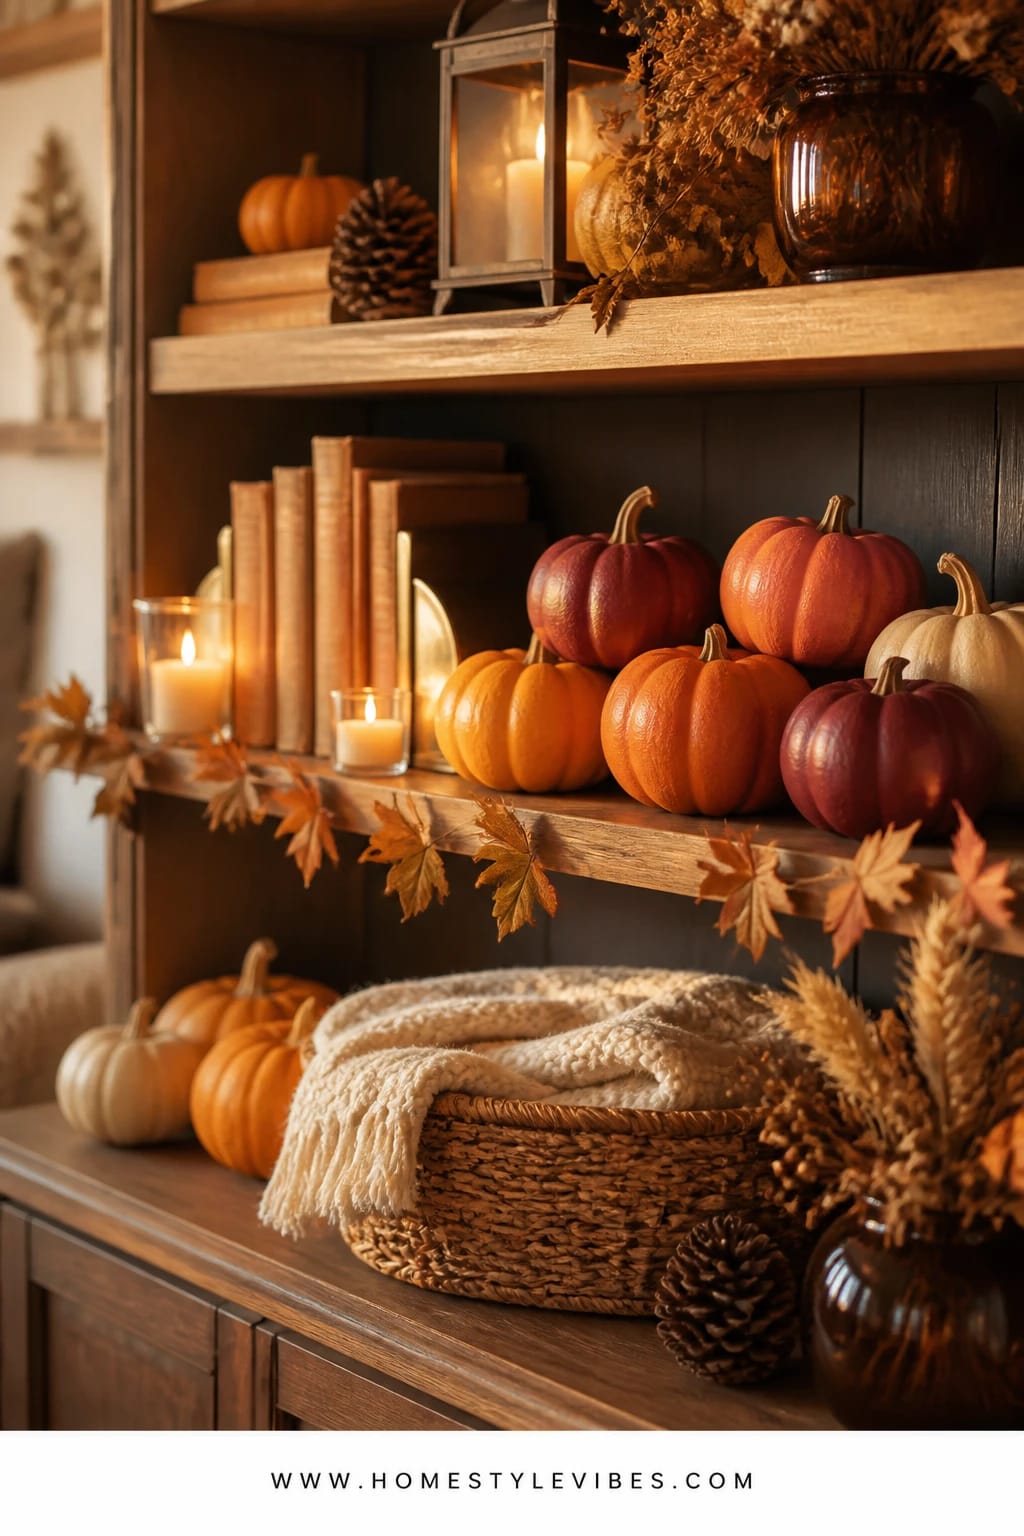
You love the idea of styling bookshelves for fall, but every attempt either turns into a cluttered tchotchke parade or disappears into the background. And yes, that “stack of tiny pumpkins” look can get cutesy fast. Here’s the crisp fix: chalk-paint a cluster of small-to-medium pumpkins in muted autumn tones (soft terracotta, dusty cranberry, warm clay), then hand-letter short storybook words or phrases — “gather,” “apple crisp,” “bonfire,” “first frost.” Anchor the section with brass bookends and a couple of well-worn novels. It’s literary, cozy, and grown-up without losing the fun.
This creates a snug, library-meets-harvest mood — perfect for early nights in. It works because chalk paint dries to a velvety matte that cuts glare under task lighting and lamp pools. The brass bookends add a little gleam to keep the shelf from feeling flat, and your warm color choices keep the camera happy. The setup is flexible, too: slide a pumpkin phrase to the front edge for a visual wink, or tuck it deeper to keep it quiet. It’s all reusable next year, and the chalk surface lets you change the phrases if your mood shifts — trust me, “mulled cider” hits different on a rainy Sunday.
Variations: go monochrome in shades of clay for a restrained look, or assign each shelf one color family (cranberry on top, clay in the middle, wheat on bottom). Small-space take: dedicate just one cubby — pumpkin, brass bookend, tiny candle, done. A friend of mine bought three different garlands before realizing her real problem was lighting; she swapped in warm bulbs, added two chalk-painted pumpkins with brass ends, and the whole shelf suddenly looked intentional.
Budget Breakdown:
- Small pumpkins (5–7): $10–$30
- Chalk paint in clay/cranberry/terracotta tones: $12–$24
- White or cream paint pen for lettering: $4–$8
- Brass bookends (vintage or new): $20–$60
- Votive or tiny lamp optional: $10–$25
Total Estimated Cost: $56 – $147
Best For: Living room bookshelves, reading nooks, or office shelves where a low-profile, story-forward look adds warmth from September to Thanksgiving without visual bulk.
Key Design Elements:
- Main seasonal props: chalk-painted pumpkins, hand-lettered words
- Color palette: soft terracotta, dusty cranberry, warm clay, cream lettering
- Lighting strategy: task lamp or bookshelf puck lights in warm white for even glow
- Textile layers: a folded plaid throw on a nearby chair to echo color
- Natural elements: a sprig of dried wheat tucked behind a bookend
- Accent details: brass bookends, a ceramic cup with wooden matches
How To Recreate This Look:
- Start by clearing one or two shelves; wipe them down for a clean slate.
- Add 5–7 chalk-painted pumpkins in your chosen palette; stagger sizes and colors.
- Layer brass bookends to bracket a short stack of novels with warm-toned spines.
- Place a tiny candle or mini lamp on an adjacent shelf to create glow across the display.
- Style with hand-lettered phrases angled slightly toward the room so they catch the eye.
Why This Looks Expensive: Matte surfaces plus a single metallic accent is a tried-and-true designer combo. The words add custom charm, and the tight palette reads curated instead of crafty.
Watch Out: Don’t over-letter. Two or three words per shelf is plenty; your goal is a quiet nod, not a chalkboard wall.
Pro Styling Tip: For photos, pull one pumpkin to the front edge and shoot slightly off-center. The brass catches the light and the depth feels layered, not flat.
Permission slip: you don’t need to perfect every room. Pick one surface you walk by a dozen times a day — the mantel, the island, that entry console — and let it hold your cozy-bright autumn story. That daily hit of warmth matters more than a house full of half-finished ideas.
Quick Checklist
- Faux or real pumpkins in varied sizes
- Cream, rust, cranberry, mustard, and warm taupe acrylic or chalk paints
- Metallic leaf kit in gold or brass with adhesive and sealer
- Paint pens in rust, sepia, olive, and cream
- Stencils or printouts for herbs and botanicals
- Brass taper holders and amber or beeswax candles
- Amber glass votives for dining tables
- Linen or natural runners for islands and tables
- Seagrass or rattan low basket
- Small ceramic lamp with linen shade for entry or shelf
- Plaid ribbon and plaid textiles (napkins, throw)
- Vintage books and brass bookends
- Foraged branches, dried wheat, or herb sprigs
- Long-reach lighter and extra tea lights
- Warm white bulbs (2700K–3000K)
Frequently Asked Questions
Can I mix real and faux pumpkins in these displays?
Absolutely. I do it all the time. Use faux as your base (they’re lighter and reusable), then tuck in a few real minis for organic texture. Just keep real pumpkins away from heat vents to avoid that sad, half-deflated look by week three.
How do I keep costs down if I’m on a tight budget?
Choose one surface and one concept. For example, the herb-stencil pumpkins on the kitchen island can be done for under $40 using two real pumpkins, a paint pen, and a tea towel you already own. Small, focused vignettes look more intentional than spreading thin across the whole house.
Are candles safe around kids and pets?
Use warm LED tapers and amber votives where little hands and wagging tails roam. They deliver the same cozy glow without worry. If you love real candles, save them for the dining table while you’re seated and supervise them closely.
When should I start decorating with painted pumpkins?
Start in mid-September with the neutral or herb-stencil looks. Add richer colors and metallic leaf in early October, then layer extra candlelight and deeper tones through Thanksgiving. This staggered approach keeps things fresh and seasonal.
What about storage after the season for painted pumpkins?
Let everything dry fully, then wrap faux pumpkins in tissue paper and stack them in a plastic bin. Keep metallic-leafed pieces separated with parchment to protect the finish. Real pumpkins should be composted or disposed of — don’t store them.
Your Cozy-Bright Finish
Pick one idea and start tonight. A single gilded-leaf pumpkin by amber candlelight can make the whole room feel warmer, richer, and more welcoming. The truth is, the magic isn’t in doing everything; it’s in choosing one small scene and layering it with color, texture, and glow until it feels like your version of fall.
Cozy-bright autumn is all about saturated warmth, easy abundance, and light you can practically feel on your skin. Paint a pumpkin, strike a match (or tap a switch), and let the room get that soft, lived-in radiance that makes dinner taste better and weeknights feel special. You’ve got this — and your home is about to look so good it’ll stop you mid-scroll in your own camera roll.
About the Author

Krisztina P.Rendes, Founder of Home Style Vibes
Founder of Home Style Vibes
Krisztina Puskásné Rendes created Home Style Vibes as a cozy-modern lifestyle space where homemaking meets inspiration. Her goal is to help women create beautiful, organized, and peaceful homes they truly love — without overwhelm. You’ll find here heart-driven content on home decor, cleaning tips, easy family recipes, organization and decluttering, DIY home projects, plants, and seasonal ideas — all designed to bring more calm, comfort, and style into everyday life.