
6 Nightmare Before Christmas Inspired Halloween Decor Ideas
You want that eerie, whimsical Halloween magic from The Nightmare Before Christmas—the kind with shadowy candlelight, crooked silhouettes, and a sprinkle of mischief. You hate when decor turns cheesy fast or looks like a tangled party store exploded on your sofa. This guide brings you six Nightmare Before Christmas inspired Halloween decor ideas that work inside real homes, using dark candlelit moments, black taper candles, subtle cobwebs, crows, and dramatic contrasts—styled in a way that feels moody, sophisticated, and totally photogenic. We’ll fix the “cluttered and childlike” problem with intentional placements, layered textures, and a palette that reads stylishly haunted. Expect a room-by-room plan you can pull together in an afternoon, with a $200–$400 budget cap per vignette depending on what you already own.
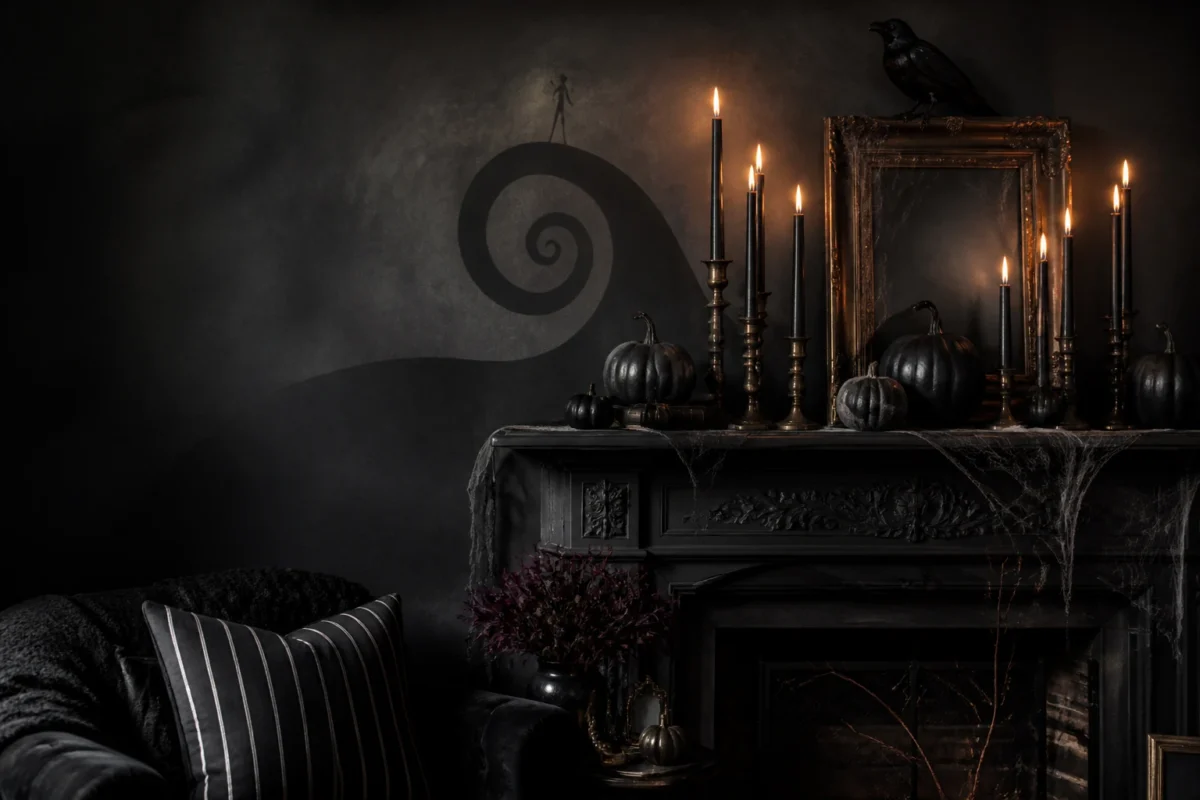
Each idea leans into stylish spooky: candlelit shadows, antique brass, jet-black pumpkins, soft velvet, and a few nods to Jack and Sally’s world—spiral hills, pinstripes, skeletal motifs—without turning your living room into a theme park. They photograph beautifully, they’re easy to store after the season, and they slide from early October all the way to Halloween night. If you love Halloween with a dash of goth poetry and a wink of playfulness, you’re in the right place.
1) Spiral Hill Mantel With Black Taper Candles And Gothic Silhouettes
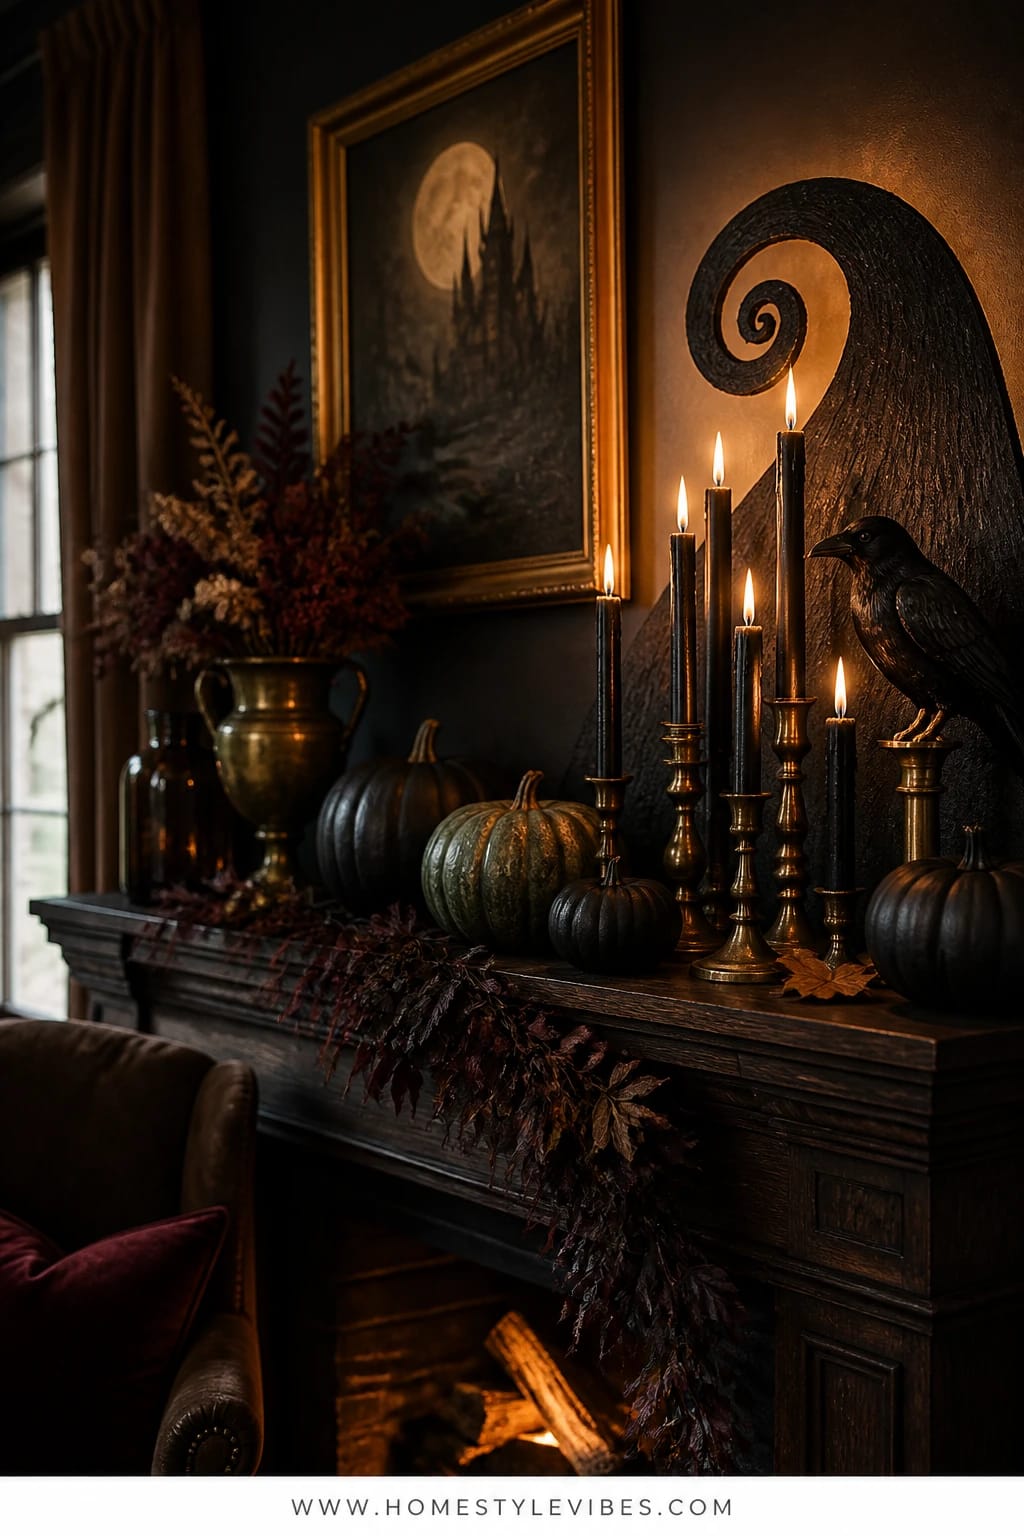
It’s that one corner that always feels off—your mantel. You’ve tried cobwebs and a felt banner, but it still looks flat and too cute. This time, we’re chasing candlelit drama. Think: a mantel vignette anchored by a hand-cut “spiral hill” silhouette (hello, Spiral Hill inspiration) rising behind a row of elegant black taper candles in antique brass holders, flanked by matte-black pumpkins and a raven or two. The mood is pure Halloween—moody, mysterious, and cinematic—without tipping into gory or kitschy.
Here’s why it works in real homes: silhouettes create height and presence without adding literal clutter. Black taper candles deliver instant shadowplay, especially as they flicker against a matte black silhouette backdrop. I tried a version of this on my own mantel last October and couldn’t believe how the candle flames made the paper hill look almost three-dimensional. Photographing this is a dream: crisp foreground candles, layered middle silhouettes, and a dark backdrop that makes the glow pop. Small space? The silhouette can be just the width of your mantel; even a 24-inch version reads strong.
Lighting is everything here. Keep overhead lights low. Use two or three black tapers and one small cluster of votives in antique brass cups to cast a low, gilded glow on the silhouettes. The props feel straight from the Nightmare Before Christmas palette: matte black, antique brass, a whisper of bone-white from a skull or skeletal hand bowl, and one deep-burgundy rose for a subtle, romantic wink.
Variations: On a budget, cut your silhouette from black poster board and tape it to black foam core for sturdiness. If you own no brass candlesticks, thrift them (look for mixed heights). Want a slightly quieter look? Swap the raven for a single black-framed art piece—a minimal crow sketch adds the right haunted whisper.
Budget Breakdown:
- Black poster board or foam core for silhouette: $5–$20
- Black taper candles (6–8): $10–$28
- Antique brass candlesticks (thrifted set of 4–6): $24–$60
- Matte-black faux pumpkins (2–3 sizes): $18–$48
- Raven or crow figurine: $12–$24
- Brass votive cups (3–5): $12–$30
Total Estimated Cost: $81 – $210
Best For: A living room with a fireplace or console that wants a moody Halloween moment. Ideal mid-October through Halloween night; dim lighting evenings make this sing.
Key Design Elements:
- Main seasonal props: Black taper candles, spiral hill silhouette, matte-black pumpkins, raven
- Color palette: Black, antique brass, bone-white, deep burgundy accent
- Lighting strategy: Clustered candlelight in mixed heights for deep shadows
- Textile layers: A black velvet runner across the mantel for extra richness
- Natural elements: Dried burgundy roses or branches with sparse leaves
- Accent details: Brass candlesticks, small skeletal bowl, black picture frames
How To Recreate This Look:
- Start with a clean mantel and lay a black velvet or matte-black cotton runner.
- Cut a spiral hill shape from black poster board; mount it on foam core for structure and stand it behind the candle line.
- Add antique brass candlesticks at varying heights; place black tapers in them.
- Layer two or three matte-black pumpkins at one end and a raven figurine at the other.
- Style with a few brass votives and a single dried rose or two for a poetic detail.
Why This Looks Expensive: The restrained palette, mixed candle heights, and a single statement silhouette read intentional and curated, not cluttered. Brass warms the black and creates museum-like glow.
Watch Out: Don’t flood the mantel with too many props. If you add spiderwebs, keep them minimal and pulled thin so they don’t obscure the silhouette’s edges.
Pro Styling Tip: Angle two candlesticks just slightly forward so the flames reflect in the brass and punch up that moody glow in photos.
2) Jack’s Pinstripe Tablescape With Bone-White Pumpkins On A Moody Dining Table
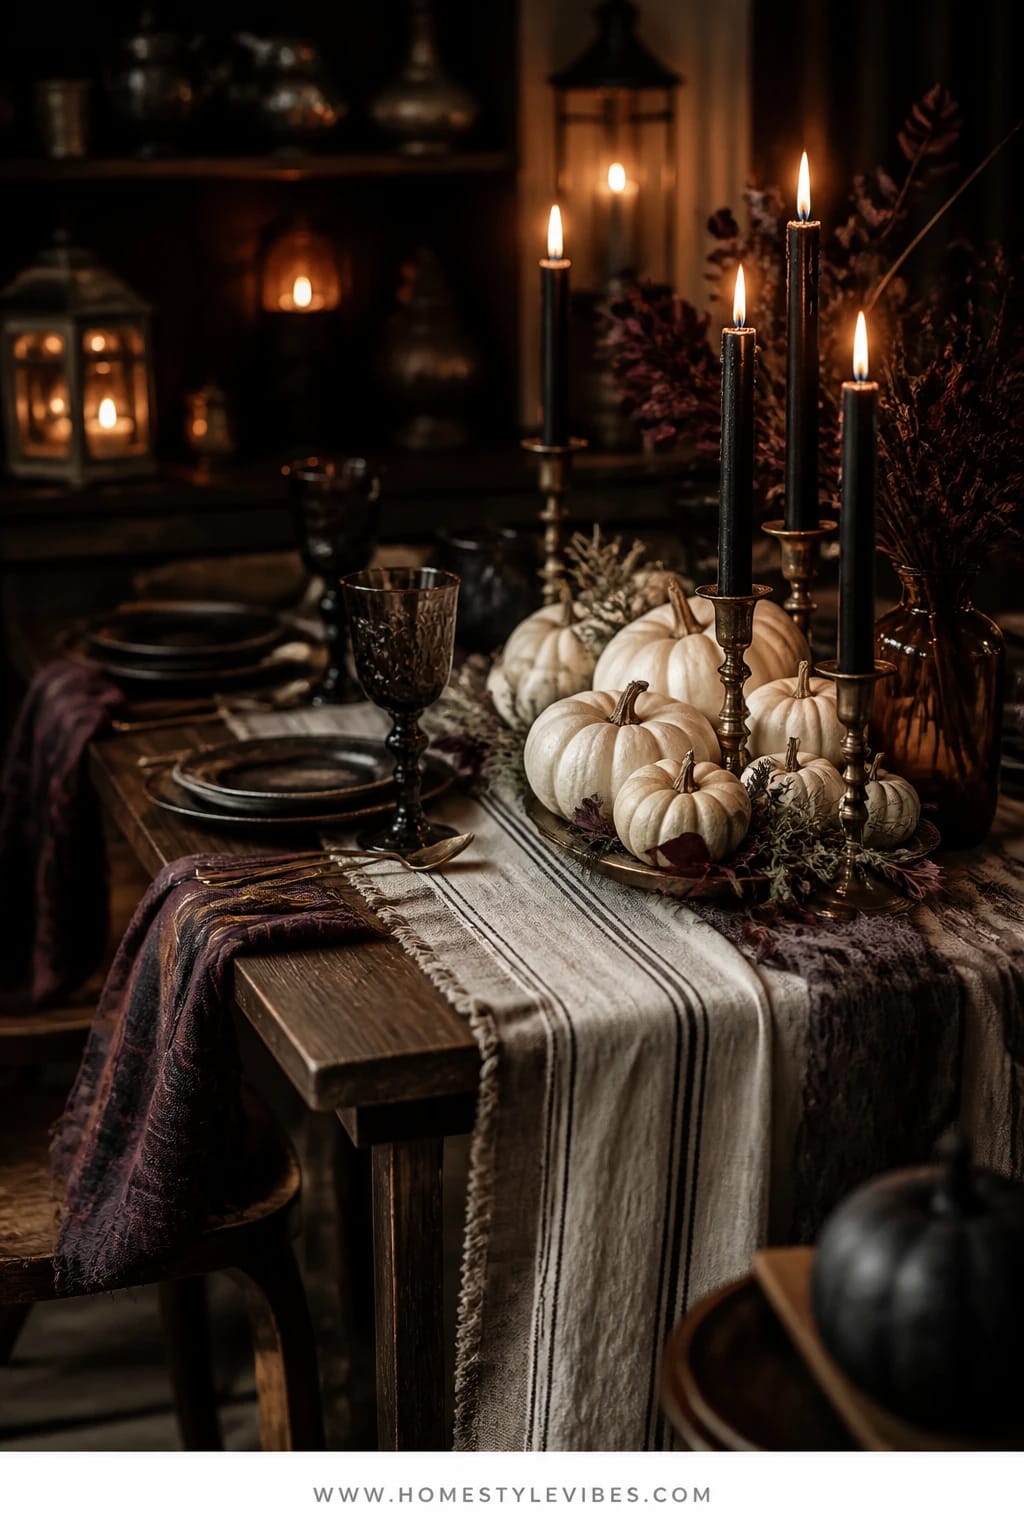
We’ve all been there: you lovingly set a Halloween table and it still reads “kids’ party” instead of “stylish spooky supper.” This tablescape fixes that with a subtle Jack Skellington nod—pinstripe textiles, bone-white mini pumpkins, black candles, and antique flatware. It’s moody without being messy, theatrical without being “theme night.” Add candlelit shadows across the plates and your dining room suddenly whispers, “Sit, stay, plot delightful mischief.”
Why it works: pinstripes add structure and sophistication, especially in black-and-ivory. Bone-white pumpkins break up the darkness and hint at skulls—playful yet elegant. Candlelight—preferably black tapers and low votives—creates shadowy drama between place settings. Photographs of this setting look editorial because of the repetition: stripes repeat in the runner, napkins, and maybe even a pinstripe-sketched place card. I once used a black-and-ivory curtain panel as a table runner in a pinch—nobody noticed, and it looked expensive.
Small-space variation: use just the center third of the table. One long runner, a cluster of three white pumpkins, and two brass candlesticks still telegraph the vibe. Neutral-leaning option: switch to soft charcoal stripes and fewer black accents; keep the shape language, lose some intensity.
Budget Breakdown:
- Pinstripe table runner or fabric (2–3 yards): $15–$45
- Bone-white mini pumpkins (real or faux, set of 6–12): $12–$36
- Black taper candles (6): $10–$20
- Antique brass or vintage flatware (thrifted): $20–$80
- Charcoal or black cloth napkins (set of 4–8): $14–$40
- Simple black plates or chargers (optional): $24–$60
Total Estimated Cost: $95 – $281
Best For: Dining rooms or kitchen tables for October dinners and Halloween night. Works beautifully for 4–8 place settings.
Key Design Elements:
- Main seasonal props: Bone-white pumpkins, black taper candles, pinstripe runner
- Color palette: Black, ivory, bone-white, antique brass
- Lighting strategy: Candles at multiple heights, dimmed overheads
- Textile layers: Pinstripe runner, black napkins, velvet ribbon ties
- Natural elements: Real mini pumpkins, dried seed pods in a slim black vase
- Accent details: Brass napkin rings, hand-lettered place cards in white ink on black card
How To Recreate This Look:
- Start with a black or dark charcoal runner down the center—or pinstripe fabric trimmed to fit.
- Add two to three clusters of bone-white pumpkins along the runner.
- Layer black taper candles in brass holders between pumpkin groupings.
- Place simple plates; top with black napkins tied with thin velvet ribbon.
- Style with handwritten black place cards lettered in white for a Jack-approved flourish.
Why This Feels Designer: Repetition of pinstripes and the tight color palette make the table look composed. The pumpkins feel sculptural, not cutesy, against the dark ground.
One Thing To Avoid: Overwhelming the center with too many pumpkins. Keep negative space so candlelight can spill across the table and plates.
Pro Styling Tip: For photos, tuck one candle slightly behind a pumpkin cluster—glow curving around the form gives you that moody depth that looks straight out of a magazine.
Keep scrolling—next we’re moving to the entryway, where first impressions get a delightfully haunted twist.
3) Oogie Boogie Entry Table With Green Glow And Shadow-Cast Lanterns
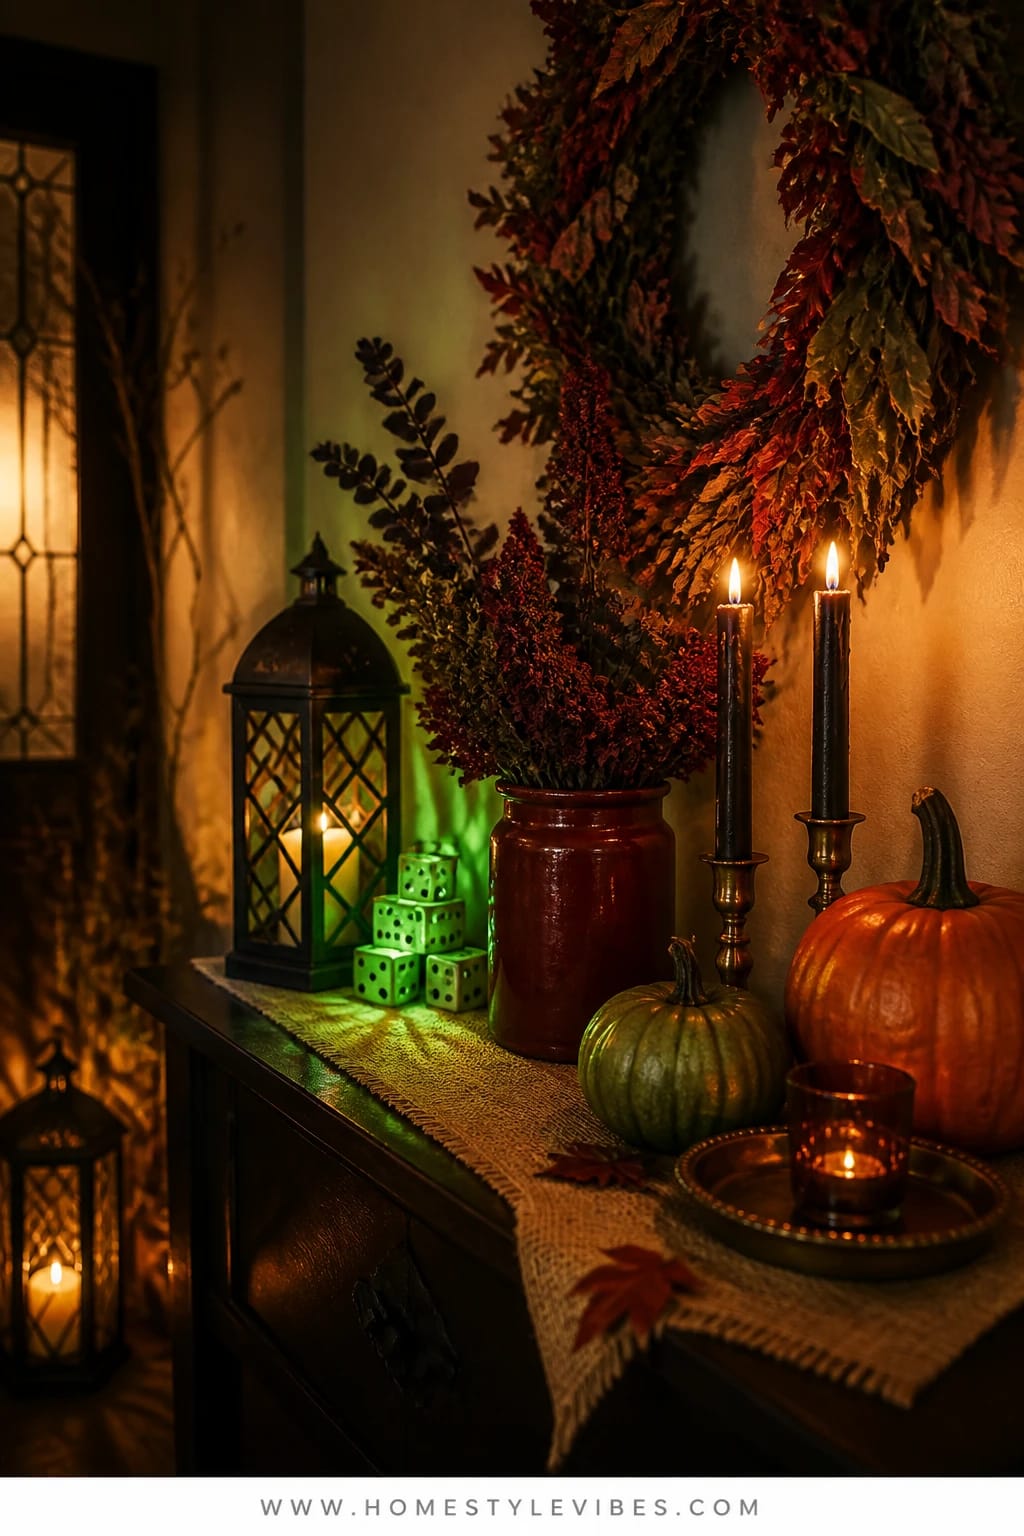
It’s the entry table that always feels like an afterthought. A dish for keys, maybe a bowl of candy, and zero drama. This setup leans into Oogie Boogie energy—but make it chic—with green “glow” accents, a burlap-textured runner, black lanterns casting lattice-like shadows, and a single dice motif tucked in. It’s playful, a little wicked, and sets the tone the second guests cross the threshold.
What mood does it create? Haunted casino meets Victorian curiosity cabinet. Candlelit shadows spill over the wall from pierced-metal lanterns or laser-cut sleeves around glass hurricanes. Why it works: you’re tapping a specific, saturated color (acid green) in small doses against matte black and burlap, keeping everything feeling stylish. Family-friendly bonus: you can swap real candles for LED pillars with green light modes or place a single green bulb inside one lantern for a subtle wash—no open flame near little hands.
Photographs love contrast, and this vignette gives you both: matte burlap against inky black, green glow against candlelit brass. It stores easily—roll the runner, stack the lanterns, tuck the dice and small props in a labeled bin. Small-space option: do a half-width runner atop a slim console with one lantern, one small bowl, and a single crow silhouette.
Budget Breakdown: (Swapped order with Key Design Elements for variety)
- Burlap or rough linen runner: $10–$24
- Black metal lanterns (2–3): $24–$90
- LED pillar candles with optional green mode (2–3): $15–$45
- Small green bulb or color-changing LED puck: $8–$15
- Matte-black bowl for keys/candy: $10–$28
- Dice motif (mini sculpture or DIY painted wooden blocks): $6–$16
Total Estimated Cost: $73 – $218
Best For: Foyers or hall drop zones that need a night-friendly, guest-facing moment throughout October.
Key Design Elements:
- Main seasonal props: Black lanterns, burlap runner, subtle dice detail, crow silhouette
- Color palette: Black, burlap tan, acid green, antique brass
- Lighting strategy: Lantern shadows plus a tucked green glow for Oogie ambiance
- Textile layers: Burlap or rough linen base
- Natural elements: Dried seed pods or twisted branches in a slim vase
- Accent details: Brass catchall tray, matte-black candy bowl
How To Recreate This Look:
- Start with a burlap runner across your entry table.
- Add two black lanterns of different heights; place LED candles inside.
- Tuck a green LED puck or bulb behind one lantern to wash the wall with a faint glow.
- Place a matte-black bowl for keys or candy; slip in a small dice detail near the base.
- Style with a crow silhouette propped against the wall and a few dried seed pods in a dark vase.
Why This Reads High-End: The restrained use of color—just a whisper of green—keeps it sophisticated. Shadow-casting lanterns add movement and pattern without more objects.
The Most Common Mistake: Going too bright with the green. Keep it dim, eerie, and directional—more suggestion than spotlight.
Pro Styling Tip: Angle a lantern so the cutout pattern hits the side wall rather than straight back—it creates a beautiful diagonal lattice in photos.
Pause here. If one idea is already sparking something, start there. You don’t need all six. Choose the corner that bugs you most and give it the moody treatment first.
4) Sally’s Patchwork Reading Nook With Burgundy Velvet And Black Candles
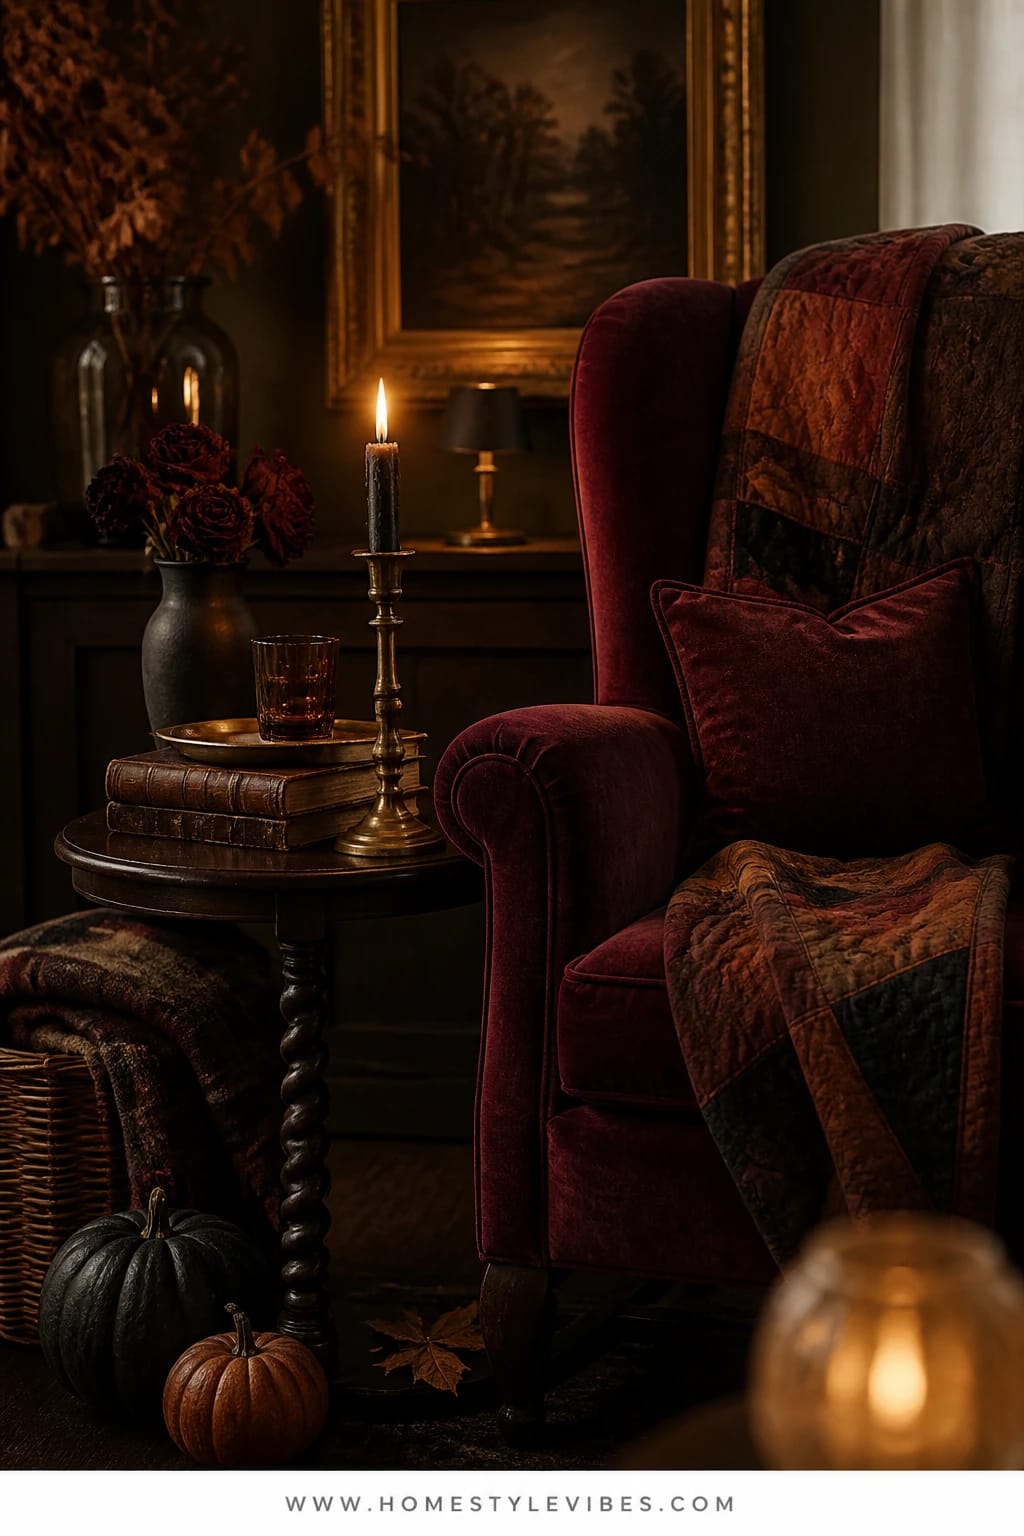
There’s always that chair in the living room that never feels cozy enough to actually sit in. You toss a blanket over it, but it still reads like a placeholder. This nook turns that corner into a stitched-together love letter to Sally—patchwork textures, deep burgundy velvet, hand-mended details, and a pool of candlelight at your elbow. It’s intimate and a little witchy: dried roses in a black vase, a thin black taper on a brass stand, and a stack of aged books losing their spines in the best way.
Why this works at home: it’s tactile and layered rather than cluttered. A velvet throw and patchwork pillow add instant richness without buying a dozen new items. Black candles deliver moody light for reading (pair with a discreet lamp behind you for actual page legibility), and everything stores flat after the season. Photographs adore the contrast between matte velvet and a shiny brass candlestick; the candle flicker makes velvet look like liquid.
Two variations: Budget-friendly? Use a thrifted throw and DIY patchwork pillow covers with iron-on hemming tape—no sewing needed. More minimal? Keep one velvet throw, one black candle, and a single dried rose stem for a whisper of the theme. If you have pets, place candles up out of tail range or use LED tapers; IMO style is never worth a singed whisker.
Budget Breakdown:
- Burgundy velvet throw or fabric yardage: $24–$68
- Patchwork-look pillow covers (2): $18–$40
- Black taper candle + brass candlestick: $8–$28
- Thrifted vintage books (3–5): $6–$25
- Black vase with dried roses: $14–$36
- Small side table or stack of vintage suitcases as a perch: $20–$60
Total Estimated Cost: $90 – $257
Best For: A living room corner, bedroom reading chair, or office lounge spot you want to feel soulful through October and into early November.
Key Design Elements:
- Main seasonal props: Black taper candle, dried burgundy roses, vintage books
- Color palette: Burgundy, black, antique brass, bone-white paper tones
- Lighting strategy: One candle for mood, one hidden floor lamp for function
- Textile layers: Velvet throw, patchwork pillows, maybe a wool footstool
- Natural elements: Dried roses, tiny dried mushrooms or seed pods in a dish
- Accent details: Brass candlestick, black ceramic mug for cocoa
How To Recreate This Look:
- Start with your coziest chair and add a burgundy velvet throw draped generously.
- Tuck in 1–2 patchwork pillows with visible “mended” details or printed stitch motifs.
- Add a small side table or stacked suitcases; place a black taper in a brass holder on top.
- Stack vintage books within arm’s reach; top with a black vase and a few dried roses.
- Style with a quiet floor lamp behind the chair angled down for real reading light.
Why This Looks Intentional: The repetition of stitched textures and one anchoring color (burgundy) gives the nook a storyline. Nothing random—each piece supports the mood.
Don’t Do This: Don’t overpattern the space. Two patchwork moments are plenty; keep surrounding surfaces mostly solid and dark for that cinematic feel.
Pro Styling Tip: For photos, crease the velvet throw once near the candle so the fold catches the flame’s highlight—small glints read as luxe on camera.
5) Haunted Bookshelf With Bone-Skull Bookends, Black Pumpkins, And Brass Candlelight
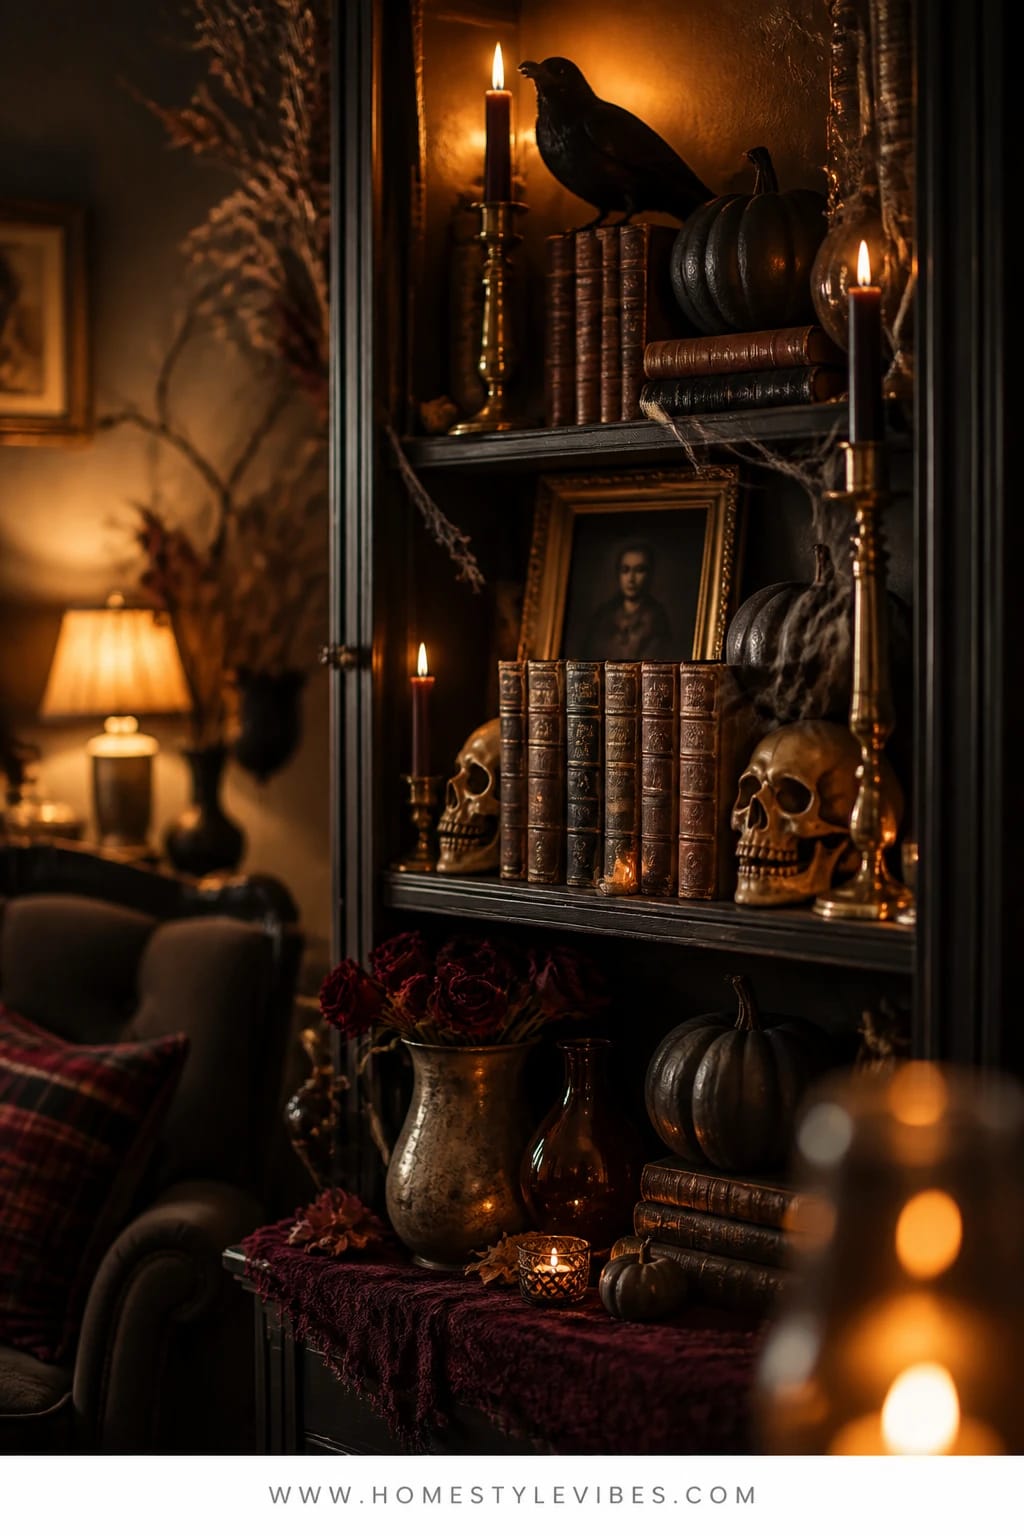
You’ve tried tossing a few bats on your bookshelf and it still looks random. This concept turns the shelf into a curated cabinet of curiosities—bone-skull bookends, matte-black pumpkins scattered among stacks, antique brass taper holders, and a crow perched on a top shelf. Add a single gilt-framed dark portrait leaning at the back, and suddenly your bookshelf becomes the spooky heart of the room.
Why it works in real life: you’re using items you likely have (books, frames) and adding just 4–5 Halloween-leaning pieces to carry the story. Shelves love repetition and negative space. Leave a few breathing gaps so candlelight can feather shadows across the spines. I helped a friend last year who bought three different garlands before realizing her problem was lighting—she added two candles and one brass mirror tile behind them, and the whole wall came alive.
Lighting note: Keep candles only on eye-level shelves and up, never where kids or pets can bump them. LED tealights in votive cups tucked behind a black pumpkin work if real candles feel risky. Store everything in one shoebox after Halloween; bookends double as year-round quirky accents anyway.
Key Design Elements:
- Main seasonal props: Bone or skull bookends, matte-black pumpkins, crow
- Color palette: Black, bone, antique brass, deep charcoal
- Lighting strategy: A few candles set back from the shelf front to cast long shadows
- Textile layers: None needed; let hard textures shine
- Natural elements: A single gnarly branch laid horizontally on one shelf
- Accent details: Gilt-edged dark art, brass mirror tile, vintage magnifying glass
Budget Breakdown:
- Skull or bone-style bookends: $20–$60
- Matte-black faux pumpkins (3–5 small): $15–$35
- Brass candleholders (2–3): $15–$45
- LED tealights or black tapers: $8–$20
- Thrifted gilt frame + printed dark artwork: $10–$30
- Crow figurine: $12–$24
Total Estimated Cost: $80 – $214
Best For: Living rooms, offices, or hall built-ins that feel flat. Great all-October backdrop for movie nights.
How To Recreate This Look:
- Start by clearing one or two shelves and grouping books by color (dark spines together).
- Add skull bookends to a single shelf as the focal point.
- Layer a matte-black pumpkin near the front of a different shelf for depth.
- Place brass candlesticks toward the back of a middle shelf; add candles.
- Style with a crow up top and a small gilt-framed dark portrait leaning at the back.
Why This Feels Designer: Using the shelf as a series of vignettes—each with one hero object—keeps the scene curated. Repetition of black forms ties it together.
Watch Out: Avoid scattering tiny trinkets across every shelf. Cluster and edit—let shadow be part of the design tool kit.
Pro Styling Tip: For photos, shoot from a slight angle so the candlelight rakes across the book spines—texture will pop like crazy.
Quick mindset reset: Your home doesn’t need to mimic a movie set. You’re creating a mood, not replicating a frame. If one corner gives you that delicious “candlelit hush,” you’ve nailed it.
6) Curiosities Bar Cart With Black Crows, Aubergine Glass, And Antique Brass
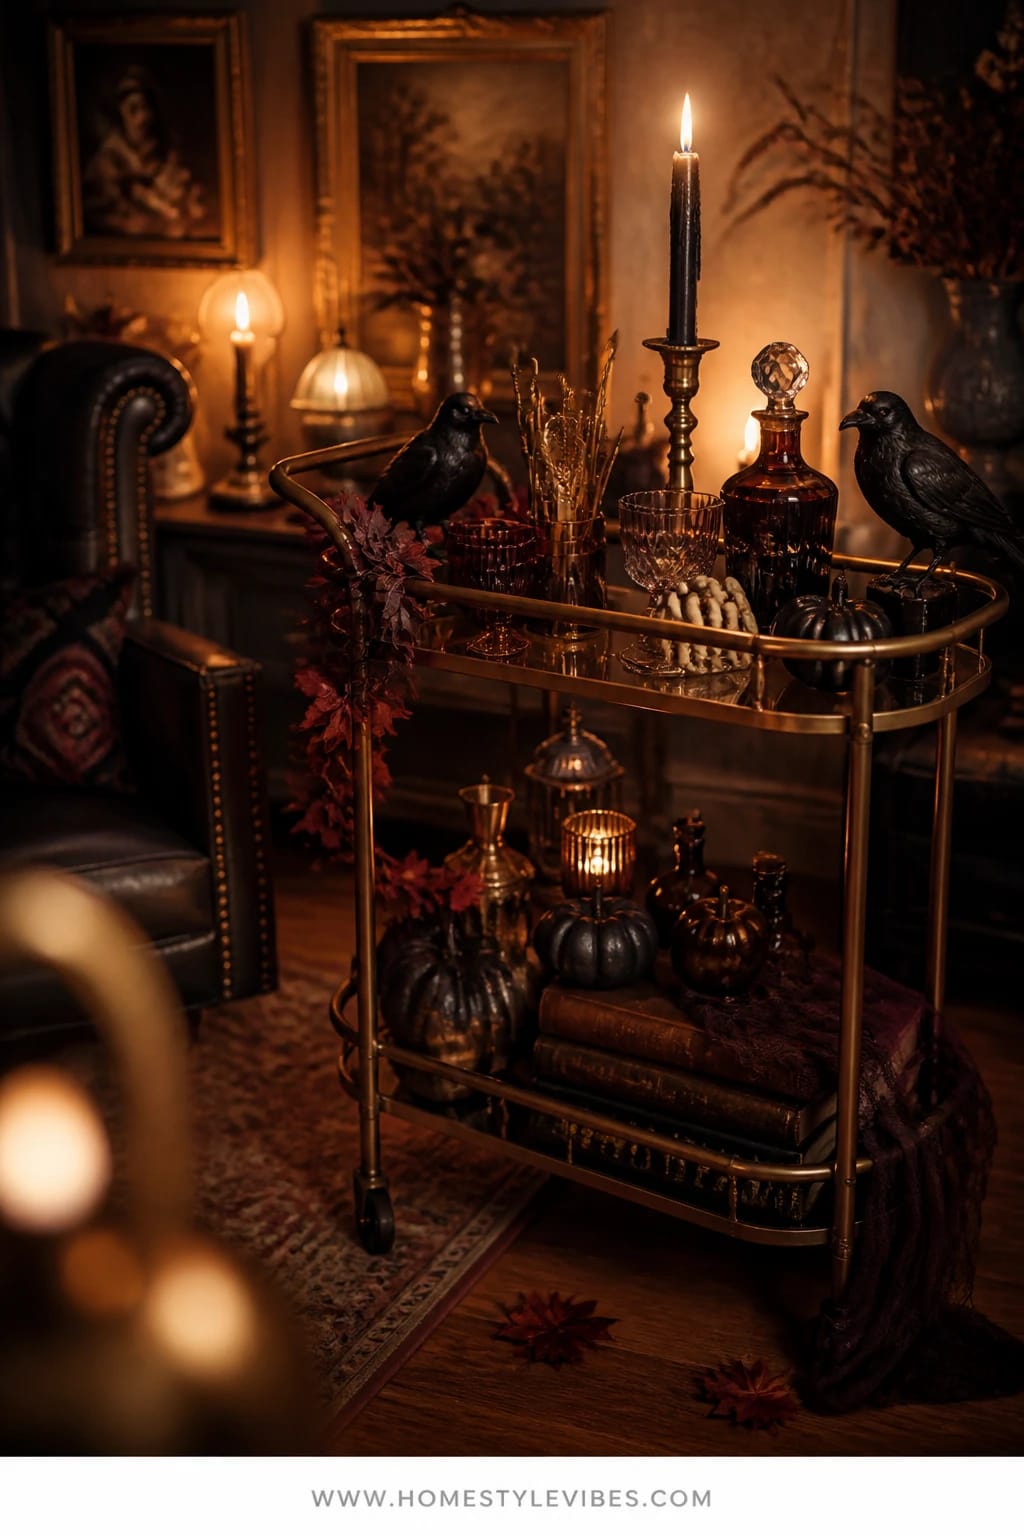
Your bar cart wants to be the party, but most Halloween bar setups end up sticky and cluttered. This version keeps it sleek, sinister, and fun: black crows perched on the top shelf, aubergine (deep eggplant) glassware glinting under candlelight, and antique brass tools laid out like a Victorian apothecary. Add a skeletal hand bottle opener, a decanter labeled “Worm’s Wort” as a winky nod, and a black taper to cast dramatic shadows on the bottles.
Mood-wise, this is darkly festive—stylish spooky, not frat-party chaos. Why it works: limited palette (black, aubergine, brass) and negative space. Stack only what you need and decant mixers into dark bottles. You can even tuck a strip of removable black contact paper under the top glass shelf to deepen the shadowy vibe. My honest admission: styling a bar cart is trickier than it looks; too many bottles and it’s noise. Three hero decanters, two stacks of glasses, and one candle, and suddenly it reads intentional.
Family night? Make it a cider cart: cinnamon sticks in a brass cup, blackberry syrup in an apothecary bottle, and mulled cider in an aubergine pitcher. If you hate purple, opt for deep burgundy glass instead—still moody, still Nightmare-friendly.
Budget Breakdown:
- Set of aubergine or deep burgundy glasses (6): $30–$75
- Antique brass bar tools: $20–$60
- Black taper candle + brass holder: $8–$28
- Crow figurines (2): $16–$32
- Apothecary labels + dark bottles: $10–$25
- Black contact paper (optional): $8–$12
Total Estimated Cost: $92 – $232
Best For: Living or dining room corners, October movie nights, and Halloween parties when you want a moody focal point that photographs like a dream.
Key Design Elements:
- Main seasonal props: Black crows, apothecary bottles, skeletal hand opener
- Color palette: Black, aubergine, antique brass, clear glass highlights
- Lighting strategy: One taper for shadowplay; optional LED puck under shelf for subtle underglow
- Textile layers: None—keep surfaces sleek for easy cleanup
- Natural elements: Dried citrus wheels or dark cherries in a shallow brass dish
- Accent details: Small gilt tray to corral tools; black cocktail napkins
How To Recreate This Look:
- Start by clearing the cart; apply black contact paper beneath the glass shelf if desired.
- Add two black crows to the top corners for instant mood.
- Place three hero decanters or bottles centered; add apothecary labels.
- Layer a gilt tray with brass tools and a skeletal opener beside one candle.
- Style with stacks of aubergine glasses on the lower shelf; tuck in dried citrus in a brass bowl.
Why This Looks Expensive: Bottles decanted and corralled on a tray read like a boutique bar. The purple glass catches candlelight like gemstones—rich and restrained.
One Thing To Avoid: Avoid colorful branded mixers on the cart. Decant or stash below; visual noise kills the moody story.
Pro Styling Tip: For photos, let one decanter sit half in shadow, half in candlelight—the tonal gradient looks incredibly cinematic.
Quick Checklist
- Black taper candles in antique brass holders
- Matte-black pumpkins in varied sizes
- Spiral hill silhouette for the mantel
- Pinstripe runner or fabric for the dining table
- Bone-white mini pumpkins for sculptural accents
- Lanterns that cast patterned shadows
- Green LED puck or bulb for subtle Oogie glow
- Burgundy velvet throw for a Sally-inspired nook
- Dried burgundy roses in a black vase
- Skull or bone bookends for curated shelves
- Gilt-framed dark art for depth
- Black crows to perch on carts or shelves
- Aubergine glassware for the bar cart
- Apothecary bottles with styled labels
- Thrifted vintage books for texture and mood
Frequently Asked Questions
How do I keep costs down while still getting that Nightmare Before Christmas inspired Halloween decor look?
Pick one hero moment, not six. Start with the mantel or the dining table and invest in black tapers, a couple of brass candlesticks, and a focal prop (spiral silhouette or bone bookends). Thrift brass, reuse glass vessels, and DIY paper silhouettes. Keep the palette tight—black, brass, bone-white—so even inexpensive pieces feel elevated.
Real or faux pumpkins—which work best for these moody setups?
Both. Real bone-white minis bring believable texture and a matte finish that photographs beautifully. Faux matte-black pumpkins deliver consistent shape and survive warm rooms. If you mix, place real pumpkins away from vents and sunny windows to avoid the sad collapse by week three.
My space is small. Which idea scales down easiest?
The entry table and bookshelf are the easiest to shrink. Do one lantern, one crow, and a small green glow for the entry. On shelves, edit to a single skull bookend pair, one candle, and a black pumpkin. The mood arrives with far fewer pieces when the color story stays strict.
How do I store everything so next year isn’t a tangled mess?
Group by vignette. One bin per corner: mantel, table, entry, etc. Wrap brass separately to avoid scratches, save a flat folder for silhouettes, and label small zip bags for crows, dice, and apothecary labels. When November hits, you’ll repack in minutes and thank yourself next fall.
Are candles safe with kids and pets? I love the glow but I’m nervous.
Use LED tapers and pillars where tails or little hands could reach. Reserve real flame for higher surfaces like mantels or adult-only dinners. Always trim wicks, use sturdy holders, and never leave candles unattended. The truth is, LED has come a long way—dim warm bulbs look convincingly haunted in low light.
When should I start decorating for this style?
Begin the first week of October with the bookshelf or entry table, then add the mantel and bar cart mid-month. Save the full pinstripe table for the week of Halloween or your party night. Layering over time keeps everything feeling fresh, not stale.
Closing Thoughts
Pick one corner—your mantel, your entry, the reading nook that’s begging for drama—and begin. Use a moody palette, a touch of brass, and that flicker of candlelight that makes shadows dance. The secret isn’t buying more; it’s choosing fewer, better pieces and letting darkness do half the styling.
This Nightmare Before Christmas inspired Halloween decor doesn’t shout. It hums. Layered blacks, bone-white accents, velvet, and antique glow work together to create depth and a little delicious eeriness. That’s the vibe: dramatic yet restrained, playful without tipping into parody. Start tonight with three candles and one black pumpkin. Light the wicks, dim the room, and watch your home lean into October with a grin.
You’ve got this. And trust me—when the first guest whispers, “Okay, this is spooky in the best way,” you’ll know you nailed it.
About the Author

Krisztina P.Rendes, Founder of Home Style Vibes
Founder of Home Style Vibes
Krisztina Puskásné Rendes created Home Style Vibes as a cozy-modern lifestyle space where homemaking meets inspiration. Her goal is to help women create beautiful, organized, and peaceful homes they truly love — without overwhelm. You’ll find here heart-driven content on home decor, cleaning tips, easy family recipes, organization and decluttering, DIY home projects, plants, and seasonal ideas — all designed to bring more calm, comfort, and style into everyday life.





