
5 Fall Buffet Table Styling Ideas For Effortless Party Hosting
You want a buffet that feels like a warm hug: amber glow, saturated rusts and burgundies, stacks of pumpkins, a little plaid, and that easy harvest abundance that makes guests linger. You hate the pre-party scramble—the cords, the clutter, the “where do the forks go?” panic—and the sad, flat table that somehow looks messy and bare at the same time. Good news: these 5 fall buffet table styling ideas fix all of that, fast. Expect cozy bright autumn color, candlelight that flatters every guest, and layouts that manage traffic so you can actually enjoy the party.
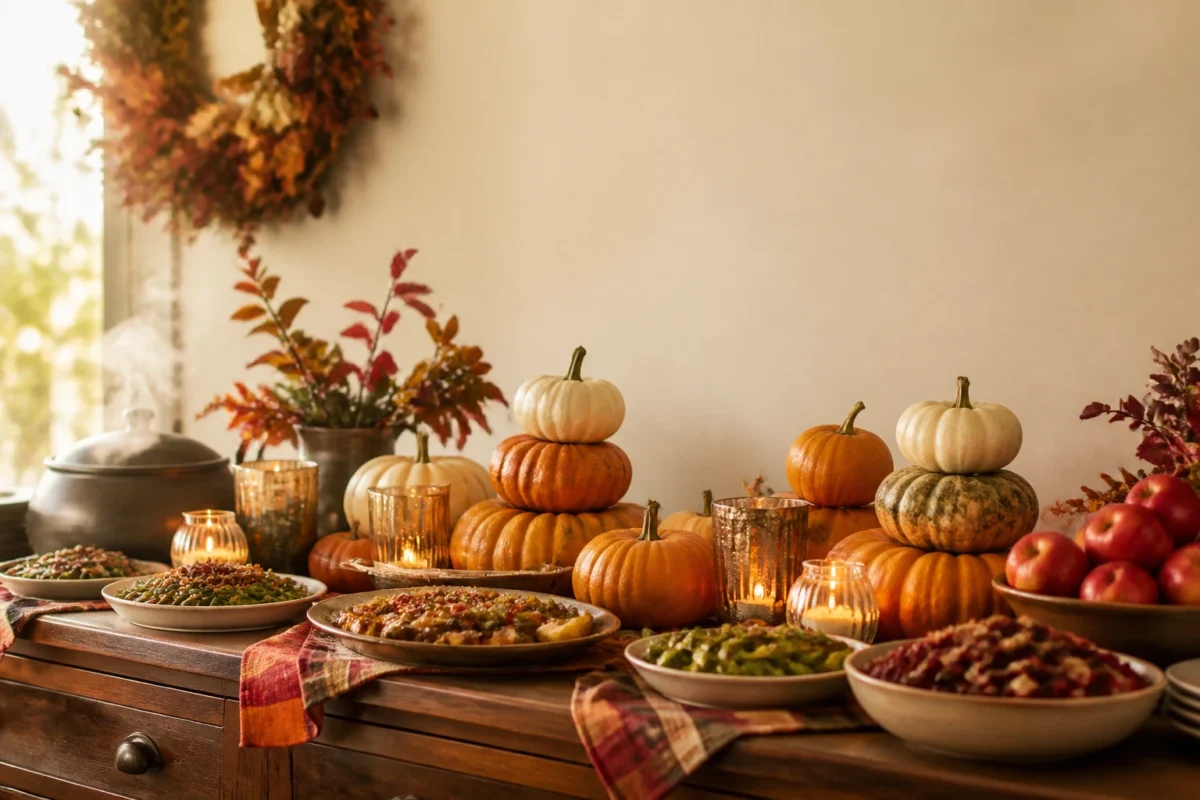
We’ll keep it realistic: $150–$400 per look, done in under an afternoon, and designed for real dining rooms, kitchen islands, sideboards, and bar carts. Each idea layers texture, color, and smart serving zones so food stays hot, spills don’t become a crisis, and the scene photographs beautifully for the family text thread or your Pinterest board. If you love harvest season—early September apples through Thanksgiving pies—this is your buffet blueprint.
1) Pumpkin Harvest Runner With Golden Candle Glow On A Dining Room Sideboard
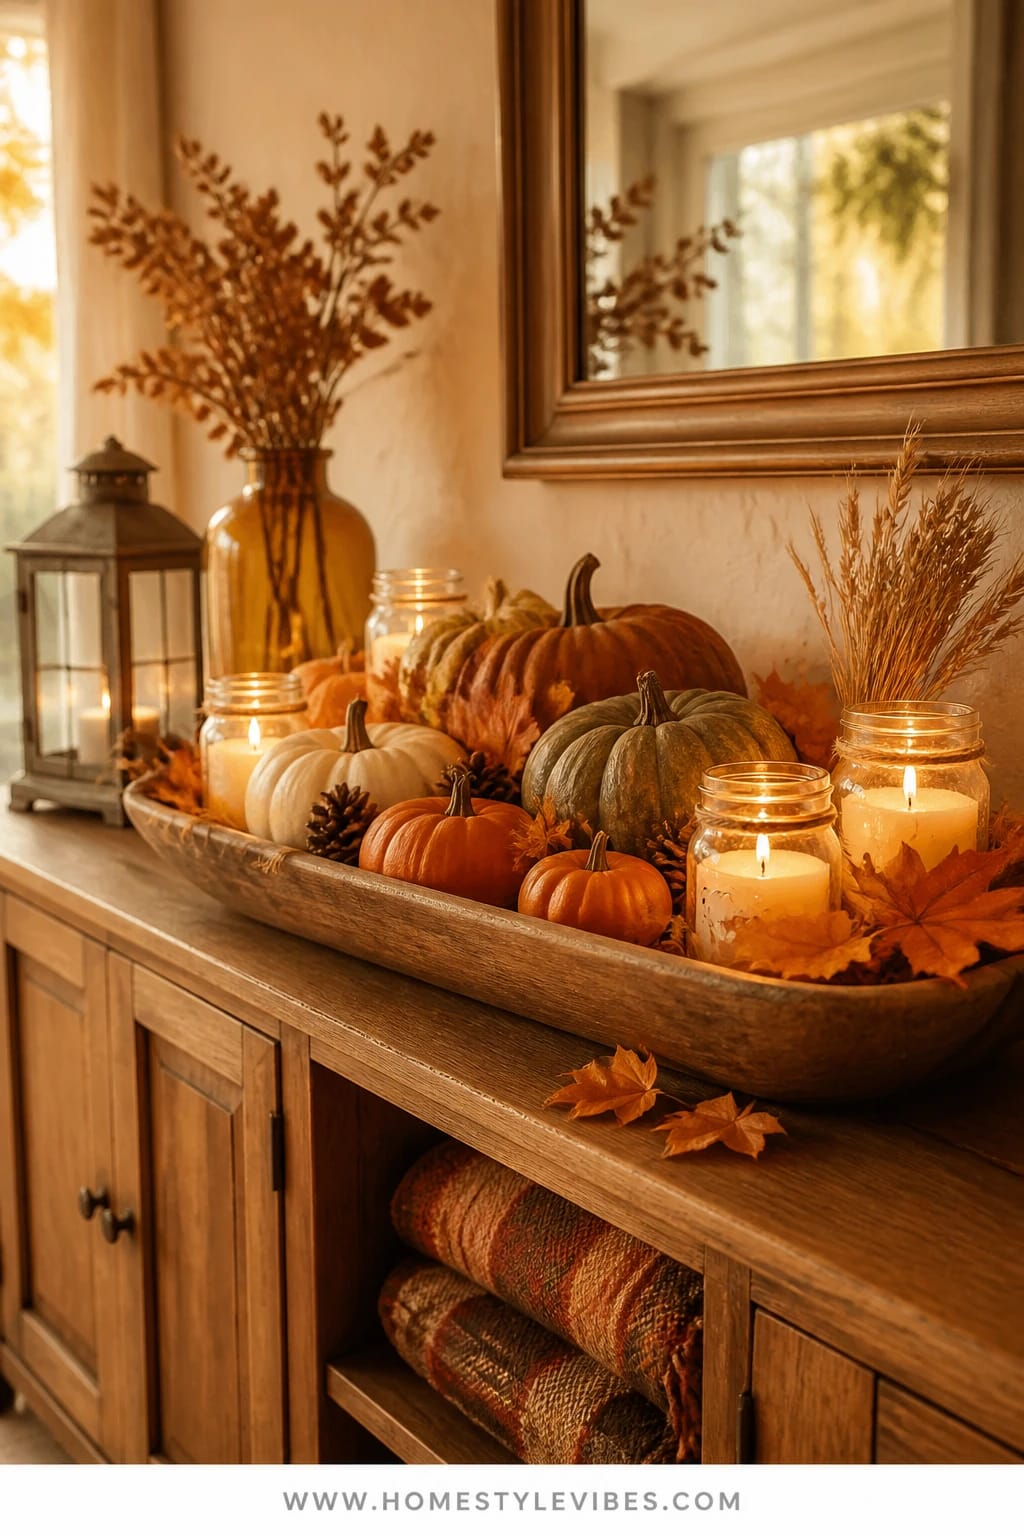
We’ve all been there: you line up serving dishes on the sideboard and it still looks like a cafeteria. Flat. Functional. Zero fall magic. This version—rich pumpkin stacks down the center like a runner, a few plaid napkins peeking out, and a golden rim of candlelight—turns that same sideboard into a cozy bright autumn moment that guests actually notice.
The mood is harvest abundance: think saturated rust and deep burgundy against warm wood, flickers of amber candlelight catching the curves of little pumpkins. It works in real homes because everything sits low and linear. You can still open drawers and stash extra cutlery. Nothing tall blocks conversation. The line of pumpkins doubles as a visual “stop” that keeps plates from migrating into clutter. Lighting does the heavy lift here—clusters of tea lights and a couple of amber glass hurricanes create that soft, glowy edge that feels flattering and celebratory, even on a Tuesday night chili bar.
Props are simple: mixed real and faux pumpkins for longevity, seeded eucalyptus or fall leaves, short brass or wooden candleholders, and one plaid textile that threads the story together. It photographs beautifully because you’ve got layered height (small pumpkins over a gauzy runner, then candles), color saturation in the produce, and that hallmark fall glow kissing every surface. Variations? Do a mini version on a shorter console with baby pumpkins and a single hurricane. Or keep it ultra-practical for big families: switch real candles to battery pillars with a warm amber hue and tuck the remotes in a little bowl behind the tallest pumpkin. You can make it quieter in November by pulling the plaid and leaning into oatmeal linen and sage gourds.
Budget Breakdown:
- Mixed pumpkins (real + faux): $40–$120
- Amber glass hurricanes (2): $30–$80
- Tea lights or warm LED votives (12–16): $12–$35
- Gauzy runner or plaid scarf: $15–$40
- Greenery (eucalyptus/leaf garland): $12–$30
- Small brass or wood candleholders (2–4): $20–$60
Total Estimated Cost: $129 – $365
Best For: Dining rooms with a sideboard or long console; hosts who want a buffet that feels abundant but stays low-profile. Ideal from early October through Thanksgiving.
Key Design Elements:
- Main seasonal props: real and faux pumpkins, seeded eucalyptus, amber hurricanes
- Color palette: rust, burgundy, pumpkin orange, warm wood, hints of brass
- Lighting strategy: low tea lights for twinkle, two amber hurricanes for anchor glow
- Textile layers: gauzy linen runner plus a folded plaid napkin stack
- Natural elements: real stems and a couple of heirloom gourds for texture
- Accent details: small brass bowls for salt, jam jars as votive cups, wooden boards
How To Recreate This Look:
- Start with a soft runner, leaving 2–3 inches of wood showing at the edges for warmth.
- Add a line of mixed pumpkins down the center, largest in the middle, tapering smaller toward the ends.
- Layer eucalyptus under and between pumpkins to hide gaps and add that papery rustle.
- Place two amber hurricanes slightly off-center to keep the line organic.
- Style with tea lights tucked into jam jars and a neat stack of plaid napkins plus small brass bowls for salts or nuts.
Why This Looks Expensive: Repetition and restraint do the heavy lifting. A tight pumpkin palette with consistent candlelight feels curated, not chaotic, and the warm metallics whisper “collected,” not “party store.”
Watch Out: Don’t scatter too many colors. Stick to 3–4 tones max or your buffet will read busy on camera and in person.
Pro Styling Tip: For photos, light tea lights five minutes before guests arrive so the wicks develop a handsome crackle and the glow reads warm, not stark.
2) Apple-Cider Bar With Amber Glass And Woven Texture On A Kitchen Island
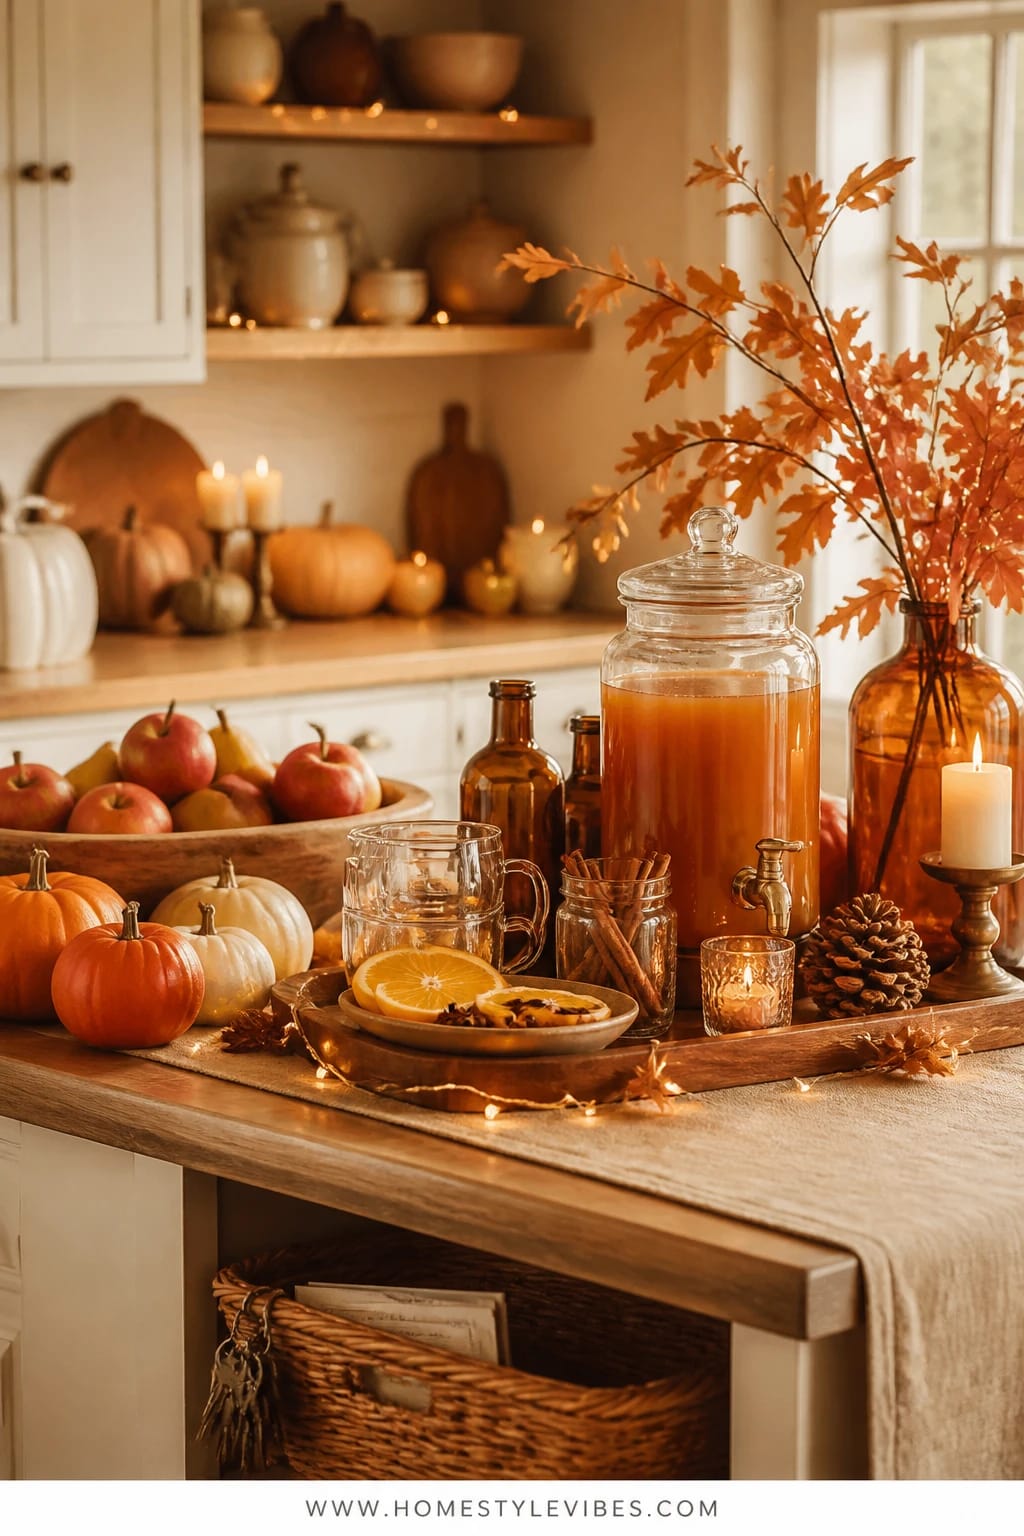
It’s that one spot that always feels off: your kitchen island becomes a drop zone five minutes into a party. Keys, mail, chargers—and then you try to pour drinks over the chaos. This apple-cider bar reins it in with a dedicated tray zone, beautiful amber glass bottles, and a woven belly basket that swallows the mess so your island reads like a styled magazine page and a busy family hub at the same time.
The vibe here is casual hospitality. Warm cider in a lidded beverage dispenser, cinnamon sticks, sliced oranges, and cozy plaid mugs that invite people to serve themselves. Because everything corals into trays and carriers, you can wipe spills quickly and ferry items to the sink without dismantling the look. Lighting bounces off amber glass like sunshine trapped in a bottle. Even under bright pendants, it still reads warm, especially if you swap harsh bulbs for warm 2700K LEDs—seriously, it matters.
Why it photographs well: layers of glass, spice, and texture. The woven basket adds chunky contrast against smooth stone, while amber bottles provide repetition and glow. I did this last October for a chili-and-cider night; the big win was dedicating the island’s back corner to a lidded basket for random phones and mail. The basket lid meant the clutter disappeared in seconds, and the bar still looked chic in photos.
Budget Breakdown:
- Glass beverage dispenser (with stand if needed): $30–$70
- Amber glass bottles or vintage apothecary jars (3–5): $20–$60
- Woven tray and lidded belly basket: $35–$90
- Mugs (6–8 in plaid or solid stoneware): $24–$80
- Spice jars (cinnamon sticks, star anise, cloves): $10–$25
- Small faux leaf sprigs or mini gourds: $10–$20
Total Estimated Cost: $129 – $345
Best For: Families or hosts who default to the kitchen during gatherings; works for everyday fall through Thanksgiving pie nights.
Key Design Elements:
- Main seasonal props: cider dispenser, amber bottles, mini gourds
- Color palette: caramel, amber, cinnamon, wheat, soft green
- Lighting strategy: warm pendants at 2700K, plus one small pillar candle in a hurricane (optional)
- Textile layers: plaid dish towel under the dispenser; felt coasters for mug drips
- Natural elements: sliced oranges, cinnamon sticks, apple garnish
- Accent details: small chalkboard tag for “spiked” vs “classic,” brass ladle
How To Recreate This Look:
- Start with a large woven tray to define the bar zone on your island.
- Add the dispenser on the tray’s back corner; tuck a plaid towel under to catch drips.
- Layer in amber bottles with cider add-ins (maple syrup, cinnamon simple syrup); label them simply.
- Place mugs on the opposite side for balance; add felt coasters in a small stack.
- Style with a lidded basket at arm’s reach for clutter; garnish with a bowl of apple slices and oranges.
Why This Feels Designer: Controlled repetition—amber glass, woven textures, and one tight color story—makes the island read intentional even when people are actively using it.
One Thing To Avoid: Don’t place the dispenser on the island edge. Guests will drip on the floor. Keep it at least 6 inches from the edge with a towel beneath.
Pro Styling Tip: For photos, float one thin orange wheel in the dispenser; it catches light and reads festive without clouding the cider.
Craving something moodier or brighter? Keep scrolling—our next setup solves plate pileups and that awkward “where do the sauces go?” dilemma.
3) Plaid Layers And Brass Candles On A Dining Table Turned Buffet Station
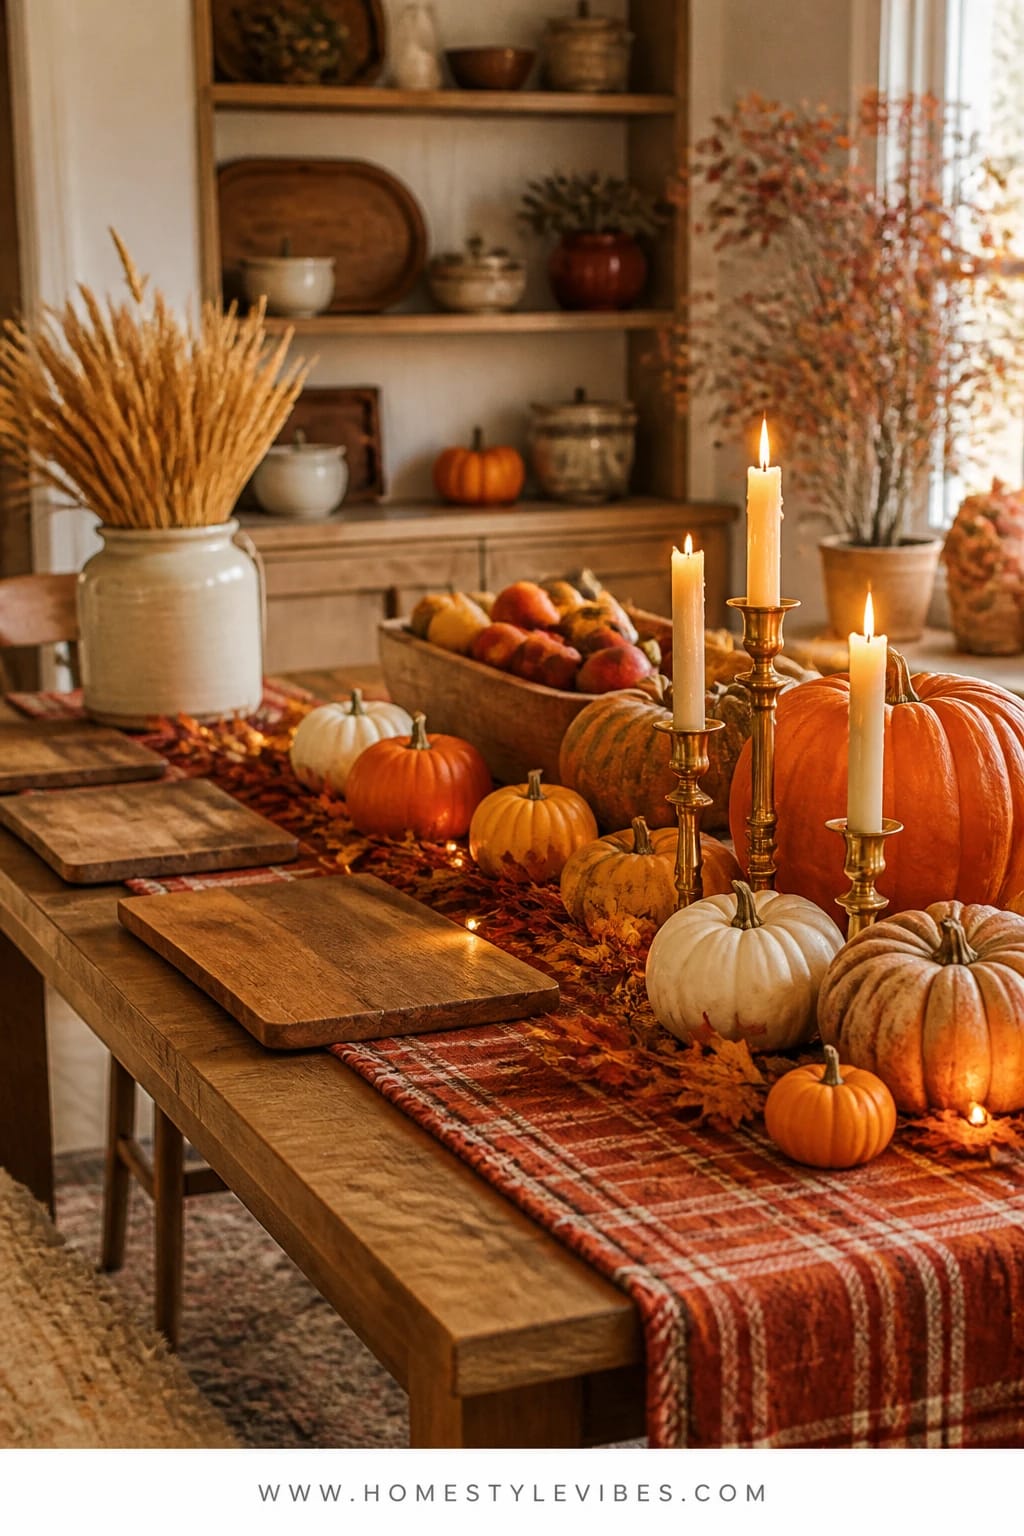
You’ve tried turning the dining table into a buffet, but it still looks like a potluck drop-off zone—no flow, constant backtracking, a plate stack that bottlenecks the entire evening. This layout fixes it with a left-to-right progression and a plaid-under-brass formula that looks classic, reads cozy, and keeps traffic moving.
Mood-wise, this is pure cozy bright autumn. Think red-rust plaid runner, low brass candlesticks in a staggered trio, and wood boards that line up like stepping stones. Why it works: guests instinctively understand “start here, end there” when you set a clear sequence. Lighting is layered—candles pooled in the center for a soft glow down the line, plus dimmed overhead fixtures to keep sightlines clear.
Photographs love this setup because plaid gives a graphic read, while brass reflects candlelight in warm ovals across the table. Add white platters for contrast and a couple of burgundy mums in squat vases to punctuate the line. Small-space version: push the table against a wall and mirror the runner up the wall with a narrow art piece to keep the look full without crowding. A quieter November version swaps bold plaid for a cream runner and rust linen napkins.
Budget Breakdown:
- Plaid runner or wool scarf: $20–$45
- Mixed brass candlesticks (3–5): $30–$120 (thrift the best ones)
- Assorted wood boards and white platters: $40–$120
- Low vases + mums or marigolds: $12–$30
- Salt/pepper mills and small ramekins for sauces: $15–$30
Total Estimated Cost: $117 – $345
Best For: Dining rooms where the table can be cleared; great for chili bars, pasta nights, or Thanksgiving sides.
Key Design Elements:
- Main seasonal props: plaid runner, brass candlesticks, mums
- Color palette: rust, burgundy, cream, brass, warm wood
- Lighting strategy: pooled candlelight down the center, dimmed ceiling fixture to 60–70%
- Textile layers: plaid runner plus a folded linen under the plate stack
- Natural elements: potted mums or cut stems in squat vases
- Accent details: ramekins on mini boards; a carved wooden spoon per dish
How To Recreate This Look:
- Start the flow at the table’s far left with plates over a folded linen for traction.
- Add mains first, then sides, then toppings, ending with cutlery and napkins at the far right.
- Layer a plaid runner down the center and stagger 3–5 brass candlesticks away from elbow zones.
- Place low vases near the runner’s ends to “bookend” the line without blocking reach.
- Style with repeating white platters and wood boards for a rhythm that looks organized.
Why This Reads High-End: The rhythm of repeat materials—white, wood, brass—creates a visual cadence. It looks designed, not improvised, even if your menu is spontaneous.
The Most Common Mistake: Centering the plate stack. It jams the line. Always start plates at one end so movement is intuitive.
Pro Styling Tip: Slide one board at a slight angle. That single diagonal adds energy to photos and keeps the layout from feeling rigid.
Take a breath here. Remember, this isn’t about recreating a showroom. It’s about hosting on autopilot so you can pour wine with one hand and slice pie with the other. If one idea clicks, start there and ignore the rest for now.
4) Harvest Bread Board Spread With Copper Accents On A Living Room Console
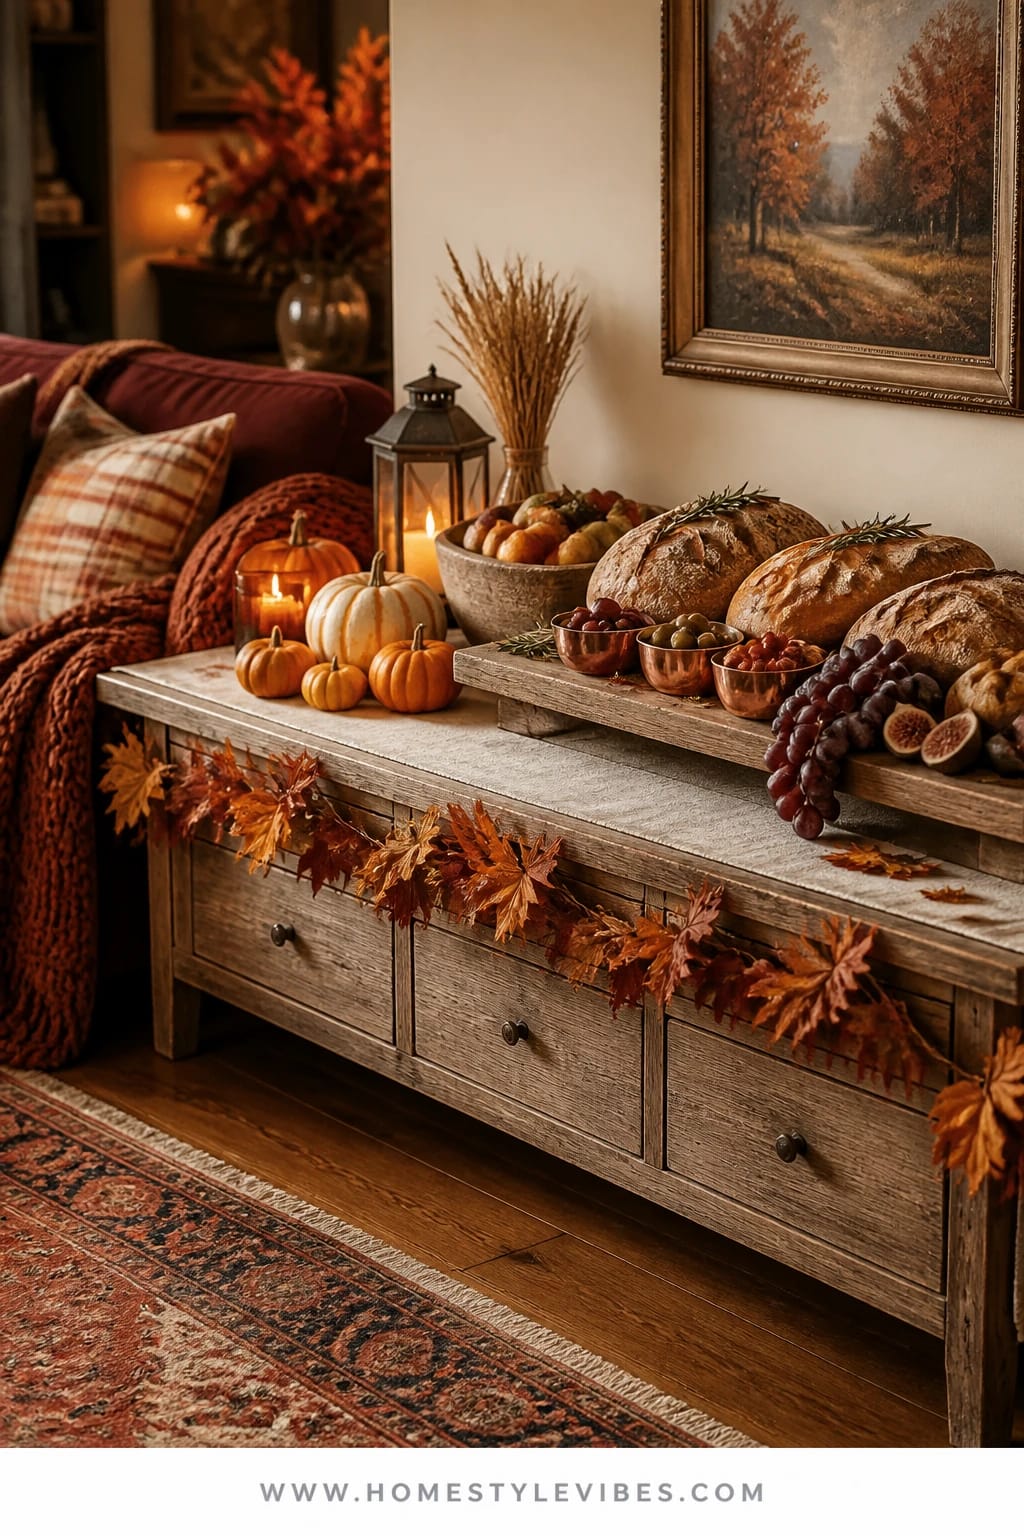
Sometimes the living room is where everyone actually hangs out, and that poor console behind the sofa becomes a balancing act of remotes and random candles. You set out snacks and poof—crumbs everywhere and nothing looks intentional. This harvest bread board spread organizes nibbles into a big, generous vignette that reads cozy and polished without feeling precious.
The mood is warm cabin comfort: crusty loaves, rosemary sprigs, tiny copper bowls for olives, and a cascade of grapes and figs spilling just a bit. Copper warms up under lamplight, which is clutch here—lamps beat overheads for living rooms. Keep one lamp at medium brightness and a single candle in a hurricane for flicker. The rest is texture-on-texture: linen towel-draped boards, braided bread, the glossy sheen of fruit. It photographs like a dream because you’ve got matte (linen), shine (copper), and organic shapes (bread and fruit) playing together.
Real-life win: a single large board means easy cleanup and clear boundaries for little hands. I did this for a Sunday football afternoon last fall. The hero move? A second “shadow” tray beneath the main board to catch crumbs and stray olives. It saved the sofa from oil stains and made me feel slightly genius, not going to lie.
Budget Breakdown:
- Oversized wood bread board: $40–$120
- Copper bowls (3–5 small): $25–$60
- Linen tea towels (2): $12–$30
- Assorted breads and crackers: $15–$35
- Seasonal fruit (grapes, figs, pears): $12–$30
- Herbs (rosemary, thyme) and a small hurricane: $10–$35
Total Estimated Cost: $114 – $310
Best For: Open-concept family rooms with a console or media cabinet; relaxed grazing before dinner or during movie nights, September through late November.
Key Design Elements:
- Main seasonal props: oversized bread board, copper bowls, seasonal fruit
- Color palette: warm wood, copper, deep grape, fig purple, sage green
- Lighting strategy: one table lamp plus a single candle in a hurricane
- Textile layers: linen towels draped casually
- Natural elements: rosemary sprigs, pears, figs
- Accent details: small butter spreaders, matte black tongs for contrast
Why This Looks Intentional: Everything collects onto one hero board, so the console doesn’t feel littered. The copper repeats in small doses to tie the story together.
How To Recreate This Look:
- Start with the largest board centered on the console; slide a thinner tray underneath if crumbs worry you.
- Add a linen towel across one third of the board for softness.
- Layer breads and crackers from largest to smallest, creating gentle mounds.
- Place copper bowls with olives, nuts, and dips nestled into negative spaces.
- Style with grapes draped off the edge, a couple of pears, and rosemary tucked in for scent.
Don’t Do This: Don’t overload dips. More than three looks messy and confuses guests. Keep flavors distinct and leave space between elements so it photographs clearly.
Pro Styling Tip: Add one unexpected pop—like a deep burgundy napkin under the bread knife—to anchor the palette and draw the eye in photos.
5) Maple-Leaf Garland And Honeyed Lanterns On A Dining Room Hutch Buffet
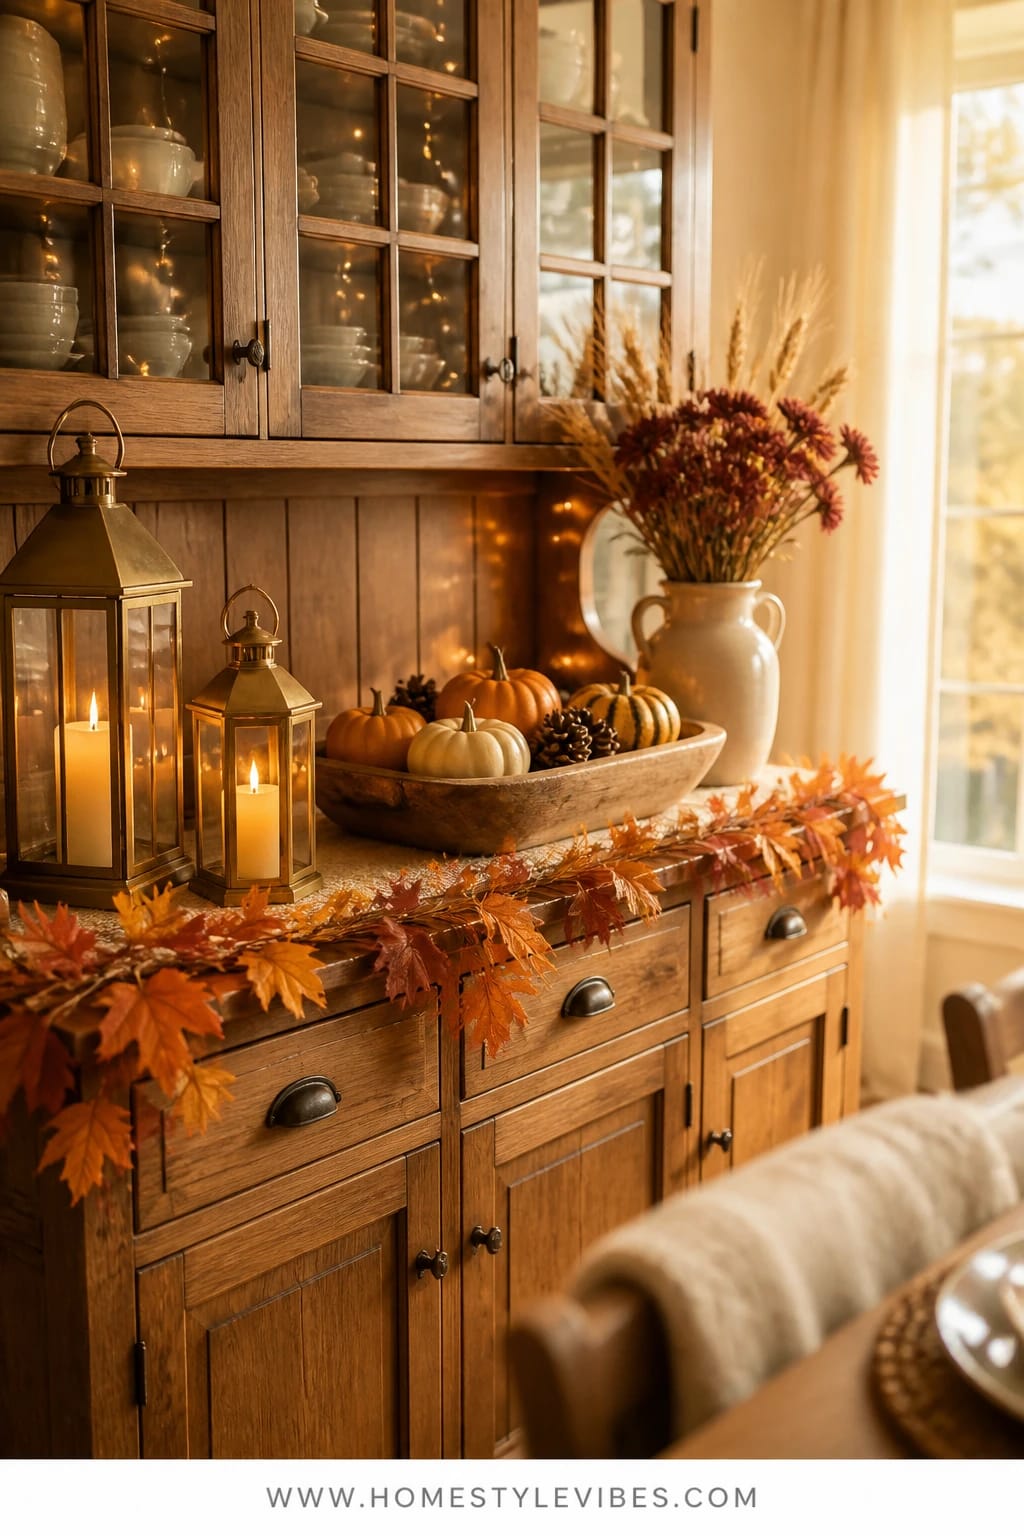
Hutches are tricky. They’re storage workhorses that can read fussy if you style the shelves too dense or sterile if you leave them bare. When you need extra buffet space, the hutch top becomes prime real estate—but it needs presence. This maple-leaf garland and honeyed lantern combo draws the eye up and creates a little stage for desserts or cheese without eating all the surface area.
The atmosphere is festive and generous. A slim maple-leaf garland trails along the hutch edge, two honey-brass lanterns flank the spread, and a cluster of white cake stands lifts pies and tarts to different levels. Overhead glow from the lanterns hits the glossy crust of a pumpkin tart just right, while a couple of mini pumpkins add color without hogging space. It’s practical because everything lifts off easily when you need to get into cabinets. Plus, it stores well—garland tucks into a roll, lanterns stack, and cake stands nest upside down with plates.
Photogenic details include the soft chord of color running across the hutch front, reflective glass from the lanterns, and that tiered dessert moment everyone snaps. For a small-space tweak, use one lantern and a half-garland draped asymmetrically. Or tone it down for late November by removing the brighter oranges and leaning into wheat and cream leaves with one amber lantern.
Budget Breakdown:
- Maple-leaf garland (faux or preserved): $18–$45
- Honey-brass lanterns (2): $40–$120
- White cake stands (2–3 heights): $30–$90
- Mini pumpkins or gourds: $8–$20
- Linen tea towel for crumbs and a pie server: $10–$25
Total Estimated Cost: $106 – $300
Best For: Homes with a dining hutch or built-in; dessert spreads, cheese boards, and late-season gatherings.
Key Design Elements:
- Main seasonal props: maple-leaf garland, honey-brass lanterns, cake stands
- Color palette: honey brass, pumpkin, cream, soft wheat
- Lighting strategy: lanterns with LED pillars at 2200K, dimmed chandelier above
- Textile layers: a single linen runner or towel beneath stands
- Natural elements: mini pumpkins, wheat stems in a slim vase
- Accent details: vintage pie server, small marble slab for cheeses
How To Recreate This Look:
- Start by anchoring the garland across the hutch edge with clear hooks or museum putty at three points.
- Add two lanterns at the outer thirds to frame the center.
- Layer cake stands at ascending heights in the middle; leave space between for easy slicing.
- Place desserts or cheeses; add a small vase of wheat to one side for height.
- Style with a couple of mini pumpkins near the stands and a folded linen under the messiest pie.
Why This Looks Expensive: The vertical emphasis—lantern height, stand tiers, garland line—creates a composed stage. It feels like a styled set, not an afterthought, even if the pie came from the grocery store. FYI, no one cares if the pie is store-bought when it’s presented like this.
Watch Out: Avoid overly fluffy garlands that crowd the surface. You want a slim silhouette that nods to fall without blocking serving space.
Pro Styling Tip: Stagger dessert heights so at least one treat peeks above lantern midlines; it adds that cover-shot dimension in photos.
If your brain is spinning, pause. You don’t need five buffets in one house. Pick the corner that does the most work—sideboard, island, table, console, or hutch—and make that your hero. The rest can be simple.
Quick Checklist
- Choose one anchor surface: sideboard, island, dining table, console, or hutch
- Commit to a warm palette: rust, burgundy, pumpkin, brass, and wood
- Set a lighting plan: 2200–2700K bulbs or candle clusters
- Use one textile layer: runner, towel, or scarf
- Repeat materials: white platters + wood boards + one metal
- Create a left-to-right serving flow if using a table buffet
- Contain clutter with trays and a lidded basket
- Introduce one natural element: pumpkins, eucalyptus, wheat, or fruit
- Elevate a few items: cake stands, boards, or books under platters
- Edit color to 3–4 tones max for a calm, photogenic look
Frequently Asked Questions
How do I keep the budget under control for a fall buffet table when I need a lot of pieces?
Choose one hero: either candles, a big board, or lanterns. Then thrift the rest. Brass candlesticks and white platters are everywhere secondhand. Borrow cake stands from a neighbor, and mix real pumpkins with a few faux so you can reuse them next year.
Are real pumpkins and florals worth it, or should I go faux for durability?
IMO, real pumpkins win every time for texture and color, but keep them away from heat vents or they’ll get that sad half-deflated look by week three. Use faux for height and filler, and layer real ones front and center. For florals, do hardy mums or eucalyptus—they last and dry beautifully.
My dining room is small. Can I still pull off a buffet without crowding the space?
Yes. Use a sideboard or console for mains and keep the dining table for drinks and dessert. Or push the table against a wall and set a single-file buffet with a clear left-to-right flow. Keep decor low and linear to preserve sightlines.
What about storage after the season ends? I don’t have a ton of space.
Pick flat-folding items: gauzy runners, faux leaf garlands that coil, nesting cake stands, and collapsible baskets. Store candleholders and lanterns in clear bins with a labeled photo on the outside so you can rebuild the look in minutes next year.
Are candles safe with kids and pets around these buffet setups?
Use enclosed hurricanes or switch to warm 2200K LED pillars for family-heavy nights. Keep real flames at least 6 inches from textiles and move them to rear corners where they can’t be bumped by eager elbows or tails.
When should I start decorating for a fall buffet if I’m hosting multiple events?
Set your base in mid-September: runner, lanterns, and neutral gourds. Layer in brighter pumpkins and mums for October, then swap bold plaid for cream and wheat textures in November to carry you through Thanksgiving.
Your Cozy Fall Hosting Era Starts Now
You don’t need a designer’s budget or an extra room to nail effortless party hosting. Choose one buffet idea and commit. Line up your color story, repeat a few materials, and light it warmly. The truth is, cozy bright autumn style comes from layered texture, warm glow, and generous, practical layouts—not fancy dishes or perfect pies.
So pick your spot—sideboard, island, table, console, or hutch—and give it that harvest-abundant treatment. Add candles that actually glow warm, a tight palette of rust and brass, and one natural element with real texture. You’ll feel the room shift the moment the first flame flickers and someone reaches for a slice of bread. You’ve got this. And if a crumb falls? That’s just proof people are enjoying themselves, which is exactly the vibe we’re going for.

About the Author

Krisztina P.Rendes, Founder of Home Style Vibes
Founder of Home Style Vibes
Krisztina Puskásné Rendes created Home Style Vibes as a cozy-modern lifestyle space where homemaking meets inspiration. Her goal is to help women create beautiful, organized, and peaceful homes they truly love — without overwhelm. You’ll find here heart-driven content on home decor, cleaning tips, easy family recipes, organization and decluttering, DIY home projects, plants, and seasonal ideas — all designed to bring more calm, comfort, and style into everyday life.





