7 Meditation Garden Ideas For A Peaceful Backyard Retreat
You want a calm, soul-soothing backyard that feels like a deep exhale. You hate the chaos: the patchy lawn, the noisy street, the random plastic planters that never looked intentional. Picture sunlight dappled through leaves, stone under bare feet, the hush of moving water, and one simple place where your brain finally gets quiet. These seven meditation garden ideas fix the noise-and-clutter problem with clear, doable design moves—most under a $2,500 cap—and help you build a peaceful backyard retreat that looks as good on camera as it feels at 7 a.m. with a cup of tea.
Expect textures, restraint, and lighting that flatters. Expect specific materials that photograph beautifully—matte stone, soft grasses, and honest wood—so your space looks magazine-ready in person and on Pinterest. Each design stands on its own, with a mood, a plan, and a budget breakdown. If you crave quiet, you’ll find your version here.
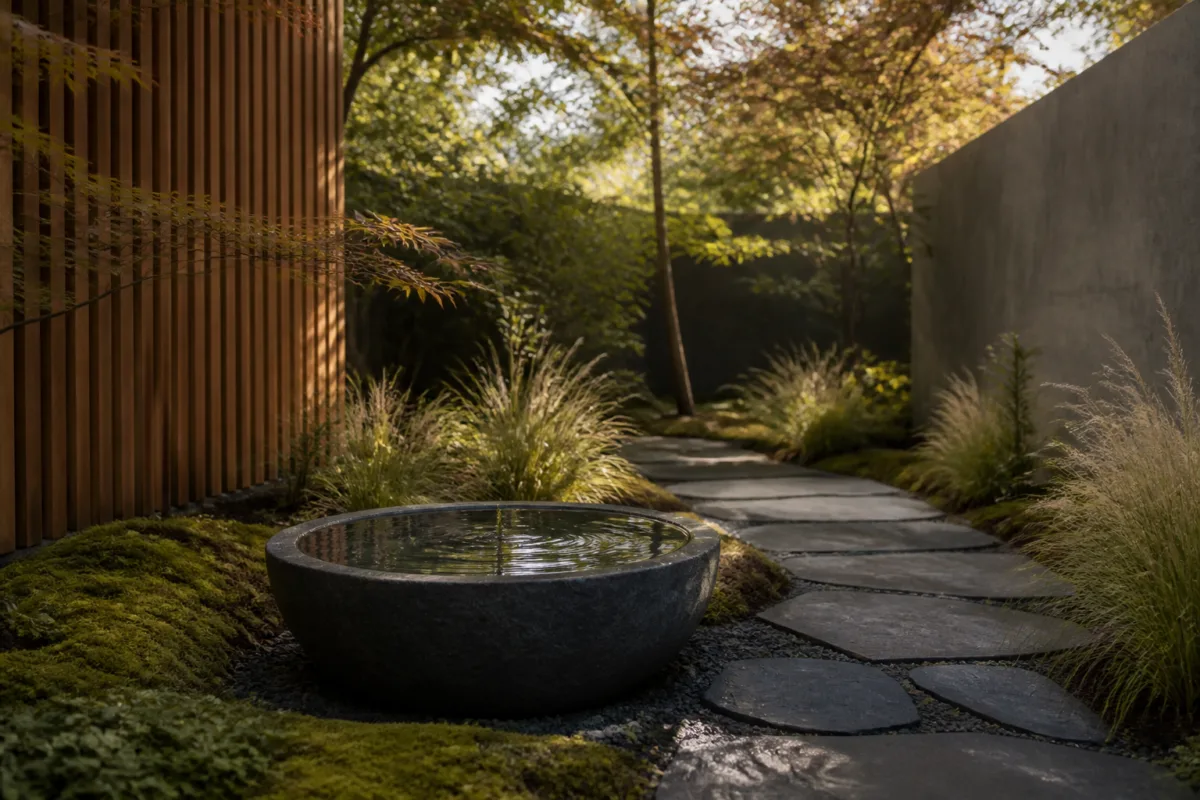
1. Charcoal Basalt Path With Dappled Morning Light And a Low Bowl Water Feature
We’ve all been there: a backyard that feels like a long to-do list instead of a sanctuary. You’ve tried pavers and a bench, but it still reads patchwork. This concept centers your meditation garden around a simple basalt stepping path that ribbons through feathery grasses and lands at a low, circular water bowl. The result? A modern Zen mood where your feet know exactly where to go, your eyes have one calming focal point, and the morning light scatters through leaves like confetti you can actually live with.
The mood leans Japandi-meets-Scandinavian minimal, so it works in small yards that need clarity and in larger spaces that need direction. Basalt brings a grounding charcoal tone with a soft, matte finish that hides dust and looks elegant wet. The bowl water feature gives sound without splash—ideal for quiet, even in tight urban lots. I tried a similar path at my last house, replacing a crooked flagstone mess with straight basalt pads; the minute I aligned them with the back door sightline, the entire yard felt composed.
Why it works at home: it’s maintenance-light, family-friendly (the path tells kids where to step), and incredibly photogenic. Dappled light dances on the stone and water, creating layered shadows that add depth on camera and soothe in person. If your yard runs dark, charcoal reads luxe, not gloomy, especially framed by soft greens like carex, lomandra, and delicate ferns.
Budget Breakdown:
- Basalt step stones or large-format pavers: $12–$25/sq ft
- Pre-formed low bowl water feature (with pump): $250–$800
- Compact ornamental grasses and ferns: $8–$24 per plant
- Gravel underlayment and sand: $100–$300
- Low-voltage path lighting: $120–$300
- Mulch or decorative gravel: $100–$250
Total Estimated Cost: $1,100 – $3,000
Best For: Narrow yards, side gardens, or any space you pass through daily. Ideal if you want a sound cue for meditation and a clean, modern look.
Key Design Elements:
- Main materials: charcoal basalt, river gravel, powder-coated steel water bowl
- Color palette: charcoal, soft green, muted silver, hints of warm wood
- Lighting strategy: low, shielded path lights to graze the stone and minimize glare
- Furniture silhouettes: one low bench, simple lines, no back or a gentle curve
- Texture layers: matte stone, shimmering water, feathery grasses, smooth pebbles
- Accent details: moss between pavers, a single sculptural boulder, blackened steel edging
How To Recreate This Look:
- Start with a clean line from your door to the water bowl—stretch a string to align your path.
- Add compact basalt pavers with 2–4 inches of even spacing; dust the joints with sand or fine gravel.
- Layer grasses in clusters of three to five around curves to soften edges and hide irrigation.
- Install the water bowl close enough to hear the trickle from your seating area.
- Style with a low teak or cedar bench and a single lantern; keep decor minimal.
Why This Looks Expensive: Restraint. One hero stone, one water moment, and a consistent charcoal tone read curated. The matte finish and controlled spacing feel intentional, not DIY-chaotic.
Watch Out: Don’t scatter random plant species everywhere. Two or three grasses in repetition beat a dozen different textures fighting for attention.
Pro Styling Tip: Photograph right after watering the basalt—wet stone deepens the tone, catches the sky’s reflection, and makes the greens pop.
Keep scrolling—next up brings warmth and scent, without the high maintenance you think comes with blooms.
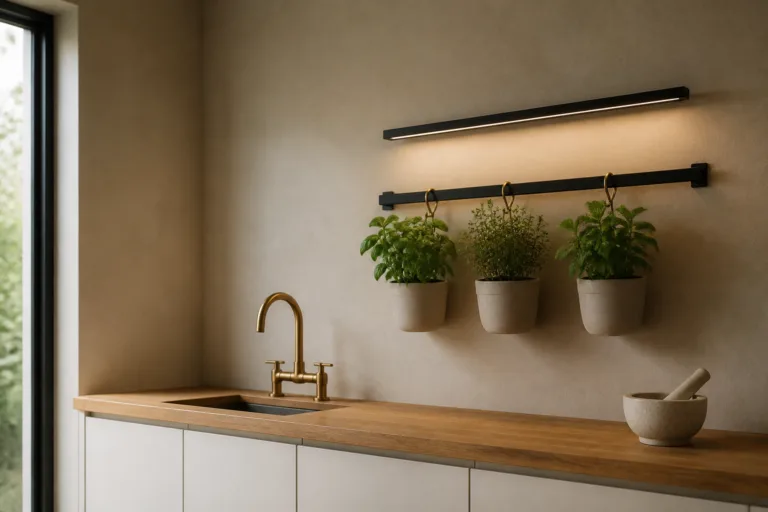
2. Honey Cedar Decking With Golden Hour Glow And a Built-In Meditation Bench
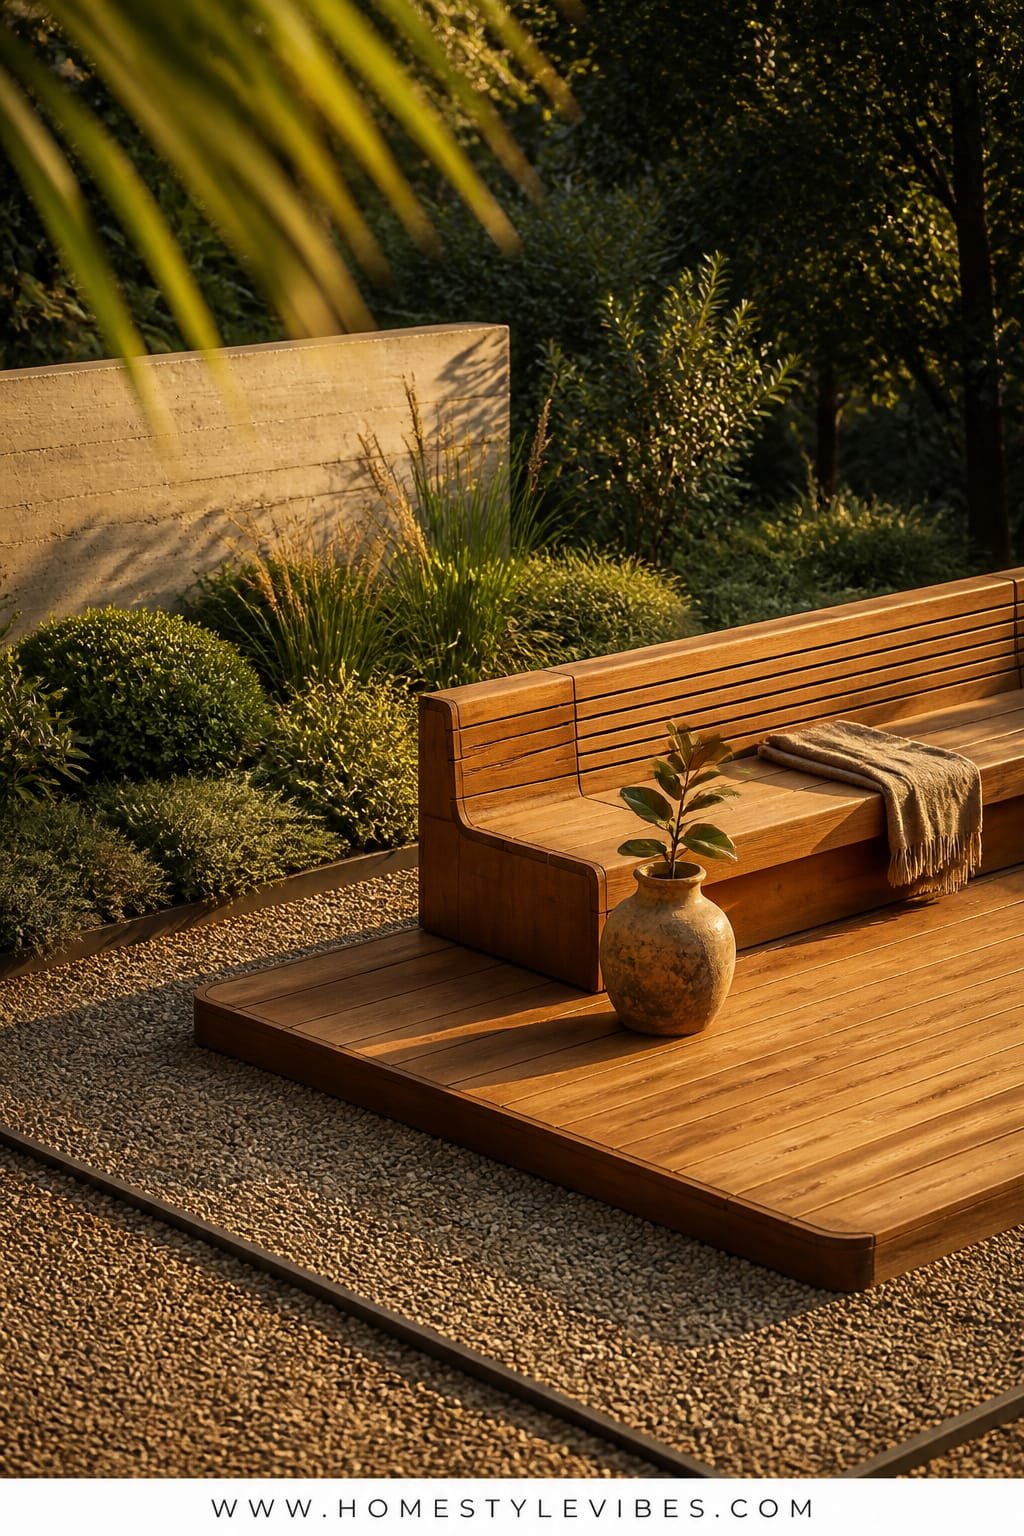
It’s that one corner that always feels off: the patio slab that collects leaves and never feels inviting. You’ve tried a bistro set, but it still looks like “outdoor waiting room.” This design turns the corner into a sanctuary by floating a compact cedar platform underfoot and carving a built-in bench along one side. At golden hour, the wood warms up like a candle, and the bench, with a quiet backrest and hidden storage, becomes the anchor of your meditation garden.
The mood lives between spa and cabin retreat. Cedar is forgiving, smells incredible (that instant “ahh” when you sit), and weathers into a silvery gray that looks coastal-chic. A built-in bench feels custom, which is exactly why it photographs like a magazine feature. It works for renters too: you can build a freestanding platform that sits on gravel pavers, then take it with you later. For small yards, go edge-to-edge in one direction so it feels expansive, not like a postage stamp floating in grass.
Key Design Elements:
- Main materials: cedar decking, concealed deck screws, black bracket hardware
- Color palette: honey wood, olive green planters, matte black accents, cream textiles
- Lighting strategy: warm 2700K LED strip tucked under the bench lip for a soft wash
- Furniture silhouettes: linear bench, low round side table, flat-woven outdoor rug
- Texture layers: smooth wood grain, nubby cushions, clay pots, leafy foliage
- Accent details: lavender or rosemary planters for scent, a single sculptural lantern
Budget Breakdown:
- Cedar decking: $3–$7/linear ft
- Joists and footings or deck blocks: $150–$450
- Built-in bench materials: $120–$300
- Under-bench LED strip (outdoor-rated): $80–$180
- Outdoor cushions and rug: $120–$400
- Planters and herbs: $60–$200
Total Estimated Cost: $800 – $2,200
Best For: Courtyards, townhouse patios, and anyone who meditates early evening. Perfect if you want warmth and scent without a high-maintenance garden.
How To Recreate This Look:
- Start by defining the platform size: at least 6×8 feet feels generous for one person.
- Add deck blocks or gravel pavers to level; install joists at 16 inches on center.
- Layer cedar boards with concealed screws; lightly sand edges for a smooth barefoot feel.
- Install a simple bench frame along the back edge and add a hinged seat for storage.
- Style with a flat-woven rug, two oversized cushions, and herbs flanking the bench ends.
Why This Feels Designer: Integrated seating plus hidden lighting. The bench looks custom and keeps the floor uncluttered, while the warm LED strip creates that “floating” effect designers love.
One Thing To Avoid: Don’t use cool white LEDs. They wash the cedar gray and flatten the vibe. Stick to warm 2700K for glow that flatters skin and wood.
Pro Styling Tip: Shoot during golden hour; the wood grain will catch light and shadow bands that add dimension to every photo.
Feeling calmer already? The next idea trades boards and benches for gravel and rhythm—zen on a budget, with serious texture.
3. White Pea Gravel Base With Cool Shade Light And a Curved Teak Lounger
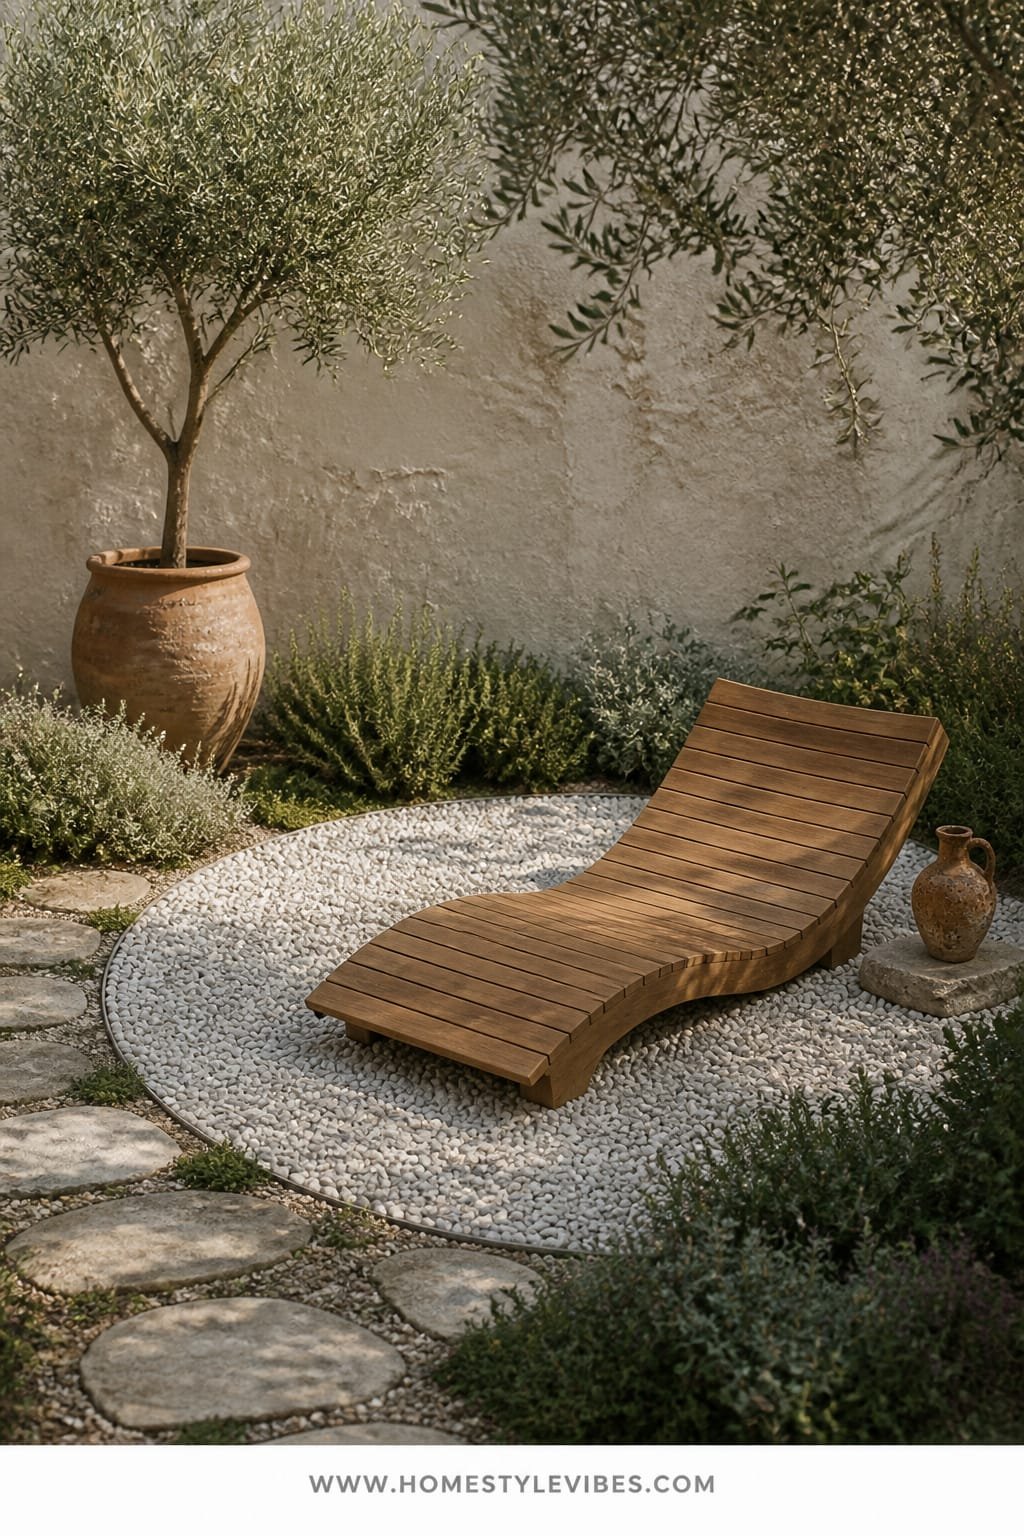
You want a dedicated spot to drop into quiet, but your lawn drains your energy and your budget. Pea gravel to the rescue. Create a defined meditation garden circle in bright white or pale gray pea gravel, then place one statement piece: a curved teak lounger that supports the spine and invites stillness. Under tree shade, the cool light keeps everything calm—like a midday siesta for your senses.
The vibe is coastal-Mediterranean meets courtyard chic. Gravel is low-cost, instantly transforming, and acoustically soothing underfoot. It makes small spaces feel intentional because of the crisp edge between gravel and planting beds. Teak looks sculptural and ages beautifully. If you’re a renter, this entire setup can be reversed in an afternoon. Bonus: gravel photographs like a natural reflector, brightening your subject without harsh glare.
Budget Breakdown:
- Pea gravel: $4–$8 per 50-lb bag or $40–$70/yard bulk
- Landscape fabric and steel edging: $120–$300
- Curved teak or acacia lounger: $250–$900
- Planter pairs with olives or bay laurel: $60–$300
- Outdoor cushion or lumbar roll: $30–$80
Total Estimated Cost: $500 – $1,800
Best For: Courtyard nooks, renters, and anyone craving texture without heavy construction. Great in partial shade where cool light makes white gravel glow softly.
Key Design Elements:
- Main materials: pea gravel, powder-coated steel edging, teak
- Color palette: white/gray gravel, warm wood, sage green, terracotta accents
- Lighting strategy: minimal—rely on ambient shade; add one low lantern for dusk
- Furniture silhouettes: sculptural curves and low profiles
- Texture layers: crunchy gravel, smooth teak, waxy olive leaves
- Accent details: round terracotta saucers, linen pillows, a single stone side table
How To Recreate This Look:
- Start with a circle or oval; stake the shape and install steel edging for a clean rim.
- Add landscape fabric to block weeds; pour gravel to 2–3 inches deep and rake smooth.
- Layer in two large planters opposite the entry to balance the lounger visually.
- Install a compact lantern and keep lighting low so the gravel doesn’t glare at night.
- Style with a lumbar roll and a folded throw for cooler mornings.
Why This Reads High-End: Geometry and contrast. A crisp-edged gravel circle with one sculptural lounger looks curated, not cobbled together. The tight shape control screams intention.
The Most Common Mistake: Skipping edging or using flimsy plastic. Your gravel will leak everywhere and the circle loses its clean silhouette.
Pro Styling Tip: For photos, rake gravel in gentle arcs around the lounger—those subtle lines add movement and texture on camera.
Pause and breathe. If one idea is already whispering “yes,” pin it. You don’t need every feature—just one move that gives your mind a home base.
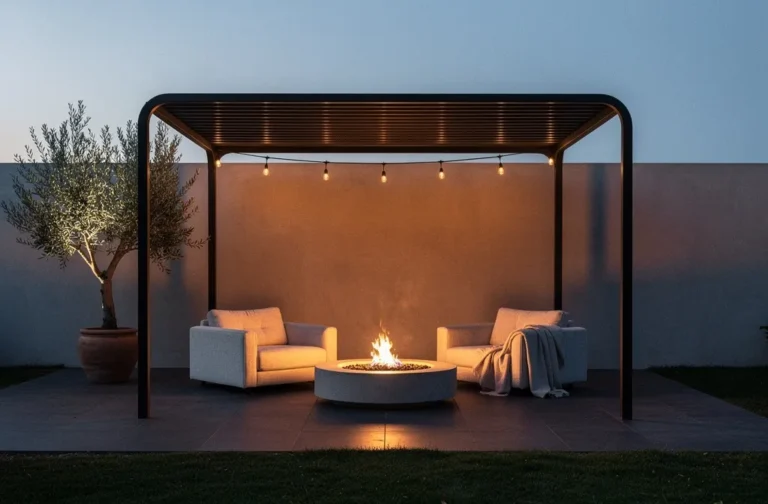
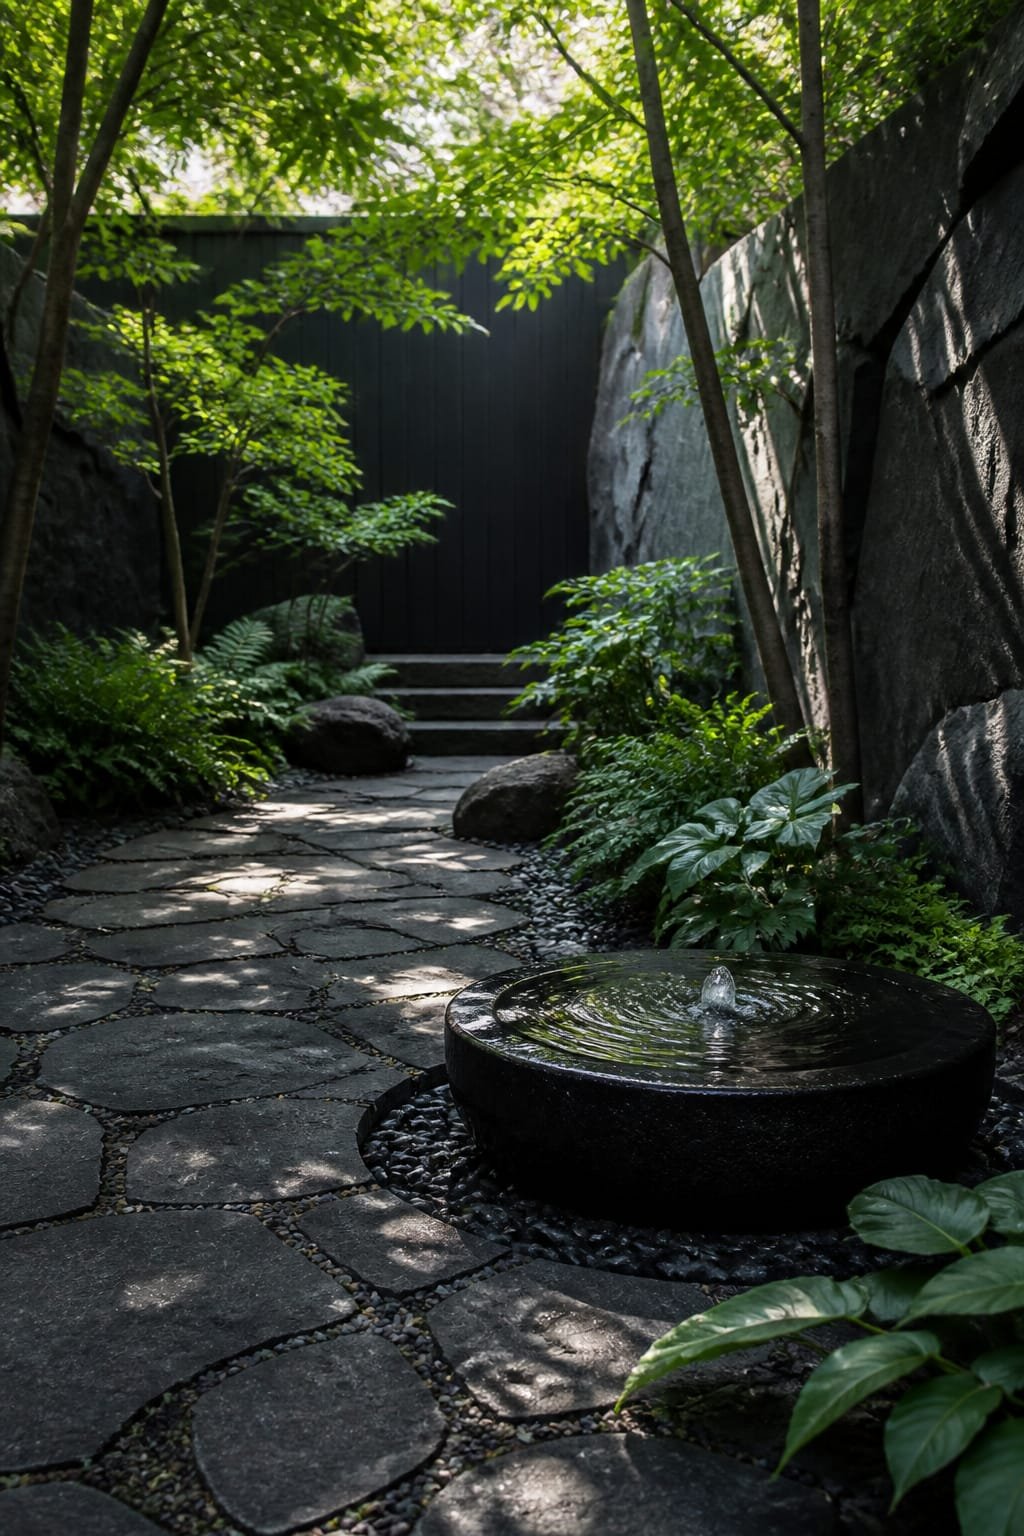
4. Tumbled Limestone Pavers With Soft Twilight Uplighting And a Sculptural Fire Bowl
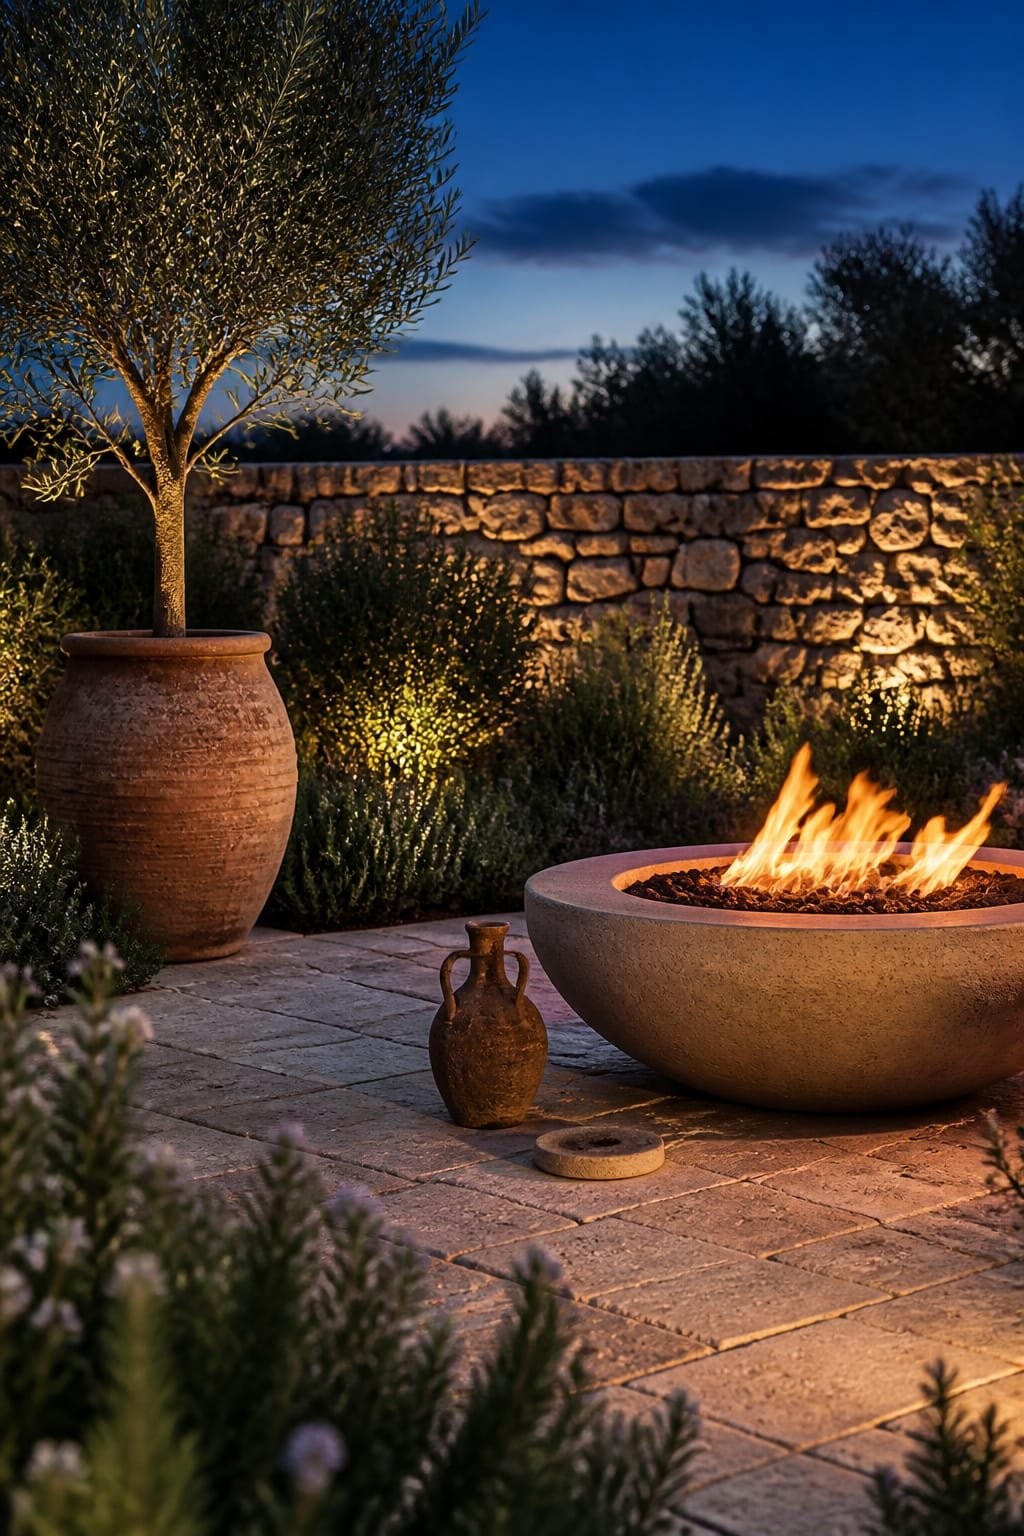
Night meditators, this one’s for you. Maybe your daytime is nonstop, and your only quiet comes after dinner. You’ve tried candles, but wind laughs at them. Anchor your meditation garden with warm-toned limestone pavers—tumbled edges, soft under bare feet—then layer in low uplights that graze plant leaves and a sculptural fire bowl as your focal point. Twilight turns the limestone buttery, and flames become your breath cue.
The mood channels hotel-spa courtyard meets modern Mediterranean. Limestone reads luxe because of its natural color variation and soft finish; it also stays cooler than concrete under sun. Uplighting done right avoids glare and creates drama through shadows. It works in real homes because you can set it up on a small patio without major demo and still get that “destination” feeling as soon as you step outside. A friend of mine spent weeks agonizing over paint colors for her fence before realizing the real problem was her lighting; we added two uplights on her olive trees and boom—instant depth.
Budget Breakdown:
- Tumbled limestone pavers: $10–$18/sq ft
- Low-voltage uplights and transformer: $200–$450
- Gas or wood fire bowl: $300–$1,200
- Wide meditation cushion or floor pillows: $80–$180
- Planters or in-ground drought plants: $100–$350
Total Estimated Cost: $1,200 – $3,500
Best For: Evening rituals, mild climates, and anyone who loves a warm, intimate glow. Great for medium patios where a fire bowl centers the layout.
Key Design Elements:
- Main materials: limestone, corten or concrete fire bowl, bronze or black fixtures
- Color palette: sand, cream, olive, ember orange at night
- Lighting strategy: uplight foliage at 30–45 degrees; keep fixtures hidden
- Furniture silhouettes: low, round forms to echo the fire bowl
- Texture layers: pitted stone, velvety pillows, flickering light, glossy leaves
- Accent details: match strike on a tray, ceramic cups for tea, a wool throw
How To Recreate This Look:
- Start by dry-laying pavers to map joints; aim for tight, consistent spacing.
- Add two to four uplights at plant bases; hide wires under paver joints.
- Layer a round fire bowl at the far third of the patio for balanced sightlines.
- Install a weatherproof cushion storage basket nearby.
- Style with oversized floor pillows and one low table for tea or mala beads.
Why This Looks Intentional: Repeating curves—fire bowl, low table, round pillows—creates cohesion. Uplighting plants instead of fixtures keeps focus on texture and form.
Don’t Do This: Don’t blast cool-white spots at the fire bowl. Warm light only, or the mood reads cafeteria instead of sanctuary.
Pro Styling Tip: Turn off porch lights during photos; let the uplights and fire define the scene for richer contrast and inky shadows.
Want a more natural, barefoot-in-the-forest feeling? The next concept leans into stone and moss—quiet, grounding, and deeply textural.
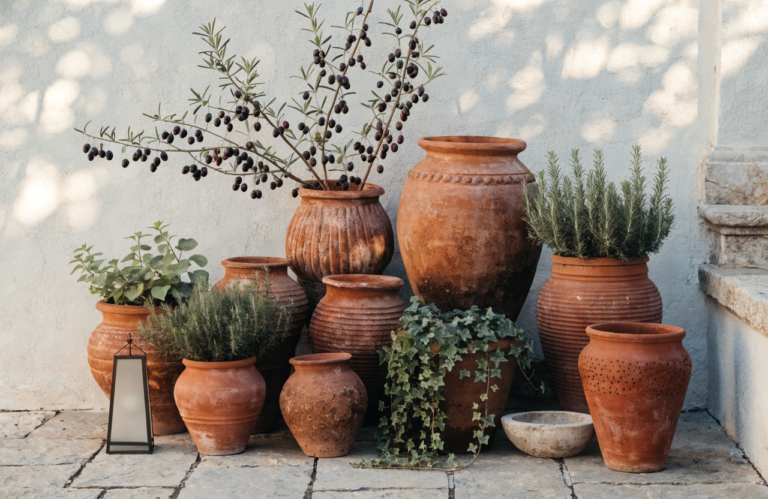
5. River Stone Groundcover With Soft-Fog Morning Light And a Carved Stone Meditation Stool
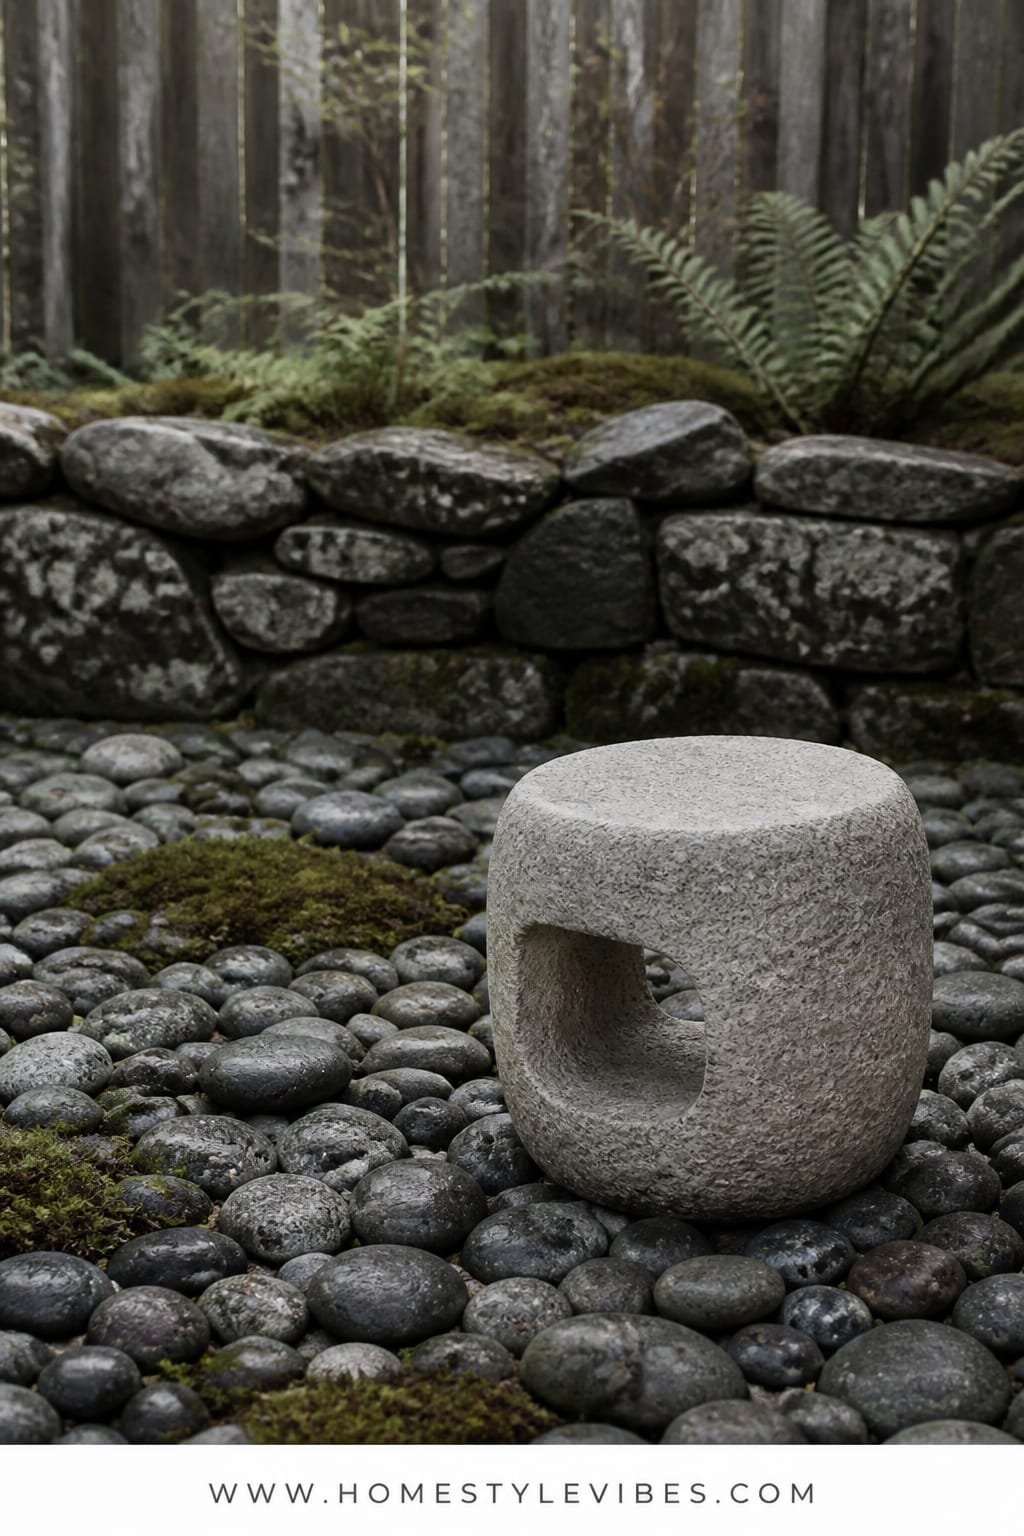
You love the idea of grounding, but your backyard still screams “utility.” Plastic pots. Random hose. A sad fence. This design swaps chaos for calm with river stone groundcover in mixed sizes, a few mossy pockets, and one carved stone stool that serves as the still point of the space. Morning fog or overcast light turns the stones into a soft grayscale painting—seriously photogenic, seriously calming.
The mood feels ancient and honest—Japanese garden influence with Pacific Northwest sensibility. River stones invite slow feet and slow thoughts; the stool’s weight literally makes you stay. It works beautifully for small spaces because contrast and texture carry the composition without lots of plants. Maintenance is simple: blow leaves, tuck moss in shady pockets, done. Vulnerable moment: getting moss to take is annoying at first. It needs shade and moisture. But when it finally grabs, it’s unexpectedly thrilling—like watching your space learn to breathe.
Budget Breakdown:
- River stones (mixed 1–3 inches): $60–$120/yard
- Steel or stone edging: $120–$300
- Carved stone stool: $180–$700
- Shade ferns and moss starters: $80–$200
- One low, dark planter with a sculptural evergreen: $60–$180
Total Estimated Cost: $500 – $1,500
Best For: Shady side yards, foggy climates, or anyone who meditates at dawn. Ideal for textural photography and low maintenance.
Key Design Elements:
- Main materials: river stone, natural stone stool, steel edging
- Color palette: charcoal, slate, soft silver, deep green
- Lighting strategy: minimal—let ambient cool light flatter the stones’ natural sheen
- Furniture silhouettes: compact, solid, and elemental
- Texture layers: smooth stones, velvety moss, lacy ferns
- Accent details: a weathered wooden ladle, a quiet ceramic bell, black gravel stripes
How To Recreate This Look:
- Start by grading slightly so water drains away from the house; add landscape fabric.
- Add a border using steel or stacked stone; keep the line sinuous, not wobbly.
- Layer larger stones first, then smaller on top for a natural gradation.
- Install the stone stool slightly off-center; leave a small, clear standing spot.
- Style with a single evergreen in a matte black planter and tuck moss into shaded crevices.
Why This Reads High-End: Weight and restraint. Real stone, few elements, and negative space support a gallery-like composition that looks custom.
Watch Out: Don’t mix too many stone colors. Stick to one cool family or one warm family so it doesn’t look like aquarium gravel.
Pro Styling Tip: After a light misting, photograph from a low angle; small reflections on the river stones create depth and mood.
Remember, this isn’t about recreating a showroom. It’s about building a corner that fits your rhythms and your budget. If one idea resonates more than the others, that’s your starting point.
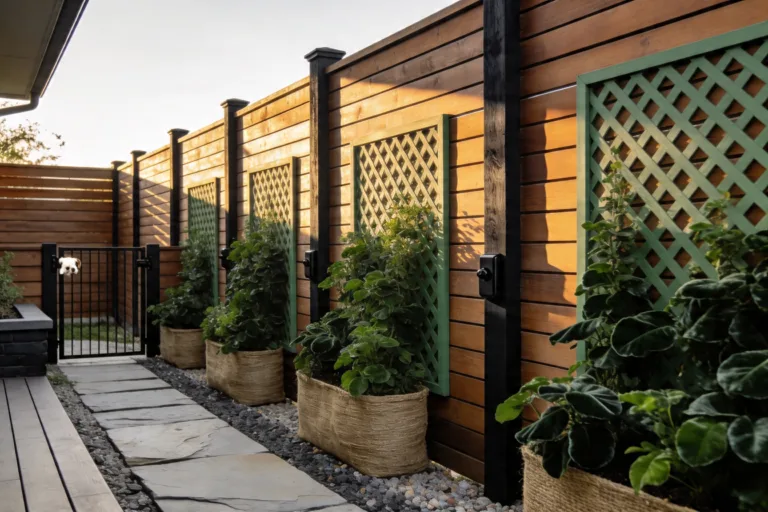
6. Black-Stained Slat Fence With Morning Sunbeams And a Low Platform Daybed
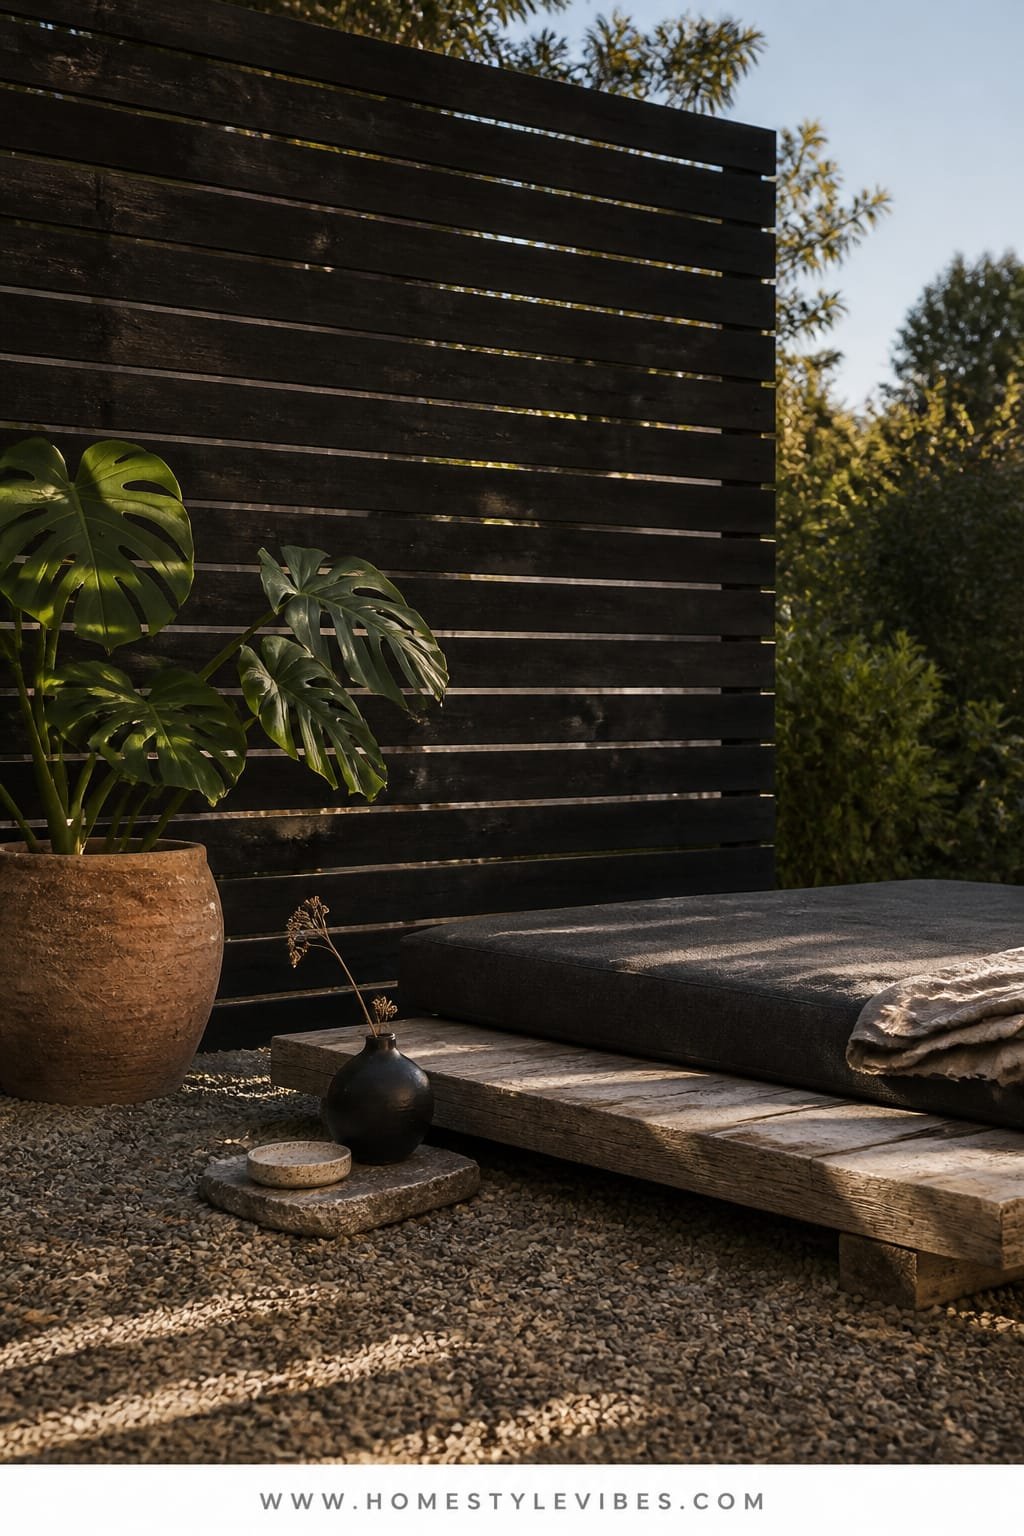
You crave privacy but your fence looks tired and busy. You’ve added planters to “hide” it, and now the yard feels crowded. Instead, control the backdrop. A black-stained horizontal slat fence instantly makes greenery pop, absorbs visual noise, and frames a low platform daybed for seated or reclined meditation. When the morning sun hits, bands of light stripe the space like a quiet art installation.
The mood is urban-jungle minimal with graphic edge. Black stain gives depth and hides imperfections; the horizontal rhythm widens a narrow yard visually. A low daybed doubles for reading and stretching, and it photographs like a boutique hotel cabana—minus the awkward resort wristband. FYI: black reads sophisticated in photos, but only when clean lines rule. Keep hardware and hinges black too so nothing interrupts the flow.
Budget Breakdown:
- Cedar or pine slats and posts: $400–$1,200 depending on yard length
- Exterior black stain and applicators: $80–$200
- Low platform daybed or pallet build: $150–$600
- Outdoor mattress and two bolsters: $200–$400
- Two large matte planters with tropicals or hardy evergreens: $120–$350
- String lights or minimal pendants, warm tone: $40–$150
Total Estimated Cost: $990 – $2,900
Best For: Narrow urban yards, renters with permission to paint/stain, or anyone needing visual calm and privacy.
Key Design Elements:
- Main materials: stained wood slats, weatherproof fabric, matte planters
- Color palette: black, deep green, cream textiles, one warm wood accent
- Lighting strategy: morning stripes, soft evening string lights, no overhead glare
- Furniture silhouettes: low, rectangular, tailored cushions
- Texture layers: smooth slats, nubby fabrics, glossy leaves, matte ceramic
- Accent details: black metal hooks for lanterns, a single linen throw, hidden storage box
How To Recreate This Look:
- Start by sanding and staining existing fence slats; go horizontal if rebuilding.
- Add a simple platform frame and top with an outdoor mattress; keep height low.
- Layer in two oversized planters at the head and foot to frame the daybed.
- Install warm string lights along the top edge; avoid droopy swag that looks messy.
- Style with two bolsters and a single tray for tea; no pile of pillows—keep it calm.
Why This Looks Expensive: Monochrome backdrop with strong lines. Plants and textiles become the stars against a deep, continuous field of black.
One Thing To Avoid: Don’t mix shiny and matte black finishes randomly. Shiny spots look cheap under sunlight. Stick to matte or satin.
Pro Styling Tip: Shoot when sun slices through the slats; highlight the light bands falling across the daybed for dramatic contrast.
Let’s soften the geometry. If your heart wants fragrance and gentle movement, the final idea is a love letter to wind and blooms.
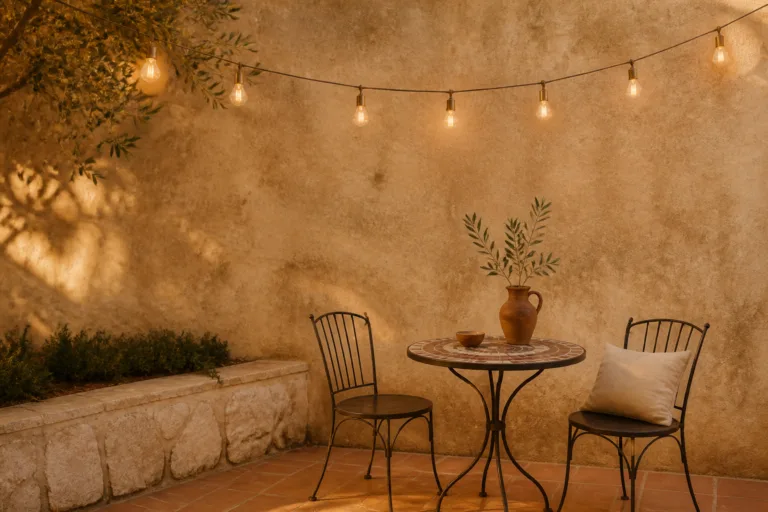
7. Limewashed Stucco Wall With Late-Afternoon Warmth And a Hanging Rattan Cocoon Chair
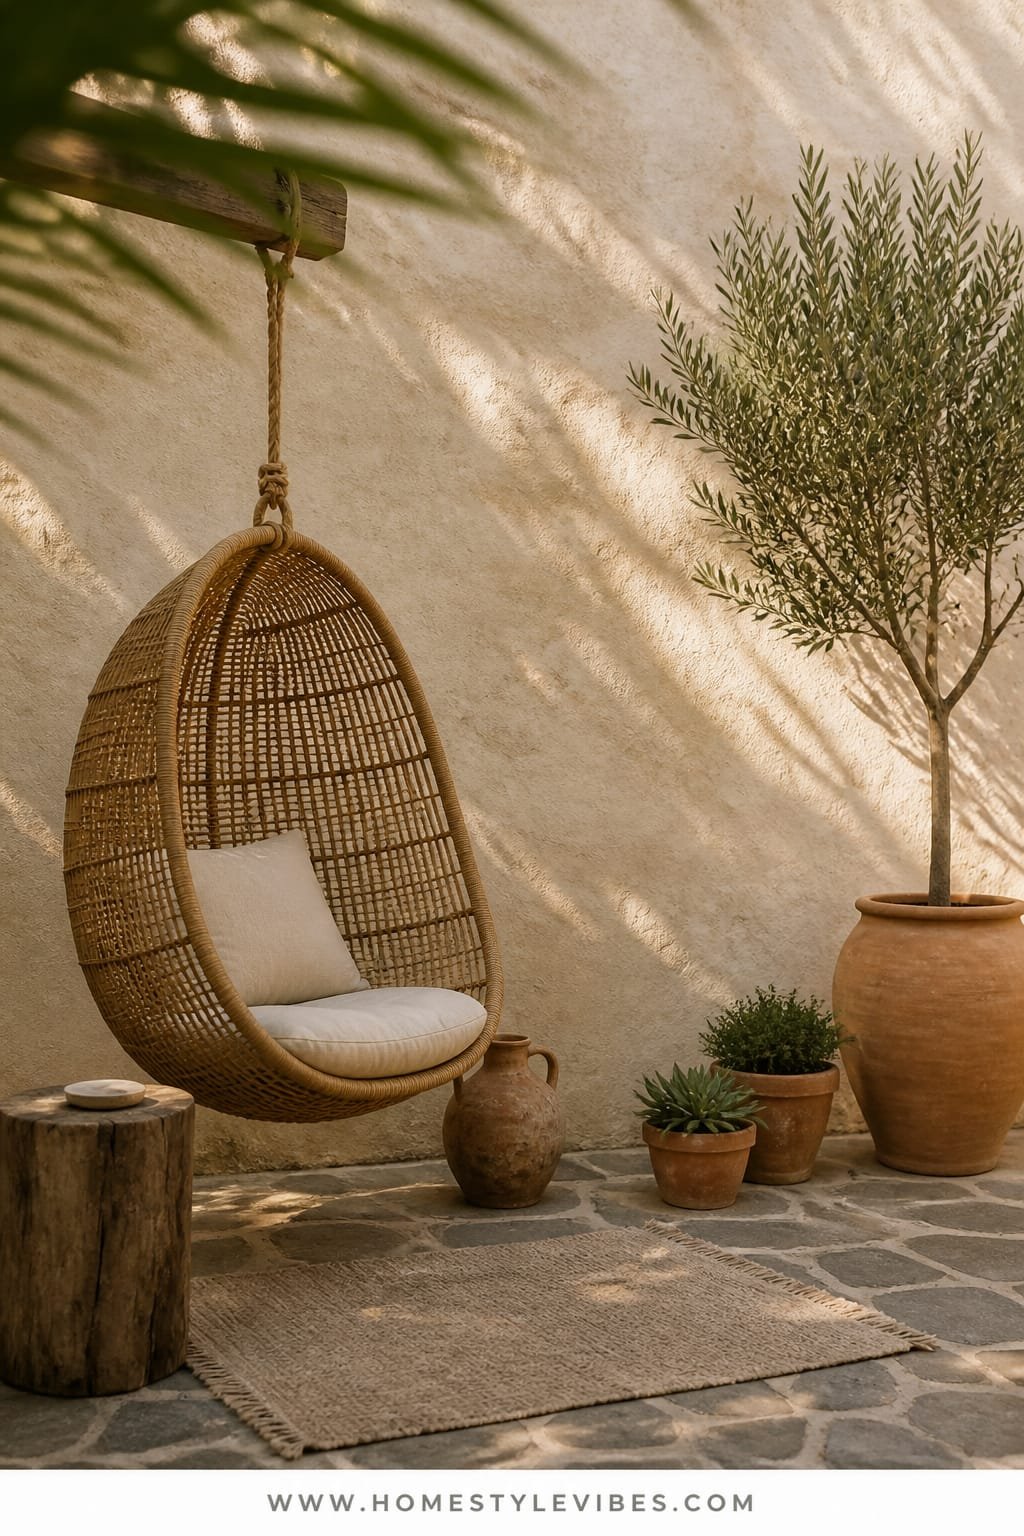
You’ve pinned Mediterranean courtyards but worry they’re too high-maintenance. Bougainvillea everywhere, crumbling stone, endless pruning. Here’s the streamlined version. Build a small limewashed stucco backdrop—creamy, imperfect, alive with light—and hang a rattan cocoon chair in front. Late-afternoon sun kisses the wall, showing off its brushstrokes while the chair floats like a nest. Add drought-tolerant pots and a simple rug. Done. It’s your private retreat that feels centuries-old and totally current.
The mood: modern Mediterranean with artful imperfection. Limewash plays with light and texture unlike flat paint; it gives movement even when nothing else is happening. Rattan brings warmth and shadows that dance across the wall. This combo works in real homes because you can start small: one panel of stucco or even a limewash over cement board, a single hanging chair from a beam or a reliable stand, and select planters. It’s romantic, photogenic, and surprisingly easy to keep clean. Imperfect is good here—embrace it.
Key Design Elements:
- Main materials: limewashed stucco, natural rattan, clay pots
- Color palette: cream, warm sand, olive, muted terracotta
- Lighting strategy: lean on late-afternoon sun; add a candle lantern at dusk
- Furniture silhouettes: cocoon chair curves, round side table, soft rug
- Texture layers: chalky wall, woven rattan, linen cushion, chalky terracotta
- Accent details: thyme and oregano pots, a woven basket for blankets, iron hook
Budget Breakdown:
- Limewash/stucco supplies: $150–$500 depending on area
- Rattan hanging chair or sturdy stand: $250–$900
- Outdoor-rated hardware or stand: $60–$180
- Clay pots and Mediterranean herbs: $80–$220
- Flat-woven outdoor rug: $80–$200
Total Estimated Cost: $620 – $2,000
Best For: Sun-washed patios, south- or west-facing walls, and anyone who wants a sensory ritual—soft sway, warm light, herbal scent.
How To Recreate This Look:
- Start with a dedicated backdrop; apply limewash in irregular strokes for depth.
- Add a ceiling anchor with proper structural support or choose a rated stand.
- Layer the rattan cocoon chair with a neutral cushion and linen throw.
- Install two clay pots with hardy herbs on either side to frame the chair.
- Style with a round side table and a lantern; keep decor simple and tonal.
Why This Feels Designer: Light-play on textured walls. Limewash gives you a living background that changes throughout the day, so your garden never looks flat.
The Most Common Mistake: Hanging the chair too high. Aim for a seat height similar to a standard chair—around 16–18 inches—so it feels grounded, not awkward.
Pro Styling Tip: Photograph at golden hour when the wall reads buttery and the rattan casts lace-like shadows—instant editorial mood.
Small confession: I once installed a cocoon chair before testing the sun path and ended up squinting through every session. Move your chair around for a day, watch the light, then commit. Trust me, five minutes of testing beats years of “almost right.”
Quick Checklist
- Choose one focal material: stone, wood, or stucco
- Define a shape with crisp edging
- Pick one hero piece: water bowl, fire bowl, daybed, or hanging chair
- Repeat plants in clusters for calm rhythm
- Use warm 2700K lighting for evenings
- Hide hardware and wires to keep the scene quiet
- Layer textures: matte stone, woven fiber, soft textile
- Limit the color palette to 3–4 tones
- Test the sun path before installing seating
- Schedule five-minute tidy rituals before you sit
Frequently Asked Questions
How do I create a meditation garden on a tight budget without it looking cheap?
Pick one strong move and do it well. A clean gravel circle with proper steel edging and one sculptural seat looks deliberate and calm. Limit plant varieties to two or three and repeat them. Keep the palette tight and avoid small, fussy decor.
My yard is tiny. Which idea works best for small spaces?
Go with the pea gravel circle and a single curved lounger or the basalt path with a compact water bowl. Defined shapes and one focal point make small yards feel intentional instead of crowded.
What’s the easiest lighting setup for a beginner?
Low-voltage path or uplights with a plug-in transformer. Choose warm 2700K fixtures, hide them in planting beds, and aim at plants or stone—not eyes. One or two well-placed lights beat a string of glare bombs.
How do I maintain these spaces season to season?
Keep a soft brush or small blower handy for daily touch-ups. Top up gravel once a year, reseal wood every 1–2 years depending on climate, and trim plants lightly but consistently. The secret is short, frequent care, not marathon weekends.
I’m a renter—can I still build a meditation garden?
Yes. Use freestanding elements: gravel on landscape fabric with steel edging staked into soil, a portable water bowl, a platform daybed, and planters. Skip permanent footings and choose lighting that plugs into an outdoor outlet.
Closing Thoughts
Pick one idea and start where your body already wants to sit. Maybe that’s a cedar platform that smells like the woods, or a gravel circle that crunches under foot and quiets your mind as you step in. Your meditation garden doesn’t need every feature; it needs one clear intention, repeated confidently.
The truth is, luxury outdoors comes from texture, lighting, and restraint. Smooth stone against feathery grass. Warm LEDs grazing a wall. One hero piece that holds your gaze. Edit harder than you think, and your backyard will start to feel like a ritual instead of a project.
You’ve got this. Five measured steps on basalt, the hush of water, a cushion that waits for you. Start small this weekend, and next week your future self will be sitting outside, breathing a little deeper, wondering why you didn’t do this sooner.