5 Outdoor Play Area Ideas for Kids That Turn Any Backyard Into an Adventure (Small Spaces, Toddlers & Budget-Friendly) Unmissable Ideas
You want a backyard that pulls your kids off screens and into sunshine. You hate the chaos: plastic toys everywhere, muddy patches that never dry, and that nagging fear that your small space can’t possibly hold big imagination. Picture this instead: sun warm on cedar boards, soft clover under bare feet, a pop of chalky color on a fence, and play zones that actually look styled. These 5 outdoor play area ideas for kids will turn even a tiny patio into an adventure—on a realistic budget, in a single weekend per zone, with materials that actually hold up.
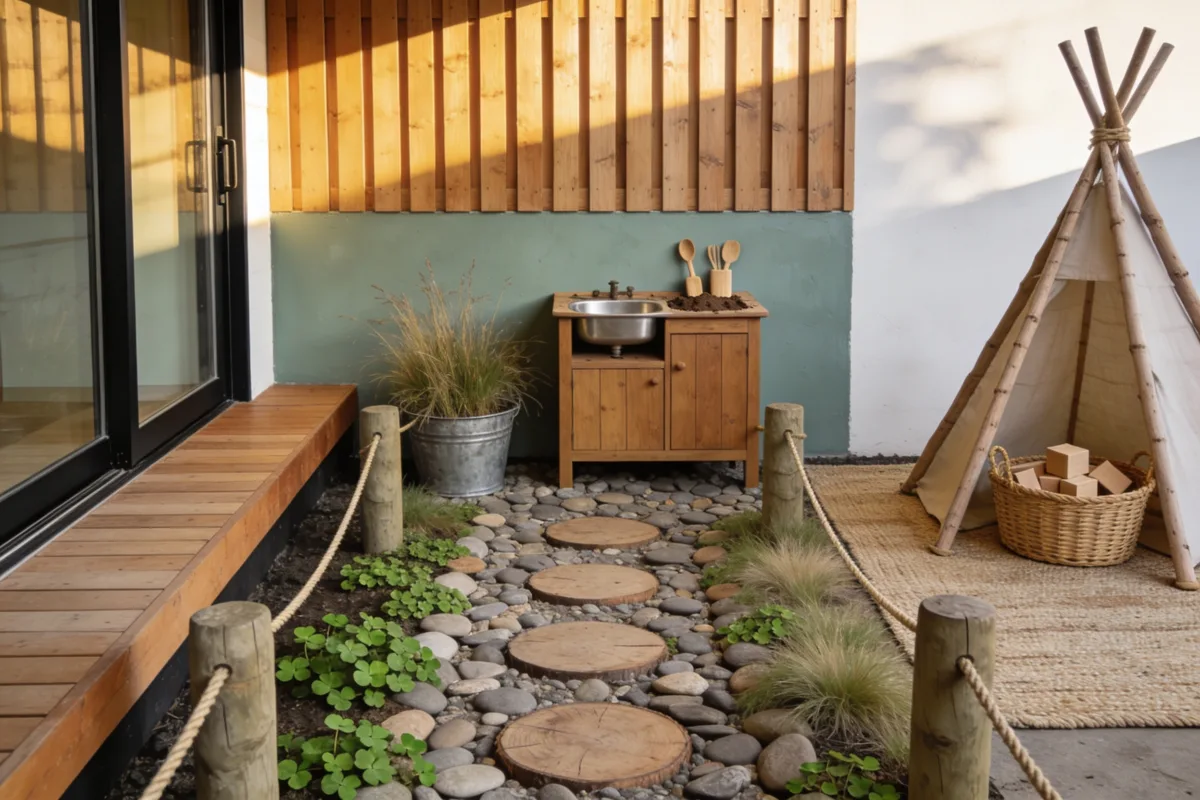
We’ll fix the mess and the meh. Expect texture (rope, wood, stone), soft light that photographs beautifully for those summer album moments, and kid-friendly layouts that feel pulled-together. Each idea has a small-space version, a toddler-safe tweak, and a budget path—so you can cap spend under $300-$1,200 per zone and still get that Pinterest-worthy vibe. If your style is modern family with a dash of nature, you’ll feel right at home here.
1. The Mini Nature Lab With Mud Kitchen & Sensory Path
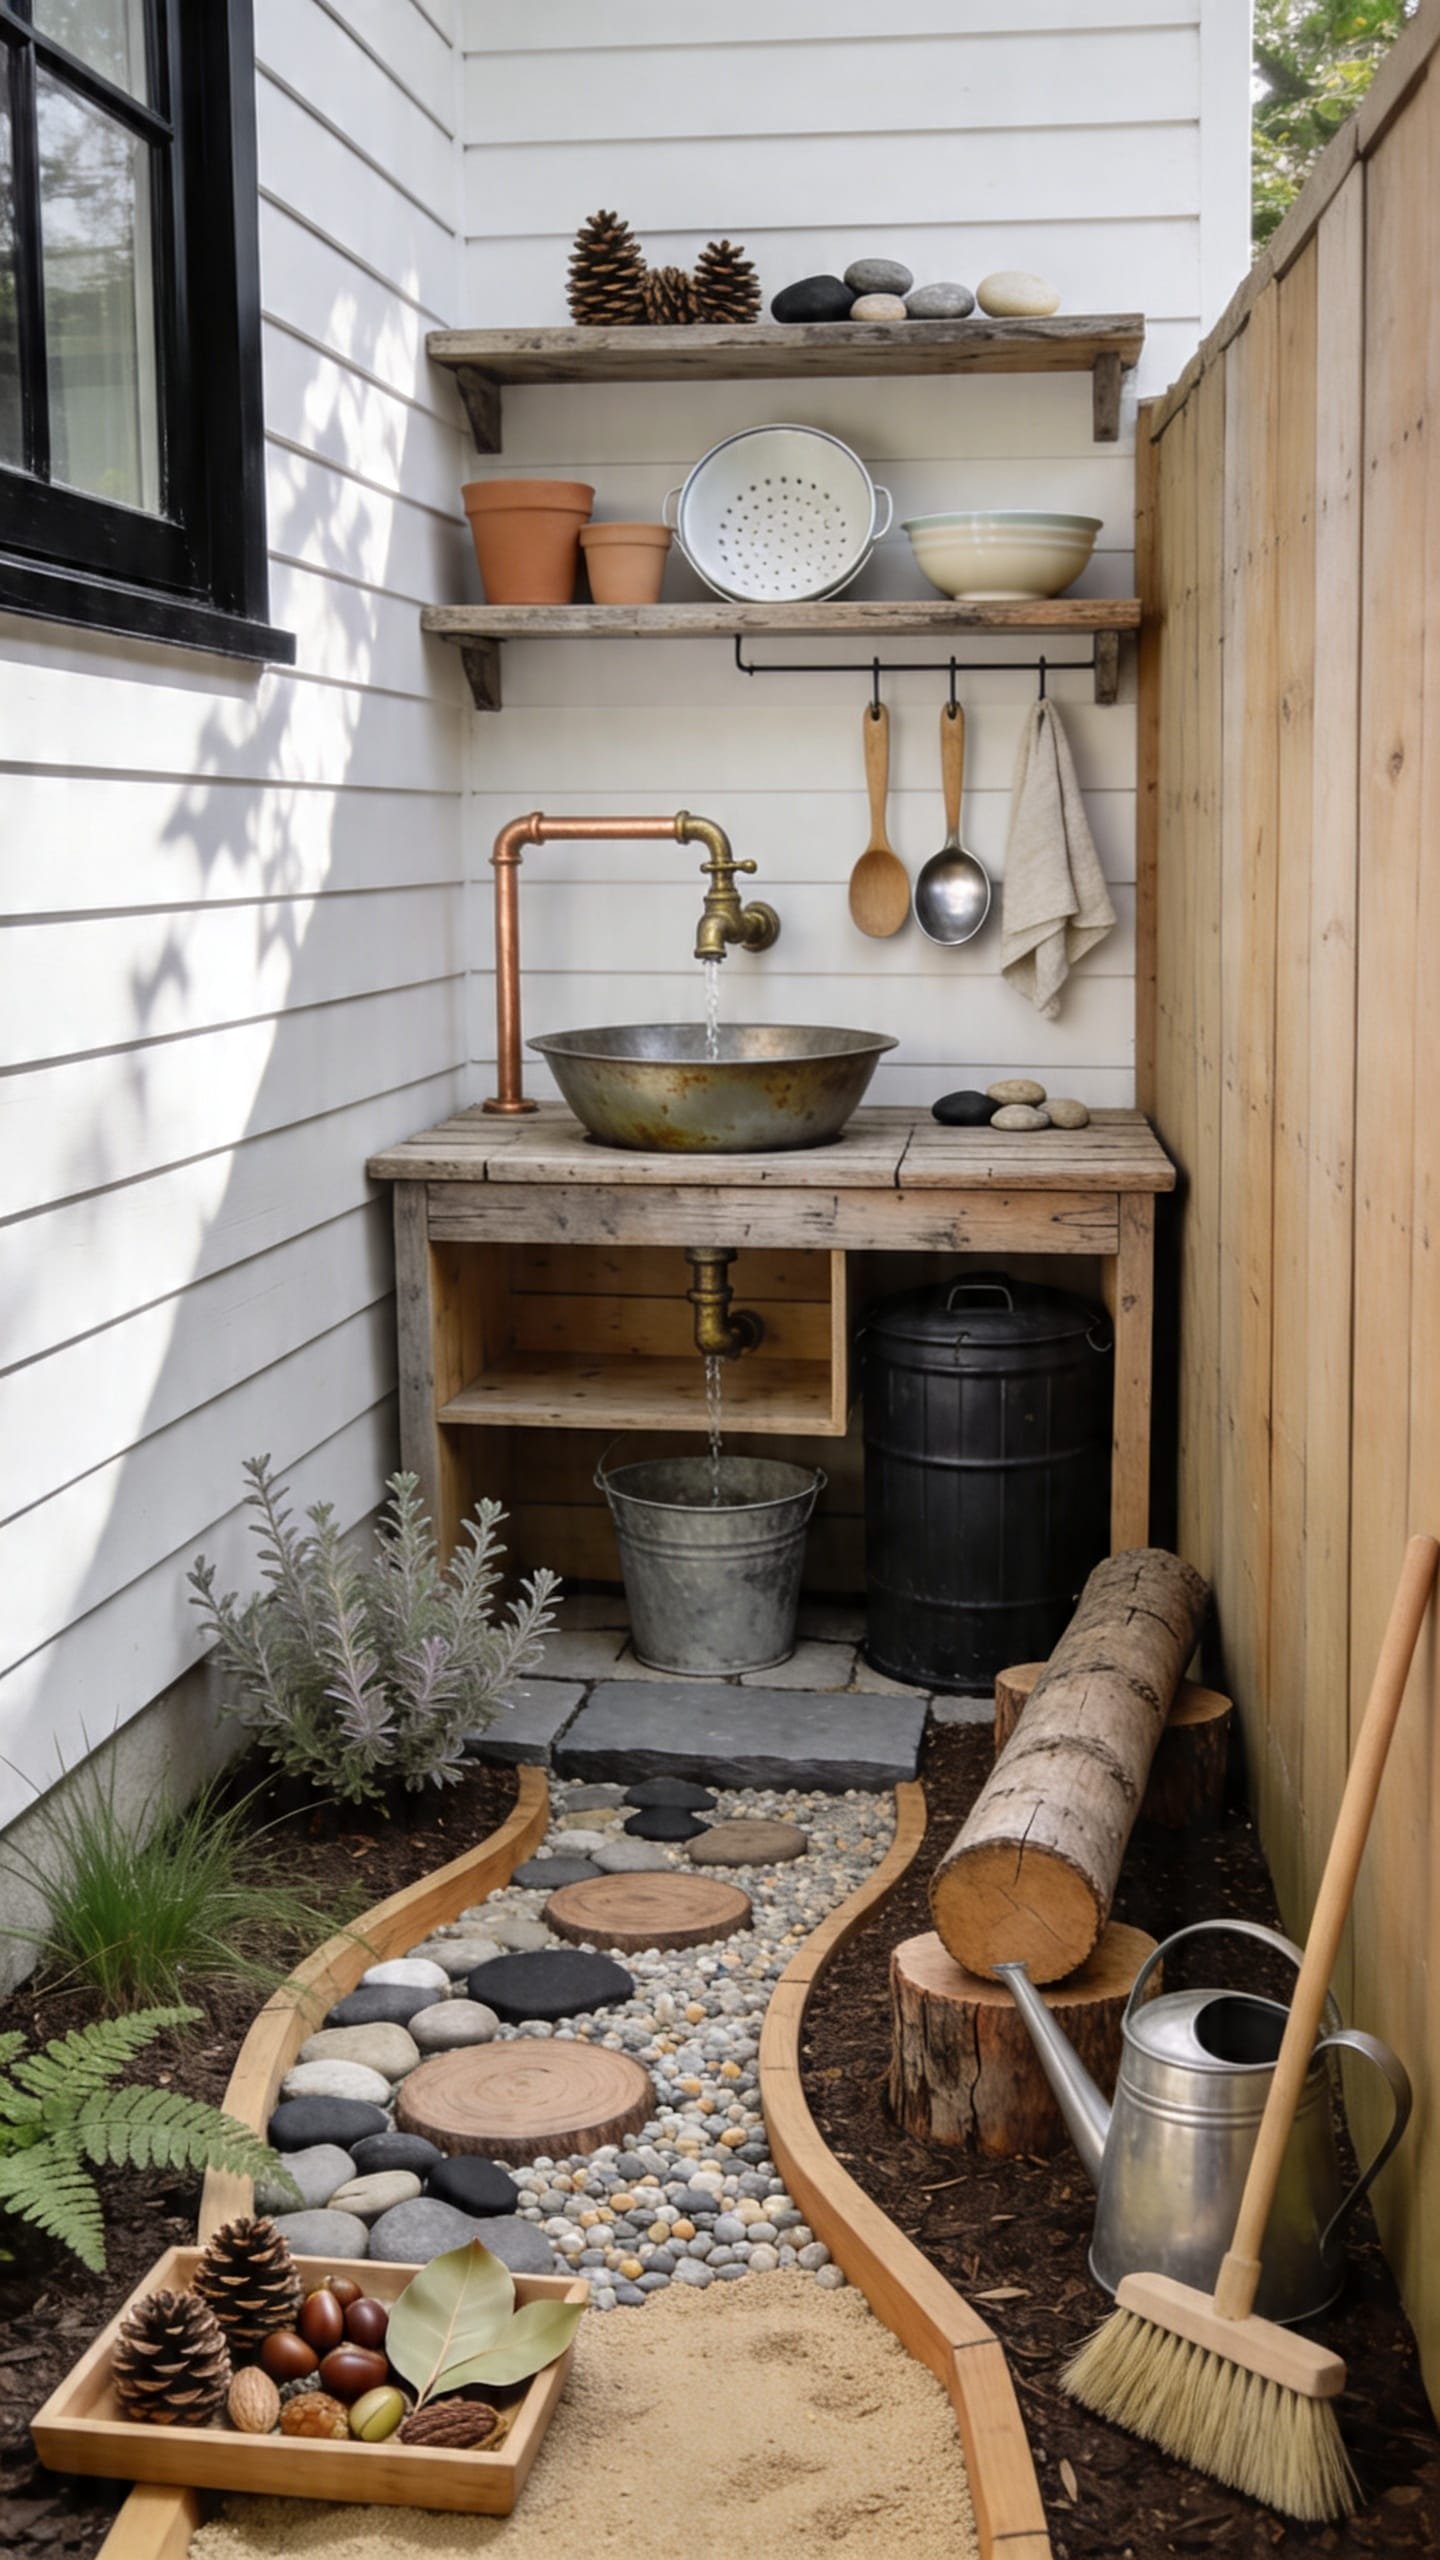
We’ve all been there: you buy the cute outdoor toys, but they end up sun-faded and abandoned along the fence line by July. The issue isn’t a lack of stuff—it’s a lack of invitation. A Mini Nature Lab creates a tiny, tactile world that calls your kid by name: water trickling into a metal bowl, pinecones stacked like tiny sculptures, and a mud kitchen that feels like it belongs to your yard, not a plastic aisle. The mood is modern cottage-meets-forest-school: calm, earthy, and deeply tactile.
This design thrives in small spaces because it’s narrow and linear. Picture a 10-foot strip along your fence: a DIY mud kitchen from weatherproof boards, a low shelf for “ingredients,” and a sensory path that snakes forward with different textures—pea gravel, smooth river stones, bark mulch, soft herb groundcover. It works because kids crave varied input; each material tells a different story underfoot. Light matters: morning shade gives the mud kitchen that gentle, dappled glow and prevents scorching hot metal. Afternoon? A retractable shade sail keeps the area usable.
Materials lean natural: sealed cedar, galvanized tubs, river rock, recycled brick edges. The camera loves this zone—contrast between matte wood and glossy water, shadow play through leaves, and little hands busy at purposeful tasks. For small yards, it reads as a styled feature, not a pile of “kid stuff.”
Variations:
– Budget-friendly: Pallet wood mud kitchen, thrifted metal bowls, repurposed cabinet pulls as hooks.
– Toddler version: Lower counter height (18-20 inches), rounded edges, deeper shade.
– Renter-friendly: Freestanding kitchen on pavers; a roll-up sensory path with rubber stepping tiles and removable mulch bags.
Budget Breakdown:
- Cedar boards or decking offcuts: $60–$140
- Galvanized tubs/bowls: $10–$40
- Hooks/rails: $12–$30
- River rocks/pea gravel/bark mulch: $60–$160
- Shade sail (optional): $30–$90
- Exterior sealant: $20–$35
Total Estimated Cost: $192 – $495
Best For: Slim side yards or fence lines; toddlers to early elementary; families who value messy play and easy cleanup. Spring through fall.
Key Design Elements:
- Main materials: Cedar, galvanized metal, natural stone
- Color palette: Warm cedar brown, soft gray metal, sage green, charcoal accents
- Lighting strategy: Morning shade or filtered light; add a solar lantern for late-day glow
- Furniture silhouettes: Boxy, simple; open shelving; chunky edging for the path
- Texture layers: Water, sand, smooth stone, bark, herbs
- Accent details (hardware, decor pieces, plants): Matte black hooks, enamel mugs, rosemary and thyme planters
How To Recreate This Look:
- Start with a 10-foot strip along a fence; level the ground and lay landscape fabric for the path area.
- Add a simple DIY mud kitchen: two-by boards for the frame, a slatted shelf, and a cutout to drop in a metal bowl as a “sink.”
- Layer textures underfoot: 3-4 sections of different materials bordered with brick or scrap lumber so they don’t migrate.
- Install a basic hose splitter and a small watering can so kids can self-serve water without flooding the yard.
- Style with enamel mugs, a metal colander for sifting, and labeled jars for “spices” like sand, pebbles, and dried leaves.
Why This Looks Expensive: Repeating natural materials (cedar + river rock) and limited colors create cohesion. The sensory path reads custom, like a landscape architect had a hand in it. The secret isn’t more features—it’s restraint and rhythm in texture.
Watch Out: Don’t skip edging your sensory path. Without a border, gravel and mulch wander everywhere, and the whole zone quickly looks messy.
Pro Styling Tip: Place a dark planter or black lantern to anchor photos; the contrast against light wood and stone makes kid action shots pop.
2. The Convertible Climb & Swing Bay (For Small Yards That Need Big Play)
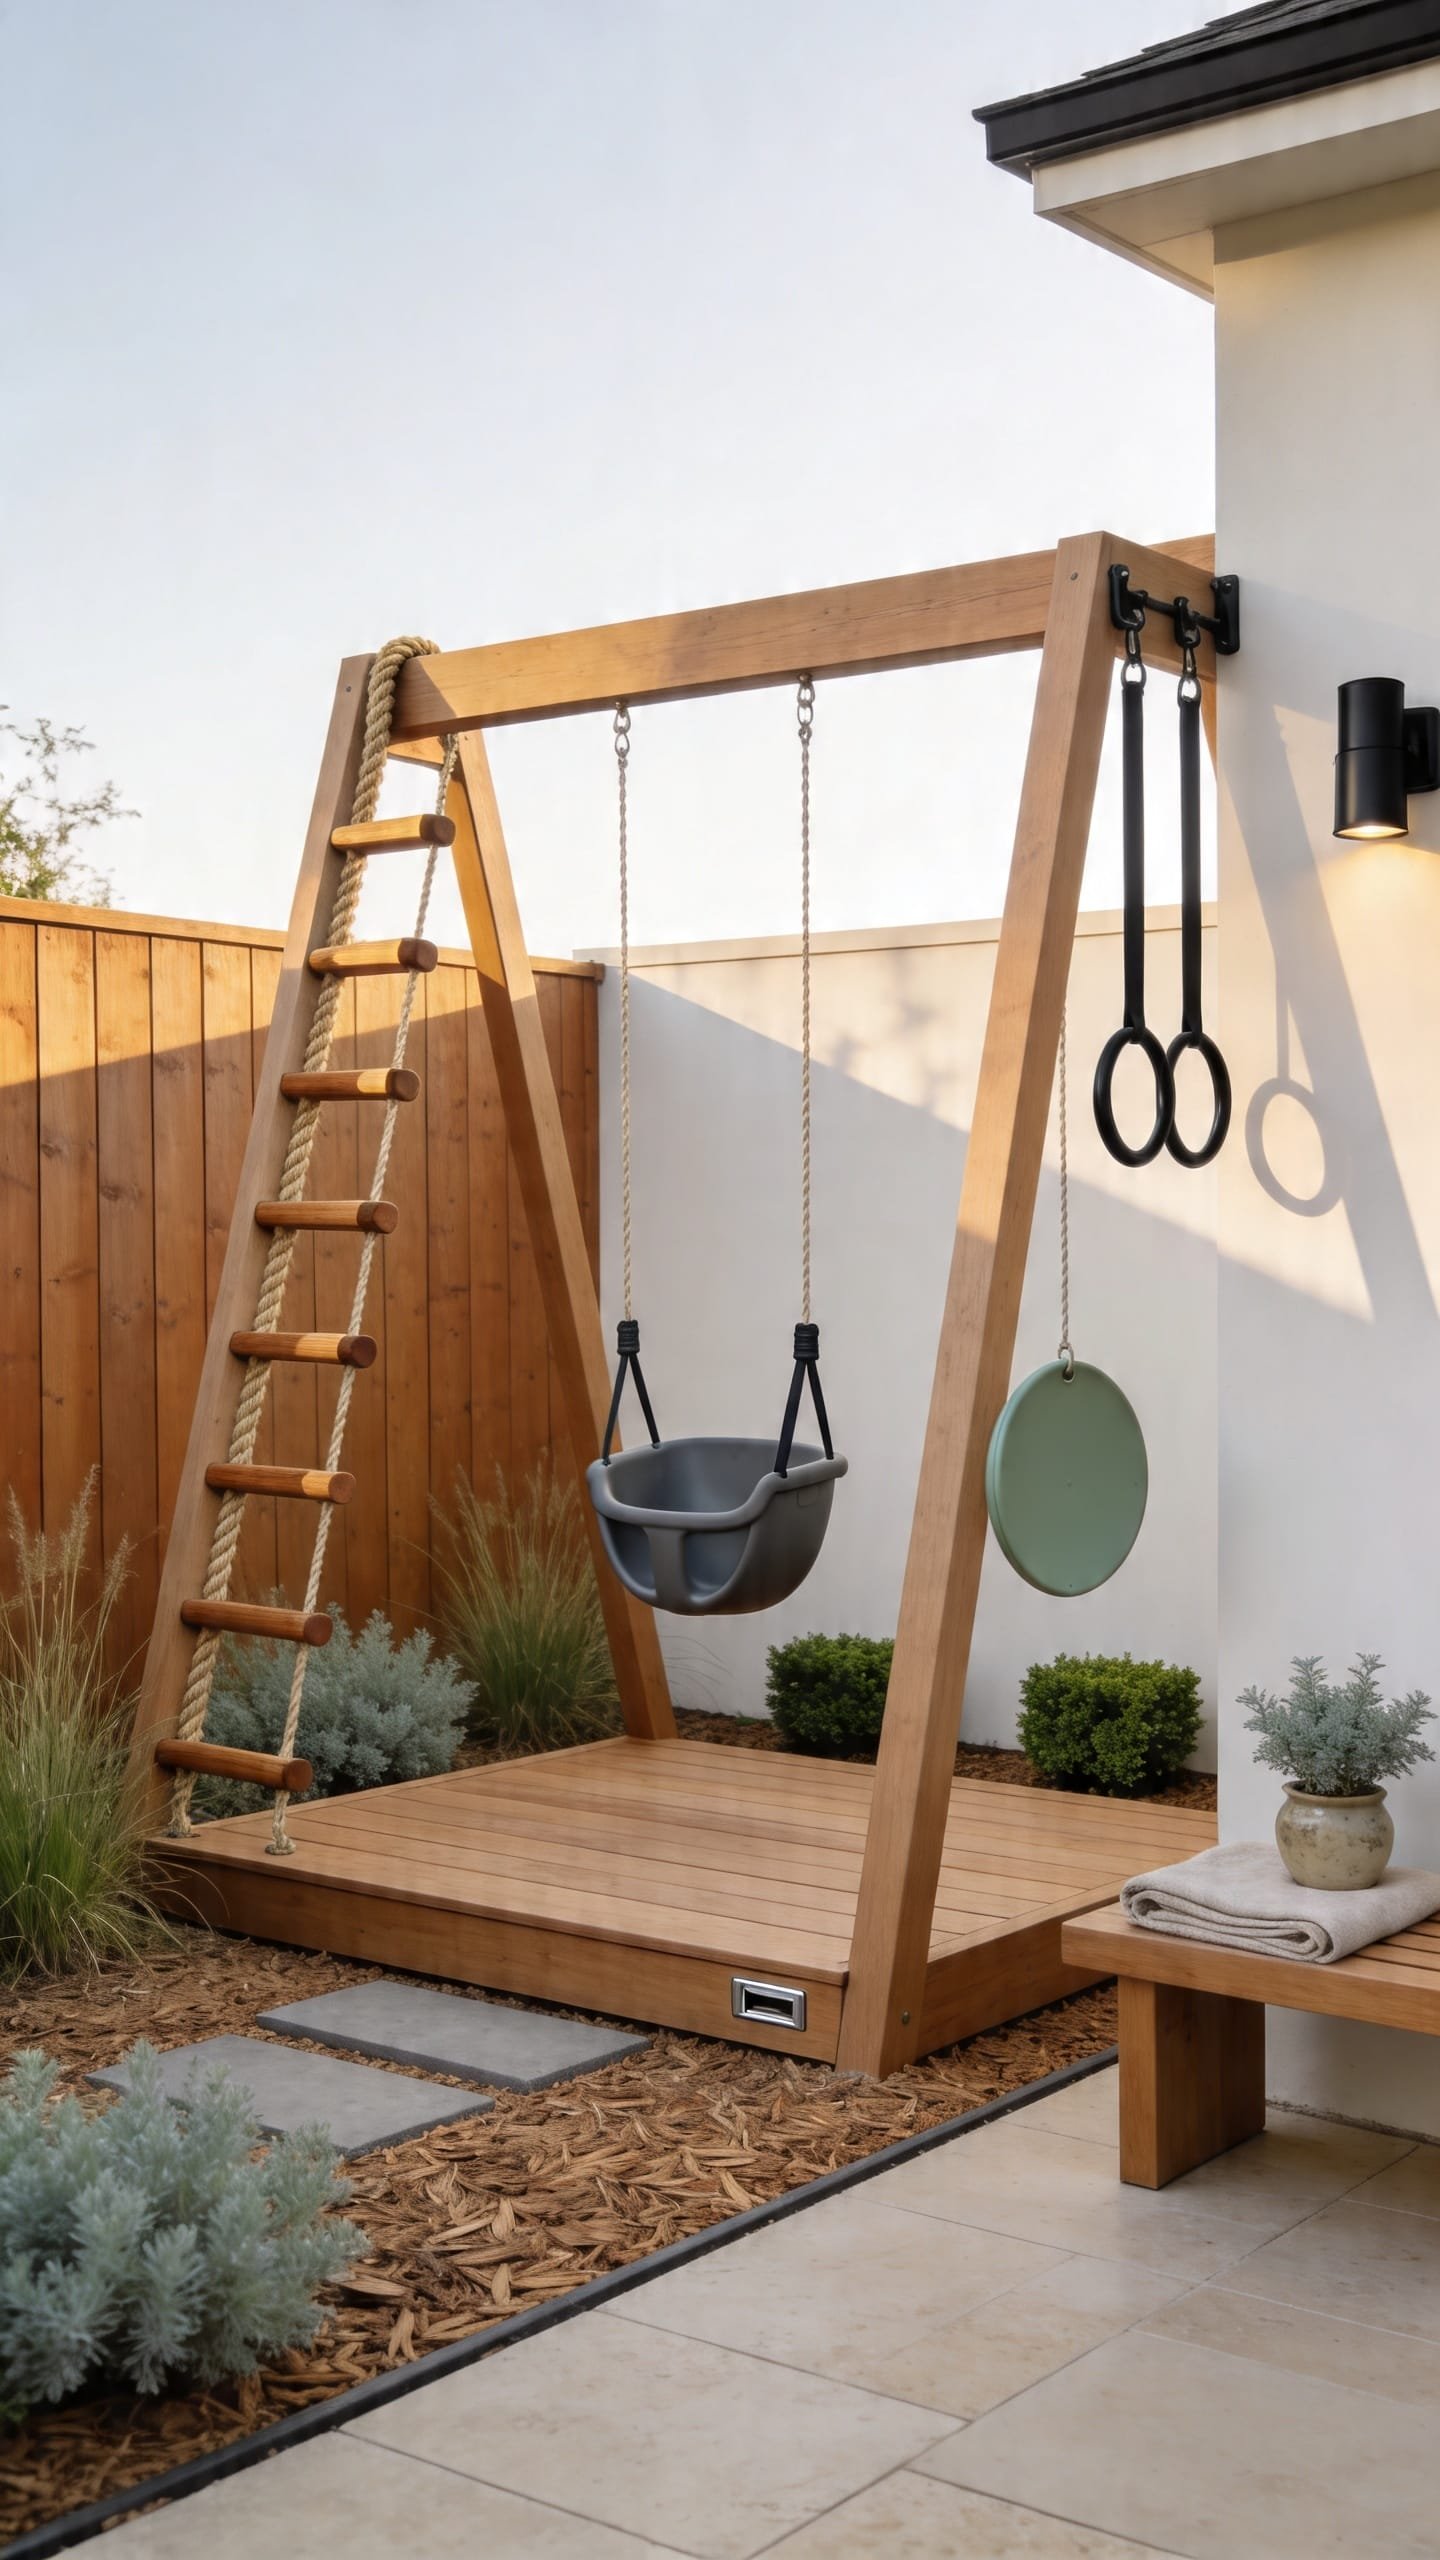
It’s that one corner that always feels off: the spot where you tried a giant plastic playset that swallowed the view and still didn’t get used. The fix isn’t larger—it’s smarter. A compact A-frame swing bay with modular add-ons is the Swiss Army knife of backyards. Think modern Scandinavian lines in treated lumber, a rope climb, and a single platform that can house a toddler bucket swing now and a disc swing or gymnastics rings later. The mood is clean and airy—modern family with a hint of adventure camp.
Why it works in the real world: it keeps clear floor space under and around the swing, so the yard doesn’t feel conquered by kid gear. Light and shadows do the heavy lifting: an A-frame throws painterly angles across grass at golden hour that look incredible in photos. Use braided natural rope and matte black brackets so the structure reads like an intentional garden feature, not an afterthought. Maintenance stays simple: hose off, tighten bolts once a season, reseal wood annually in high-sun climates.
Variations:
– Budget-friendly: Use pressure-treated 4x4s with galvanized brackets; swap in a single classic swing.
– Small-space version: One-bay frame (6-8 feet wide) with foldable gym rings that tuck away.
– Renter-friendly: Free-standing frame built on heavy pavers; no concrete footings.
Key Design Elements:
- Main materials: Treated lumber, outdoor-grade rope, powder-coated hardware
- Color palette: Honeyed wood, black hardware, linen rope, jewel-toned swing seat
- Lighting strategy: Keep it open to late-afternoon light for photogenic shadows; add a solar spotlight angled up the frame for evening drama
- Furniture silhouettes: Tapered A-frame, simple horizontal beam, slim platform
- Texture layers: Rope grain, wood striations, matte metal
- Accent details: Canvas flag bunting in muted hues, a small outdoor rug under the platform, potted grasses to soften edges
Budget Breakdown:
- 4×4 or 6×6 lumber: $120–$280
- Brackets and bolts: $45–$110
- Swings/attachments (bucket, disc, rings): $30–$120
- Outdoor rope + carabiners: $20–$60
- Pavers (if not setting posts): $40–$90
Total Estimated Cost: $255 – $660
Best For: Narrow backyards or patios where footprint matters; ages 2–10; families who want multi-year use without a giant structure.
How To Recreate This Look:
- Measure an 8–10 foot span and map a safe swing arc (twice the swing length as clear space).
- Build the A-frame with a crossbeam; use rated swing brackets and lock washers.
- Add a single platform deck at one side for shoes, sits, and supervising siblings.
- Attach one swing at first; plan for modular add-ons (rope, rings) with extra eye-bolts pre-installed.
- Style with two planters flanking the frame to integrate it into the garden; choose feathery grasses for movement.
Why This Feels Designer: The hardware choice matters. Powder-coated black brackets and carabiners match and visually “disappear,” leaving the clean geometry of the frame to star. It looks intentional, not improvised.
One Thing To Avoid: Don’t overload it with three different swings right away. Start with one and let kids “ask” for the next. Too many options dilutes the invitation to play.
Pro Styling Tip: For photos, place a low, light-colored rug aligned with the swing path; it creates a motion line that reads dynamic and editorial.
Pause here and breathe. You don’t need a backyard amusement park to have happy kids. If one idea resonates more than the others, that’s your starting point. Great play zones evolve—just like your family does.
3. The Chalk Wall Courtyard + Scooter Loop
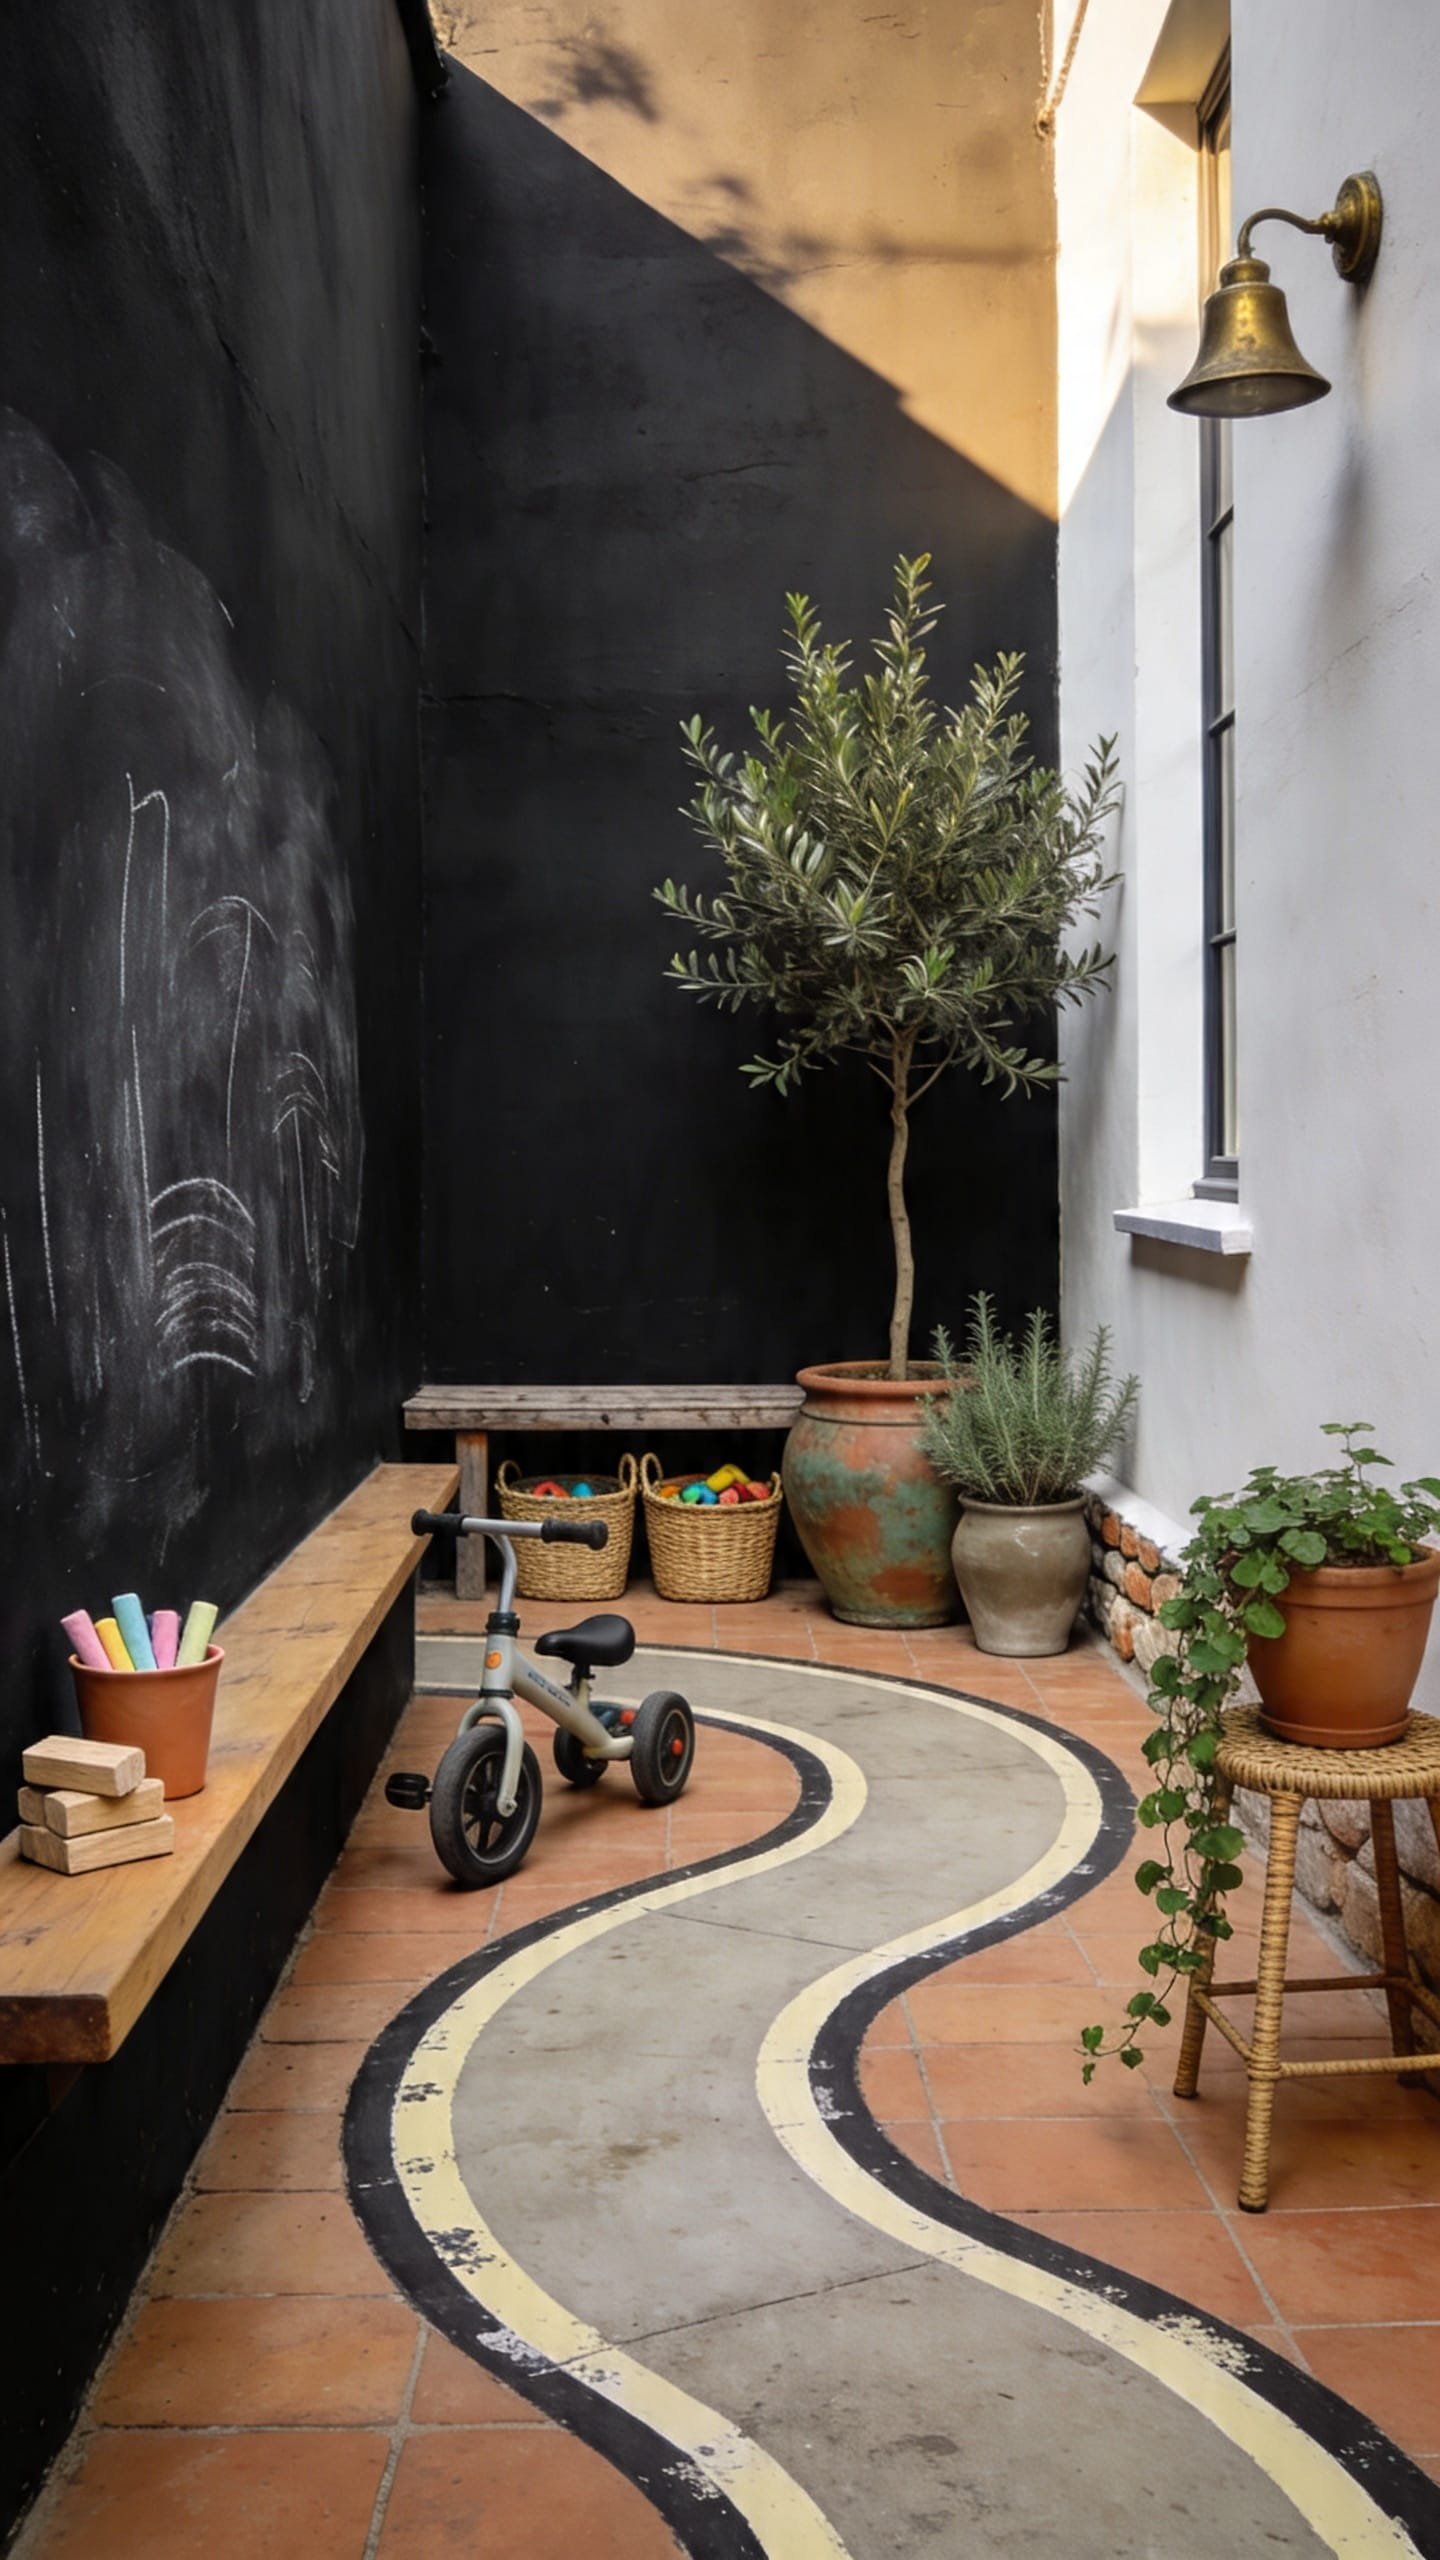
You’ve tried baskets and bins, but the outdoor toys keep migrating everywhere. Visual clutter kills the vibe, and somehow the kids still say they’re bored. The Chalk Wall Courtyard solves two problems at once: it gives a bold focal point that photographs beautifully and sets a simple loop for movement (scooters, trikes, or balance bikes) that burns energy. The mood leans urban courtyard meets Mediterranean alley—matte black chalk wall on one side, warm pavers or concrete with a painted track, a few terracotta pots with rosemary for scent.
This works in small yards because it’s perimeter-based: the action hugs the edges, leaving the center as breathing room. A chalk wall steals the show in pictures; dark matte surfaces make chalk colors sing and throw a soft, flattering bounce on faces. Bonus: the wall hides scuffs that light-colored fences never forgive. Lighting helps: morning light keeps chalk dust cool and crisp; string lights add evening sparkle.
Variations:
– Budget-friendly: Paint a section of your existing fence with exterior matte black; use chalk markers for less dust.
– Toddler version: Keep the loop short and smooth; add a mini stop sign and a parking zone mat for social play.
– Renter-friendly: Freestanding chalk board from cement board framed with 1x2s; removable adhesive track tape on patio pavers.
Budget Breakdown:
- Exterior matte black paint or chalkboard paint: $25–$60
- Paint roller + tray + angled brush: $12–$25
- Pavement loop materials (porch paint or track tape): $18–$45
- String lights: $20–$50
- Terracotta pots + herbs: $25–$60
Total Estimated Cost: $100 – $240
Best For: Concrete patios, townhouse yards, side yards with long runs; ages 2–9; after-dinner energy burns and impromptu art shows.
Key Design Elements:
- Main materials: Painted fence/wall, concrete or paver path, terracotta
- Color palette: Matte black, sun-faded terracotta, olive green, chalk brights
- Lighting strategy: String lights at 9–10 feet high for halo glow; solar up-light at the herb pots for shadows
- Furniture silhouettes: Slim bench, low storage crate, simple scooter stand
- Texture layers: Chalk dust matte, gritty concrete, clay pot patina, plant softness
- Accent details: Painted “start/finish” lines, a bell on the fence, clipboards for drawing “tickets”
How To Recreate This Look:
- Pick a 6–12 foot wall/fence section; sand splinters and wipe clean.
- Roll on matte black exterior paint in two thin coats; let cure fully for best chalk performance.
- Tape a 24–36 inch wide loop on the ground; paint with porch paint or apply outdoor track tape along the perimeter.
- Add a narrow bench against the wall for parents, chalk storage, and snack landings.
- Style with string lights overhead and two tall rosemary pots to scent the “track.”
Why This Reads High-End: The big swath of matte black creates instant drama and cohesion—like a gallery wall outdoors. Fewer colors, bigger gestures. It feels curated, not kiddie.
The Most Common Mistake: Painting the entire fence. You only need one intentional panel for impact. Too much black can feel heavy in a small yard.
Pro Styling Tip: Before snapping photos, wipe the chalk wall with a damp cloth in a big, loose swirl to leave a soft ghost pattern that gives depth and avoids harsh blocks of color.
4. The Storybook Nook: Teepee Deck + Reading Garden
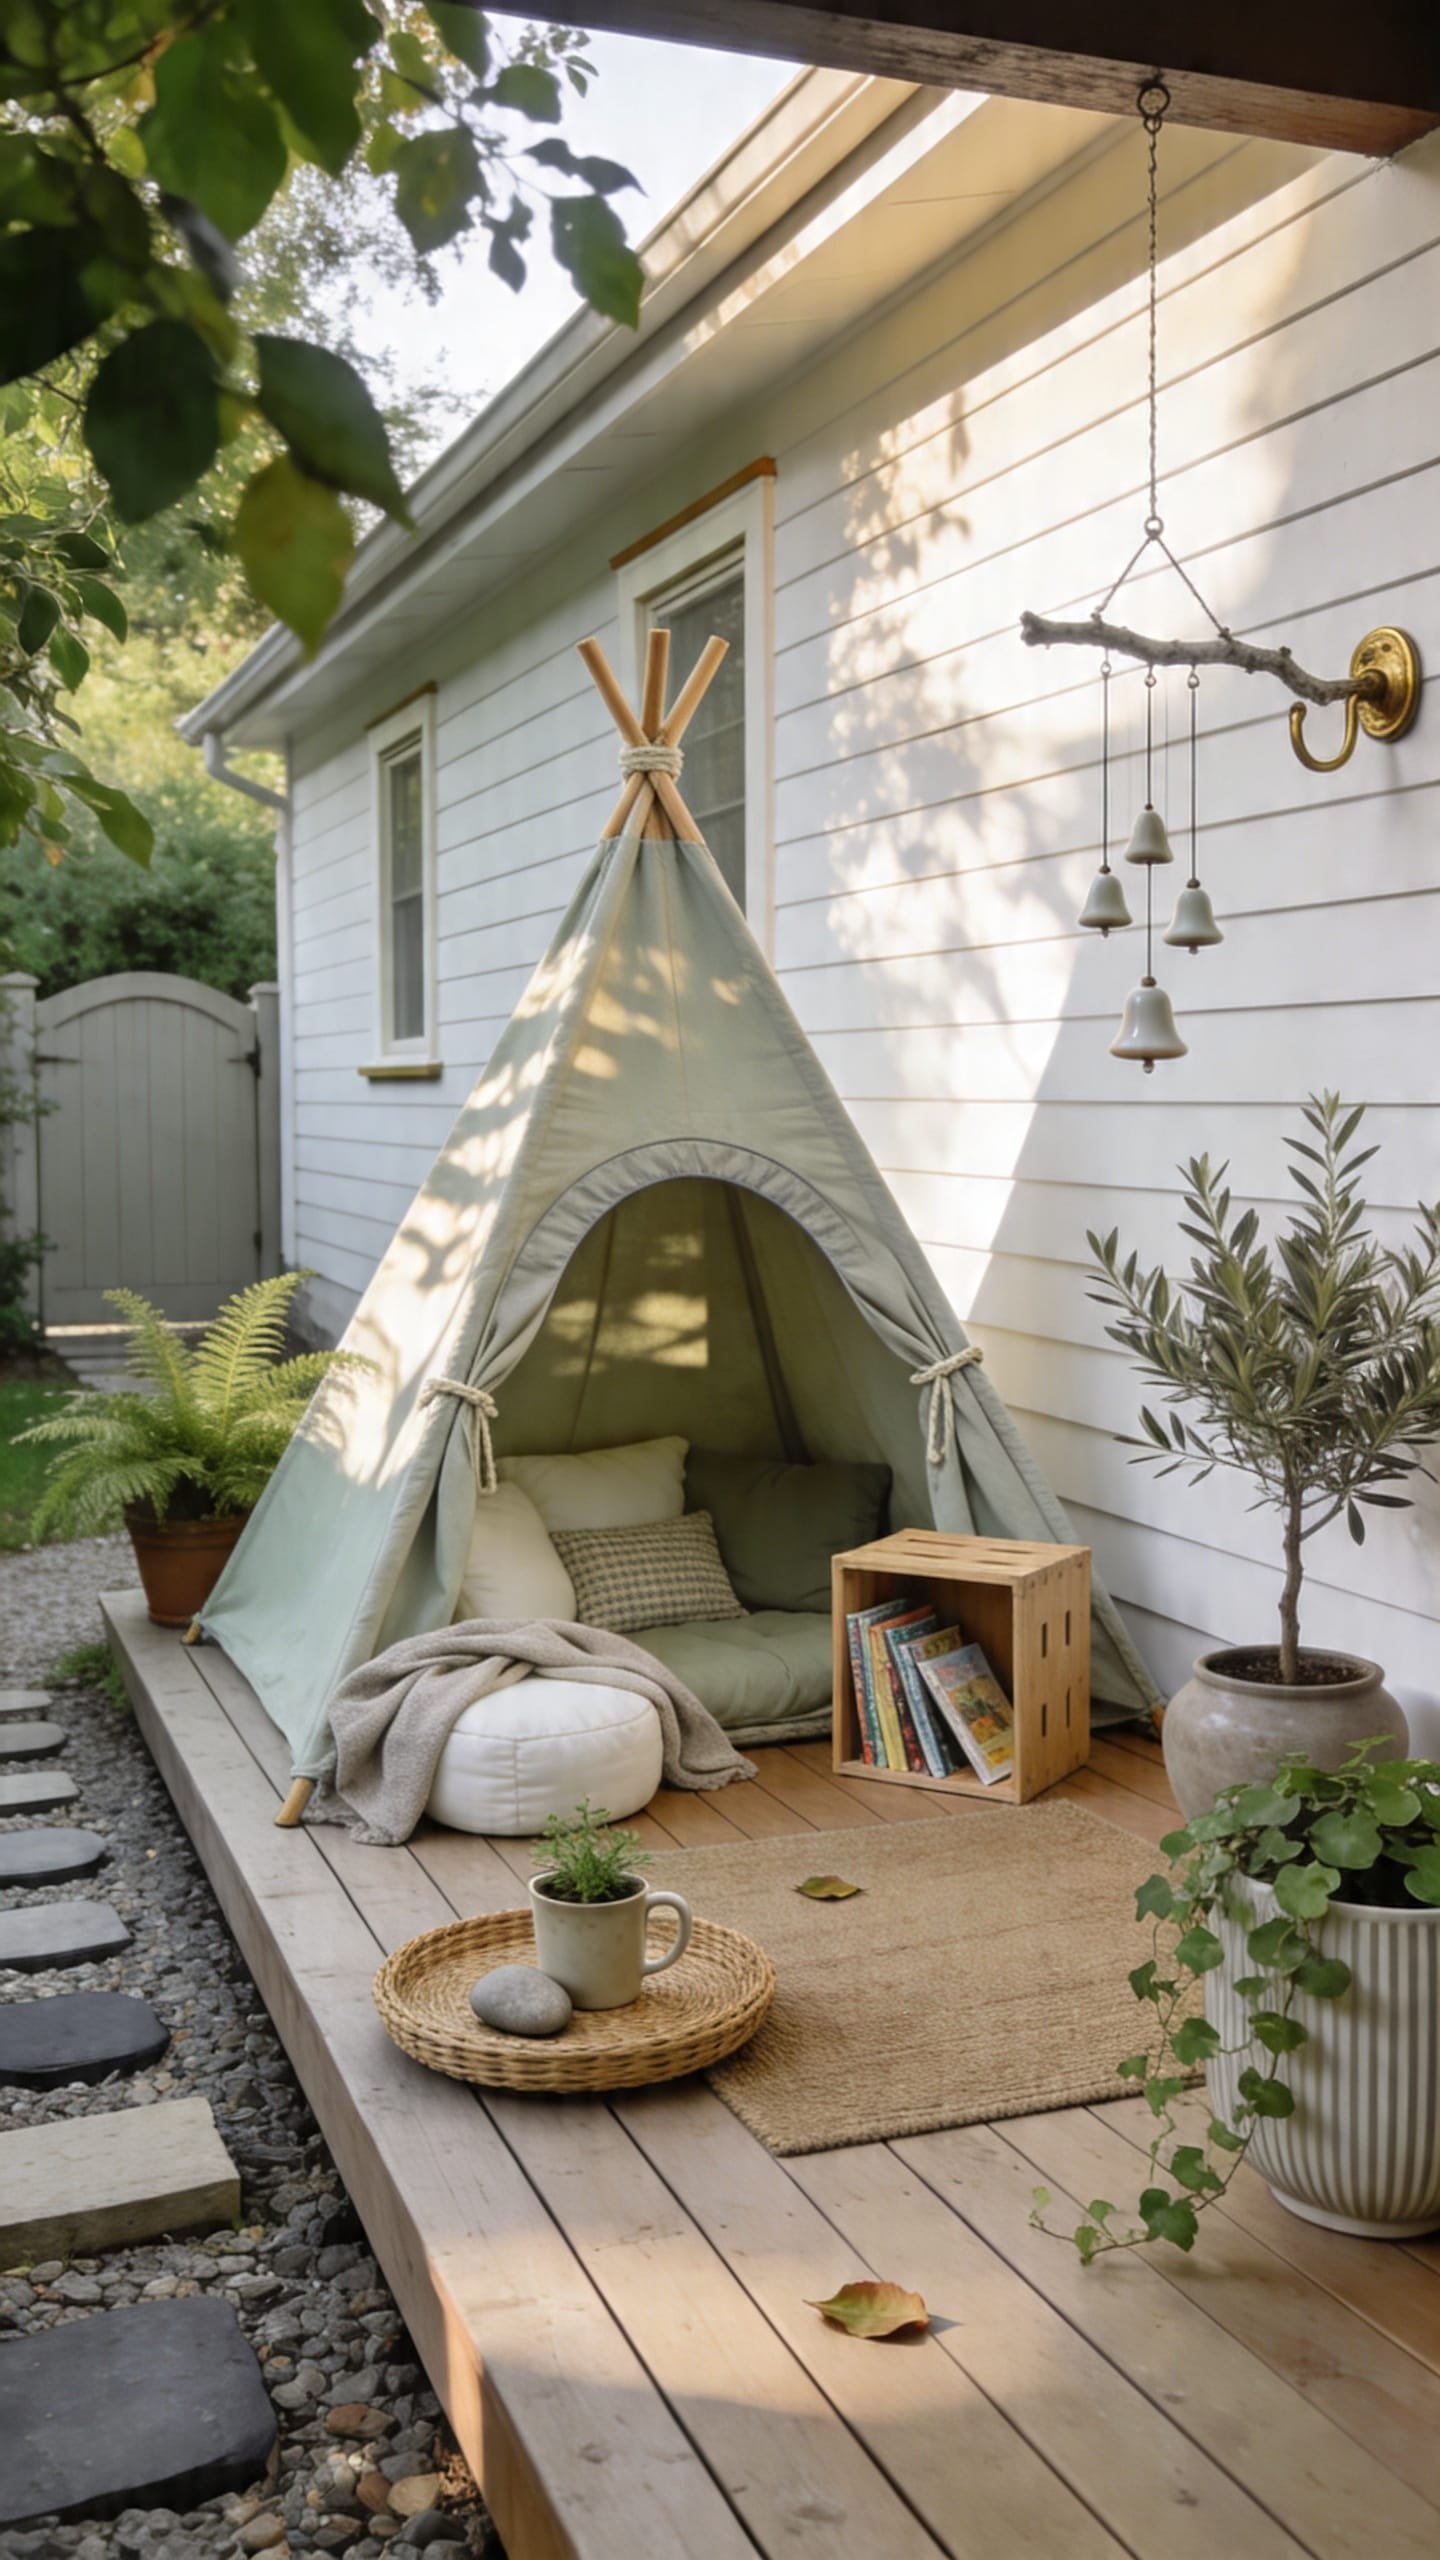
It’s that awkward side patch you never use—the one that gets decent shade but feels forgotten. You’ve tried tossing a blanket out there, but bugs and damp grass don’t exactly whisper “stay awhile.” The Storybook Nook turns a neglected sliver into a hideaway: a low deck, a weatherproof canvas teepee or arched canopy, outdoor cushions, and a mini library box. The mood is whimsical Scandinavian cottage: pale wood, creamy textiles, leafy greens, and the soft hush of a wind chime.
Here’s why it works in real homes: kids crave smallness. A slightly enclosed space feels safe and sparks imagination. Reading outdoors becomes a ritual, and on non-reading days it morphs into puppet theater or nap pod. Lighting is key: soft, indirect light is perfect for picture books and gives the teepee canvas a glow that looks stunning on camera. For maintenance, choose removable, washable cushion covers and a deck that dries quickly after rain.
Variations:
– Budget-friendly: Pallet deck sanded smooth, thrifted cushions, a DIY fabric canopy on a clothesline.
– Small-space version: A 4×4 foot deck square tucked behind a shrub with a half-canopy to save headroom.
– Renter-friendly: Interlocking deck tiles you can lift; a collapsible teepee that stores in a closet.
Key Design Elements:
- Main materials: Cedar or composite deck tiles, canvas, cotton cushions
- Color palette: Soft ivory, sandy wood, eucalyptus green, denim blue accents
- Lighting strategy: Dappled shade; add a clip-on solar reading light for dusk
- Furniture silhouettes: Low platform, triangular teepee, round floor cushions
- Texture layers: Canvas weave, ribbed knit throws, smooth wood slats, leafy plants
- Accent details: Woven basket for books, child-height bell, small wind chime
Budget Breakdown:
- Deck tiles or pallet deck materials: $80–$220
- Canvas teepee/canopy: $35–$120
- Outdoor cushions + washable covers: $40–$140
- Book basket + weatherproof box: $25–$60
- Solar clip light: $15–$35
Total Estimated Cost: $195 – $575
Best For: Side yards, under-tree pockets, renters who want a reversible setup; toddlers through early readers; late afternoon quiet time.
How To Recreate This Look:
- Choose a slightly shaded spot; clear a 4×6 foot area and lay a weed barrier if needed.
- Install deck tiles or build a low, ventilated pallet deck; ensure no standing water can collect.
- Set up the teepee or canopy and secure it with discreet stakes or paver weights.
- Add oversized floor cushions and a low, lidded basket with 6–10 rotating books.
- Style with a small plant cluster (ferns or hostas), and hang a wind chime just outside the opening.
Why This Looks Intentional: Limiting the book selection and sticking to two cushion colors keeps the nook from feeling cluttered. The defined platform tells the eye, “This is a room,” even without walls.
Don’t Do This: Skipping airflow under the deck. A ground-hugging platform that can’t dry invites mildew and mosquitoes. Keep an air gap.
Pro Styling Tip: Angle the teepee just off-square to the deck edges; that slight misalignment adds charm and makes photos feel candid, not staged.
Remember, this isn’t about recreating a showroom. It’s about building an outdoor play area that actually fits your family’s rhythms. If your kid loves water, start with the Nature Lab. If motion soothes them, the Scooter Loop is your win.
5. The DIY Splash + Build Zone: Water Wall, Loose Parts, and Mini Workbench
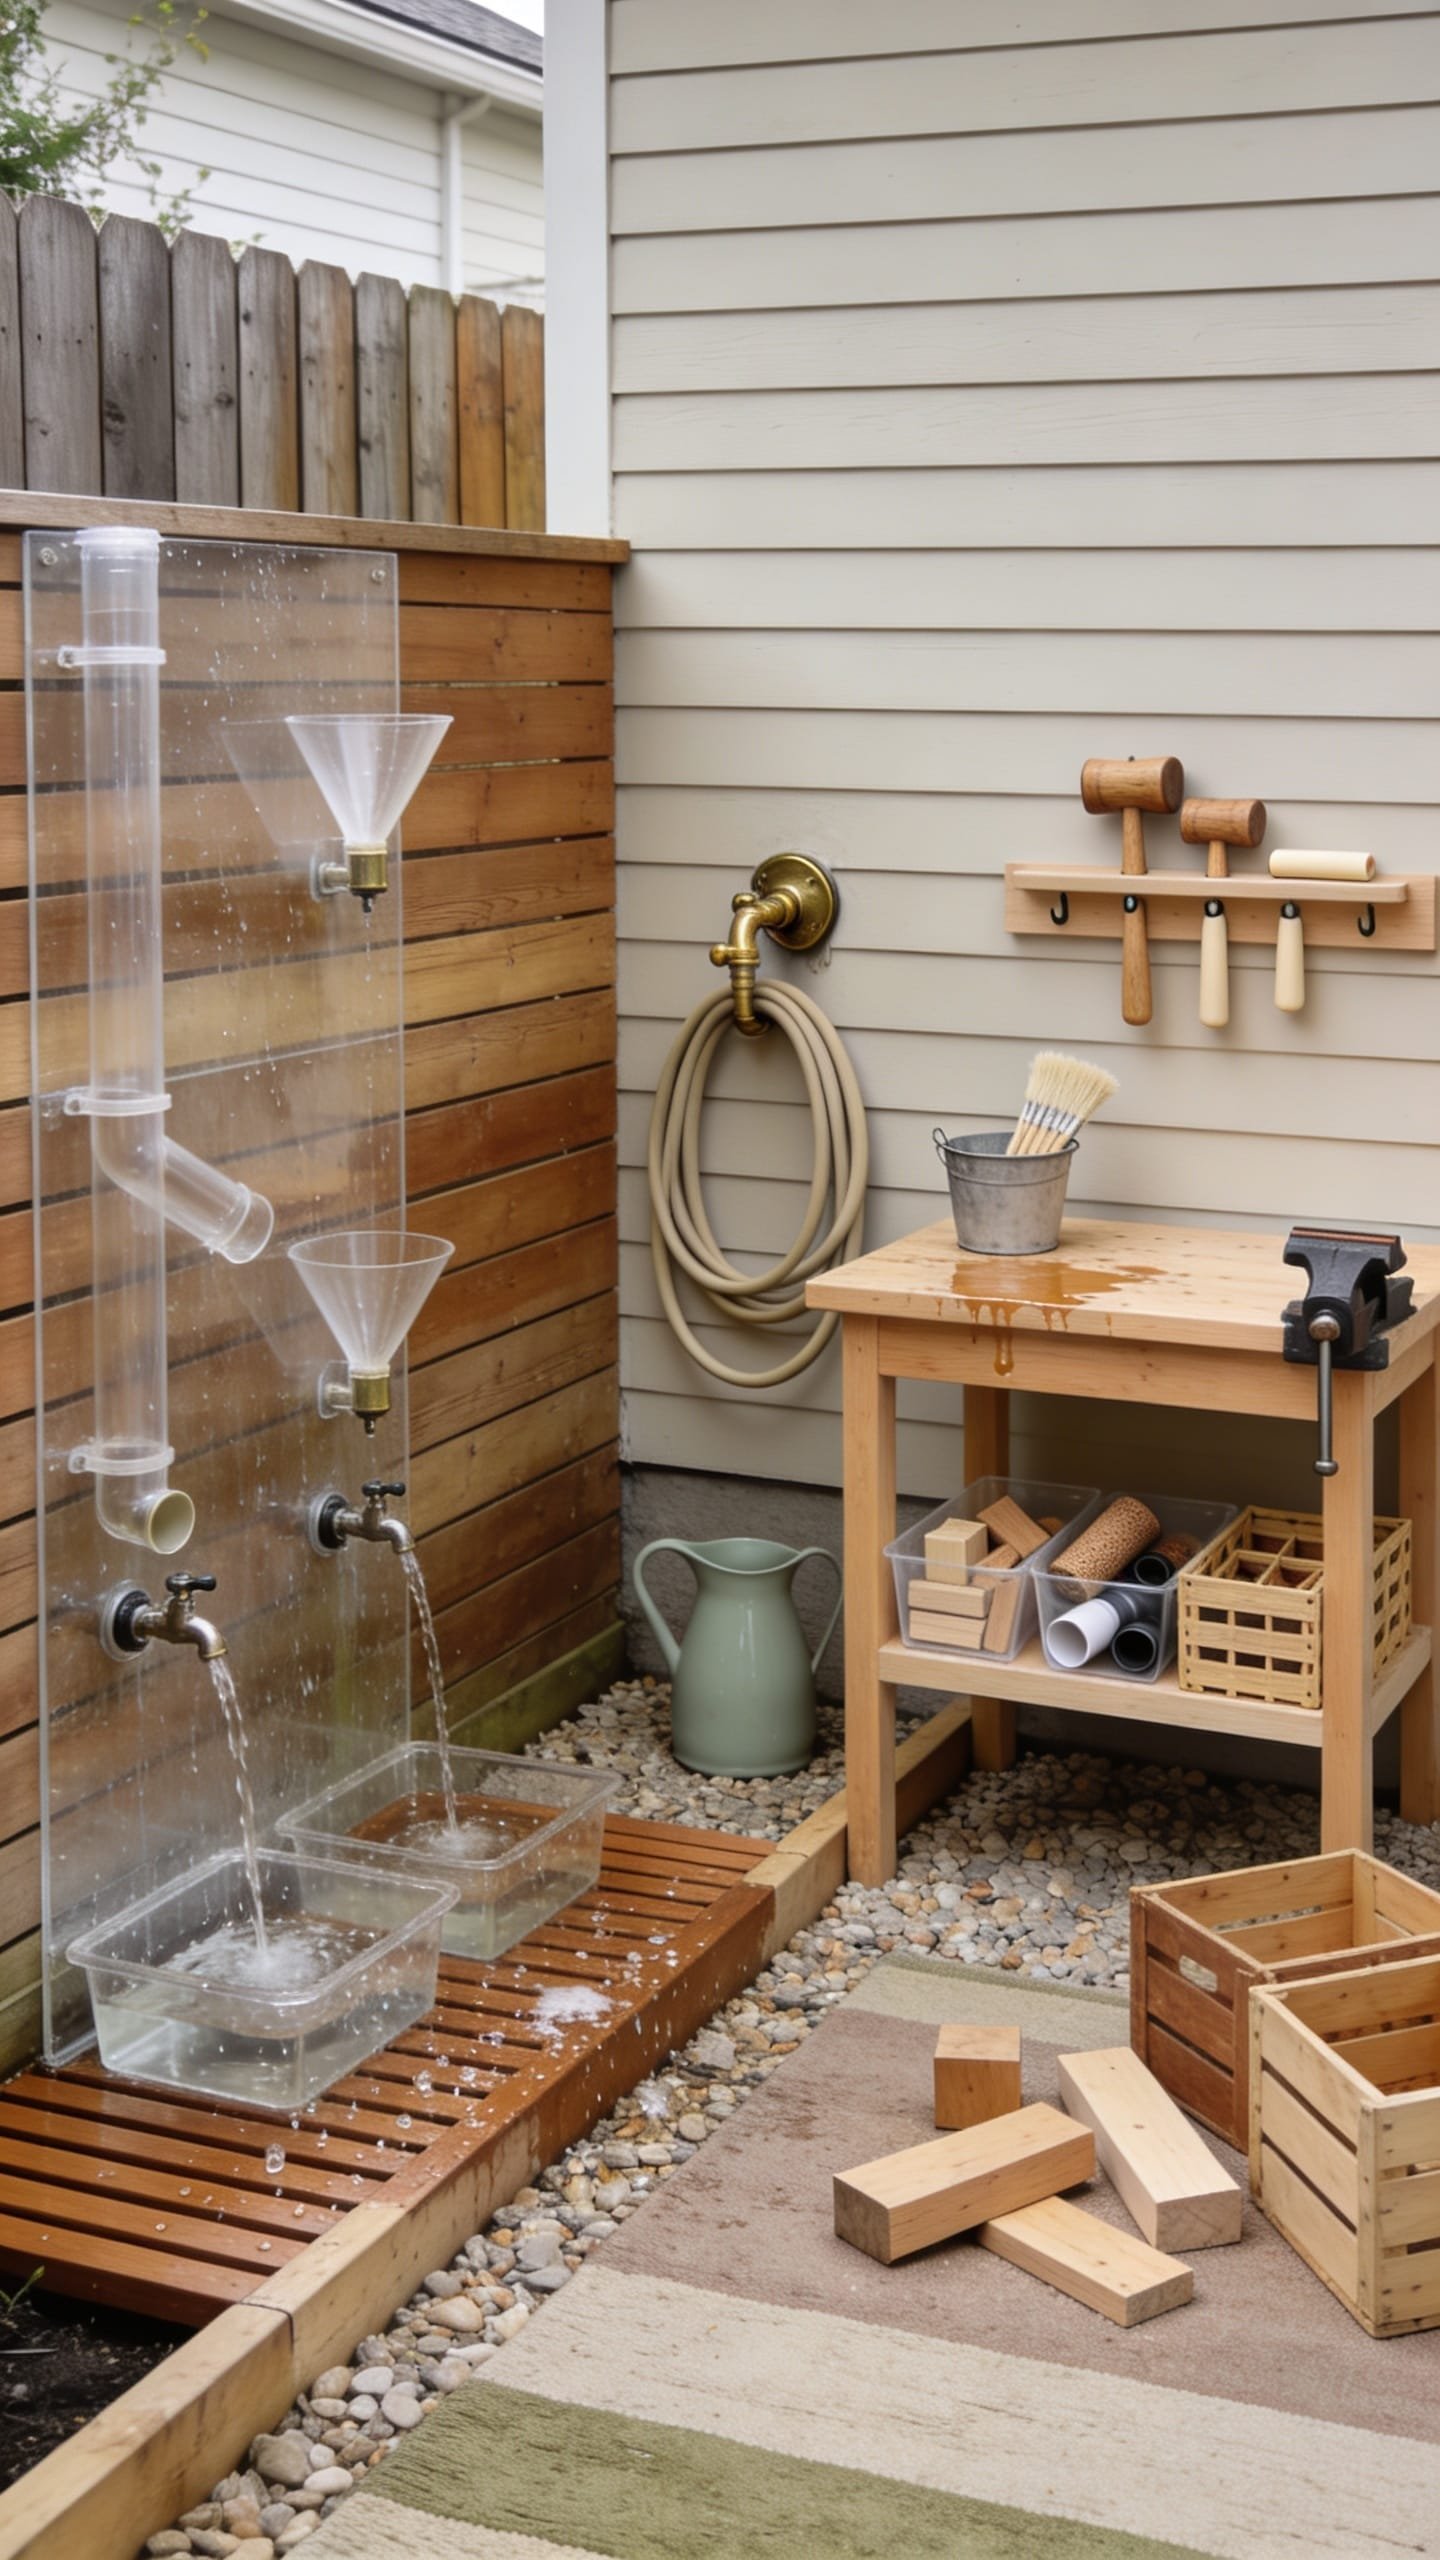
Let’s be honest: water play can feel like inviting chaos. You set out a tiny kiddie pool and suddenly your entire yard becomes a slip ‘n slide. The trick is containment with purpose. A vertical water wall converts chaotic splashing into a cause-and-effect experiment, and pairing it with a loose-parts build zone (think wooden planks, big blocks, crates) scratches the engineering itch. The mood is modern maker-lab meets summer camp—transparent tubes, clear bins, chunky wood pieces, and a compact workbench that looks legitimately cool.
Why this shines in real life: the water stays primarily on one panel and drains into a gravel trough or a large bin you can dump into thirsty garden beds—hello, sustainability. Add a bike-pump water feature if you have older kids who want a challenge. The build zone beside it gives wet hands something constructive to do next; it extends play by another 30–40 minutes (I timed it with my nephew last July and shocked myself). For photos, water refracts light, giving sparkly highlights; layered bins and blocks add depth.
Variations:
– Budget-friendly: Upcycle clear soda bottles, zip ties, and a pallet board; use a storage bin to catch runoff.
– Toddler version: Keep components large and slow-flow with wide spouts; soft rubber edges on everything.
– Small-space: A single 2×4 foot panel on a rolling base that lives against the fence when not in use.
Budget Breakdown:
- Plywood or composite panel + waterproofing: $40–$110
- Clear tubing, funnels, spigots, zip ties: $25–$70
- Gravel catch trough or large bin: $15–$45
- Loose parts (planks, crates, jumbo blocks): $40–$180
- Mini workbench or sawhorse table: $35–$120
Total Estimated Cost: $155 – $525
Best For: Sunlit fence walls, kids who love cause-and-effect, families that want STEM-y play without a tech screen. Peak summer afternoons.
Key Design Elements:
- Main materials: Sealed plywood/composite, clear tubing, pine planks
- Color palette: Natural wood, clear/blue-tinted water elements, black hardware, citrus accents
- Lighting strategy: Position panel to catch side light; glare across droplets looks magical in late afternoon
- Furniture silhouettes: Simple rectangle panel, stocky workbench, modular block stacks
- Texture layers: Wet sheen, rough wood, smooth plastic, gritty gravel
- Accent details: Measurement marks on the panel, a rubber mallet for block tapping, bright buckets
How To Recreate This Look:
- Seal a 2×4 or 3×5 foot panel and mount it to fence posts or a freestanding frame.
- Attach funnels, tubing, and spigots with zip ties and screws; create multiple routes with open/close valves.
- Set a gravel-filled trough or bin at the base to catch runoff; position next to thirsty planters.
- Place a mini workbench 2–3 feet away and stock with oversized planks, crates, and connectors.
- Style with two color-coded buckets (fill and catch) and a towel hook nearby so cleanup is part of the system.
Why This Looks Expensive: Transparency reads premium outdoors. Clear tubes and a repeating grid of valves look engineered and intentional, especially against a clean, sealed panel with simple black hardware.
Watch Out: Don’t overcomplicate the paths. Three routes are plenty. If setup time exceeds two minutes, you’ll start dreading it—and kids sense that energy.
Pro Styling Tip: For photos, set the hose to a slow drip through the highest funnel; those steady droplets catch light like glass beads and make the scene sparkle.
Honest moment: I once built a water wall that looked incredible and… never got used. The issue? No nearby towel hook and the path back into the house crossed dirt. We fixed the route with a small paver “runway,” added a towel hook, and boom—daily use. Sometimes it’s the mundane details that unlock the magic.
Quick Checklist
- Cedar or treated wood for durable, warm-toned structures
- Matte black hardware for a cohesive, modern look
- Defined zones: water, movement, nature, quiet
- Shade strategy: sail, tree dapple, or string lights
- Textured ground layers: gravel, bark, stone, clover
- Anchoring dark accent to photograph well
- Renter-friendly bases: pavers, deck tiles, rolling frames
- Two-color rule for soft furnishings to avoid visual clutter
- Hooks where kids finish play: towels, chalk buckets, watering cans
- Seasonal maintenance plan: seal wood, tighten bolts, refresh gravel
Frequently Asked Questions
How do I keep costs under control when building an outdoor play area?
Choose one zone at a time and define a material palette you reuse across projects—cedar, black hardware, and galvanized metal, for example. Build the core piece now (mud kitchen or A-frame), then add accessories seasonally. Repetition saves money and makes the yard feel cohesive.
My yard is tiny. Which idea works best in really small spaces?
Start with the Chalk Wall Courtyard or the Storybook Nook. Both hug the edges and use vertical surfaces, leaving the middle clear. Keep your color palette tight so the space reads calm and bigger than it is.
What about maintenance—will these ideas create more work for me?
Set a seasonal checklist: reseal wood once a year, tighten hardware at the start of summer, and hose down gravel paths monthly. Choose washable cushion covers and use bins that drain. Build smart once, then maintain lightly.
I’m a renter. Can I do any of this without risking my deposit?
Yes. Use freestanding frames on pavers for swings, interlocking deck tiles for the reading nook, a rolling water wall, and a framed cement-board chalk panel. Keep everything reversible and avoid drilling into permanent structures.
What common design mistake makes outdoor play areas look messy?
Too many colors and materials. Limit yourself to two wood tones, one metal, and two accent colors max. Also, edge every loose material. Without borders, gravel and mulch migrate and the space reads chaotic fast.
The Last Word
Pick one idea that makes your shoulders drop and your kid’s eyes light up. Start there. You don’t need a sprawling setup or a massive budget to create an outdoor play area for kids that feels like an adventure. One well-designed zone teaches your yard to work harder for your family—and, honestly, to look better while doing it.
The truth is, luxury outside comes from texture, lighting, and restraint. Repeat materials, keep colors intentional, and let shadows and sunlight do half the styling. Layer in the personal: a bell on the fence, the chalked-in “bakery,” the book that always lives in the teepee basket.
You’ve got this. One weekend, one corner, one idea. By next week, you’ll have a backyard moment that looks styled—and gets used, daily. And when you catch that first golden-hour photo with muddy smiles and soft shadows? That’s the good stuff. Seriously.

About the Author

Krisztina P.Rendes, Founder of Home Style Vibes
Founder of Home Style Vibes
Krisztina Puskásné Rendes created Home Style Vibes as a cozy-modern lifestyle space where homemaking meets inspiration. Her goal is to help women create beautiful, organized, and peaceful homes they truly love — without overwhelm. You’ll find here heart-driven content on home decor, cleaning tips, easy family recipes, organization and decluttering, DIY home projects, plants, and seasonal ideas — all designed to bring more calm, comfort, and style into everyday life.