6 Toy And Playroom Organization Ideas That Make Cleanup Actually Easy
You want a playroom that looks like a sunlit Pinterest dream—soft rugs, warm wood, color that feels intentional. You hate stepping on plastic dinosaurs at 10 p.m. and the five-minute “clean up” that turns into a 40-minute negotiating session. You’re picturing baskets that swallow messes, art supplies that don’t migrate to every corner, and a room that still feels playful without feeling chaotic. The six toy and playroom organization ideas below attack the real pain point: getting kids to clean up with systems that make intuitive sense. These are photogenic, budget-conscious, and realistic—most can be done over a single weekend for under $600 per concept. If you’ve wanted a tidy space that still feels like a childhood, not a showroom, this is for you.
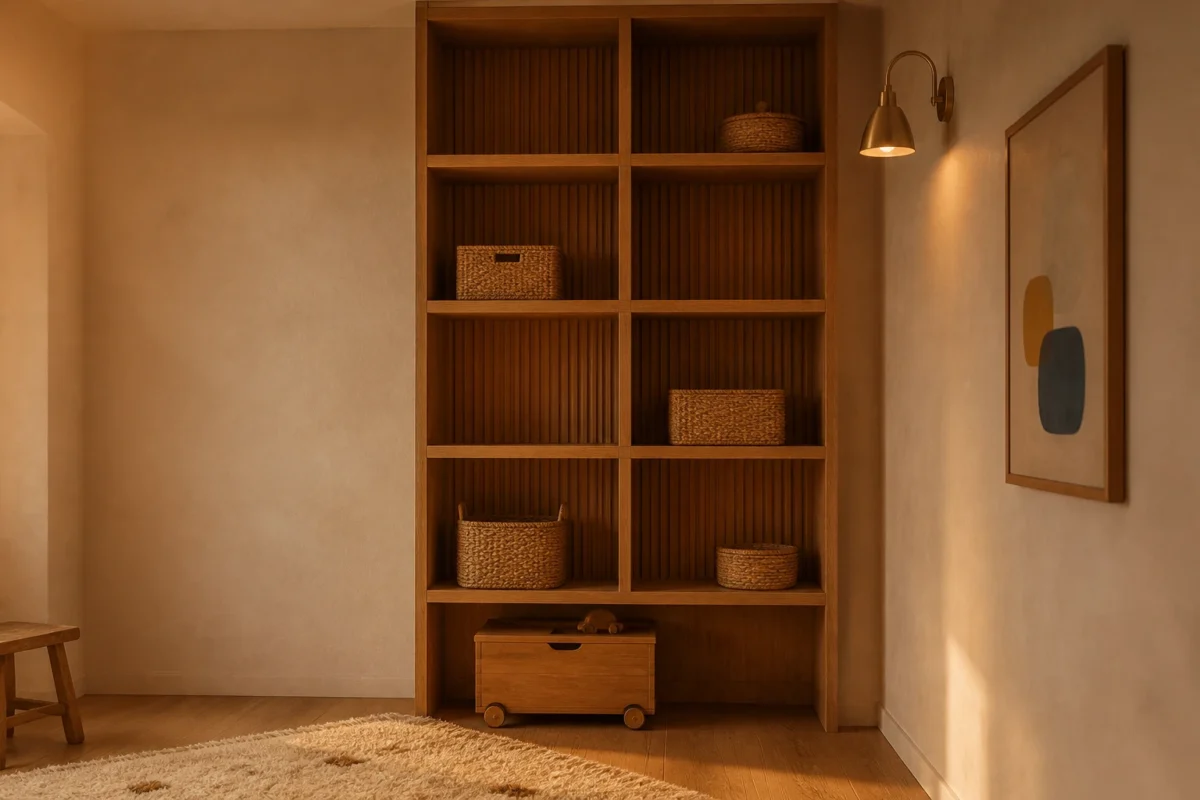
1. Warm Oak Grid Shelving With Soft Amber Glow And Rolling Toy Trunk
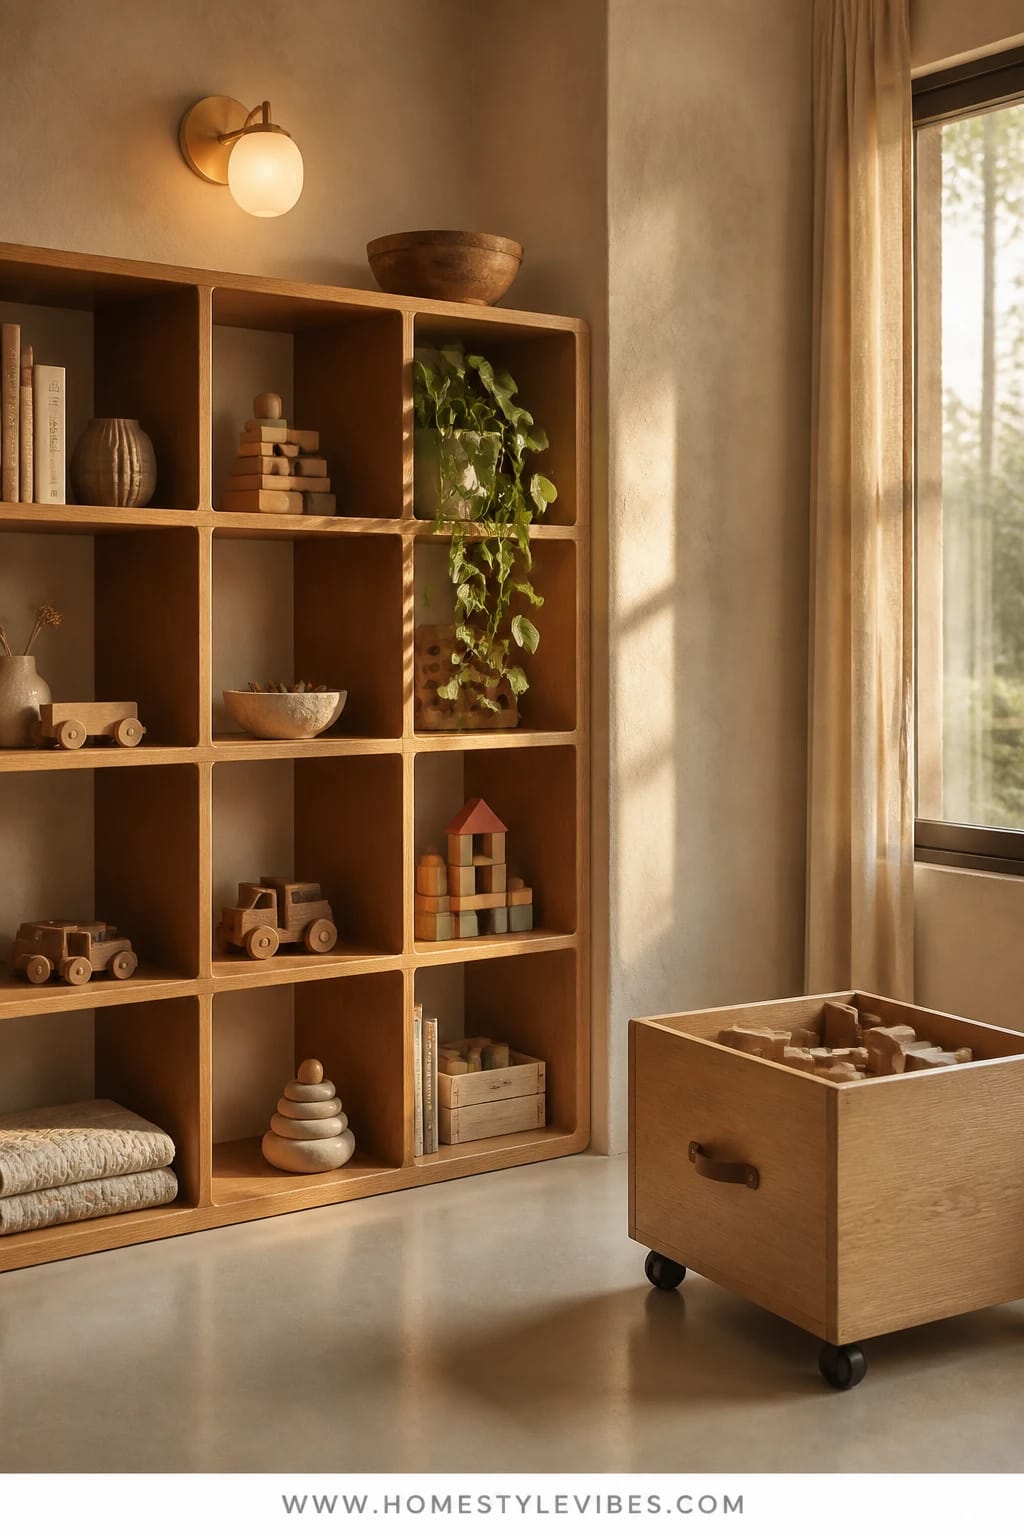
We’ve all been there: the cubbies look cute, but everything spills out and the labels get ignored. This design solves that with a warm oak shelf grid that creates natural “home bases” for each type of toy and a rolling toy trunk that invites a final sweep. Think cozy, Scandinavian-ish calm with a soft amber glow from a single wall sconce that makes even plastic blocks look intentional. It works in real homes because the grid limits visual chaos, and the rolling trunk creates one easy-catch-all step at day’s end when energy is gone.
Amber lighting shifts the mood from “busy play” to “evening wind-down,” so kids feel the cue to tidy. The dominant materials—oiled oak veneer, woven seagrass bins, and felt catch-alls—photograph beautifully by adding grain, weave, and matte textures. You’ll see contrast between warm wood and soft neutral bins, with a hero piece: a low rolling trunk with leather pulls that doubles as block city during the day and a shove-it-all-in vault at night.
For small spaces, use a half-height grid with fewer cubbies and a slim rolling trunk that slides under a bench. Renter-friendly? Use freestanding shelving plus removable adhesive sconces. On a tight budget, swap oak for birch or pine and add a walnut stain. Prefer a moodier vibe? Choose darker baskets and a deeper amber bulb to create more shadow play and depth in photos.
Budget Breakdown:
- Modular oak-effect grid shelving: $180–$450
- Seagrass or felt bins (8–12): $80–$160
- Rolling toy trunk with casters: $90–$180
- Wall sconce with amber LED bulb: $40–$120
- Leather strap pulls for trunk: $20–$40
- Label set (wood tags or clip labels): $12–$30
Total Estimated Cost: $422 – $980
Best For: Families who want nightly reset simplicity. Works best in rooms 8×10 and larger, but scales down easily. Great for wood-accent homes, Scandinavian, transitional, or Japandi styles.
Key Design Elements:
- Main materials: warm oak veneer, woven seagrass, felt
- Color palette: honey wood, linen, soft white, caramel accents
- Lighting strategy: one amber wall sconce on a dimmer to cue wind-down
- Furniture silhouettes: clean grid, low rolling trunk with rounded corners
- Texture layers: wood grain, basket weave, matte felt liners
- Accent details: leather pulls, wood clip labels, one trailing plant up high
How To Recreate This Look:
- Start with a wall-sized oak-effect grid shelf or two smaller grids side by side for flexibility.
- Add uniform bins that fit snugly (measure first) so the grid reads visually clean.
- Layer in a low rolling trunk and pre-measure casters that won’t scratch floors.
- Install a dimmable wall sconce and use an amber 2200–2700K bulb.
- Style with matching labels using pictures and words so kids can decode fast.
Why This Looks Expensive: Repetition. Matching bins in a warm wood grid look cohesive and intentional. The leather pulls and amber light add a boutique-kids-store vibe that feels curated rather than improvised.
Watch Out: Don’t mix too many bin styles or colors. Two materials max (e.g., seagrass and felt) keep it calm. Also, avoid overtly bright bulbs—cool white makes toys look harsher and cheaper.
Pro Styling Tip: Slightly pull bins forward by half an inch to cast tiny shadows and increase depth in photos.
Keep scrolling—next we’ll tackle the chaos of art supplies without plastic towers.
2. Birch Pegboard Wall With Natural Daylight Wash And Drop-Front Craft Bins
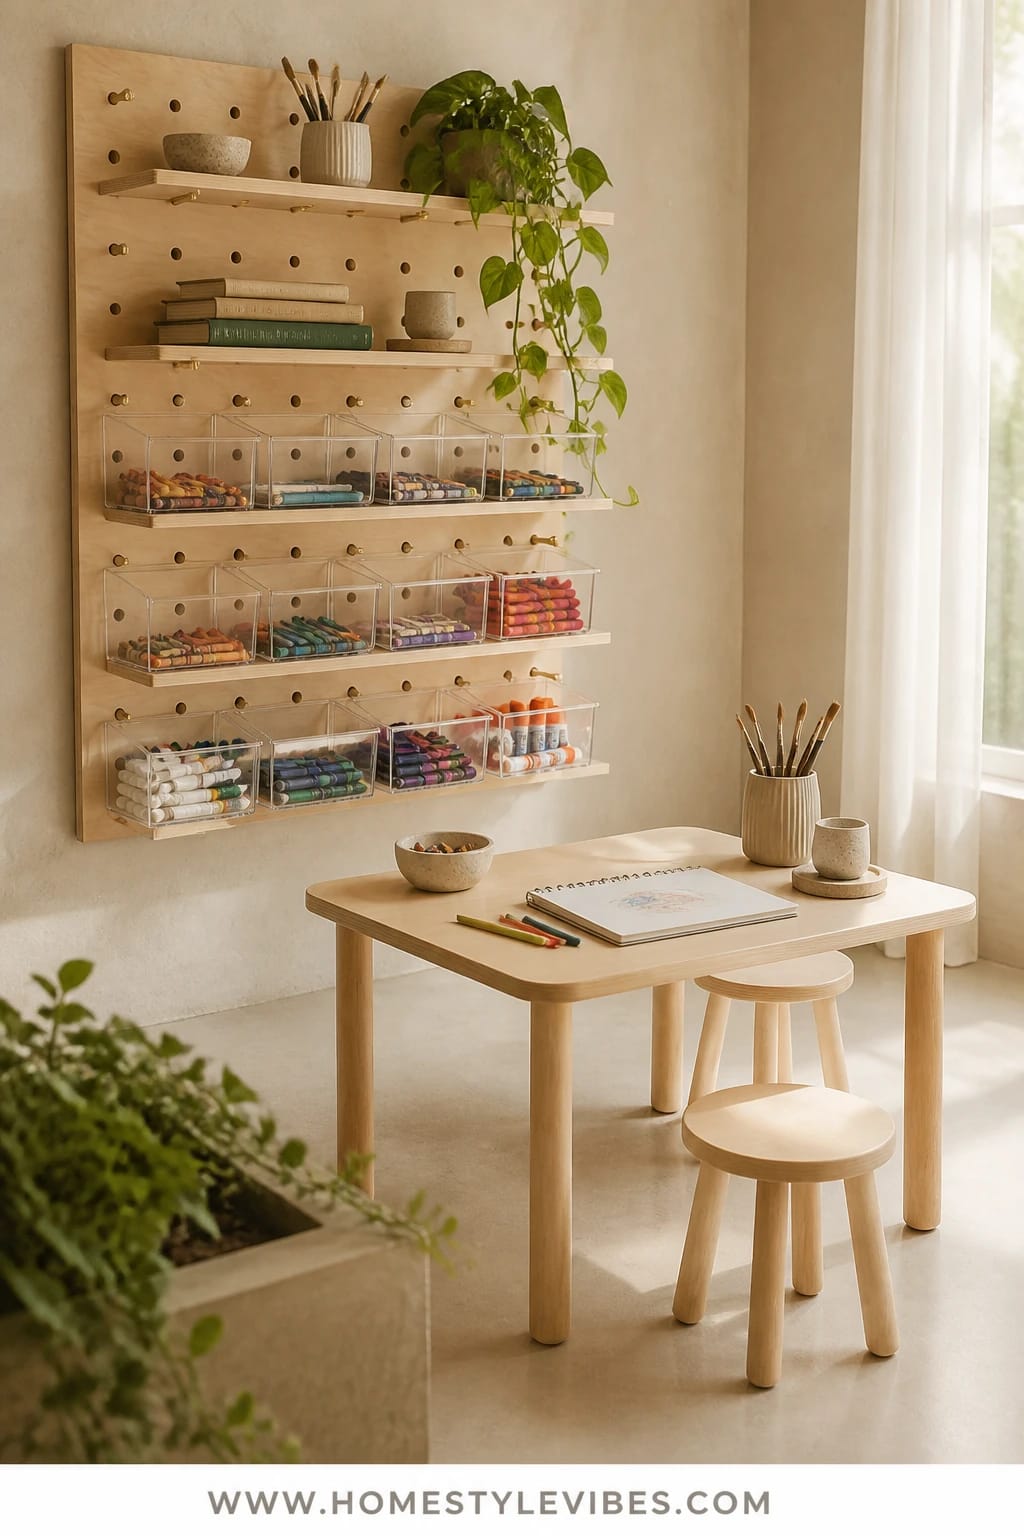
It’s that one corner that always feels off—the art table. You’ve tried mason jars and carousel caddies, but somehow glue sticks go walkabout and crayons end up under the rug. Enter a birch pegboard wall with adjustable shelves and hooks, paired with drop-front clear craft bins. It reads modern Montessori and is incredibly forgiving for real life because it’s customizable as interests change.
This setup creates an airy, focused mood. Natural daylight or a full-spectrum LED wash brightens pigments and invites kids to sit and make things. Birch, cork, and linen add Scandinavian warmth, while the drop-front bins keep tiny pieces visible and reachable—no digging. It photographs beautifully thanks to rhythmic pegboard holes, soft shadows from floating shelves, and the sheen of translucent bins against matte wood.
For small spaces, mount a half-width panel beside a window and tuck a slim wall-mounted desk beneath. On a budget, use plywood with a pegboard overlay rather than solid birch. Renter-friendly version? Use command strips for a smaller framed pegboard and freestanding A-frame shelves. For a darker room, add an under-shelf LED strip with a diffuser to avoid those weird stair-step light reflections.
Key Design Elements:
- Main materials: birch pegboard, cork, linen desk pad
- Color palette: pale wood, soft taupe, white, hints of primary color in supplies
- Lighting strategy: daylight bulbs at 4000–5000K for craft accuracy
- Furniture silhouettes: slim wall desk, floating shelves, rounded peg hooks
- Texture layers: smooth birch, nubby cork, linen weave
- Accent details: brass cup hooks, terracotta cup for brushes, framed kid art
Budget Breakdown:
- Birch pegboard panels and hardware: $120–$280
- Drop-front clear bins (6–10): $60–$140
- Floating shelves and pegs: $50–$120
- Slim wall-mounted desk: $120–$250
- Under-shelf LED strip with diffuser: $25–$60
- Cork board panel: $20–$45
Total Estimated Cost: $395 – $895
Best For: Craft-heavy homes, multi-kid households, and anyone who wants art time to start in under one minute with zero hunting.
How To Recreate This Look:
- Start by mounting birch pegboard securely into studs; plan for at least one meter wide.
- Add a slim desk below, leaving legroom and easy sweep access.
- Layer in floating shelves for paints and stack drop-front bins at kid height.
- Install daylight LED strip under the lowest shelf for even task light.
- Style with cork for drying art and a single framed piece to “gallery” the space.
Why This Feels Designer: The wall reads like a curated shop display. Everything is visible and aligned, with negative space around each tool. Function becomes decoration, which is the sweet spot.
One Thing To Avoid: Overfilling the shelves. Leave at least 20–30 percent empty so the eye can rest. Stuffed cubbies look messy even when technically organized.
Pro Styling Tip: Group tools by color family—warm-toned pencils in one bin, cool-toned in another—for a subtle tonal gradient that photographs beautifully.
Pause and breathe. Remember, this isn’t about recreating a showroom. It’s about building a space that actually feels like yours and works with your family’s rhythms. If one idea resonates more than the others, that’s your starting point.
3. Fluted Pine Toy Console With Soft Sage Backdrop And Ladder-Back Reading Chair
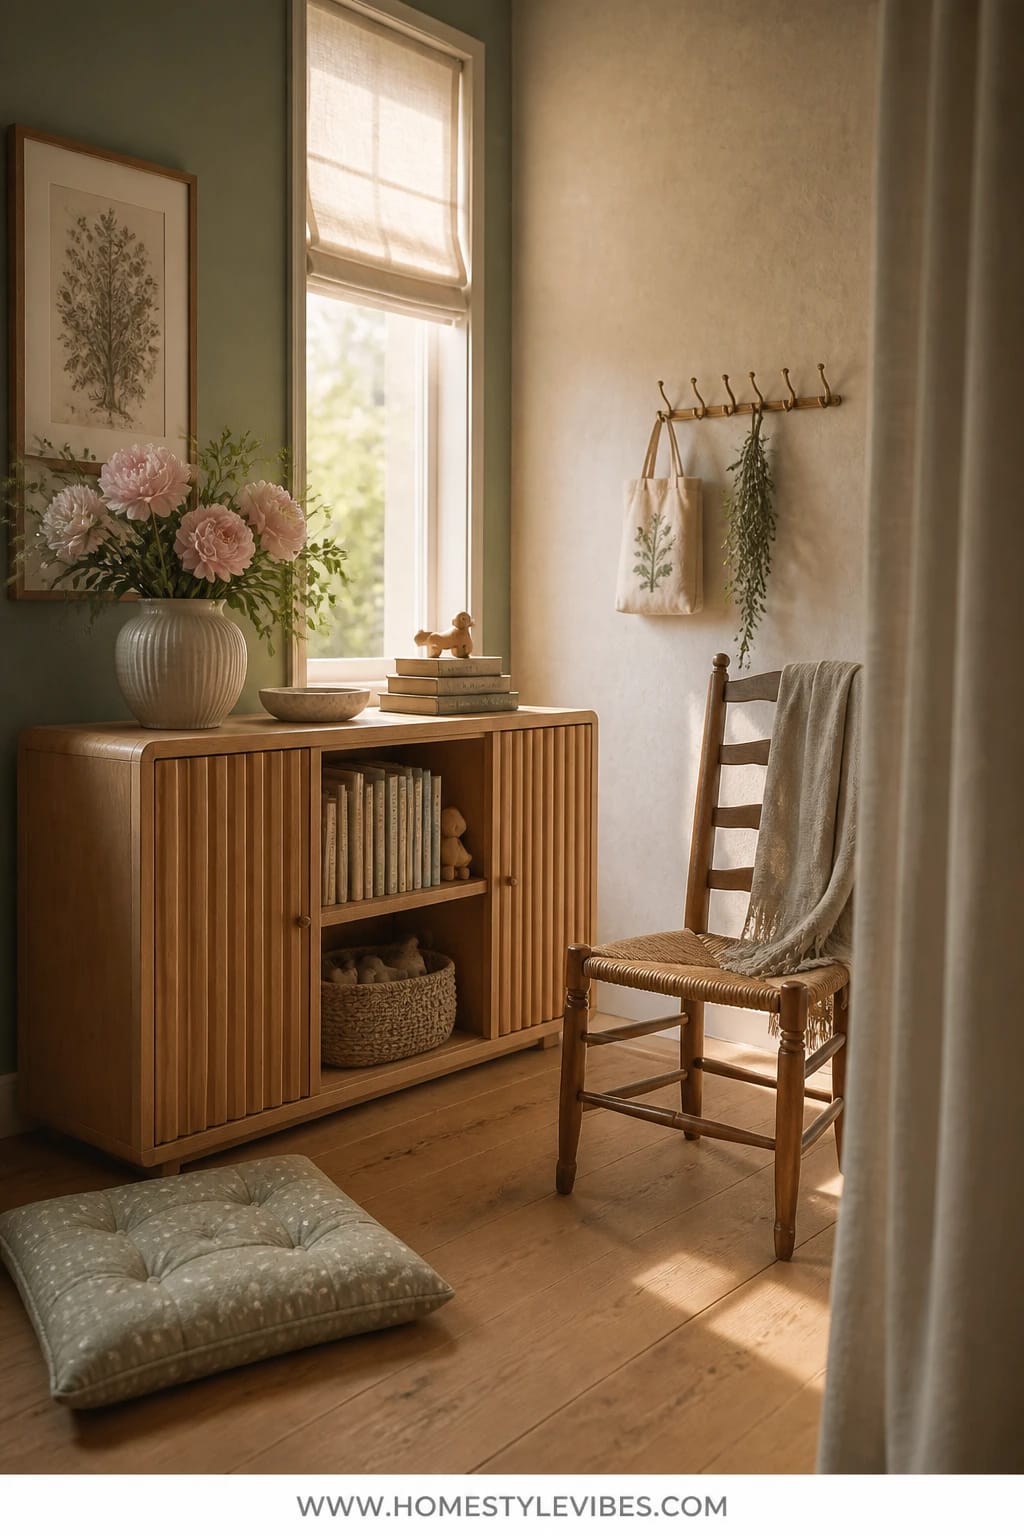
You want cozy storytime, but the books multiply and topple. The softcovers slide off tall shelves and somehow you keep reading the same three because they’re the only ones visible. This design anchors a reading zone with a low fluted pine console, a soft sage wall, and a ladder-back reading chair that feels charmingly old-school. It keeps book spines at kid height while hiding puzzles and card games behind fluted doors.
The mood is calm and cottage-meets-Japandi—gentle, tactile, and cuddly. Pine’s vertical flutes create shadow texture that makes the console feel custom. Sage paint brings a quiet backdrop that photographs as a serene wash rather than a loud color block. Lighting? Keep it warm and indirect: a floor lamp with a linen shade over the chair adds a soft oval of light on pages without glare.
Small space version: Swap the console for a narrow fluted bench with hidden storage and a petite reading stool. On a budget, DIY the fluting with half-round molding on a thrifted cabinet. Renter-friendly? Paint a removable canvas drop cloth in sage and hang it as a wall panel behind the console—instant color, zero commitment. If you prefer a deeper palette, try olive instead of sage and a darker linen shade to push the mood-cozy factor.
Budget Breakdown:
- Fluted pine console or DIY kit: $220–$620
- Sage paint (1 gallon): $40–$70
- Ladder-back reading chair with cushion: $120–$280
- Linen shade floor lamp: $70–$180
- Fabric book bins for console interior (4–6): $30–$80
- Wall art ledge for current reads: $20–$40
Total Estimated Cost: $500 – $1,270
Best For: Families building a nightly reading habit and anyone craving a softer, less toy-store vibe in the playroom. Great for rooms with wood floors or woven rugs.
Key Design Elements:
- Main materials: fluted pine, linen, woven cotton
- Color palette: soft sage, natural pine, warm white, inky book spines
- Lighting strategy: one warm floor lamp plus a dim overhead for evening
- Furniture silhouettes: low console, high ladder-back chair, rounded lamp shade
- Texture layers: fluting shadows, linen weave, cotton cushion piping
- Accent details: painted wall ledge, simple brass knob, a small plant in terracotta
How To Recreate This Look:
- Start by painting a soft sage rectangle on the wall the width of your console—it frames the zone.
- Add the fluted pine console centered on the painted area.
- Layer in a ladder-back chair angled 15 degrees toward the lamp.
- Install a wall ledge at kid eye level to display 4–5 current favorites front-facing.
- Style with a linen cushion and a knit throw to signal “stay awhile.”
Why This Reads High-End: Fluting adds architectural interest without shouting. A single, well-chosen statement texture plus a muted paint field looks custom and editorial, like a boutique children’s bookstore.
The Most Common Mistake: Too many face-out book ledges stacked to the ceiling. Limit to one or two and rotate weekly. Over-displaying kills the magic and creates visual noise.
Pro Styling Tip: Stack two or three oversized picture books flat on the console to break up vertical lines and add magazine-ready dimension.
4. Powder-Coated Steel Rail System With Cool White Task Light And Swing-Arm Display Shelf
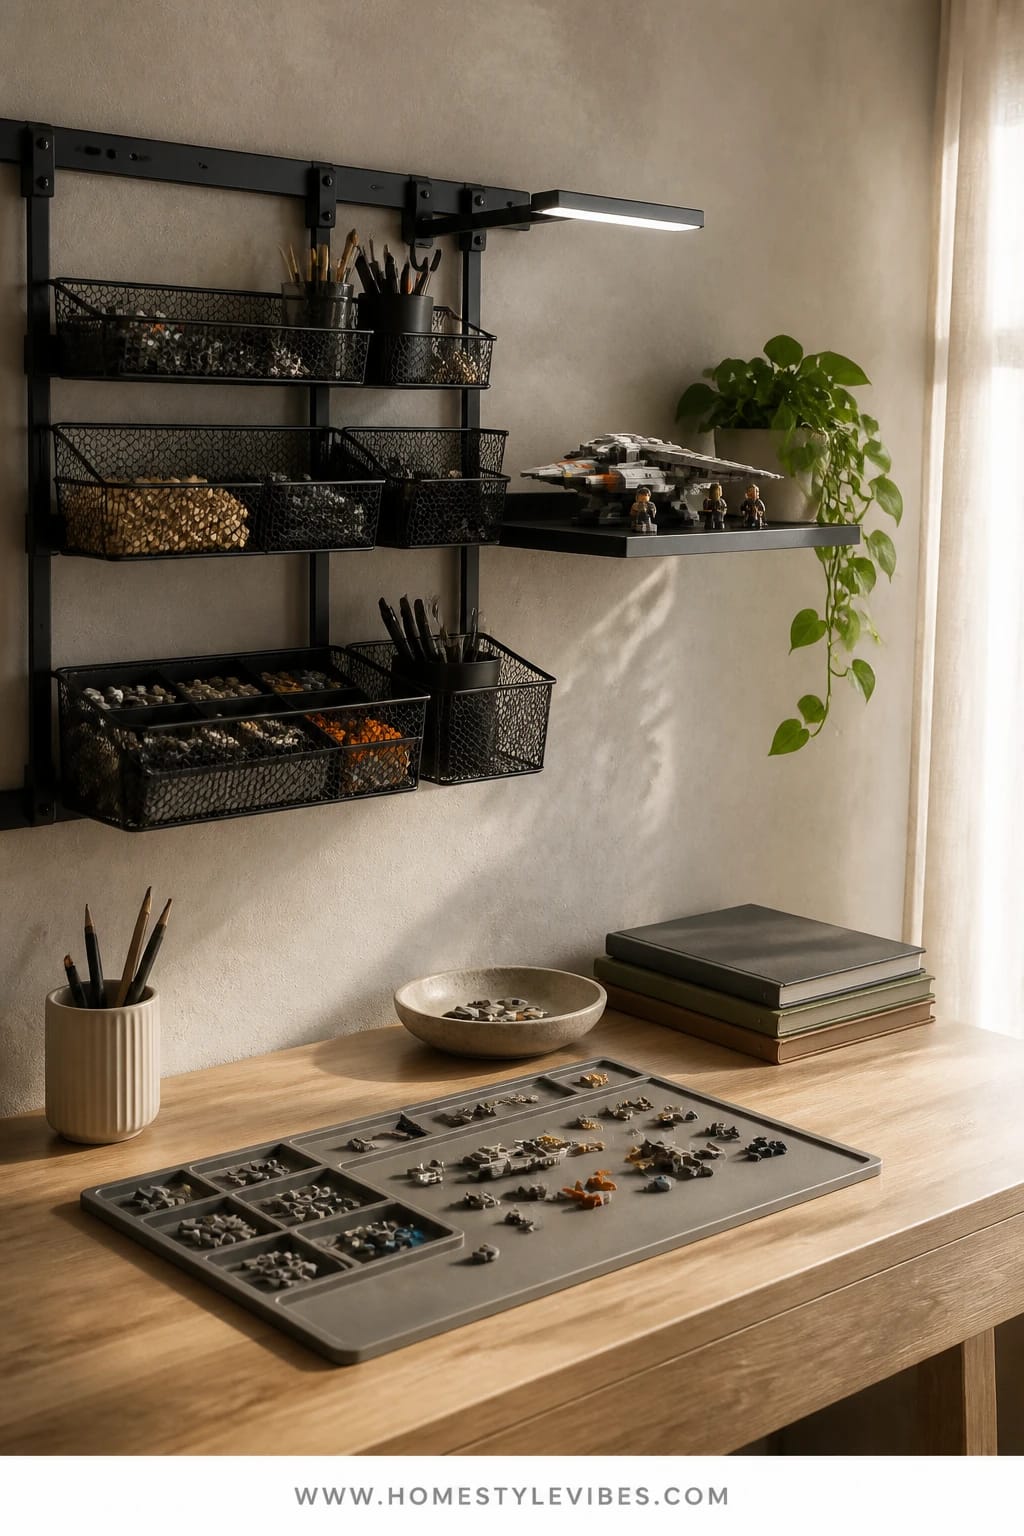
Here’s the secret struggle: you want LEGO builds, train tracks, and STEM kits to live somewhere that isn’t your dining table. You’ve tried plastic drawers, but the tiny parts vanish and the builds get crushed. This wall-mounted rail system—powder-coated steel with modular baskets—gives every micro-piece a visible home. Add a cool white task light for build clarity and a swing-arm display shelf to celebrate finished creations without dust-prone open shelves everywhere.
The mood is modern workshop meets kid lab. It works in real homes because vertical storage clears floor space for play, and the cool white lighting (think 4000K) helps with color sorting and instructions. Materials like steel, acrylic, and durable melamine wipe clean and resist the crayon incident that always happens. Photographically, the matte rails against a mid-tone wall create linear geometry. The single swing-arm shelf acts like a spotlight moment—today’s pride build gets star treatment.
Budget-friendly path: use a closet track system with wire baskets and spray them matte for a custom look. Small space? Install a single bay with three baskets and a narrow build table that folds down. Renter? Use freestanding utility racks with locking wheels and clamp-on lamps. Prefer a softer look? Paint the wall a misty blue-gray so the steel reads calm, not industrial.
Budget Breakdown:
- Powder-coated rail system with baskets and hooks: $180–$380
- Swing-arm display shelf: $40–$110
- Cool white clamp-on task light: $25–$60
- Narrow build table or fold-down desk: $120–$280
- Clear acrylic parts trays with dividers (4–6): $40–$120
- Cable clips and cord sleeve: $12–$25
Total Estimated Cost: $417 – $975
Best For: LEGO lovers, budding engineers, and homes where the build phase lasts weeks. Ideal along one long wall or a closet nook.
Key Design Elements:
- Main materials: powder-coated steel, acrylic, melamine
- Color palette: soft gray wall, matte black or white rails, pops of primary from bricks
- Lighting strategy: cool white task lighting targeted at the work zone
- Furniture silhouettes: crisp lines, low-profile baskets, thin tabletop
- Texture layers: matte metal, glossy acrylic, smooth melamine
- Accent details: grid labels, magnetic cup for minifigs, a single poster for personality
How To Recreate This Look:
- Start with two vertical rails anchored into studs; add three or four baskets.
- Add a narrow table below the lowest basket for builds-in-progress.
- Layer in clear acrylic trays with dividers inside baskets—group by color or type.
- Install a clamp-on task light and route the cord cleanly with clips and a sleeve.
- Style with a swing-arm shelf off to the side for the weekly display build.
Why This Looks Intentional: Consistent hardware and visible sorting give instant order. The swing-arm display tells a story: this is a creative lab, not a dumping zone.
Don’t Do This: Pile multiple open builds on one surface. Give each major build its own tray or a labeled bin lid as a “parking spot,” so cleanup doesn’t destroy progress.
Pro Styling Tip: Leave one empty basket for surprise sets. Negative space reads luxury, even in a kid lab.
Little breather: You don’t need six projects this weekend. Pick the zone that hurts the most—art, books, open play—and start there. You’ll get momentum when one corner finally behaves.
5. Cane-Front Toy Buffet With Golden Hour Sheers And Floor Cushion Pit
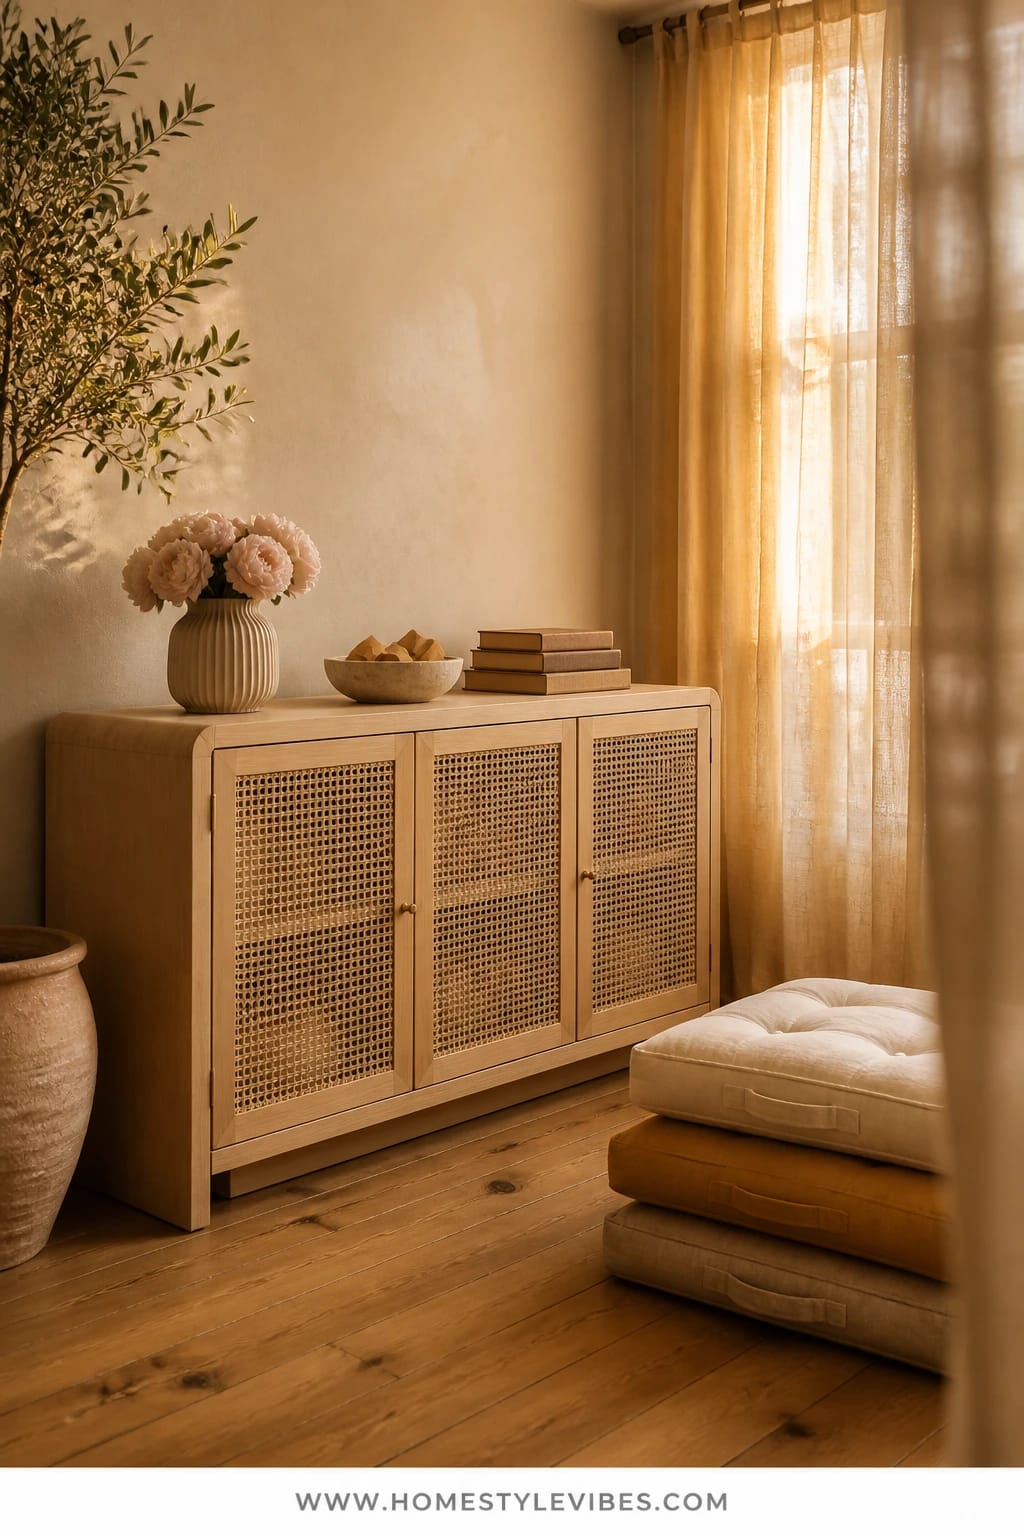
Messy stuffed animals and pretend play accessories can swallow a room. The basket tower leans. The costumes drape over every chair. This solution leans into texture and softness: a cane-front toy buffet that breathes (no weird toy smell) plus low, movable floor cushions that stack neatly. Golden hour sheers filter light to create a late-afternoon calm that makes cleanup feel like the natural pause before dinner.
The mood channels modern Mediterranean with a breezy, sun-kissed vibe. Cane fronts add artisanal warmth and hide mismatched toy chaos without making the room feel heavy. Sheers in a warm white catch light and blur the background, so photos read dreamy, not cluttered. A low buffet keeps everything within kid reach—no step stools—and the floor cushion “pit” creates a zone for pretend picnics or puzzle time that flips into a tidy stack in seconds.
For small rooms, select a half-length buffet and two oversized cushions. On a budget, retrofit an IKEA cabinet with cane panels and simple wood knobs. Renter-friendly? Tension-rod sheers for that glow without drilling. If the room runs dark, choose lighter cane and double up on warm white bulbs reflecting off creamy walls to mimic sunset warmth.
Budget Breakdown:
- Cane-front sideboard or DIY panels: $260–$780
- Sheer curtains and tension rod: $40–$120
- Floor cushions (3–5): $90–$250
- Low baskets inside buffet (4–6): $40–$100
- Wood knobs or leather pulls: $18–$40
- Warm LED bulbs (2700K): $10–$30
Total Estimated Cost: $458 – $1,320
Best For: Homes that want a softer, styled look with hidden storage. Ideal if your playroom also hosts guests or sits open to living areas.
Key Design Elements:
- Main materials: natural cane, light oak or beech, cotton-linen sheers
- Color palette: sand, cream, wheat, muted clay accents
- Lighting strategy: layered warm light with sunlight diffusion via sheers
- Furniture silhouettes: slim buffet, round stacked cushions, soft edges
- Texture layers: woven cane, slubbed sheers, soft cotton cushions
- Accent details: clay pot with olive branch, raffia baskets, rattan mirror
How To Recreate This Look:
- Start by placing a cane-front buffet along the wall that gets the softest light.
- Add sheer curtains to warm up the window light and hide street views.
- Layer baskets inside the buffet for quick category sorting (animals, play food, dolls).
- Install warm bulbs in overheads and lamps to echo late-day sun.
- Style with stacked floor cushions; teach kids to “pancake stack” as the last tidy step.
Why This Looks Expensive: Textural restraint. Cane plus sheers plus a single wood tone feels curated and timeless. It reads boutique hotel lounge—kid-friendly but grown-up appropriate.
Watch Out: Don’t pair heavy blackout curtains with caned doors—too weighty together. If you need blackout, layer a roller shade behind the sheers and keep it hidden during the day.
Pro Styling Tip: Let the sheers graze the floor by half an inch. That subtle break adds softness on camera without looking sloppy.
6. Rubberwood Bench Nook With Dimmable Cove Light And Pull-Out Crate Bank
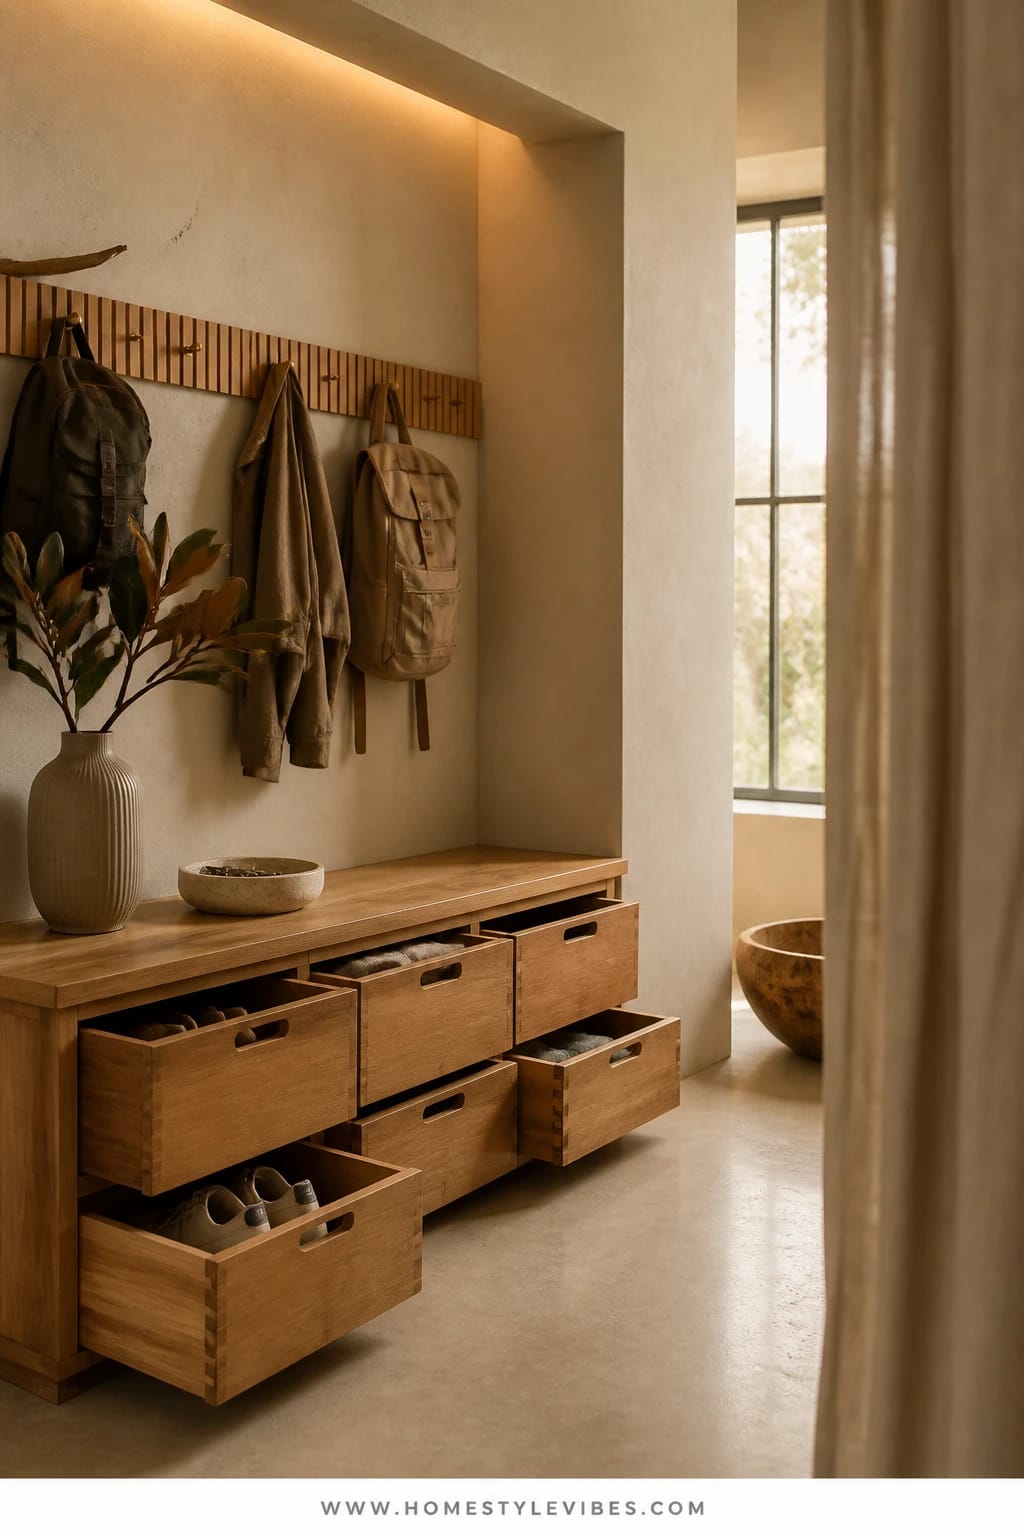
There’s always that drop zone where shoes, backpacks, and random toys collide. You’ve tried a bench, but stuff just piles underneath and mocks you. This final design creates a true landing strip: a rubberwood bench nook with a dimmable cove light tucked under a shallow overhang and a bank of pull-out crates on soft-close runners. The statement piece is the bench itself—sleek, low, and deeply practical—turning chaos into a ritual of “pull, drop, push.”
The mood sits somewhere between minimal mudroom and Japandi calm. Rubberwood’s even grain takes light beautifully and resists scuffs. The cove light adds a soft halo that guides kids toward the right spot without you nagging. Because everything pulls out like a drawer, the cleanup motion becomes satisfying—truly. In photos, the shadow line from the overhang creates depth, while the crate fronts (canvas or wood slats) add graphic rhythm.
Small-space twist: make the bench the exact width of a window wall and add only three crates. On a budget, use a ready-made shoe bench and swap in wood-framed canvas bins on drawer slides. Renter-friendly? Use a freestanding bench with felt-backed crates and a plug-in LED strip along the back wall. Prefer bold? Paint the back wall a muted charcoal to make the rubberwood glow.
Budget Breakdown:
- Rubberwood bench or DIY build: $220–$600
- Soft-close drawer slides for crates (3–5 sets): $40–$100
- Crates or canvas-front bins (3–5): $60–$175
- Plug-in cove LED with dimmer: $35–$90
- Wall hooks above for bags (optional): $25–$60
- Mat or runner: $30–$120
Total Estimated Cost: $410 – $1,145
Best For: Entry-adjacent playrooms, multipurpose family rooms, or anywhere you need a daily reset station for “stuff with handles.”
Key Design Elements:
- Main materials: rubberwood, canvas, powder-coated hooks
- Color palette: light wood, oat, charcoal or white accents
- Lighting strategy: dimmable cove strip to cue end-of-day reset
- Furniture silhouettes: low linear bench, crate fronts with finger pulls
- Texture layers: smooth wood, canvas grain, flat paint backdrop
- Accent details: single art print above hooks, slim runner, matte black screw caps
How To Recreate This Look:
- Start by measuring the nook; aim for a bench depth of 14–16 inches for comfy sitting.
- Add soft-close slides inside the bench cavity and fit crates that glide smoothly.
- Layer a plug-in LED strip under the upper lip; connect to a table-top dimmer.
- Install two or three hooks above for bags or capes—keep spacing even.
- Style with a washable runner and a single framed print to define the zone.
Why This Feels Designer: The lighting line. That quiet cove glow suggests custom millwork. Pair it with smooth-glide crates and the whole nook reads tailored, not temporary.
One Thing To Avoid: Open baskets that scrape on the floor. If crates don’t glide, kids won’t use them. Add felt pads or proper slides and test with a full load before finalizing.
Pro Styling Tip: Keep the bench top mostly clear—one plant or one low tray max—to photograph as a calm “pause” line between wall and floor.
Honest moment: I once spent a week choosing the perfect sage paint for a reading nook, only to realize the real problem was that our bins didn’t fit the shelf depth. The magic happened when we fixed the fit and added a floor lamp. After that, my son actually sat to read without me hovering. Sometimes the answer isn’t prettier storage—it’s the right dimensions plus the right light.
Another small story: A friend agonized over color-coding LEGOs. We scrapped that and sorted by “big” and “tiny” with a single display shelf. Cleanup time dropped from 25 minutes to 6. The truth is, the secret isn’t stricter rules—it’s fewer categories and better access.
Quick Checklist
- Match bin sizes to shelf depth within 1 inch
- Choose one warm wood tone as your anchor
- Use dimmable lighting to cue cleanup
- Add at least one closed storage piece per zone
- Label with pictures and words
- Reserve 20–30 percent empty space
- Sort tiny pieces into drop-front or clear trays
- Display only a few “hero” items at a time
- Test glides and casters under full load
- Photograph with shadows—don’t blast everything with light
Frequently Asked Questions
How do I create toy and playroom organization on a tight budget?
Prioritize one anchor piece (a shelf grid or a bench) and buy matching bins secondhand. DIY fluting with half-round molding, retrofit an old cabinet with cane, or use plywood with a pegboard overlay. Keep categories broad so you need fewer containers.
Our playroom is tiny. Which idea should I start with?
Go vertical. The birch pegboard or the rail system works best in small spaces because they free floor area. Pair with one low rolling trunk or a single bench nook—avoid multiple small carts that clutter circulation paths.
How do I maintain these systems when kids are very young?
Use picture labels, big bins, and as few categories as possible. Think “Animals,” “Blocks,” “Cars.” Skip lids for daily-use bins and reserve lidded boxes for sets that come out with adult supervision.
I rent—can I still do the lighting pieces?
Yes. Choose plug-in sconces, clamp-on task lights, and stick-on LED strips with diffusers. Use tension rods for sheers and freestanding shelves. All deliver the mood shift without touching your lease.
What’s the most common mistake with toy and playroom organization?
Too many containers and too much variety. Mismatched sizes and colors create visual chaos and decision fatigue. Pick one bin style, keep labels consistent, and leave breathing room.
Closing Thoughts
Pick one idea and start—the shelf grid, the pegboard wall, the fluted console, the rail lab, the cane buffet, or the bench nook. You don’t need all six to feel the shift. One finished zone with the right light, the right texture, and simple categories will teach your kids how the room should behave.
Remember, what reads as luxury isn’t price—it’s texture, lighting, and restraint. Warm wood against soft bins, a single statement piece, and a predictable cleanup ritual will make the room feel finished and calm. Your playroom can look beautiful and work hard at the same time.
You’ve got this. Tidy doesn’t mean sterile; it means the space has your back. Start with the corner that bugs you the most, set a 90-minute timer, and enjoy that sweet moment when the floor appears again—no plastic dinosaur in sight, seriously.

About the Author

Krisztina P.Rendes, Founder of Home Style Vibes
Founder of Home Style Vibes
Krisztina Puskásné Rendes created Home Style Vibes as a cozy-modern lifestyle space where homemaking meets inspiration. Her goal is to help women create beautiful, organized, and peaceful homes they truly love — without overwhelm. You’ll find here heart-driven content on home decor, cleaning tips, easy family recipes, organization and decluttering, DIY home projects, plants, and seasonal ideas — all designed to bring more calm, comfort, and style into everyday life.