5 Best Oven Cleaner Methods That Work Better Than Anything You Buy at the Store
You want that just-moved-in feeling every time you open your oven door. You hate the baked-on grease, the sticky brown film, and the chemical fog that stings your nose. The good news? I’ve got five tried-and-true oven cleaner methods that beat store-bought sprays, save money, and deliver a glass-door reveal you’ll actually want to photograph. Follow along and you’ll have a cleaner that works, smells better, and costs under $15 per method — with before-and-after results worthy of your Pinterest board.
What’s Inside
The Overnight Baking Soda Paste That Lifts Grease Like Magic
This is the quiet hero: a thick paste that does the work while you sleep.
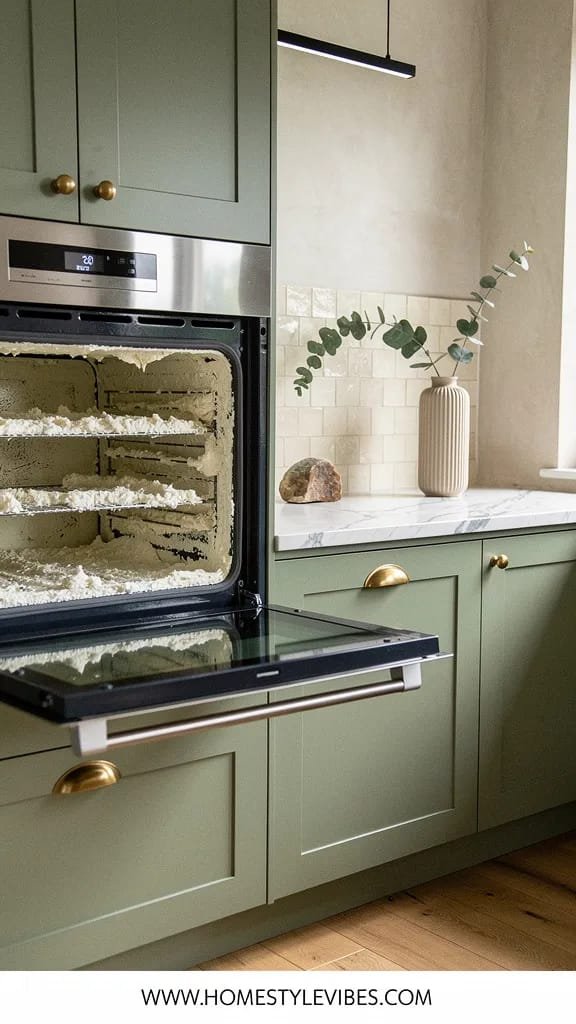
We’ve all been there — promising ourselves we’ll scrub the oven this weekend, then opening the door to find glossy amber drips and crispy black “mystery spots.” The truth is, harsh oven sprays often spread the mess and choke the kitchen with fumes. An overnight baking soda paste is low-drama, insanely effective, and friendly to your lungs and your budget. By morning, that gritty white paste turns warm brown as it pulls oils and sugars out of the enamel like a magnet.
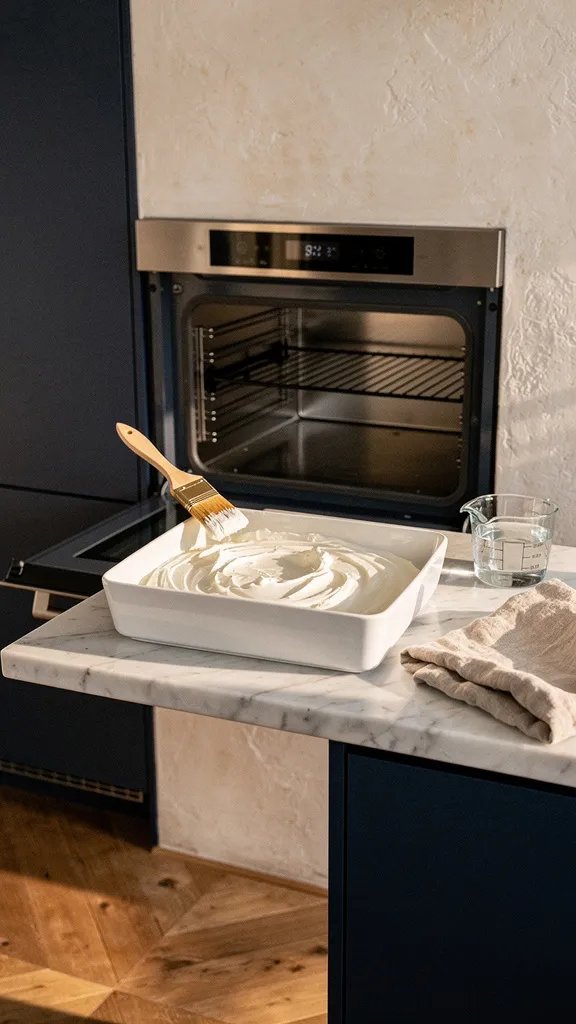
Here’s why it works: baking soda is alkaline, so it breaks down acidic, caramelized food residue without scratching. Mixed into a thick, spreadable texture (think sour cream), it clings to vertical surfaces. When you open the oven the next day, you’ll see softened grime that wipes off in ribbons. The surface feels smooth again, not sticky, and the air smells faintly clean — no sting, no headache.
If you rent or you’re worried about scratching, this is your go-to. You can do it with a bowl, a spoon, and an old pastry brush. And yes, it’s effective on the glass door too, revealing that satisfying clear pane so your next roast chicken looks stage-lit.
Budget Breakdown
- Baking soda (4 lb bag, Walmart): $3–$5
- White vinegar (1 gal, Target): $3–$4
- Old brush or sponge: $0–$4
- Optional essential oil (lemon): $5–$10
Best For: Beginners, chemical-sensitive households, weekly maintenance, and ovens with a dull brown film rather than thick tar-like build-up.
How to Do It
- Mix 1 cup baking soda with 6–8 tablespoons water until you have a thick paste.
- Spread over the interior (avoid bare heating elements). Go heavier on corners and the back wall.
- Let sit 8–12 hours. Keep the door closed — the darkness and still air help.
- Wipe with a damp microfiber cloth. Mist with white vinegar to fizz away any residue.
- Finish with a clean, dry cloth on the glass for streak-free sparkle.
Steam Power: Lemon-Water Sauna That Softens Grime in 20 Minutes
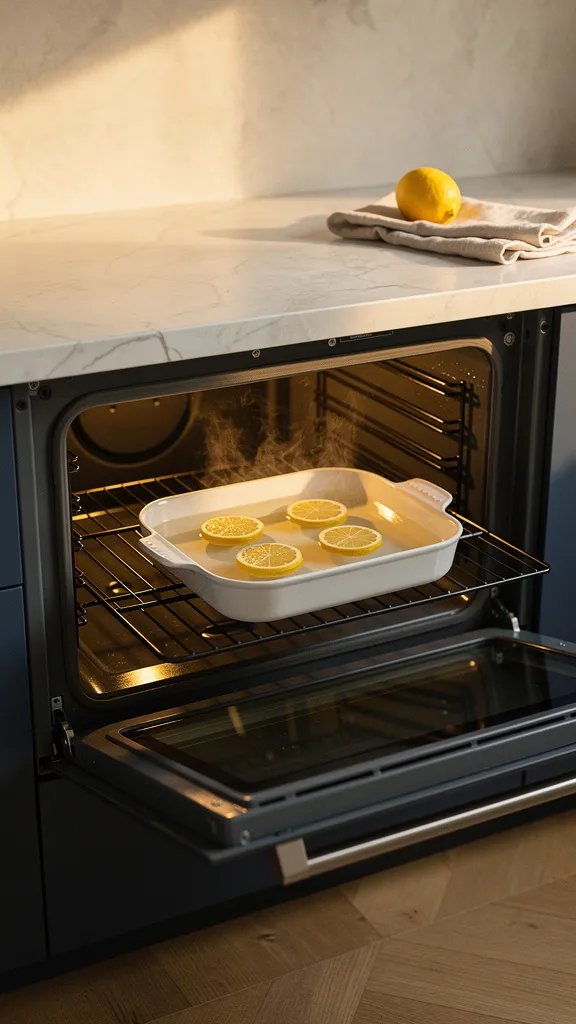
When you need a quick pre-clean that makes everything else easier, use steam.
It sounds obvious, but here’s where it usually falls apart: people jump straight to scrubbing and skip the softening phase. Steam loosens the grime so your sponge glides instead of skids. Add lemon and your kitchen fills with a fresh, zesty scent that makes the chore feel less… chore-like. The warm, citrusy fog melts through fat and sugar residue so they release without force.
Here’s why it works: hot steam penetrates dried spills, and the lemon’s mild acidity helps break down grease. You’ll see the walls turn from matte and dusty to dewy and glossy as condensation beads up. That’s your cue. After this 20-minute mini-sauna, even the corners give in with a light wipe. Renter-friendly? Absolutely. You’re just using a pan and water.
For busy weeknights, this is your reset ritual. Throw in the lemon halves and let the oven do the work while you clean the counters. When you open the door, a gentle wave of citrus steam billows out — not chemical haze, just clean warmth.
Budget Breakdown
- Lemons (2, any grocery): $1–$2
- Water: free
- Oven-safe dish or 9×13 pan: already in most kitchens
Best For: Light to moderate grime, pre-softening before any deeper method, and quick refreshes when company’s on the way.
How to Do It
- Fill a 9×13 pan with 2 cups water, add 2 sliced lemons.
- Heat oven to 250–300°F for 20–30 minutes.
- Turn off, crack the door, and let steam relax for 5 minutes.
- Wipe walls and door with a microfiber cloth while surfaces are still warm.
This isn’t about achieving a magazine-perfect oven overnight — it’s about momentum. Use steam as your fast win, then pick one deeper method when you have more time. If you skip a week, nothing falls apart. You simply start again.
DIY Degreaser Spray: Dawn + Vinegar for Stubborn, Sticky Gunk
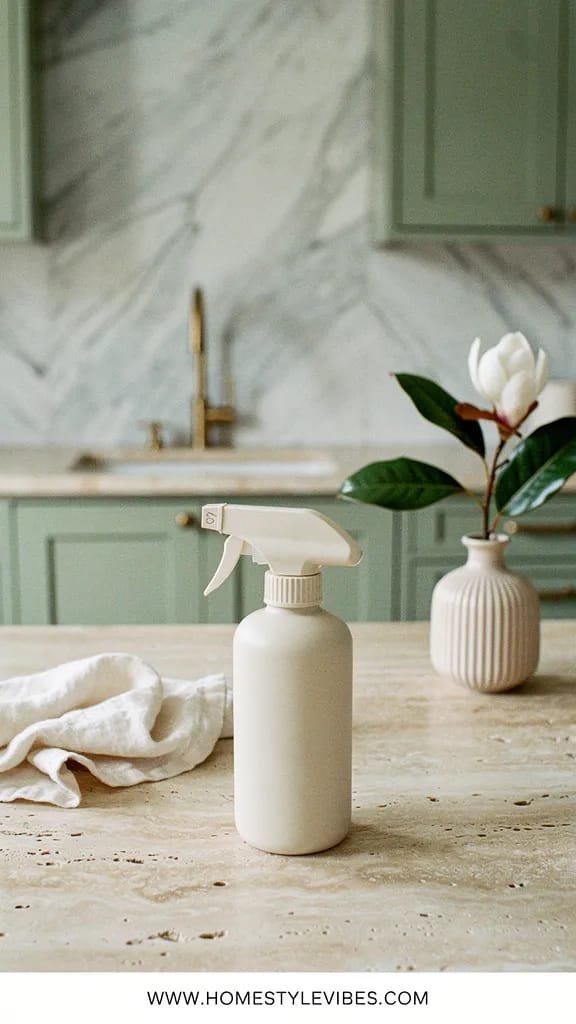
When you need slip, slide, and serious cut-through power, this combo wins.
You’ve tried soapy water, but it still feels slick and smeary, right? That’s because grease needs both surfactants and acidity to break apart. A DIY mix of dish soap (Dawn is the classic) and heated white vinegar creates a powerhouse degreaser that clings, breaks up fats, and rinses clean. It’s the solution for that sticky rim around the door, the glossy corners, and the greasy film that laughs at plain water.
Here’s the science in plain English: dish soap surrounds grease molecules and makes them water-friendly; vinegar lowers the pH so caramelized sugars loosen their grip. Together, they cut through the shiny, stubborn layer that otherwise re-spreads. The result? A squeaky-clean feel and a faintly bright, vinegar-lemon scent that disappears once it dries. Pair with a soft brush and you’ll see suds change from pale blue to café-au-lait as they lift grime away.
For renters or anyone on a budget, this is a slam dunk. No special tools, just a spray bottle and a bit of patience. It’s also perfect for the metal frame around the oven window where gunk likes to hide.
Budget Breakdown
- Dawn dish soap (19 oz, Target): $3–$5
- White vinegar (1 gal, Walmart): $3–$4
- Spray bottle (Home Depot or Amazon): $2–$8
- Soft nylon brush: $4–$8
Best For: Sticky grease layers, door rims, control panel surrounds (check your model’s guidance), and touch-ups between deep cleans.
How to Do It
- Warm 1 cup white vinegar until hot (not boiling), then pour into a spray bottle with 1 tablespoon Dawn.
- Shake gently and spray liberally on cool oven surfaces.
- Let sit 10–15 minutes. Agitate with a nylon brush in small circles.
- Wipe with a damp microfiber cloth; follow with a clean, dry cloth.
- Best overall: Classic blue Dawn — unmatched grease-cutting, easy rinse.
- Budget pick: Store-brand blue dish soap — slightly more scrubbing but still solid.
- Skip this one: Moisturizing or “lotion” dish soaps — they leave a film.
The Razor Blade Trick for Burnt Spills (Yes, It’s Safe When You Do It Right)

For those dark, baked-on blobs that laugh at scrubbing, use precision.
This is the part most people get wrong: they either gouge the enamel or give up too soon. A single-edge razor, used flat and lightly, can lift carbonized spills cleanly from oven glass and some smooth enamel surfaces. The secret isn’t pressure — it’s angle. Keep the blade almost parallel to the glass, listen for that quiet “shhh” scrape, and watch stubborn black specks pop off like tiny vinyl stickers.
Why it works: burnt sugars and carbon form a hard layer that mechanical lift removes faster than chemicals. Think of it as shaving, not chiseling. When you follow with a degreaser or a vinegar rinse, the glass turns crystal-clear and the enamel looks evenly matte again. The tactile shift is instant: rough to smooth, gritty to satin.
Renter-friendly and budget-smart, this trick is best for the oven window and truly stuck drips. For textured enamel, test a small area first. Pair it with a towel under your hand to control pressure, and you’ll feel pro-fast with almost no effort.
Budget Breakdown
- Single-edge razor scraper with cover (Home Depot): $3–$8
- Replacement blades (pack): $3–$6
- Microfiber cloth: $1–$3
Best For: Burnt-on glass door spills, hardened caramel spots, and edges where paste didn’t fully lift residue.
How to Do It
- Spritz the area with warm water or a little soapy water — always work wet.
- Hold the razor at a very shallow angle (10–15 degrees) and glide lightly.
- Wipe the blade on a cloth after each pass.
- Finish with a vinegar spritz and a dry buff for clarity.
- Best for beginners: A scraper with a long handle and safety cover — more control, less risk.
- Worth the splurge: A professional glass cooktop scraper — sturdier, smoother glide.
Quick mindset reset: progress is the goal, not perfection. Your oven’s story includes weeknight pizzas, birthday cakes, and one spectacular lasagna overflow. Clean what you can today; the rest waits patiently for round two.
Trash Bag Rack Rescue: Ammonia Vapor Clean Without Scrubbing
If your oven racks feel like a cheese grater, this overnight trick brings back the glide.
You’ve soaked racks in the tub, scrubbed until your shoulders burned, and they still snag your tea towel. The answer is vapor cleaning with a small cup of household ammonia sealed in a heavy-duty trash bag with your racks. The fumes soften baked-on grease so it wipes off with almost no pressure. By morning, you’ll see dull brown residue melt into gray smudges that slide away with a sponge.
Here’s why it works: ammonia breaks down grease rapidly as a gas, reaching crevices and wire joins where brushes struggle. You don’t need to flood the bag — just a small open cup. The finish returns to a soft metallic sheen, and the racks feel silky again, so pans slide like they’re on ice.
Budget-friendly and wildly effective, this method stays outside on a porch or balcony for safety and scent control. If you live in an apartment, do it in a well-ventilated area like near an open window, keeping the bag fully sealed during the soak. Serious results, minimal effort.
Budget Breakdown
- Household ammonia (gallon, Walmart): $3–$5
- Heavy-duty contractor trash bags (Home Depot): $8–$12
- Old sponge or scrub pad: $1–$3
- Rubber gloves: $3–$8
Best For: Oven racks with heavy, baked-on grease; people who want power-clean results without endless scrubbing.
How to Do It
- Place oven racks inside a heavy-duty trash bag. Add a small cup (about 1/4 cup) of ammonia upright inside.
- Seal tightly and set outside or in a well-ventilated area overnight.
- Open bag away from your face. Rinse racks thoroughly with water and wipe clean.
- Dry completely to prevent spotting.
- Best overall: Contractor-grade trash bags — stronger seal, fewer leaks.
- Budget pick: Two regular heavy-duty bags nested together — DIY double barrier.
Bonus: Glass-Door Clarity Formula for That “New Oven” Look
When you want the glass to look invisible, use a two-step clean-and-polish.
We’ve all been there: you wipe the door and it looks fine… until the light hits and you see streaks, hazy swirls, and that shadowy outline where spills baked in. The solution is a tidy one-two combo: a cleaner to lift residue, followed by a polish that evens the sheen. I like a gentle cream cleanser followed by a vinegar-water spritz and a final buff with a dry, plush microfiber. The finish is glossy but not flashy — just clear, like a window after rain.
Why it works: cream cleansers contain ultra-fine mineral abrasives that polish without scratching, especially when used with water on glass only. Then the vinegar cuts any remaining surfactant film. Under bright kitchen lights, the clarity is striking; you see crisp reflections instead of a milky veil. For renters, this is fail-safe and looks expensive without spending more than a coffee.
If your oven door has a removable inner pane, check your manual — a quick removal lets you clean between the glass where mystery smudges hide. That’s an optional flex, but the payoff is huge for the photo-ready “after.”
Budget Breakdown
- Non-scratch cream cleanser (Bar Keepers Friend Soft Cleanser or Bon Ami powder + water): $2–$6
- White vinegar: $3–$4
- Microfiber cloths (pack, Amazon): $8–$12
Best For: Final polish after any deep clean, glass that shows streaks under light, and quick refresh before guests arrive.
How to Do It
- Apply a dollop of cream cleanser to damp glass, spread thinly, and massage in small circles.
- Wipe away with a wet cloth until no residue remains.
- Mist with a 1:1 vinegar-water mix and squeegee or buff dry with a fresh microfiber.
- Best overall: Bar Keepers Friend Soft Cleanser — smooth consistency, easy rinse, mirror-clear finish.
- Budget pick: Bon Ami powder made into a paste — excellent polish for less, needs a careful rinse.
Remember, this is a collaboration with your future self. A 15-minute steam tonight means a 10-minute wipe next week. Habits beat heroics every time.
How to Choose the Right Method for Your Mess
Pick your battle based on what you see — not what you hope will work.
It sounds obvious, but here’s where it usually falls apart: we use a light method on a heavy mess and blame the cleaner. Match the solution to the situation. If you’re looking at matte brown film, go straight to the baking soda paste. If you see hard, black, glassy scabs, bring out the razor. Sticky shine? That’s your soap-vinegar moment. For racks that feel rough, ammonia vapor is the VIP pass.
Think of your oven like skincare: cleanse (steam), treat (paste or degreaser), extract (razor), and finish (glass polish). Each step has a purpose, and you don’t always need them all. The air will feel lighter, the metal will look brighter, and your next bake won’t have that faint “last week’s pizza” aroma lingering in the background.
Budget Breakdown
- Full kit (baking soda, vinegar, Dawn, razor scraper, cream cleanser, ammonia, gloves, bags): $25–$45 total
- Refills going forward: $5–$10 per deep clean
Best For: Anyone who wants a repeatable routine. Use steam weekly, paste monthly, racks quarterly, polish as needed.
Suggested Pairings
- Best overall combo: Steam + Baking Soda Paste + Glass Polish — gentle, thorough, low-fume.
- Heavy-duty combo: Paste + Razor on spots + DIY Degreaser rinse — fast results on older build-up.
- Time-crunched combo: Steam + Degreaser — good enough for tonight’s dinner party.
Quick Checklist
- Baking soda
- White vinegar
- Dawn dish soap (classic blue)
- Lemons
- Single-edge razor scraper with safety cover
- Non-scratch cream cleanser
- Household ammonia
- Heavy-duty trash bags
- Microfiber cloths
- Nylon scrub brush
- Rubber gloves
- Oven-safe 9×13 pan
- Spray bottle
- Squeegee (small)
Frequently Asked Questions
Is it safe to use a razor on my oven glass?
Yes, when used correctly: keep the blade flat, work on wet glass, and use light pressure. Avoid the blade corners and never scrape dry. Test a small area first if you’re nervous.
My apartment is tiny — how do I handle fumes from ammonia?
Do the rack method outdoors or on a balcony if possible. If not, seal the bag tightly, place near an open window, and open the bag outside when done. Rinse racks in the tub with the fan on and the door closed.
What if I have a self-cleaning oven?
You can still use these methods, but avoid abrasive pads on the enamel and check your manual for restrictions. IMO, paste + steam is gentler than a 800°F cycle and keeps gaskets from aging fast.
How do I keep the oven clean longer after all this work?
Wipe fresh spills after the oven cools, run a 10-minute lemon steam monthly, and line the bottom with a removable oven liner (not touching heating elements). A quick degreaser spritz on the door once a week keeps the glass photo-ready.
What’s the cheapest method that still works really well?
The baking soda paste plus a vinegar spritz. Under $10, low effort, and great results. Add a lemon steam pre-step for faster wipe-off if grime is older.
Conclusion: Your Clean-Oven Ritual Starts Today
Perfection isn’t the goal — pride is. Start with one small step: a 20-minute lemon steam while you tidy the counters. Then choose one deeper method this week. You’ll feel it the next time you pull out a sheet pan and the rails glide smoothly, the air smells neutral, and the glass shows dinner like a little stage.
The secret isn’t a pricey spray. It’s matching the right method to the mess and repeating a simple rhythm: steam, treat, spot-fix, finish. You’ve got this. Set a timer, cue a favorite playlist, and give Future You the gift of a clean, calm oven that makes cooking feel like a pleasure again.

About the Author

Krisztina P.Rendes, Founder of Home Style Vibes
Founder of Home Style Vibes
Krisztina Puskásné Rendes created Home Style Vibes as a cozy-modern lifestyle space where homemaking meets inspiration. Her goal is to help women create beautiful, organized, and peaceful homes they truly love — without overwhelm. You’ll find here heart-driven content on home decor, cleaning tips, easy family recipes, organization and decluttering, DIY home projects, plants, and seasonal ideas — all designed to bring more calm, comfort, and style into everyday life.