6 Small Bathroom Decor Ideas That Make Your Space Look Bigger
You want a small bathroom that feels airy and spa-like. You hate how cramped, shadowy, and clutter-prone it always looks by 7 a.m. You dream of milky light on smooth tile, soft textures that don’t get soggy, and finishes that make your mirror selfies look editorial. These six small bathroom decor ideas tackle that exact frustration with specific, photogenic moves that make your space look bigger—without a renovation marathon or a luxury budget. Think under $1,500 for most makeovers, a couple of weekends, and clear, step-by-step ideas that fix the daily annoyances. If you love a clean, hotel-spa vibe with personality and clever storage, you’re in the right place.
1. Light-Sculpted Spa with Vertical Lines and Glass Glow
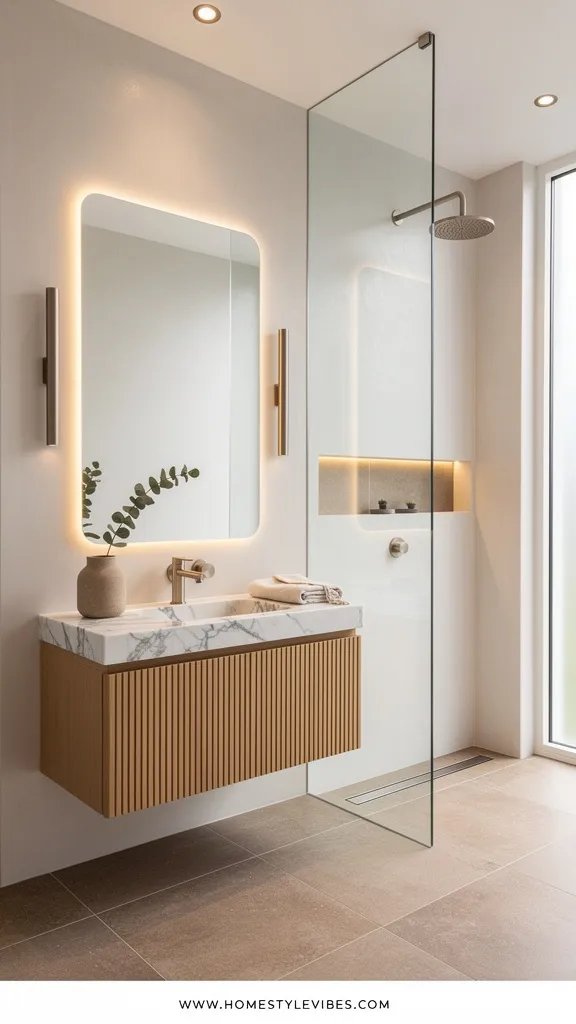
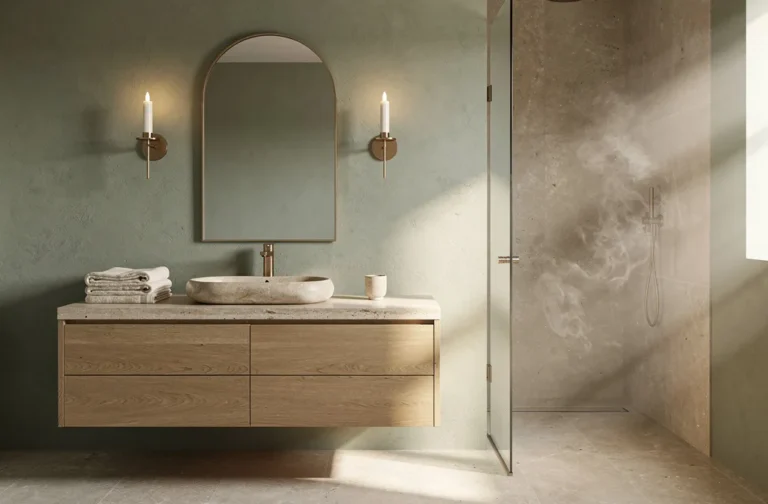
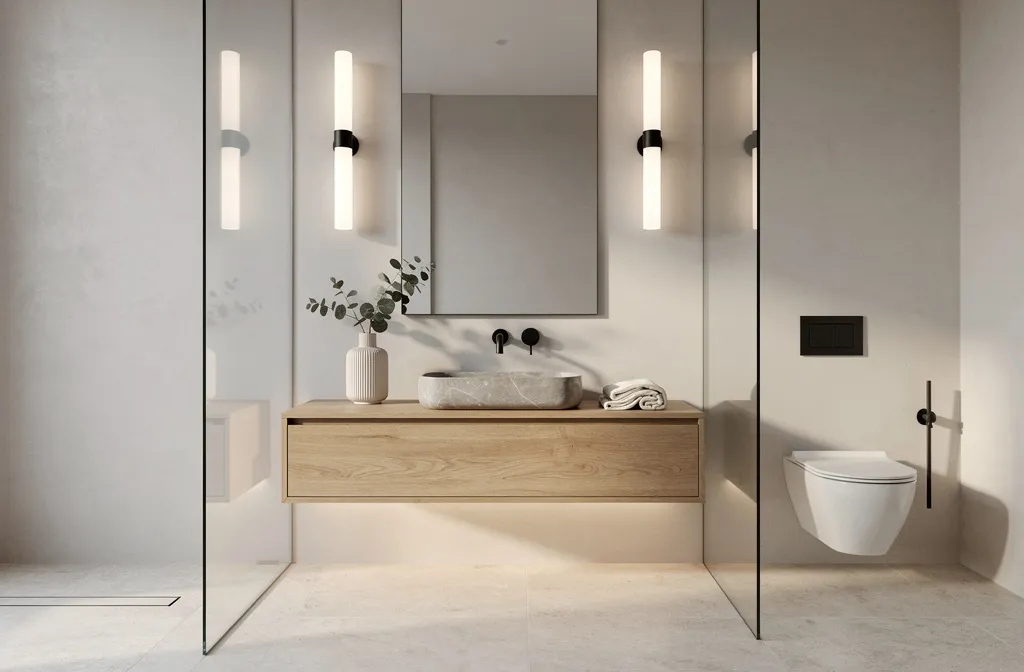
We’ve all been there: you buy a cute soap dispenser and a new bathmat, yet the bathroom still feels… tight. The room reads flat, the corners feel heavy, and the mirror swallows light instead of bouncing it. This design leans into vertical lines (to pull the eye up) and low-iron glass elements that invite light to stretch across the room. Think of it as the “light-sculpted spa”: bright, upright, and quietly luxurious.
The mood is polished hotel bathroom meets gentle Scandinavian spa. It works in real homes because vertical rhythm adds height without demolition, and glass keeps sightlines open. Lighting becomes your secret weapon: a trio—overhead ambient, vertical sconces flanking the mirror, and a soft LED tape under a floating vanity—creates glow without glare. Materials sing: ribbed ceramic wall tile, brushed nickel or soft brass hardware, a clear glass shower screen, and a tone-on-tone clay paint that reads warm, not sterile. In photos, the combination of repeated vertical textures and crisp glass edges delivers an instant “bigger than it is” effect with delicious shadow play.
Play with variations. On a budget, use vinyl plank flooring that mimics white oak and a DIY acrylic panel in place of custom glass. In a renter-friendly version, add a tension shower rod with a linen-blend curtain but mount the rod close to the ceiling so the panel lines still feel vertical. Have a darker bathroom? Use pale warm-gray tiles with a satin finish, then lean hard on layered lighting and a backlit mirror to keep it bright.
Budget Breakdown:
- Ribbed ceramic wall tile: $4–$9/sq ft
- Clear low-iron glass shower panel (or acrylic alternative): $250–$900
- Backlit mirror or vertical sconces: $120–$450
- LED tape light for vanity underglow: $30–$80
- Neutral clay or mineral paint: $45–$85/gallon
- Brushed hardware set (faucet, pulls, hooks): $150–$450
Total Estimated Cost: $600 – $2,200
Best For: Narrow bathrooms, low ceilings, anyone craving a clean spa vibe that photos beautifully on bright mornings and still feels warm at night.
Key Design Elements:
- Main materials: ribbed or fluted ceramic tile, low-iron glass, satin-finish paint
- Color palette: warm off-white, pale mushroom, soft nickel or brushed brass
- Lighting strategy: overhead dimmable, vertical sconces, under-vanity LED glow
- Furniture silhouettes: floating vanity, slim-framed mirror, minimal shower hardware
- Texture layers: ribbed tile, smooth glass, linen-blend shower curtain (if not glass)
- Accent details (hardware, decor pieces, plants): eucalyptus bundle, stone soap dish, slim tray
How To Recreate This Look:
- Start with the walls: install vertical ribbed tile on your splash zone or behind the vanity to emphasize height.
- Add a clear glass shower screen or a ceiling-height curtain to extend vertical lines.
- Layer lighting: mount vertical sconces at eye level and add LED tape under the vanity for a soft floor glow.
- Install a floating vanity or paint yours the same tone as the wall to blend the mass.
- Style with restraint: one plant, a textured hand towel, a small tray with essentials—leave negative space.
Why This Looks Expensive: The vertical rhythm plus honest materials (glass, ceramic, stone) create architectural presence. The under-vanity glow hints at custom millwork, and the low-iron glass reads crystal clear in photos.
Watch Out: Don’t add a heavy, dark bathmat that chops the floor visually. Opt for a thin, pale runner or a textured kilim-style mat in a soft neutral so the floor feels continuous.
Pro Styling Tip: When you shoot the room, dim the overhead light slightly and let the sconces and underglow do the work—shadows around the tile ribs add delicious depth.
Keep going—the next idea solves a different problem: visual clutter around the sink and toilet that makes everything feel busy, even when it’s technically “tidy.”
2. The Quiet Storage Wall with Slim Niches and Soft Contrast
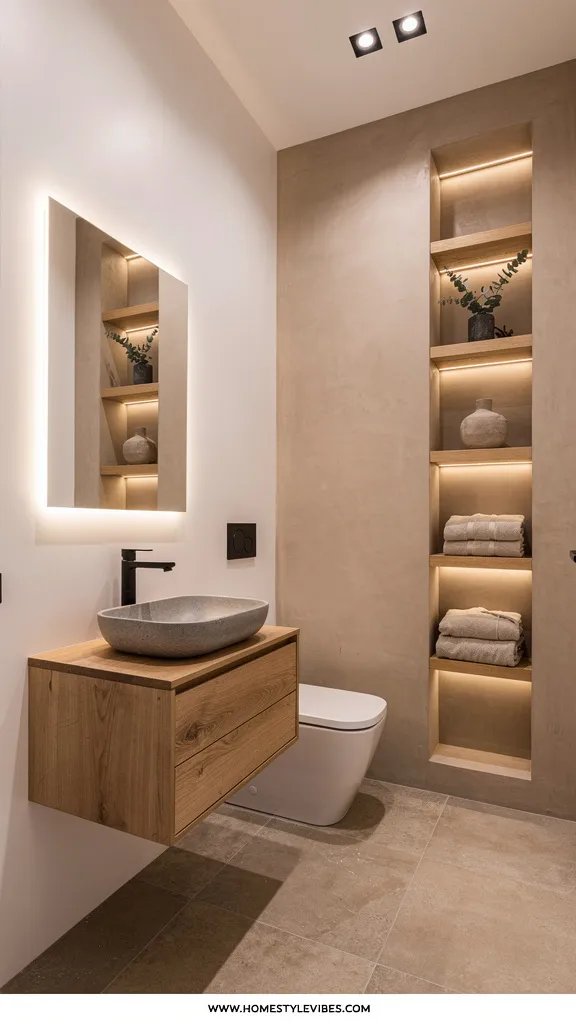
It’s that one corner that always feels off: toilet paper towers, leaning hair tools, nowhere to park skincare without it looking like a pharmacy shelf. You’ve tried baskets and over-the-toilet shelving, but it still looks chaotic. This design turns an entire short wall into a “quiet storage” moment with recessed niches, slim ledges, and tonal contrast so your eye reads calm, not stuff.
The mood is Japandi-meets-zen library. It works because everything has a dedicated landing spot, and the color story stays close: warm whites paired with a gentle greige or sand tone so the storage reads like architecture, not clutter. Lighting shifts to thoughtful accents—small puck lights inside a niche, a soft beam washer that grazes a textured wall. Materials matter: limewash or mineral paint for soft movement, matte porcelain tile on the floor, slim wood ledges sealed to resist moisture. In photos, the niches create satisfying shadow pockets that look tailored and intentional.
Variations help real life. On a budget, use picture ledges sealed with poly instead of recessed niches. In rentals, mount a shallow metal shelf system with micro-containers and use contact paper inside for wipeability. For darker tastes, go for a rich taupe wall with pale wood shelves and brighter, crisp-white towels to maintain contrast.
Budget Breakdown:
- Recessed niche kit or carpentry: $120–$600
- Limewash/mineral paint: $60–$120
- Matte porcelain floor tile: $3–$8/sq ft
- LED puck or strip lights for niches: $25–$90
- Wood ledges and sealant: $60–$180
- Matching storage containers (glass or matte plastic): $30–$120
Total Estimated Cost: $350 – $1,600
Best For: Small bathrooms with limited vanity storage; households that like skincare, hair tools, or extra towels handy but out of visual chaos.
Key Design Elements:
- Main materials: limewash, sealed wood, matte porcelain
- Color palette: warm white, sand, taupe; black or brushed brass accents
- Lighting strategy: niche accents + small overhead + dimmable vanity source
- Furniture silhouettes: flat-front vanity, slim ledges
- Texture layers: soft limewash movement, matte tile, linen towels
- Accent details: labeled apothecary jars, a single sculptural vase
Why This Feels Designer: Purpose-built storage that disappears into the architecture always reads custom. Tonal colors keep the wall visually quiet while lit niches add tiny “wow” moments that feel curated.
How To Recreate This Look:
- Start by picking a tonal palette: one wall shade deeper than the others for soft contrast.
- Add recessed niches or install sealed wood ledges at two heights for towels and daily items.
- Layer in niche lighting or a mini wall washer to graze the feature wall.
- Install matching containers and decant your everyday products; store backup items in a closed bin.
- Style with one sculptural object and a folded towel stack; resist the urge to overfill.
One Thing To Avoid: Don’t mix five different container styles. Pick one or two finishes (frosted glass + matte black lids, for example) so your eye reads unity, not noise.
Pro Styling Tip: Stagger shelf heights with a little negative space above the tallest item—breathing room photographs as “luxury.”
Remember, this isn’t about recreating a showroom. It’s about building a space that actually supports your morning rhythm. If one idea resonates more than the others, that’s your starting point. You don’t need all of them.
3. Monochrome Marble Moment with Thin Profiles and Curved Edges
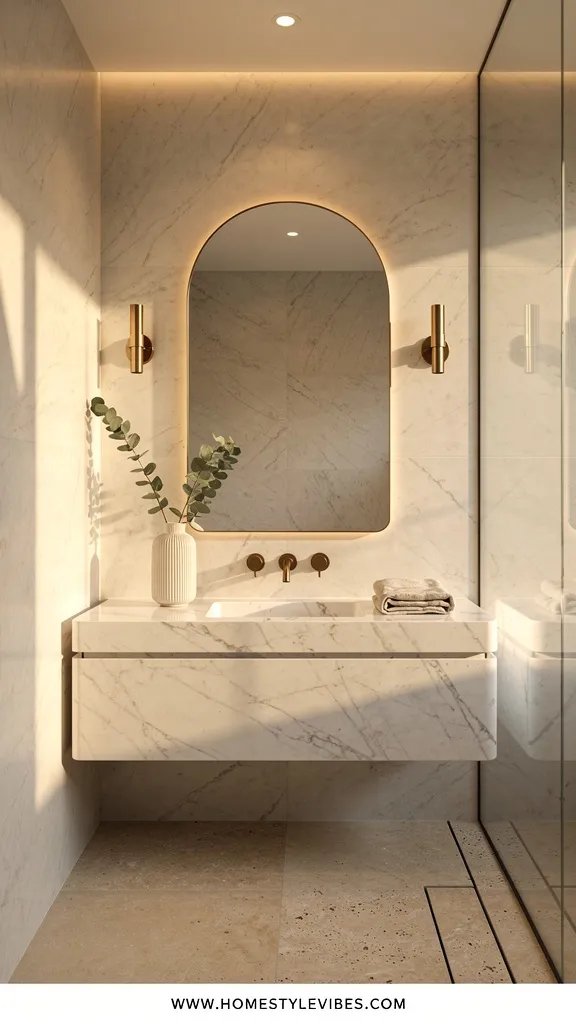
You want glamorous materials, but your room can’t handle heavy pattern or thick, boxy edges. You’ve tried a bold tile and it looked busy, or a chunky vanity top that ate up air. This approach uses a monochrome story—one stone look or stone-and-solid hybrid—with thin profiles and soft curves that push the walls outward visually.
The mood: modern Mediterranean with a whisper of Parisian powder room. Why it works: a limited palette keeps visual noise low; the thin countertop profile and curved corners reduce shadows that can feel choppy. Lighting plays quietly: one central flush mount with a diffused shade for even glow, plus a frameless mirror with vertical edge lighting that kisses the marble. Materials star: porcelain marble-look slab or a honed real stone remnant, plaster-like wall paint, and curved-edge accessories. In photos, the soft curves and consistent veining read like a serene cloud—no broken grid to make it look cramped.
Variations help different budgets. For a luxe version, use a single porcelain slab on the vanity and a matching 4–6 inch backsplash with a gentle radius corner. On a budget, go for a marble-look laminate with a slim edge and paint the walls and trim in the same color to stretch the perimeter. For small spaces, a petite rounded-front vanity prevents shin crashes and improves flow.
Key Design Elements:
- Main materials: honed marble or porcelain slab, plaster-finish paint
- Color palette: warm white or pale stone with muted veining
- Lighting strategy: diffused ceiling light + edge-lit mirror
- Furniture silhouettes: thin-profile countertop, rounded edges, arched or pill-shaped mirror
- Texture layers: honed stone, soft plaster, cotton or waffle towels
- Accent details: curved hooks, rounded soap dish, tapered vase
Budget Breakdown:
- Porcelain slab or remnant marble: $300–$1,200
- Laminate alternative with slim edge: $80–$250
- Edge-lit mirror: $150–$500
- Diffused flush mount: $60–$250
- Paint with plaster effect: $70–$140
- Curved accessories set: $40–$120
Total Estimated Cost: $400 – $2,000
Best For: Tiny bathrooms or powder rooms where pattern overwhelm is a risk; anyone who loves a quietly luxurious, one-material story.
How To Recreate This Look:
- Start with your stone choice—real or porcelain—then match wall color within two tones for calm continuity.
- Add a thin-profile vanity top with rounded front corners or a pill-shaped edge mirror to soften the silhouette.
- Layer diffused lighting overhead and an edge-lit mirror to keep glare low and faces flattered.
- Install minimalist hardware with curved edges to reinforce the theme.
- Style with a single tapered vase and a small tray—keep it simple so the stone shines.
Why This Reads High-End: Restraint. One strong material, repeated with intention, feels architectural. Rounded edges suggest custom fabrication and reduce fussy lines that can read inexpensive.
The Most Common Mistake: Mixing too many stone patterns (marble vanity + busy pebble floor + speckled tile). Pick one star, keep everything else quiet.
Pro Styling Tip: Wipe the stone to a satin sheen before photographing and remove labels from containers—nothing ruins the cloud effect like a neon sticker.
Ready for something warmer and moodier that still feels bigger? The next look proves dark can be stunning in a tiny bath—if you do it right.
4. Moody Oak and Bronze with Mirror Walls and Layered Reflection
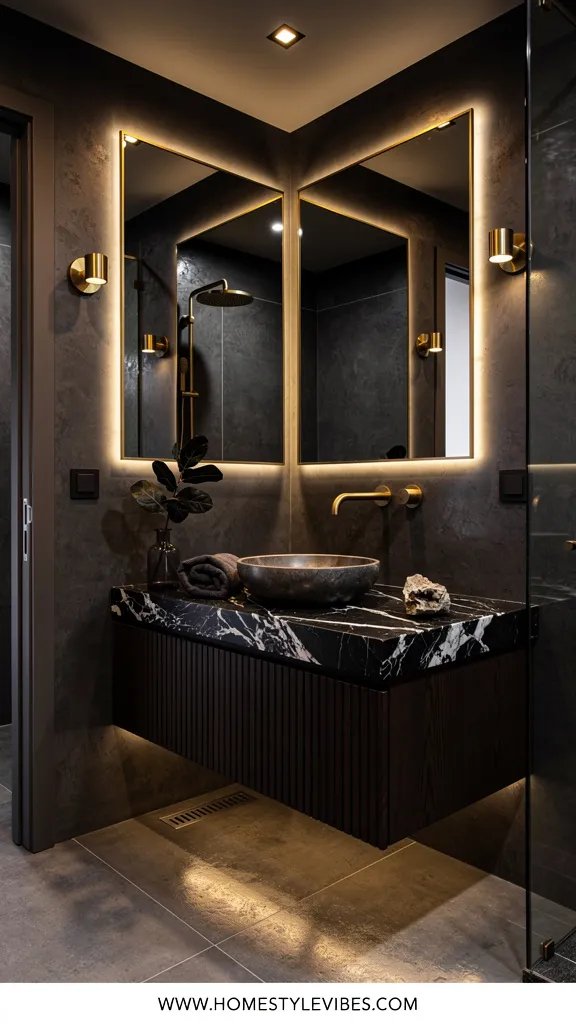
You love dark wood and vintage bronze, but every time you try it, the room shrinks. You’ve painted a wall charcoal before and immediately panicked. Here’s the fix: pair moody oak and bronze accents with strategic mirror surfaces and layered reflections so the darkness feels infinite, not cramped.
The mood is boutique-hotel cocktail hour meets cocoon. It works because mirrors multiply light and create the illusion of depth where you can’t physically add square footage. Lighting is sultry: a dimmable ceiling light in warm 2700K and a pair of small, directional pin lights aimed at textured wood. Materials dominate: rift-cut oak (real or veneer), patinated bronze or aged brass, smoked or clear mirrors, and a deep paint tone on the ceiling to envelope. Photos love it because dark walls recede while mirror reflections create surprising depth, like secret doorways.
Variations for different spaces: On a budget, use peel-and-stick mirror tiles along the backsplash line instead of a full mirror wall. For renters, swap the vanity hardware to bronze and add a large leaning mirror on a ledge. Prefer a lighter take? Choose mid-tone oak and use clear mirror with brighter white grout to keep the vibe moody but not cave-like.
Budget Breakdown:
- Mirror panel or peel-and-stick tiles: $80–$600
- Rift-cut oak vanity doors (real or veneer): $250–$1,000
- Bronze or aged brass hardware set: $160–$500
- Dimmable ceiling fixture + pin lights: $120–$450
- Deep ceiling paint (eggshell/satin): $45–$85
- Smoked glass shelf (optional): $70–$200
Total Estimated Cost: $475 – $2,600
Best For: Evening bathers, powder rooms used for entertaining, and anyone who finds white-on-white too sterile but still wants the small bathroom to look bigger through reflection.
Key Design Elements:
- Main materials: oak veneer, bronze hardware, mirror panels
- Color palette: deep taupe, ink, espresso wood, warm metallics
- Lighting strategy: dimmable overhead, accent pin lights, candlelight optional
- Furniture silhouettes: flat fronts, slim profiles, squared edges balanced by the glowing mirrors
- Texture layers: wood grain, metal patina, glass reflection, plush hand towels
- Accent details: smoked glass shelf, amber glass soap bottle, small art leaned on the mirror
Why This Looks Intentional: The darkness isn’t an accident—it’s supported by multiple reflective planes and focused lighting. Your eye always lands on a glow or a reflection, not a dead zone.
How To Recreate This Look:
- Start by selecting a deep paint tone for the ceiling and one wall—keep the rest mid-tone so it doesn’t feel cave-like.
- Add a mirror panel behind the vanity or a long mirror strip as a backsplash to double depth.
- Layer lighting with dimmers and aim a pin light at the wood to bring out the grain.
- Swap in bronze hardware and a smoked glass shelf for a subtle vintage feel.
- Style with deep-toned towels and one amber vessel—skip bright trinkets that break the spell.
Don’t Do This: Don’t frame the mirror with a thick, dark border. You’ll outline the smallness. Let the mirror go edge-to-edge or keep the frame razor thin.
Pro Styling Tip: For photos, light a single candle and turn off the overhead—let the pin lights and reflections do the talking; the wood grain will look like velvet.
Quick mindset reset: you don’t need a total identity shift for your bathroom. Adjusting reflection, vertical lines, or your storage rhythm often does more than new tile. Pick one path and follow it fully.
5. Soft-Patterned Floor with Sky Walls and Floating Fixtures
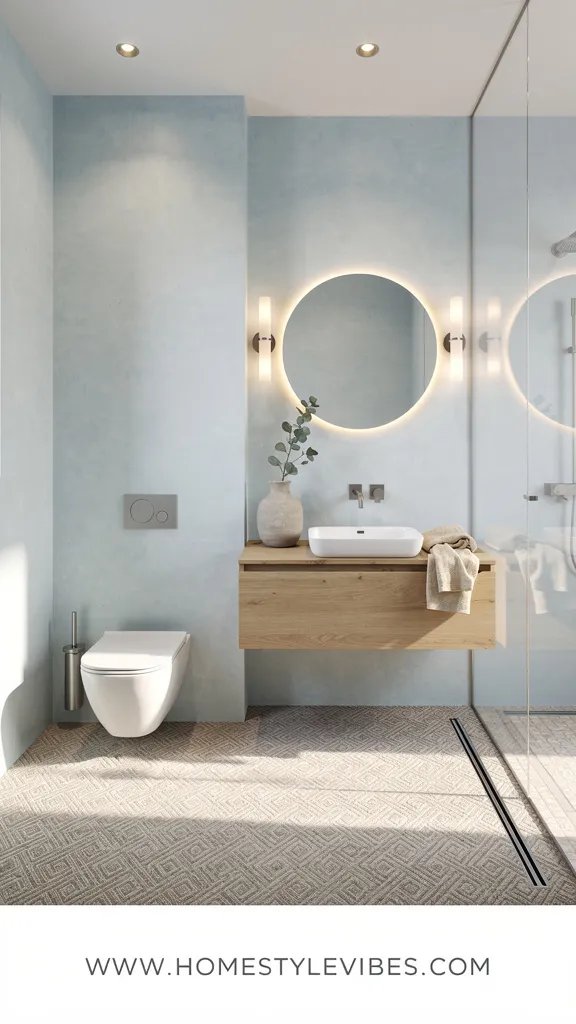
Maybe your bathroom feels boxy because everything important happens at waist height: vanity, toilet, towel bar. You’ve swapped rugs, nothing changes. This design pulls the eye down with a soft-patterned floor that reads like a woven textile, lifts the gaze with “sky” walls (light, airy hue), and frees floor space with floating fixtures. The room suddenly feels like it’s breathing.
The mood is coastal-Scandi morning. It works because scale and placement matter more than size: a gentle floor pattern stretches the footprint, floating elements let the floor run visual laps, and airy color makes corners relax. Lighting is crisp and daylight-leaning: a high-output, diffused overhead and a small pendant near the mirror to create a pretty focal. Materials include encaustic-look porcelain tiles with tiny pattern repeats, painted beadboard or smooth walls in a pale blue-gray, and minimal, wall-hung accessories. The camera loves the rhythm between the patterned floor and floating lines—it’s dynamic without clutter.
Variations make it flexible. On a budget, use peel-and-stick vinyl tiles in a micro-pattern. For renters, add a floating shelf instead of a floating vanity and use leggy stools or open baskets that keep the floor exposed. Prefer warmer tones? Try a sand-and-ivory micro-pattern and walls in pale wheat.
Budget Breakdown:
- Patterned porcelain or vinyl tile: $2–$10/sq ft
- Floating vanity or wall-hung sink: $180–$900
- Wall color (light sky hue): $45–$85
- Minimal pendant or mini lantern: $60–$250
- Wall-hung accessories (toilet brush, waste bin): $40–$120
- Open storage baskets: $30–$90
Total Estimated Cost: $400 – $1,900
Best For: Small baths where baseboards and legs chop the room; households that want fresh, bright mornings without all-white everything.
Key Design Elements:
- Main materials: patterned floor tile, painted walls, wall-hung fixtures
- Color palette: sky blue-gray or pale wheat with ivory and soft charcoal pattern
- Lighting strategy: bright overhead + small decorative pendant
- Furniture silhouettes: floating vanity, slim shelves, open baskets
- Texture layers: crisp tile, soft cotton towels, woven baskets
- Accent details: tiny art print near the mirror, coastal sprig of olive or grass
How To Recreate This Look:
- Start with the floor: choose a small-scale repeating tile that feels like fabric, not a bold motif.
- Paint the walls a light, airy tone that matches a lighter color in the floor pattern.
- Install a floating vanity or wall-hung sink; if that’s not possible, use a vanity with legs and no visual kick plate.
- Add a minimal pendant near the mirror for a soft focal and flattering light.
- Style with open baskets and slim, wall-mounted accessories to reveal as much floor as possible.
Why This Looks Expensive: Floating fixtures always suggest custom planning, and a restrained, textile-like floor feels boutique instead of busy. The airy color story reads editorial, especially in morning light.
Watch Out: Avoid giant geometric patterns that require perfect centering. Small bathrooms rarely align perfectly, and misaligned motifs scream “tight.”
Pro Styling Tip: For photos, wet-mop the floor 10 minutes before shooting to bring out a gentle sheen without reflections; the pattern will look crisper.
Almost there. The last idea ties scent, sound, and maintenance into the visual story so the bathroom stays “big” after week one.
6. Renter-Savvy Layered Neutrals with Tall Mirrors and Micro-Storage
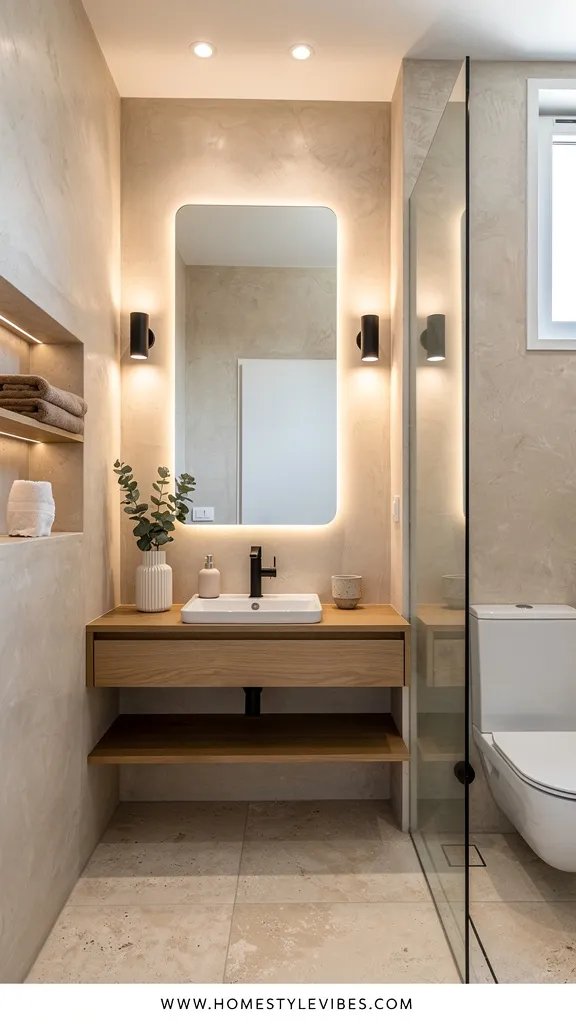
You rent, or you simply don’t want to renovate right now. You’ve tried adding cute accessories and removable wallpaper, but the space still feels cramped by Thursday. This design stacks subtle neutral textures, height-maximizing mirrors, and sneaky micro-storage that slides into the gaps you usually ignore. The result: bigger sightlines, calmer counters, and maintenance that doesn’t eat your weekend.
The mood is calm, textural minimalism—think quietly layered cottons, smooth ceramics, and milk-glass finishes. It works because layered neutrals trick the eye into reading depth where there’s none: nubby towels, ribbed ceramic canisters, and a linen shower curtain draw your eye along surfaces. Tall, frameless mirrors steal extra inches from the ceiling and bounce light. Lighting is practical: a bright, high-CRI bulb in the existing fixture, plus a battery-powered, motion-sensor light under a shelf. In photos, neutral layering avoids hotspots—everything blends and breathes.
Variations keep it versatile. Budget-friendly? Switch to a tension rod and an extra-tall, linen-blend curtain with clip rings; add adhesive hooks inside the vanity door for brushes and cords. Darker bathrooms? Use a pale greige instead of white so shadows look cozy, not dingy. If you can’t paint, lean a large, tall mirror on the counter (non-slip pads!) and coordinate accessories to the existing tile undertones.
Key Design Elements:
- Main materials: linen-blend textiles, ribbed ceramic, powder-coated metal
- Color palette: oatmeal, soft white, pale greige, light graphite accents
- Lighting strategy: upgrade bulbs + add motion sensor under-shelf light
- Furniture silhouettes: slim, tall mirror; narrow rolling cart or stacked trays
- Texture layers: nubby towels, ribbed ceramics, soft matte metals
- Accent details: a single sprig in a bud vase, scented soap in a neutral bottle
Budget Breakdown:
- Tall frameless mirror or over-door mirror: $40–$180
- Linen-blend extra-tall shower curtain + rings: $45–$120
- Ribbed ceramic canisters/trays: $30–$90
- Battery motion-sensor under-shelf light: $20–$60
- Adhesive hooks and inside-door organizers: $20–$80
- High-CRI bulbs: $12–$35
Total Estimated Cost: $170 – $565
Best For: Renters, busy households, and anyone who needs easy upkeep with a soft, neutral look that makes a small bathroom feel bigger all week long.
How To Recreate This Look:
- Start by raising the curtain rod as high as possible and hang an extra-tall linen-blend curtain for height.
- Add a tall, frameless mirror (or over-door style) to bounce light and extend the ceiling line.
- Layer neutral textures: nubby towels, ribbed ceramic canisters, a soft-matte metal tray.
- Install a motion-sensor under-shelf light and swap bulbs for high-CRI warm white.
- Style with micro-storage: adhesive hooks inside doors, a narrow rolling cart, and labeled minis for the counter.
Why This Feels Designer: Height tricks plus curated neutrals read like restraint, not lack. When everything matches undertones, the bathroom looks considered even when real life creeps in.
One Thing To Avoid: Don’t mix cool-blue whites with creamy beiges. Undertone wars make small bathrooms look patchy and cheap. Pick warm or cool and stay loyal.
Pro Styling Tip: For a magazine-style shot, fold towels in thirds lengthwise, then roll—stack two and add one flat folded on top for height variation and shadow play.
Honest moment: I once spent weeks debating paint colors for a client’s shoebox bath before realizing the overhead bulb was the true villain. We swapped in a high-CRI 2700K bulb and a tall mirror, and suddenly even the old tile looked intentional. The secret isn’t always a new finish—it’s how your eye experiences height, light, and clutter lines.
Another micro-story: Last fall, I tested a floating vanity in my own tiny guest bath. I was terrified the plumbing would show or that storage would suffer. Reality? The cleaning got easier, the floor line looked longer, and my mother-in-law asked if we’d expanded the room. We hadn’t. We just stopped blocking the sightline.
Quick Checklist
- Mount shower rod or glass as high as possible
- Use vertical textures like ribbed tile or beadboard
- Add layered lighting: overhead, task, and accent
- Choose one star material and keep the rest quiet
- Float the vanity or use leggy pieces to show more floor
- Install mirror panels or tall frameless mirrors
- Keep the 30–48 inch “clutter band” visually calm
- Match undertones across paint, tile, and textiles
- Pick small-scale floor patterns that read like fabric
- Use high-CRI warm bulbs for flattering, rich color
Frequently Asked Questions
How much should I budget to make my small bathroom look bigger without renovating?
Plan $300–$1,500 for real impact using lighting, mirrors, paint, and hardware. If you add a floating vanity or glass panel, expect $800–$2,200 depending on quality and labor. Start with lighting and mirrors for the biggest visual shift per dollar.
I’m nervous about dark colors making my bathroom feel smaller. Can moody still work?
Yes—pair deep tones with large mirror surfaces, warm dimmable light, and mid-tone elements so the darkness recedes rather than closing in. Avoid thick mirror frames and keep hardware slim to maintain sightlines.
What’s the easiest renter-friendly trick that actually makes a small bathroom look bigger?
Raise the shower rod and hang an extra-tall curtain, add a tall frameless mirror, and swap in high-CRI bulbs. Those three steps usually shift the room from cramped to composed in one afternoon.
How do I avoid clutter when I have a lot of products?
Create a “quiet storage wall” with shelves or niches and decant daily items into matching containers. Keep backups in a closed bin under the sink. The key is visual consistency at eye level; it’s what makes the room read calm and, by extension, larger.
Will patterned floors make my small bathroom feel busy?
Choose a small, repeating pattern with low contrast so it reads like a woven textile. Large, high-contrast patterns can highlight alignment issues and make the room feel tight. Soft patterns lengthen the floor visually.
Your Next Step
Start with one idea. If vertical lines and glass glow speak to you, do that this weekend. If the quiet storage wall feels like the daily fix you need, make a plan for shelves and decanting. You don’t need to do all six to make your small bathroom look bigger—you just need one or two choices done with conviction.
The truth is, luxury in a small bathroom comes from texture, lighting, and restraint. Not from stuffing it with trends. Smooth stone and ribbed ceramic, high-CRI light that flatters, a mirror that rises tall—these are the moves that make the room actually feel finished and much larger than it is.
Pick your favorite idea, gather your materials, and give yourself a quiet afternoon. You’ll step back, see cleaner sightlines and better shadows, and think: Oh, there it is. Space. You’ve got this—seriously.

About the Author

Krisztina P.Rendes, Founder of Home Style Vibes
Founder of Home Style Vibes
Krisztina Puskásné Rendes created Home Style Vibes as a cozy-modern lifestyle space where homemaking meets inspiration. Her goal is to help women create beautiful, organized, and peaceful homes they truly love — without overwhelm. You’ll find here heart-driven content on home decor, cleaning tips, easy family recipes, organization and decluttering, DIY home projects, plants, and seasonal ideas — all designed to bring more calm, comfort, and style into everyday life.