
6 Halloween Balcony And Patio Decor Ideas For Apartment Dwellers
You want a little slice of Halloween magic the second you step outside your sliding door. You hate staring at a too-small balcony or concrete patio that feels more “storage zone” than seasonal sanctuary. You want playful spooky touches—jack-o’-lantern grins, black candlelight, a friendly crow or two—without going gory or overwhelming your neighbors. These 6 Halloween balcony and patio decor ideas for apartment dwellers solve the small-space struggle with smart styling, renter-safe tricks, and loads of candlelit mood. Think black taper candles flickering in antique brass, carved pumpkins tucked into corners, and cobwebby textures that read chic at a glance and charming up close.
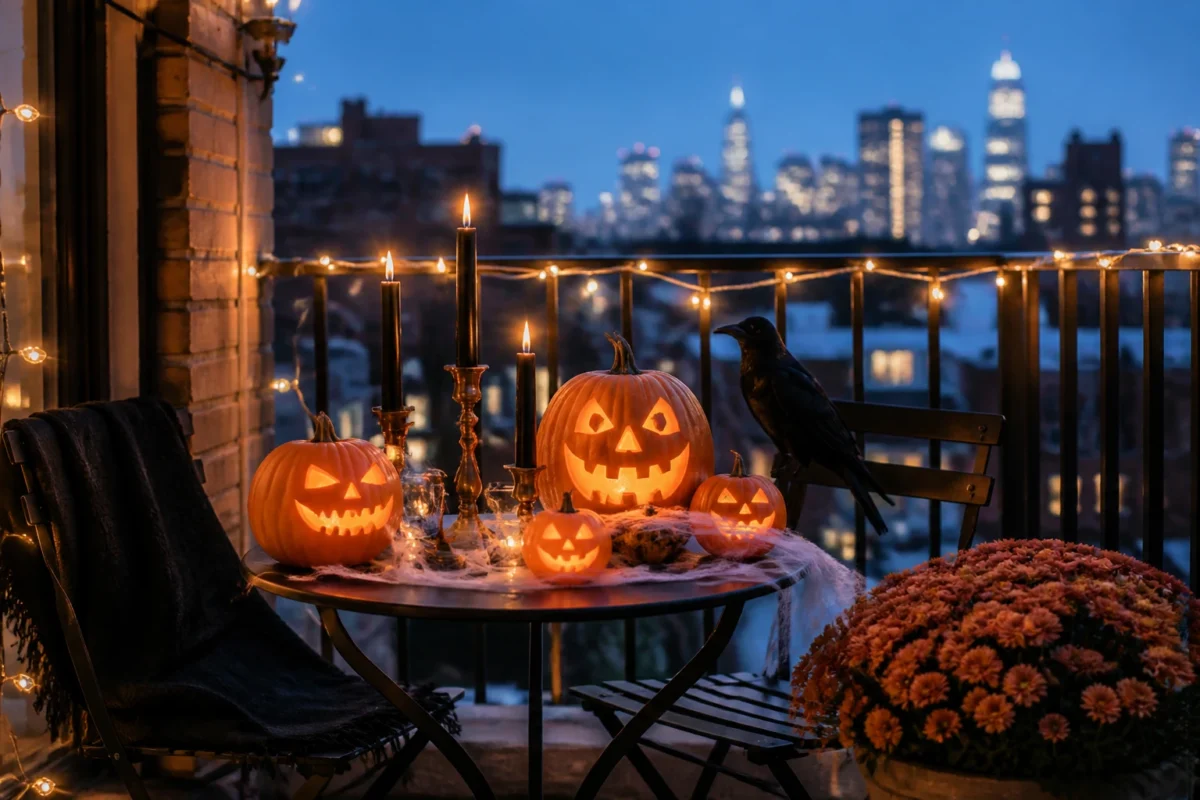
Each idea is tailored to apartment life: tiny footprint, easy set-up, low storage needs, pet-friendly options, and a sweet payoff in under a weekend. Expect atmospheric lighting, stackable decor, and photogenic layers that look as good on your phone as they do in person. We’re talking a transformation you can see by dusk tonight—under $200 if you shop smart, and easily reusable next year. Perfect if you love Halloween’s whimsy with a little dark-and-stylish edge and want your “just outside the living room” space to actually feel finished all October long.
1) Jack-O’-Lantern Cluster With Black Candle Glow on a Compact Bistro Set
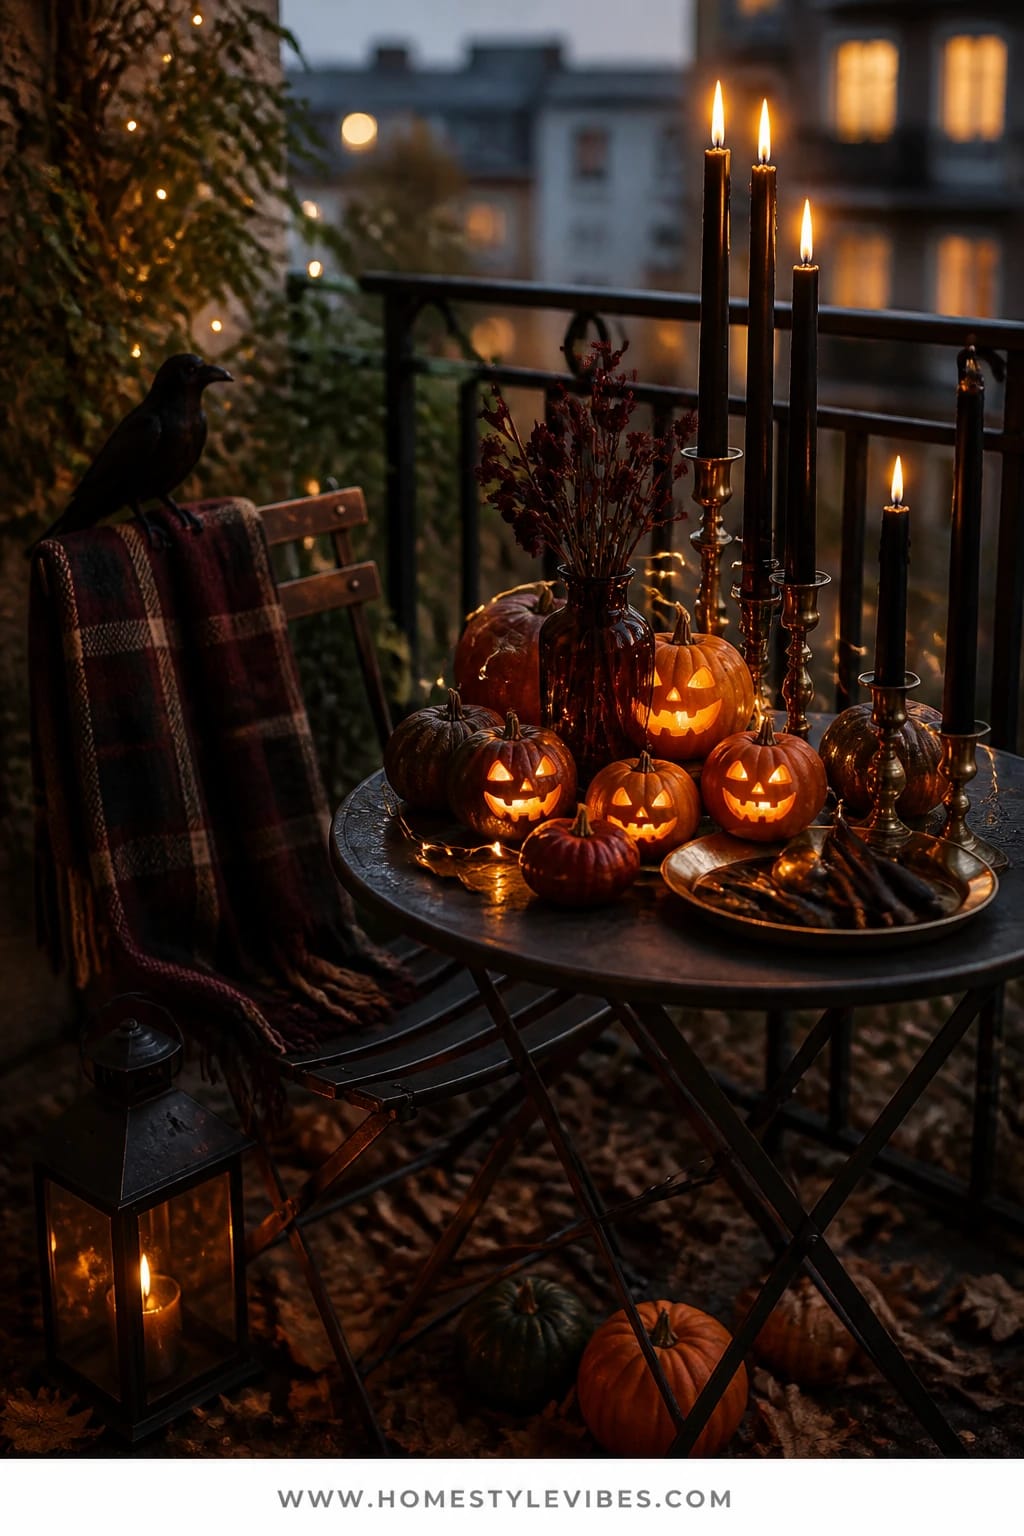
We’ve all been there: your tiny balcony hosts a brave little bistro set…and not much else. You’ve tried a pumpkin or two, but it still looks sparse and awkwardly spread. This idea gathers the magic into one tight, photogenic moment: carve or paint a family of mini jack-o’-lanterns, nestle them together on the bistro table, and thread in slim black tapers in squat brass holders. The result? Playful spooky meets candlelit intimacy. It’s moody without being heavy, and it tucks right where you drink your morning coffee.
Here’s why it works in real homes: you’re concentrating your decor where you naturally look and linger, so your space feels finished without adding clutter to the floor. Candles (battery or real) cast clustered shadows across the table surface, making even the smallest balcony feel atmospheric by dusk. Use an odd number of pumpkins for a natural rhythm; their soft orange beside black candlelight is a Halloween classic that photographs beautifully—glow in the middle, depth at the edges, and a clear focal point.
Lighting is the secret here. Slide the table close to the railing if you can and let the candles dance against the glass and metal. If open flames make you nervous, matte-black LED tapers still deliver that inky silhouette. Add a single crow figurine perched on the chair back for a wink of “haunted” without going full prop-shop.
Variations: On a tight budget, skip carving and draw faces with a black paint marker—faster, cleaner, and they last longer. In very small spaces, cluster three jack-o’-lanterns on a round tray and remove one chair to keep movement easy. Renters: use removable felt pads under candleholders and a wipeable table runner so wax or soot never touches the table itself.
Budget Breakdown:
- Mini pumpkins (real or faux): $1–$5 each (6–8 pieces)
- Black taper candles or LED tapers: $12–$30/set
- Brass or black candleholders (thrifted or new): $4–$15 each (2–4 pieces)
- Black crow figurine: $8–$15
- Round tray or runner: $10–$25
Total Estimated Cost: $45 – $135
Best For: Tiny balconies and micro patios where a single styled surface can carry the whole vibe; early October through Halloween night.
Key Design Elements:
- Main seasonal props: mini jack-o’-lanterns, black tapers, a crow
- Color palette: pumpkin orange, inky black, antique brass
- Lighting strategy: clustered candle glow at tabletop height for strong shadows
- Textile layers: wipeable black runner or round tray liner
- Natural elements: real pumpkins, a sprig of dried eucalyptus if desired
- Accent details: brass candleholders, matte-black tray, small ceramic dish for matches
How To Recreate This Look:
- Start with your bistro table: clean it and center a black or dark runner or tray.
- Add 5–7 mini pumpkins; carve or paint simple faces for personality.
- Layer 2–4 candleholders at varying heights; place black tapers or LED tapers.
- Place a small crow on the chair back or near the table edge for a playful nod.
- Style with a tiny bowl of wrapped caramels or black-and-white napkins for warmth.
Why This Looks Expensive: The antique brass against matte black implies intention, not impulse-buy chaos. Repetition (multiple pumpkins, matching candle color) reads curated rather than cluttered.
Watch Out: Don’t scatter pumpkins all over the floor; the effect gets choppy and makes the balcony feel smaller. Keep the cluster tight and the walkway clear.
Pro Styling Tip: For photos, light candles five minutes before shooting so the wicks char slightly—your camera will catch that moody, lived-in glow.
2) Cobwebbed String Lights with Charcoal Throw Pillows on a Narrow Loveseat
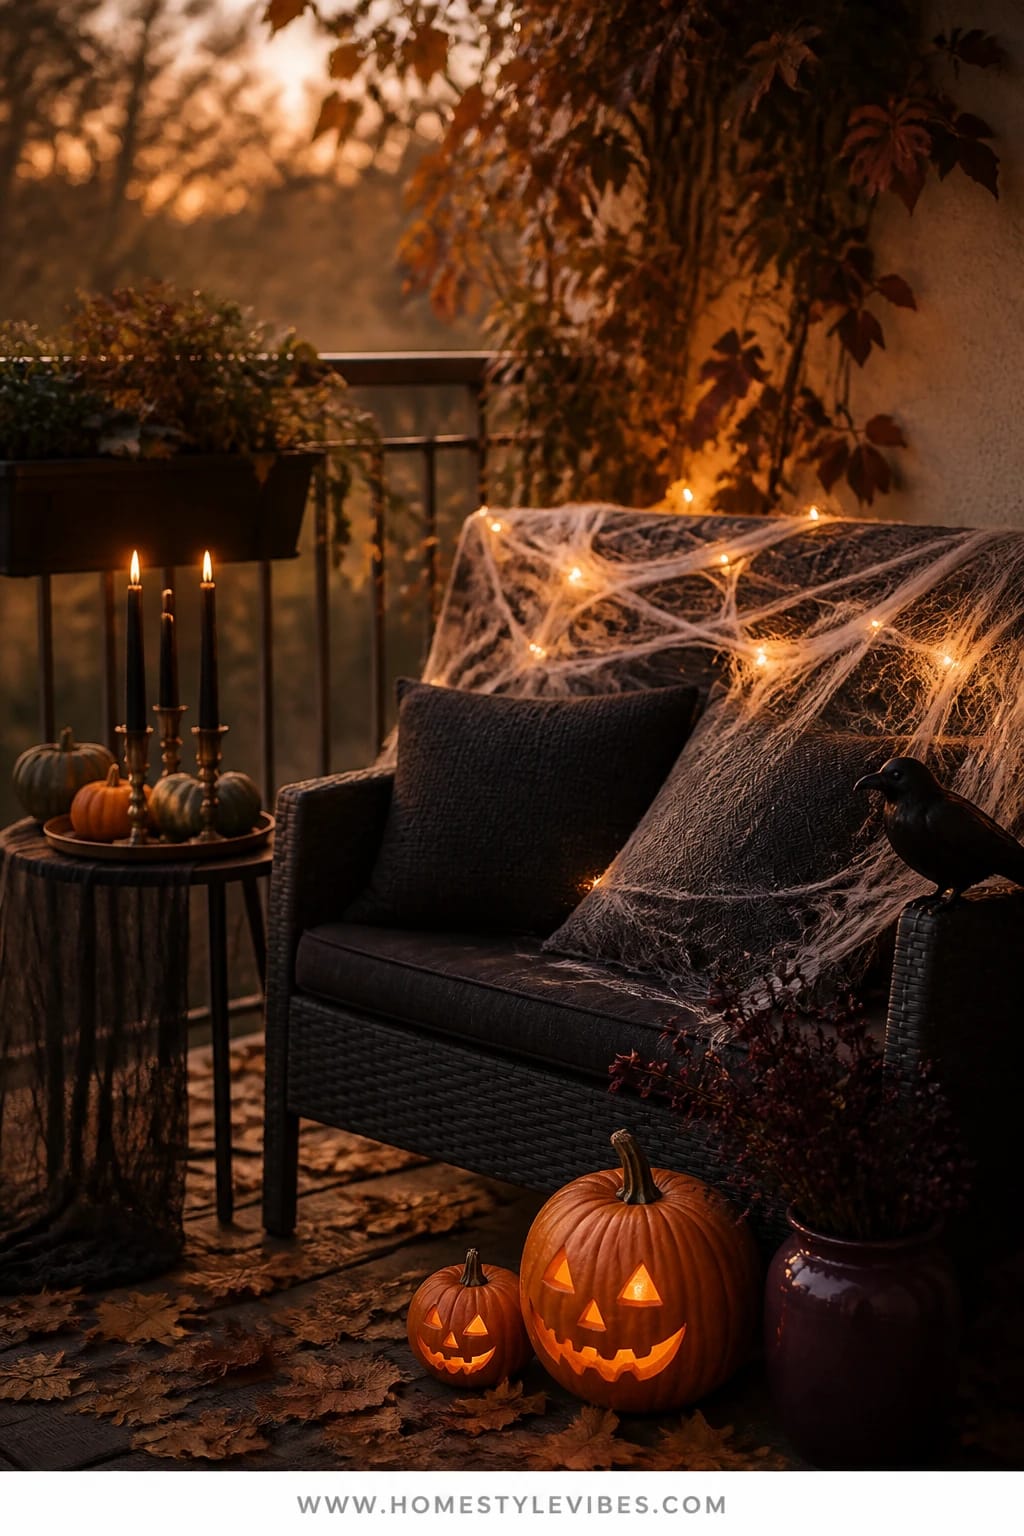
It’s that one corner that always feels off: the narrow outdoor loveseat where you want to curl up, but every pillow combo seems too summery. Drape a gauzy cobweb over the back, weave in mini string lights, and swap your pillows for charcoal or black covers with subtle texture. Suddenly, the whole seat hums with Halloween spirit without a single plastic skull yelling about it.
This setup leans into cozy spooky: the lights glow like fireflies caught in cobwebs, and the dark pillows ground the scene. It’s practical too—pillow covers store flat, and faux cobweb is light and cheap. The best part is the glow floats behind your shoulder as you sit, creating a halo in photos and a cocoon-like mood in person. Neighbors will see the twinkle; you’ll feel the hush.
Variations: Got a super windy balcony? Pin the cobweb in three spots with clear adhesive hooks. Prefer a softer vibe? Choose a deep charcoal rather than true black and add one velvety rust pillow for warmth. Pet-friendly swap: use a loosely knit black scarf instead of cobweb if cats treat the webbing like a toy (learned that the hard way—my cat turned it into a haunted yarn festival in 14 seconds).
Budget Breakdown:
- Charcoal/black pillow covers: $8–$20 each (2–3)
- Mini warm string lights (battery): $10–$20
- Faux cobweb pack: $3–$7
- Clear removable hooks or clips: $6–$12
Total Estimated Cost: $27 – $79
Best For: Apartment balconies with one seating piece; anyone who wants soft glow and comfort from mid-October through Halloween night.
Key Design Elements:
- Main seasonal props: faux cobweb, warm mini string lights
- Color palette: charcoal, black, a whisper of warm white light
- Lighting strategy: backrest glow that frames the seat and adds depth
- Textile layers: pillow covers with subtle texture (cord, velvet, slub weave)
- Natural elements: a single dried grass stem in a vase on the side table
- Accent details: clear hooks, small black side table, tiny raven figurine
How To Recreate This Look:
- Start by swapping summer pillows for charcoal or black covers—mix one texture with one smooth.
- Add mini string lights along the loveseat back; secure with clear hooks near the corners.
- Layer a small amount of faux cobweb over the lights; stretch thin so it reads airy, not clumpy.
- Place a small black side table with a battery candle or a mug tray.
- Style with one tiny Halloween accent (raven, bat silhouette) and call it done.
Why This Feels Designer: Consistency wins. One tight color story and one focal effect (lit cobweb) tell a clear visual narrative. It’s restraint with just enough theatrical flair.
One Thing To Avoid: Don’t overload the cobweb. Thick clumps look cheap and turn into dust collectors. Stretch it until it’s whisper-thin.
Pro Styling Tip: Flip on the lights before sunset so the glow gradually shows in your photos; you’ll capture that moody twilight sweet spot.
Remember, this isn’t about recreating a catalog set. It’s about taming one small area at a time so you actually sit out there and enjoy it. If one idea resonates more than the others, that’s your starting point.
3) Bat Silhouette Garland and Antique Brass Lanterns by the Railing
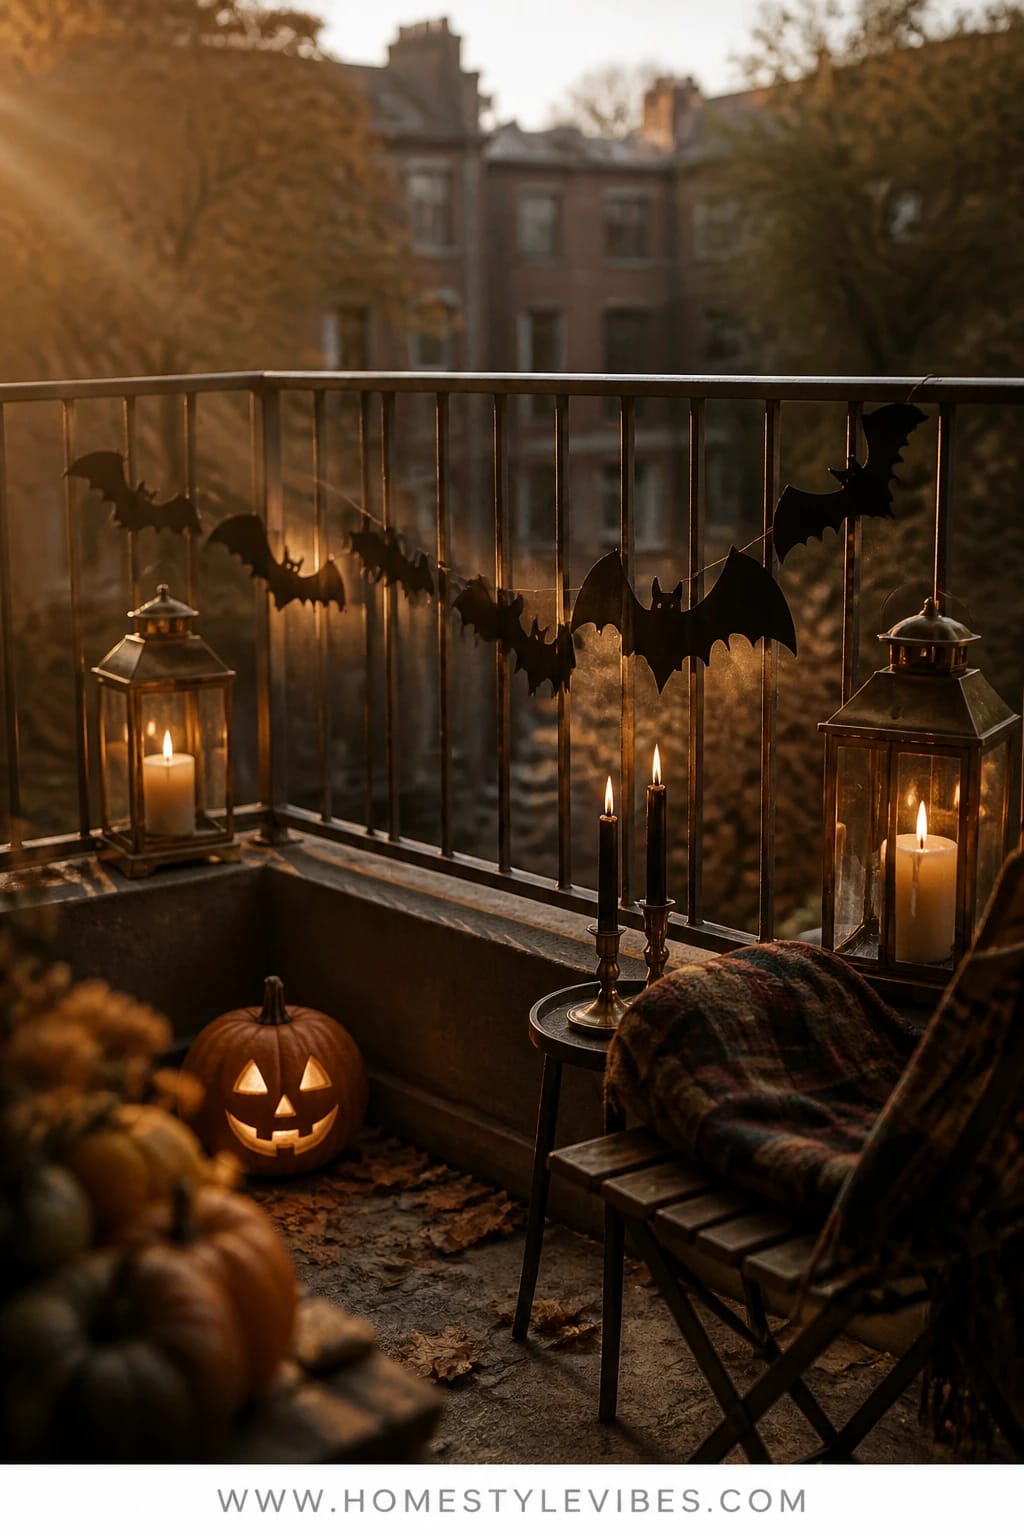
You’ve tried a pumpkin on the floor by the railing, but it still looks lonely and your eye goes straight to the parking lot view. Time to lift the action up where your gaze lands: hang a bat silhouette garland across the railing at eye level and anchor the corners with antique brass lanterns. Now your sightline hits a playful Halloween horizon, and the lanterns add gravitas and glow.
The mood is classic “stylish spooky.” Black bats read graphic and clean, while lanterns deliver serious candlelit shadows after dark. It’s crowd-pleasing for apartment dwellers because it uses vertical space you already have, and the garland stores flat in a drawer after the season. If real candles are off-limits, place warm LED votives inside—no one can tell from six feet away.
Photographically, this setup sings. You get layered depth: bats in the foreground, lanterns at the edges, and tiny points of light in the middle ground. That contrast of inky silhouettes and warm brass will make your balcony feel like a tiny stage scene each night.
Variations: Budget route—DIY bats from black cardstock and fishing line. Small-space version—hang a single strand centered above a single lantern. Renter tip—use outdoor-rated removable hooks so you don’t mark the railing; add rubber bumpers under the lanterns to protect surfaces.
Budget Breakdown:
- Pre-made bat garland or cardstock: $6–$18
- Fishing line or black twine: $3–$6
- Antique brass lanterns (2): $25–$60 each (thrift stores are gold here)
- LED votives/tea lights: $8–$20/set
- Removable outdoor hooks: $6–$12
Total Estimated Cost: $48 – $156
Best For: Balconies with a front-facing railing; anyone who wants maximum curb appeal with minimal floor clutter from early October through Halloween.
Key Design Elements:
- Main seasonal props: bat garland, brass lanterns, LED votives
- Color palette: black, warm brass, candlelit amber
- Lighting strategy: perimeter glow with a silhouetted line at eye level
- Textile layers: optional slim black ribbon bows at garland ends
- Natural elements: a small bundle of dried wheat in one lantern for texture (no flame nearby)
- Accent details: matte-black S-hooks, tiny brass bells at garland edges for movement
How To Recreate This Look:
- Start by measuring the railing width and cut garland/fishing line accordingly.
- Add bats spaced 5–7 inches apart; use a hole punch and tie with short loops.
- Layer the garland at eye level; secure with removable hooks or S-hooks.
- Place two lanterns at either end; add LED votives inside for a warm core of light.
- Style with a few loose bats “escaping” the line on a side wall for movement.
Why This Reads High-End: Combining graphic black shapes with metal lanterns feels intentional. The brass adds weight and heritage, countering the playful bats so nothing reads kiddish.
The Most Common Mistake: Hanging the garland too high. Keep it at eye level when you’re seated; that’s where the magic is when you step outside with a blanket at dusk.
Pro Styling Tip: Angle one lantern slightly inward so the inner glow points toward the seating zone—your camera reads the light as an invitation.
4) Pumpkin Stair-Step with Smoky Glass Hurricanes by the Sliding Door
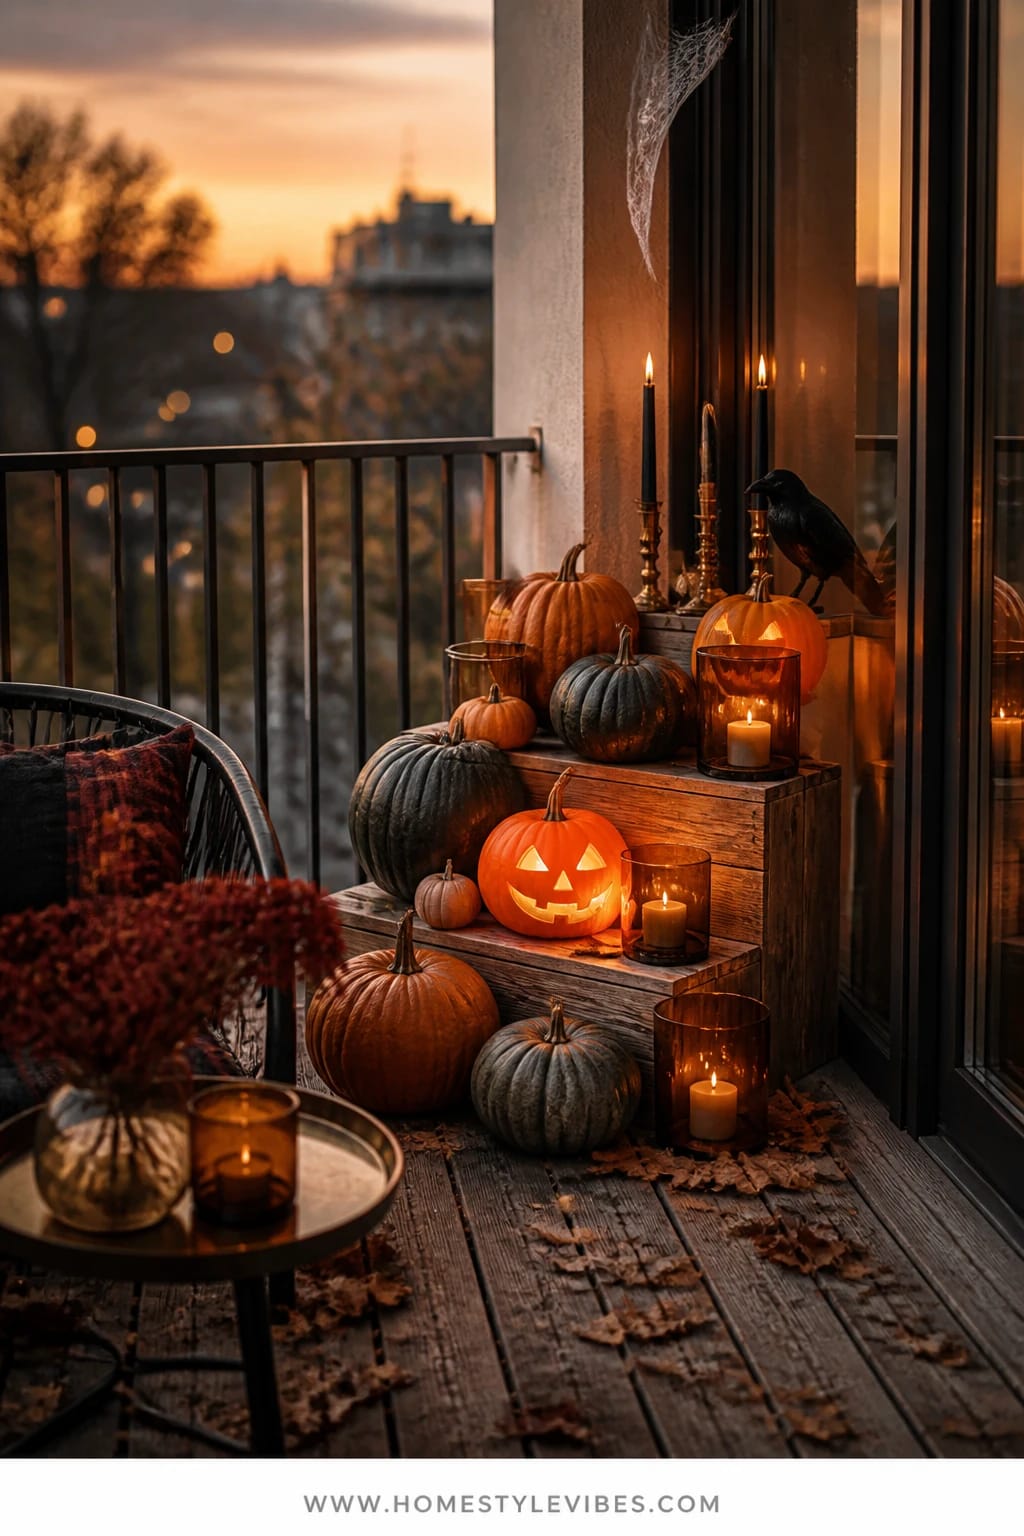
Here’s a classic balcony pain point: the area by your sliding door becomes a no-decoration zone because you’re scared you’ll trip over stuff. That blank space steals atmosphere from the main seating. The fix? A pumpkin stair-step that hugs the door frame—two or three levels of pumpkins rising like a little harvest altar—with smoky glass hurricanes tucked in for candle safety and wind protection.
Think small, tidy, and secure. This design feels like a tiny entry moment for your outdoor space, which sets a scene before you even reach the chairs. Smoky glass keeps the mood in the Halloween pocket—dramatic but not heavy—while the stacked height tricks the eye into seeing abundance without flooding the floor.
I tried a version of this last October and honestly couldn’t believe the difference. My patio felt “finished” the second I opened the door. Bonus: the smoky glass diffused the LED candle into velvety light that looked gorgeous in evening photos, like a faint cauldron glow every time I slid the door open for fresh air.
Variations: Tiny balcony? Use just two pumpkins: one at floor level, one on a short plant stand. Budget: thrift simple clear hurricanes and add a light coat of removable window film in “smoked” tint for the season. Renter-friendly: use adhesive felt on the bottom of stands to prevent scratching any threshold metal.
Budget Breakdown:
- Real or faux pumpkins (3–5 sizes): $2–$15 each
- Smoky glass hurricanes (2–3): $15–$35 each
- Short plant stand or nesting stool: $15–$40
- LED pillar candles: $12–$28/set
- Removable felt pads: $4–$6
Total Estimated Cost: $60 – $178
Best For: Apartments with a sliding door or single patio door; perfect from the moment the nights cool through Thanksgiving (swap the jack-o’ faces for plain pumpkins in November).
Key Design Elements:
- Main seasonal props: mixed-size pumpkins, smoky glass hurricanes
- Color palette: traditional orange pumpkins, charcoal smoke, soft amber light
- Lighting strategy: contained pillar glow that bounces within tinted glass
- Textile layers: optional small coir mat trimmed to fit just inside the door area
- Natural elements: a few birch twigs rising behind the tallest pumpkin
- Accent details: black metal plant stand, tiny brass matchbox (purely decorative if using LED)
How To Recreate This Look:
- Start with the tallest piece (a low stool or plant stand) closest to the door frame.
- Add your largest pumpkin on the tallest level, a medium beside it on floor level, and a small one stacked on a book or block for the third tier.
- Layer smoky hurricanes between pumpkins, tucking LED pillars inside.
- Place a few twigs behind the tallest pumpkin for vertical lift.
- Style with one subtle Halloween face pumpkin on the lowest tier if desired.
Why This Looks Intentional: Heights step down in a pleasing gradient, and the smoky glass repeats the charcoal tone that ties it to Halloween rather than general fall.
Don’t Do This: Avoid placing pumpkins where the door sweep will hit them. Slide the composition one foot away from the track to keep traffic smooth.
Pro Styling Tip: Light your LED pillars first, then set the hurricanes—minimizes fingerprints and keeps glass photo-ready.
Quick mindset reset: you don’t need to cover every inch. One statement moment near the door plus a single vignette by the railing can make the whole patio feel alive. Pick your two best spots and put your energy there.
5) Crow-Perched Planter with Black Mulch and Warm Lantern String Overhead
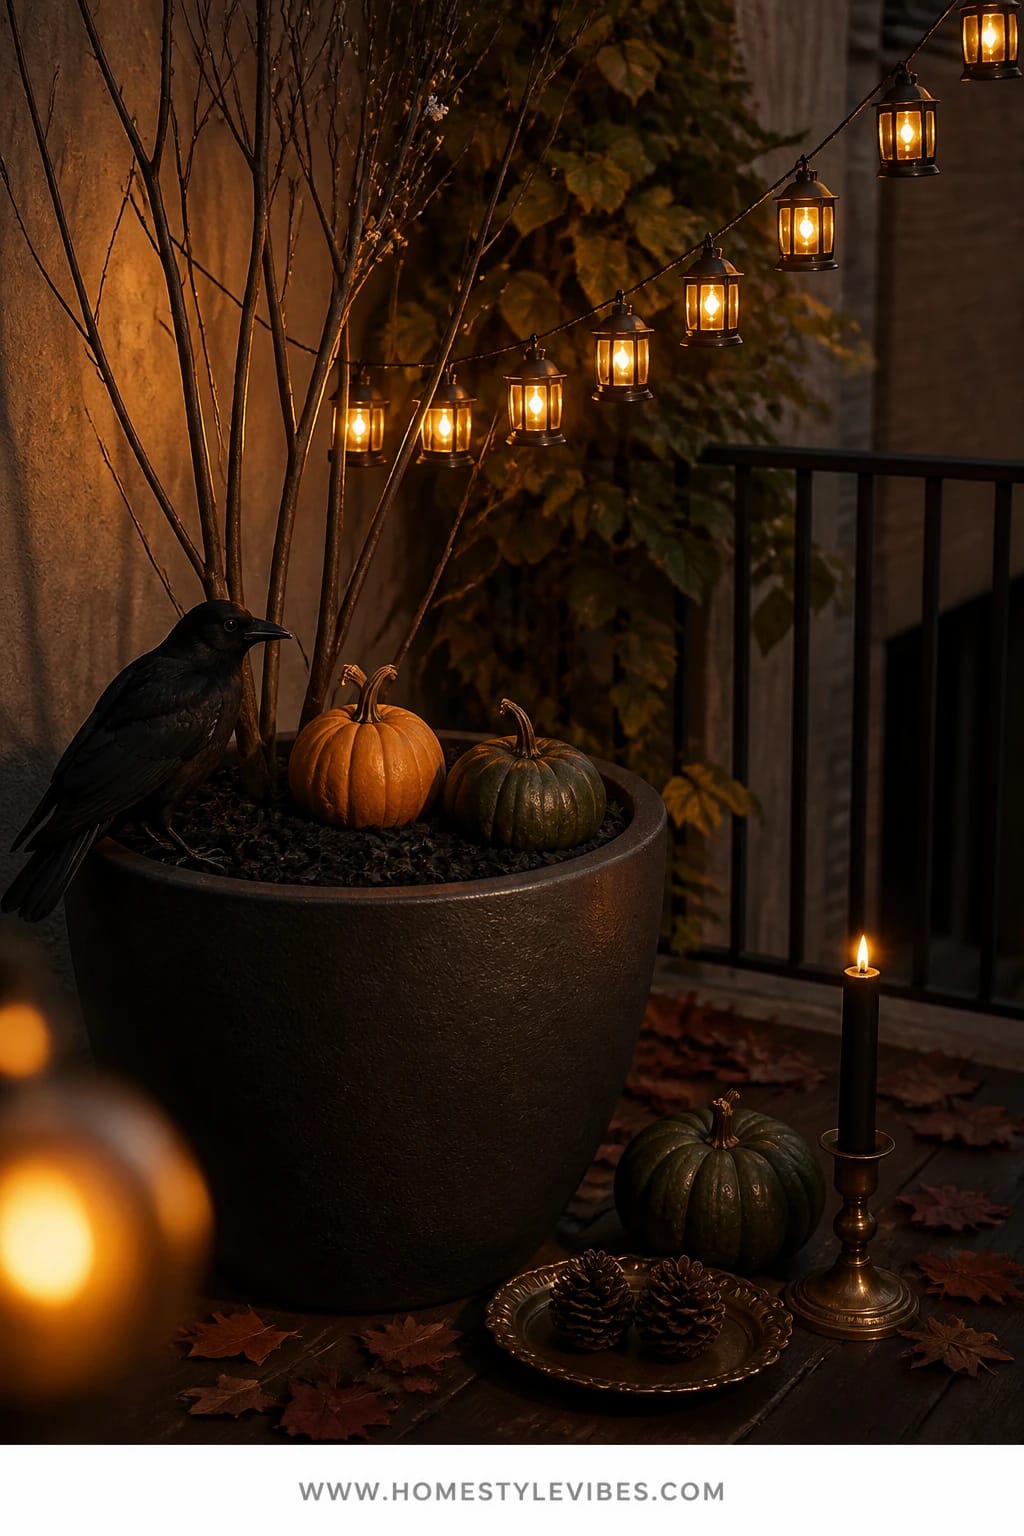
Planter frustration is real: summer annuals are fading, the soil looks tired, and you can’t face replanting for just one month. Enter the Halloween cheat: top your planters with black mulch, add a few faux dark branches, nestle in a couple of small pumpkins, and perch a crow on the rim. Then sweep a warm lantern string overhead to create a soft canopy glow that pulls the scene together.
The vibe is subtly haunted garden—no gore, all mood. Black mulch is a visual trick that instantly deepens the palette and hides tired soil. You get texture and contrast without an expensive autumn replant. The overhead lanterns run like a halo, bouncing warm light down into the planter scene and across your seating. It’s easy to store too: bagged mulch can be used next season, crows stack, and the lantern string earns its keep year-round.
Why it photographs well: you get a strong top-down light source plus dark negative space in the mulch, which makes pumpkins and the crow’s silhouette pop. That balance is magic in low-light phone shots.
Variations: Small-space option—do a single medium planter and hang just 3–5 lanterns from a single tension rod or two command hooks. Budget—use a bag of black aquarium gravel on top of soil for the same dark base (trust me, it looks luxe). Renter note—choose lantern strings with battery packs to avoid extension cords snaking inside.
Budget Breakdown:
- Black mulch or aquarium gravel: $6–$12
- Faux dark branches: $8–$18
- Small pumpkins (2–3): $2–$8 each
- Crow figurine: $8–$15
- Warm lantern string (battery): $18–$40
- Outdoor-rated removable hooks or tension rod: $8–$20
Total Estimated Cost: $44 – $113
Best For: Apartment patios with at least one planter; great for late October when summer plants have bowed out.
Key Design Elements:
- Main seasonal props: crow figurine, small pumpkins, faux branches
- Color palette: black mulch, inky accents, warm lantern light
- Lighting strategy: overhead lantern canopy that gently washes the scene
- Textile layers: none needed—let the textures be botanical and sculptural
- Natural elements: existing planter greens if any, dried seed pods
- Accent details: matte-black plant labels with chalk “Boo” or “Nightshade” for fun
Why This Feels Designer: Treating the planter like a styled bowl—dark base, sculptural branch, focal accent—gives it gallery energy. The overhead light ties it all together.
How To Recreate This Look:
- Start by topping your existing soil with a 1–2 inch layer of black mulch or gravel.
- Add two faux dark branches in a crisscross, anchored into the soil.
- Layer in 2–3 small pumpkins off-center to keep it asymmetrical.
- Place the crow on the rim or a small rock for height.
- Hang a short lantern string overhead using removable hooks; keep bulbs 8–12 inches above the planter.
One Thing To Avoid: Don’t overload the planter with too many pumpkins. Two or three is the sweet spot so the crow and branches still read.
Pro Styling Tip: For photos, angle one lantern bulb directly above the crow; the catchlight on the beak adds a tiny, cinematic gleam.
6) Witchy Welcome Tray with Black Tapers on a Storage Bench
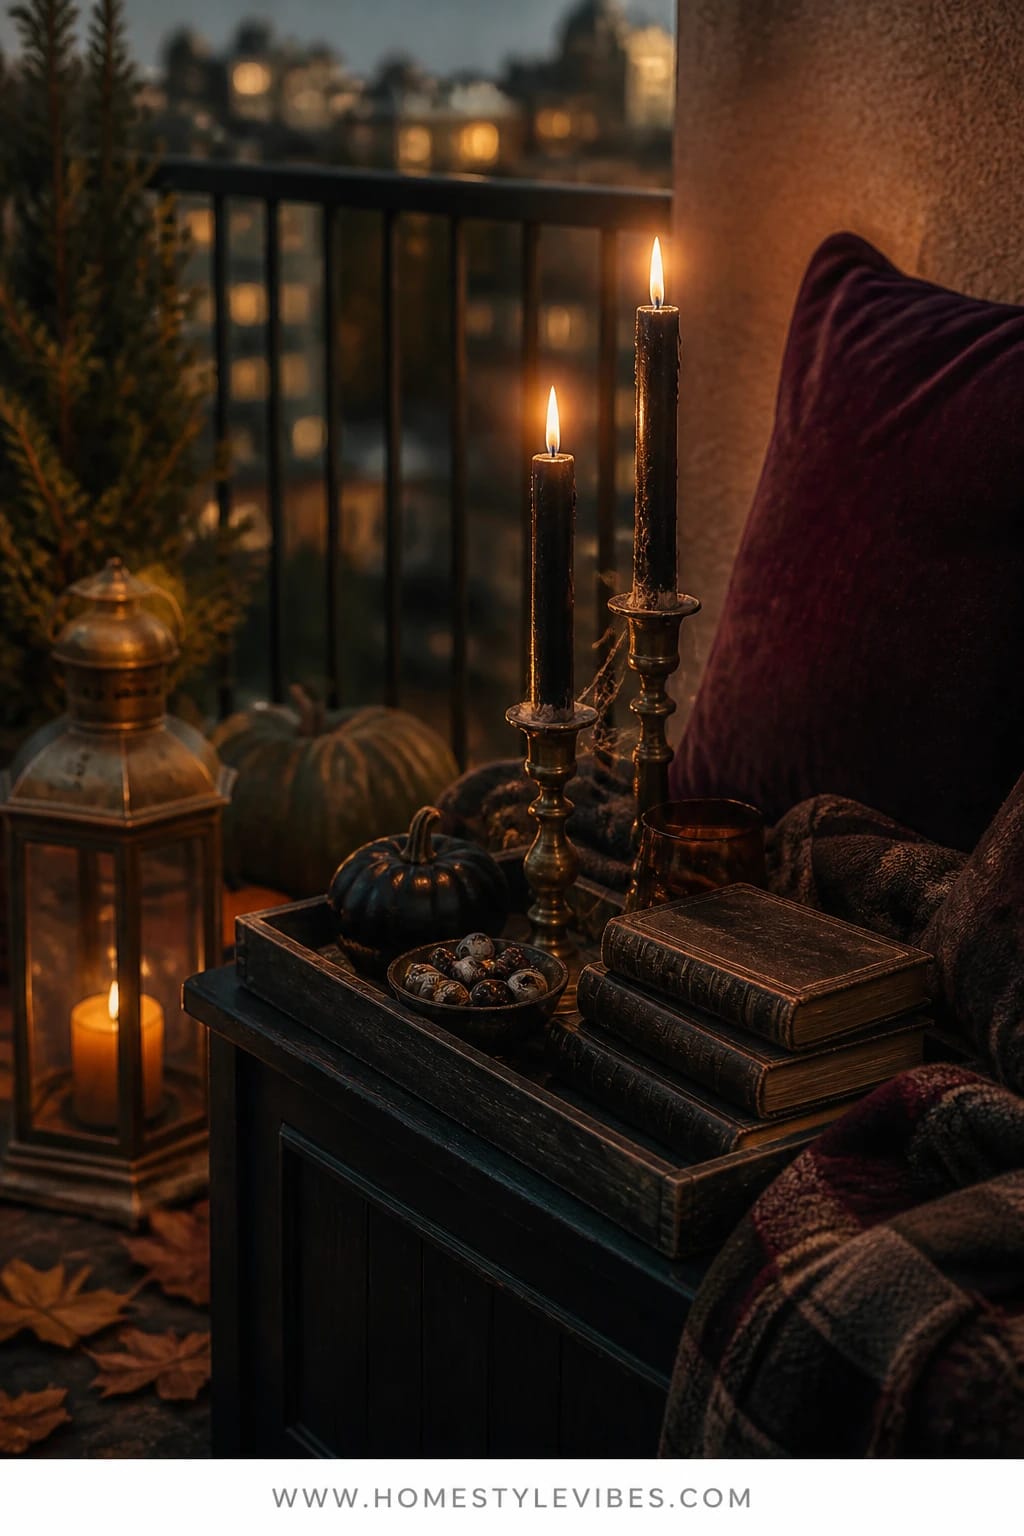
You’ve got a hardworking outdoor storage bench that hides cushions and gardening odds and ends, but it screams “utility.” Here’s how to make it feel like a haunted little parlor: style a witchy welcome tray on top with black tapers in mixed candleholders, a small bowl of candy eyeballs (or wrapped chocolates if you’re anti-sticky), and a tiny vintage-look book stack. It becomes your balcony console table without sacrificing function.
Ambience-wise, this setup leans intimate and a touch scholarly—think subtle witchy academia with candlelit shadows skimming across the bench lid. It’s perfect for apartment dwellers because everything lives on a tray. Need to access storage? Lift the whole vignette in one go. Need safekeeping from pets or a wind burst? The tray tucks inside in seconds.
Here’s why this photographs beautifully: glossy black candles, antique brass or iron holders, and a mini stack of leather-bound-style books create three distinct textures. The candle flames throw moving highlights across the book spines and the tray rim—tiny details that read “old-world Halloween” without a single plastic skeleton in sight.
Variations: On a tight budget, wrap two paperback spines in black kraft paper, draw a thin gold border, and hand-letter spooky titles—instant “vintage.” Small-space version, use a narrow breadboard as your tray. Renter-safe wax trick: line candleholders with a teaspoon of rice so any drips pop out after they cool. And, FYI, if you’re hosting friends, add a small decanter of cider and two enamel mugs for a five-minute “welcome bar.”
Budget Breakdown:
- Tray or breadboard: $12–$35
- Black taper candles or LED tapers: $12–$30
- Mixed candleholders (thrift or new): $4–$18 each (2–4)
- Mini book stack (thrift or DIY wraps): $0–$20
- Small candy bowl: $6–$12
- Removable felt pads for tray feet: $4–$6
Total Estimated Cost: $38 – $139
Best For: Patios with a storage bench or low cabinet; shines from the first cool night through Halloween, then pivots to a harvest drinks tray for November.
Key Design Elements:
- Main seasonal props: black taper candles, vintage-look books, candy bowl
- Color palette: inky black, antique brass, warm candle amber
- Lighting strategy: candle cluster for intimate shadow play
- Textile layers: a square of black linen or cheesecloth under the tray for softness
- Natural elements: one dried burgundy rose in a bud vase if you like a hint of drama
- Accent details: tiny brass key, match striker, or a moon-shaped trinket
How To Recreate This Look:
- Start with a tray centered on your storage bench; add felt pads to protect the lid.
- Add 2–4 mixed candleholders with black tapers; vary the heights slightly.
- Layer a mini book stack to one side; top with a tiny trinket or dried rose.
- Place a small candy bowl opposite the books for balance.
- Style with a folded black cloth under one candleholder to break up the surface.
Why This Looks Expensive: Mixed metals, layered heights, and a literary moment read curated. The tray corrals everything into a single, confident tableau—no visual sprawl.
Watch Out: Don’t overcrowd the tray. You want negative space so candlelight can bounce. If everything touches, the light dies.
Pro Styling Tip: For night photos, turn off nearby overheads. Let the tray candles be the hero so shadows stay dramatic and the glow looks rich.
One honest note before we wrap: open-flame candles can feel intimidating on a small balcony, especially with pets and kids. I love real flame, but LED tapers and pillars have come a long way. On my sister’s tiny patio, her set of warm LED tapers fooled me until I went to blow them out. If staying stress-free is the difference between decorating and giving up, go LED and enjoy the vibe—no shame, seriously.
Quick Checklist
- Mini jack-o’-lanterns (real or painted)
- Black taper candles or warm LED tapers
- Antique brass or matte-black candleholders
- Warm white string or lantern lights
- Faux cobweb or black knit scarf
- Bat silhouette garland and removable hooks
- Smoky glass hurricanes and LED pillars
- Crow figurines and faux dark branches
- Black mulch or aquarium gravel for planters
- Tray or breadboard for a portable vignette
- Charcoal/black pillow covers
- Small pumpkins in varied sizes
Frequently Asked Questions
How do I keep the budget under control for a small balcony?
Pick one focal zone—tabletop, railing, or door area—and invest there. Reuse a single color story (black + brass + pumpkin orange) so even a few pieces look cohesive. Thrift candleholders, DIY bat garlands from cardstock, and use LED lights you’ll reuse at the holidays.
Are real or faux pumpkins better for apartment patios?
Real pumpkins look fantastic but can soften by week three if they sit in full sun or pool water around the stem. For railing or door vignettes, real minis are great; for high-traffic floor spots, consider quality faux to avoid the sad, half-deflated look and fruit flies. Mix both and no one will clock it.
What if my balcony is very small—like standing room only?
Go vertical. A bat garland at eye level, a single lantern at the corner, and a crow perched on a planter create a full story with zero floor clutter. Style the bistro table if you have one; otherwise, a narrow tray on the windowsill or ledge can carry the vibe.
How do I store everything after Halloween in a tiny apartment?
Pick fold-flat or multi-season pieces: garlands, pillow covers, LED tapers, and a tray all stack easily. Use a single under-bed bin and label a small zip pouch for “balcony Halloween” so next year you’re not hunting for bats under beach towels.
Are candles safe with pets and kids on a balcony?
Use LED tapers and pillars whenever you’re not sitting right there. If you do light real candles, choose hurricanes that shield the flame, keep everything centered on a stable surface, and never place open flame near cobweb or dried foliage. When in doubt, LED—it still gives you the glow.
When should I start decorating a balcony for Halloween?
Start light in late September: swap pillows to charcoal and add string lights. Layer in bats, crows, and pumpkins the first or second week of October. The week of Halloween, add any carved faces or candy moments so everything looks fresh.
What renter limitations should I consider?
Skip drilling. Use outdoor-rated removable hooks, tension rods for overhead lights, and felt pads under anything heavy. Avoid adhesives on painted railings unless rated removable. Contain displays on trays so they’re easy to move for cleaning or inspections.
Your Halloween Balcony, Done
You don’t need a sprawling porch to have a storybook Halloween moment. Choose one of these six Halloween balcony and patio decor ideas for apartment dwellers, claim a small zone, and build a scene with layers of black accents, playful silhouettes, warm candle glow, and a hint of brass. Focus your lighting, repeat a few colors, and let one seasonal prop—pumpkins, bats, a lone crow—steal the show.
The truth is, Halloween magic lives in contrast: candlelight and shadow, orange and black, soft cobweb and sturdy metal. Aim for depth and little moments of surprise, like a crow peeking over a planter rim or a bat drifting off the garland line. Start tonight with the spot you see first when you step outside. Light the LEDs, open the door to the cool October air, and enjoy your tiny haunted hideaway.
You’ve got this. One cozy glow at a time, your balcony can be the moody, charming Halloween nook you’ve dreamed about—small, stylish, and absolutely yours.

About the Author

Krisztina P.Rendes, Founder of Home Style Vibes
Founder of Home Style Vibes
Krisztina Puskásné Rendes created Home Style Vibes as a cozy-modern lifestyle space where homemaking meets inspiration. Her goal is to help women create beautiful, organized, and peaceful homes they truly love — without overwhelm. You’ll find here heart-driven content on home decor, cleaning tips, easy family recipes, organization and decluttering, DIY home projects, plants, and seasonal ideas — all designed to bring more calm, comfort, and style into everyday life.





