6 Christmas Bathroom Decor Ideas That Make Even a Tiny Bathroom Feel Festive
You want that instant Christmas bathroom glow—candy-red touches, crisp white layers, a pop of fresh green—every time you brush your teeth. But your bathroom is tiny, storage is already maxed out, and the last time you tried to decorate it, it looked cluttered in five minutes. This guide is your shortcut to a festive, photo-ready tiny bathroom using classic red and white Christmas bathroom decor, fresh greenery, and warm light—without sacrificing function or precious counter space. We’ll work wall by wall, nook by nook, so every idea has a home and a purpose. Most of these are 20-minute swaps under $60 and they photograph beautifully: think glowy mirror light, juicy red ribbon, and crisp ceramic whites. Set these up the weekend after Thanksgiving and enjoy them through New Year’s—then keep a few neutral pieces into January for a gentle winter vibe.
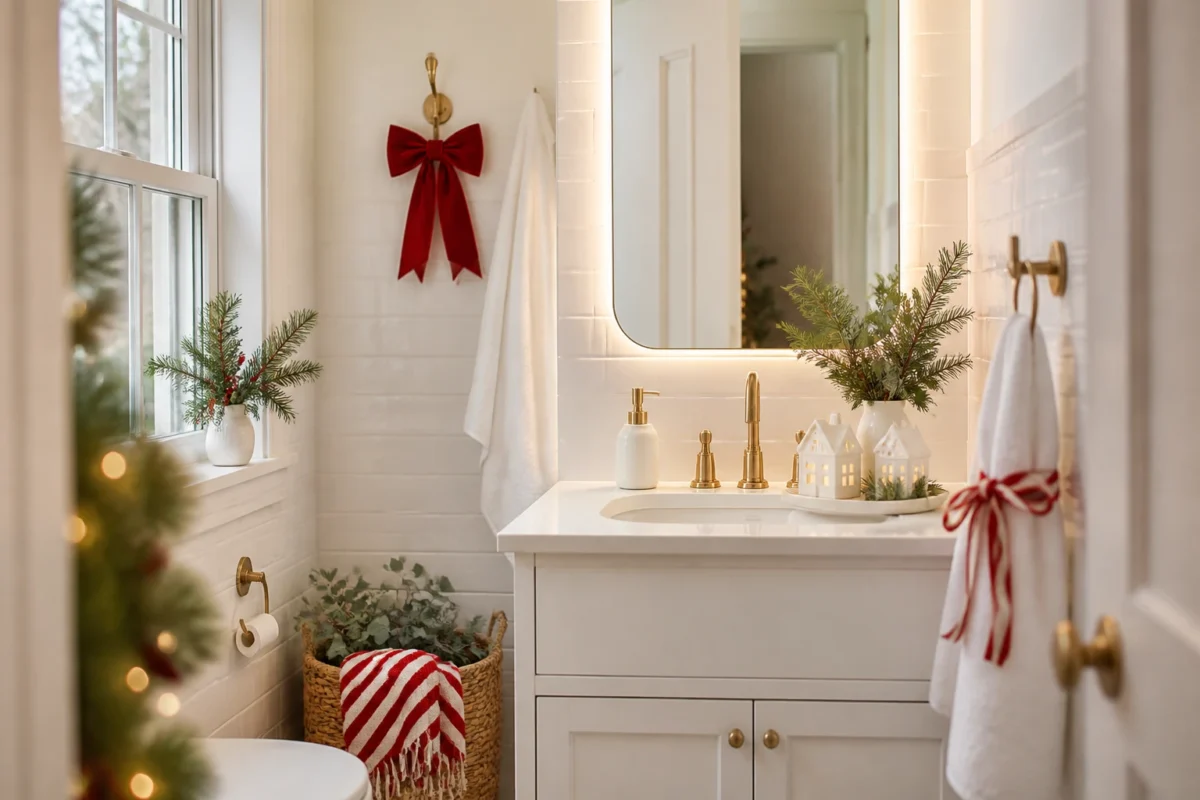
If you love a candy-cane classic look—or if you’ve ever wanted your morning routine to feel a little more like a holiday movie montage—these six ideas will make even a tiny bathroom feel festive in real life, not just on Pinterest.
1) Candy-Stripe Ribbon And White Ceramic Houses On The Vanity And Sink
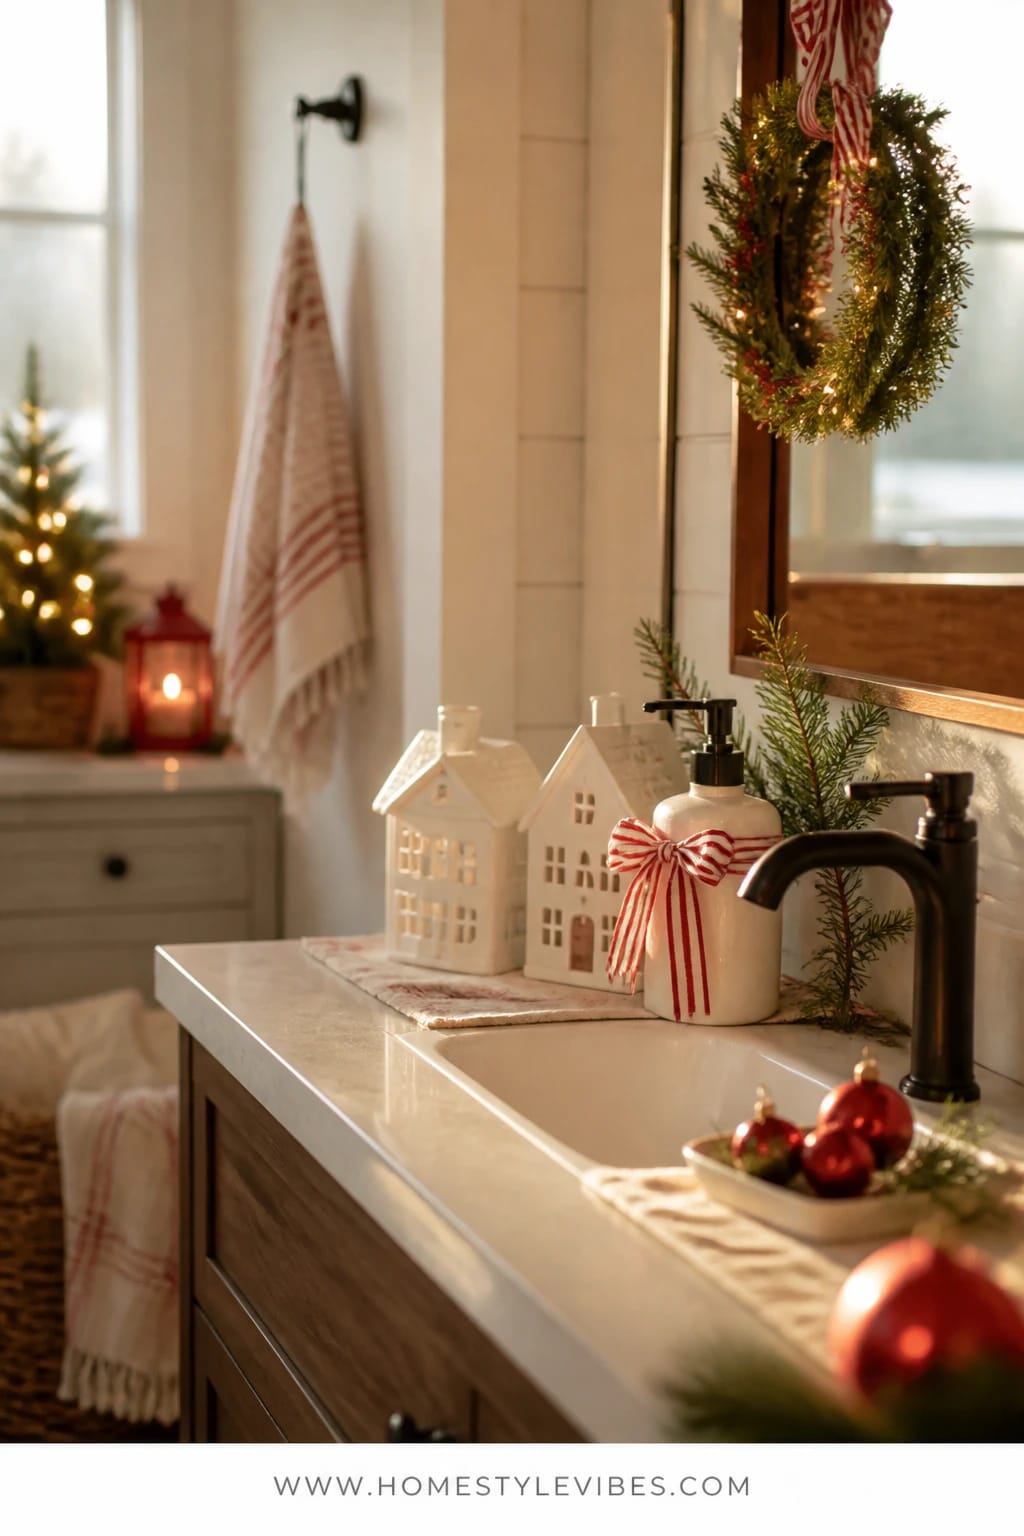
It’s that one surface that always feels chaotic—the vanity. Toothbrushes, soap, hair ties, rogue lip balm. You’ve tried adding a tray, but it still looks like clutter wearing a hat. This idea turns your vanity into a simple, classic Christmas vignette that reads tidy, not fussy: two or three small white ceramic houses lined along the back edge of the sink or vanity tray, a soap pump dressed with a candy-stripe red-and-white ribbon, and a sprig of fresh green tucked behind the faucet. The mood is clean and bright with a wink of nostalgia—like a snow-dusted village got a minimalist edit.
Why it works in real homes: you’re swapping a few everyday things instead of adding lots of new ones. The ceramic houses are compact, they glow with tiny battery tea lights (safe around water), and they create that warm white twinkle the camera loves. Red-and-white ribbon gives you the classic hit of color without eating counter space. The whole thing stores flat in January, and those little houses work on a bookshelf elsewhere next year if you want to rotate decor.
Lighting is everything here. Warm white from the ceramic houses creates cozy sparkle under task lighting, and the glossy white sink bounces that glow back up to your face—instant “I slept eight hours” illusion. And yes, this photographs like a dream: soft bokeh from the village lights, crisp contrast of red ribbon, and layered whites looks fresh and intentional.
Variations:
- Budget-friendly: Use two houses instead of three and a simple white ramekin as a “mini house” stand-in; tie red baker’s twine on the soap pump if ribbon isn’t handy.
- Smallest sinks: Skip the houses; use a slim white tray with a single house or a white votive holder and a miniature bottle-brush tree.
- January-friendly: Remove red ribbon after New Year’s and keep the ceramic houses with plain white or cream twine for a wintery village through February.
Budget Breakdown:
- White ceramic houses (set of 2–3): $12–$30
- Battery tea lights (pack): $6–$10
- Red-and-white ribbon or baker’s twine: $4–$8
- White vanity tray or dish: $10–$25
- Small greenery sprig (fresh or faux): $3–$8
Total Estimated Cost: $35 – $81
Best For: Tiny powder rooms or shared family baths where counters need to stay functional; great from Thanksgiving weekend through New Year’s, with pieces that can stay wintery into January.
Key Design Elements:
- Main holiday props: white ceramic houses, red-and-white ribbon, battery tea lights
- Color palette: candy red, crisp white, fresh green
- Lighting strategy: warm white tea lights inside houses plus overhead task lighting
- Textile and ribbon layers: candy-cane ribbon on soap pump and tray jar
- Greenery and natural elements: a single fir or cedar sprig by the faucet
- Accent details: white tray, small bottle-brush tree if space allows
How To Recreate This Look:
- Start with a cleared vanity; give the faucet and counter a quick polish for extra shine.
- Add a slim white tray centered or off-center depending on plumbing placement.
- Layer 2–3 small ceramic houses along the back of the tray; place battery tea lights inside.
- Place your soap pump on the tray’s front corner; tie a short red-and-white ribbon bow at the neck.
- Style with one petite green sprig tucked behind or beside the faucet; add one tiny bottle-brush tree if you have a spare inch.
Why This Looks Expensive: Repeating white ceramics with consistent warm glow reads custom and calm. The restraint—just one pattern (the stripe) and one pop color—feels boutique-hotel thoughtful.
Watch Out: Don’t overcrowd the tray. If you can’t wipe the counter without moving everything, it’s too much. Two houses max on narrow sinks.
Pro Styling Tip: Dim your vanity lights slightly and let the tea lights glow; shoot from sink level to catch the little house windows twinkling.
2) Fresh Cedar Garland And Red Berry Clips Framing The Mirror
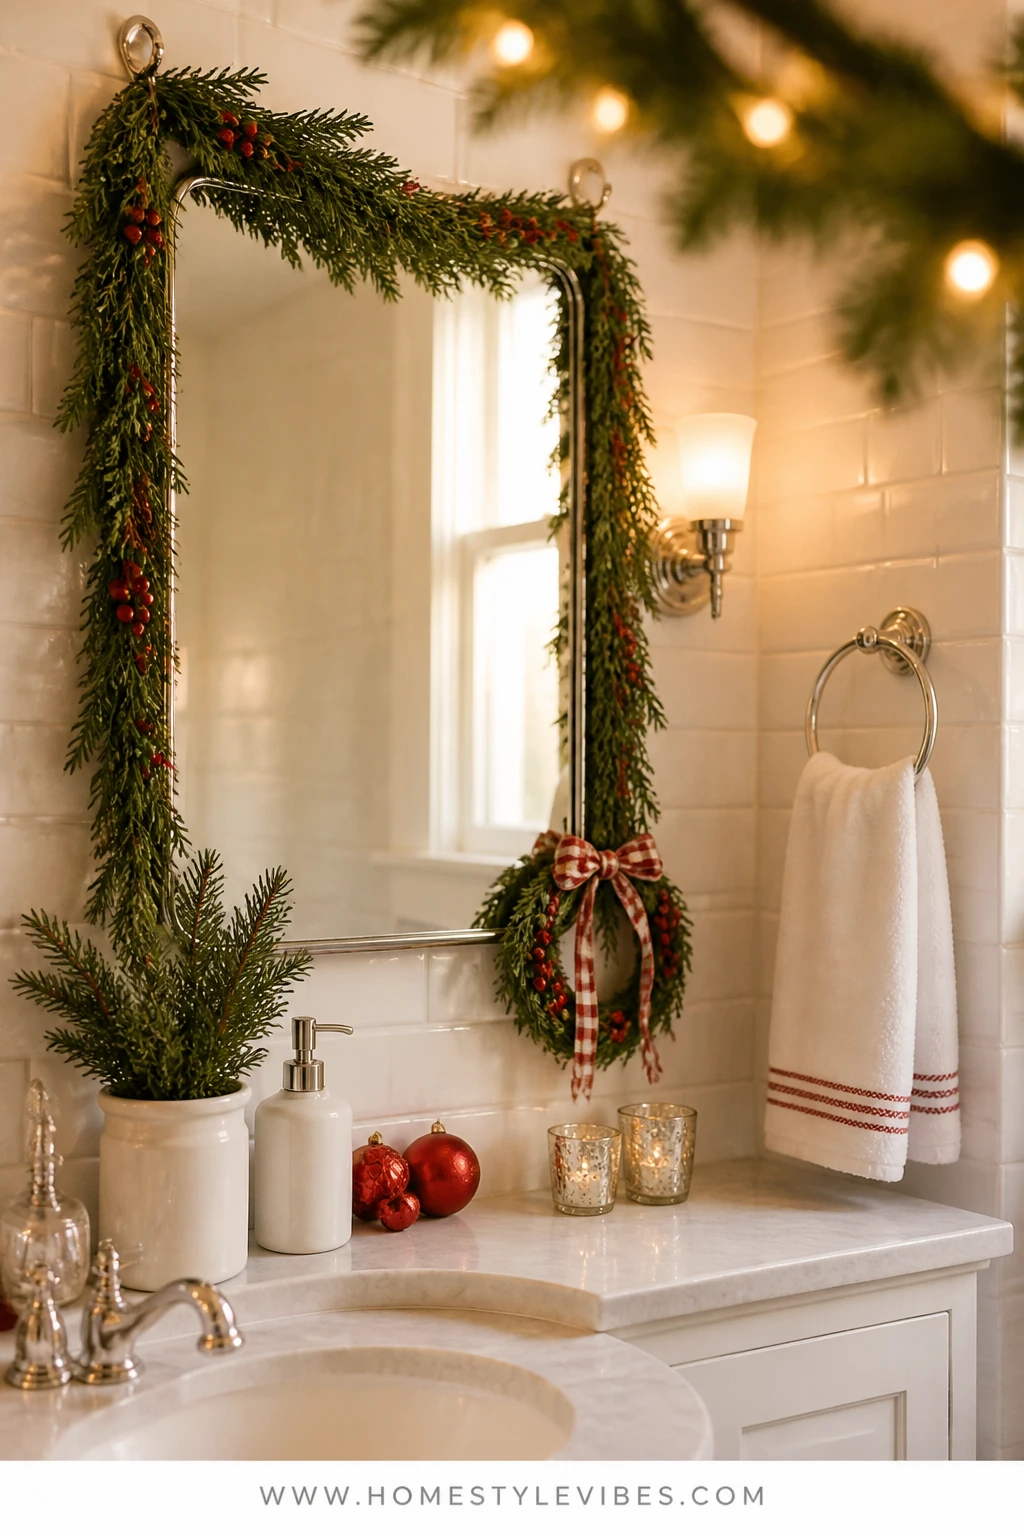
Mirrors can be harsh in winter light, especially in a tiny bathroom. We’ve all been there—overhead bulbs, pale skin, zero charm. Wrapping the mirror with a slim fresh cedar garland instantly softens the look, adds fragrance, and brings that classic Christmas bathroom decor moment in a single move. Punctuate it with small red berry clips—tiny pops of color that read crisp and cheerful in every selfie and Zoom you sneak from the bathroom mirror.
This setup is practical: the garland sits on top of the mirror frame or attaches with removable hooks on the wall perimeter, so you keep the glass clear. The greenery texture breaks up shiny tile and chrome, while the warm green against white tile turns a utilitarian wall into a festive focal point. Lighting bounces off the mirror and through the cedar fronds, creating layered depth that looks way fancier than it is.
Variations:
- Faux-friendly: Use a thin faux cedar rope garland to avoid needle drop; dust it in the tub with a hairdryer on cool before hanging to remove lint.
- Minimalist: Skip the berries and tie two small candy-red velvet bows at the top corners only.
- January transition: Remove the berries after New Year’s and leave the plain greenery for a calm winter look.
Budget Breakdown:
- Fresh or faux slim cedar garland (6–9 ft): $18–$40
- Berry clips or mini berry picks: $6–$14
- Removable clear hooks or adhesive cord clips: $8–$12
- Two small velvet bows (optional): $6–$10
Total Estimated Cost: $32 – $76
Best For: Bathrooms with a single statement mirror or medicine cabinet; ideal if you want maximum visual impact with one move and minimal surface clutter.
Key Design Elements:
- Main holiday props: slim cedar garland, red berry clips, small velvet bows
- Color palette: deep evergreen, berry red, white
- Lighting strategy: mirror bounce light, warm white overhead on dimmer if possible
- Textile and ribbon layers: velvet bows for softer edges
- Greenery and natural elements: cedar for scent and movement
- Accent details: clear hooks to keep the look invisible and clean
How To Recreate This Look:
- Start with a fully cleaned mirror—streak-free glass makes the greenery pop.
- Add clear adhesive hooks at the top corners and sides, following your mirror frame line.
- Layer the cedar garland around the mirror, starting at the top center, draping evenly to each side.
- Place berry clips every 6–8 inches, focusing more at the corners for a framed feel.
- Style with two tiny velvet bows at the upper corners if desired; trim stray cedar stems for a neat outline.
Why This Feels Designer: Framing a focal point is a pro move. The mirror becomes a holiday “portal” with controlled color and texture, like a boutique hotel powder room in December.
One Thing To Avoid: Don’t place garland where it blocks cabinet doors or medicine cabinet swing. Test movement before finalizing clips.
Pro Styling Tip: For photos, stand slightly to the side so the mirror reflects the garland twice—instant depth and lushness.
Before we dive into textiles, pause and breathe. Your bathroom doesn’t need every idea—one high-impact move can set the mood all season. If you’re short on time, choose the mirror framing and call it joyfully done.
3) Red-And-White Turkish Towels With Evergreen Sprigs On The Towel Bar
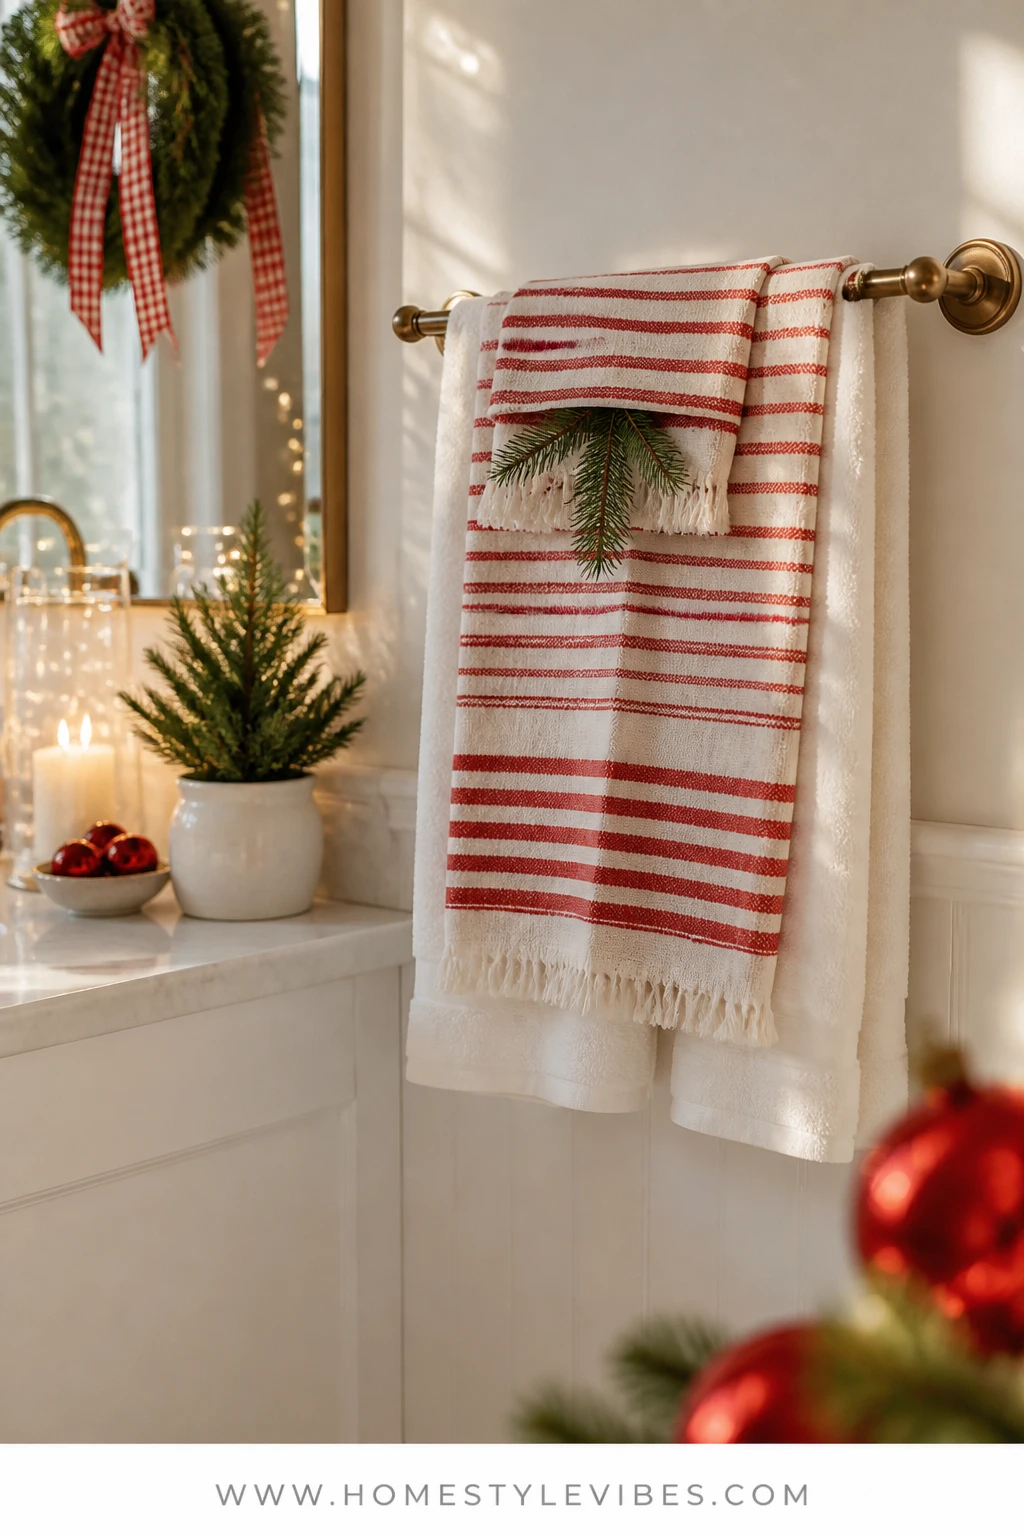
Towels are the workhorses that rarely feel festive. You swap in “holiday towels” and suddenly the room screams novelty. Here’s the better path: keep it classic and functional with red-and-white striped Turkish hand towels layered with crisp white bath towels. Tuck a small evergreen sprig under the fold at the towel bar or ladder for subtle fresh green that smells like Christmas morning without feeling kitschy.
This mood is bright and tailored: picture candy-cane stripes, soft fringes, and a whisper of cedar. The materials store thin, dry fast (Turkish towels are MVPs), and they wash well. Plus, you get huge style for the cost—textiles bring color and pattern without adding clutter. Lighting skims across the towel texture and fringe, which looks fantastic in photos—especially when the rest of the room stays restrained.
Variations:
- Budget: Use one striped hand towel over a white towel and a single sprig; skip bath sheets.
- Kid-friendly: Replace fresh sprigs with faux to avoid sap and any pokey bits; tuck them higher out of reach.
- January mode: Keep the white towels and swap striped hand towels for oatmeal or grey—winter calm, zero effort.
Budget Breakdown:
- Red-and-white Turkish hand towels (set of 2): $14–$28
- White bath towels (2): $20–$50
- Faux or fresh cedar sprigs (2–3): $4–$12
- Simple ribbon ties (optional): $4–$8
Total Estimated Cost: $38 – $98
Best For: Family bathrooms and guest baths needing soft color that can handle daily use; great from early December through New Year’s.
Key Design Elements:
- Main holiday props: striped Turkish towels, white base towels, tiny cedar sprigs
- Color palette: candy red, crisp white, fresh green
- Lighting strategy: play up natural light or a warmer bulb to soften textile tones
- Textile and ribbon layers: towel layering, optional ribbon band
- Greenery and natural elements: petite evergreen tucked under folds
- Accent details: matte black or brass towel bar for contrast
How To Recreate This Look:
- Start with two clean white bath towels; fold lengthwise and hang evenly on the bar.
- Add one red-and-white striped Turkish towel centered over the white towel.
- Layer a second striped towel slightly off-center for a casual, styled look if space allows.
- Place a small cedar sprig under the top fold so it peeks out 1–2 inches.
- Style with a tiny ribbon band tied loosely around the Turkish towel if desired, bow tails short and neat.
Why This Reads High-End: Hotel layering—white base, patterned accent—signals quality and thoughtfulness. The consistent palette ties every element together.
The Most Common Mistake: Overly bulky folds that crowd the bar. Keep folds slim so the stripe pattern reads cleanly.
Pro Styling Tip: Angle your photo so the fringe and sprig overlap slightly; that intersection of pattern and greenery draws the eye.
4) White Bottle-Brush Trees And Silver Bells On The Shelf Above The Toilet
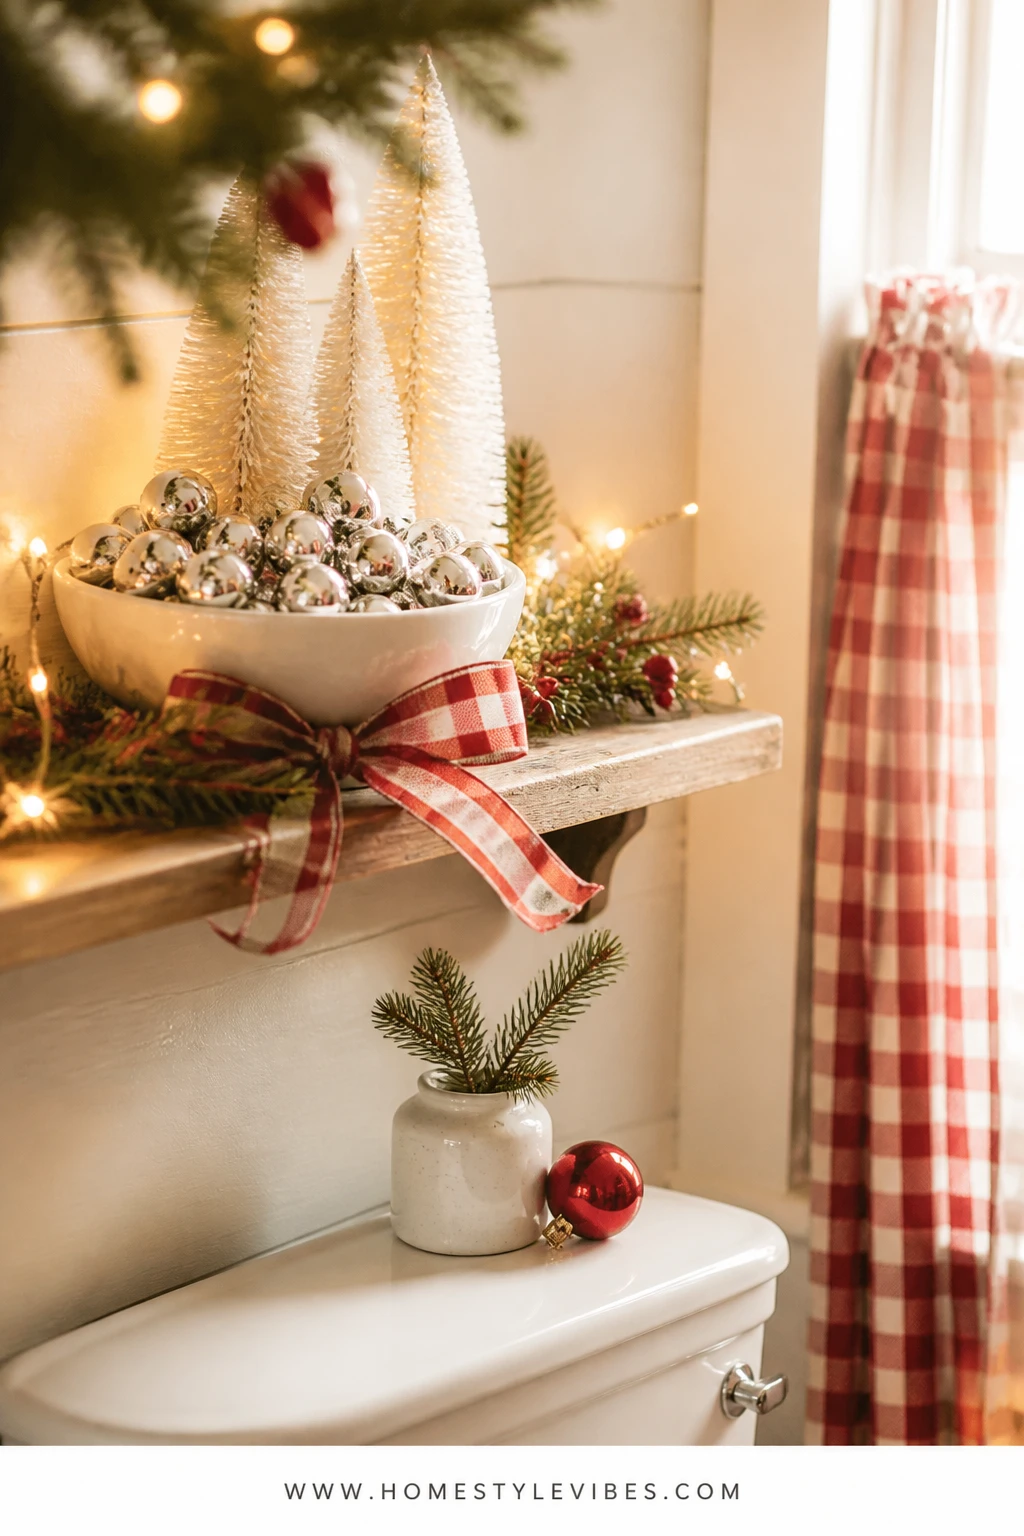
The shelf above the toilet is notorious—too empty, too busy, or home to 64 extra rolls that don’t exactly say festive. You’ve tried a sign or a jar, but it still looks like a random storage zone. Instead, curate a tiny, classic vignette with white bottle-brush trees in staggered heights and a cluster of silver bells in a shallow white bowl. It’s cheerful, reflective, and compact. And the scale is perfect for a tiny bathroom: vertical interest without visual weight.
The vibe is crisp and wintery, grounded by glossy whites and the soft shimmer of bells. With warm white fairy lights coiled behind the trees (battery pack tucked in a lidded jar or behind a frame), you get that gentle evening glow that turns a forgettable corner into a favorite moment. This setup stores flat, can be assembled in 10 minutes, and doubles as a January vignette if you remove the red elements elsewhere in the room.
Variations:
- Mini shelf: Use two trees only and a trio of bells; keep spacing generous.
- Color pop: Add one slim candy-red ribbon tied to the bowl for a hit of festive color.
- Kid-safe: Choose shatterproof bells or plastic versions; no glass near curious hands.
Budget Breakdown:
- White bottle-brush trees (set of 3–5): $12–$28
- Silver bells (set or bag): $6–$15
- Shallow white bowl or low tray: $8–$20
- Warm white micro fairy lights (battery): $8–$12
Total Estimated Cost: $34 – $75
Best For: Powder rooms and tiny baths with a single floating shelf or cabinet top; great when you want shine and glow without greenery maintenance.
Key Design Elements:
- Main holiday props: white bottle-brush trees, silver bells, warm micro lights
- Color palette: white, silver, a whisper of green elsewhere
- Lighting strategy: hidden micro lights for evening sparkle
- Textile and ribbon layers: optional thin red ribbon on the bowl
- Greenery and natural elements: none required; keeps things tidy and modern-classic
- Accent details: smooth white ceramic and reflective metal
How To Recreate This Look:
- Start with a dusted shelf; leave at least 6 inches of clearance from the wall art or vent.
- Add the shallow white bowl to one side; scatter a handful of silver bells inside.
- Layer bottle-brush trees in odd numbers (3 or 5), tallest at the back, smallest up front.
- Place a micro light strand snaked behind the trees, battery pack hidden in a small lidded jar or behind a photo frame.
- Style with a single red ribbon bow on the bowl for a festive wink.
Why This Looks Intentional: Repetition (all-white trees) plus one metallic accent feels curated. The asymmetrical placement keeps it modern and avoids “gift shop” vibes.
Don’t Do This: Don’t line the trees like soldiers. Stagger heights and overlap slightly for dimension.
Pro Styling Tip: For photos, lower the lens to tree level; the bells will catch light and create tiny starbursts.
Remember, this isn’t about recreating a showroom. It’s about a bathroom that works hard and still smiles back at you. If one idea resonates more than the others, that’s your starting point—one corner done well beats five corners halfway.
5) Red Velvet Bow And White Paper Stars On The Back Of The Door
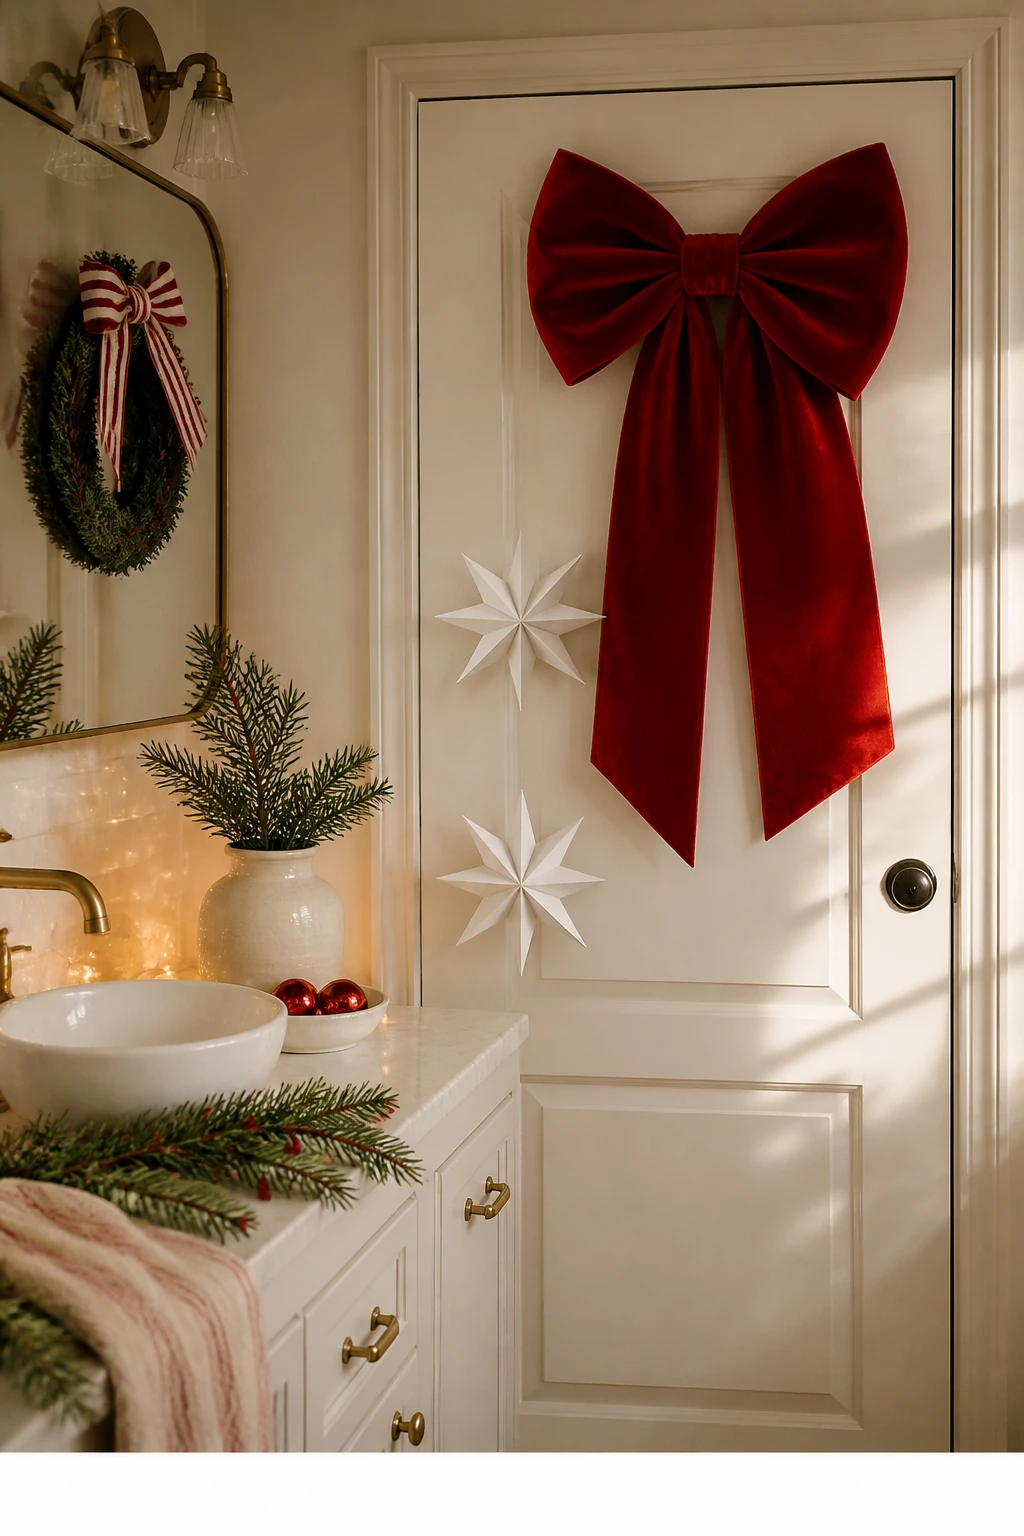
The back of the bathroom door is prime real estate most of us ignore. Hooks? Sure. Style moment? Rarely. You’ve probably hung a wreath once and realized it bonked the wall every time the door opened. Here’s the smarter version: a single oversized red velvet bow hung high, flanked by two or three lightweight white paper stars arranged vertically. The look is graphic and classic—candy red meets crisp white—without any door-thumping bulk.
Why it works: it’s vertical decor that doesn’t steal floor space, renter-friendly with removable hooks, and it reads instantly festive even when the rest of the room is minimal. Paper stars fold flat in storage, the bow rolls up, and you can put it all up in ten minutes. Lighting from your vanity will kiss the paper folds and create subtle shadows; at night, warm bulbs make the velvet look deeper and richer—like a little holiday boutique moment every time you close the door.
Variations:
- Micro door: Use one medium star under the bow; keep proportions balanced to door width.
- Subtle: Swap the red bow for white velvet and add a slim red ribbon tail for the classic color hit.
- January plan: Remove the red bow and keep the white stars through winter for a calm, snowy vibe.
Budget Breakdown:
- Oversized red velvet bow: $10–$20
- White paper stars (2–3): $12–$24
- Removable hooks or clear command strips: $8–$12
- Optional fishing line for invisible hanging: $3–$5
Total Estimated Cost: $33 – $61
Best For: Tiny bathrooms with zero free surfaces; great for renters or anyone who prefers decor that stores flat.
Key Design Elements:
- Main holiday props: oversized velvet bow, white paper stars
- Color palette: candy red, crisp white
- Lighting strategy: overhead glow that grazes paper folds for gentle shadowplay
- Textile and ribbon layers: sumptuous velvet against matte paper
- Greenery and natural elements: optional slim cedar tie behind the bow tails
- Accent details: invisible fishing line to “float” stars
How To Recreate This Look:
- Start by measuring the upper third of the door; place a removable hook centered 6–10 inches below the top edge.
- Add the velvet bow to the upper hook so the tails land around eye level.
- Layer two additional hooks in a vertical line below; space them 8–12 inches apart.
- Place paper stars on fishing line and hang them from the lower hooks at staggered heights.
- Style bow tails so they hang straight; trim any star tag strings for a clean look.
Why This Looks Expensive: Clean negative space around a single luxe texture (velvet) reads refined. The high placement lengthens the door visually—an old designer trick for taller-feeling rooms.
Watch Out: Doors near steamy showers can loosen adhesive. Press hooks firmly for 30 seconds and avoid hanging heavy items; check once after the first hot shower.
Pro Styling Tip: Photograph straight-on with the door closed so the stars create a vertical rhythm; a slightly lower angle makes the bow look grander.
6) Peppermint-Striped Shower Curtain And Evergreen Soap Dish On The Tub Ledge
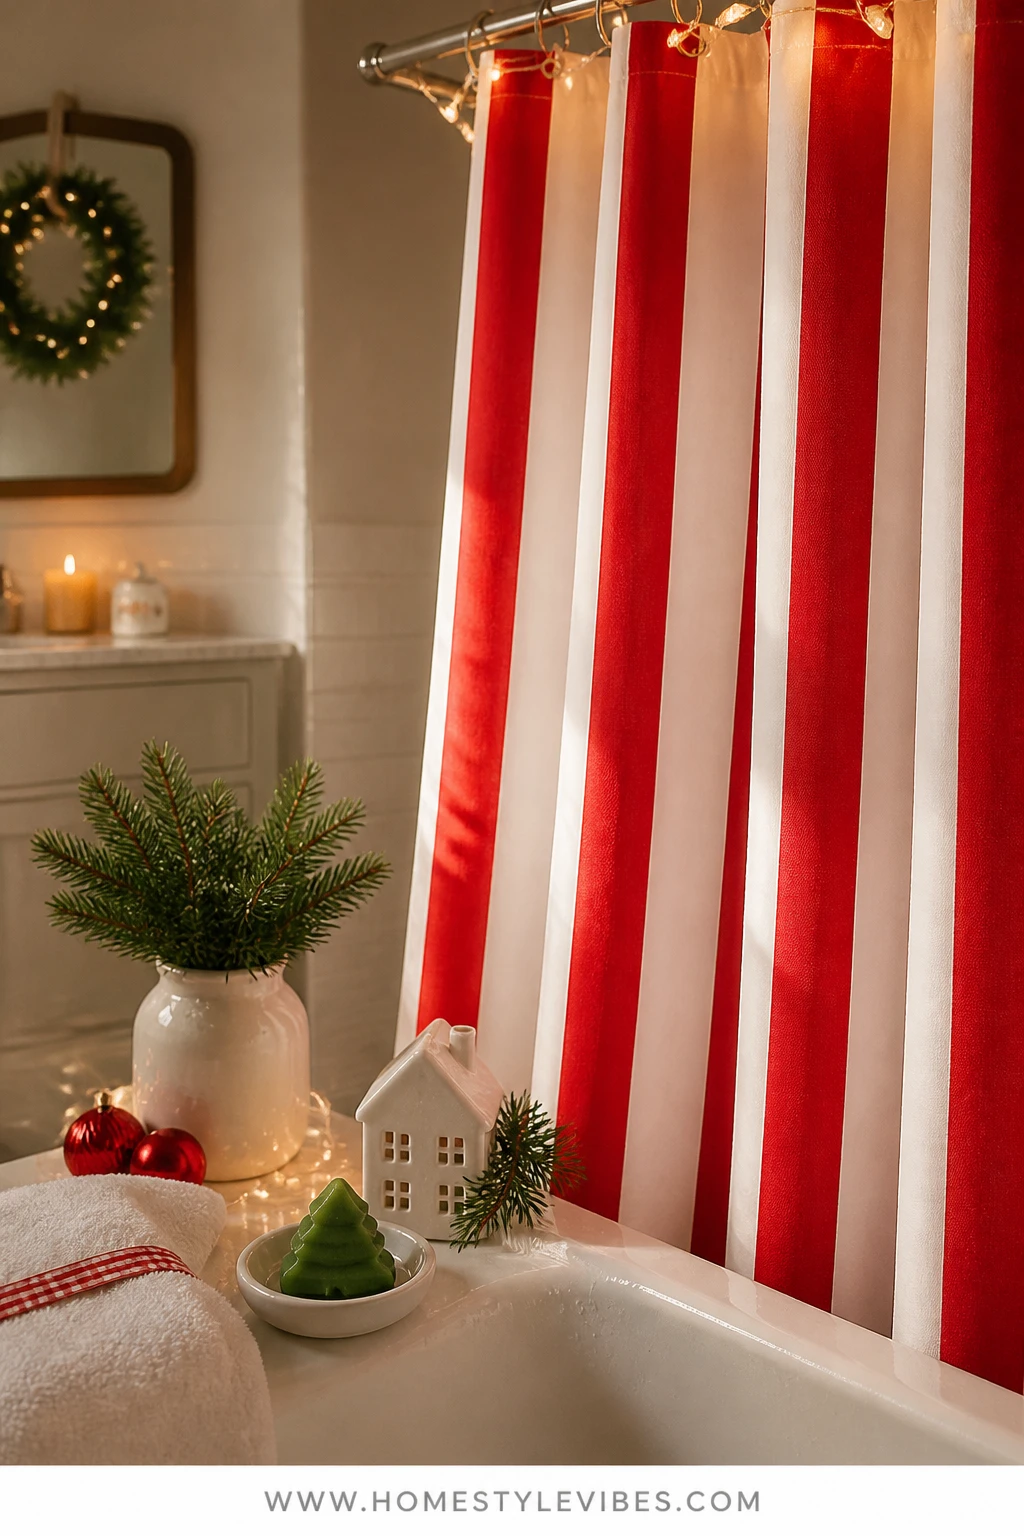
Shower curtains are the billboard of a tiny bathroom. You’ve swapped in seasonal art and candles but the room still feels “everyday.” A peppermint-striped shower curtain—red-and-white vertical or candy-cane diagonal—does the heavy lifting in one move. Pair it with a low-profile evergreen soap dish and a small white ceramic house or tree on the tub ledge. Suddenly the entire room reads classic Christmas, even if the rest is minimal.
Here’s why this works: it’s a massive color and pattern moment with zero extra surfaces needed. The vertical stripes make the room feel taller, and the red-and-white palette threads through the whole space. Use warm white string lights along the top of the curtain rod (battery-operated, tucked behind the folds) for a gentle evening glow—no outlets needed near water. The result photographs with strong lines, cheerful color, and simple styling. And when January hits, swap the stripe for a white waffle curtain—fast seasonal reset.
Variations:
- Soft stripe: Choose a narrow pinstripe for a quieter classic look.
- Tiny tub: If you only have a glass door, hang a candy-red-and-white towel over the door bar for the same effect.
- Family-friendly: Keep decor on the outer ledge only; choose shatterproof accents.
Budget Breakdown:
- Peppermint stripe shower curtain: $20–$45
- Shower curtain liner and rings (if needed): $12–$22
- Evergreen soap dish or tray: $8–$16
- Small white ceramic tree or house: $6–$15
- Battery micro lights for rod (optional): $8–$12
Total Estimated Cost: $46 – $110
Best For: Bathrooms where the shower curtain dominates the view; ideal for quick, high-impact color with easy January swap-out.
Key Design Elements:
- Main holiday props: striped shower curtain, white ceramic accent, evergreen soap dish
- Color palette: candy red, crisp white, touches of green
- Lighting strategy: hidden micro lights along the curtain rod for soft evening glow
- Textile and ribbon layers: bold pattern in one large textile for max effect
- Greenery and natural elements: tiny evergreen touch on the ledge
- Accent details: matte or chrome rings that match your fixtures
How To Recreate This Look:
- Start by removing the old curtain; wash or replace the liner for a fresh base.
- Add the striped curtain on matching rings; ensure the hem skims, not puddles.
- Layer a strand of battery micro lights along the rod behind the curtain header; secure with clear clips.
- Place a low evergreen soap dish on the tub ledge; keep it clear of the water stream.
- Style with a small white ceramic house or tree at the far corner for a neat focal point.
Why This Feels Designer: A single oversized pattern in a controlled palette looks confident. Designers commit to a bold textile and let it do the talking.
One Thing To Avoid: Competing patterns. If the curtain stripes are bold, keep bath mats and towels solid white or soft textured neutrals.
Pro Styling Tip: For photos, pull the curtain one-third open so stripes frame the shot and the ceramic accent peeks from the corner—instant story.
Quick story: last December, I swapped our everyday grey curtain for a red-and-white stripe at 11 p.m. before my in-laws arrived. The next morning my mother-in-law walked in and said, “Oh! It’s like a Christmas card in here.” That’s the power of one textile.
Quick Checklist
- White ceramic houses with battery tea lights
- Red-and-white ribbon for soap pumps and small accents
- Slim cedar garland and berry clips for mirror framing
- Red-and-white Turkish hand towels layered over white bath towels
- White bottle-brush trees and a shallow bowl of silver bells
- Oversized red velvet bow and white paper stars for the door
- Peppermint-striped shower curtain as a statement textile
- Warm white micro fairy lights for subtle glow
- Removable clear hooks and fishing line for damage-free hanging
- Tiny evergreen sprigs tucked into folds and trays
Frequently Asked Questions
How do I decorate a tiny bathroom for Christmas without making it feel cluttered?
Choose one statement zone (mirror, shower curtain, or door) and one supporting zone (vanity or shelf). Keep the palette tight—candy red, crisp white, and a touch of green—and repeat materials (white ceramics, ribbon) so it feels cohesive, not busy.
Is fresh greenery safe in bathrooms with showers and lots of steam?
Yes, but pick sturdy greens like cedar or fir and keep them away from direct spray. Fresh garland will last 1–2 weeks near steam; faux is great for longevity. Never mix real flames with greenery—use flameless tea lights.
When should I put up Christmas bathroom decor?
Thanksgiving weekend is perfect. Start with the big move (shower curtain or mirror garland), then add small accents over a week. After New Year’s, keep the whites and some greenery for a winter look and remove the red touches.
What’s the best way to handle lights and moisture?
Use battery-operated micro lights and tea lights rated for indoor use, and keep battery packs tucked away from splashes. Turn them off when showering to extend battery life and avoid any condensation issues.
How do I store these pieces after the holidays?
Paper stars fold flat; ribbon rolls into a zip bag; ceramic houses nest with bubble wrap inside a shoe box. Label a small “Bathroom Christmas” bin so setup next year is a five-minute task, not a treasure hunt.
Wrapping It Up With A Bow
Pick one idea and start there. Frame your mirror with cedar, swap in a peppermint-striped shower curtain, or tie a velvet bow on the door—each brings that classic red-and-white warmth, a touch of fresh green, and the soft glow that makes even a tiny bathroom feel festive and finished. You don’t need more space; you need the right focal points and a tight palette.
The truth is, Christmas bathroom decor works best when it’s simple, repeatable, and a little bit joyful to use every day. Crisp white ceramics, candy-cane ribbons, warm micro lights, and a hint of evergreen—these are the pieces that make brushing teeth feel like a small celebration. Start small, trust your eye, and enjoy that moment when the mirror reflects back a room that finally feels merry.
You’ve got this. Ten minutes, one corner, and a ribbon. Your tiny bathroom is about to smile back at you.

About the Author

Krisztina P.Rendes, Founder of Home Style Vibes
Founder of Home Style Vibes
Krisztina Puskásné Rendes created Home Style Vibes as a cozy-modern lifestyle space where homemaking meets inspiration. Her goal is to help women create beautiful, organized, and peaceful homes they truly love — without overwhelm. You’ll find here heart-driven content on home decor, cleaning tips, easy family recipes, organization and decluttering, DIY home projects, plants, and seasonal ideas — all designed to bring more calm, comfort, and style into everyday life.