
5 Fall Photo Booth And Photoshoot Setup Ideas For Stunning Autumn Pictures
You want scroll-stopping, cozy-bright fall photos that feel like a golden hug — not another awkward snapshot in a dim corner. You love harvest colors, plaid throws, warm candlelight, and pumpkins galore… but lighting, clutter, and “where do I even put this?” keep tripping you up. These 5 fall photo booth and photoshoot setup ideas fix all that with easy, in-home scenes designed for rich color, layered texture, and flattering warm light — all on a realistic weekend timeline and under a reasonable budget cap per setup. Expect warm amber glow, saturated rust and burgundy, playful fall props, and styling tricks that make your pictures look Pinterest-famous without living inside a showroom.
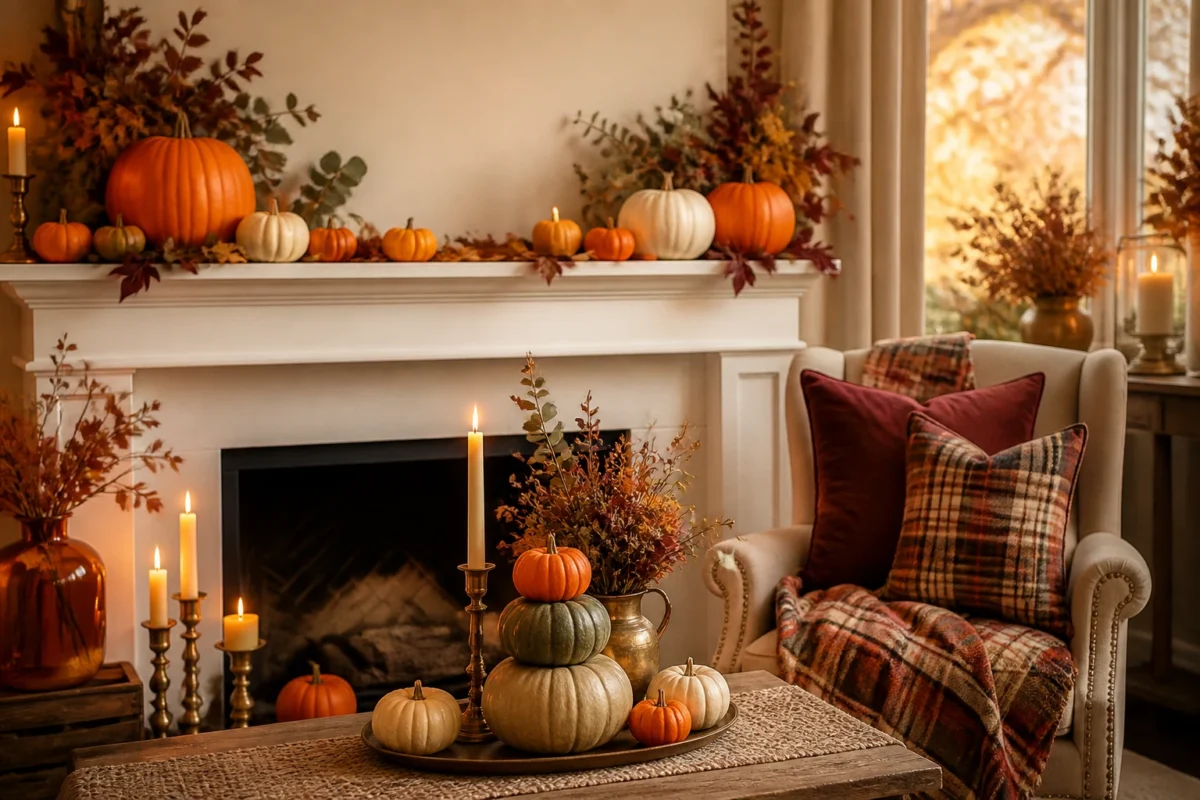
We’re talking real homes: living rooms, dining tables, kitchen islands, mantels, and entryways turned into cozy-bright autumn backdrops. If you’ve been craving that harvest-abundant mood with flickering candles, plaid pillows, and pumpkin stacks that actually read on camera, this guide is your shortcut. Five ideas, zero guesswork, max delight. Perfect for family pictures, Friendsgiving selfies, and content creators who want a polished seasonal vibe from September through Thanksgiving.
1) Harvest Pumpkins With Amber Candle Glow On The Living Room Mantel
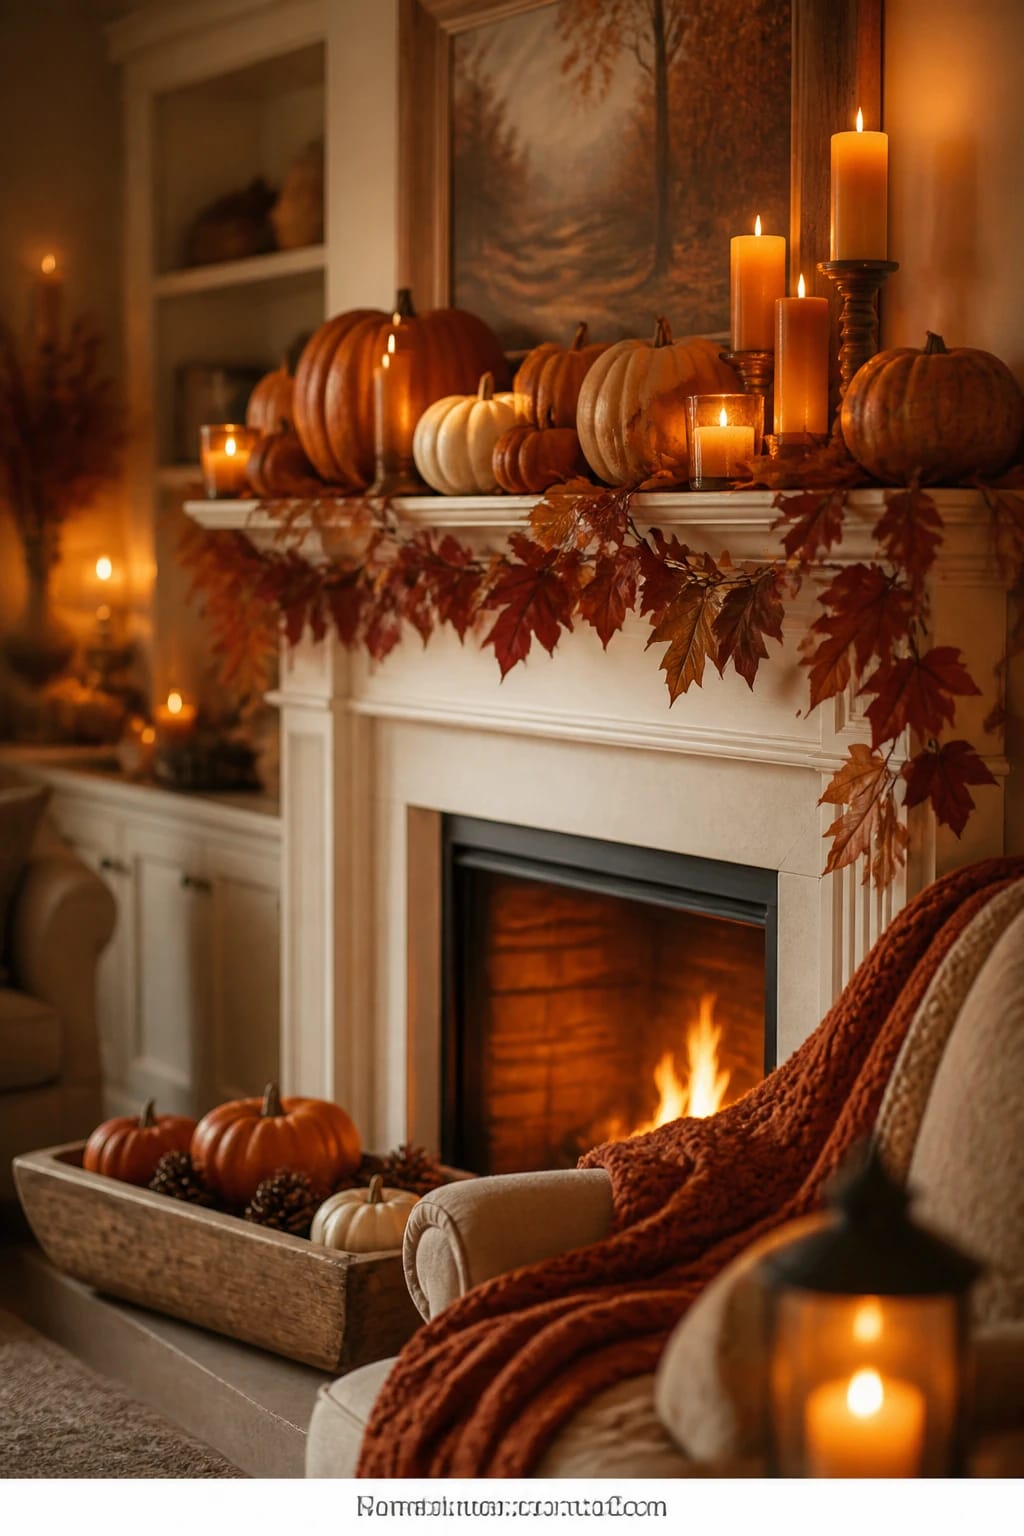
We’ve all been there: you line up a few pumpkins on the mantel, add a random garland, and somehow the photo reads… flat. The secret isn’t more stuff — it’s layered height, focused amber lighting, and a rust-and-burgundy story that carries across your whole living room. This fall photo booth idea turns your mantel into the heart of cozy-bright autumn, so every shot hums with warmth and depth.
The mood is golden and generous — think amber candle glow flickering against creamy and rust-toned pumpkins, a leafy garland draped with intention, and plaid pillows echoing the colors on the sofa nearby. It works because the mantel gives you a natural stage: easy to style, easy to light, and easy to keep kid-friendly by clustering the open flames inside hurricane glass (or using flickering LED pillars). Living rooms also give you space for foreground and background layers: a coffee table with a small pumpkin bowl, a throw on the armchair, and your glowing mantel anchoring the shot.
Lighting matters most here. Place candles at varied heights to create a warm halo that lifts faces and adds dimension. Sprinkle in two small lamps on either side of the room with warm bulbs (2700K) and dim them to a soft glow — not bright, just enough to fill shadows. Your photos end up with that cozy, wrapped-in-a-blanket feeling, which is exactly what this fall photo booth setup promises.
Photographs love this because saturated rust, burgundy, and warm metallics read beautifully next to creamy pumpkins and amber glass. The garland adds a pleasing arc line across the frame, and staggered heights keep it dynamic. Add one reflective surface — a small gilded frame or a brass mirror — to catch the candlelight for an extra spark.
Variations:
- Budget-friendly: Use a mix of thrifted brass candlesticks and LED tapers; craft a faux-leaf garland with floral wire and clearance stems.
- Small-space: Halve the scale — three pumpkins total, one short garland length, and lean art instead of hanging it to avoid holes.
- September-to-Thanksgiving transition: Start with greens and softer oranges in September, add deeper burgundy stems by late October, and finish with a few wheat sprigs for Thanksgiving.
Budget Breakdown:
- Faux leaf garland with berries: $25–$60
- Assorted pumpkins (mix of real and faux): $20–$80
- Brass candlesticks or LED pillars: $25–$70
- Amber glass hurricanes or votives: $15–$45
- One thrifted gilded frame or small mirror: $10–$40
Total Estimated Cost: $95 – $295
Best For: Traditional or modern family rooms with a standard-width mantel. Works beautifully for family portraits, holiday cards, and candid sofa-side selfies from early fall through Thanksgiving.
Key Design Elements:
- Main seasonal props: Mixed pumpkins, faux leaf garland, amber glass votives
- Color palette: Rust, burgundy, warm cream, antique brass
- Lighting strategy: Candle clusters with warm table lamps on dimmers
- Textile layers: Plaid throws, nubby knit pillows in complementary tones
- Natural elements: Wheat sprigs, eucalyptus, dried seed pods
- Accent details: Brass frames, small gilded mirror, shallow wooden bowl on coffee table
How To Recreate This Look:
- Start with a clean mantel; lean one gilded frame or mirror slightly off-center.
- Add a leaf garland, letting one end drape for a soft curve that photographs well.
- Layer 3–5 pumpkins in graduating sizes, alternating textures (matte, slightly glossy, velvet faux) for depth.
- Place candlelight in threes: one pillar, one taper, one votive cluster — repeat on the opposite side, not perfectly symmetrical.
- Style the room to echo the mantel: plaid throw on the sofa, a wooden bowl with mini pumpkins on the coffee table, and warm bulbs in any lamps.
Why This Looks Expensive: Repetition of brass and amber across the room reads intentional and elevated, while asymmetrical balance on the mantel feels designed rather than decorated.
Watch Out: Don’t line items like soldiers. A straight row of identical pumpkins flattens the photo. Stagger heights and pull a few pieces slightly forward for a layered look.
Pro Styling Tip: Slide a tiny votive just behind a pumpkin so its rim catches the glow — that rim light photographs like magic.
2) Plaid Blanket Backdrop With Golden String Lights On The Dining Table
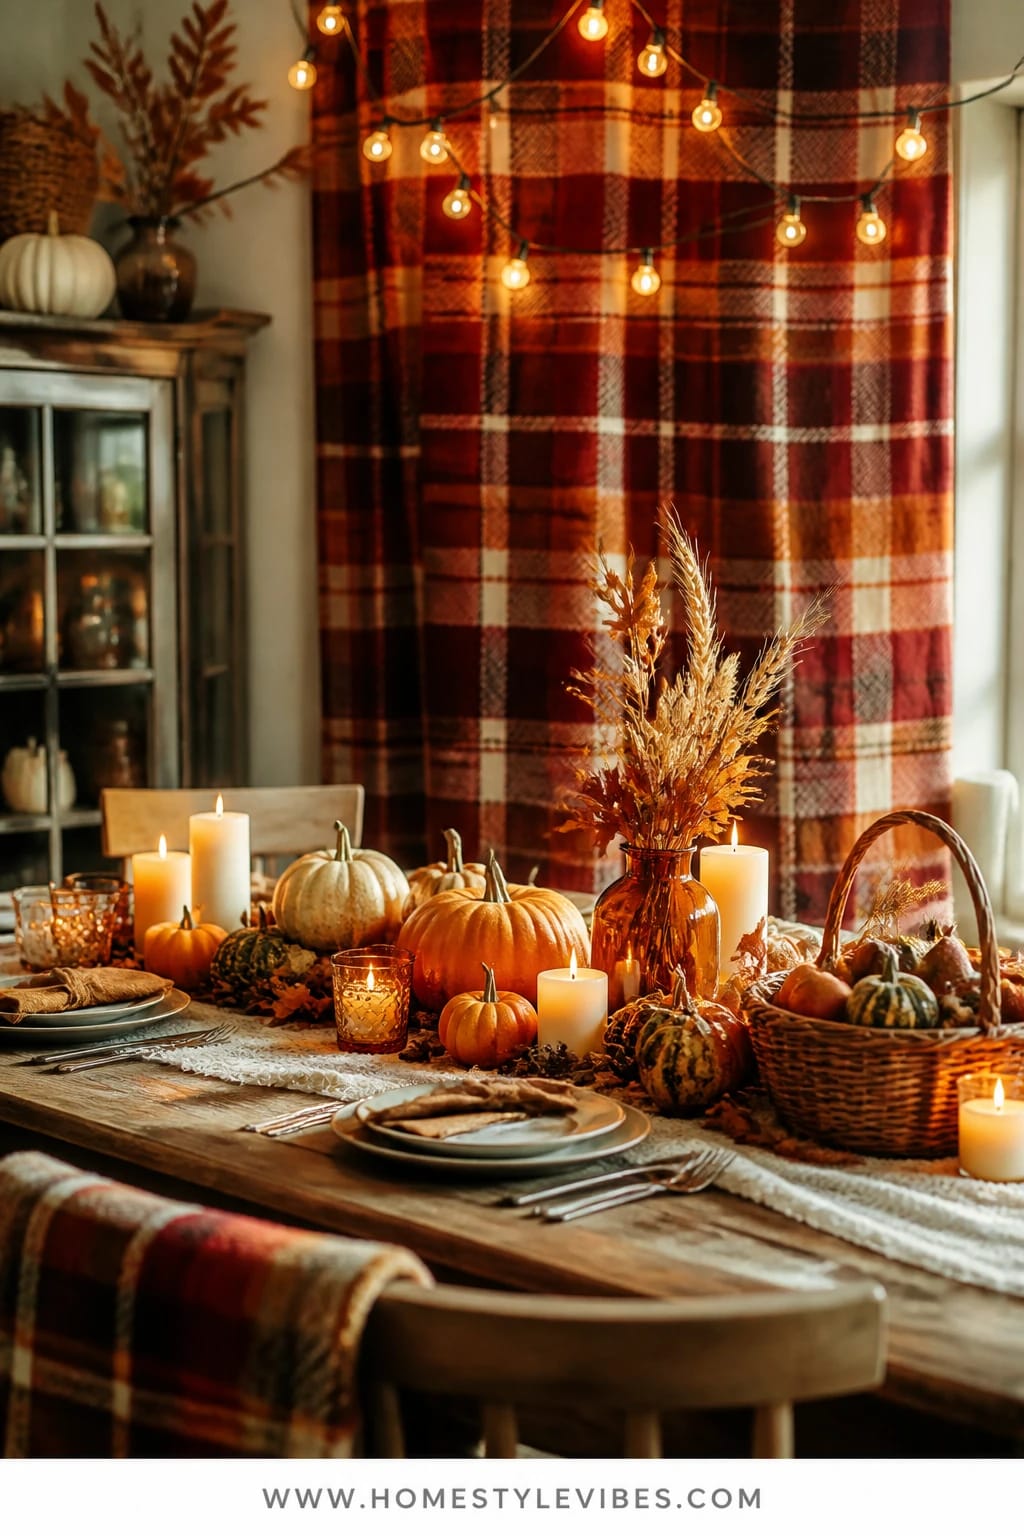
It’s that one corner that always feels off: your dining table looks cute in person, then the pictures turn muddy. Here’s why this works better — a plaid blanket becomes a bold, textural backdrop (yep, behind the table), and a gentle canopy of golden string lights adds the warm, even glow your camera craves. Together, they frame the faces at the table and the harvest spread in the middle with rich, saturated fall color.
The mood leans cheerful harvest dinner: saturated plaids in rust and burgundy, twinkling lights, and a tabletop runner layered with eucalyptus, pears, and a few squat pumpkins. It’s friendly, family-proof, and super reusable. When you’re done, the blanket goes back to the sofa, the lights get wound around cardboard and stored, and the pumpkins turn into pie or soup. Also, your guests look amazing. Golden micro-lights act like tiny softboxes, smoothing skin and intensifying those warm tones.
For photos, the depth created by foreground place settings, a midline runner, and that plaid wall moment behind the table gives your camera three distinct layers. Translation: instant “my dining room is a magazine” energy. If you’ve ever been burned by a sad overhead light casting harsh shadows, this setup saves the day — the string lights and a couple of side lamps keep things gentle and glowy.
Variations:
- Budget-friendly: Use a thrifted plaid blanket or even a large scarf pinned as the backdrop; choose one strand of micro-lights instead of two.
- Small-space: Style half the table for a tight shot; move the backdrop closer for a cropped, cozy frame.
- Make-ahead: Pre-tape the string-light swag to removable hooks the day before; set the runner components on a tray so you can drop them into place.
Budget Breakdown:
- Plaid blanket or oversized scarf (backdrop): $15–$60
- Warm white micro-string lights (plug-in preferred): $12–$35
- Table runner or layered kraft paper roll: $8–$25
- Mixed pumpkins and pears: $15–$40
- Greenery stems (eucalyptus, olive): $10–$30
Total Estimated Cost: $60 – $190
Best For: Open dining areas or breakfast nooks; perfect for Friendsgiving group photos and candid dinner sequences from dusk to evening.
Key Design Elements:
- Main seasonal props: Plaid textile, mini pumpkins, pears
- Color palette: Rust, burgundy, deep gold, fresh green
- Lighting strategy: Canopy of string lights plus two side lamps with warm bulbs
- Textile layers: Plaid backdrop, neutral runner, linen napkins
- Natural elements: Fresh pears, eucalyptus stems, rosemary sprigs
- Accent details: Matte ceramics, wood chargers, simple glass tumblers
How To Recreate This Look:
- Start by hanging the plaid blanket behind the table using removable hooks and binder clips (hidden at the top corners).
- Add a loose swag of micro-lights across the top, letting a few strands drape like a smile.
- Layer the table with a runner or a strip of kraft paper; crinkle it lightly for texture.
- Place pumpkins and pears down the center, tucking greenery between them for soft edges.
- Set simple place settings with one warm-toned element (rust napkin rings, amber water glasses) to tie the palette together.
Why This Feels Designer: The statement plaid backdrop creates a strong vertical plane of pattern balanced by a restrained, textural table — that tension reads curated, not cluttered.
One Thing To Avoid: Don’t mix cool white lights with warm bulbs. The color clash turns skin tones sallow. Keep everything in the 2200–2700K zone.
Pro Styling Tip: For photos, angle your camera slightly off-center to catch the light swag’s curve and the runner’s diagonal — those gentle lines guide the eye through the frame.
If you’re feeling the vibe but not the plaid, keep scrolling — we’ve got a clean kitchen-island moment that’s all about playful abundance.
3) Maple Leaf Garland And Warm Edison Glow On The Kitchen Island
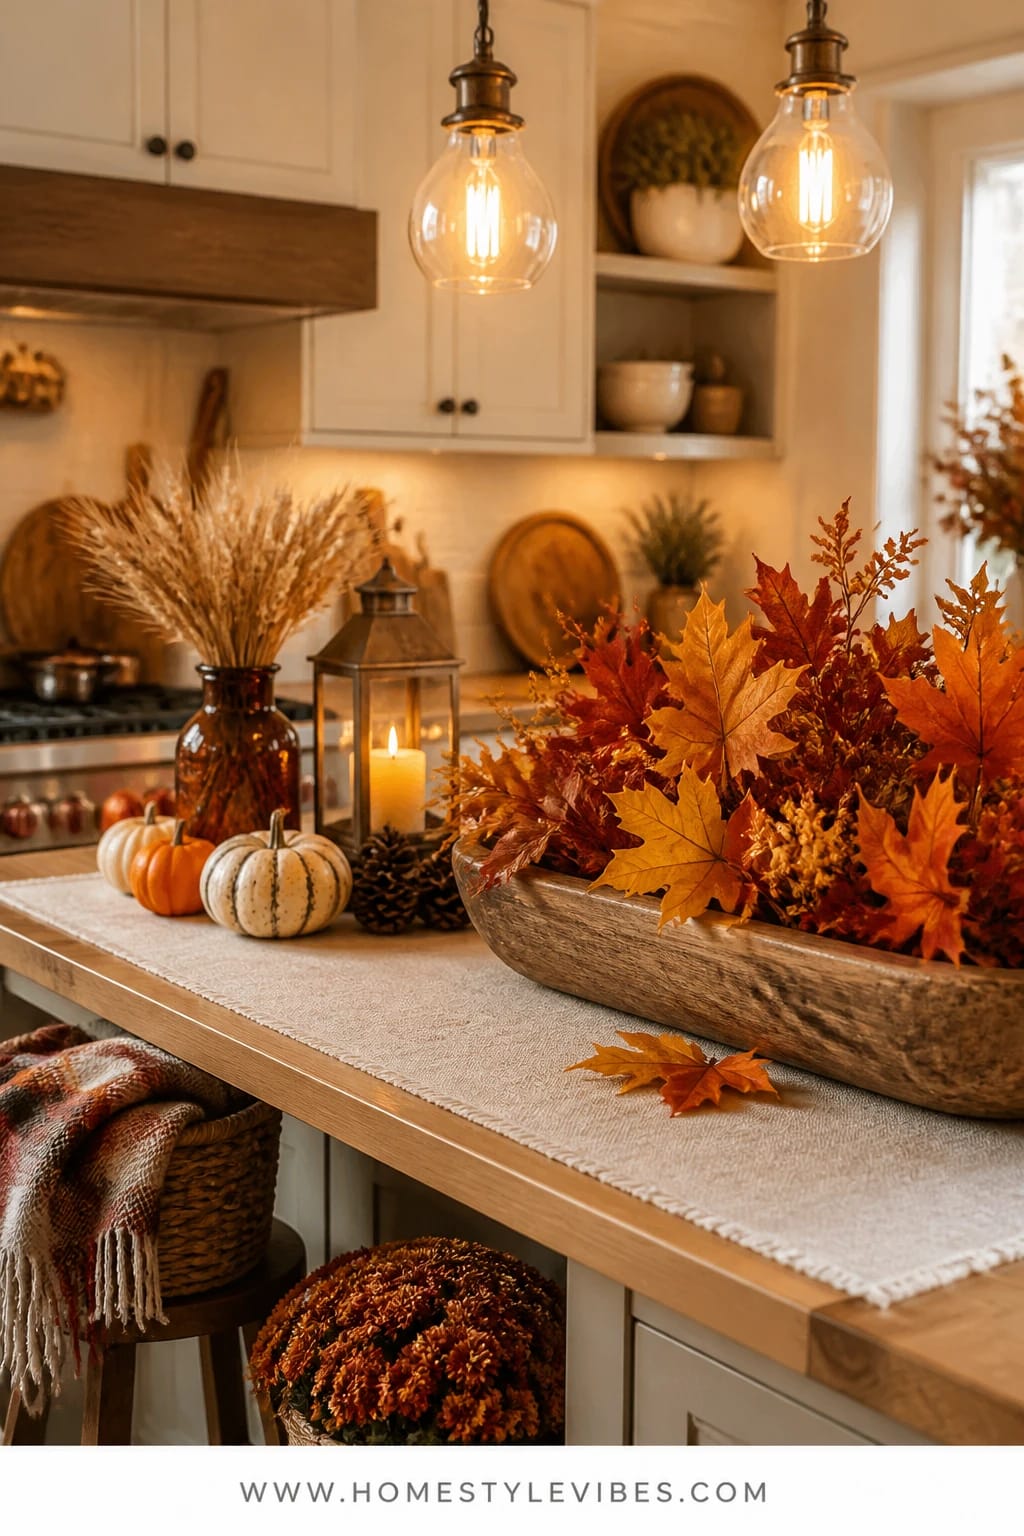
You’ve tried styling the kitchen before, but it still looks like “functional chaos” in photos — mail pile, random spoon rest, that one ugly fruit bowl. This fall photo booth idea corrals the chaos into a beautiful, photogenic centerpiece right on your island. Use a maple leaf garland in rich rusts and golds, then layer in warm Edison bulbs overhead to create that golden-hour kitchen feeling, even on a cloudy day.
The mood is lively, cheerful, and a little bit harvest market. Picture a wooden board anchoring a cornucopia of mini pumpkins, honeycrisp apples, cinnamon sticks in a small jar, and a ceramic pitcher with wheat. Overhead, Edison bulbs cast an amber glow that flatters skin and gives food a gourmand sheen. The island becomes your stage for selfies, kids’ cookie-decorating shots, and those hands-in-the-dough reels (yes, the ones that get saved ten thousand times).
Why it works: central placement, strong color story, and height variation without cluttering prep space. The garland acts as a soft border that hides outlets and appliance cords along the back of the island. Plus, everything lifts off in one go at mealtime — set it on a tray so dinner doesn’t compete with your styling.
Photographically, the island provides foreground depth with an easy angle from the kitchen entrance. Warm bulbs (try 2400K) give the glossy apples and ceramic surfaces that magazine-friendly warmth. If your fixtures dim, even better; dial them low, and add two tiny votives at the edges for sparkle.
Variations:
- Budget-friendly: Faux leaves from the craft store wired into a DIY garland; swap Edison bulbs for warm filament-style LEDs.
- Small-space: Style a half-board vignette along one corner; keep the rest clear for everyday life.
- Make-ahead: Pre-style the board in the morning; store it in the pantry and drop it onto the island before guests arrive.
Budget Breakdown:
- Faux maple leaf garland: $12–$35
- Warm filament-style bulbs (pack of 3): $18–$40
- Wood serving board or tray: $20–$60
- Mini pumpkins and apples: $10–$25
- Ceramic pitcher with wheat: $15–$45
Total Estimated Cost: $75 – $205
Best For: Family kitchens with an island or peninsula. Ideal for daytime baking photos, cozy snack spreads, and everyday autumn content from snacks to cider nights.
Key Design Elements:
- Main seasonal props: Maple leaf garland, mini pumpkins, wheat
- Color palette: Rust, golden yellow, apple red, cream
- Lighting strategy: Warm Edison overheads plus tiny votives for highlights
- Textile layers: Striped or plaid tea towel, knit hot pad under the pitcher
- Natural elements: Apples, wheat, cinnamon sticks
- Accent details: Ceramic pitcher, wood board, glass jar
How To Recreate This Look:
- Start by clearing the island completely — wipe surfaces for a subtle sheen that catches light.
- Add a long wood board or tray; place the ceramic pitcher at one end for height.
- Layer the maple leaf garland along the back edge; tuck leaves under the board’s rim to anchor.
- Pile mini pumpkins and apples down the board; add a small jar of cinnamon sticks for scent and texture.
- Turn on warm filament bulbs and, if possible, dim to 60%; place two votives just off the board to create glints.
Why This Reads High-End: The curated color trio (rust, cream, apple red) and disciplined placement on a single board look styled on purpose. Nothing floats; every item belongs.
The Most Common Mistake: Overloading the board. Leave visual breathing room between clusters; crowded props photograph like clutter.
Pro Styling Tip: For flat-lays, pull the board near a window, kill overheads, and use only side light plus one votive — the texture of leaves and apples will pop.
Feeling energized? Next up is the entryway — a tiny zone with huge photo payoff and the easiest place to corral guests for that first “we’re here!” selfie.
4) Wheat Sheaves In Warm Gold Beside The Entryway Console
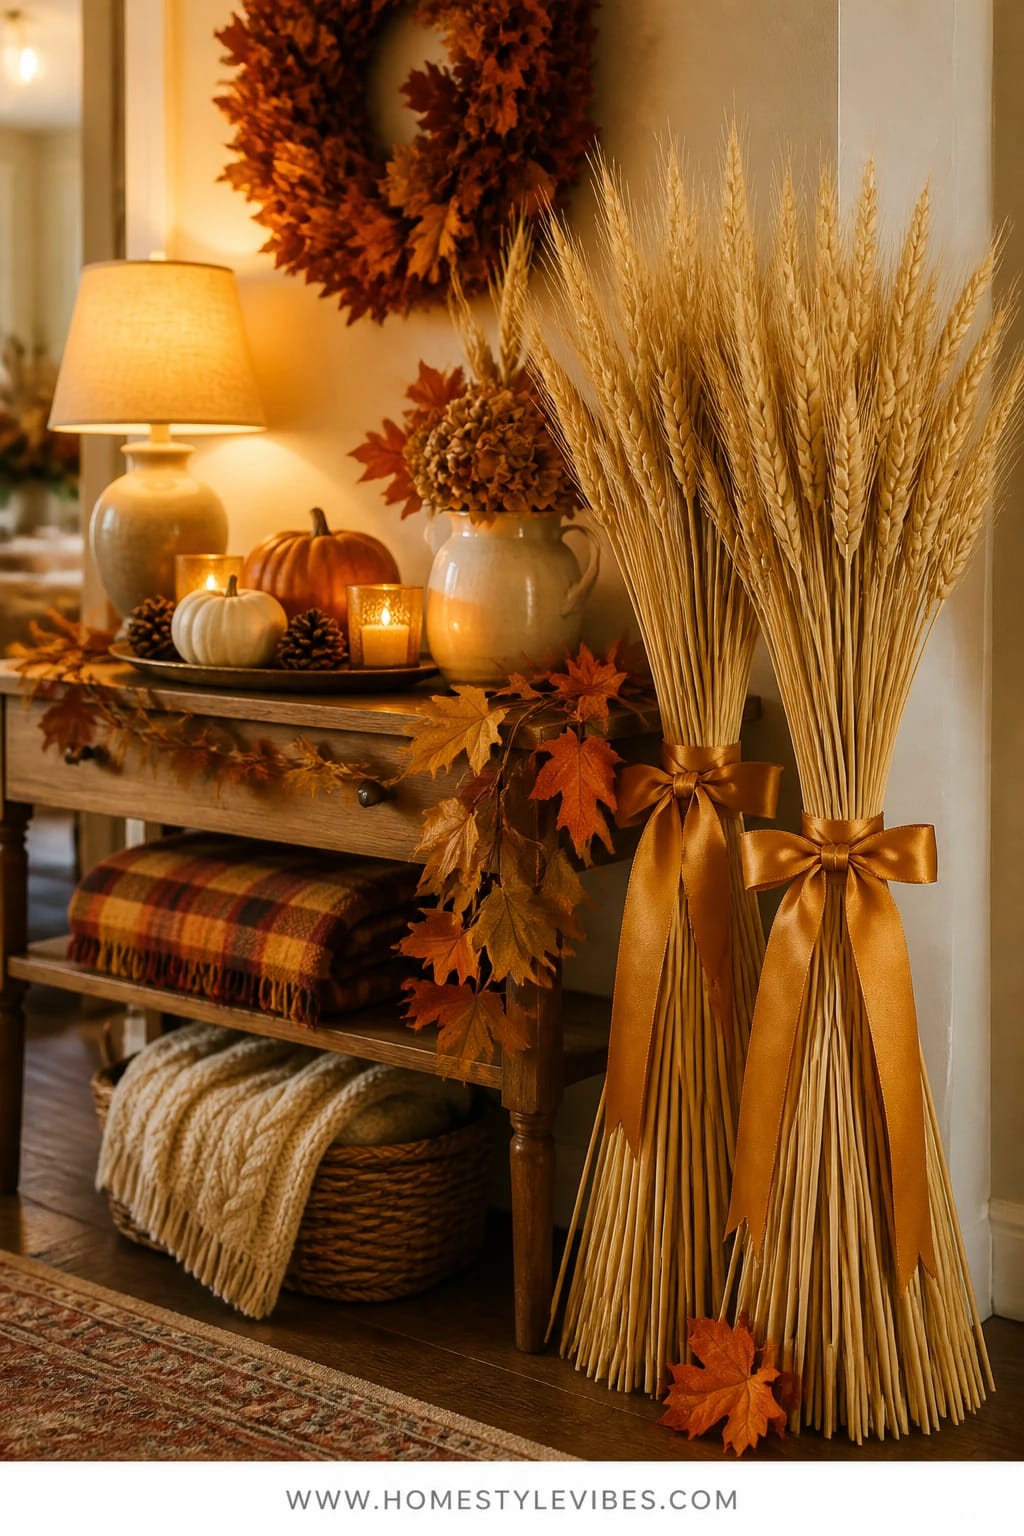
Entryways can feel like a traffic jam: keys, backpacks, stray mail, nowhere to set a pumpkin without it rolling off. This fall photo booth idea treats your entry console like a mini set — anchored by tall wheat sheaves tied in golden ribbon, a warm-toned lamp, and a curated tray. It’s simple, sculptural, and wildly photogenic as people come and go.
The vibe? A cheerful welcome soaked in honeyed light. Wheat brings height and movement, catching lamp glow in a way leaves can’t. Add a low arrangement of caramel and cream pumpkins, a bowl for keys that doesn’t ruin the shot, and one framed art print in harvest colors. It’s also the lowest-effort cleanup — dust occasionally, swap out a candle, and done.
Why this works in real homes: entryways are small, so a few large-scale elements calm the visual noise. A single lamp with a warm bulb and a soft-glow shade makes everything look expensive, and because the surface is shallow, you’ll naturally edit out clutter. For photos, the contrast of tall wheat and low pumpkins reads as a balanced composition without fuss.
I tried this last October with thrifted wheat bundles and a matte brass lamp. Honestly, I couldn’t believe the difference. Everyone paused in the entry for a selfie, and the lamp did half the work. Pro tip I learned the hard way: keep wheat away from heat vents unless you enjoy confetti-level shedding.
Variations:
- Budget-friendly: DIY wheat sheaves with dollar-store wheat picks wrapped around a tall branch; tie with jute twine and tuck into a tall vase.
- Small-space: One wheat bundle plus a pair of pumpkins — skip the tray, use a compact bowl for keys.
- From September to Thanksgiving: Start with more greens and a small gourd; deepen into caramel/burgundy tones by late October; add a gratitude note card holder by November.
Budget Breakdown:
- Wheat sheaves or tall faux wheat stems: $18–$55
- Warm brass or ceramic table lamp: $40–$120
- Assorted small pumpkins: $10–$30
- Tray or shallow basket: $12–$45
- Framed art print (digital download + frame): $15–$50
Total Estimated Cost: $95 – $300
Best For: Narrow entryways, transitional and traditional homes. Excellent for quick “arrival” photos, kid costume snaps, and pet portraits (if they’ll sit for two seconds).
Key Design Elements:
- Main seasonal props: Wheat sheaves, mini pumpkins
- Color palette: Warm gold, caramel, cream, soft rust
- Lighting strategy: Single warm lamp with opaque shade for glow
- Textile layers: Woven tray, small knit pumpkin or felted acorn bowl
- Natural elements: Wheat, dried grasses, a few preserved oak leaves
- Accent details: Brass lamp base, simple black or wood frame, ceramic catchall
Why This Looks Intentional: The vertical-to-horizontal contrast (tall wheat vs. low pumpkin line) and a tight gold-caramel palette make the styling feel composed, not random. Your eye knows where to rest.
How To Recreate This Look:
- Start by placing the lamp on one end of the console; add a warm 2700K bulb.
- Add wheat sheaves in a tall vase or tie them neatly and lean them against the wall, overlapping the lamp base slightly.
- Center a tray; place a catchall bowl on it for function that still photographs clean.
- Line up a trio of pumpkins along the tray’s front edge; vary size and color within your palette.
- Lean framed art behind the tray to connect all elements and hide outlet plates or thermostat nubs.
Don’t Do This: Avoid tiny, scattered objects (acorns, micro-pinecones) without containment. They look messy in photos and slide everywhere near the door.
Pro Styling Tip: Angle the lamp slightly so the shade opening doesn’t glare at the camera — feather the light across the wheat for that soft, golden halo.
Feeling brave? Let’s head to the sofa zone for a color-forward setup that turns Sunday lounging into your favorite fall photos yet.
5) Cranberry Velvet Pumpkins Under Warm Lamp Light On The Sofa Corner
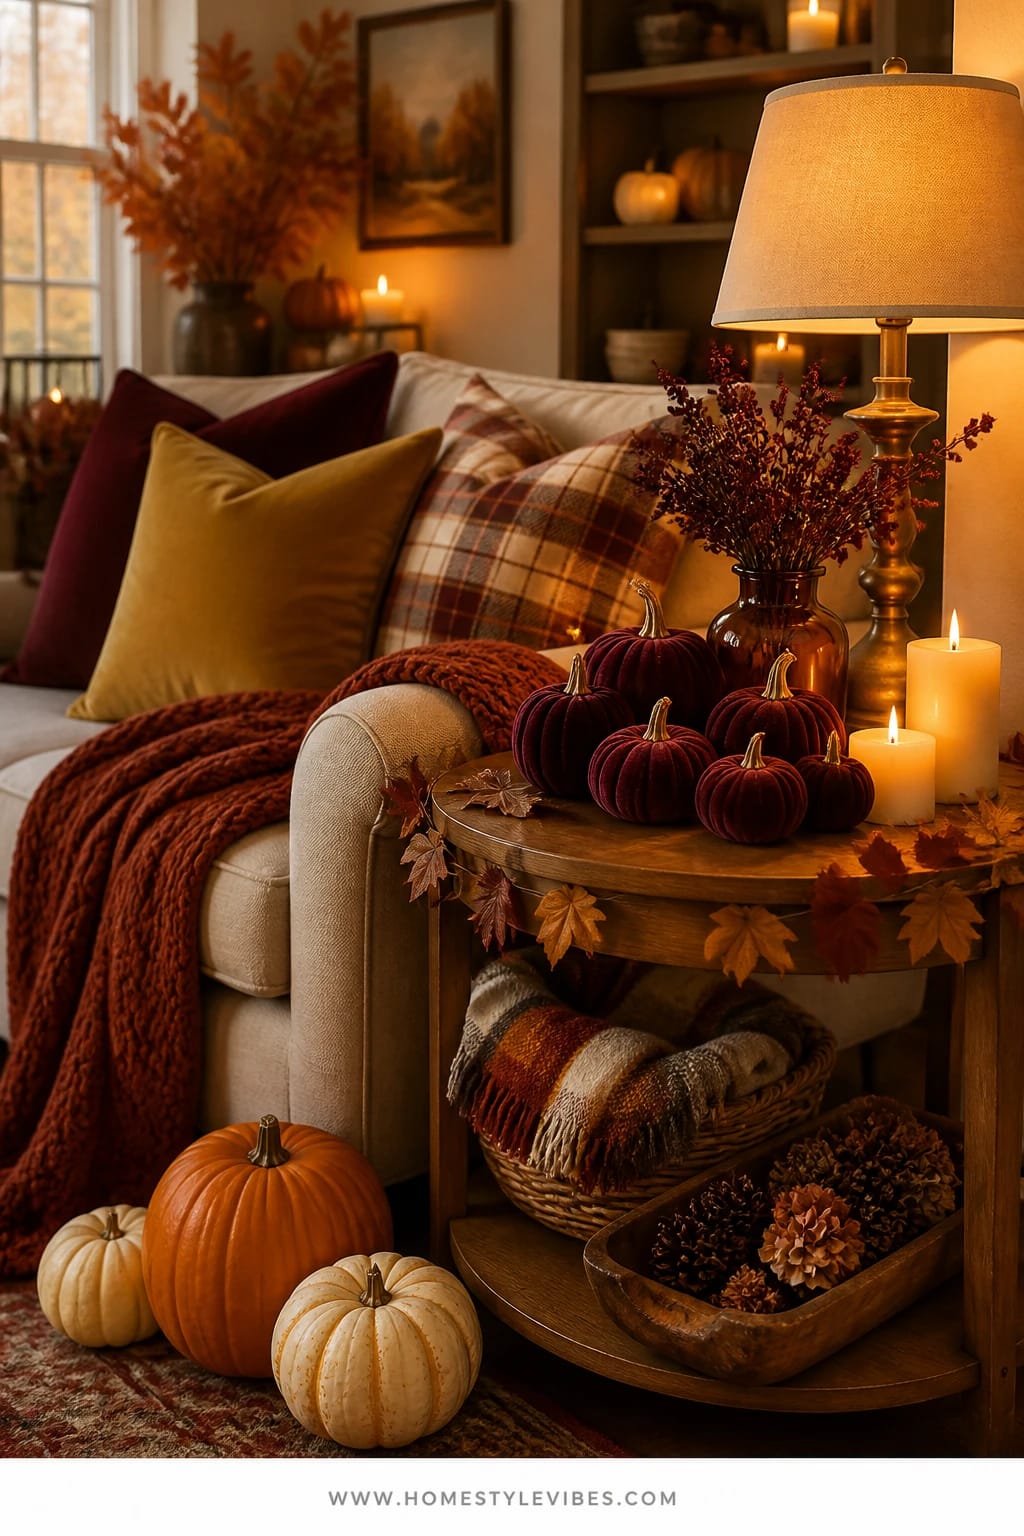
You love the couch for photos — it’s comfy, everyone gathers there — but the background always looks tired. This fall photo booth scene leans into plush texture: cranberry velvet pumpkins, a rust knit throw, and layered pillows under a warm lamp. It’s the “cozy bright” cliché, but dialed precisely so your camera loves every inch.
The mood is indulgent and inviting: soft fabrics, saturated cranberry and rust, and a lamp that pools buttery light in the corner. Try a round side table with a stack of books and one candle in amber glass. It reads polished, lived-in, and very snuggle-me-with-cider. Also, zero risk of the “sad half-deflated” real pumpkins by the heat vent — velvet pumpkins keep their shape and don’t mind a warm room.
Why it works: the sofa corner frames people naturally and gives you height variance with pillows and throws. Layered textures keep a single-color story interesting; cranberry carries the drama, while rust and cream play supporting roles. When the light falls just right — lamp on, window shades half-drawn — you get soft highlights on velvet and a glow that flatters everyone.
A friend of mine bought three different garlands for her living room before realizing the problem was lighting. When she swapped the cool bulb in her sofa lamp for a warm dimmable one, the entire corner suddenly looked like a lifestyle shoot. Sometimes the fix is a $9 bulb, not a $90 garland.
Variations:
- Budget-friendly: DIY velvet pumpkins using scrap fabric and rice filling; thrift a lamp and paint the base a matte caramel.
- Small-space: Style one pillow stack, one throw, and a single oversized velvet pumpkin on a book stack — fewer pieces, bigger presence.
- Seasonal glide: Start with cranberry + cream in September, add rust by October, and bring in a subtle plaid pillow for Thanksgiving weekend.
Budget Breakdown:
- Velvet pumpkins (set of 3–5): $18–$55
- Rust knit throw: $20–$60
- Coordinated pillow covers: $24–$80
- Side table candle in amber glass: $10–$25
- Warm dimmable bulb: $9–$18
Total Estimated Cost: $81 – $238
Best For: Family rooms and dens where you already hang out. Great for book-club nights, cozy movie selfies, and content creation that needs a softer, luxe background.
Key Design Elements:
- Main seasonal props: Velvet pumpkins, knit throw
- Color palette: Cranberry, rust, cream, touches of amber
- Lighting strategy: One warm lamp and window light feathered through a sheer
- Textile layers: Velvet, chunky knit, linen or boucle pillows
- Natural elements: Dried leaves in a bud vase, a few cinnamon sticks in a dish
- Accent details: Amber glass candle, stacked hardcover books, ceramic mug
How To Recreate This Look:
- Start by clearing the side table; add a warm bulb to the lamp and dim to a cozy level.
- Layer the sofa with 2–3 pillow covers in cranberry, cream, and rust; vary textures deliberately.
- Fold the rust knit throw on the arm, letting one corner puddle slightly for movement.
- Place velvet pumpkins: one on the side table, one tucked at the pillow corner, and one on a book stack.
- Finish with an amber glass candle and a ceramic mug for scale and a lived-in feel.
Why This Feels Designer: A tight color story anchored in cranberry and rust plus unapologetically plush textures reads luxe. It’s restraint with richness — the designer sweet spot.
Watch Out: Don’t scatter too many small pumpkins across the seating; they become clutter and end up on the floor five minutes into movie night.
Pro Styling Tip: When photographing, angle the lamp shade just out of frame so you see the glow but not the bulb; the fall-off light makes velvet look dimensional and dreamy.
Remember, this isn’t about recreating a showroom. It’s about building moments that feel like your fall — full of warmth, cinnamon in the air, a plaid throw you actually use, and pictures that make you smile weeks later. If one idea sings to you, start there. You don’t need all five to get stunning autumn pictures at home.
Quick Checklist
- Warm bulbs in the 2200–2700K range for all featured lamps
- 1–2 statement textiles per scene (plaid blanket, rust throw, or linen runner)
- Mixed pumpkin sizes and finishes for depth (matte, real, velvet)
- At least one reflective accent (brass, gilded frame, amber glass)
- Leafy garland or wheat sheaves for height and movement
- One anchored surface per setup (mantel, table, island, console, side table)
- Dimmer or smart plug to fine-tune glow during photos
- Tray or board to corral smaller props and keep shots tidy
- Color story planned in advance: rust + burgundy + cream or cranberry + rust + cream
- A tiny hidden light source (votive or micro-light) for that “why does this look so good?” sparkle
Frequently Asked Questions
How can I keep the budget under control while still getting Pinterest-worthy results?
Choose one anchor per setup and let it do the heavy lifting: a plaid blanket backdrop, a single lush garland, or a velvet pumpkin trio. Then fill in with inexpensive basics — warm bulbs, a wood cutting board, apples, and a stack of books. Reuse across rooms so your colors repeat and feel cohesive.
Real or faux pumpkins and florals — what photographs better and lasts longer?
Real pumpkins photograph beautifully thanks to natural matte skin and subtle color variation, but they can sag near heat sources. Faux holds up for weeks and stores well. I like a mix: real minis and apples for texture, faux garlands and velvet pumpkins for longevity.
My home is small. Which of these photo booth ideas works best without crowding?
The dining table backdrop (Section 2) and the sofa corner (Section 5) scale down easily. Style half the table or one sofa corner, keep your palette tight, and lean art instead of hanging to avoid extra holes. Small spaces love strong color control and fewer, larger pieces.
What about storing all this after fall? I don’t want a craft avalanche in January.
Use two clear bins only: one for textiles and garlands (rolled, not folded, to avoid creases) and one for hard goods (pumpkins, candlesticks). Wrap fragile items in off-season pillowcases. Label by room — Mantel, Kitchen, Entry — so next year’s setup is plug-and-play.
Are candles safe with kids and pets, or should I stick to LED?
If you have curious hands or wagging tails, go LED for tapers and pillars, and reserve real flame for hurricane glass on stable surfaces. The warm bulb temperature and a few amber votives provide the same golden glow in photos without the stress.
When should I start decorating for fall to get the most photo mileage?
Start light in early September with wheat, a few pumpkins, and warm bulbs. Layer in deeper rusts and burgundies by mid-October. Keep your richest textures through Thanksgiving, then swap to winter greens. This pacing keeps photos feeling fresh all season.
Closing Thoughts
Pick one corner — the mantel, the island, the entry console — and build a little world there. Keep your color story warm and focused, layer textures with intent, and let the light do half the work. Cozy bright autumn loves abundance, but it loves thoughtful abundance even more.
The truth is, stunning autumn pictures come from depth, glow, and small, well-chosen details: a brass rim catching candlelight, a cranberry velvet pumpkin nestled into a knit throw, a string of lights softening faces around the table. Start simple, trust your eye, and tweak the light before you buy another prop. You’re closer than you think to photos you’ll be proud to print.
Ready? Turn one lamp warm, fluff that plaid, and place your first pumpkin. You’ve got this — and your fall feed is about to look delicious.

About the Author

Krisztina P.Rendes, Founder of Home Style Vibes
Founder of Home Style Vibes
Krisztina Puskásné Rendes created Home Style Vibes as a cozy-modern lifestyle space where homemaking meets inspiration. Her goal is to help women create beautiful, organized, and peaceful homes they truly love — without overwhelm. You’ll find here heart-driven content on home decor, cleaning tips, easy family recipes, organization and decluttering, DIY home projects, plants, and seasonal ideas — all designed to bring more calm, comfort, and style into everyday life.





