6 Fall Front Yard Landscaping Ideas For A Garden That Shines Through Autumn
You want that storybook front yard in fall—the golden light, the rustle of leaves, cozy lantern glow, mums spilling color along the walk. But your actual lawn? Patchy, tired, a little chaotic by the mailbox. You crave that warm, abundant autumn look you see in those drool-worthy Pinterest shots, yet what you’ve got is a handful of pumpkins that somehow look lonely and a wreath that feels too small. These six front yard landscaping ideas fix that exact frustration—and they’re realistic. With a weekend and under $400 per idea, you can create curb appeal that actually looks finished and keeps shining through September, October, and right through Thanksgiving. Picture rich burgundy mums, amber lanterns, crisp plaid cushions on a garden bench, and the subtle crunch of leaves underfoot. Highly photogenic? Absolutely. Perfect for that golden-hour scroll? Yup.
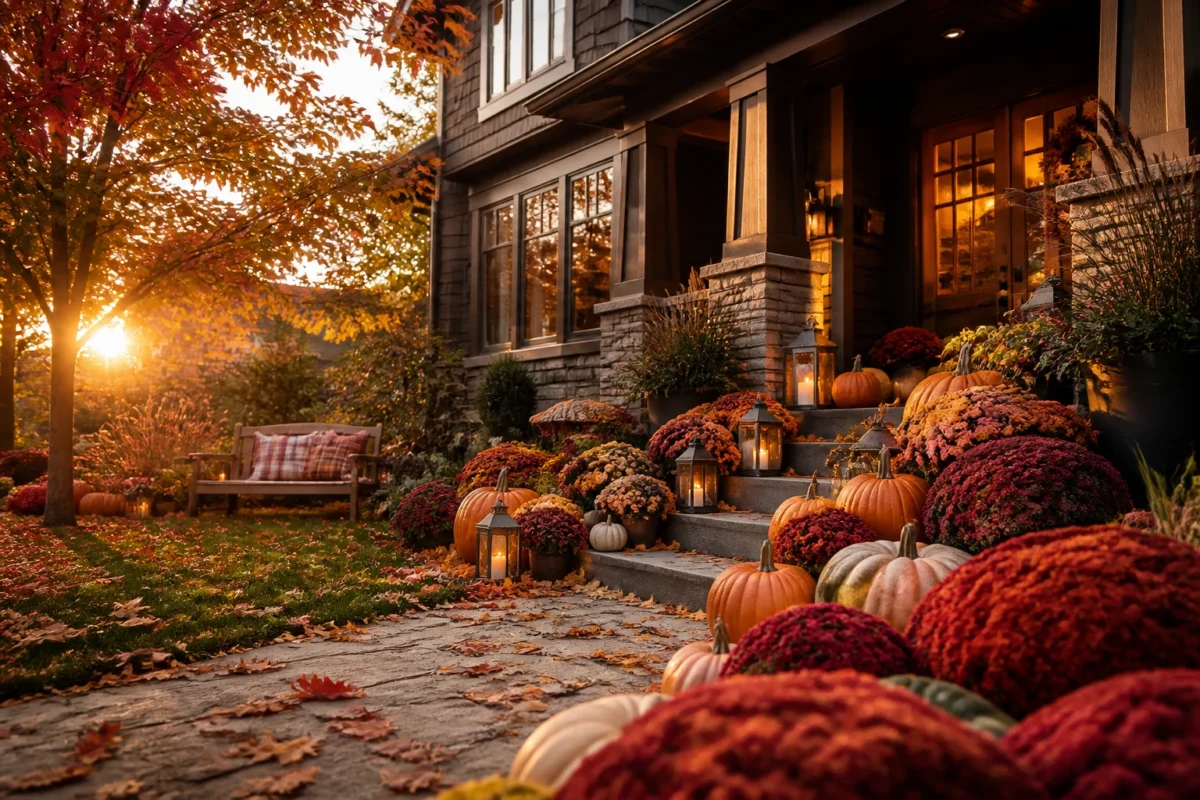
Each idea layers color, texture, and warm lighting in a way that feels lush without needing a professional crew. If you love a cozy, abundant fall garden vibe, these front yard projects are for you—especially if you want it to feel welcoming for trick-or-treaters, weekend guests, and the drive-by “WOW” moment when you pull into your own driveway at dusk.
1. Pumpkin Parade With Golden Lantern Glow Along Porch Steps
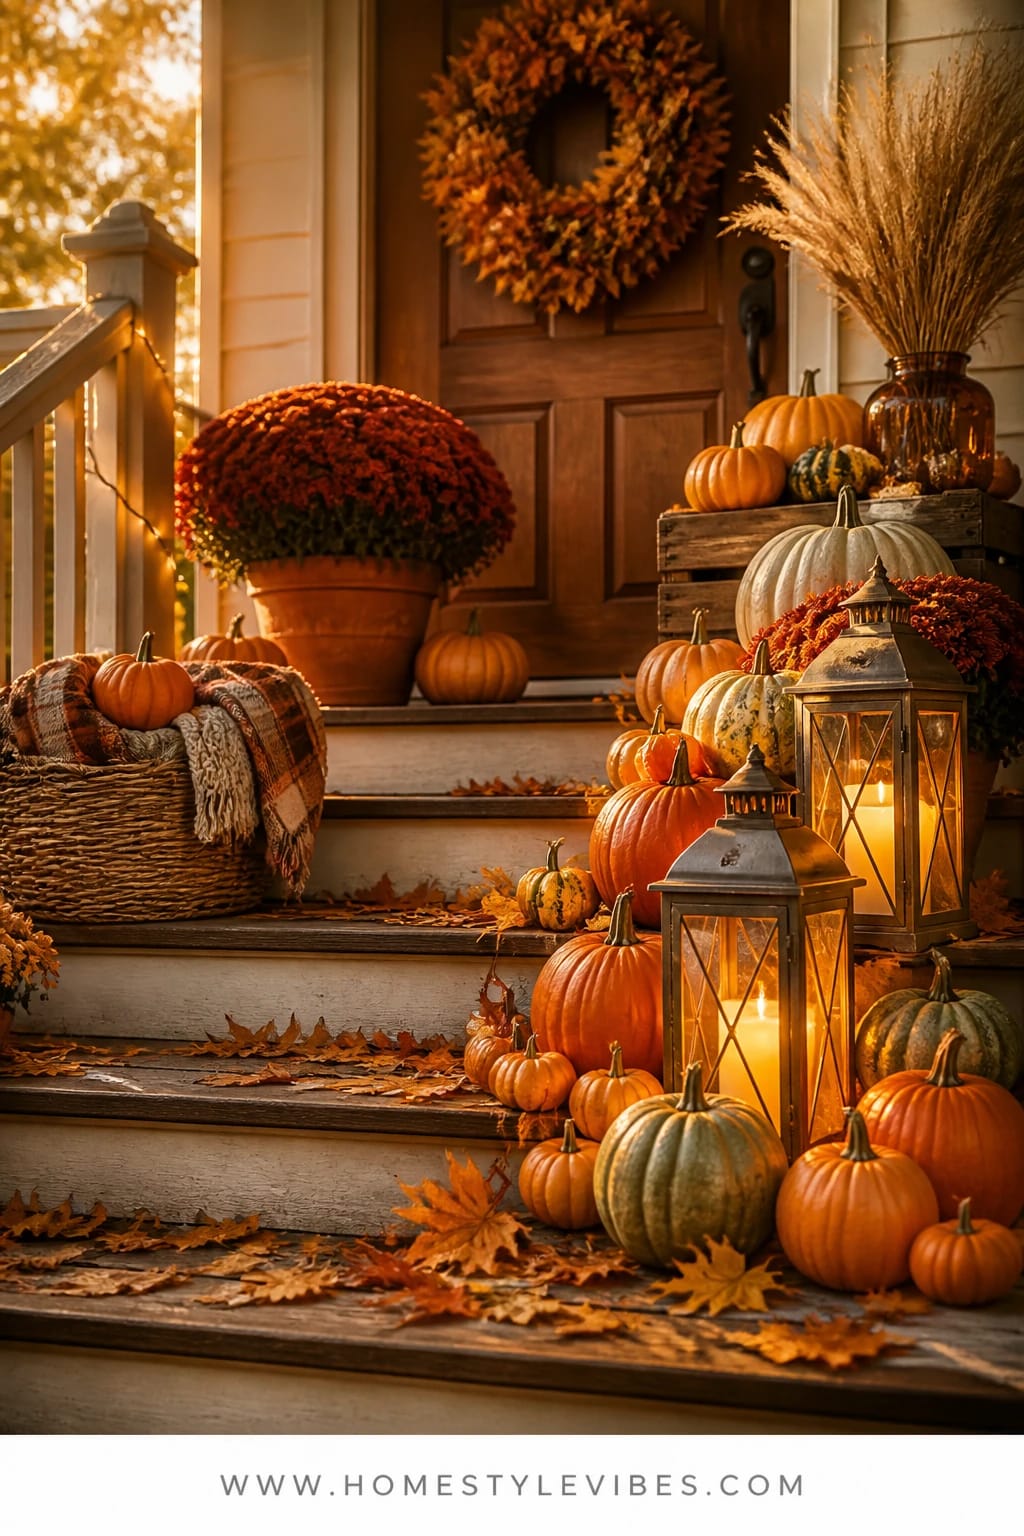
We’ve all been there—your porch steps look flat and empty no matter how many pumpkins you plop down. It’s that one area everyone sees first, yet it reads like an afterthought. This setup creates festive gathering energy with layers of pumpkins and soft golden lantern light guiding the eye up to the front door. Why it works in real homes: it loves repetition, not precision. You don’t need perfect symmetry; you need consistent spacing, a clear rhythm from step to step, and a lighting plan that makes those curves gleam when the sun dips.
The glow matters most. Lanterns with warm white LED candles (or real if you’re feeling the cinnamon-scented drama) add dimension and a calm flicker that makes the space feel finished. Materials stay honest: natural pumpkins and gourds in mixed sizes, woven baskets for height, and a few sprigs of dried wheat for movement. It photographs beautifully because of the depth and the play between glossy pumpkin skin and matte lantern frames. Scatter a few tiny white “Baby Boo” pumpkins near the edges for that layered, editorial feel.
Try two variations. Budget-friendly: use mostly faux pumpkins from last season and add a few real statement pumpkins up front for authenticity. Small stoop version: stack pumpkins vertically in a three-tier basket or two tall urn planters, slipping single LED tea lights in between for a miniature-but-mighty look. Keep this running from early September (lean into caramel and cream tones) through Thanksgiving (add deep green gourds and a handful of pinecones).
Budget Breakdown:
- Mixed real pumpkins and gourds (8–12 pieces): $40–$100
- Metal or wood lanterns (2–4): $60–$160
- LED candles with timers (pack): $15–$35
- Woven baskets or low crates for height: $20–$60
- Dried wheat or grass bundles: $10–$25
Total Estimated Cost: $145 – $380
Best For: Homes with visible porch steps or a low stoop; families who want a warm welcome for guests and a glow that reads beautifully at dusk and on Halloween night.
Key Design Elements:
- Main seasonal props: mixed pumpkins, gourds, dried wheat
- Color palette: burnt orange, creamy white, sage, a touch of rust
- Lighting strategy: golden lantern glow on alternating steps, LED timers for convenience
- Textile layers: none required; optional plaid outdoor rug at the top step
- Natural elements: corn husks, grasses, eucalyptus sprigs
- Accent details: woven baskets, wooden crates, matte black or brass lanterns
How To Recreate This Look:
- Start with a clean sweep of your steps; leaves and debris kill the vibe fast.
- Add lanterns with warm LED candles on alternating steps to create a zigzag of glow.
- Layer pumpkins from largest at the bottom to smaller at the top; keep colors varied but cohesive.
- Place a few baskets or crates on their sides for staggered height and tuck in dried wheat.
- Style with small white pumpkins and pinecones at the edges for a soft, finished frame.
Why This Looks Expensive: Repetition and intentional spacing read as curated, not cluttered. The warm glow bouncing off curved pumpkin skins adds depth like a professional photo set.
Watch Out: Don’t crowd the treads so much that walking becomes awkward. Safety first—and keep candles far from dry grasses if you’re using real flame.
Pro Styling Tip: Stagger heights and pull one pumpkin slightly forward to create foreground depth for photos; your camera will love the dimension.
2. Rust Plaid Throw And Mum Layers On a Garden Bench With Lanterns
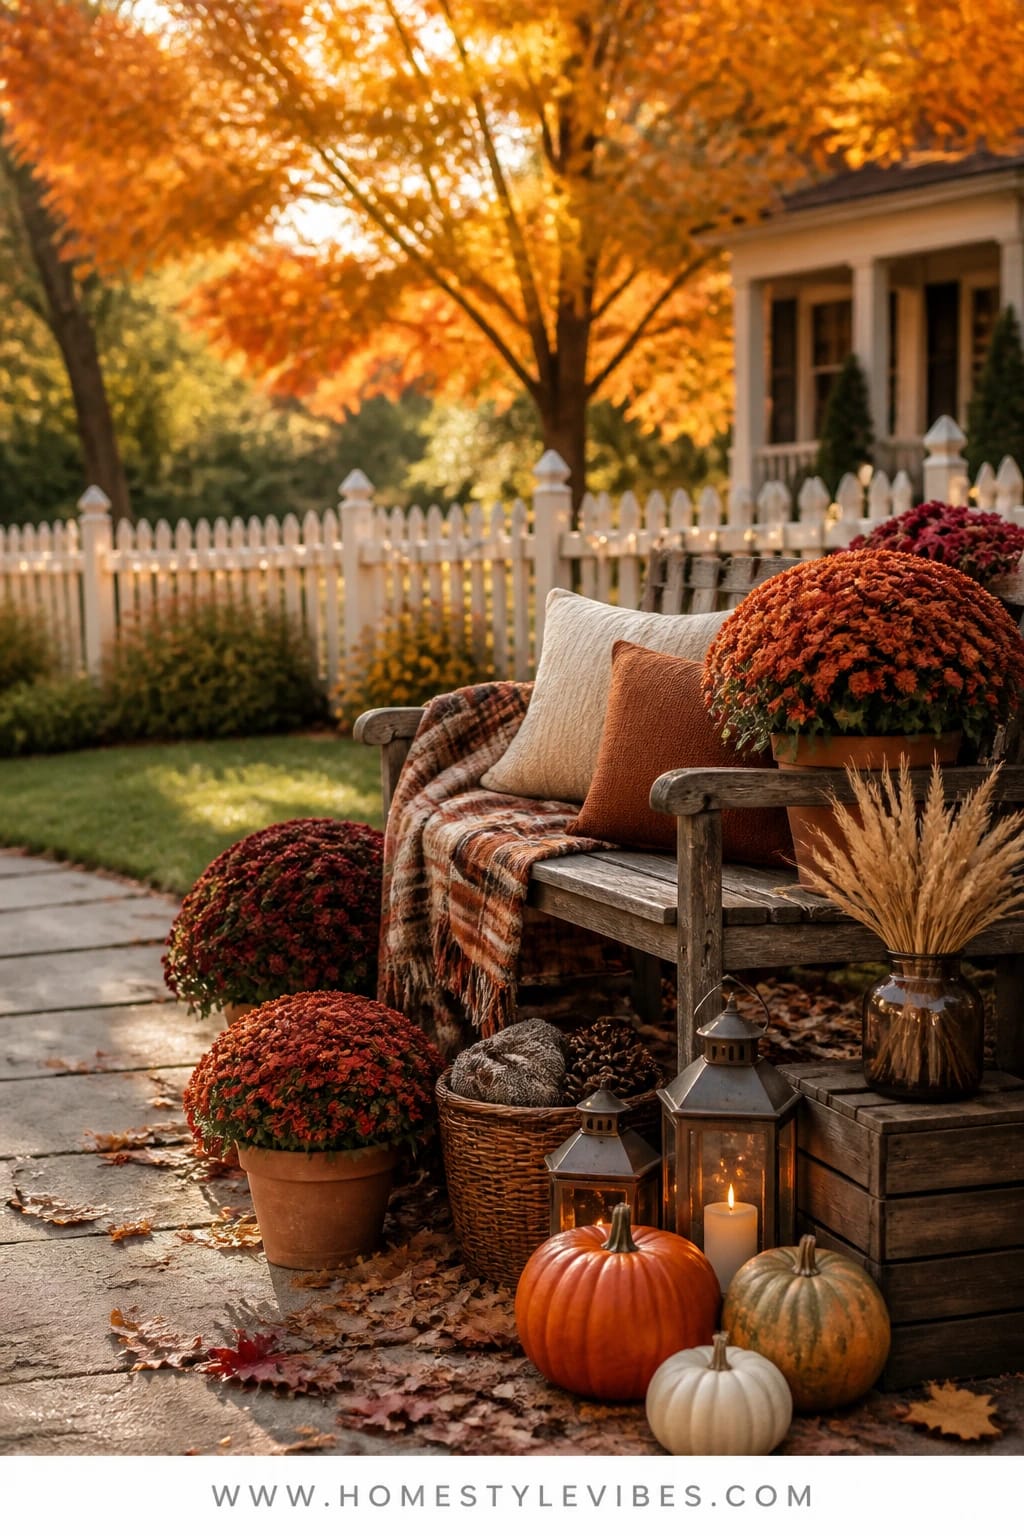
It’s that front yard bench that always looks like a prop instead of a destination. You’ve tried one planter beside it, maybe a pillow, but it still reads sparse. This idea leans hard into texture—plaid, woven baskets, bristly mums in tight domes—and pulls it all together with a couple of lanterns. The mood is cozy cabin warmth, but out where the crisp air hits your cheeks. It works in real homes because benches are natural focal points and these layers make them functional and photogenic without much upkeep.
Light matters, again. A lantern tucked just under the bench seat gives a soft glow that makes the bench feel like it belongs in a magazine. Materials do the heavy lifting: rust plaid throws, chunky outdoor pillows in wheat and burgundy, two to three mum planters in terracotta or aged concrete, and one basket spilling pinecones. Photographs love the plaid texture against the mum petals—the contrast is instant charm.
Variations are easy. Neutral lover? Swap plaid for a cream knit throw and white mums for a calm look that still feels finished. Small bench? Add a single oversize mum and let the plaid throw do the talking. I tried this in my own front yard last October, and the bench finally stopped looking like lost furniture—it felt like a perch for a warm mug moment.
Budget Breakdown:
- Rust plaid outdoor-safe throw: $25–$60
- Outdoor pillows (2): $30–$80
- Mums (3 medium): $24–$45
- Terracotta or aged-finish planters (2–3): $30–$90
- Lanterns (2) + LED candles: $40–$100
- Basket + pinecones: $15–$35
Total Estimated Cost: $164 – $410
Best For: Front yards with a visible garden bench or a quiet corner near the walkway; early October through Thanksgiving when mums peak.
Key Design Elements:
- Main seasonal props: mums, pinecones, plaid throw
- Color palette: rust, burgundy, wheat, warm black accents
- Lighting strategy: one lantern on each side of the bench, glow angled inward
- Textile layers: outdoor plaid throw, weather-resistant pillows
- Natural elements: terracotta, pinecones, dried seed pods
- Accent details: aged pots, woven baskets, matte lanterns
How To Recreate This Look:
- Start with the bench: add a rust plaid throw draped casually over one side.
- Add two pillows—one solid, one subtle pattern—in warm tones.
- Layer in mums on each side in planters, tallest at the back, short and full in front.
- Place lanterns flanking the bench, slightly tucked in for a soft vignette.
- Style with a basket of pinecones at the bench’s leg for texture and warmth.
Why This Feels Designer: Multiple textures with consistent color notes say “collected” instead of “store-bought set.” The throw’s movement counters the mums’ structured shape for balance.
One Thing To Avoid: Don’t choose mums and pillows in the exact same shade. You want tonal variety—think rust and burgundy, not matchy-matchy rust-on-rust.
Pro Styling Tip: Angle the pillows so one peeks over the bench slat; that hint of asymmetry reads instantly more organic on camera.
Pause and take a breath. Remember, this isn’t a showroom. It’s your home and your fall. If one detail—like that rust plaid—makes your heart do a tiny happy dance, lead with it and build from there.
3. Amber String Lights Through a Leaf Garland Arch at the Front Door
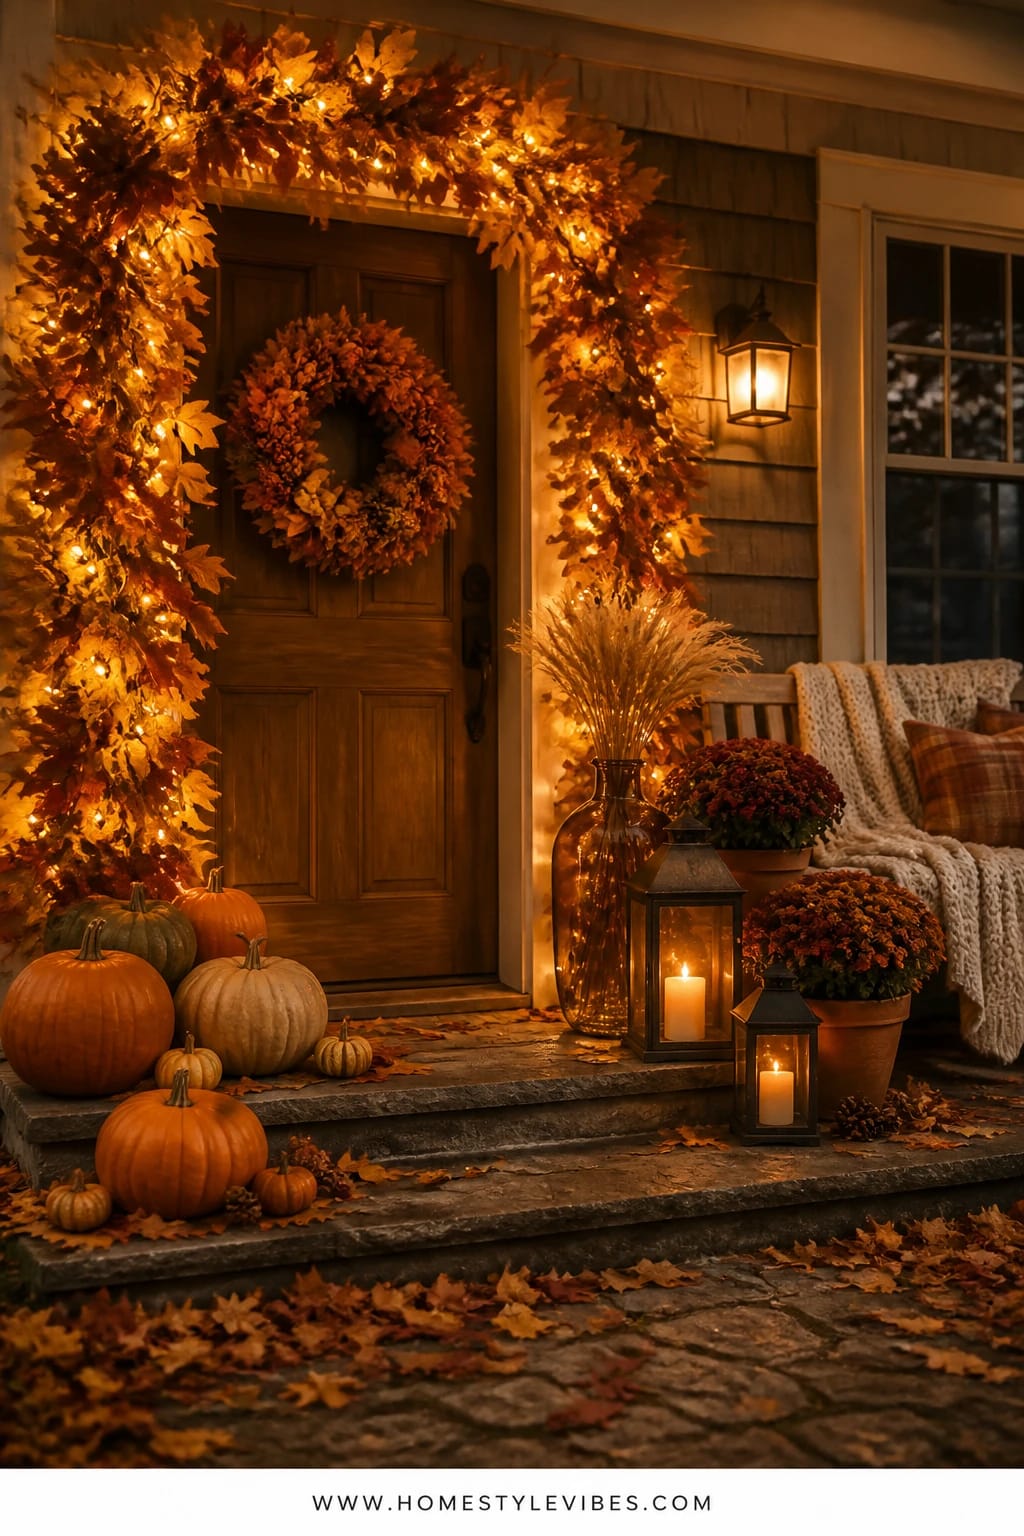
That front door… it’s supposed to be the hero, but it can slide into “basic wreath and hope for the best” territory. You’ve tried a wreath, maybe a welcome mat, but it still looks flat. This idea introduces movement and glow by framing your door with a leaf garland arch laced with amber string lights. The mood? Golden-hour magic, every evening. It works for real homes because it’s a simple install with a huge payoff, and it scales: narrow door, wide door, even a peaked entry—all fair game.
Lighting anchors this design. Choose warm 2200–2700K string lights and wind them into a sturdy faux leaf garland (maple, oak, or mixed). The amber against rust and burgundy leaves gives that candlelit warmth, minus the candle drama. Materials are minimal but strategic: garland, lights, a generous wreath with depth, and a coir mat layered over a patterned outdoor rug. Photos turn out rich because the garland frames the scene and the lights add those cozy bokeh dots after dark.
Variations keep it flexible. Budget build: two garlands instead of four and skip the rug layer. Showstopper version: add swags of dried wheat bundles at the corners for sculptural volume. Pro tip from a friend who learned the hard way: if your garland looks skimpy, the problem probably isn’t the garland—it’s your light density. More tiny bulbs equals more glow and fuller visuals.
Budget Breakdown:
- Faux leaf garlands (2–4 lengths): $40–$160
- Warm white string lights (outdoor, 1–2 strands): $20–$60
- Overfilled fall wreath: $35–$120
- Layered doormat + patterned outdoor rug: $30–$80
- Command outdoor hooks or masonry clips: $10–$18
Total Estimated Cost: $135 – $438
Best For: Any front entry that needs depth and drama; especially great for evening curb appeal and trick-or-treat night.
Key Design Elements:
- Main seasonal props: faux leaf garland, wreath
- Color palette: amber glow, rust, burgundy, a hint of moss green
- Lighting strategy: string lights woven through garland, timer set for dusk
- Textile layers: coir mat over a patterned outdoor rug
- Natural elements: optional dried wheat clusters
- Accent details: matte black door hardware, brass house numbers
Why This Reads High-End: Framing the door draws the eye like a stage proscenium; the arch creates a contained vignette that looks purpose-built, not pieced together.
How To Recreate This Look:
- Start by securing outdoor hooks around the door frame (top corners and midway on each side).
- Add garland lengths from one bottom side up, across, and down the other side.
- Layer warm string lights through and around the garland, tucking the cord behind leaves.
- Place a deep, full wreath at eye level; choose one with a mix of leaf shapes and textures.
- Style with a patterned outdoor rug under a coir mat to anchor the whole entry visually.
The Most Common Mistake: Hanging garland too skimpy or too high. Keep it full and close to the door frame so it reads like architecture, not holiday tinsel.
Pro Styling Tip: For evening photos, set your camera lower and shoot slightly upward to catch the glow halo and the doorway depth—it’s instant magazine energy.
4. Dried Floral Urns in Burnt Orange at the Front Door With Pinecones
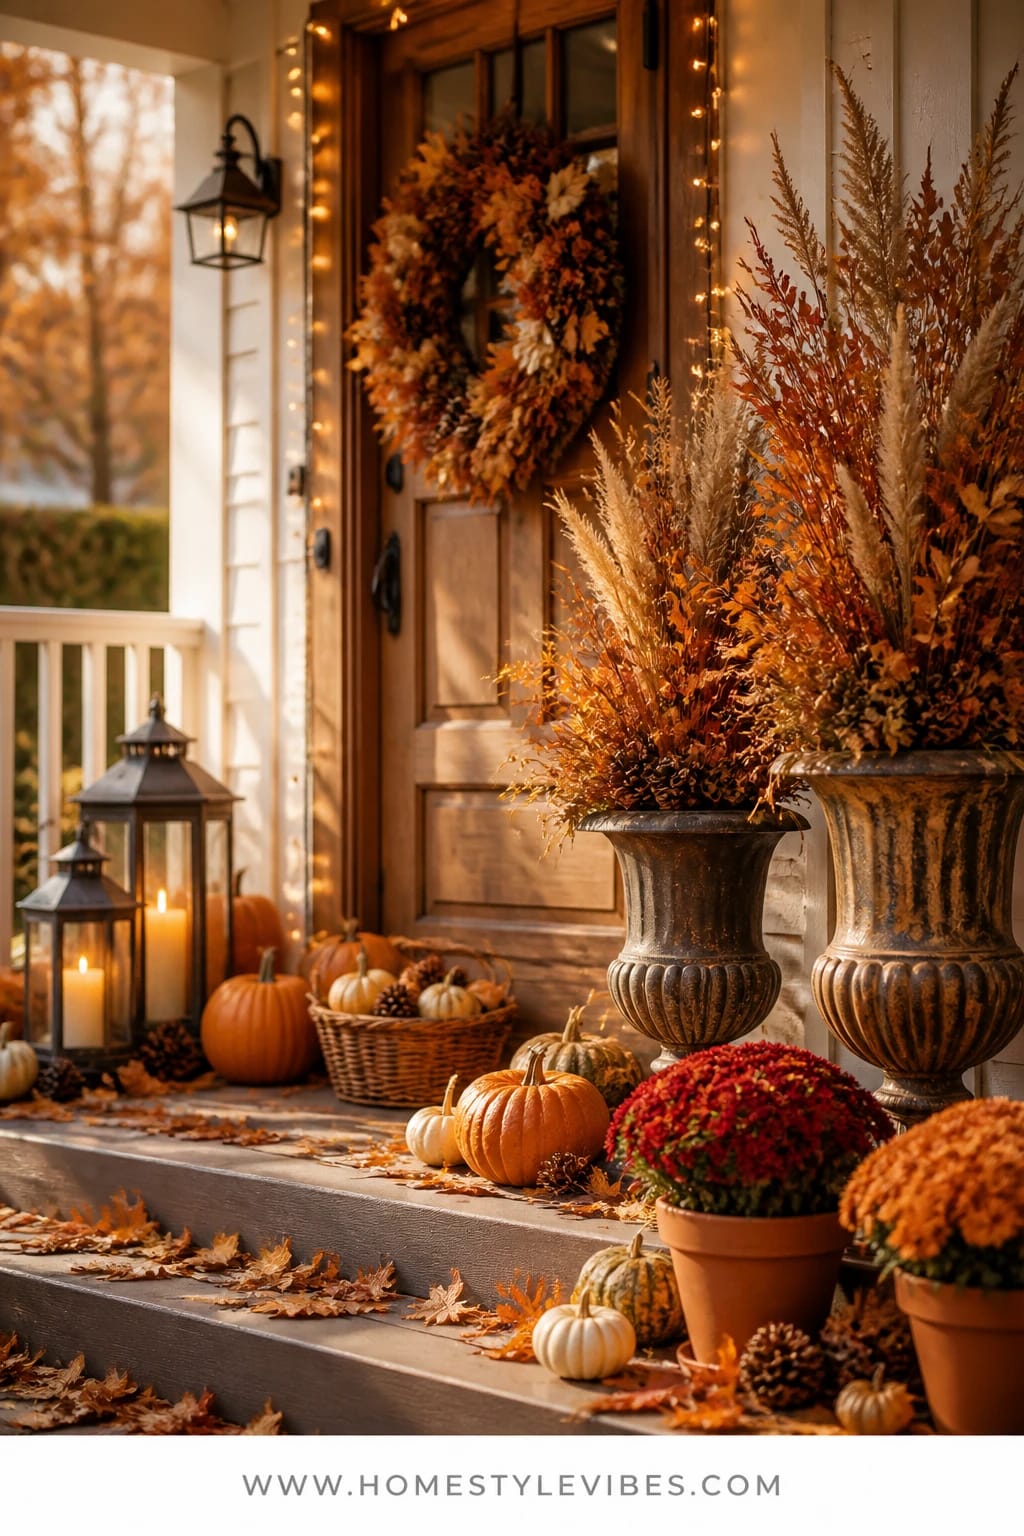
It’s that awkward empty space on either side of your front door—too narrow for a chair, too visible to ignore. You’ve tried seasonal planters before, but by mid-October they’ve wilted out. This approach uses dried florals and preserved grasses in tall urns for a sculptural, low-maintenance look. The vibe is artful harvest abundance with a little European garden drama. It thrives in real homes because nothing here needs watering and everything stores well for next year.
Light plays a supporting role. No need to over-illuminate—let the textures do it. A small stake spotlight aimed upward at each urn adds just enough evening definition. Materials shine: preserved wheat, dried hydrangea heads in caramel, burgundy eucalyptus, curly willow for height, plus pinecones mounded at the base for cozy texture. Photographs love the structure—the urn silhouettes create vertical lines that balance a wide doorway or brick facade.
For variations, go monochrome with toasty neutrals (caramel, wheat, bone) if you love a quiet palette. Or get bold: add a handful of deep plum faux dahlias for a color punch. Small stoop? Use one substantial urn centered under the knocker and two petite planters mirroring it on the steps. Heads up: arranging dried florals can be prickly—I’ve definitely had a wheat stalk poke me in the eye while I was aiming for perfect height. Step back often and let “perfectly imperfect” win.
Key Design Elements:
- Main seasonal props: dried florals, preserved grasses, pinecones
- Color palette: burnt orange, caramel, deep plum, warm neutrals
- Lighting strategy: subtle uplighting with low-lumen stake lights
- Textile layers: none; the texture comes from botanicals
- Natural elements: curly willow branches, eucalyptus, wheat, hydrangea
- Accent details: aged urns, moss tuck-ins, jute twine ties
Budget Breakdown:
- Tall outdoor urns (1–2): $80–$300
- Dried florals/grasses bundle: $40–$120
- Pinecones (bulk): $10–$25
- Outdoor stake lights (2): $30–$70
- Floral foam and filler moss: $10–$20
Total Estimated Cost: $170 – $535
Best For: Formal entries, brick or stone facades, homeowners who want low-maintenance decor that keeps its shape through late fall.
How To Recreate This Look:
- Start by placing urns and weighting them with gravel or bricks for stability.
- Add floral foam or a soil base to anchor stems.
- Layer the tallest elements first (curly willow), then fill mid-height with hydrangea and eucalyptus.
- Tuck wheat and grasses around the edges for softness.
- Style with a mound of pinecones at the base to hide mechanics and add texture.
Why This Looks Intentional: Tall verticals plus dense mid-level blooms tell the eye “this is arranged,” not tossed together. The pinecone base is the finishing detail that makes it feel complete.
Don’t Do This: Skip mixing too many flower types. Choose 3–4 and repeat them. Visual echo is what makes it read curated.
Pro Styling Tip: For photos, rotate one urn slightly so the tallest stems angle toward the camera—this creates a leading line into the entry.
Quick mindset check: You don’t need every idea. If one section got you excited, that’s your green light. Pick your favorite corner of the yard and make that one moment sing.
5. Burgundy Wreath, Pumpkins, and String Lights Around the Mailbox Bed
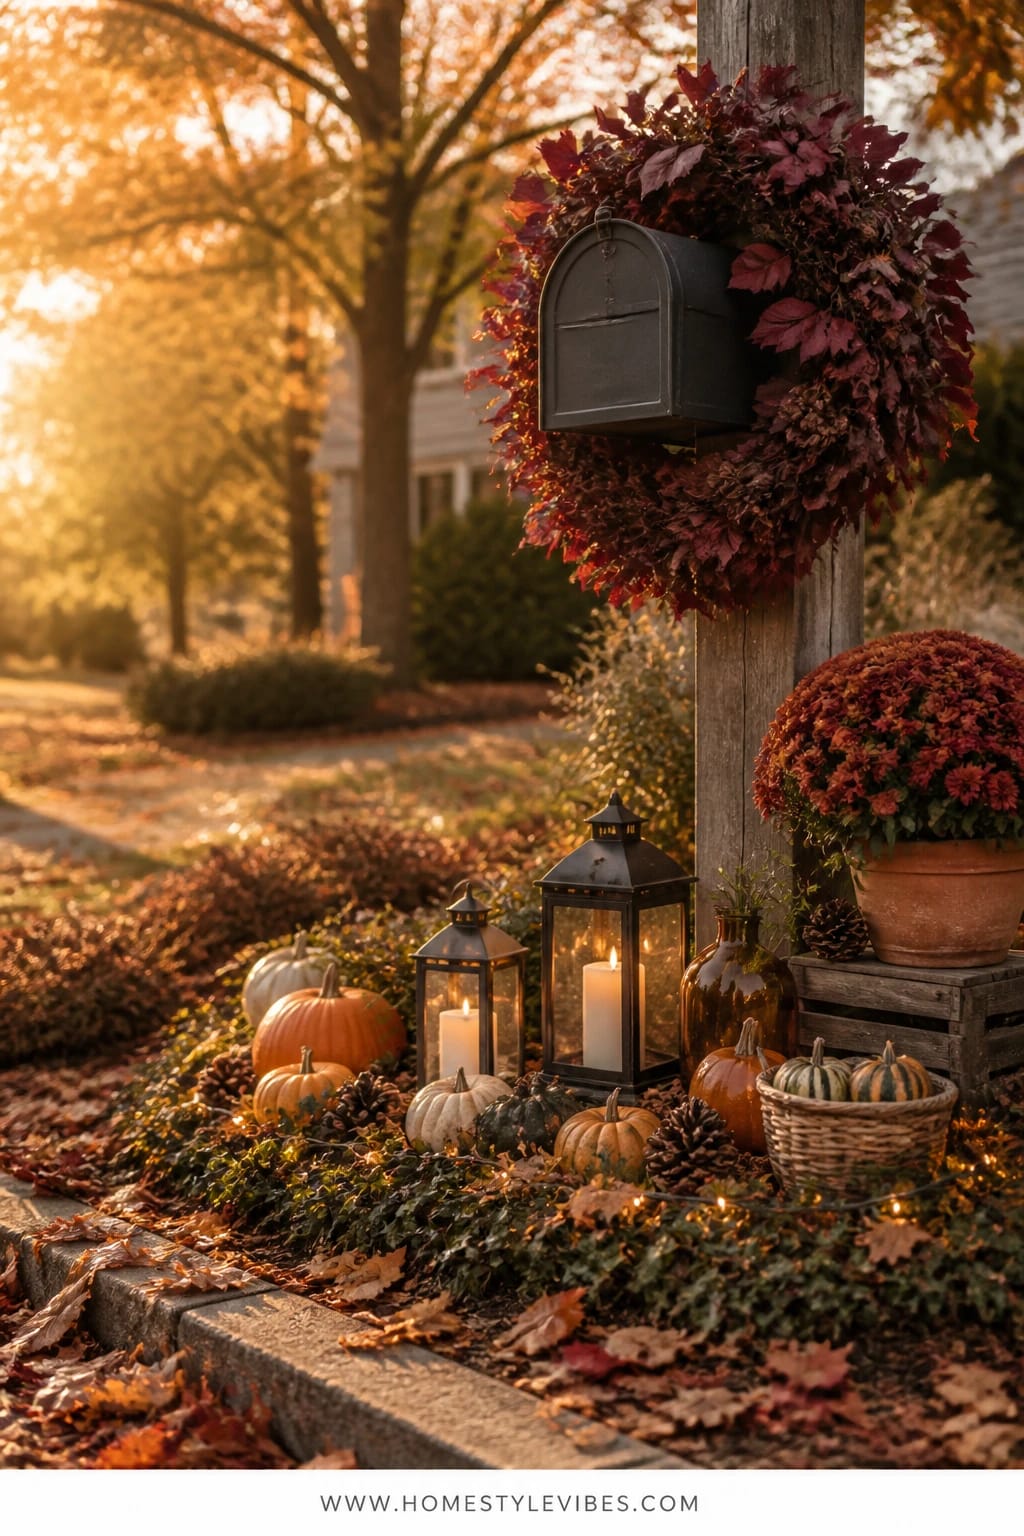
That little bed around the mailbox tends to be a landscaping afterthought—a mulch circle with a lonely hosta. You’ve added a pumpkin there before, but it read like a lost prop. This idea treats the mailbox as a mini stage: a lush burgundy wreath on the box post, a smart cluster of pumpkins at the base, and a low strand of warm string lights weaving through the groundcover. The mood is cheerful welcome right at the curb, and it works because it takes a small space and gives it purpose, not random bits.
Lighting here is subtle, like twinkle lights through ivy or tuck-ins along a stone border. Materials stay hardy: faux wreath that can handle dewy mornings, real pumpkins in two or three tones (muted orange, creamy white, a hint of green), and flat river stones or mini bales to keep everything anchored. Photographs love the scale contrast of a big wreath against the narrow post and the little pop of light at night.
Variations for different set-ups: If your mailbox sits on a metal post, use a clamp wreath hanger or a small S-hook with jute twine. For a longer bed border, echo the mailbox look at intervals—little clusters of two pumpkins every 4–6 feet pulls the eye along in a satisfying rhythm. IMO, real pumpkins win every time here, but I do like using one faux at the sunniest spot because, FYI, real pumpkins can fade fast under a relentless afternoon glare.
Budget Breakdown:
- Outdoor-safe burgundy wreath: $35–$95
- Pumpkin trio (real): $15–$40
- Mini string lights (solar or battery): $12–$30
- River stones or mini straw bales: $10–$25
- Wreath hanger/clamps/zip ties: $5–$12
Total Estimated Cost: $77 – $202
Best For: Small front yards or anyone wanting instant curb charm right where people pull up; great from mid-September to early November.
Key Design Elements:
- Main seasonal props: burgundy wreath, pumpkins, mini string lights
- Color palette: burgundy, soft orange, cream, mossy green
- Lighting strategy: low twinkle along the bed edge or groundcover
- Textile layers: none; this is a landscape vignette
- Natural elements: groundcover, stone border, straw bale texture
- Accent details: jute ties, matte black mailbox hardware
Why This Looks Expensive: You’ve framed a mundane utility feature with intentional symmetry and glow. That alone reads as thoughtful—and thoughtful reads as luxe.
How To Recreate This Look:
- Start by clearing weeds and redefining the bed edge; tidy lines do half the work.
- Add the wreath to the mailbox post, securing with a clamp or zip ties behind.
- Layer 2–3 pumpkins at the base, largest at the back, smallest at the front.
- Weave a short string of warm lights through the groundcover or along the stone border.
- Style with two or three river stones or a mini straw bale to prop and stabilize pumpkins.
Watch Out: Avoid bright, icy LED lights—they’ll clash with fall tones and look cold. Stick to warm, amber hues for harmony.
Pro Styling Tip: For street-side photos, shoot from a low angle across the pumpkins so the wreath sits proud against the sky. Instant “stop the scroll.”
6. Pinecones, Pumpkins, and Golden Glow on a Pathway Border With Low Lanterns
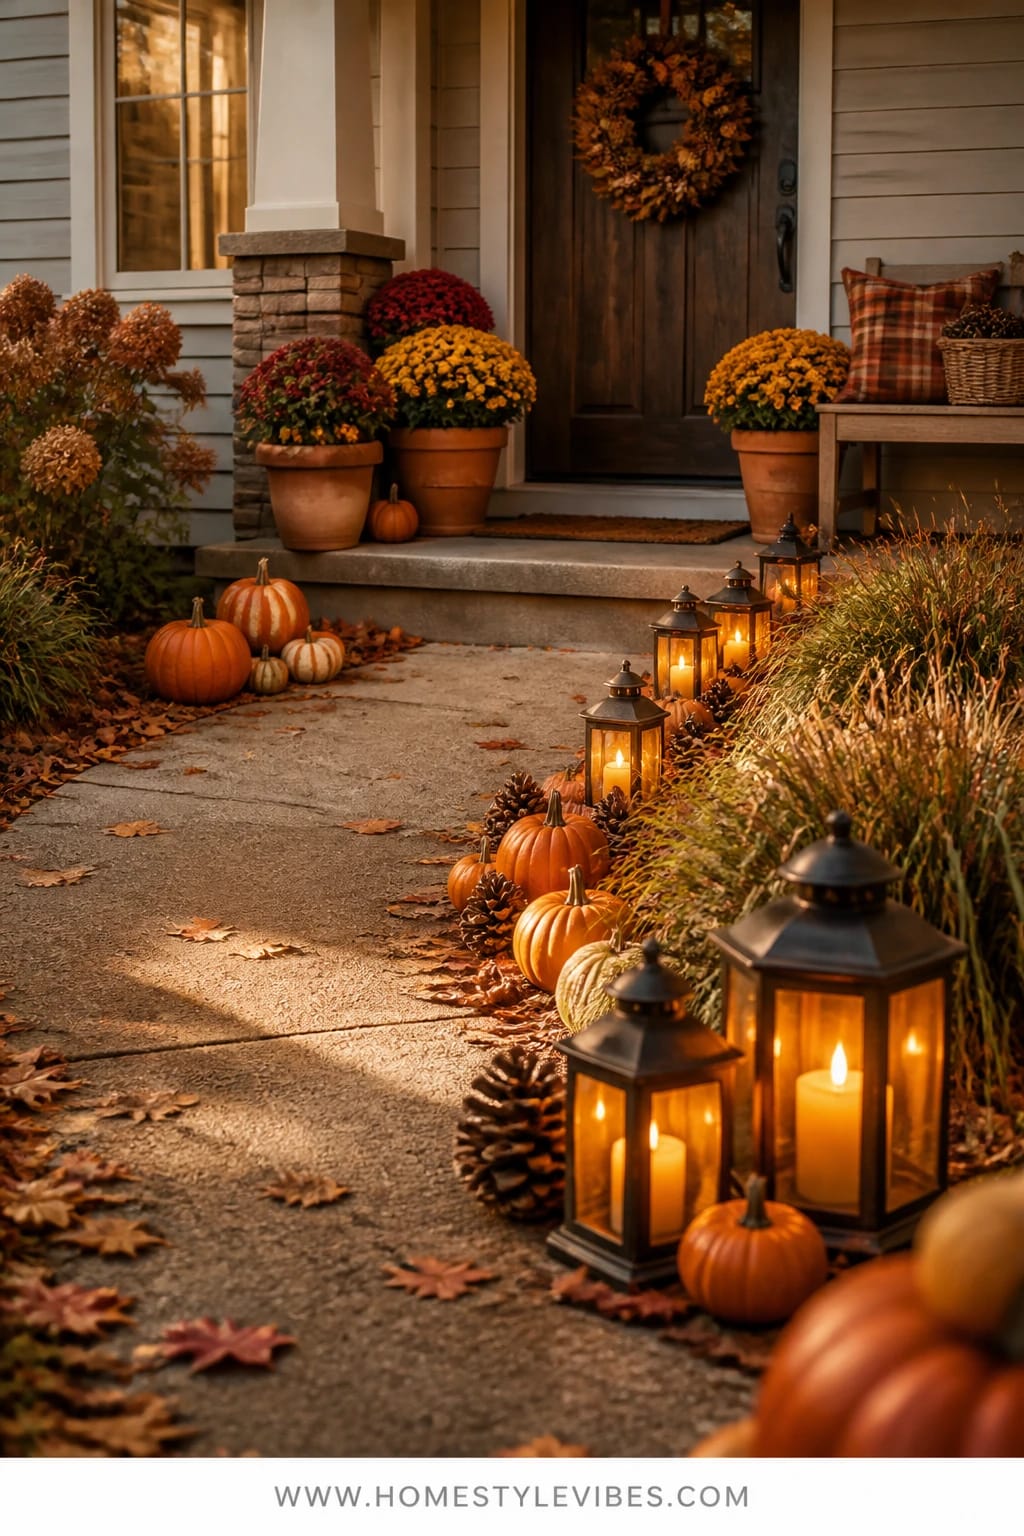
Paths can feel utilitarian, like “just get me to the door.” You’ve lined the walkway with solar stakes before, and it still looked meh. This concept creates a gentle, continuous story from curb to porch using low lanterns, scatterings of pinecones, and a string of pumpkins that feel like they “rolled in” from the pumpkin patch. The mood is calm and welcoming, with a golden glow brushing the edges of the path. It works because it clarifies flow—your guests know exactly where to go, and your yard finally looks finished, even at night.
Light strategy is layered, not bright. Mix small floor-style lanterns with two or three ground spotlights grazing ornamental grasses. Materials are all about repetition: one type of pumpkin in two sizes, clusters of pinecones every few feet, and warm lanterns on the inside edge of the path to avoid lawn mower drama. Photos adore the rhythm; repeating shapes and a warm light line look expensive, even when the elements are simple.
Variations adapt easily. Narrow path? Use fewer lanterns, placed at wider intervals. Modern home? Choose sleek black lanterns and green/white pumpkins for a cleaner palette. I did a version of this for a friend—she had one stretch of brick path that always felt cold. We added five lanterns, a handful of pinecones, and white pumpkins. By the first evening, neighbors were texting her about “the vibe.” Honestly, the soft grazing light on her feather reed grass was the secret sauce.
Budget Breakdown:
- Small outdoor lanterns (4–8): $60–$200
- LED candles or solar lantern inserts: $20–$60
- Pumpkins (6–12, consistent palette): $30–$100
- Pinecones (bulk): $10–$25
- Ground spotlights (2–3, warm): $40–$90
Total Estimated Cost: $160 – $475
Best For: Walkways from driveway to front door or garden paths leading to a porch; September through Thanksgiving with minor color swaps.
Key Design Elements:
- Main seasonal props: pumpkins, pinecones, low lanterns
- Color palette: golden glow, cream/soft orange, deep brown
- Lighting strategy: low, continuous warm lanterns plus grassy uplight
- Textile layers: optional outdoor runner at the porch landing
- Natural elements: ornamental grasses, mulch, stone
- Accent details: matte black lantern frames, aged brass handles
Why This Feels Designer: Consistency. Repeating one pumpkin style and one lantern style creates an intentional “installation” that looks pulled from a styled catalog.
How To Recreate This Look:
- Start by marking lantern placement every 3–5 feet on the inside edge of the path.
- Add ground spotlights to graze any grasses or low shrubs for subtle highlights.
- Layer pumpkins in singles or pairs between lanterns for a soft, rolling effect.
- Place small clusters of pinecones near each lantern base to connect the dots.
- Style by adjusting spacing until your eye can “read” a steady, inviting line.
The Most Common Mistake: Over-lighting. If it feels like a runway, you’ve gone too bright. Dial back to warm, gentle illumination.
Pro Styling Tip: For photos at dusk, wait until the sky turns deep blue; the golden path will pop, and your pumpkins will glow softly without blowing out the highlights.
Remember: progress over perfection. A few well-placed lights, a smattering of pumpkins, and one strong color note can make your whole front yard feel pulled together. Choose ease, not stress.
Quick Checklist
- Warm white LED candles or string lights (2200–2700K)
- Mix of real pumpkins and a few sturdy faux for sunny spots
- Lanterns in one consistent finish for cohesion
- Outdoor-safe plaid throw and pillows for bench styling
- Faux leaf garlands with clips/hooks for door framing
- Dried florals and preserved grasses for no-maintenance urns
- Bulk pinecones for texture and gap-filling
- Layered doormat and patterned outdoor rug at the entry
- Command hooks, zip ties, and floral wire for easy installs
- Ground spotlights to graze grasses and highlight features
Frequently Asked Questions
How do I keep costs under control when landscaping for fall curb appeal?
Pick one focal zone and do it well—porch steps, front door, or mailbox bed. Reuse anchors like lanterns and wreath bases each year, then refresh only the consumables (mums, pumpkins, small florals). Buy pumpkins in bulk from farm stands late afternoon for better prices, and choose a controlled palette so fewer items look more intentional.
Real or faux pumpkins and florals—what lasts and looks best?
For looks, real pumpkins win, especially for color nuance and those charming stems. For longevity, pair real with quality faux in sunny or windy spots. Dried florals and preserved grasses in urns beat live arrangements for staying power from early October through Thanksgiving without the sad, drooping phase.
My front yard is small. Will these ideas overwhelm it?
Scale down the count, not the idea. One lantern per step instead of two, a single oversize mum instead of three, or a compact mailbox vignette works beautifully. Keep your color palette tight—two main shades plus a neutral—and repeat them so the yard feels cohesive, not crowded.
Where do I store all this after fall ends?
Choose collapsible lanterns or stackable styles, stash faux garlands in clear bins with labels, and use garment bags for wreaths to prevent flattening. Keep a “fall box” that lives with holiday decor so you can quickly rebuild next year. Dried florals can be wrapped in tissue and stored upright in a tall bin.
Are candles and string lights safe with kids and pets around?
Go LED for anything within reach. Use timer candles in lanterns and solar or battery string lights tucked safely behind garland or within planters. If you use real candles, keep them high and far from dried materials, and never leave them unattended.
When should I start decorating my front yard for fall?
Late September is the sweet spot for most climates. Start with lighting and neutral elements (lanterns, garlands, rugs), then add mums and pumpkins in early October. If you want longevity, lean into dried florals and faux garlands first, then refresh with a few real pumpkins closer to Halloween.
The Cozy Close
Pick one corner and go all in. That’s the secret. A lit pathway or a glowing garlanded door changes how you feel pulling into the driveway at night—and that feeling matters. You don’t need every accent. You need the right rhythm of light, a handful of rich colors, and textures that whisper “harvest” when the air turns crisp.
The truth is, cozy comes from layers: the lanterns that kick on at dusk, the plaid that softens a bench, the pumpkins marching up your steps like a parade. Generous, warm, and a little bit imperfect is exactly the point. Start small today—one lantern, one mum, one rust throw—and let the rest follow. Your front yard will smile back, and you’ll feel it before you even reach the door. Seriously, you’ve got this.
About the Author

Krisztina P.Rendes, Founder of Home Style Vibes
Founder of Home Style Vibes
Krisztina Puskásné Rendes created Home Style Vibes as a cozy-modern lifestyle space where homemaking meets inspiration. Her goal is to help women create beautiful, organized, and peaceful homes they truly love — without overwhelm. You’ll find here heart-driven content on home decor, cleaning tips, easy family recipes, organization and decluttering, DIY home projects, plants, and seasonal ideas — all designed to bring more calm, comfort, and style into everyday life.