7 Small Laundry Room Makeover Ideas That Make A Tiny Space Feel Bigger
You want a laundry nook that feels calm, bright, and easy—somewhere you can actually breathe while sorting socks. But clutter, bad lighting, and that awkward appliance tangle keep dragging the mood down. Imagine soft daylight on clean tile, textures that whisper “spa,” and surfaces that wipe clean in seconds. These 7 small laundry room makeover ideas will fix what’s actually making your space feel cramped, and they’re all achievable—most under $1,500 and doable in a weekend or two.
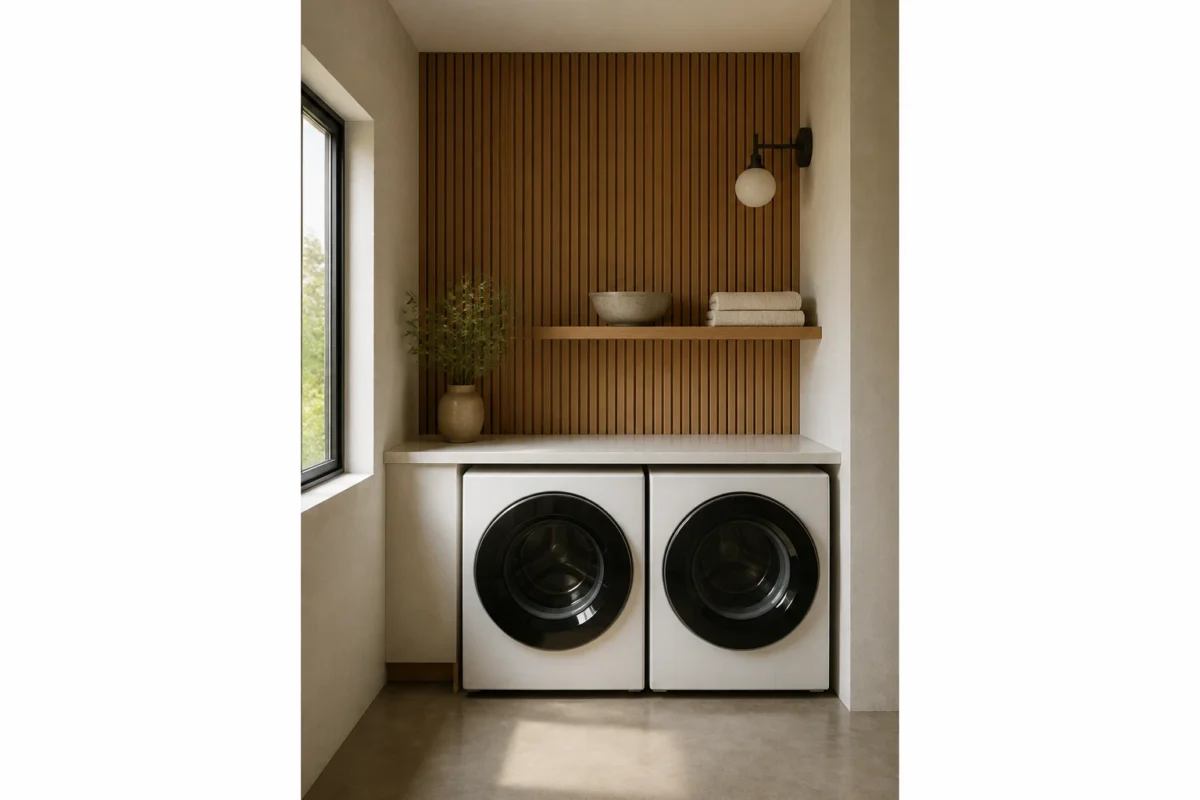
Expect photogenic results: crisp edges, layered texture, satisfying shadows. If you crave a room that’s beautiful and genuinely functional, these concepts were made for you. Minimalist? Farmhouse? Japandi? We’ve got you. This is laundry with a vibe—especially for the design-lover who refuses to accept a clutter cave.
1. Fluted Oak Wall, Soft Diffused Light, and a Slim Countertop Bridge
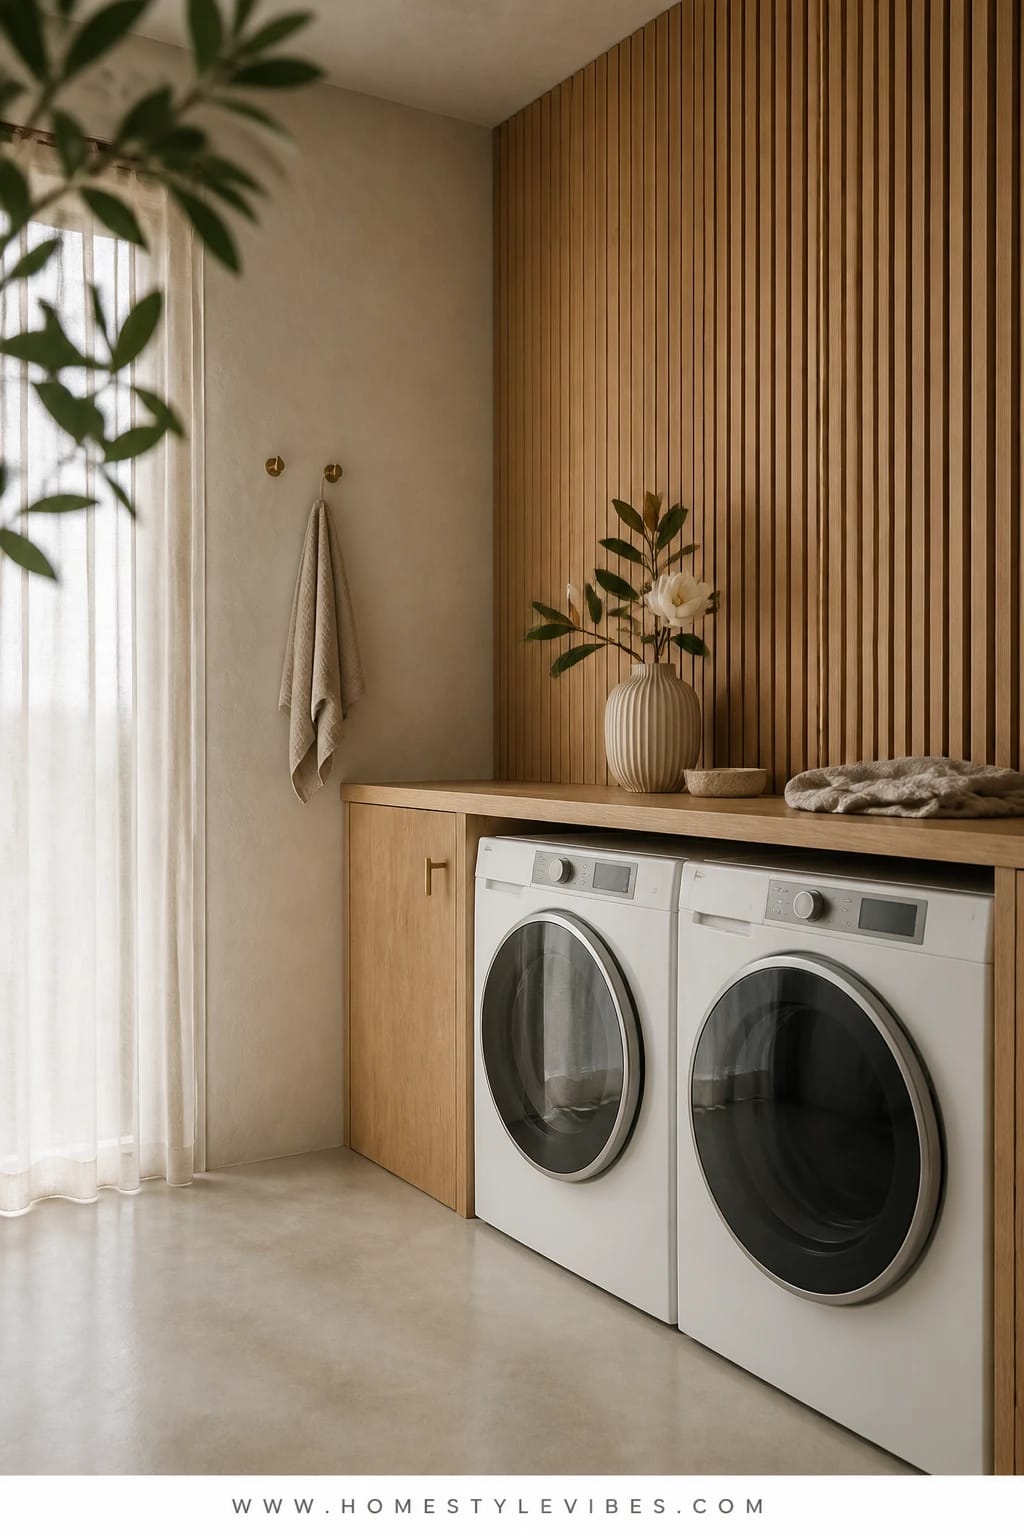
We’ve all been there: detergent bottles lined up like a chaotic parade, cords dangling, and a dead zone between machines that eats socks. You’ve tried cute bins, but it still looks busy and small. This design creates a warm-Japandi mood with a vertical fluted oak accent panel behind the machines, a slim countertop bridge that spans them, and soft diffused light that erases harsh shadows.
Here’s why it works in real homes. Vertical lines visually lift low ceilings, the oak warms up a cold utility corner, and the counter bridge gives you one wide, uninterrupted work surface. It’s family-friendly, too—everything has a landing pad. Soft diffused lighting (think fabric shade or milk-glass flush mount) spreads evenly, so bleach stains and dust don’t star in the spotlight.
Photographs beautifully because of the juxtaposition: warm oak against crisp appliances, gentle shadows along the flutes, and a satin-matte counter that reduces glare. The overall impression reads clean and tall. Variations? Budget-friendly: use fluted MDF or peel-and-stick slats finished in a golden-oak stain. Darker version: try smoked ash slats with warm 2700K bulbs. Renter-friendly swap: cut a plywood “bridge” that rests on anti-slip pads over the machines—no screws, instant upgrade.
Budget Breakdown:
- Fluted wood panels or MDF slats: $120–$450
- Wood finish (stain + poly) or prefinished panels: $25–$180
- Countertop bridge (butcher block or laminate): $90–$350
- Diffused flush mount or drum ceiling light: $60–$180
- Cable management + slim tray set: $25–$60
Total Estimated Cost: $320 – $1,220
Best For: Narrow laundry closets or pass-through laundry rooms where the eye needs height. Works beautifully in Scandinavian, Japandi, and warm minimalist homes.
Key Design Elements:
- Main materials: fluted oak or oak-look slats, butcher block or matte laminate
- Color palette: warm oak, crisp white, soft gray, hint of matte black hardware
- Lighting strategy: diffused overhead + optional under-shelf LED strip
- Furniture silhouettes: long, uninterrupted counter; slim profile shelf above
- Texture layers: vertical grain, matte finishes, woven utility basket
- Accent details: black hooks, ceramic jar for pods, a single trailing plant
How To Recreate This Look:
- Start with a clean wall—fill, sand, and prime for a smooth backdrop.
- Add vertical slats or fluted panels, finishing edges with slim wood trim.
- Layer a countertop bridge across your machines and secure with anti-slip pads.
- Install a diffused flush mount overhead; target 2700–3000K bulbs for warmth.
- Style with one lidded jar, a slim tray for stain sticks, and a small plant for life.
Why This Looks Expensive: The continuous counter and vertical fluting create custom millwork vibes, while diffused lighting hides seams and makes the finish feel luxe.
Watch Out: Don’t skip edge trim on the fluted panel. Raw ends look cheap and catch lint.
Pro Styling Tip: Angle the plant so its leaves cast a soft shadow across the flutes—texture on texture reads beautifully on camera.
2. Honed Marble Shelf, Cool Daylight Glow, and a Recessed Pull-Out Hamper
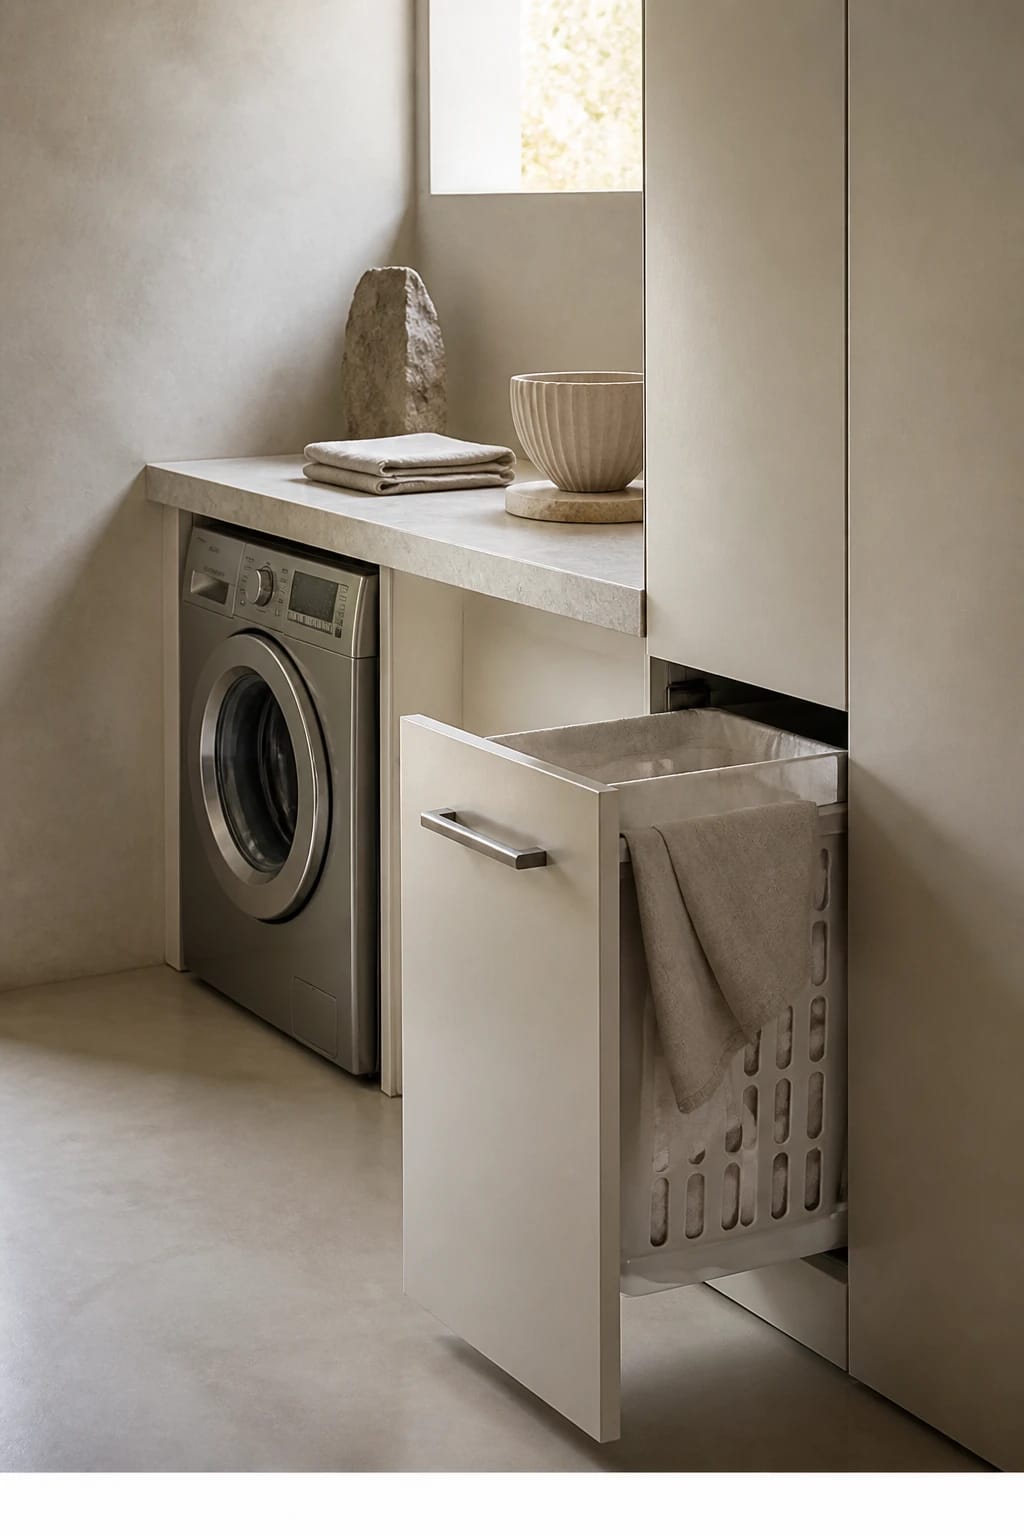
It’s that one corner that always feels off—piles of clothes with nowhere to land. You’ve tried baskets, but they hog floor space and block the door. This concept leans into a boutique-hotel mood: a single honed marble shelf for detergent luxury, cool daylight bulbs to mimic window light, and a recessed pull-out hamper that disappears when you don’t need it.
Why it works. Honed marble adds quiet pattern and low sheen so dust and drips don’t scream. The cooler light (3500–4000K) tightens the visual edges, which makes a tiny laundry room feel precise instead of mushy. A built-in or faux-built pull-out hamper frees floors and gives you an easy “hide-the-chaos” moment before guests arrive.
It photographs like a dream because honed stone scatters light softly, the recessed nook creates shadow depth, and the cool glow crisps up whites and stainless. Budget-friendly variation: use a marble-look porcelain shelf or solid-surface offcut. Renter-friendly: a freestanding rolling hamper tucked under a tension-rod curtain in a tailored fabric (think pinstripe or seersucker) for that custom feel.
Key Design Elements:
- Main materials: honed marble or marble-look slab, soft-close drawer slides
- Color palette: blue-gray veining, soft white, nickel, pale eucalyptus green
- Lighting strategy: high-CRI 3500–4000K ceiling LED + mirror bounce if possible
- Furniture silhouettes: slender shelf, slim pull-out cabinet face
- Texture layers: stone sheen, brushed nickel, linen-textured hamper liner
- Accent details: narrow framed art, a reed diffuser, microfiber cloth stack
Budget Breakdown:
- Honed marble shelf or porcelain-look slab: $120–$420
- Pull-out hamper hardware + cabinet face: $90–$260
- High-CRI LED fixture/bulbs: $40–$120
- Trim + paint for niche: $35–$90
- Small decor (diffuser, framed art): $30–$80
Total Estimated Cost: $315 – $970
Best For: Closet-style laundry rooms or hallway alcoves where every inch counts. Pairs well with modern, transitional, or coastal minimal styles.
How To Recreate This Look:
- Mark a niche location beside the machines and plan a 12–16 inch width for a hamper pull-out.
- Install drawer slides and a cabinet face; line with a washable fabric bag.
- Mount the honed shelf at eye level with hidden brackets.
- Swap in 3500–4000K bulbs; add a narrow mirror opposite the light if you can.
- Style the shelf with one stone tray and keep labels minimal for a calm look.
Why This Feels Designer: The disciplined restraint—one beautiful stone surface, one invisible storage move—reads deliberate, not improvised.
One Thing To Avoid: Don’t overdo accessories on the shelf. More than three items turns “spa” into “stockroom.”
Pro Styling Tip: Slightly angle the framed art so the marble veining leads the eye toward it—your photo gains movement without clutter.
Still with me? The next idea flips the script on storage and color so even a no-window laundry closet gets personality, not chaos.
3. Beadboard Wainscot, Warm Candlelight LED, and a Wall-Mounted Folding Table
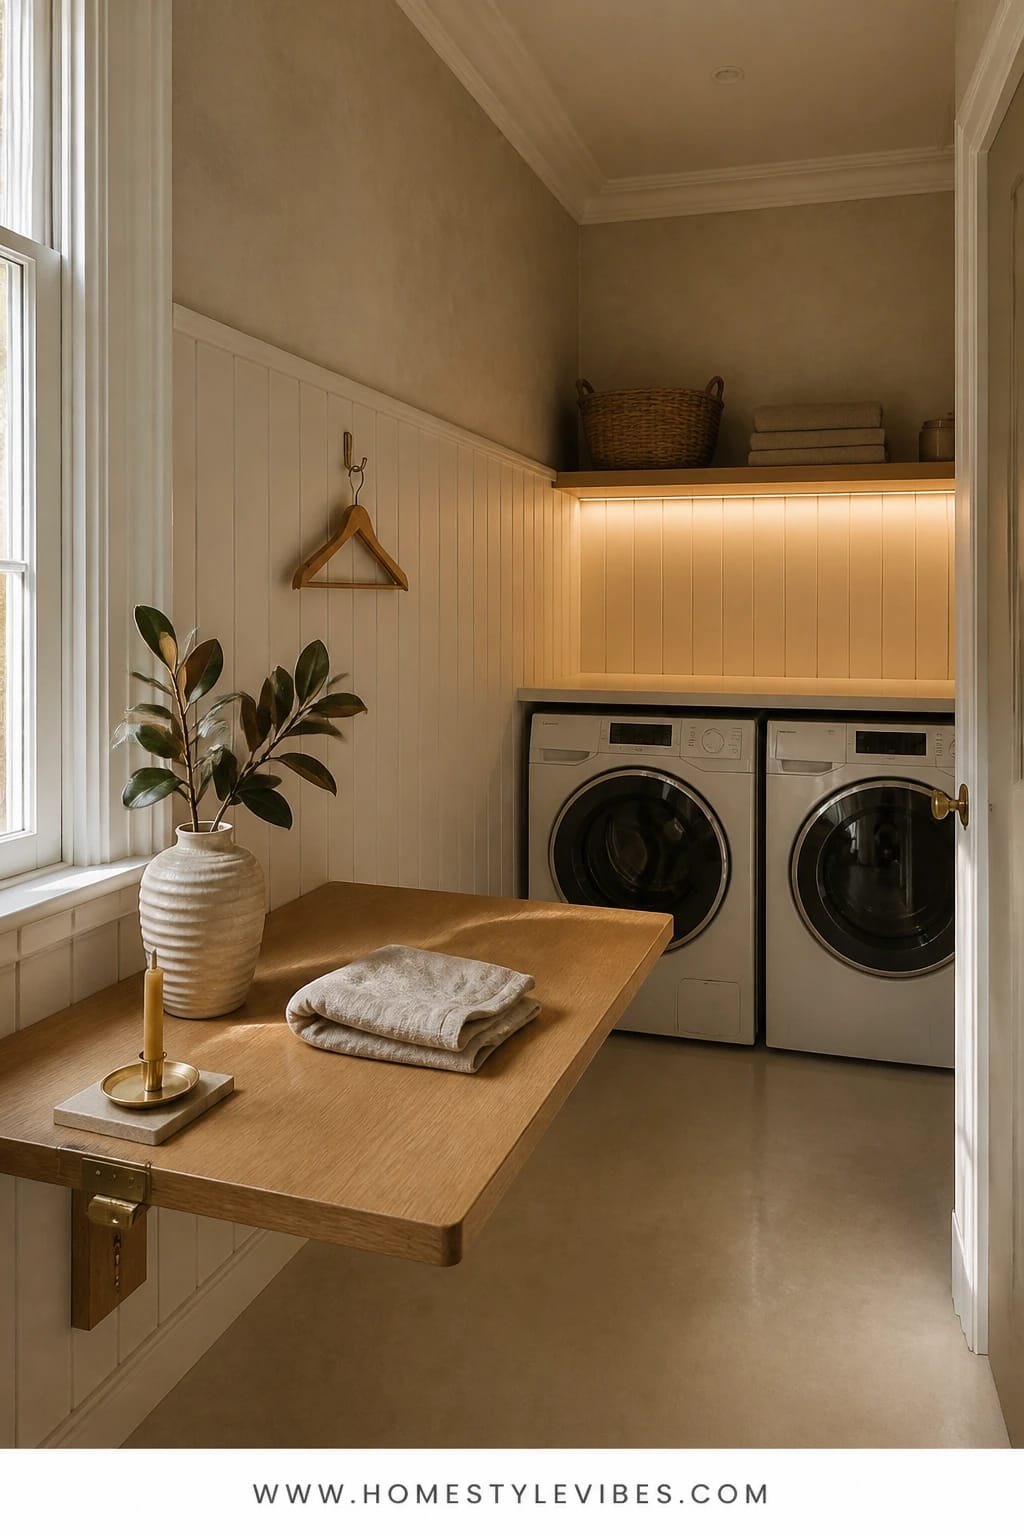
You want charm. You hate chaos. And if we’re honest, that popped-out dryer hose and bunch of tangled hangers ruin every mood. Enter modern cottage: beadboard wainscot for texture at eye level, a warm candlelight LED glow (2200–2700K) that turns a utility task into a ritual, and a wall-mounted folding table that disappears after use.
The setup brings a cozy-English-laundry vibe to tiny rooms. Beadboard adds linear rhythm, hides scuffs, and it’s easy to wipe down. The fold-down table creates a just-right perch for a steamer or a stack of towels without stealing permanent floor space. Warm light softens harsh appliance edges and makes whites feel creamy instead of clinical.
Photos love the play of vertical grooves and shadow lines, especially when a single brass sconce hits the texture at an angle. Budget version: MDF beadboard panels and a birch plywood flip table with piano hinge. Renter-friendly: apply peel-and-stick beadboard wallpaper and a removable shelf bracket that folds.
Budget Breakdown:
- Beadboard panels + cap molding: $80–$220
- Paint (durable satin): $35–$70
- Wall-mounted folding table hardware: $45–$120
- Warm LED sconce or plug-in picture light: $50–$180
- Hook rail + wood hangers: $25–$60
Total Estimated Cost: $235 – $650
Best For: Petite laundry closets or mudroom-laundry combos that need personality and function. Great for family homes and anyone who irons or folds on the fly.
Key Design Elements:
- Main materials: beadboard, painted wood, brass or aged bronze
- Color palette: cream, clay, soft moss, warm white
- Lighting strategy: warm sconce layered with a soft overhead
- Furniture silhouettes: slim fold-down top, shaker pegs or hook rail
- Texture layers: grooved wall, woven hamper, nubby linen ironing cover
- Accent details: striped tea towels, small botanical print
How To Recreate This Look:
- Measure wainscot height at 48–54 inches to visually raise the room.
- Install beadboard and a cap molding; caulk seams for a finished look.
- Paint in a satin finish for wipeability.
- Mount the folding table at hip height with robust brackets and a safety latch.
- Layer in a warm sconce; add a hook rail for hang-dry pieces.
Why This Reads High-End: The tailored wainscot height and cap molding detail mimic custom millwork, while the fold-down top solves a daily pain point with style.
The Most Common Mistake: Installing beadboard too high so it fights with upper shelving. Leave space for air above.
Pro Styling Tip: Drape one striped towel over the table edge and tuck a corner under—effortless folds photograph “real,” not staged.
Before we go bold, a quick mindset shift: You don’t need to redo everything. Choose the one tension that bothers you the most—messy bottles, bad light, no surface—and solve that. One precise fix usually unlocks 80% of the calm you’re after.
4. Glossy Ceramic Tile Backsplash, Crisp White Light, and a Ceiling-Mounted Drying Rack
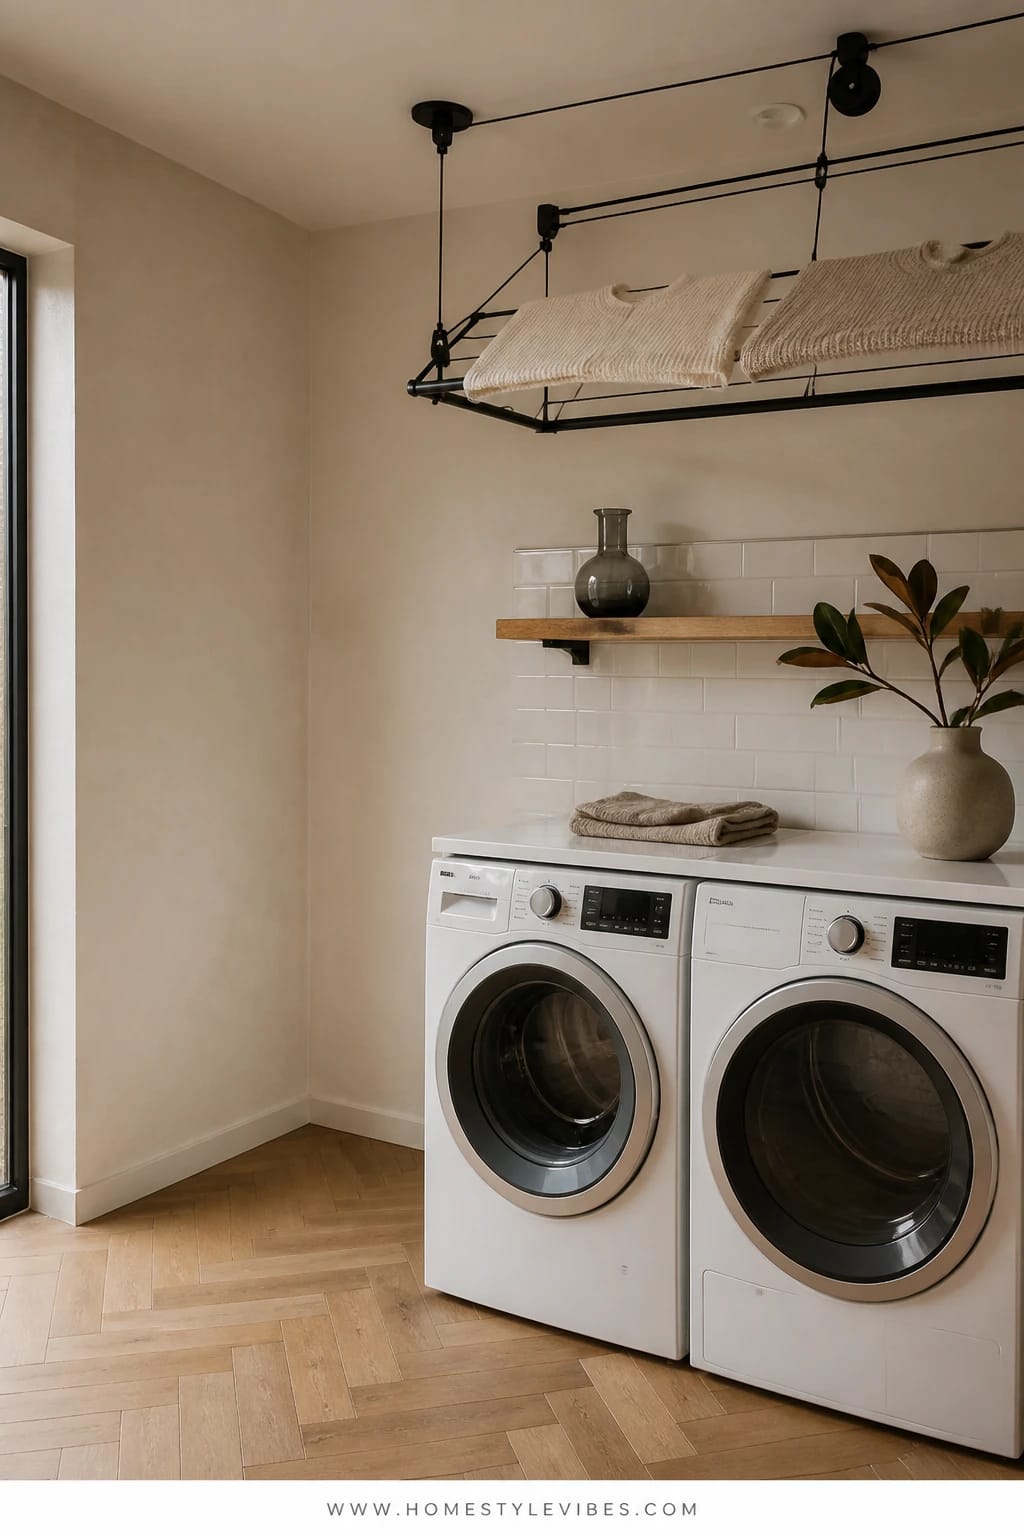
You want every inch to work. You hate shirts draped on door frames. Glossy ceramic tile adds light bounce, crisp white light makes colors accurate for stain treatment, and a ceiling-mounted drying rack clears the floor while giving sweaters an actual home.
The mood skews urban-fresh-meets-lab-clean—but not sterile. A narrow run of stacked glossy tile behind the machines adds reflectivity that visually doubles depth. A pulley or slide-out ceiling rack keeps wet laundry high and out of sight lines, a win for tiny or windowless rooms.
It photographs beautifully because glossy tile reflects the crisp light and creates soft highlights that shape the room. For a darker palette, try deep green tile with 3000K light for richness. Budget approach: white 3×6 ceramic subway with a contrasting grout. Renter-friendly: removable tile stickers on a primed plywood panel you lean in place behind the machines.
Budget Breakdown:
- Glossy ceramic tile + grout: $90–$280
- Ceiling-mounted drying rack kit: $70–$220
- LED panel or high-CRI flush mount (4000K): $60–$160
- Moisture-resistant paint for surrounding walls: $35–$70
- Stain-treatment caddy: $20–$40
Total Estimated Cost: $275 – $770
Best For: No-window laundry rooms and compact spaces with poor ventilation. Great for athletic households with frequent hang-dry loads.
Key Design Elements:
- Main materials: glossy ceramic tile, powder-coated metal rack
- Color palette: bright white or saturated jewel tone, cool gray grout, stainless
- Lighting strategy: crisp, even ceiling light with high color accuracy
- Furniture silhouettes: linear tile runs, slim ceiling rack bars
- Texture layers: shiny tile, soft cotton knitwear, silicone-coated hooks
- Accent details: labeled spray bottles, narrow wall clock, microfiber mitt
How To Recreate This Look:
- Tile the wall behind the machines to at least 60 inches high for splash protection.
- Grout with a slightly contrasting color for a graphic, camera-ready grid.
- Install the ceiling rack centered between light fixture and wall for visual balance.
- Swap in a high-CRI LED fixture to ensure accurate color for stains.
- Mount a narrow shelf or caddy for stain tools directly below the light.
Why This Looks Intentional: The geometry of stacked tile lines up with the rack bars and the machines, creating a visual framework so the eye reads order—even when laundry’s hanging.
Don’t Do This: Avoid mixing warm and cool bulbs in the same room. That mismatch creates weird shadows and makes whites look dirty.
Pro Styling Tip: For photos, hang three items at staggered heights; negative space between pieces makes the room feel larger.
5. Limewash Plaster Wall, Golden Hour Sconce, and a Curved Edge Utility Sink
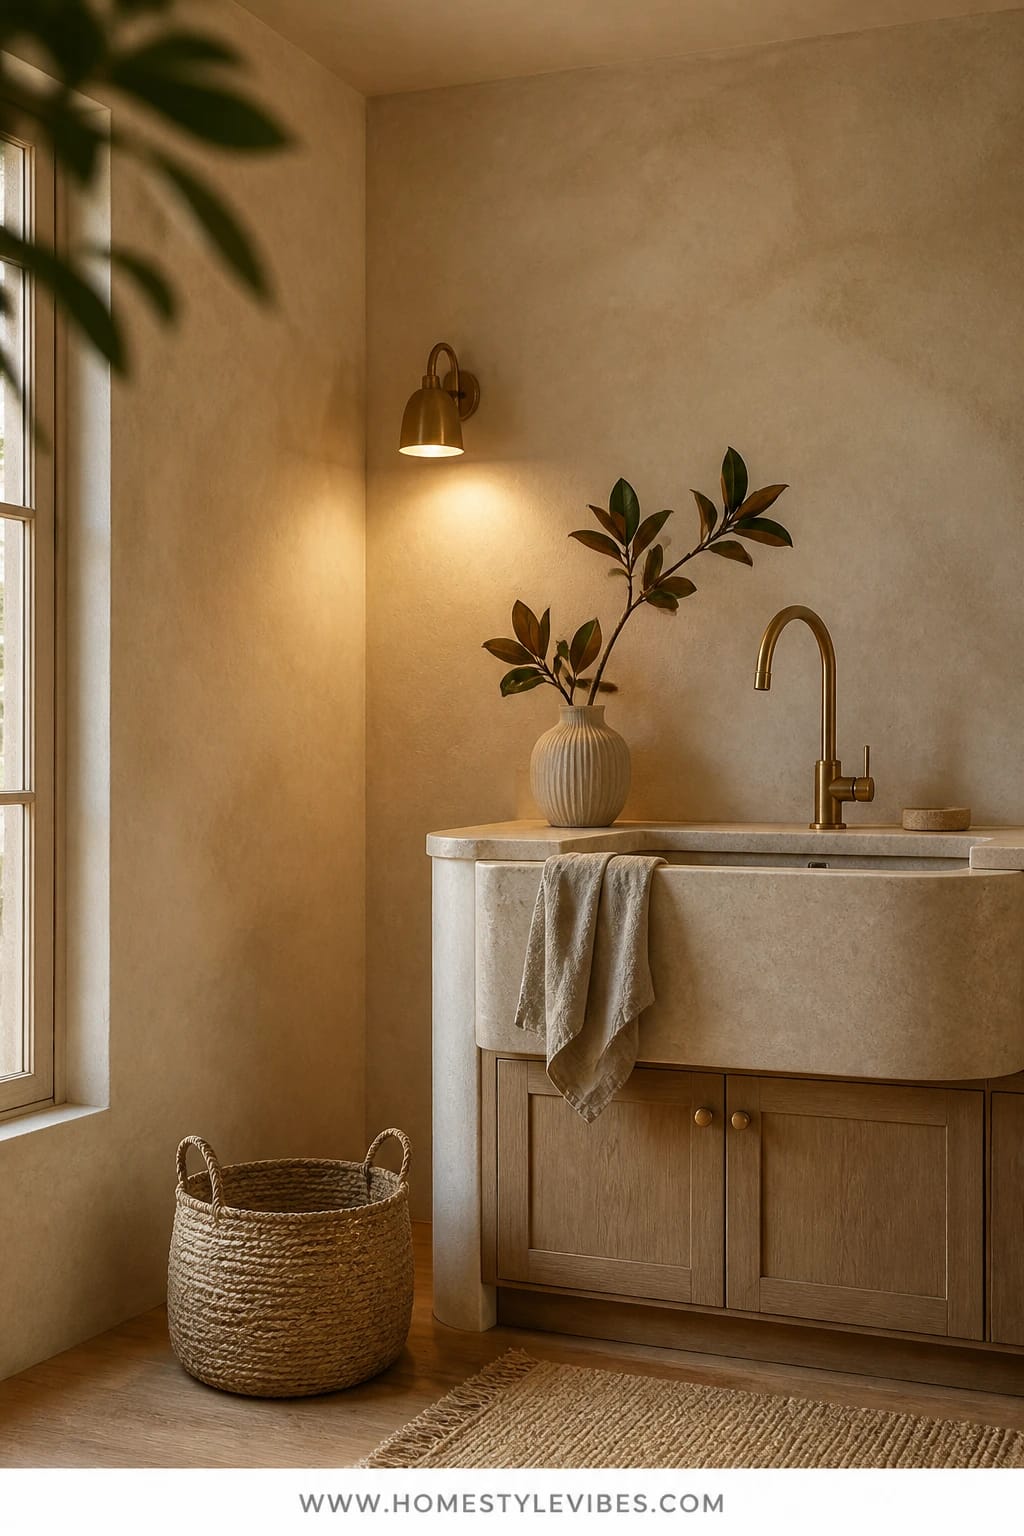
You’ve tried to make the laundry room pretty with art and pretty baskets, but it still feels flat. The wall texture is the problem, not the styling. Limewash plaster brings depth and movement, a golden hour sconce wraps everything in warmth, and a curved-edge utility sink feels sculptural instead of industrial.
The mood is modern Mediterranean—breezy, tactile, no-fuss. Limewash adds micro-variation so lint and tiny splashes disappear visually. A curved sink (think rounded front apron) softens the boxiness of machines and cabinets. Golden, indirect light (2700K) creates gentle gradients across the plaster for that vacation-home energy.
On camera, the play between matte limewash and ceramic sheen gives layered contrast. Budget variation: use a mineral paint with a glaze pass. Renter-friendly: apply limewash-effect paint on a large canvas or fiberboard panel and lean it; swap a clip-on sconce with warm LED.
Budget Breakdown:
- Limewash or mineral paint kit + brush: $80–$200
- Brass or aged-bronze sconce: $80–$220
- Curved-edge utility sink (composite or enamel): $160–$450
- Matte black or brass faucet: $90–$280
- Drainboard or bamboo sink insert: $25–$60
Total Estimated Cost: $435 – $1,210
Best For: Small rooms that feel too flat or “builder basic.” Perfect for design lovers who want tactile walls and an artful sink moment.
Key Design Elements:
- Main materials: limewash plaster, enamel/composite sink, aged metal
- Color palette: sand, bone, warm brass, soft putty
- Lighting strategy: golden, indirect sconce plus a dimmable overhead
- Furniture silhouettes: rounded sink, slim open shelf
- Texture layers: chalky wall, glossy ceramic, woven rattan for clothespins
- Accent details: olive branch clipping, soap in a stone dish
How To Recreate This Look:
- Patch and prime walls smooth; limewash loves a consistent base.
- Apply two to three coats in cross-hatch strokes for depth.
- Install your curved sink and pair with a gentle-arc faucet.
- Mount a warm sconce that grazes the wall—angle it for soft shadows.
- Style with a single branch and a stone dish; keep surfaces quiet.
Why This Looks Expensive: Rich texture plus sculptural plumbing telegraph custom work. The sconce glow acts like a filter for the entire room.
Watch Out: Limewash can look patchy until the final coat dries. Trust the process; it evens out as it cures. I panicked on coat two once—then loved it the next morning.
Pro Styling Tip: Photograph from an angle where the sconce light rakes the wall—those feathered shadows are editorial gold.
Pause and breathe. Remember, this isn’t about recreating a showroom. It’s about editing visual noise so the room finally works for your real life. If one idea resonates, that’s your starting point.
6. Satin Black Steel Rail, Cool Neutral Light, and a Narrow Rolling Island
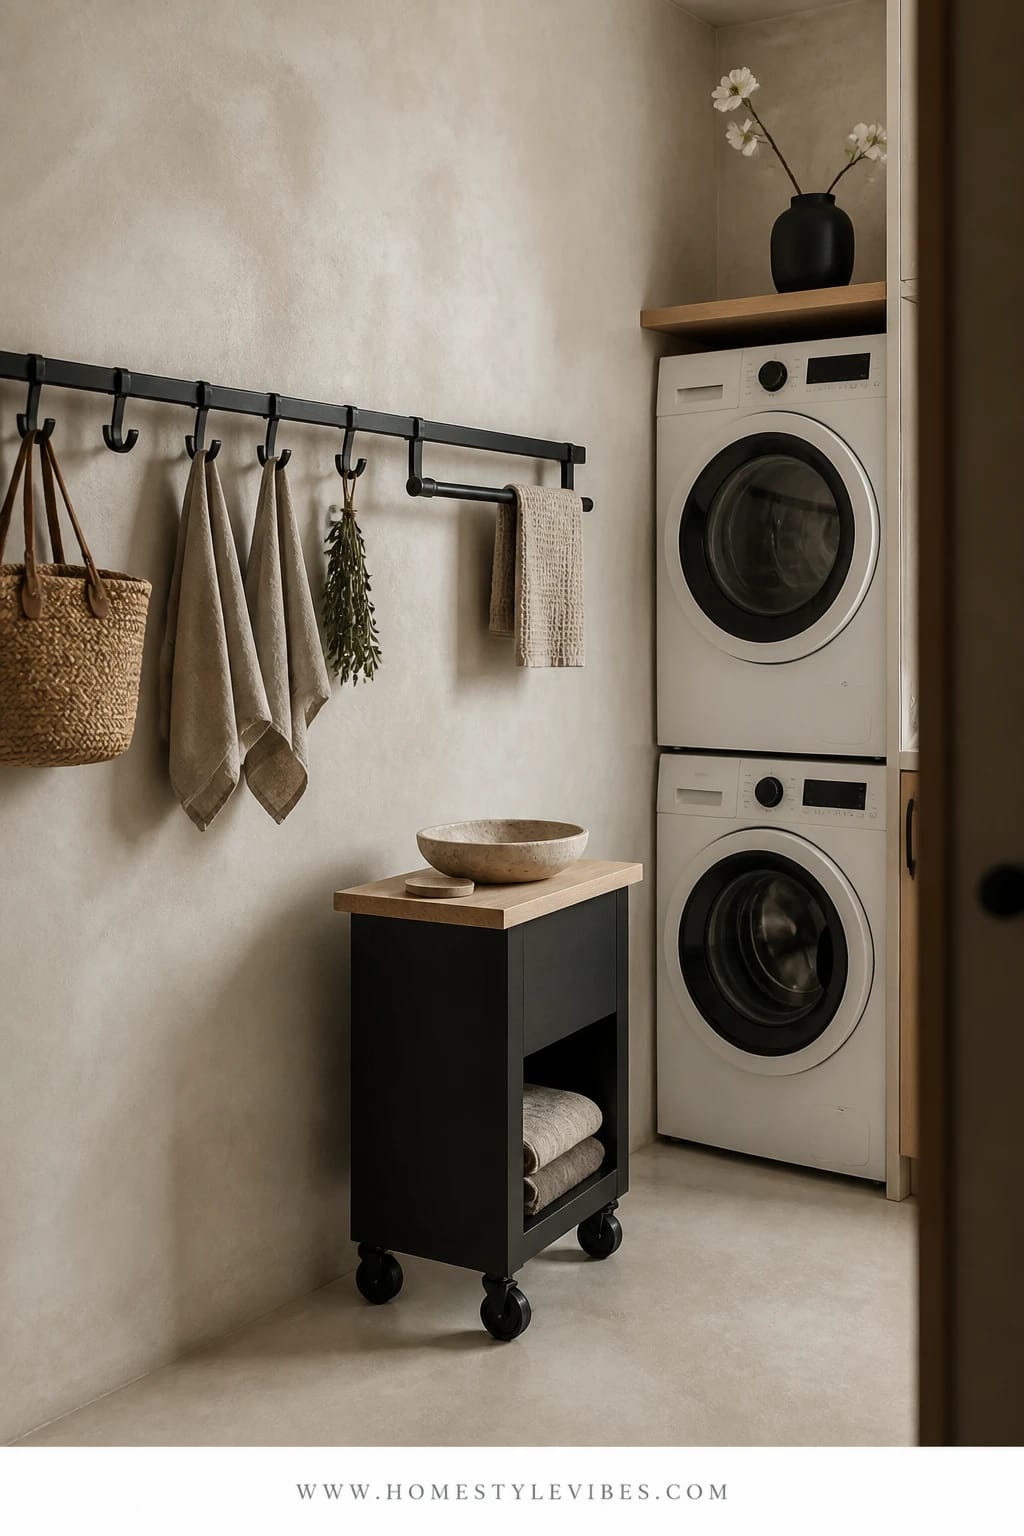
You crave efficiency. You hate bending, shuffling, and the backpack-in-the-corner that somehow lives here now. This look leans industrial-minimal: a satin black steel rail for hooks and hang-dry, cool neutral lighting for clarity, and a narrow rolling island that becomes your folding, sorting, and “drop your keys in the tray” hub.
Works in real homes because it designs for movement. The rail replaces clunky freestanding racks and gives you vertical function. A rolling island (12–18 inches wide) threads between machines and a wall; it’s slim but mighty—hidden side hooks, a shallow top drawer for lint rollers, and a lower shelf for towels. Cool neutral light (3500K) keeps colors true while avoiding office-blue vibes.
It photographs with graphic punch: black lines against pale walls, shadow gaps under the island, and a tight color story that reads sharp. Budget version: spray a wooden dowel and use black pipe brackets. Renter-friendly: a slim bar cart with removable hooks and locking casters.
Budget Breakdown:
- Satin black rail + hooks (or pipe + flanges): $40–$120
- Narrow rolling island or bar cart: $90–$280
- LED fixture or track with 3500K bulbs: $70–$200
- Matte baskets + trays: $25–$60
- Adhesive cable raceway for tidy cords: $15–$30
Total Estimated Cost: $240 – $690
Best For: Galley-style laundry rooms and apartments where flexibility rules. Perfect for busy households that sort, steam, and stage outfits.
Key Design Elements:
- Main materials: satin black steel, butcher block or laminate top, powder-coated wire
- Color palette: black, white, greige, eucalyptus or slate accent
- Lighting strategy: even, neutral overhead plus directional task over the island
- Furniture silhouettes: narrow cart, linear rail, low-profile baskets
- Texture layers: matte metal, smooth wood, soft felt drawer liner
- Accent details: small framed typography, graphite spray bottles
How To Recreate This Look:
- Install the rail at 66–70 inches so shirts clear the island top.
- Choose an island under 18 inches deep; add locking casters for stability.
- Run an adhesive cable channel to tame tangle behind the appliances.
- Swap bulbs to 3500K and add a directional spot over the cart location.
- Style with one tray, two matching baskets, and uniform black hangers.
Why This Feels Designer: Repetition and restraint. The black line language ties every element together, making the room feel edited instead of piecemeal.
One Thing To Avoid: Overloading the rail. Leave negative space between hooks to keep the wall reading long and light.
Pro Styling Tip: For a hero shot, park the cart at a slight diagonal to show both the front and side—depth sells scale in small rooms.
7. White Oak Slab Counter, Sky-Light LED Panel, and Built-In Upper Cabinets With Recessed Pulls
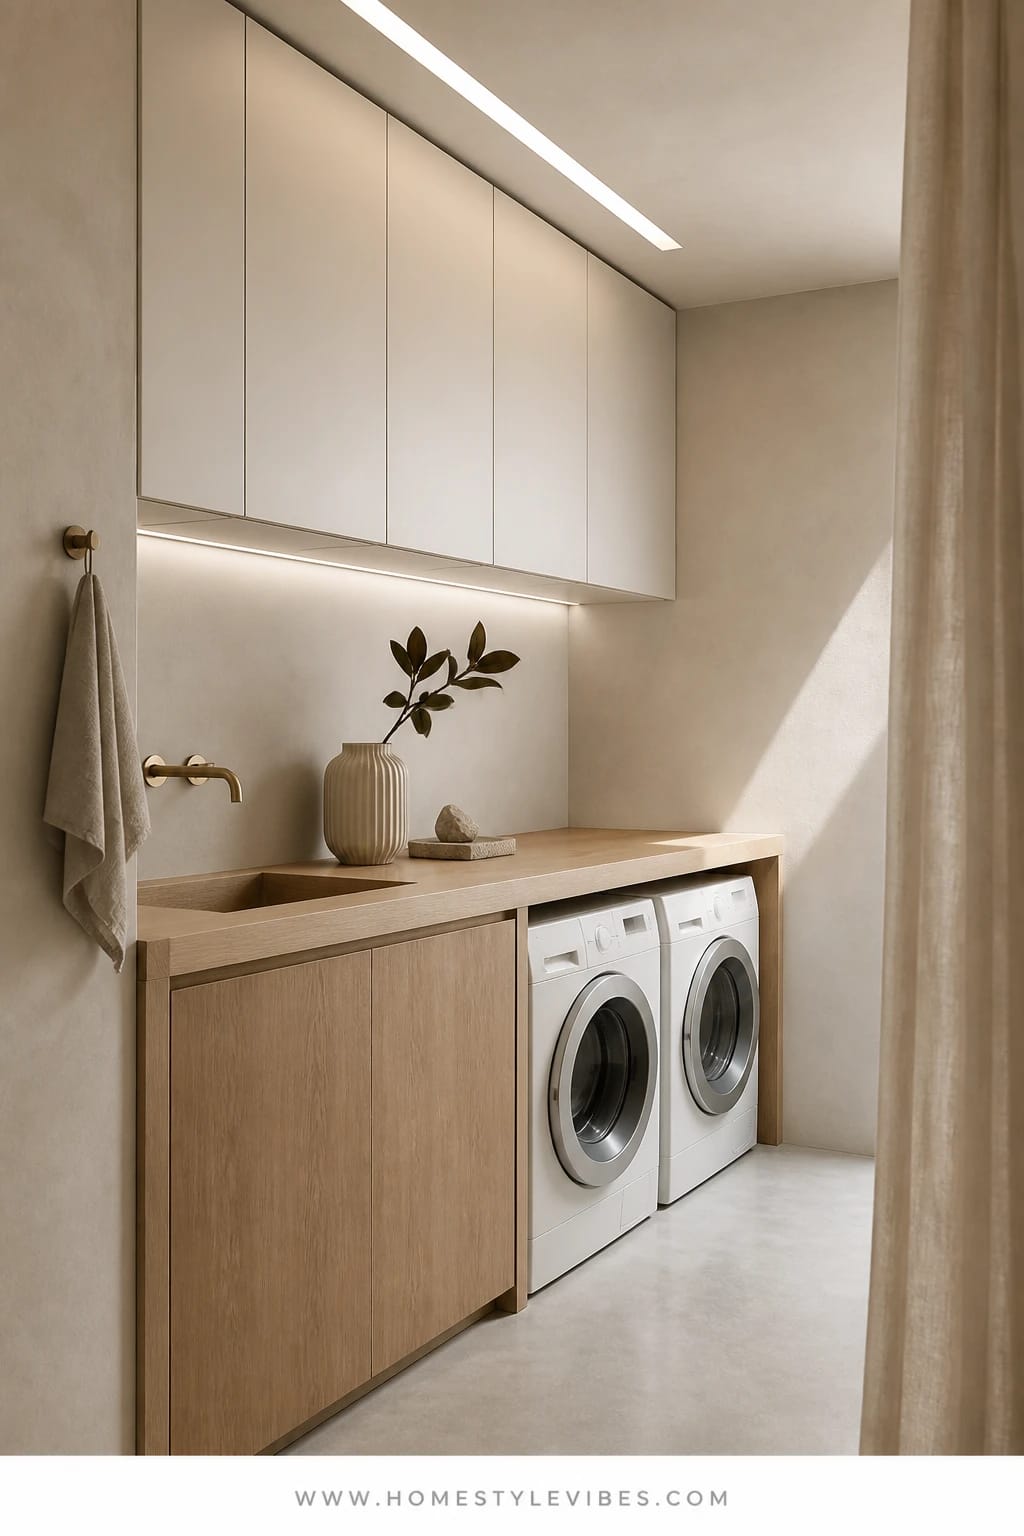
You’ve shuffled bins for months and still can’t find the dryer sheets. The underlying issue: no real cabinet storage, no generous counter, and overhead glare that flattens everything. Enter a built-in moment that looks custom: a white oak slab counter spanning the appliances, a thin sky-light LED panel that mimics daylight, and upper cabinets with recessed pulls so nothing visually snags.
The mood is calm, architected, and resale-friendly. Oak adds organic movement that hides crumbs and lint, while recessed pulls keep fronts serene. A skylight-style panel spreads light evenly wall-to-wall so you can finally see what you’re doing without harsh reflections. It’s easy to keep clean, and the uniform cabinet faces photograph like a high-end kitchen—because let’s be real, design rules apply here too.
Variations: Budget-friendly uses oak-look laminate counters and semi-custom shaker uppers. Darker version uses walnut-look laminate and a 3000K panel for warmth. Renter-friendly: freestanding pantry cabinets with a wide counter-height console bridging the machines; apply stick-on recessed “pulls” to fake the look.
Budget Breakdown:
- White oak slab or laminate counter: $180–$650
- Upper cabinets (semi-custom or flat-pack): $300–$1,100
- Recessed pulls or integrated profiles: $40–$160
- Sky-light LED panel (edge-lit): $90–$260
- Paint + filler for a seamless wall: $40–$80
Total Estimated Cost: $650 – $2,250
Best For: Small but permanent laundry rooms where built-in storage pays off. Suits modern, Scandinavian, or new-traditional homes prioritizing value and calm.
Key Design Elements:
- Main materials: white oak, matte lacquer cabinet fronts, integrated pulls
- Color palette: pale oak, soft white, mushroom gray, brushed steel
- Lighting strategy: large surface-area LED panel for shadow-free work
- Furniture silhouettes: slab counter span, full-height uppers
- Texture layers: wood grain, smooth lacquer, minimal textile
- Accent details: single stem in a glass bud vase, linen-wrapped storage boxes
How To Recreate This Look:
- Measure and scribe the counter to hug the walls; secure with cleats.
- Install upper cabinets in a tight block, shimming for perfect alignment.
- Add recessed pulls or edge profiles; avoid mixed hardware styles.
- Mount the sky-light LED panel centered on the workspace.
- Style with two matching linen boxes and conceal labels on the inside.
Why This Reads High-End: Alignments and planes. When cabinet seams and counter edges line up precisely, the brain reads “custom millwork.” The lighting’s evenness seals it.
The Most Common Mistake: Stopping the counter short of the wall. Gaps trap lint and visually break the line—scribe for a tight fit.
Pro Styling Tip: Wipe the counter with a barely damp microfiber and buff dry before shooting; wood grain pops when light skims a clean surface.
True story: A friend of mine spent weeks agonizing over paint colors before realizing the real problem was her lighting. We swapped her overhead with an edge-lit panel and, no joke, the “right” paint basically chose itself. Sometimes the fix is upstream.
One more mindset note: Perfection isn’t required. I still have a rogue dryer sheet that appears in photos like an uninvited guest. The point is clarity, not control. Choose finishes that forgive real life and lighting that makes everything kinder.
Quick Checklist
- Swap to high-CRI warm or neutral LEDs for accurate color and calmer light
- Add a continuous counter bridge across appliances for a single work surface
- Use vertical texture (fluted panels or beadboard) to visually raise the ceiling
- Install one statement sconce or skylight-style panel for even illumination
- Choose one hero material (oak, marble, glossy tile, limewash) and keep others quiet
- Introduce hidden storage like a pull-out hamper or rolling narrow island
- Mount a ceiling or wall rack to get drying off floors
- Match hangers and decant detergents into simple, labeled containers
- Leave negative space on shelves for breathability in photos and real life
- Scribe counters and finish edges—details make small rooms feel custom
Frequently Asked Questions
How much should I budget for a small laundry room makeover if I only change lighting and storage?
Plan $200–$700. A quality LED fixture, uniform hangers, one rail, and a rolling cart or pull-out hamper handle 80% of function and make the room feel bigger fast.
I rent—what upgrades will actually make my tiny laundry closet feel bigger without drilling?
Use a countertop bridge that rests on anti-slip pads, a freestanding bar cart, peel-and-stick beadboard or tile panels, and plug-in sconces. Add uniform containers and a tension-rod curtain to hide clutter.
My laundry room has no window. How do I avoid the sterile look while keeping colors accurate?
Choose 3500K high-CRI bulbs for accurate colors without the icy cast. Add one warm accent light (a sconce at 2700K) to layer in comfort. Matte or honed finishes help soften glare.
What’s the most common mistake in small laundry rooms that makes them feel crowded?
Too many small containers and mismatched finishes. Pick one hero material and one hardware finish, then decant products so labels don’t shout. Leave open space between items.
How do I maintain materials like limewash or wood counters around water?
Seal wood with a water-resistant finish and wipe spills quickly. For limewash, use a compatible sealer on splash zones or place a narrow shelf/backsplash in high-contact areas.
Here’s Your Finish Line
Pick one of these 7 small laundry room makeover ideas and start there. Maybe it’s the counter bridge that turns chaos into a smooth plane, or the lighting shift that finally makes colors honest. When a room feels small, the secret isn’t more stuff—it’s texture, light, and restraint used with intent.
You don’t need a full renovation to make your tiny space feel bigger. You need a few strong moves that calm the eye and respect how you actually live. Choose your hero material, commit to a coherent light temperature, and let negative space do its quiet magic.
You’ve got this. Make one precise change, take a breath, and watch the room open up. And when that first load folds itself (okay, fine, wishful thinking), at least the view will be worth it.

About the Author

Krisztina P.Rendes, Founder of Home Style Vibes
Founder of Home Style Vibes
Krisztina Puskásné Rendes created Home Style Vibes as a cozy-modern lifestyle space where homemaking meets inspiration. Her goal is to help women create beautiful, organized, and peaceful homes they truly love — without overwhelm. You’ll find here heart-driven content on home decor, cleaning tips, easy family recipes, organization and decluttering, DIY home projects, plants, and seasonal ideas — all designed to bring more calm, comfort, and style into everyday life.