6 Living Room Wall Design Ideas That Instantly Elevate A Modern Space
You want a living room that feels finished: magazine-level crispness, layered textures, and lighting that flatters at any hour. But every time you stare at that big blank wall, the room falls flat—too echoey, too beige, too “we tried.” You’re craving a modern space with soul: soft shadows, tactile surfaces, warm wood, a touch of gloss, and art that looks intentional, not like a last-minute cart addition. These six living room wall design ideas fix the “off” feeling fast and give you highly photogenic, Pinterest-worthy moments you can pull off in two weekends or less—most under a $2,500 cap per wall, with renter-friendly swaps included. If you love a clean modern vibe but refuse to live in something that feels cold, this is your path.
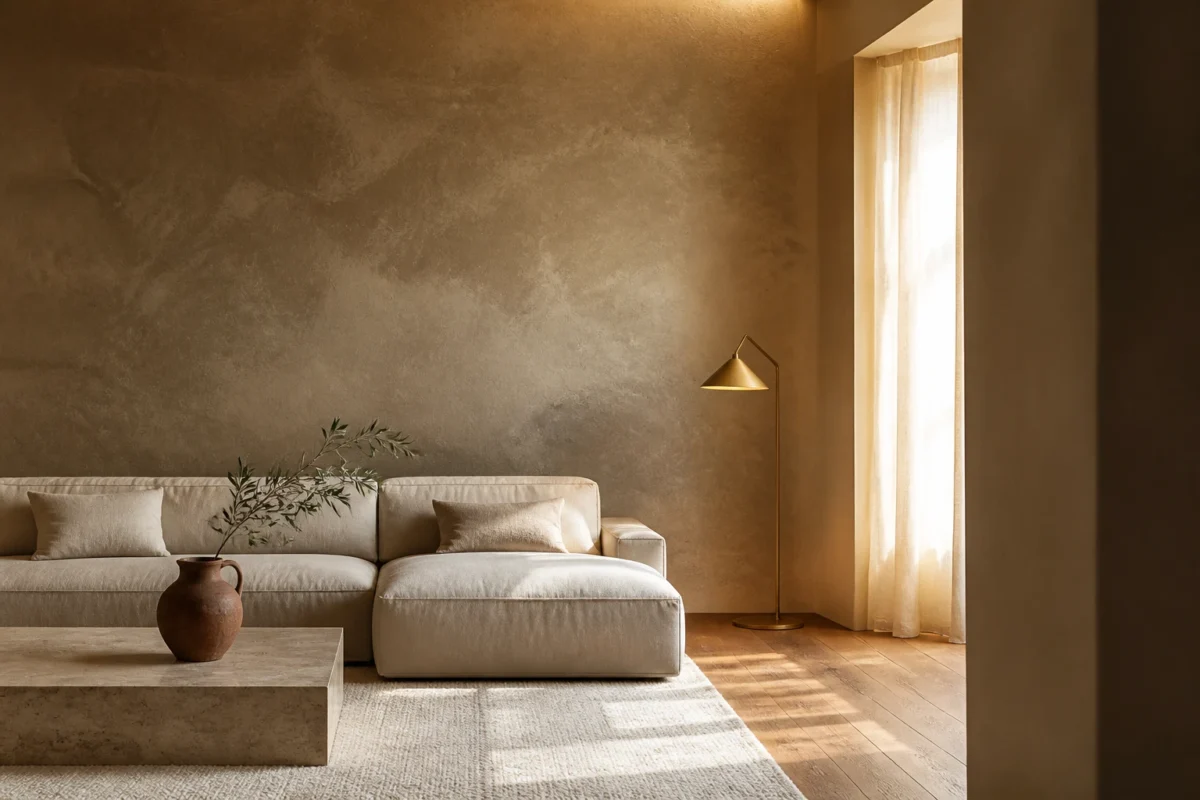
1. Textured Limewash Wall With Soft Uplighting And Low-Slung Linen Sofa
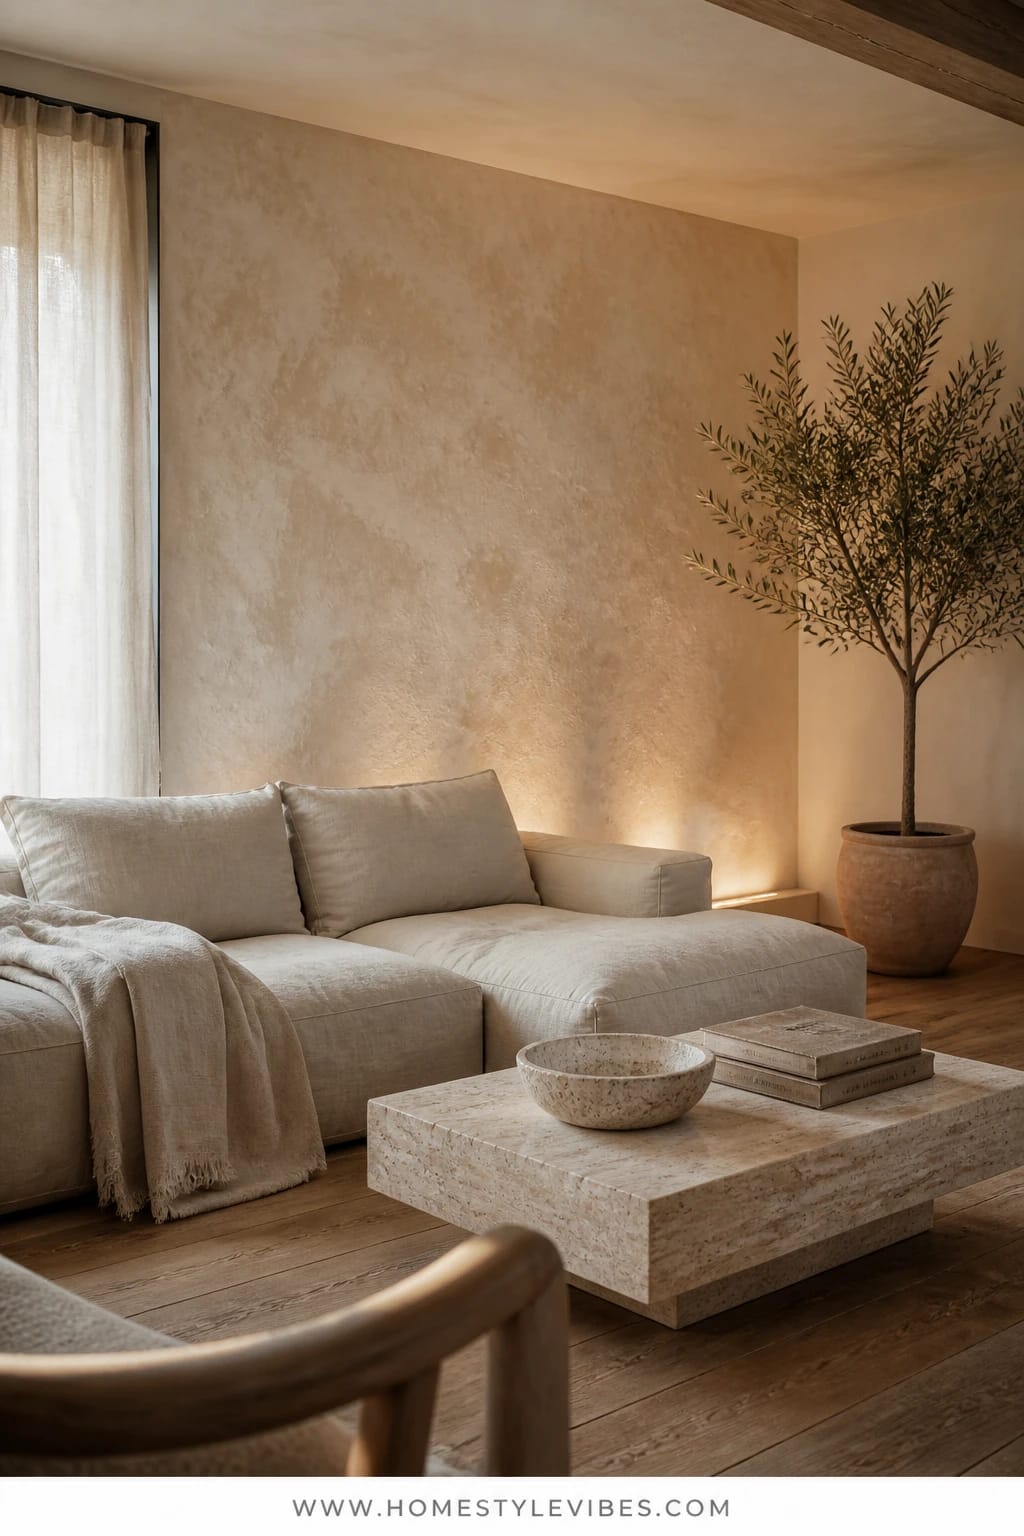
We’ve all been there: pristine white walls that somehow feel sterile, like the room is wearing a lab coat. You’ve tried framed prints and a plant, but it still reads unfinished. This design leans into tactility—using a limewash wall that catches light in moody, velvety ways—then pairs it with soft uplighting and a low, generous linen sofa that says, “bring the snacks, leave your shoes at the door.” The mood is modern Mediterranean meets quiet luxury: sun-diffused, calm, and whispery.
Why it works in real homes: limewash gives depth without busy pattern, works brilliantly in small spaces (because it blurs harsh corners), and forgives scuffs better than stark paint. Uplighting (on the floor or at baseboards) warms the room at night and smooths out the dreaded ceiling shadows that can make even expensive spaces feel cheap. The combination photographs beautifully because the texture eats glare and the light creates feathered gradients. Honestly, I tried this in my own living room last fall and couldn’t believe how that single wall suddenly made the whole room feel expensive-level intentional.
Budget Breakdown:
- Limewash kit (primer, paint, brush): $150–$350
- Plug-in floor uplights or LED baseboard strip: $60–$300
- Low-slung linen sofa: $900–$2,800 (budget: look for performance linen blends)
- Oversized framed art or vintage textile: $150–$700
- Textured throw pillows (bouclé, slub cotton): $60–$180
Total Estimated Cost: $1,320 – $4,330
Best For: Small to medium living rooms that read flat in photos; anyone who wants warmth without clutter; low-light spaces that need glow rather than brightness.
Key Design Elements:
- Main materials: limewash, linen, slub cotton
- Color palette: bone, taupe, sand, mushroom, soft black accents
- Lighting strategy: floor-mounted uplights or hidden baseboard LEDs to graze texture
- Furniture silhouettes: low, deep sofa; slim black side tables; curved ottoman
- Texture layers: bouclé pillows, nubby wool throw, woven tray
- Accent details: large-scale art or a framed textile; matte black frames for contrast
How To Recreate This Look:
- Start with a limewash kit and prep the feature wall; apply two to three irregular coats to keep that cloudlike movement.
- Add plug-in floor uplights at two to three points along the wall; aim the beams upward for a soft wash.
- Layer in a low-slung linen sofa in a neutral color; keep legs minimal so the piece feels grounded.
- Install a simple black or oak picture ledge; lean one oversized piece of art to break up the texture.
- Style with tactile pillows, a wool throw, and a small sculptural bowl to catch remotes without shouting.
Why This Looks Expensive: Subtle texture paired with controlled, indirect lighting feels editorial. The wall becomes art—even with minimal decor—because the light shifts throughout the day and the finish shows depth that flat paint can’t touch.
Watch Out: Don’t choose a bright white limewash on a north-facing wall; it can turn chalky. Go warmer (think mushroom or pale putty) and test a patch because color shifts a lot with this finish.
Pro Styling Tip: For photos, angle one uplight slightly so it casts a diagonal gradient—this adds shadow depth and keeps the frame from feeling static.
Keep scrolling. The next idea brings in sculptural rhythm that sets a modern tone before you even hit the couch.
2. Fluted Oak Paneling With Warm White Sconces And A Curved Lounge Chair
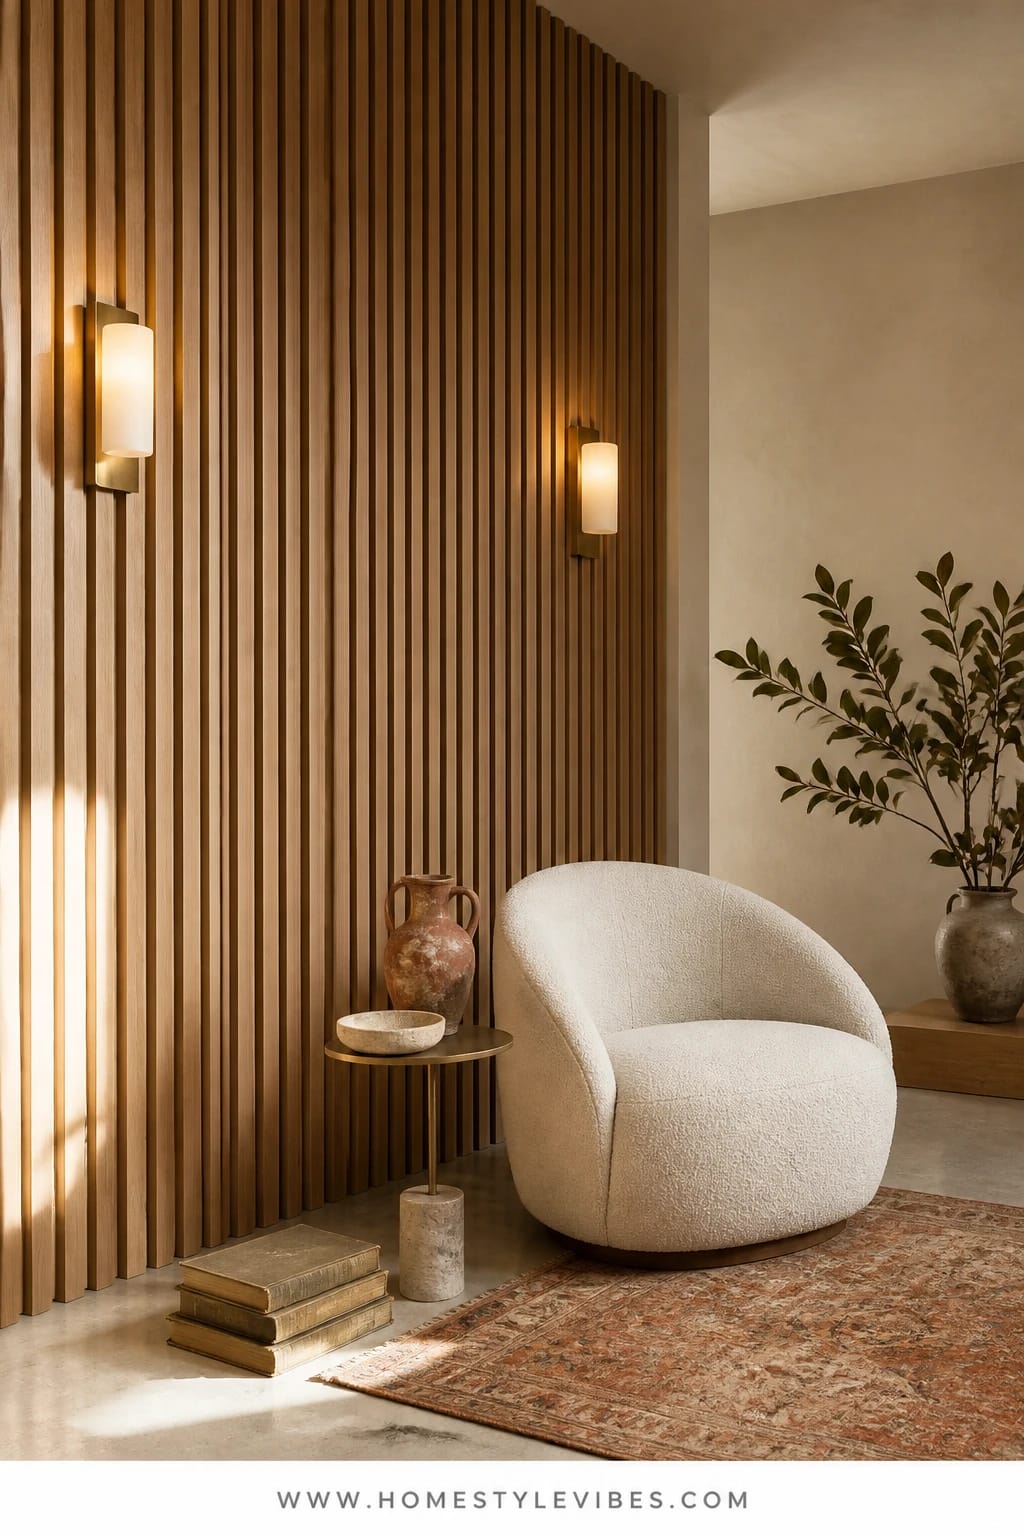
It’s that one corner that always feels off—plenty of light, decent rug, still no presence. You’ve tried another print and a fig tree, but the wall looks flat and forgettable. Fluted oak paneling brings sculptural rhythm without heaviness. It’s modern, tactile, and instantly architectural. Add warm white sconces (2700K to 3000K) and a curvy lounge chair and the whole zone starts to feel like a boutique hotel lobby you never want to leave.
Here’s why it lands: the vertical lines draw the eye up, which makes ceilings feel higher and rooms feel taller. Oak’s honey tone plays beautifully with modern palettes and improves resale because it reads as a material upgrade. In photos, the fluting captures shadows like corduroy in sunlight—rich, dimensional, and never flat. Families love it because it hides dings better than drywall, and dust barely shows on matte-finished wood.
Key Design Elements:
- Main materials: fluted oak panels, brass or plaster sconces
- Color palette: oak, warm whites, camel, espresso accents
- Lighting strategy: pair fluting with sconces that wash light sideways to enhance shadows
- Furniture silhouettes: low modern sofa elsewhere, one curved lounge chair as the star
- Texture layers: leather ottoman, cashmere throw, ribbed ceramic vase
- Accent details: slim black shelf or thin ledge for a single art book
Budget Breakdown:
- Fluted oak panels or DIY slat kit: $350–$1,200 depending on wall width
- Warm white wall sconces (plug-in or hardwired): $120–$600
- Curved lounge chair: $300–$1,500
- Matte poly or oil finish: $25–$80
- Small ledge or shelf: $40–$160
Total Estimated Cost: $835 – $3,540
Best For: Medium to larger walls where you want a focal point; contemporary or Scandinavian-leaning homes; anyone craving architectural interest without a major renovation.
How To Recreate This Look:
- Measure the wall and decide full-height vs. partial-height paneling; partial works great behind a TV to reduce echo.
- Attach furring strips if needed; mount fluted panels or evenly spaced slats. Keep consistent gaps (use spacers).
- Finish with a matte oil or low-sheen poly to protect while preserving the raw look.
- Install sconces centered between flutes if possible to emphasize rhythm; choose warm bulbs.
- Place a curved chair and a low side table; keep decor minimal so the fluting leads.
Why This Feels Designer: The repetition of lines plus asymmetry (chair on one side, sconce line on the other) creates deliberate tension. It looks curated, not “I just bought stuff.”
One Thing To Avoid: Don’t push the chair too close to the wall. Give it at least 8–12 inches of breathing room so the curves read clearly and shadows fall behind it.
Pro Styling Tip: For a strong photo, angle the chair three-quarters to the camera, not dead-on—this shows both the fluting’s depth and the chair’s curve in one frame.
Pause and exhale. If one idea is already clicking, save it. You don’t need all six. Pick your anchor wall, then build the room around that single gesture. That’s how modern living rooms feel calm instead of chaotic.
3. Honed Stone Fireplace Surround With Shadow-Cove Lighting And A Slender Metal Coffee Table
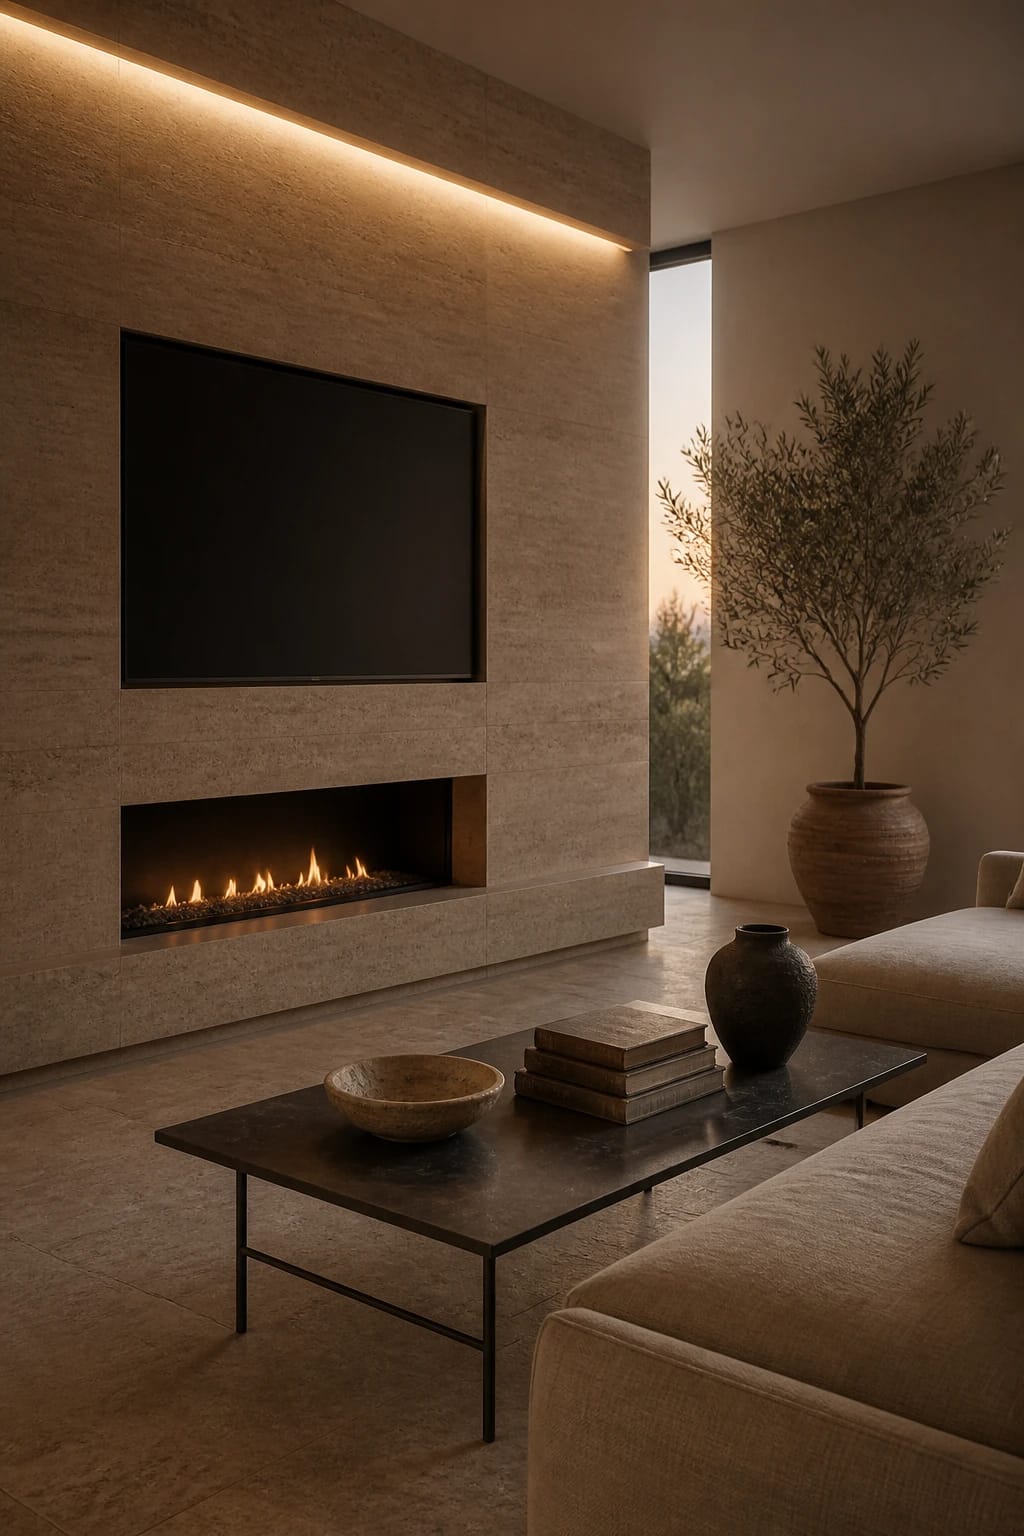
You want drama without clutter. But every gallery wall you try feels busy next to the TV, and every shelf reads messy by week two. This design makes one heroic move: a honed stone surround that wraps your fireplace or media wall, with a slim cove light tucked just under a top ledge to create that quiet halo of light. Then you keep the furniture line sleek with a slender metal coffee table that slices the composition cleanly.
The mood hits modern sanctuary: tactile but not rustic, sophisticated without screaming. Stone stays cool to the touch, diffuses light beautifully, and anchors even the most awkward room layout. If you’re worried about resale, stone always reads as a high-value upgrade. Bonus: a honed finish won’t give you that glare line on Zoom calls like polished stone does. This setup photographs like a magazine spread because the cove lighting silhouettes the surround and creates separation between tones—hello depth.
Budget Breakdown:
- Honed stone slabs or large-format porcelain lookalikes: $1,000–$4,500
- LED cove strip with dimmer: $80–$220
- Slender metal coffee table (blackened steel or brass): $300–$1,200
- Low console or hearth shelf: $200–$900
- Cable management kit: $25–$60
Total Estimated Cost: $1,605 – $6,880
Best For: Open-plan living rooms, spaces with a TV you can’t hide, anyone craving a strong focal anchor without fussy decor.
Key Design Elements:
- Main materials: honed marble, limestone, or porcelain slabs
- Color palette: soft gray, putty, charcoal, warm white
- Lighting strategy: hidden cove under a ledge for shadow play, plus one dimmable lamp
- Furniture silhouettes: thin legs, squared edges, low-profile seating
- Texture layers: wool rug, leather catchall, single stone bowl
- Accent details: minimal—one large branch in a matte vase is enough
Why This Reads High-End: Monolithic materials with quiet seams feel custom. The light isn’t there to brighten—it’s there to sculpt. That restraint screams confidence.
How To Recreate This Look:
- Work with a fabricator or use slab-style porcelain panels for budget; wrap the fireplace or media bump-out with minimal seams.
- Integrate a 1–2 inch overhang at the top for an LED cove; install a dimmer.
- Mount the TV slightly off the stone (French cleat or inset) and conceal wires with a cable kit.
- Choose a slender metal coffee table that leaves breathing room over the rug pattern.
- Style sparsely: one sculptural branch, a textured bowl, and a single book stack with space around it.
The Most Common Mistake: Picking a polished stone. It reflects everything, including the TV, and cheapens the effect. Go honed or leathered for that soft-lit depth.
Pro Styling Tip: Shoot at dusk with the cove light at 40%—you’ll get velvety shadows and a subtle glow line that photographs like a dream.
Ready for color? The next idea balances bold paint with sleek organization so nothing tips into chaos.
4. Deep Charcoal Paint With Picture-Frame Moulding, Brass Picture Light, And A Tailored Tuxedo Sofa
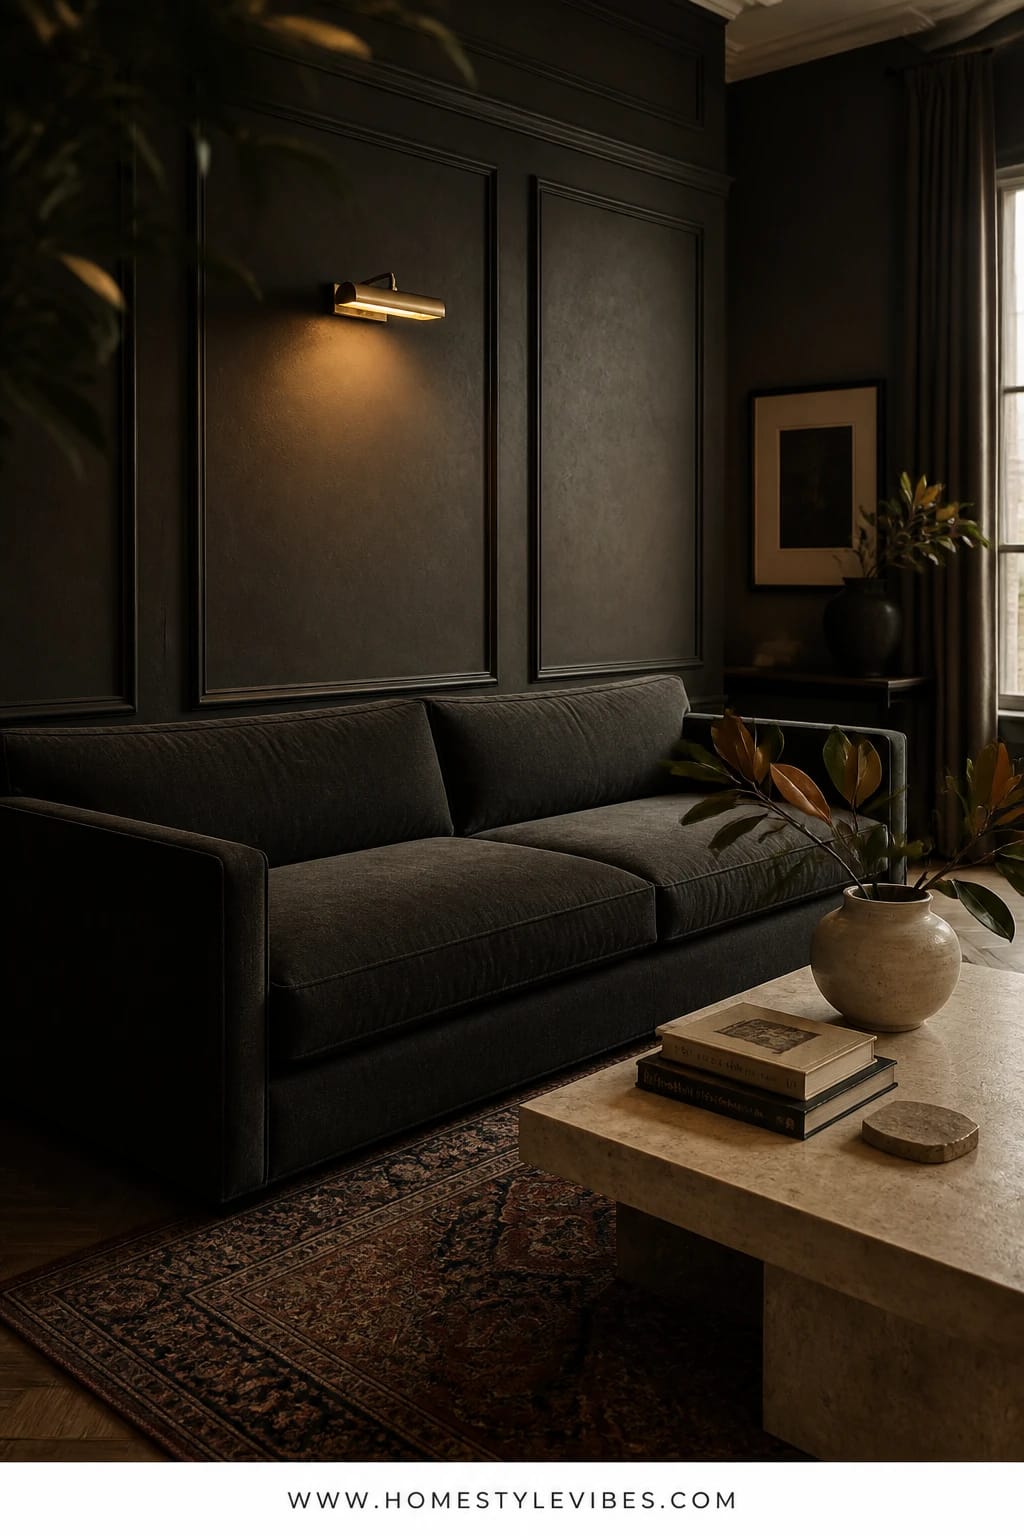
Ever paint a bold color and then panic because the room suddenly felt smaller and heavy? You’re not alone. The secret isn’t avoiding dark walls—it’s giving them architecture and glow. Deep charcoal with picture-frame moulding creates subtle geometry, and a brass picture light introduces warm highlight at eye level. A tailored tuxedo sofa (arms as high as the back) balances the weight with clean edges and chic presence.
The vibe channels “modern library meets cocktail hour.” It’s wildly photogenic because the moulding catches the light, the brass adds a glint, and the charcoal absorbs glare so everything else pops—wood, greenery, even your coffee table book. In small spaces, dark walls actually recede visually at night, making the perimeter feel infinite when you dim the lights. Renter? Use peel-and-stick moulding and plug-in picture lights—promise, it looks believable if you paint the moulding to match.
Key Design Elements:
- Main materials: satin charcoal paint, lightweight moulding, unlacquered or brushed brass
- Color palette: charcoal, ecru, camel, brass, black
- Lighting strategy: picture light above a single large artwork; add a dimmable floor lamp
- Furniture silhouettes: tuxedo sofa, cube side tables, low bench
- Texture layers: velvet pillow, wool rug, ribbed glass vase
- Accent details: slim black frames, aged brass hardware, soft boucle throw
Budget Breakdown:
- Paint and supplies: $80–$160
- Peel-and-stick or wood moulding: $120–$450
- Picture light (plug-in or hardwired): $100–$500
- Tuxedo sofa: $900–$2,600
- Large framed art or canvas: $150–$800
Total Estimated Cost: $1,350 – $4,510
Best For: Medium rooms with decent natural light or reliable lamps; anyone drawn to moody, dramatic evenings and grown-up cocktails at home.
How To Recreate This Look:
- Paint the wall charcoal (try a satin or matte washable finish); color-match moulding and paint it before install.
- Lay out picture-frame moulding in balanced rectangles; keep margins consistent and centered behind the sofa.
- Mount a picture light over a single oversized artwork; aim the beam so it grazes the surface, not the frame.
- Position the tuxedo sofa a few inches off the wall to keep the moulding visible; add cube side tables for structure.
- Style minimally: two velvet pillows, one wool throw, and a single ribbed glass vase with branches.
Why This Looks Intentional: The moulding pins the paint to an architectural story, and the single picture light makes the wall feel curated, not just painted. The eye reads a plan, not a color experiment.
Don’t Do This: Avoid cool bulbs with charcoal. They make the color look blue and lifeless. Warm white bulbs or nothing.
Pro Styling Tip: Leave an inch of negative space around the frame inside the moulding box—this breathing room looks editorial in photos.
Quick perspective reset: you’re not building a set. You’re building a room you’ll actually live in—on messy Tuesdays and sparkling Saturdays. Pick one wall, one material, one glow. That’s the trick.
5. Plaster Niche Wall With Diffused LED Backlight And A Sculptural Console Table
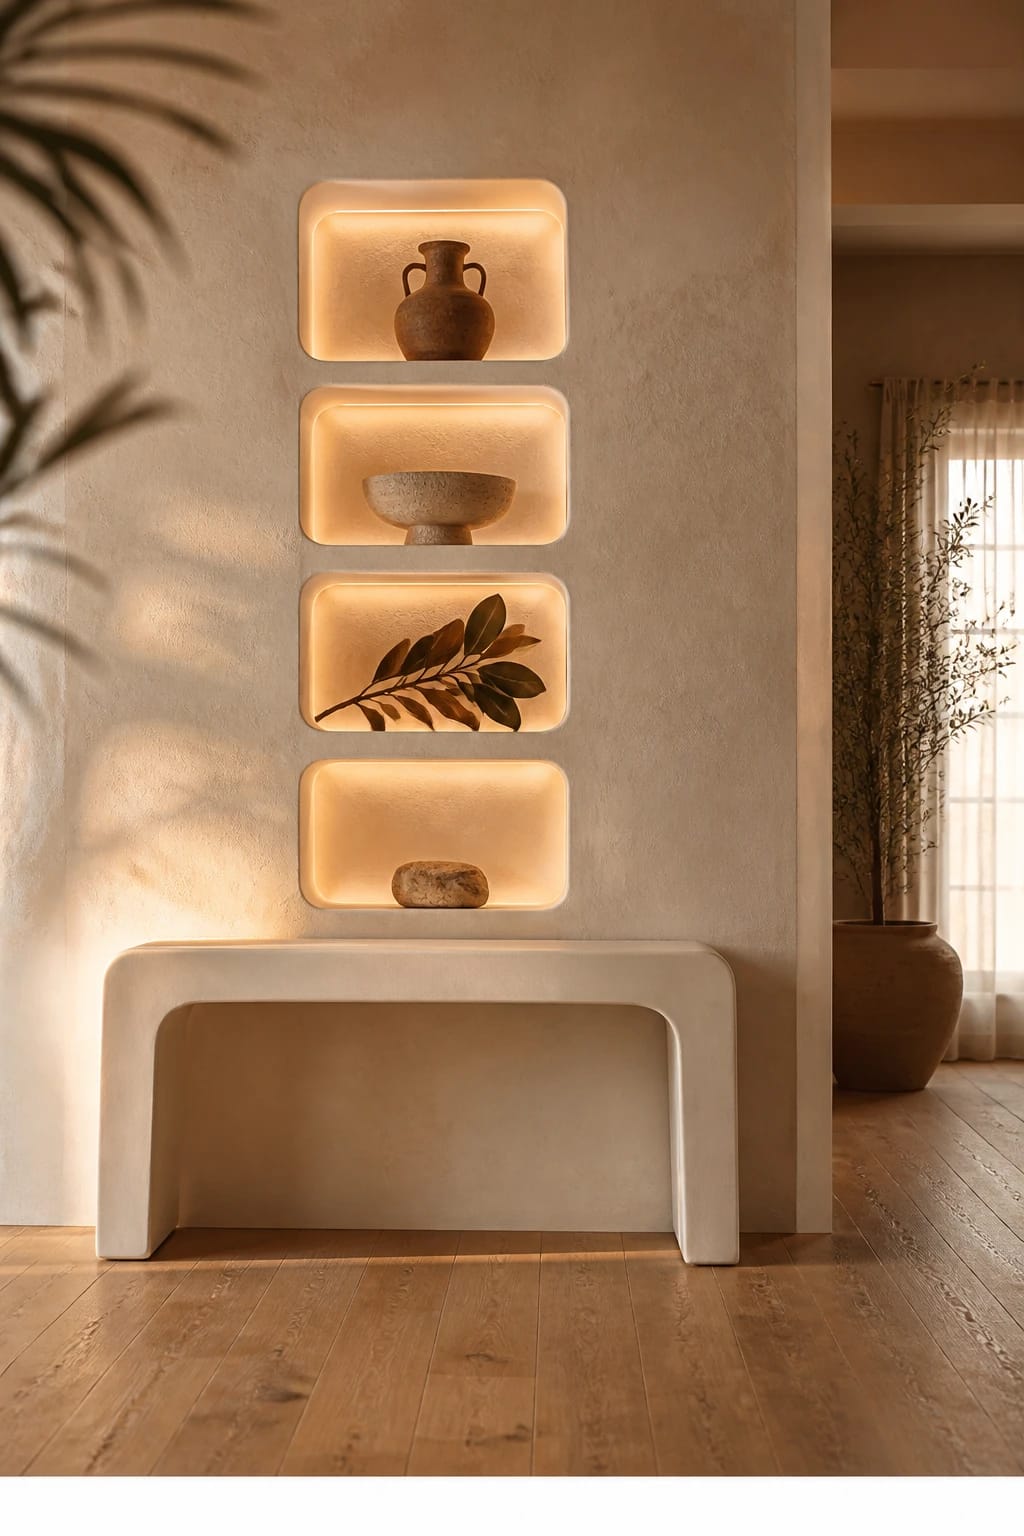
You’ve collected pretty objects—ceramic vessels, a special bowl, a small sculpture—but they disappear on a basic shelf. You want that gallery moment without dust-trap bookcases or visual noise. Build (or fake) a plaster niche wall, backlight it with diffused LEDs, and anchor the scene with a sculptural console. Your living room turns into a quiet exhibition you control with a dimmer.
The mood leans art-forward and serene, like a Mediterranean gallery with soft air and slow light. Plaster reads luxurious because it’s imperfect in the best way; no two walls finish exactly the same. Backlighting avoids harsh hot spots and wraps your objects in a gentle halo. In photos, the niche openings and the negative space around them build rhythm and depth that flat walls can’t touch. Small-space friendly? Absolutely—niches let you display without projecting heavy furniture out into the room.
Budget Breakdown:
- Veneer plaster or gypsum skim coat: $250–$800
- Pre-fab niche boxes or drywall framing materials: $150–$600
- LED diffusers, channels, and transformer: $120–$300
- Sculptural console table (stone-look or wood): $300–$1,500
- Minimal art objects: $80–$300
Total Estimated Cost: $900 – $3,500
Best For: Long living rooms needing rhythm; collectors who want display space without clutter; renters can use shallow, freestanding niche cabinets with peel-and-stick plaster wallpaper.
Key Design Elements:
- Main materials: plaster or plaster-look finish, LED diffusers, matte ceramics
- Color palette: warm white, stone, sand, matte black accents
- Lighting strategy: hidden LED channels in the niche tops for soft falloff
- Furniture silhouettes: sculptural, arched or column-like console, light on legs
- Texture layers: chalky ceramics, woven runner, smooth glass
- Accent details: one statement vessel, a single art book, quiet negative space
Why This Feels Designer: Negative space is the flex here. When you leave air around pieces, each object feels important. The backlight turns your styling into a scene, not a clutter shelf.
How To Recreate This Look:
- Decide on one to three niches (odd numbers read better); sketch sizes with painter’s tape to test proportions.
- Build shallow drywall boxes or install pre-fab niches; skim with plaster for a seamless face.
- Install LED channels with diffusers at the top interior edge; wire to a dimmer or plug-in transformer.
- Place a sculptural console below; align its proportions to the niche rhythm.
- Style with restraint: two or three matte ceramic pieces, one low stack of books, done.
One Thing To Avoid: Don’t place shiny, mirrored objects under niche backlights; they produce hot spots that glitch the calm vibe. Matte finishes keep the glow even.
Pro Styling Tip: For photos, turn off all overheads and let the niche backlights do the work; the resulting shadows make the wall read like carved stone.
Craving a nature-forward option? The next approach brings indoor-outdoor energy without a single seashell in sight.
6. Raked Concrete Accent With Daylight Wash And A Low Media Credenza
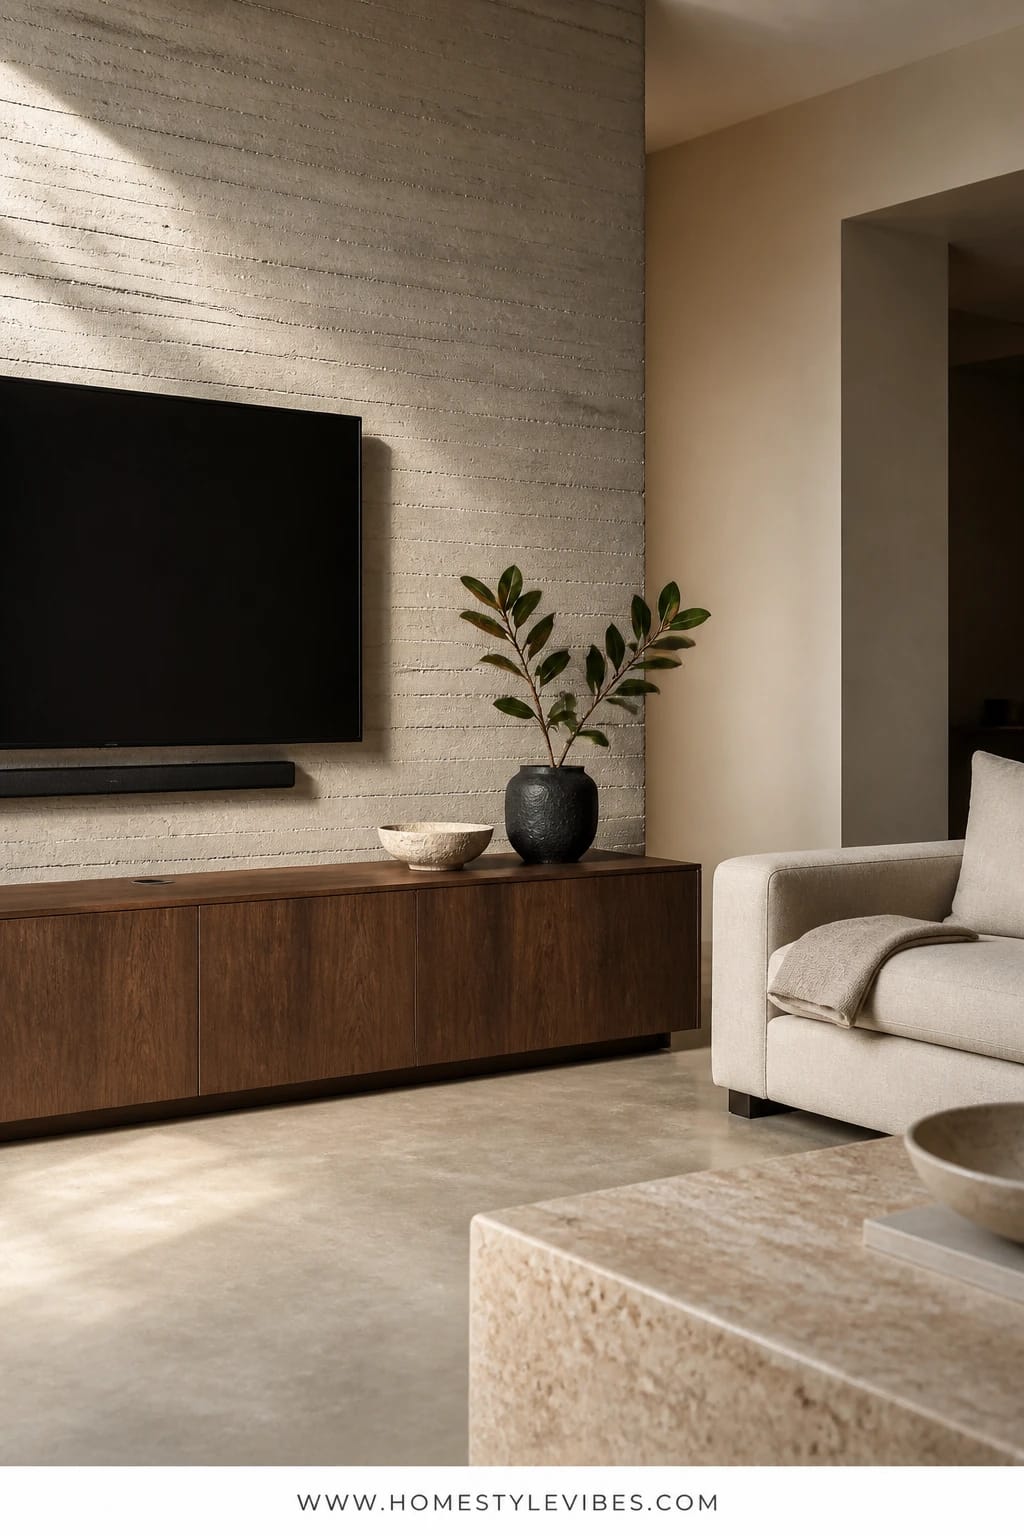
Some rooms just need grit. Not mess—texture. You’ve tried another rug, but everything still feels polite. Enter a raked concrete accent wall: tactile, urban, and quietly dramatic. Let it catch real daylight from a window wash (no direct spotlight) and ground the composition with a low, wide media credenza. The effect is modern loft meets gallery—mature but unfussy.
In real homes, concrete-look finishes work because they absorb visual noise. TVs, speakers, and cables disappear against it if you color-match well. The raked texture creates linear shadow even when the sun is shy. Photographs love it because the surface reads like soft stone, not shiny faux. Maintenance is easy: matte sealer, occasional dusting, done. If you rent, use mineral-based, removable panels or lightweight 3D wall tiles that stick with command strips—seriously, very doable.
Key Design Elements:
- Main materials: raked concrete plaster or concrete-look panels
- Color palette: warm gray, bone, black, olive green accents
- Lighting strategy: rely on side daylight; add a single thin LED bar grazing from above
- Furniture silhouettes: low credenza with long lines; optional floating shelf
- Texture layers: nubby wool rug, linen curtains, matte metal planters
- Accent details: overscaled greenery (olive or rubber tree), simple black frames
Budget Breakdown:
- Concrete-look plaster or panels: $300–$1,200
- Matte sealer: $30–$80
- Low media credenza: $350–$1,500
- Thin LED grazer (optional): $80–$220
- Greenery and planters: $120–$350
Total Estimated Cost: $880 – $3,350
Best For: Rooms with adjacent windows, modern or industrial-leaning homes, anyone managing a visible TV while keeping the room calm and grown-up.
How To Recreate This Look:
- Choose a warm gray raked plaster or panel with linear texture; avoid blue-gray which can feel cold.
- Prep the wall; apply in vertical passes to exaggerate height. Seal matte to protect without adding shine.
- Place a low, long credenza centered on the wall; keep hardware minimal so the wall stays the feature.
- Mount the TV slightly lower than usual so the top third doesn’t reflect the ceiling; cable-manage tightly.
- Add one tall plant and one oversized black frame; stop before you over-style.
Why This Looks Expensive: The surface looks architectural, like you discovered the building’s bones and decided to keep them. Crisp edges plus a single long line of furniture read custom.
Watch Out: Avoid heavy overhead lighting. Concrete textures hate top-down glare. Use daylight and one thin grazer from above or below.
Pro Styling Tip: In photos, angle the camera so daylight rakes across the wall—those micro-shadows sell the texture instantly.
Little mindset moment: perfection is not the brief. Real homes evolve. Pick one wall, set a mood, and let the rest of the room catch up over time. I promise, guests will notice the vibe shift even if you still have a moving box masquerading as a side table. Been there.
Quick Checklist
- Limewash or plaster for soft, light-catching texture
- Fluted oak or slat paneling for vertical rhythm
- Honed stone or slab-look porcelain for a monolithic focal point
- Deep charcoal paint with picture-frame moulding for geometry
- Backlit niches with diffusers for gallery-level glow
- Raked concrete finish for urban grit and TV camouflage
- Warm white bulbs (2700K–3000K) for every lamp and sconce
- Dimmer switches to control mood and shadows
- Low-profile, tailored furniture to let walls read clearly
- One oversized artwork instead of many small pieces
- Matte finishes over shiny to avoid glare and cheap reflections
- Consistent cable management for clean lines
- One sculptural plant to add life without clutter
- Negative space—leave breathing room around styled items
- Test swatches at different times of day before committing
Frequently Asked Questions
How do I pick the right wall for a feature without throwing off the layout?
Choose the wall your eye lands on first when entering the room or the wall that hosts your anchor piece (fireplace, TV, sofa). Avoid walls with doors or multiple interruptions. If in doubt, stand in the doorway and take a quick phone photo—whichever wall dominates that frame is your candidate.
I’m worried dark paint will make my living room feel small. Should I skip charcoal?
You can absolutely use charcoal. The key is pairing it with architectural detail (moulding) and warm, directional lighting. At night, dark walls recede and feel cocooning. Keep furniture light-toned and add a brass picture light so the darkness reads cozy, not cave-like.
What’s the most budget-friendly option that still looks high-impact?
Limewash or plaster-look paint with simple uplighting delivers a huge mood shift for under $600 on a typical wall. Add one oversized framed textile or canvas and you’re done. It’s also renter-friendly if you use removable hooks and plug-in lights.
I rent. Which of these living room wall design ideas won’t cost my security deposit?
Use peel-and-stick moulding for the charcoal wall, removable slat panels for the fluted look, plaster-look paint that cleans off well, and freestanding niche cabinets with LED puck lights. Plug-in sconces and picture lights with neat cord covers read custom without drilling.
How do I keep statement walls from feeling cluttered six months later?
Set styling limits. For example, “Only three objects on the console” or “One art piece per wall.” Use a closed credenza to hide remotes and chargers. Schedule a five-minute Sunday reset to put away visual noise. Guard the negative space; it’s part of the design.
Conclusion
Pick one idea that makes your shoulders drop when you imagine it—the wall that catches late afternoon light in a soft wash, or the fluted oak that turns a blank corner into a conversation. Start there. You don’t need perfection on day one; you need a clear move that sets a mood.
The truth is, luxury isn’t a price tag—it’s texture, lighting, and restraint working together. Choose one material with soul, add a warm glow, and leave room for the eye to rest. That’s how a modern living room stops feeling unfinished and starts feeling like you.
So grab the brush, order the sconces, or book the slab. You’re closer than you think. And when that first evening hits and the wall hums softly in the background, trust me—you’ll feel it.

About the Author

Krisztina P.Rendes, Founder of Home Style Vibes
Founder of Home Style Vibes
Krisztina Puskásné Rendes created Home Style Vibes as a cozy-modern lifestyle space where homemaking meets inspiration. Her goal is to help women create beautiful, organized, and peaceful homes they truly love — without overwhelm. You’ll find here heart-driven content on home decor, cleaning tips, easy family recipes, organization and decluttering, DIY home projects, plants, and seasonal ideas — all designed to bring more calm, comfort, and style into everyday life.