How to Make the Best Scented Candles at Home (Recipes That Actually Smell Amazing) Secrets You’Ll Use Tonight
You want that cozy, hotel-lobby scent floating through your home every evening. You hate when your DIY candle smells like nothing after the first burn — or worse, turns sooty and tunnels. This guide hands you the exact formulas, tools, and step-by-step process to pour gorgeous, strong-smelling candles for under $40 in starter supplies and under 90 minutes of active time. Expect photogenic jars, refined fragrance, and recipes that actually perfume a room — not just the two feet around your coffee table.
What’s Inside
Supplies That Actually Matter: Wax, Wicks, and Jars That Won’t Fail You
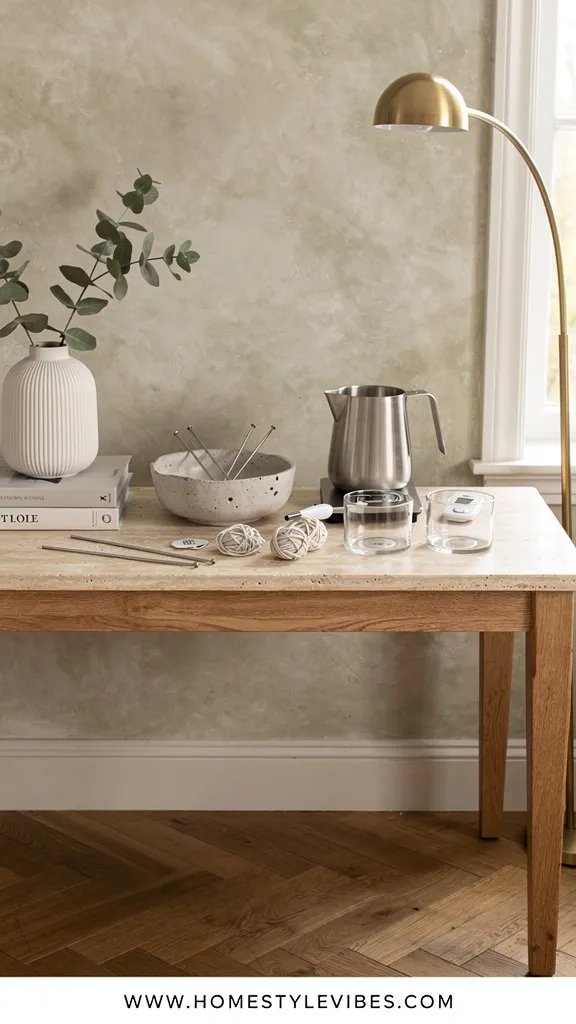
If you’ve ever poured a candle that smelled like warm cardboard, this is where the fix begins.
We’ve all been there: you grabbed a random wax kit online, tossed in a few drops of oil, and ended up with a pretty candle that barely smells. The truth is, materials do the heavy lifting. When you choose the right wax, the right wick, and a jar sized to match, you get an even, glossy burn and a scent that actually fills the room like soft, warm air wrapping your shoulders.
Here’s why this works: different waxes hold and release fragrance differently. Coconut and soy blends feel creamy to the touch and burn cooler, giving you a longer burn and richer scent. A proper wick width pulls up enough melted wax (that’s your fuel) so the fragrance throws. And jars with thicker glass distribute heat more evenly, avoiding that streaky, frosted look on the sides.
Budget-friendly alternatives are easy and chic:
- Wax: Start with a soy-coconut container blend from brands like NatureWax or CandleScience, usually under $4 per pound on Amazon. Pure soy is budget pick; coconut-soy is best overall for scent throw.
- Wicks: Cotton or wooden wicks from Eco or CDN series. “Best for beginners”: cotton; “Worth the splurge”: crackling wooden wicks for ambiance.
- Jars: Reuse smooth pasta sauce jars (labels removed with hot water and a little oil), or grab 8 oz straight-sided tumblers from Target or Amazon.
- Fragrance oils: Choose high-quality phthalate-free oils labeled candle-safe from CandleScience, Makesy, or The Flaming Candle. Essential oils alone are “skip this one” for strong throw in containers — they tend to fade fast.
Melt and Pour Like a Pro: Temperatures, Ratios, and Zero Tunneling
This is the part most people get wrong — and it’s why your candle burns down the middle like a tiny well.
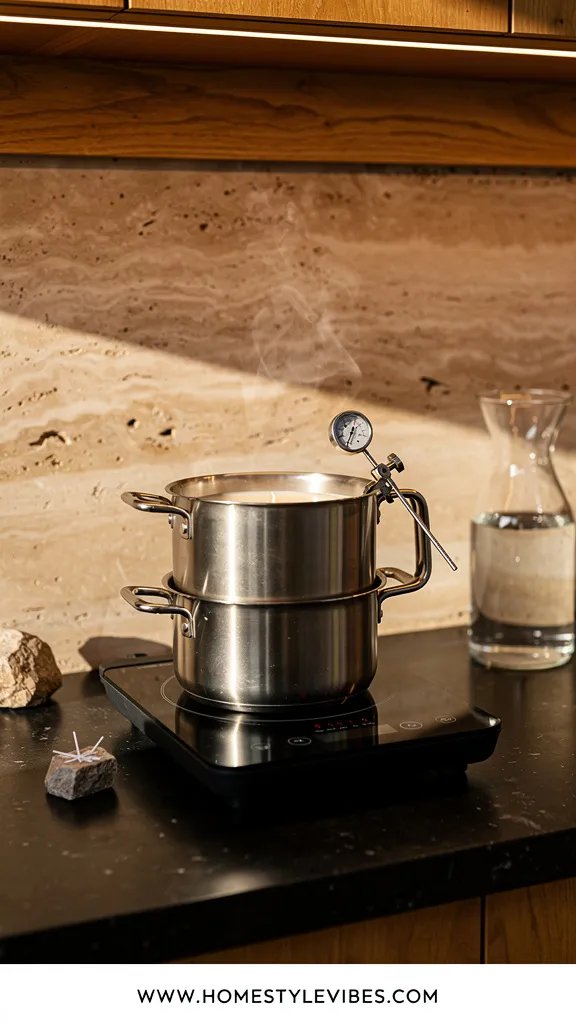
Here’s the simple science: wax has a melt point and a pour temp; fragrance binds best in a sweet spot. Heat your wax too hot and it can smell flat, like warmed plastic. Pour too cool and you risk bumps and frosting. When you respect the temperatures, you get a silky top, creamy texture, and a scent that blooms every time the pool of melted wax reaches the warm glass sides.
Baseline numbers that actually work for a soy-coconut blend: melt to 185°F, add fragrance at 175°F, stir for a full 2 minutes, and pour at 135–145°F into room-temperature jars. Use 6–10% fragrance by weight. For an 8 oz candle (about 6.5 oz of wax by weight), that’s roughly 0.6 oz to 1.0 oz fragrance oil. Budget swap: use a basic digital thermometer from Walmart and a $10 pour pitcher from Amazon. No fancy lab gear required.
- Best overall method: double-boiler on the stove — gentle, controlled heat.
- Budget pick: microwave in 30-second bursts, stirring between rounds; works well for 1–2 small candles at a time.
- Skip this one: direct heat in a pot. Hot spots scorch wax and ruin fragrance.
This isn’t about achieving a magazine-perfect home — it’s about building a ritual that makes your space feel grounded. If your first pour isn’t flawless, you didn’t fail; you learned your wax. Keep going.
Signature Candle Recipes That Perfume a Room (3 Crowd Favorites)
You’ve tried “vanilla” before and it smelled like a sugar cookie after one burn. These blends stay dimensional.
It sounds obvious, but here’s where it usually falls apart: people use single-note oils at low percentages and expect hotel-level throw. The secret isn’t just more oil — it’s balance. Layering a bright top note, a cozy mid, and a grounding base creates that round, room-filling scent that lingers in the air like a memory. Below are three tested blends using a 9% fragrance load in coconut-soy, sized for a single 8 oz container (about 6.5 oz wax by weight).
Recipe 1: Weekend Linen (Citrus, Lavender, Cashmere)
Smells like windows open at 10 a.m., sun on clean sheets, hint of warmth.
- Fragrance total: 0.6 oz
- Blend: 40% lemon verbena (0.24 oz), 35% French lavender (0.21 oz), 25% cashmere musk (0.15 oz)
- Best for beginners: forgiving, bright, strong cold and hot throw.
Recipe 2: Fireside Vanilla Noir (Vanilla, Smoked Cedar, Cardamom)
Creamy vanilla with low, smoky warmth and a crackle if you use a wooden wick.
- Fragrance total: 0.6 oz
- Blend: 50% Madagascar vanilla (0.30 oz), 30% smoked cedar (0.18 oz), 20% cardamom (0.12 oz)
- Worth the splurge: upgrade to a premium vanilla absolute blend for depth.
Recipe 3: Green Fig Terrace (Fig, Green Leaves, Amber)
Fresh-cut stems, milky fig, golden dusk. Lush but not sweet.
- Fragrance total: 0.6 oz
- Blend: 45% ripe fig (0.27 oz), 35% green leaves (0.21 oz), 20% amber resin (0.12 oz)
- Best overall for living rooms: wide appeal, sophisticated finish.
Budget-friendly swaps:
- Use CandleScience or The Flaming Candle oils — both reliable and under $3–$5 per 1 oz bottle.
- Renter-friendly boost: place your lit candle near a hallway to move scent with gentle airflow, no diffusers needed.
If you skip one of these steps, nothing falls apart. You simply pick up where you left off. Candles are forgiving when you respect time and temperature — think slow cooking, not flash frying.
Wick Matching Made Simple: The One Decision That Makes or Breaks Scent Throw
You can nail your fragrance and still end up disappointed if the wick can’t keep up.
We’ve all trimmed a wick, lit the candle, and watched it tunnel like a tiny canyon. That’s a wick mismatch. Your wick size should be chosen for your jar diameter and wax blend. A proper wick melts the top into a full pool that reaches the edges within 3–4 hours, creating that glossy lake of fragrance that perfumes the room with soft, even warmth.
Which to choose? For an 8 oz straight-sided tumbler (~2.8–3 inches diameter) with coconut-soy:
- Best for beginners: ECO 10 or CD 14 cotton wick — reliable, stable flame.
- Best overall ambiance: medium crackling wooden wick (0.5 inch wide) with a booster wick if your blend is heavy on vanilla or resin.
- Skip this one: tiny tea-light wicks in larger jars. They’ll tunnel and waste wax.
Budget-friendly: buy a wick sample kit on Amazon or Makesy and test two sizes side-by-side. Renter-friendly trick: use wick stickers for easy recentering if needed; no messy hot glue.
Finish Like a Designer: Tops, Labels, and Little Details That Feel Luxe

You nailed the pour. Now let’s make it look like a $38 candle from a boutique in Charleston.
Here’s why this actually works: packaging and finishing cue our senses before the candle ever burns. A smooth top, a crisp label, and an elegant lid invite the hand — and the nose. Think smooth, satin wax surface catching soft afternoon light, black-and-ivory label, and a warm oak lid that adds a faint woody scent when you lift it.
Elevate on a budget:
- Top it off: If your surface sinks as it cools, hit it briefly with a heat gun to level. No heat gun? A hair dryer works in short bursts.
- Labels: Print on waterproof matte sticker paper and keep text minimal: fragrance name, notes, burn time. Use free templates in Canva.
- Lids: Grab bamboo or metal lids on Amazon; or thrift small saucers as covers — “Budget pick” and unexpectedly chic.
- Vessel upgrade: Reuse ceramic ramekins for a pottery vibe; add a candle-safe warning label to the base.
Your candle doesn’t have to be perfect to be beautiful. Think slow living: small rituals, repeated well. This is craft, not a race.
Troubleshooting Like a Candle Maker: Fix Frosting, Wet Spots, and Weak Throw
If you’ve ever seen white crystals on the surface or trapped air along the glass, take a breath — both are fixable.
Frosting looks like tiny snow on soy-based wax. It happens with quick temperature changes, not because you “did it wrong.” Slow your cooling and keep your workspace around 70–75°F. Wet spots (little air pockets against the glass) happen when wax contracts away from the jar. Pre-warm jars and pour a tad warmer to help the wax hug the glass. For weak scent, it’s nearly always under-wicking, under-fragrancing, or off-temperature blending.
Budget-friendly fixes you can do today:
- Place cooling candles on a wooden cutting board, not a cold stone counter.
- Add a low cardboard box over cooling candles to create a mini “cooling tent.”
- Test a higher wick size before adding more fragrance — it often solves throw issues.
- Best overall fix for weak throw: correct wick size and full melt pool on burn two.
- Best for frosting: steadier room temp and slower cooling.
- Skip this one: tossing in extra oil after the pour. It won’t bind and can be a fire risk.
Quick Checklist
- Soy-coconut container wax (at least 1 lb)
- Cotton or wooden wicks matched to jar diameter
- 8 oz straight-sided glass jars with lids
- Candle-safe fragrance oils (phthalate-free)
- Digital kitchen scale
- Digital thermometer
- Pouring pitcher or heat-safe glass measuring cup
- Wick stickers or hot glue
- Popsicle sticks or wick holders
- Heat gun or hair dryer for smoothing tops
- Matte waterproof label paper
- Warning labels for the jar base
- Scissors or wick trimmer
- Cardboard box “cooling tent”
- Notebook for testing notes
Frequently Asked Questions
How much does it cost to start making strong-smelling candles at home?
About $35–$45 for starter supplies: a pound of wax, a few wicks, two to three fragrance oils, and two jars from Target or Amazon. Add a $10 thermometer and a $10 pour pitcher if you don’t already have them. Each 8 oz candle usually ends up in the $3–$5 range depending on your fragrance choice.
I live in a small apartment — will the scent be too strong?
Not if you wick correctly and use a moderate fragrance load (8–9%). Start with one candle in an 8 oz jar and crack a window for the first 10 minutes if you’re sensitive. Choose fresher blends like citrus-lavender or green fig for lighter, airier throw.
My candles tunnel. What am I doing wrong?
Likely an under-sized wick or you didn’t burn long enough on the first two burns. Size up the wick one step and let the candle burn 3 hours so the melt pool reaches the edges. Always trim to 1/4 inch before lighting.
Can I use only essential oils instead of fragrance oils?
You can, but expect weaker throw and faster fade. Most essential oils don’t perform as well in container candles and some aren’t safe at high heat. If you want naturals, look for candle-formulated natural blends from reputable suppliers.
How long should I cure my candles before burning or gifting?
For soy-coconut, 3–7 days is ideal. Store them with lids on at room temperature. The cure lets the fragrance bind evenly so it throws beautifully on the first burn.
Bringing It All Together
Making the best scented candles at home isn’t about luck — it’s about a few right choices repeated with care. You choose a wax that loves fragrance, a wick that actually reaches the edges, and blends that tell a story: crisp morning linen, dusky vanilla, a leafy terrace at golden hour. The steps are simple, the results are soulful.
Start tiny today. Melt one pound of wax, pour two jars, and pick one recipe from this guide. Light it next week after a proper cure, and let the first glow fill your living room while you make tea. If you’re thinking, “What if I mess it up?” — you won’t. You’ll learn, adjust one variable, and your next pour will be better.
Homes become beautiful through rituals. This one just happens to smell incredible. Trust me: by your third candle, you’ll be the friend everyone texts for refills — and your space will feel like the calm, elevated retreat you’ve wanted all along.

About the Author

Krisztina P.Rendes, Founder of Home Style Vibes
Founder of Home Style Vibes
Krisztina Puskásné Rendes created Home Style Vibes as a cozy-modern lifestyle space where homemaking meets inspiration. Her goal is to help women create beautiful, organized, and peaceful homes they truly love — without overwhelm. You’ll find here heart-driven content on home decor, cleaning tips, easy family recipes, organization and decluttering, DIY home projects, plants, and seasonal ideas — all designed to bring more calm, comfort, and style into everyday life.