6 River Rock Landscaping Ideas for a Low-Maintenance Yard (Flower Beds, Pool Edges & Mulch Combos) That Wow
You want a yard that feels calm and put-together—like a quiet resort path after golden hour. You hate the messy mulch, the weedy flower beds, and the way water ruins your hard work every rainy weekend. River rock landscaping fixes the exact headache: it’s tidy, textural, and low-maintenance while setting off your plants like a frame around a favorite photo. These six ideas show you how to use river rocks around flower beds, pool edges, and mulch combos for a yard you can whip into shape in a weekend or two with a budget cap you control.
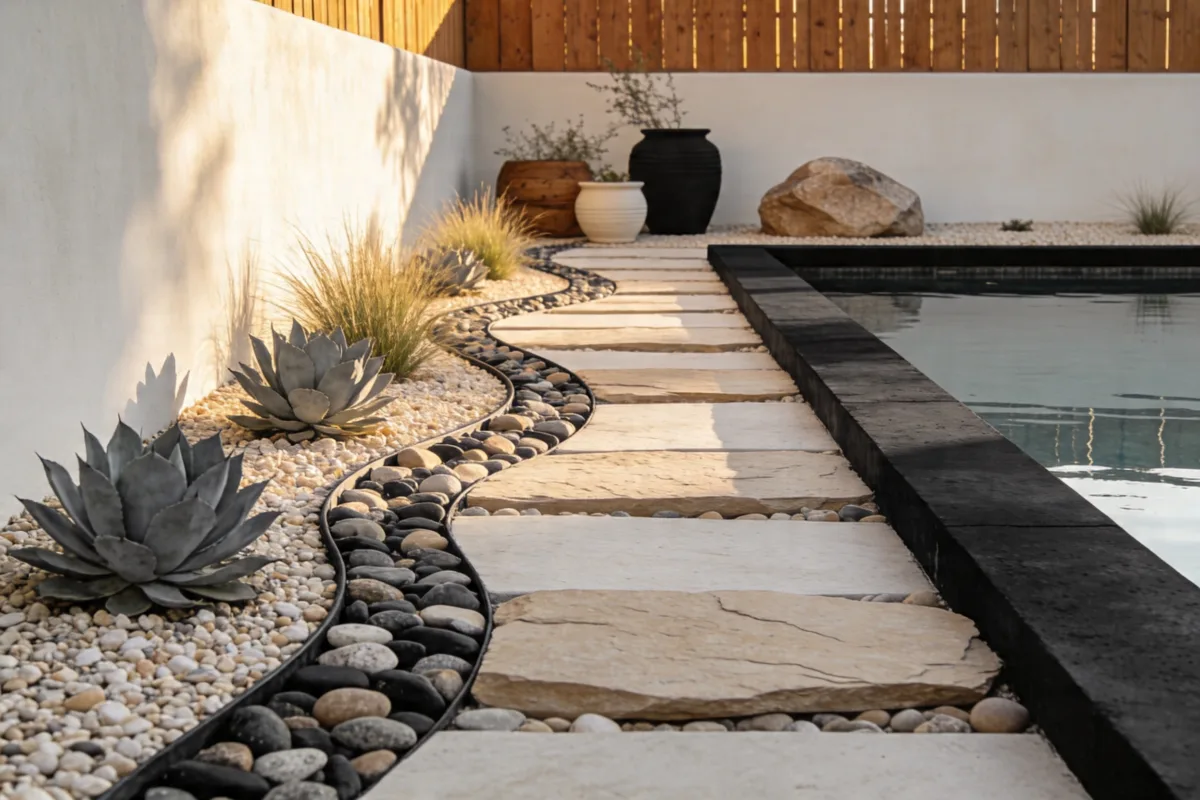
Think sun-washed stones against slate-gray succulents. Powdery, pale pebbles catching soft light. Clean borders that make everything look deliberate. These ideas are not just pretty—they solve drainage drama, reduce weeding, and photograph like a dream. If you’re the person who loves a zen mood and hates yard chores, this story was written with you in mind.
1. Desert-Modern Bed With River Rock Ribbon Borders
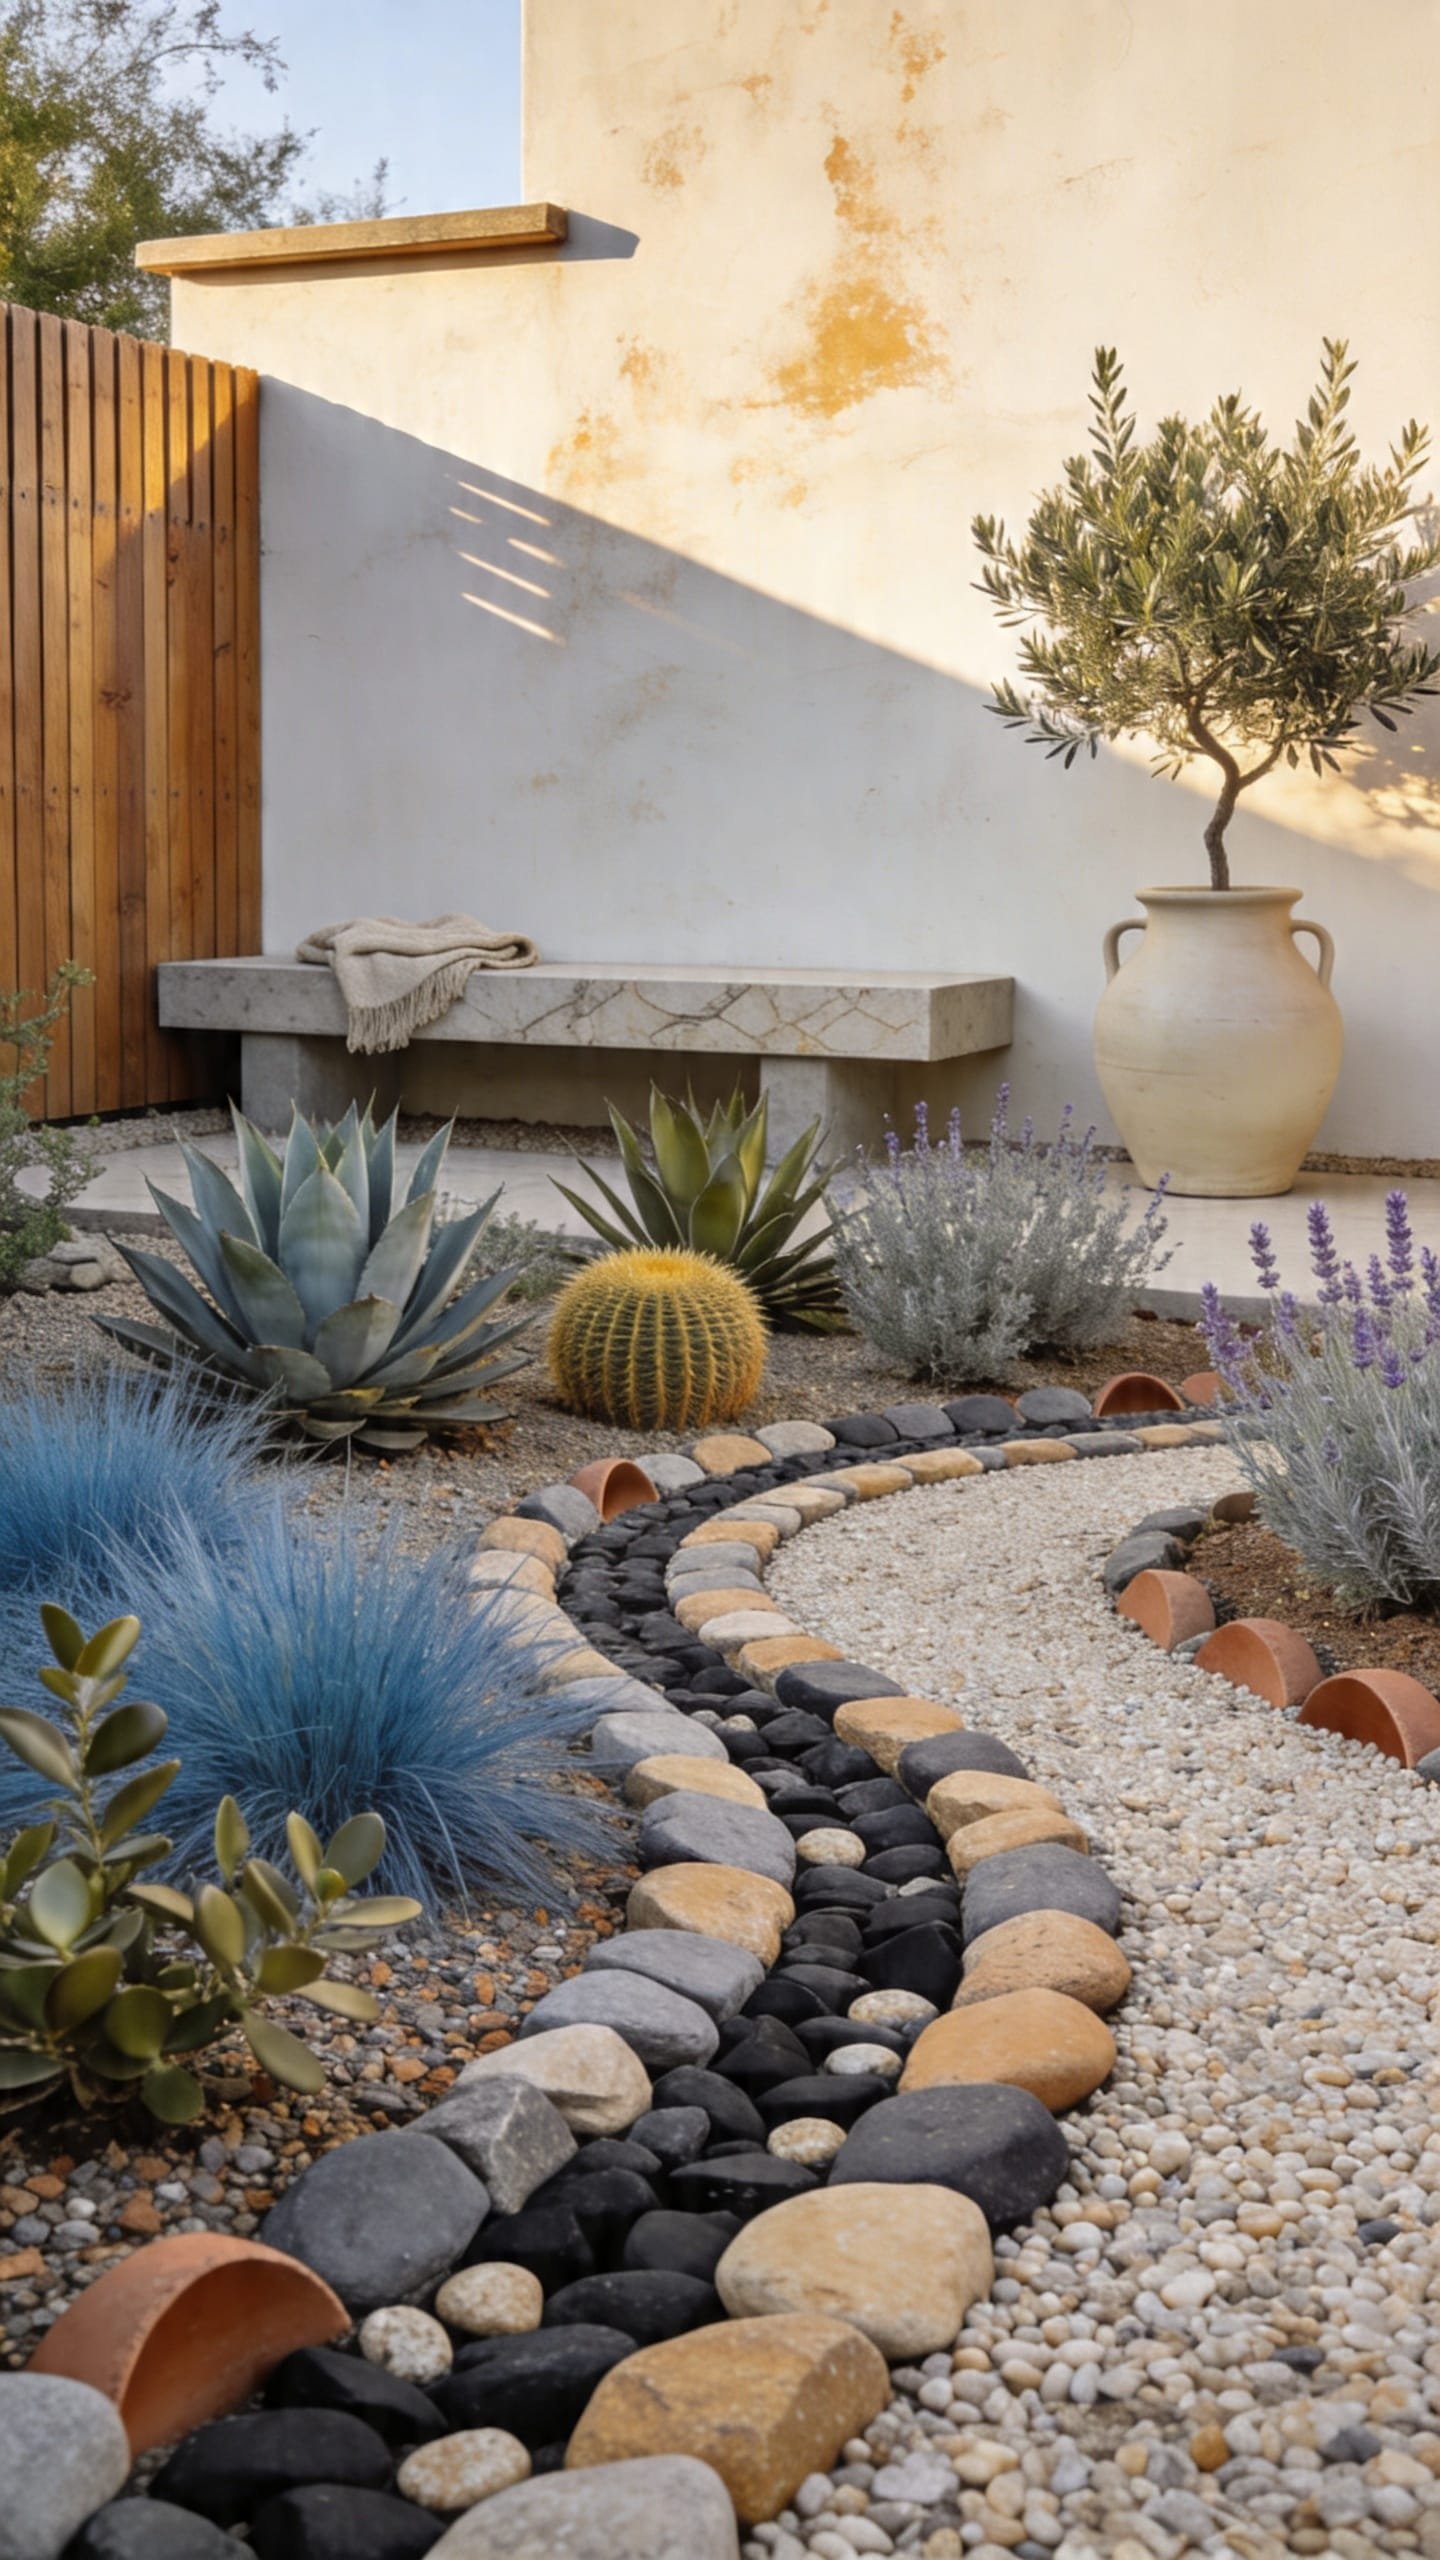
We’ve all been there: you add new mulch to your flower beds, and two weeks later it looks tired and patchy. Or you try a lush, English-garden look and it becomes a watering and pruning marathon. This desert-modern bed uses river rock as a sculpted border—like ribbons gently curving—so the design feels crisp and graphic without needing constant care.
The mood is calm, sunbaked, and quietly expensive—think modern Mediterranean meets Palm Springs. It works in real homes because the elements are drought-tolerant, kid-friendly, and insanely easy to maintain: evergreen shrubs, architectural succulents, and a neat rock edge that keeps soil exactly where it belongs. Lighting matters: uplight one sculptural plant and the shadows on the stones instantly read high-end. Materials here are simple—smooth river rocks, decomposed granite or dark mulch, matte black metal edging, and a few olive or sage-toned plants.
Why does this photograph beautifully? Contrast. Soft, rounded stones against spiky agaves. Dark soil against pale river rock. Curves playing with straight sightlines of your walkway. The camera loves the shadow pockets that rocks create at sunset.
Try variations: For a tighter budget, keep existing mulch and just add a single 8–12 inch-wide river rock “ribbon” along the front edge. In small spaces, choose one dramatic plant (a blue glow agave or dwarf olive) and wrap it with pebbles like a halo. Renter-friendly? Use flex steel edging staked into the soil and remove later with minimal traces.
Budget Breakdown:
- River rock (3/4–1.5 inch), 0.5–1 ton: $80–$220
- Metal landscape edging, 40–60 linear feet: $120–$300
- Decomposed granite or mulch, 1–2 cubic yards: $60–$180
- Drought-tolerant plants (5–8 pieces): $75–$250
- Low-voltage uplights, 2–3 fixtures: $90–$210
Total Estimated Cost: $425 – $1,160
Best For: Front beds that need a cleaner edge and less maintenance; modern or Mediterranean homes; sunny exposures.
Key Design Elements:
- Main materials: smooth river rock, dark mulch or decomposed granite, steel edging
- Color palette: soft grays and warm taupes with olive green and slate
- Lighting strategy: focused uplighting on one or two hero plants
- Furniture silhouettes: if nearby, go low and linear—powder-coated benches or a slim concrete stool
- Texture layers: smooth stones, gritty DG/mulch, matte foliage, a touch of brushed metal
- Accent details: a small terracotta vessel, a black house number plaque nearby, a spiky aloe for contrast
How To Recreate This Look:
- Start with a clean bed: remove weeds, shape a subtle curve to the front edge, and rake the soil level.
- Add steel or aluminum edging along your curve and stake it firmly so it doesn’t wave.
- Layer your substrate: mulch or DG in the main bed, then pour a 8–12 inch-wide river rock ribbon along the edge.
- Install one or two sculptural plants—agave, yucca, or dwarf olive—spaced so they don’t crowd.
- Style with one discreet uplight aimed at the plant’s trunk or core, and tuck a terracotta pot nearby.
Why This Looks Expensive: The curve of the rock ribbon and the negative space around the hero plant feel curated, not crowded. High-contrast textures read as intentional design, and the single uplight adds that boutique-hotel “glow” after dark.
Watch Out: Don’t mix too many rock sizes or colors. Two sizes max. Otherwise it starts to look like a construction mix pile, not a design choice.
Pro Styling Tip: For photos, mist the rocks lightly before shooting—moisture deepens the tone and brings out a silky sheen that pops on camera.
Keep scrolling—next we’re taking river rocks to the pool for a luxe resort vibe you can actually maintain.
2. Resort-Quiet Pool Edge With Pebble Bands and Soft Plantings
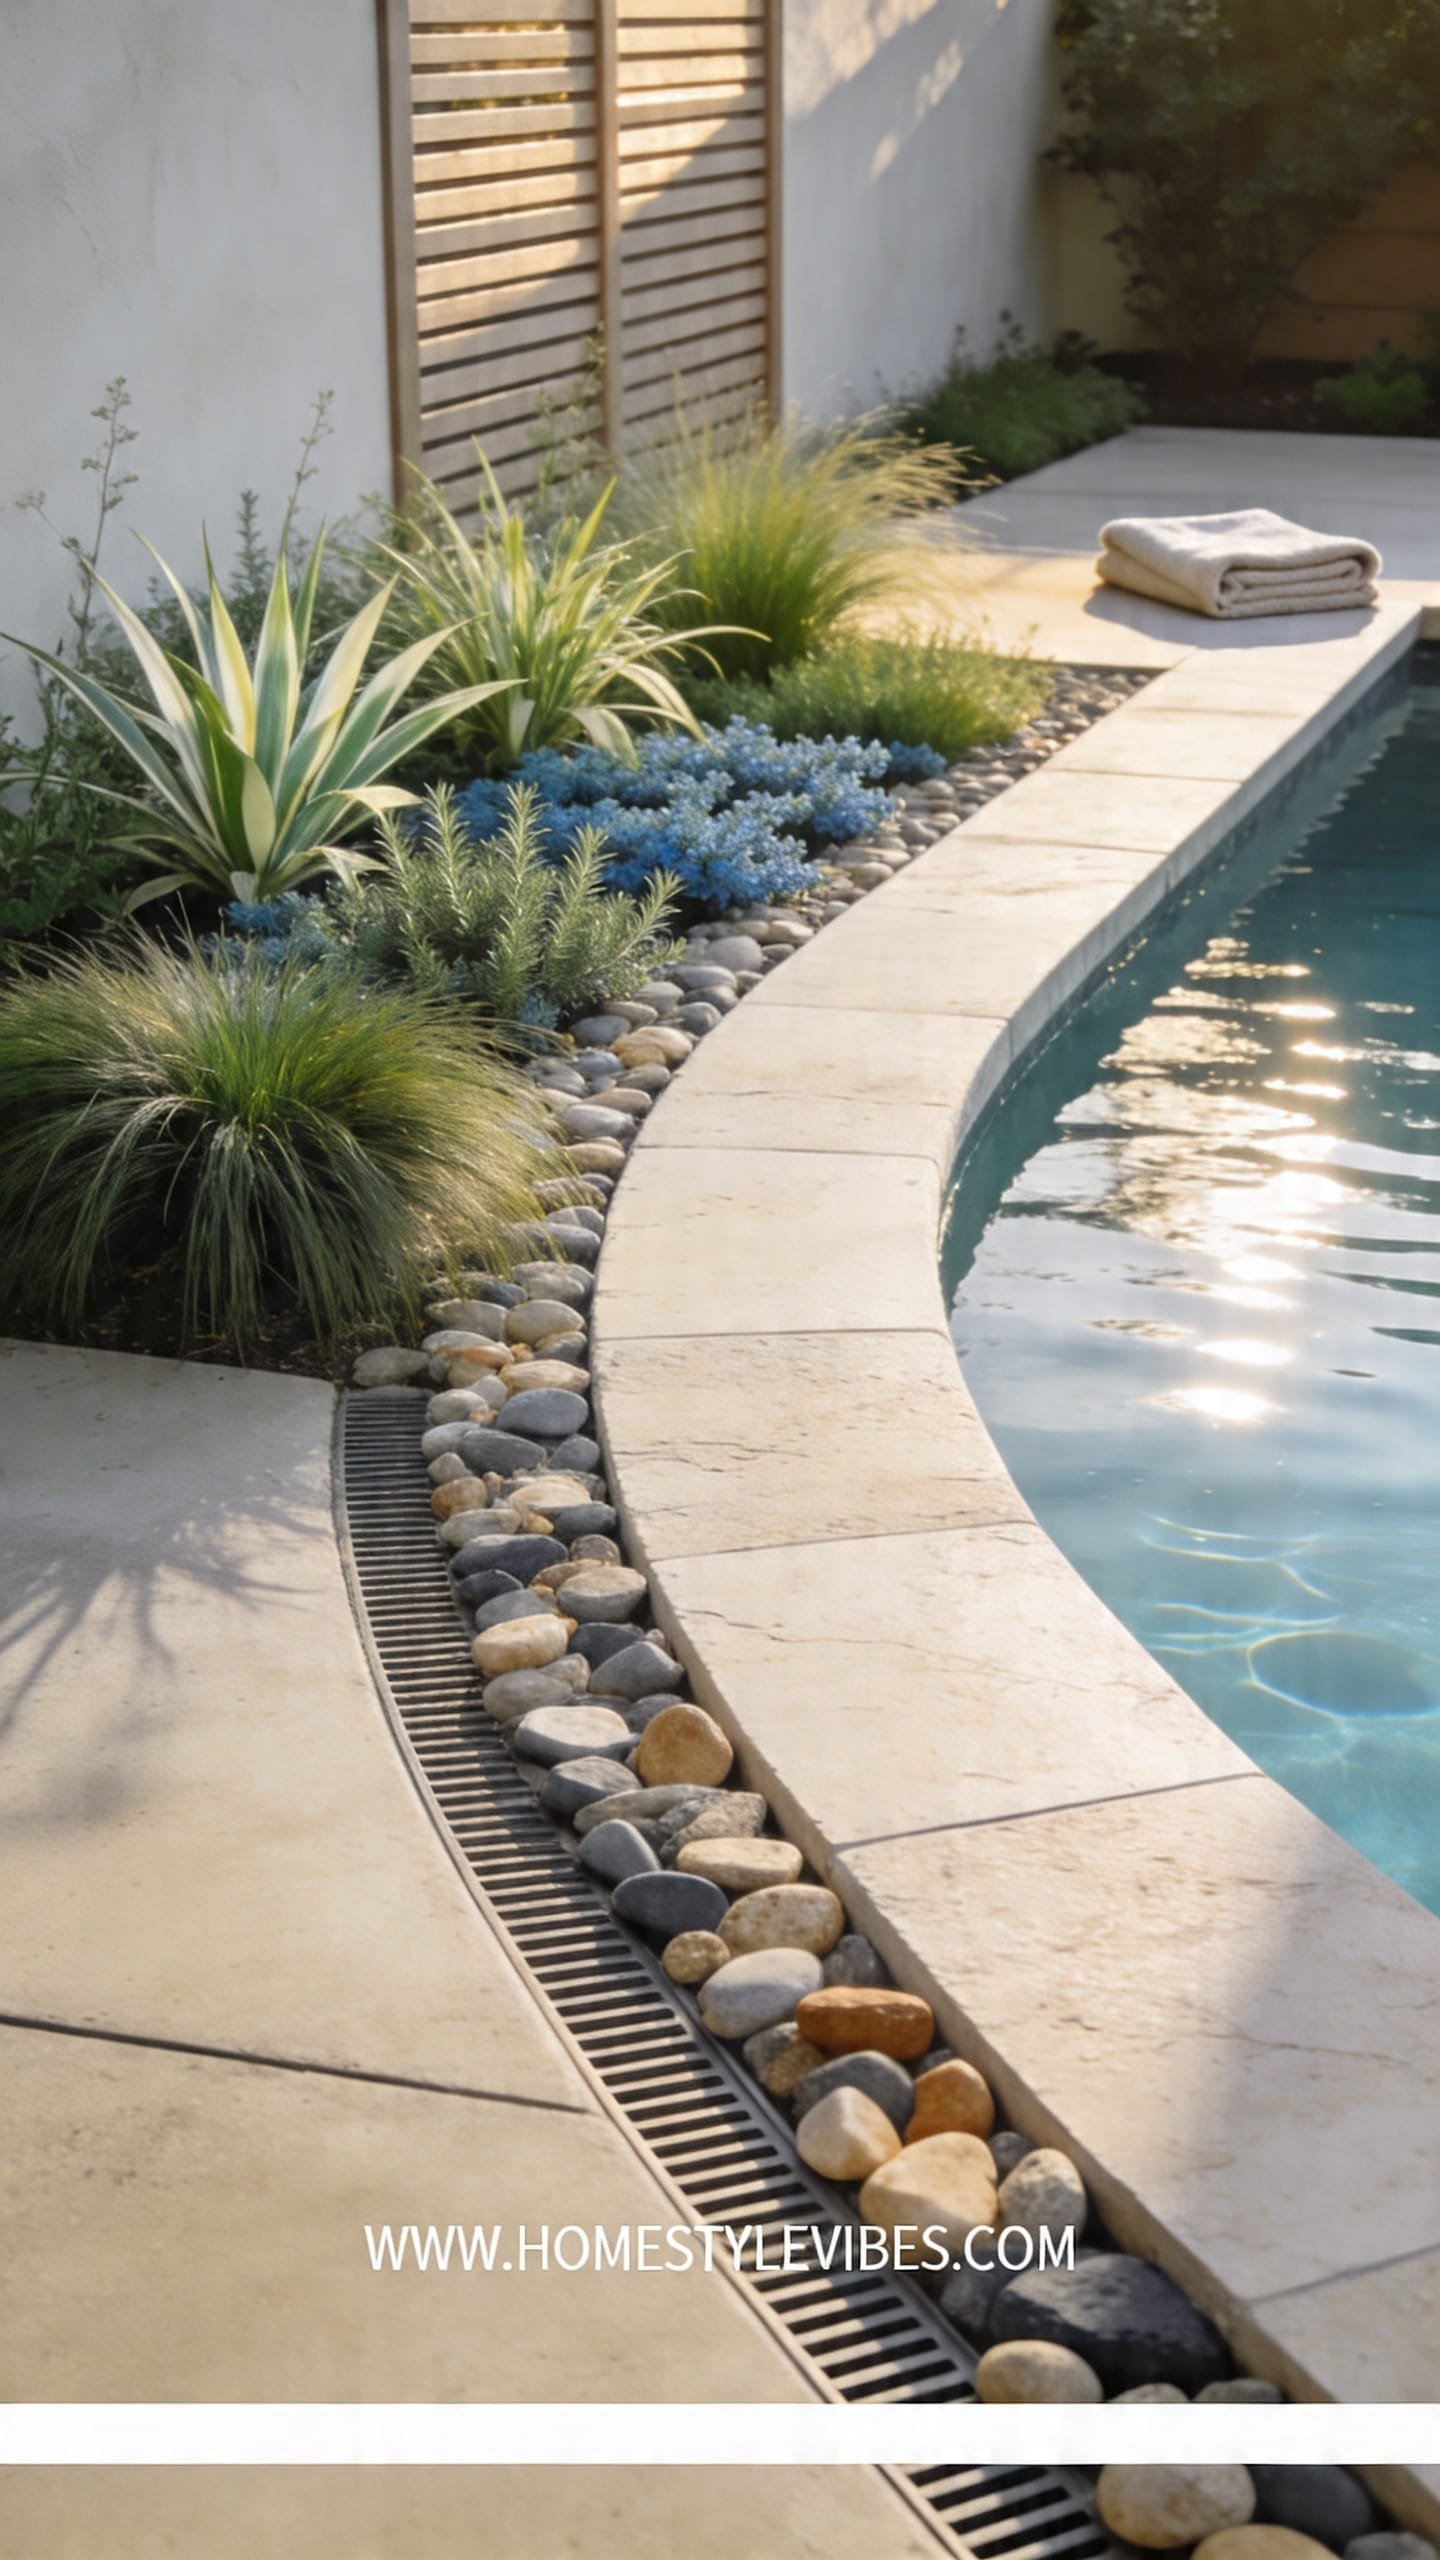
It’s that one edge by the pool where mulch floats away and chlorine bleaches everything sad-beige. You’ve tried bark chips. They migrate. You’ve tried potted plants. They tip in the wind. A river rock band around the pool reads clean, drains beautifully, and doesn’t blow around when your cousin cannonballs.
This design creates a quiet, hotel-spa mood with strategic plantings: dwarf lomandra, flax lily, rosemary ‘Prostratus,’ and low mounding grasses that sway without shedding messy leaves into the pool. Lighting becomes ambient: subtle step lights or low bollards instead of blinding floods. Materials lean coastal—rounded river pebbles, porcelain pavers, soft grasses, and maybe a teak accent stool if you’re feeling extra. On camera, this sings: light hitting pale stones, water reflecting little starbursts, and wispy grasses adding movement.
For variations, go budget with a single 12–18 inch-wide pebble band against existing concrete. For small yards, run the rock band only along the longest straight edge to visually lengthen the space. Prefer moodier? Choose charcoal-gray pebbles and pair with inky-blue tile for a contemporary feel.
Key Design Elements:
- Main materials: 3/4–1 inch river pebbles, porcelain or concrete coping, low grasses
- Color palette: pale stone, cool gray decking, blue-green foliage
- Lighting strategy: in-ground step lights, dimmable warm-white path lights
- Furniture silhouettes: low-profile loungers, teak stool, slim umbrella with minimal hardware
- Texture layers: smooth pebbles, crisp pavers, feathery grasses, satiny water surface
- Accent details: clean-lined pool skimmer cover, hidden hose reel, black landscape spikes
Budget Breakdown:
- River pebbles, 1–2 tons: $160–$440
- Landscape fabric and steel edging: $80–$190
- Pool-safe lighting, 3–5 fixtures: $150–$450
- Low-maintenance plants (6–10): $90–$320
- Teak or resin side table: $60–$180
Total Estimated Cost: $540 – $1,580
Best For: Homes with constant sun, windy zones, or anyone tired of skimming bark off the water. Pairs well with modern and coastal architecture.
How To Recreate This Look:
- Start by scraping back any mulch and installing steel edging to define a clean band along your pool deck.
- Lay landscape fabric for weed control and drainage while keeping the rocks from sinking.
- Add your pebble band, raking to a uniform depth of 2–3 inches.
- Plant low-litter grasses or herbs at the outer edge, keeping a 4–6 inch gap from pool coping.
- Install warm, low bollard lights and keep them subtle—aim for a glow, not stadium lights.
Why This Feels Designer: The consistent banding creates rhythm. The negative space around plant bases keeps the look calm and maintenance low. And that controlled palette? Always chic.
One Thing To Avoid: Don’t crowd plants near the pool edge. Wet leaves stain pale coping, and overhang makes skimming harder than it needs to be.
Pro Styling Tip: For photos or hosting, float a few minimal pool lights at dusk and extinguish overheads—the pebbles will sparkle softly without glare.
Pause and breathe: you don’t need to redo the whole yard. One clean band of stone can make the pool feel finished—like it finally belongs to the house, not just the builder.
3. Contrasting Mulch + River Rock Combo for Flower Beds That Stay Put
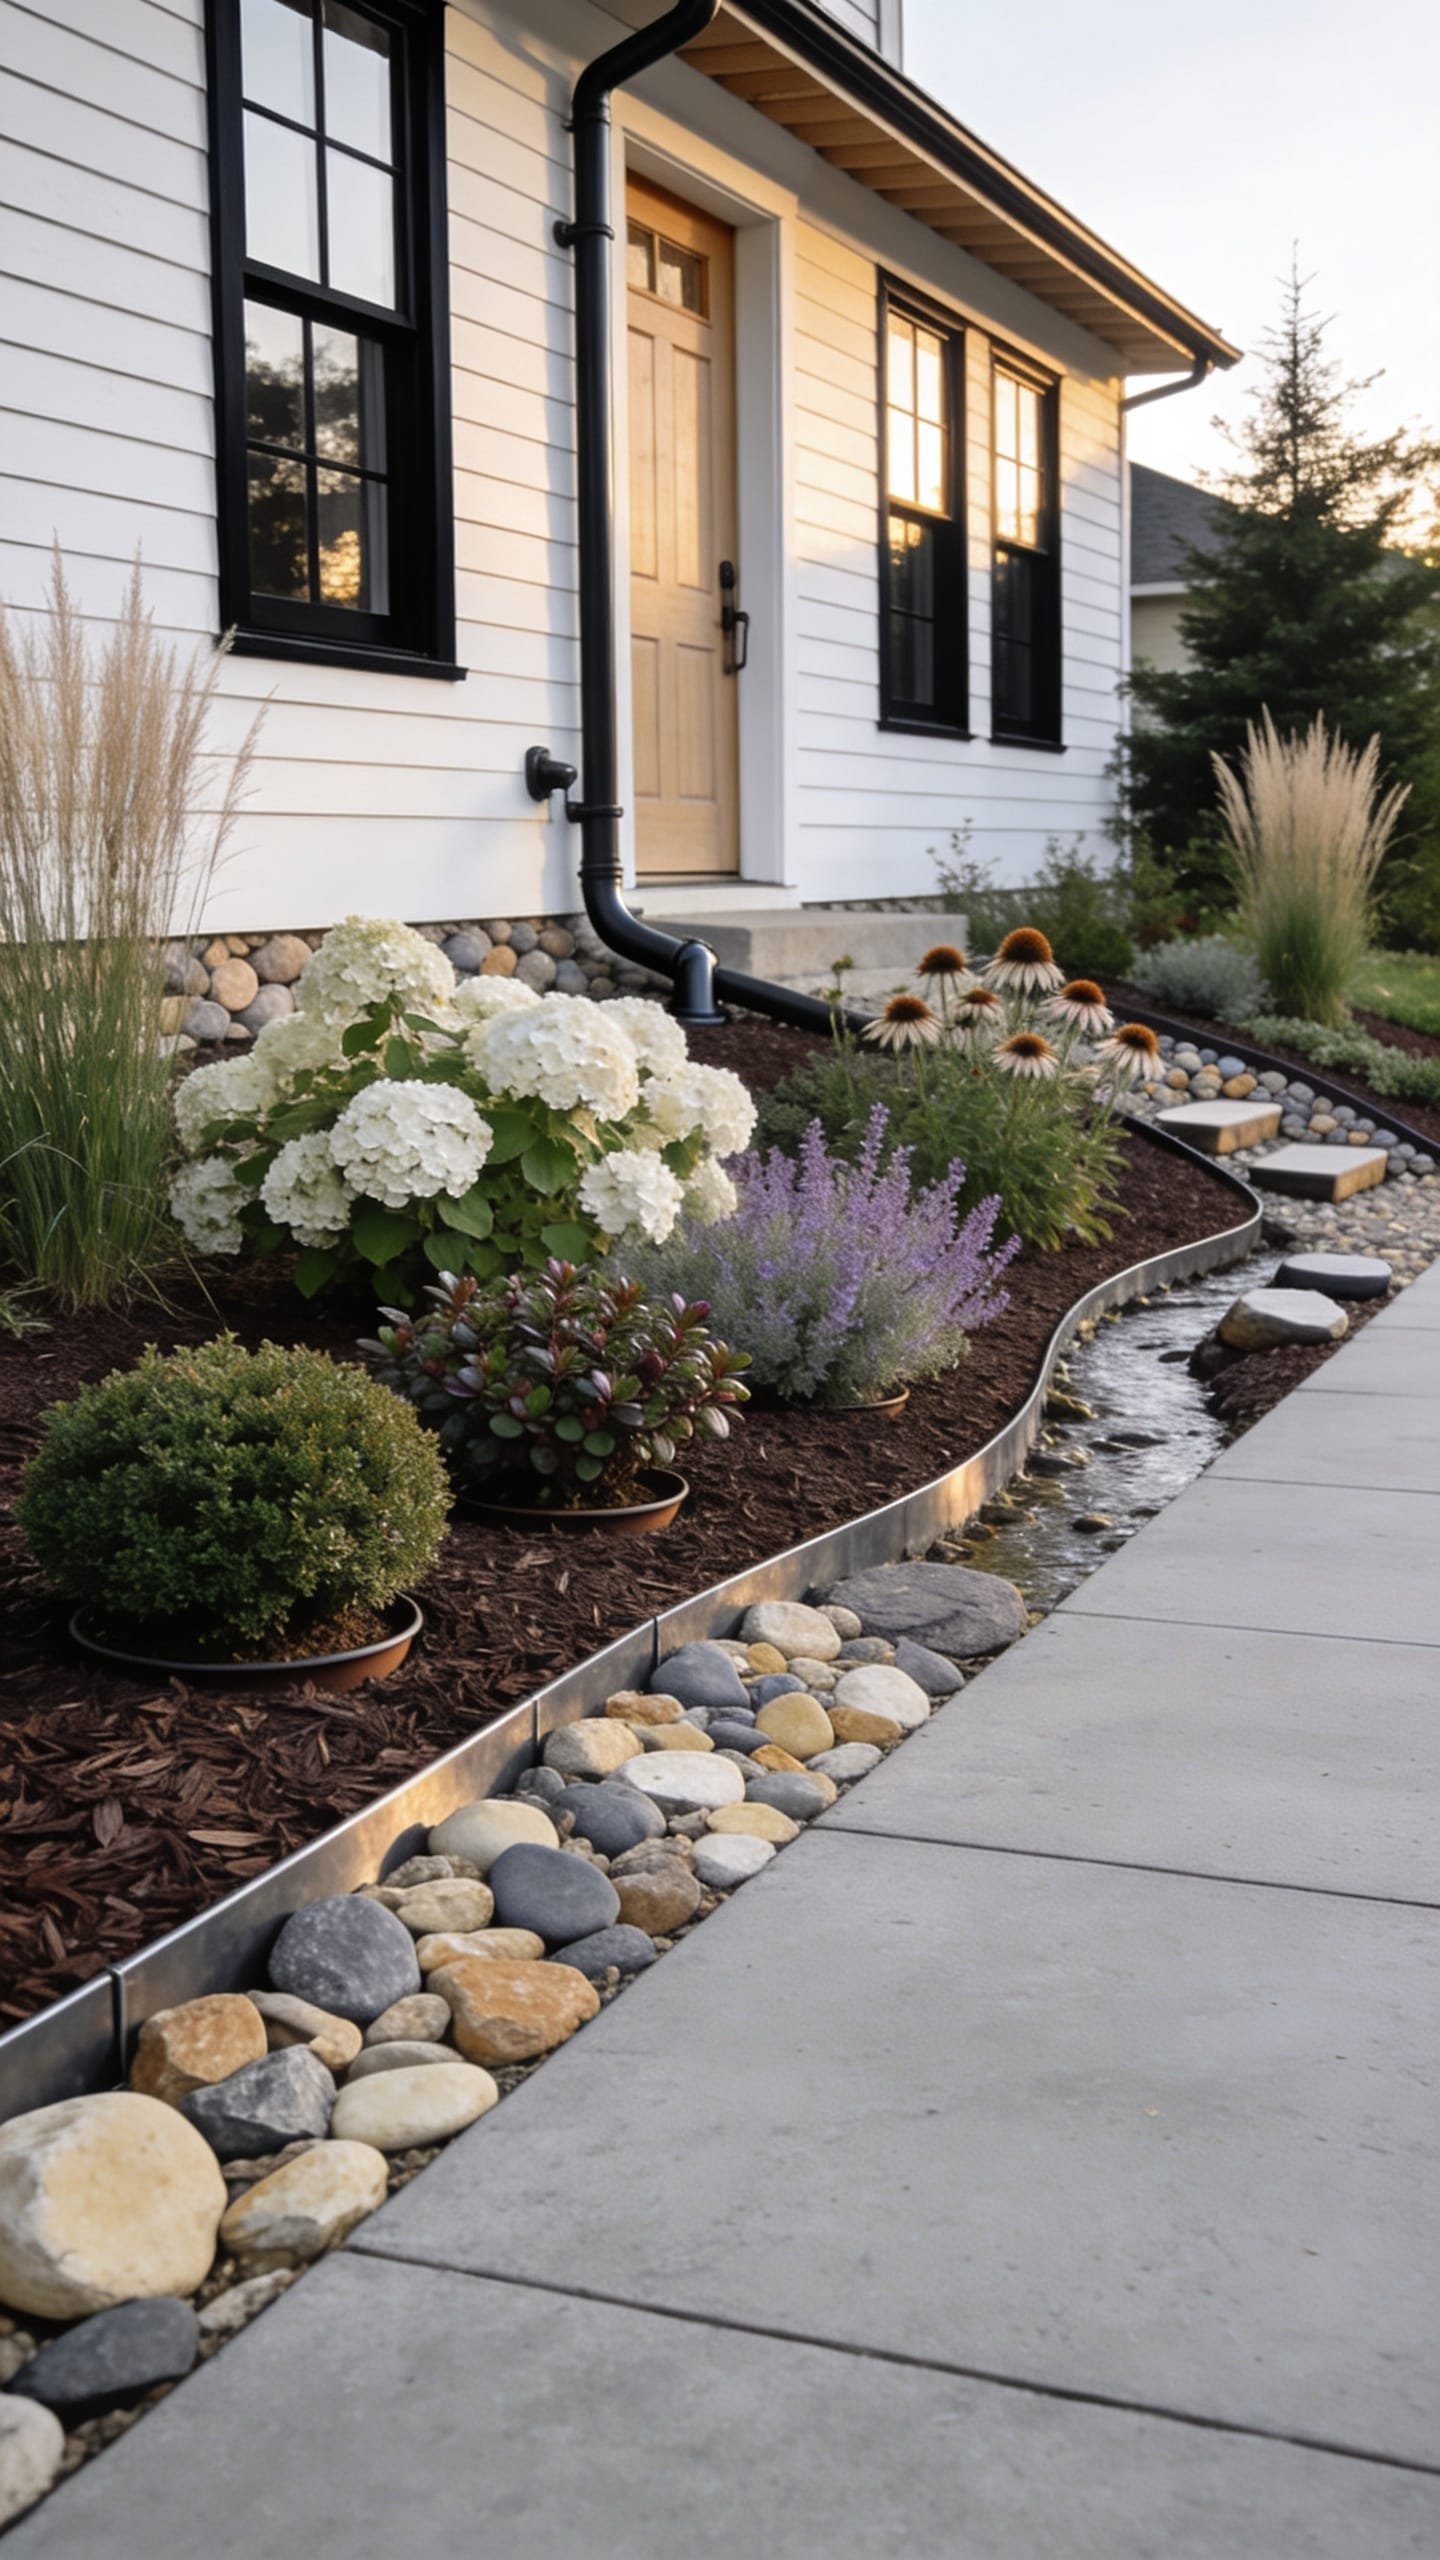
You want lush, layered flower beds but hate constant weeding and the way heavy rains carve little rivers through your mulch. This combo uses river rock only where it matters—drip lines and slope edges—while dark mulch fills the rest, creating fully framed beds that resist erosion and still feed the soil.
The vibe reads modern cottage: soft planting shapes, crisp borders, and color contrast that makes blooms and shrubs pop. It works beautifully in family homes because mulch keeps soil cooler and happier, while rocks act like armor where kids and sprinklers cause chaos. Lighting is simple here: small, shielded path lights and a single spotlight on your most structured shrub or small tree. Photographically, this layout wins every time—dark mulch recedes while river rock highlights edges and gives the camera that clean, finished line.
Try variations: For a small space, create a checker of mulched quadrants divided by thin rock lines. On a slope, run a river rock “catch” trench at the base to stop runoff. If you rent, use flexible edging and keep rocks shallow so you can scoop them up into bags when you move.
Budget Breakdown:
- Mulch (2–4 cubic yards): $80–$240
- River rock for edges/trenches (0.5–1 ton): $80–$220
- Edging (composite or metal): $90–$260
- Plants, mixed heights (6–12): $120–$480
- Path lights (3–4): $120–$260
Total Estimated Cost: $490 – $1,460
Best For: Flower beds that wash out in storms; anyone who wants softer plantings with strong visual structure; transitional and cottage-style homes.
Key Design Elements:
- Main materials: shredded hardwood mulch, 1–2 inch river rock, composite edging
- Color palette: dark chocolate mulch, pearl-gray stone, fresh greens, seasonal blooms
- Lighting strategy: low, warm path lighting; one spotlight for a topiary or dwarf tree
- Furniture silhouettes: curved iron bench or a slatted garden chair to echo organic shapes
- Texture layers: velvety mulch, smooth stone, glossy leaves, matte edging
- Accent details: ceramic birdbath, matte black watering can tucked into a nook
How To Recreate This Look:
- Start by reshaping beds with generous curves; avoid tiny wiggles that feel fussy.
- Add edging and hammer stakes until the border feels straight and firm in plan view.
- Layer mulch in the main zones at a 2–3 inch depth; keep a mulch-free donut around each trunk.
- Fill drip lines and bed fronts with river rock to create a contrasting band that holds shape.
- Style with a single ceramic element—a birdbath or low bowl—for a focal anchor.
Why This Reads High-End: The dual-material strategy looks layered and smart. Mulch nurtures, rock defines. That contrast feels like a designer drew the plan, not a weekend impulse buy.
The Most Common Mistake: Mixing bark nuggets with rounded river rock. The shapes fight visually, and the nuggets roll right into your stones. Choose shredded mulch for a cleaner edge.
Pro Styling Tip: When shooting your flower bed, crouch low and angle the camera to catch the crisp line where mulch meets rock—your eye follows it like a runway.
Remember, this isn’t about recreating a showroom. It’s about building a yard that works on Tuesday at 6 p.m. when you’re tired and the sprinklers just finished. Clean lines + right materials = less fuss.
4. Zen Drainage Stream (The Pretty French Drain You Actually Want)
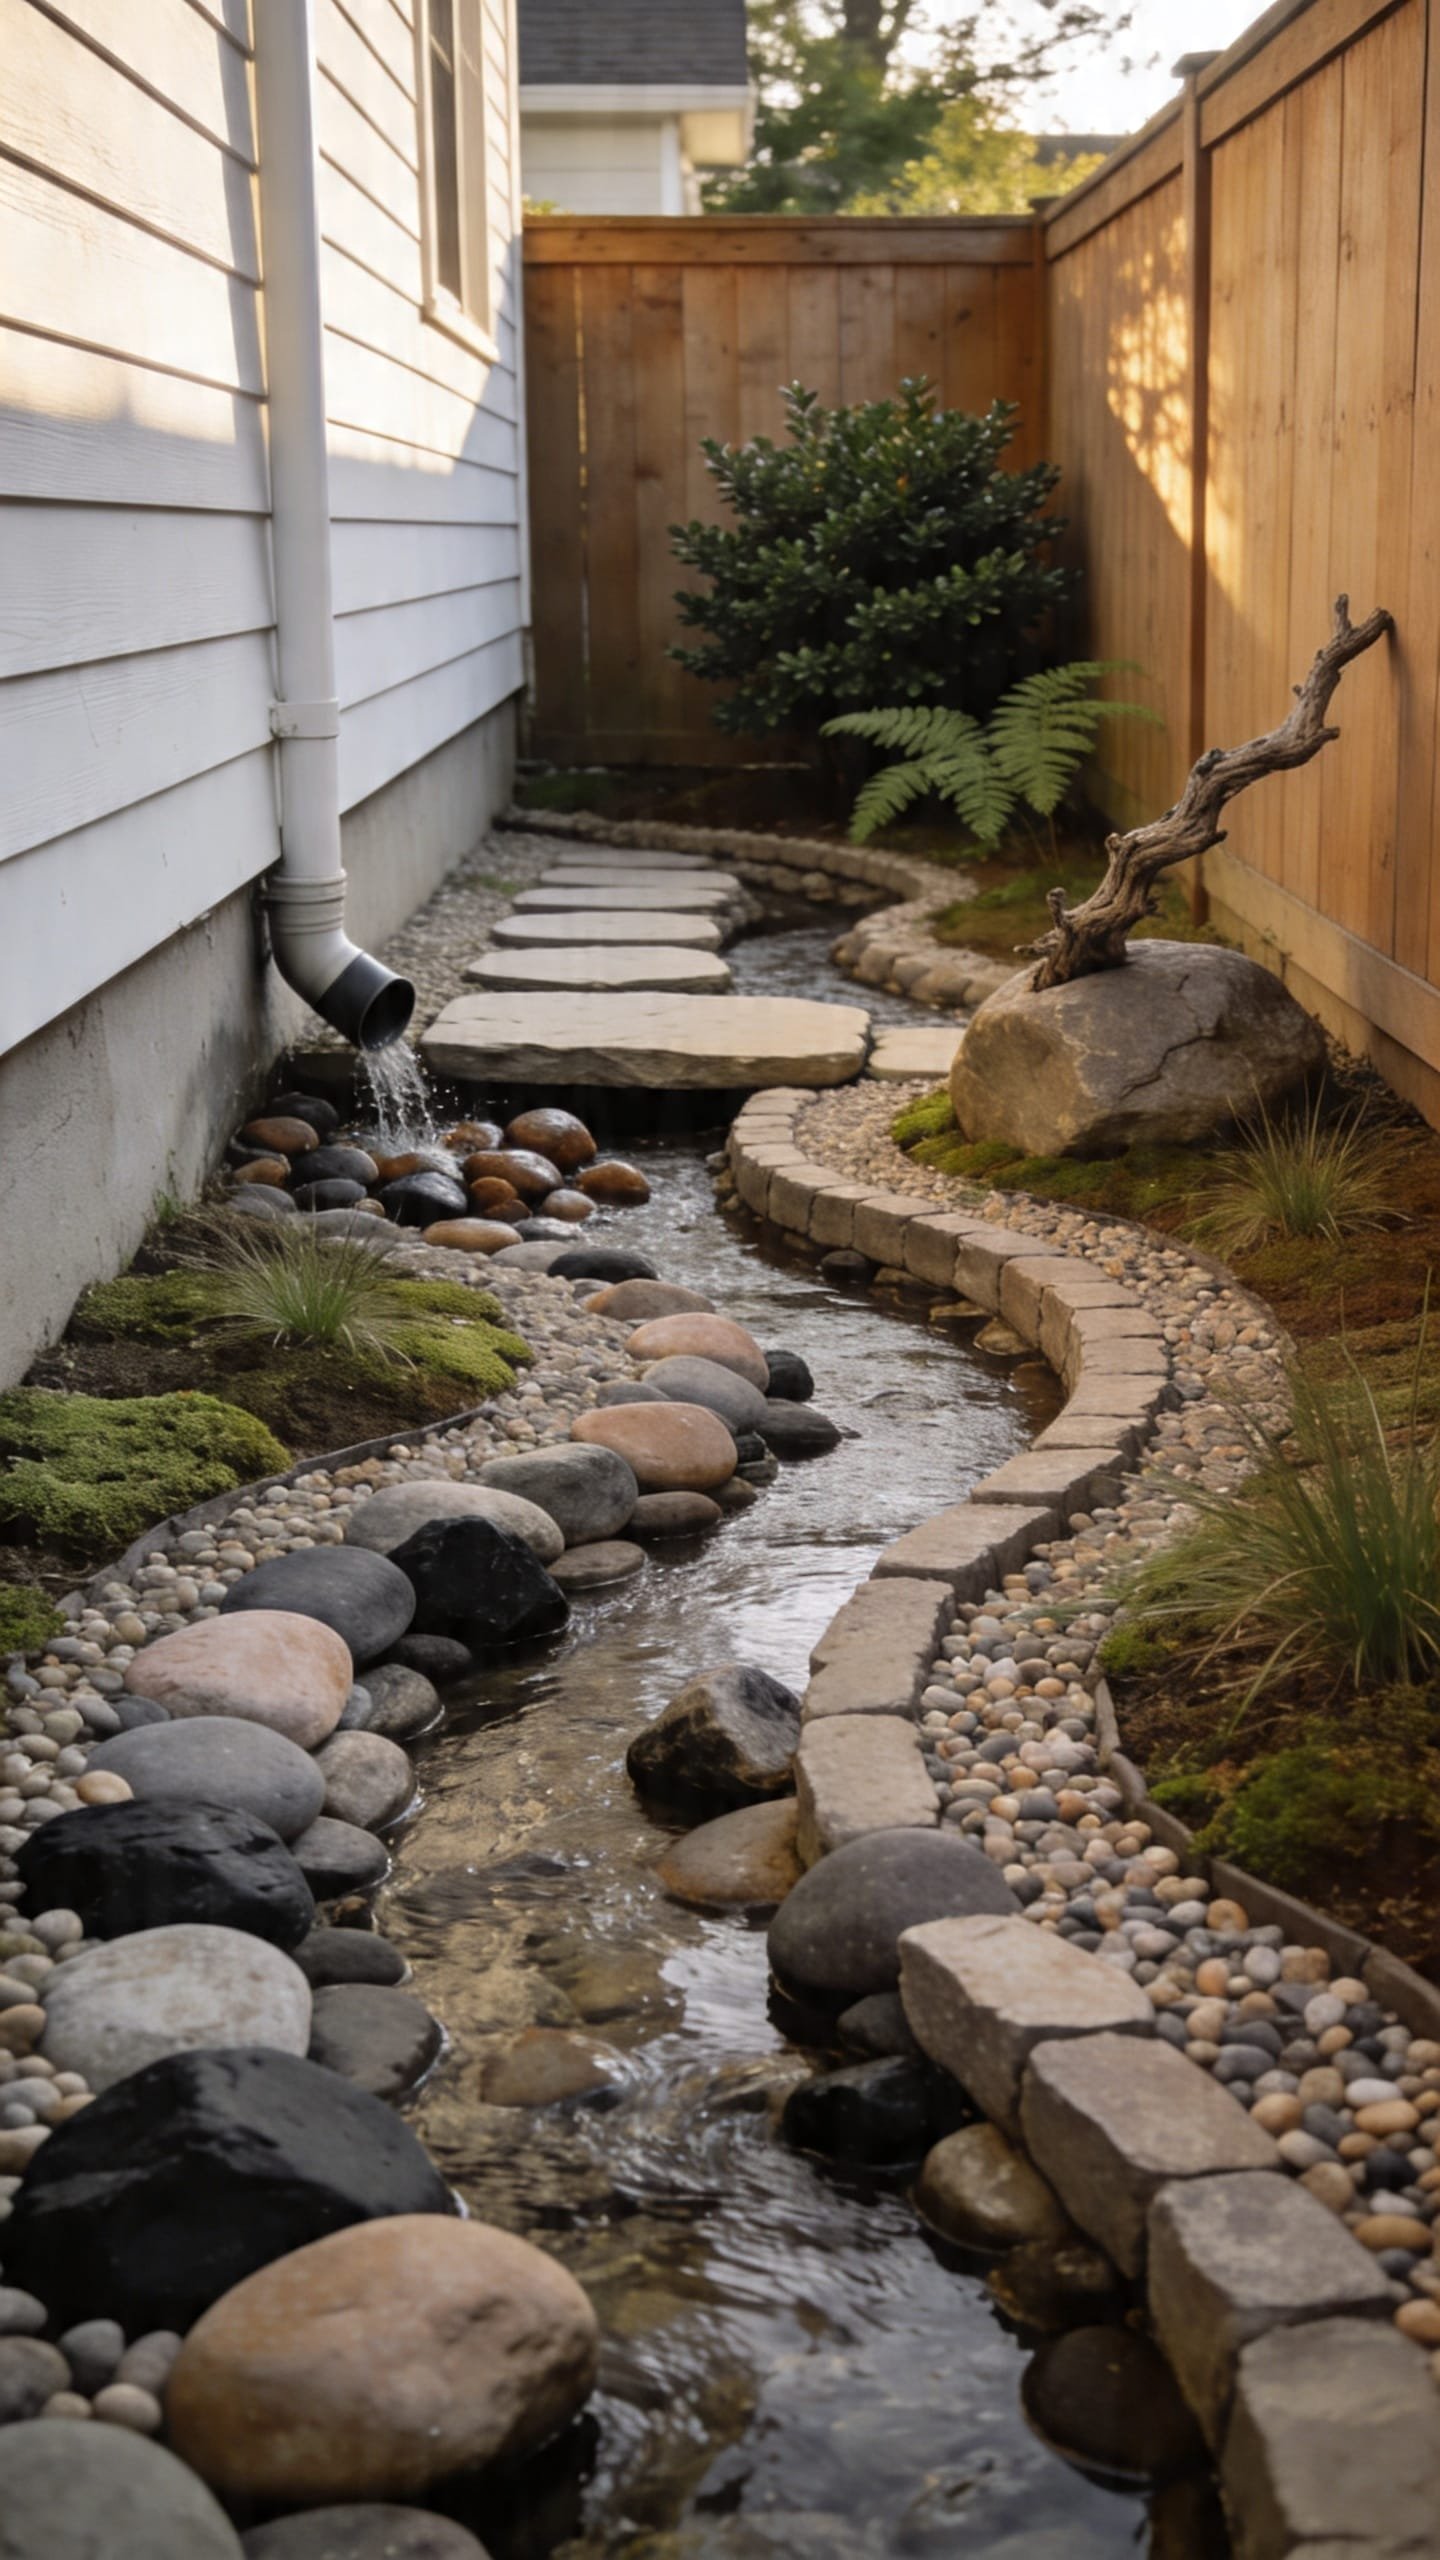
You want less mud and more calm, but your side yard turns into a minor river whenever it rains. Been there. I once spent weeks blaming my neighbor’s sprinklers before realizing the real problem was my downspout splash zone. The fix? A river rock “dry creek” that looks intentional and acts like a drainage hero.
This design creates a Japanese-meets-naturalist mood: soft, meandering lines, boulder accents, and mossy groundcover or dwarf mondo grass that peeks between stones. It works in real homes because it doubles as a functional French drain or swale. Lighting shifts from showy to subtle: tiny path markers or low, hidden well lights at curve points. Materials lead with smooth river rock in 1–3-inch mix, a few anchor boulders (not too many), and tough groundcovers. The camera loves the layered scales: big stone, mid pebble, tiny green leaves—serene and dimensional.
Variations to consider: For small yards, make a 12-inch stream that traces from downspout to lawn. On a big lot, weave a 24–36 inch band with two intentional bends to slow water. Rental? Use a resin downspout extender into a shallow pebble basin—no digging required.
Key Design Elements:
- Main materials: 1–3 inch river rock, a few boulders, landscape fabric, groundcovers
- Color palette: cool grays, soft whites, deep leaf greens, charcoal accents
- Lighting strategy: discreet well lights at bends, warm 2700K for softness
- Furniture silhouettes: if any, a simple backless bench or a stepping stone path
- Texture layers: large stone, mid pebble, small leaf, a hint of bark or mulch beyond
- Accent details: a single water bowl, bamboo spout if you want a subtle trickle (optional)
Budget Breakdown:
- River rock, 1–2 tons: $160–$440
- Boulders (2–4 pieces): $100–$300
- Landscape fabric, pins, and edging: $70–$160
- Groundcovers (12–24 plugs): $60–$180
- Downspout extensions/splash guards: $20–$60
Total Estimated Cost: $410 – $1,140
Best For: Side yards, low spots, soggy corners, and anyone who wants drainage that doubles as a design feature.
How To Recreate This Look:
- Start with a shallow trench, deeper at the source (downspout) and feathering out as you go; a 1–2 percent slope is enough.
- Add landscape fabric and anchor with pins—overlap seams by 8 inches to block weeds.
- Place boulders first at gentle bends; keep them partially buried so they look native, not plopped.
- Layer medium river rock, then top with a scattering of larger stones for texture and naturalism.
- Plant groundcovers along the edges and water them in to knit everything together.
Why This Looks Intentional: The partial bury on boulders, the consistent rock size in the main channel, and restrained plant palette signal design, not a post-storm panic install.
Don’t Do This: Avoid neon-white marble chips. They glare in sunlight and look harsh with greenery. Stick to naturally rounded river stone tones.
Pro Styling Tip: Photograph from an angle where the creek bends—curves read longer and more immersive than straight-on shots.
Feeling calmer already? Good. Next up, a courtyard moment that uses river rock like a luxe rug you can’t stain.
5. Courtyard “Stone Rug” With Potted Greens and Lantern Glow
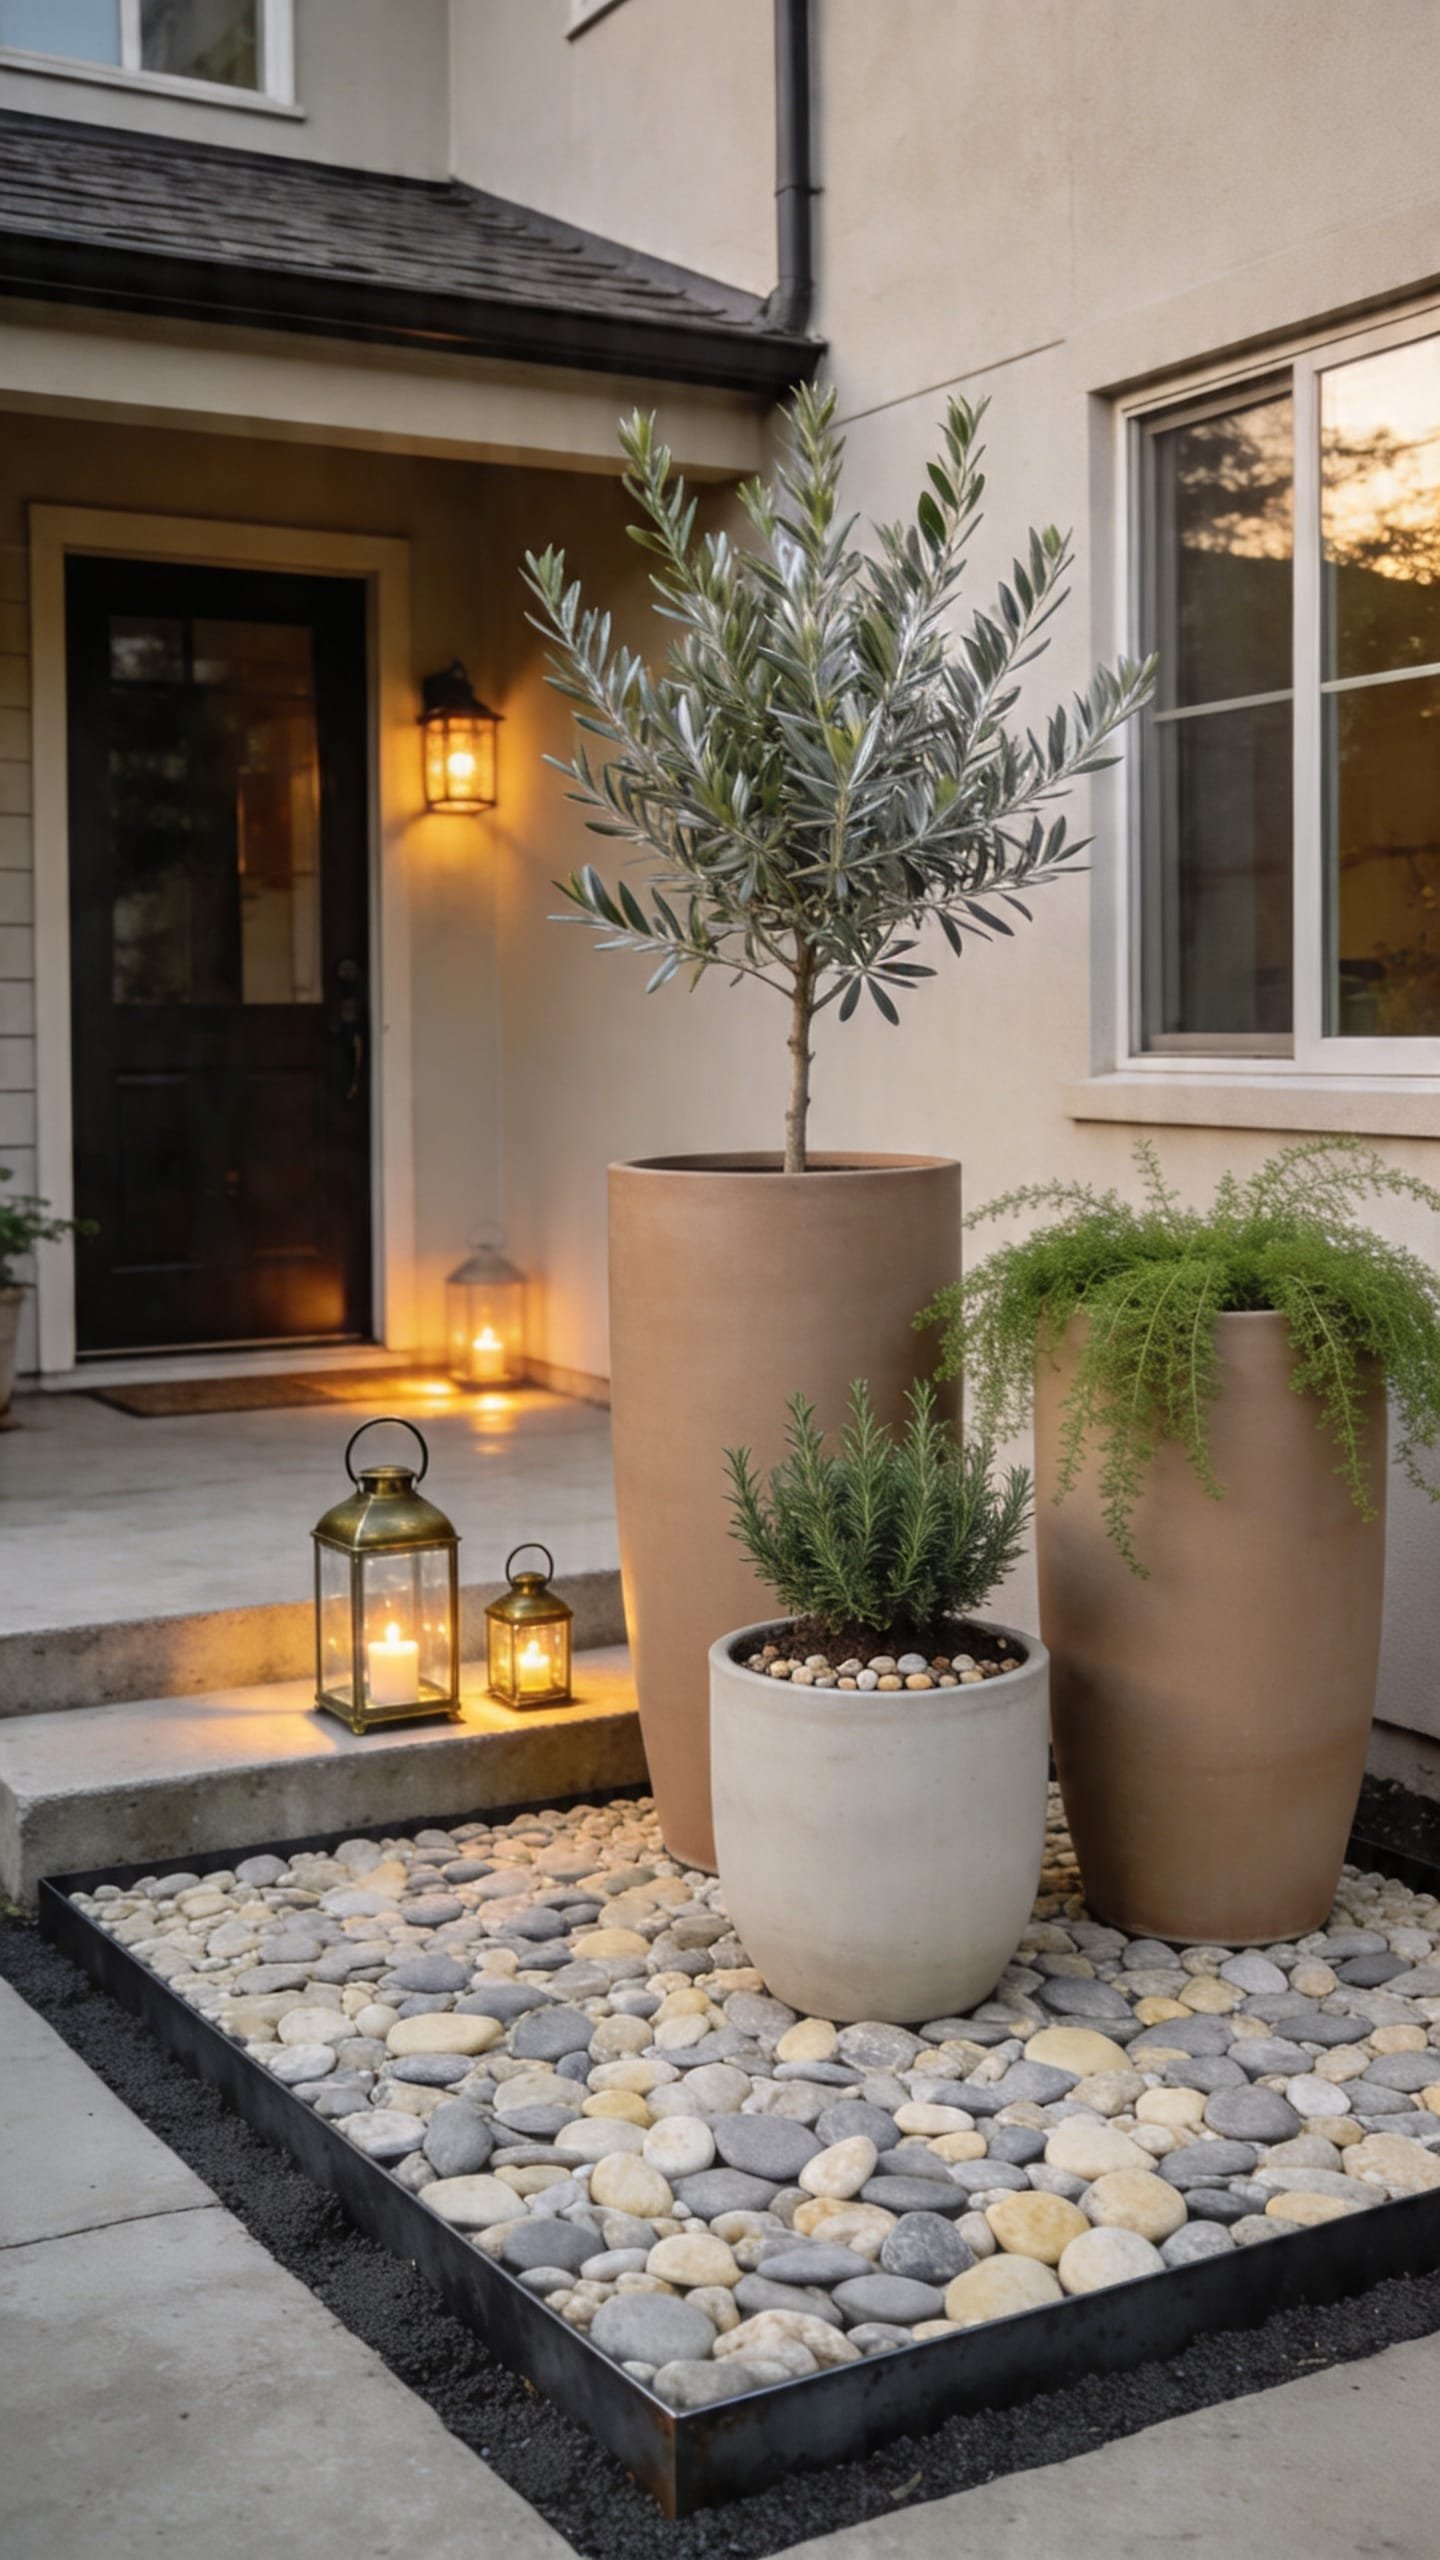
It’s that small front courtyard or patio that always feels unfinished—like the builder left you a concrete square and a shrug. You’ve tried an outdoor rug. It mildewed. You tried more pots. It turned into a plant orphanage. A river rock “stone rug” instantly grounds the space and frees you from constant scrubbing and swapping.
The mood is warm minimal with a Euro-cafe whisper: a rectangle or oval of pale pebbles framed by steel edging, a few oversized pots (two matching, one sibling), and lanterns that throw honeyed light on the stones at night. Why it works for real life: sweepable, drainable, and flexible. You can move furniture without rug corners flipping, and rainfall cleans the surface. Photographing this is pure joy—the pebble field acts as a textured backdrop that makes terracotta, olive foliage, and black lanterns feel editorial.
Variations: On a budget, keep the stone rug small (4×6 feet) under a bistro set. For dark, moody homes, choose smoky gray stones and charcoal planters. Renters can build the “rug” over landscape fabric without digging—stakes hold edges in place for easy removal.
Budget Breakdown:
- River pebbles, 0.5–1 ton: $80–$220
- Steel or composite edging (12–20 linear feet): $60–$180
- Large planters (2–3): $180–$600
- Lanterns with LED candles: $40–$120
- Bistro set or two chairs: $120–$400
Total Estimated Cost: $480 – $1,520
Best For: Small patios, front stoops, townhouse entries, and anyone craving a finished welcome moment.
Key Design Elements:
- Main materials: smooth pale pebbles, matte planters, steel edging
- Color palette: ivory stone, terra tones, olive green, matte black or bronze metal
- Lighting strategy: lantern clusters at differing heights; one low spotlight on a hero pot
- Furniture silhouettes: slim bistro or sling chairs with soft curves
- Texture layers: fine pebble, rough terracotta, glossy leaves, soft candlelight
- Accent details: a small olive tree, rosemary standard, or citrus in a clay pot
How To Recreate This Look:
- Start by mapping a rug shape with string or hose; keep it proportional to your courtyard.
- Add edging along your outline and secure it with stakes flush to the ground.
- Lay landscape fabric inside, then fill with river pebbles to 2 inches deep, raking level.
- Place two large planters to anchor corners and a third to offset symmetry just enough.
- Style with lanterns clustered near seating and plant herbs for scent as you pass.
Why This Feels Designer: Oversized planters on a consistent stone field look curated. The palette stays tight, and candlelight softens everything—budget pieces feel luxe under that glow.
One Thing To Avoid: Mixing too-small planters. Go bigger than you think—like a 20–24 inch diameter. Tiny pots read cluttered on a textured base.
Pro Styling Tip: For photos, set two lanterns on stones and one on a planter ledge to create height layers and shadow depth that the camera reads as rich.
Small honesty moment: getting proportions right here can feel tricky. I once tried four different planter sizes in a client’s courtyard before we landed it. The secret isn’t more things—it’s bigger anchors and fewer of them.
6. Low-Mow Side Yard Path With River Rock Pockets and Native Grasses
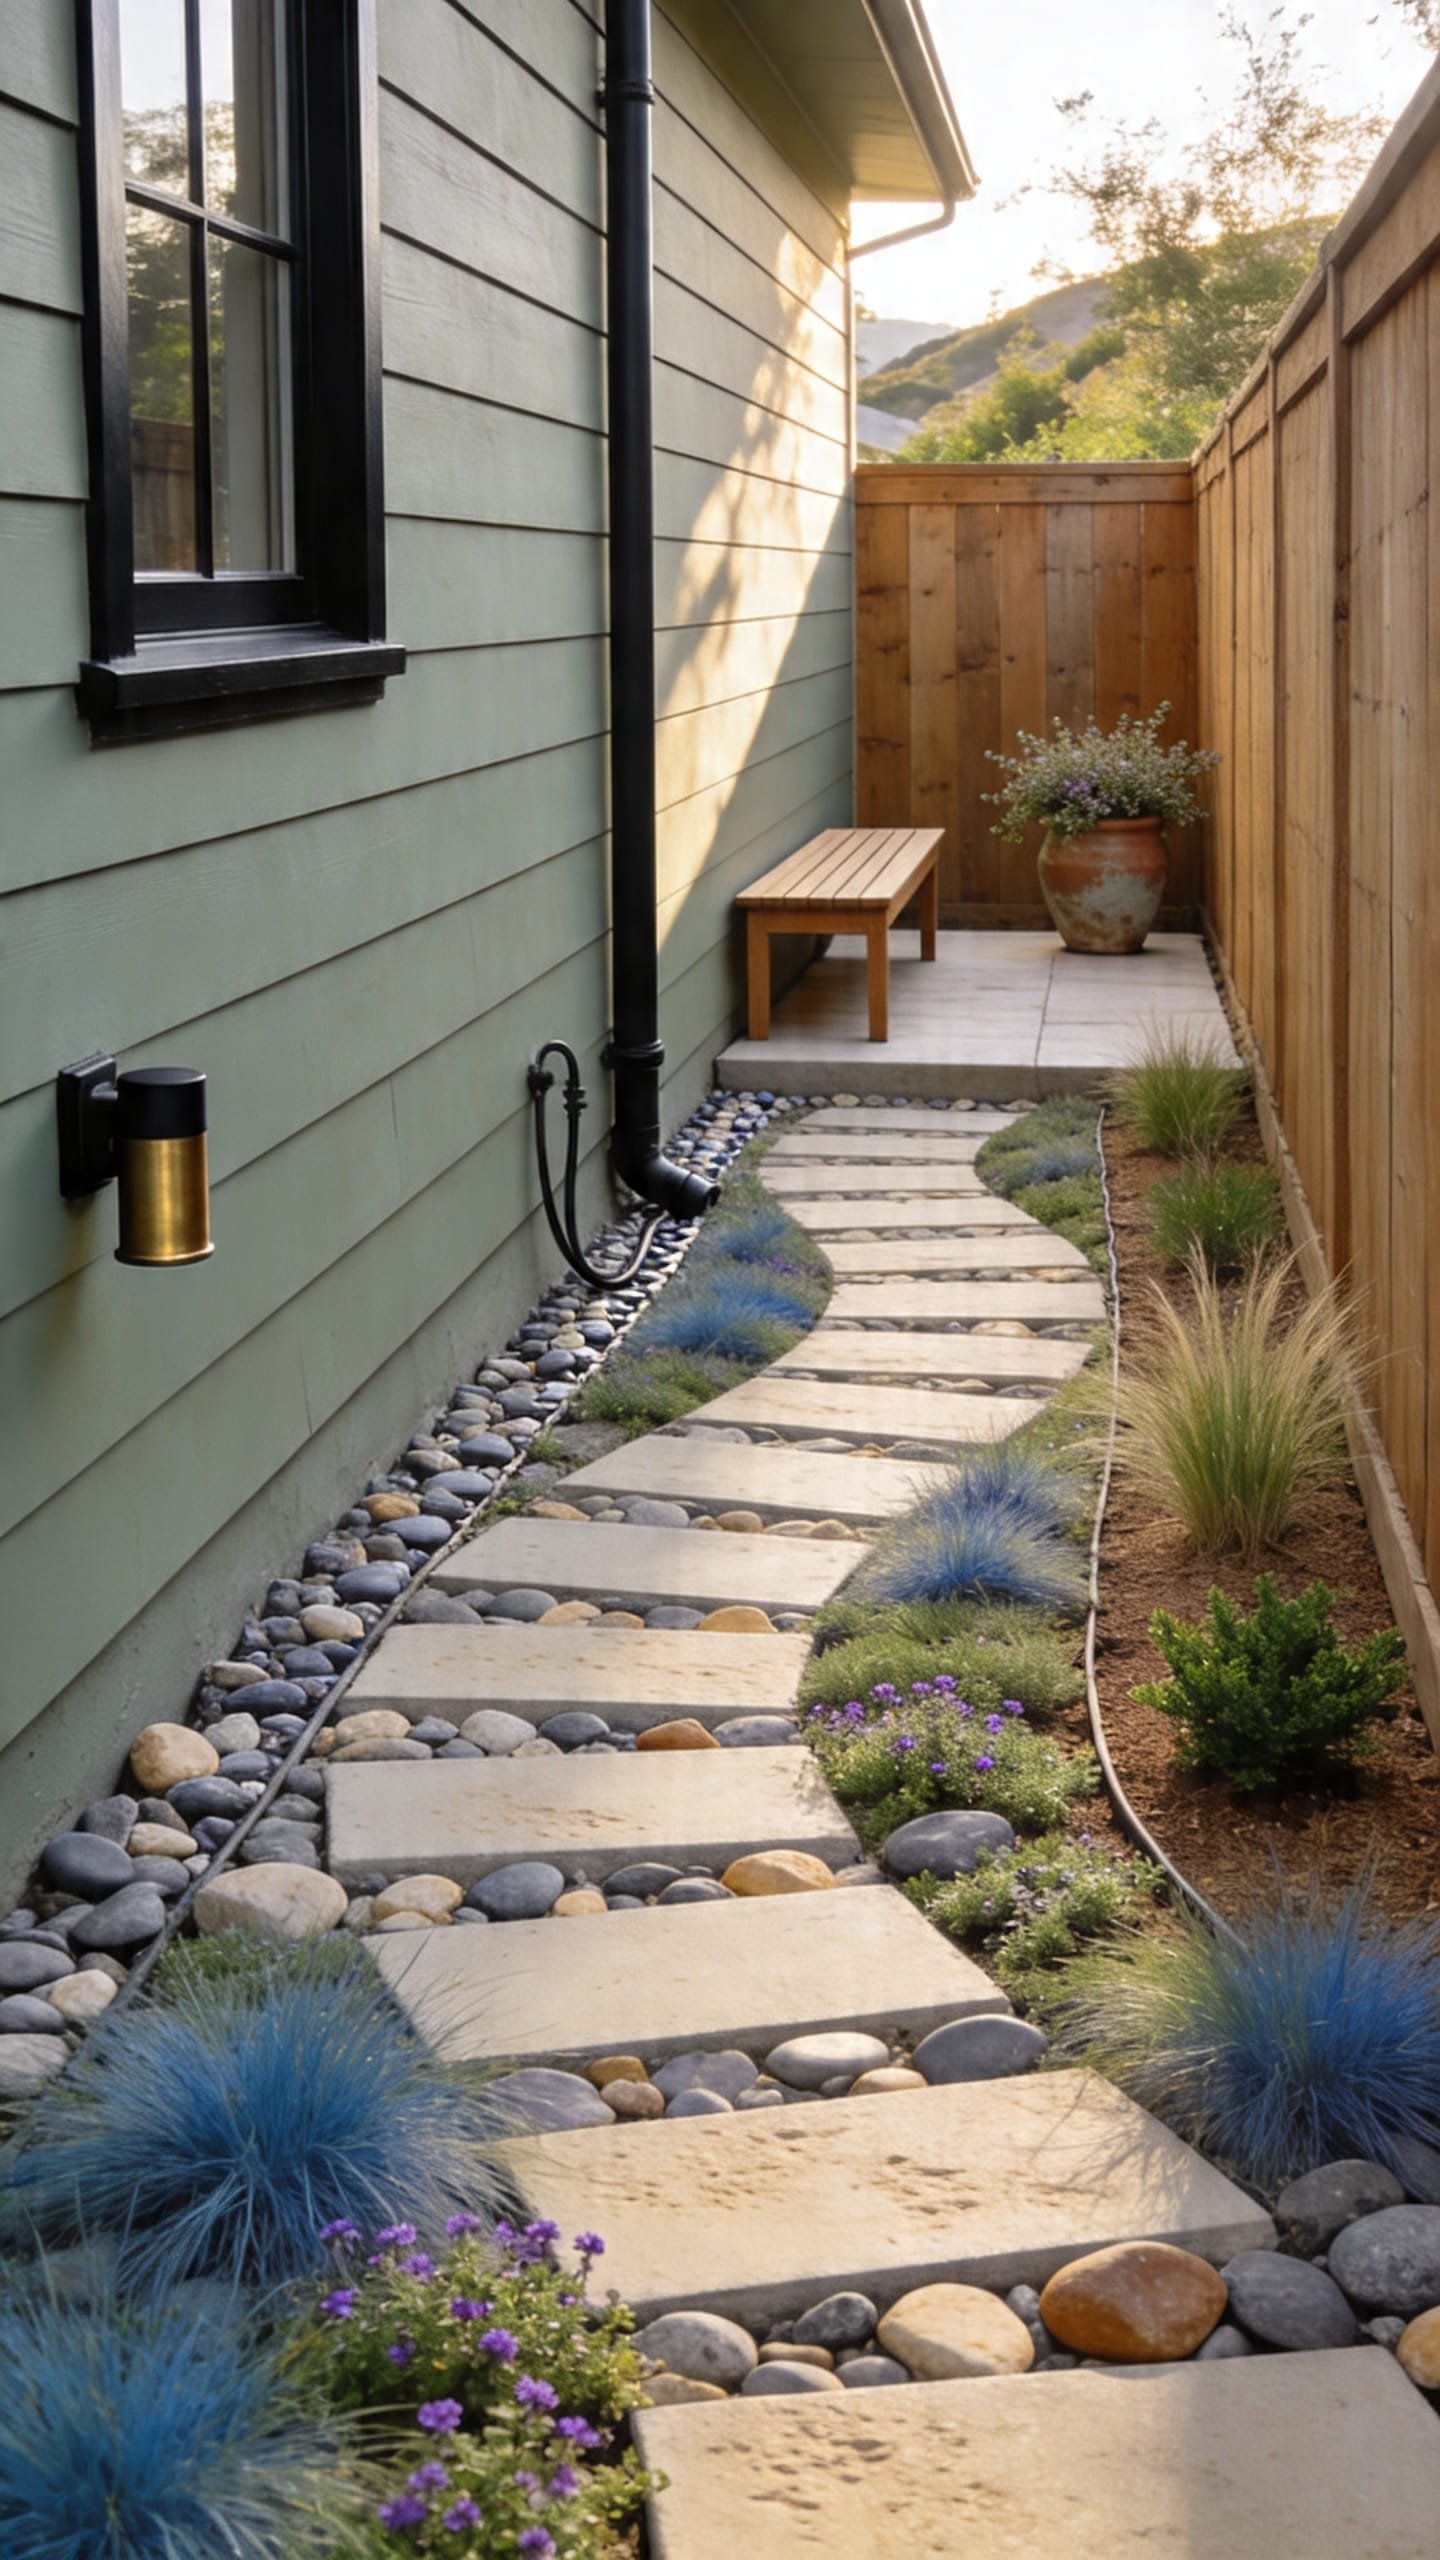
You want to stop dragging the mower down that narrow side yard that nobody visits except on trash day. The grass struggles anyway. You’ve tried concrete stepping stones that look like teeth and get slippery. This design swaps the whole strip for a meandering path of pavers nestled in river rock pockets, with native grasses or thyme filling the gaps for a soft, breathable walkway.
The mood lands in modern-natural—part Scandinavian cabin, part hillside trail. It works well for families because it drains well, doesn’t get muddy, and keeps shoes clean while you take bins out or sneak herbs from the kitchen door. Lighting runs low and smart: a few bollards or stake lights at knee height keep glare off windows. Materials blend river rock (3/4–1 inch), rectangular pavers or stone slabs, and climate-appropriate grasses or groundcovers. Photos love the rhythm of repeated pavers, the pebble sparkle, and soft green stitching between stones.
Variations: Tight budget? Use reclaimed pavers or simple concrete rectangles with a clean saw-cut edge. Tiny side yards do best with fewer, wider stones—avoid busy patterns. For a moody look, pick darker pavers and pewter-toned rock, then choose blue fescue or black mondo for color depth.
Key Design Elements:
- Main materials: rectangular pavers, 3/4–1 inch river rock, drought-tolerant grasses
- Color palette: warm gray pavers, taupe-gray river stone, silvery and blue-green foliage
- Lighting strategy: low bollards spaced 8–10 feet; keep beam spreads narrow
- Furniture silhouettes: none needed, but a slim wall-mounted shelf near a door is handy
- Texture layers: crisp paver edges, rounded rocks, tufted grasses, shadow bands at dusk
- Accent details: a matte-black hose guide, house numbers or mailbox in brushed metal
Budget Breakdown:
- Pavers or stepping stones (12–20): $150–$600
- River rock, 0.5–1 ton: $80–$220
- Landscape fabric and gravel base: $70–$160
- Grasses/groundcover (12–24): $60–$200
- Bollard lights, 2–4: $120–$360
Total Estimated Cost: $480 – $1,540
Best For: Narrow side yards, shaded strips where turf sulks, and anyone craving a path that looks intentional but stays easy.
How To Recreate This Look:
- Start by removing existing turf and leveling the soil; add a 2–3 inch gravel base and compact it.
- Lay landscape fabric, then set pavers in your preferred stride pattern (a natural 24–28 inch step).
- Backfill around pavers with river rock to just below the paver top so edges stay defined.
- Plant low grasses or creeping thyme in pockets between pavers in sunny stretches.
- Install low, warm lights on the fence or ground to outline the route without glare.
Why This Looks Expensive: Repetition with restraint. Consistent paver size, controlled rock depth, and a limited plant palette create an architect’s-lawn vibe—no fuss, all intention.
Watch Out: Don’t set pavers flush with the soil. Leave a slight proud edge (1/4 inch) so silt and leaves don’t smear over the top when it rains.
Pro Styling Tip: Photograph down the length of the path at an angle, not straight-on—this emphasizes the cadence of pavers and the gentle sparkle of stone.
If one idea resonated more than the others, that’s your starting point. You don’t need all six. Pick one area that bugs you the most and solve it beautifully—then stop and enjoy your yard for a season.
Quick Checklist
- Choose one river rock size and color family for consistency
- Use metal or composite edging to keep clean lines
- Lay landscape fabric under rock to reduce weeds
- Anchor curves with one sculptural plant or boulder
- Keep rock depth at 2–3 inches for stability
- Use warm-white low-voltage lighting for nighttime glow
- Pair rock with shredded mulch for flower bed health
- Create drainage-friendly swales or dry creeks where water collects
- Scale planters up—bigger reads calmer and more luxe
- Leave negative space; resist overplanting
Frequently Asked Questions
How much river rock do I actually need for a bed border or band?
Measure length x width x depth in feet to get cubic feet. For a 12-inch-wide band at 2 inches deep, every 10 feet equals about 1.7 cubic feet. Divide by 27 to convert to cubic yards. Most suppliers sell by the ton—ask for coverage per ton at your depth.
I’m on a tight budget. Which idea gives me the biggest visual impact for the least cost?
Start with a single river rock ribbon border around an existing flower bed (Design 1). It’s affordable, fast, and the clean line makes the whole yard look finished. Add one spotlight to a hero plant for nighttime payoff.
Will river rock make my yard hotter or damage plants?
Lighter stone reflects heat better than dark. Keep rocks a few inches away from trunks and stems, and use mulch around plant roots if you’re in a very hot climate. For pool edges, choose paler stones to protect bare feet in summer.
What if my yard is tiny—won’t rocks make it look busy?
Choose a single rock size and a tight color palette. Use rocks as bands or “rugs,” not everywhere. Negative space helps a small yard breathe, so keep plantings simple and repeat the same grass or shrub for calm.
I rent—can I do any of this without getting in trouble?
Yes. Create removable stone rugs and narrow bands using landscape fabric and staked edging. Skip digging, keep depth shallow, and you can scoop rocks into bags when you move. Document existing conditions and improvements just in case.
Closing Thoughts
Pick one corner that nags you—the pool edge with runaway mulch, the flower bed that never looks crisp, that soggy side yard—and give it a river rock solution. These aren’t just pretty ideas. They’re weekend-scale changes that cut chores and make your yard feel calm and deliberate.
The truth is, luxury outside comes from texture, lighting, and restraint. Smooth stones next to soft foliage. One clean band of light at night. Fewer types of materials, repeated with confidence. That’s how you make an outdoor space feel done without babysitting it every Saturday.
Start small, stay consistent, and trust your eye. You’ve got this—and your low-maintenance yard is about to be the place you actually want to linger, barefoot, coffee in hand, admiring how those river rocks catch the morning light. Seriously, you’ll smile every time you walk past.

About the Author

Krisztina P.Rendes, Founder of Home Style Vibes
Founder of Home Style Vibes
Krisztina Puskásné Rendes created Home Style Vibes as a cozy-modern lifestyle space where homemaking meets inspiration. Her goal is to help women create beautiful, organized, and peaceful homes they truly love — without overwhelm. You’ll find here heart-driven content on home decor, cleaning tips, easy family recipes, organization and decluttering, DIY home projects, plants, and seasonal ideas — all designed to bring more calm, comfort, and style into everyday life.