6 Christmas Dessert Table Ideas That Look Bakery-Worthy With Zero Stress
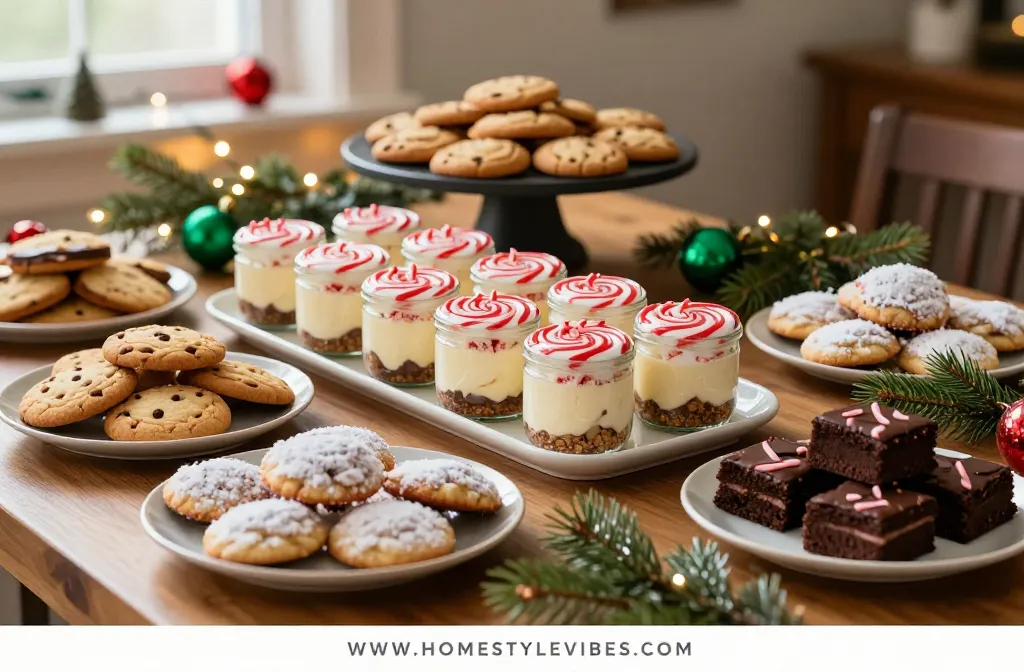
You want a Christmas dessert table that looks straight out of a fancy bakery window. But the baking marathon, the sticky caramel fails, and that last-minute sprinkle chaos make it feel impossible. This guide solves it with Christmas dessert table ideas that are photogenic, crowd-pleasing, and seriously low-stress. We’re talking smart shortcuts, make-ahead magic, and festive flavors that scream holiday without keeping you up past midnight. Bookmark this — it’s your blueprint for a calm, gorgeous sweets spread.
Quick quiz to warm up:
What’s the most important strategy for a bakery-worthy holiday dessert table with minimal stress?
- One complicated showstopper as the centerpiece
- All from-scratch recipes made the same day
- A mix of no-bake, bar, and hand-held treats made ahead and styled well
- Purchasing everything from a bakery
Correct answer: 3 — Variety plus make-ahead and simple styling does the heavy lifting so you look pro without scrambling.
1. No-Bake Peppermint Cheesecake Jars With Swirled Tops And Crushed Candy Cane Crunch
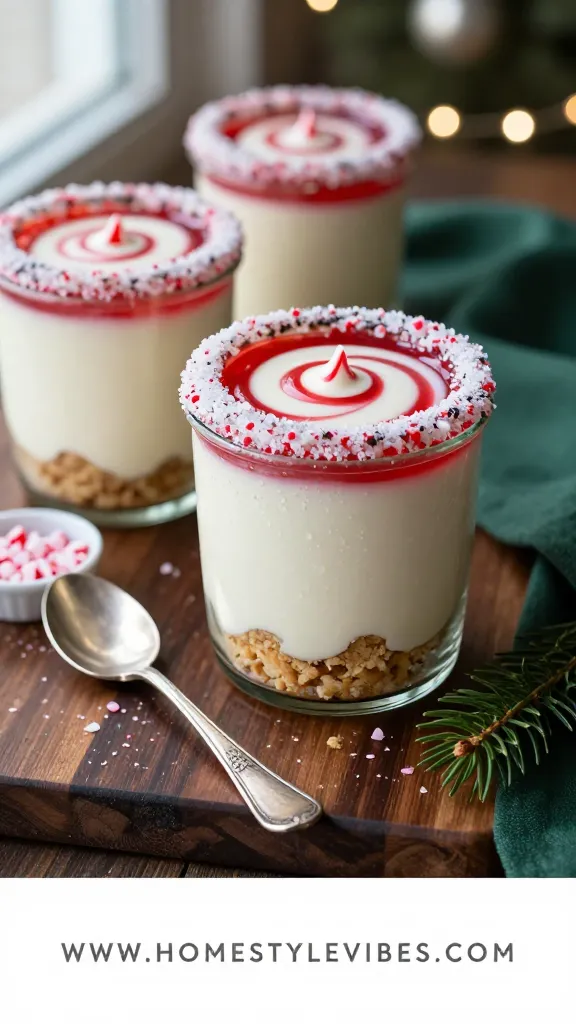
These no-bake jars deliver that creamy cheesecake bite with peppermint-kiss freshness and a dramatic red-white swirl that looks like you hired a pastry chef. They stack easily in the fridge and travel like champs for Christmas Eve or office potlucks.
Texture matters: the buttery cookie crumb, the cool, fluffy filling, and the crackly crushed candy cane give you contrast in every spoonful. The secret isn’t fuss — it’s a quick whip, a rest, and a pretty swirl. Make them 1–2 days ahead; garnish right before serving so the candy stays crisp.
Variations keep everyone happy: swap chocolate sandwich cookies for a darker base, or go kid-friendly with milder peppermint. Gluten-free? Use certified GF sandwich cookies. Dairy-free? Coconut cream and dairy-free cream cheese work beautifully with a touch more powdered sugar for structure.
Prep Time: 25 minutes
Chill Time: 3 hours
Total Time: 3 hours 25 minutes
Servings: 10 jars (8-ounce mason jars)
Best For: Make-ahead dessert tables, gifting to neighbors, kid-friendly holiday parties.
Ingredients:
- 24 chocolate wafer cookies (or chocolate sandwich cookies), crushed (about 2 cups crumbs)
- 6 tablespoons unsalted butter, melted
- 16 ounces cream cheese, softened
- 1 cup powdered sugar
- 1 teaspoon pure vanilla extract
- 1 teaspoon peppermint extract
- 1 1/2 cups cold heavy cream
- 1/8 teaspoon fine sea salt
- 6–8 drops red gel food coloring
- 1/2 cup crushed candy canes, plus extra for garnish
- Whipped cream for topping (about 1 1/2 cups)
Instructions:
- Stir cookie crumbs with melted butter until the texture is like damp sand. Spoon 3 tablespoons into each 8-ounce mason jar and press lightly with the back of a spoon.
- Beat cream cheese, powdered sugar, vanilla, peppermint extract, and salt until smooth and fluffy, 2 minutes. In a separate bowl whip heavy cream to medium-stiff peaks.
- Fold whipped cream into the cream cheese mixture gently until no streaks remain. Fold in 1/2 cup crushed candy canes.
- Divide filling: transfer 2/3 to a piping bag. Tint the remaining 1/3 with red gel and pipe alternating swirls into the jars to create a candy-cane effect. Tap jars to settle.
- Chill 3 hours until set. Before serving, top with whipped cream and a pinch of crushed candy canes.
Serve the jars straight from a wooden crate or galvanized drink tub packed with ice packs hidden under a tea towel; garnish is whipped cream plus crushed candy cane. For gifting, screw on lids and tie a ribbon — they hold 2 days refrigerated (add garnish day-of). Pro Plating Tip: Drag a toothpick through the red and white layers in small figure-eights at the surface for a clean, bakery swirl.
Ready for something slice-and-serve that rides to the party like a champ? The next one cuts clean and loves a chill.
2. Cranberry-Orange Shortbread Bars With Sparkling Sugar Tops And Clean, Sharp Edges
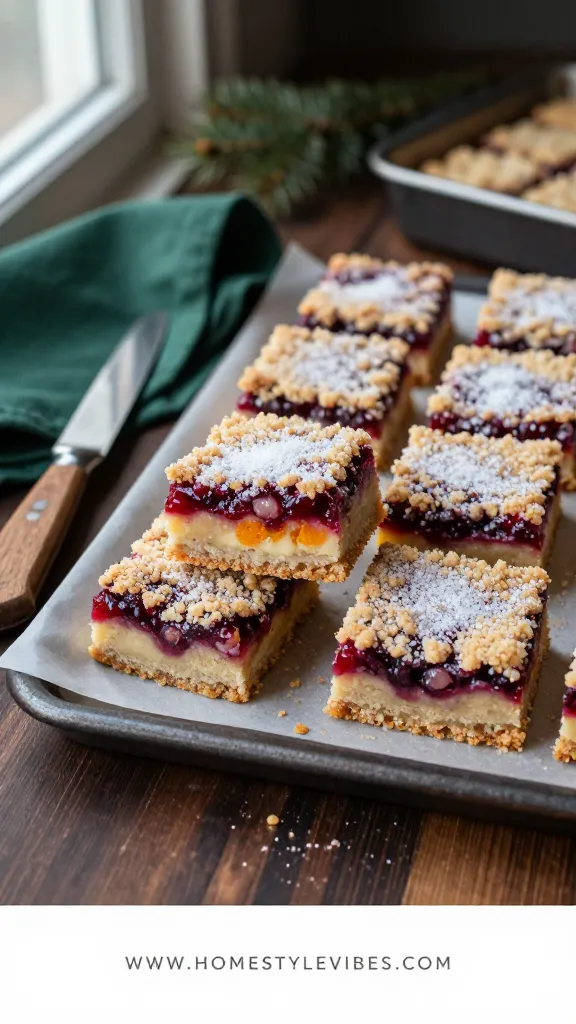
Bars are the secret backbone of a zero-stress Christmas dessert table. These bake in one 9×13-inch pan, slice into flawless squares, and shine with sweet-tart cranberry jam and bright orange zest. They’re sturdy, buttery, and completely freezer-friendly.
What makes them bakery-worthy: a sandy-crisp shortbread base, a jewel-toned cranberry layer, and a sandy crumble crowned with sparkling sugar. They hold at room temp for hours and taste even better the next day, which means you can bake early and breathe easy.
If you’ve ever chased crumbs around a cutting board, you’ll love how clean these slice when fully cooled. My neighbor brought a version to a cookie swap last year, and I spent all night angling for the recipe — this is that vibe, simplified.
Prep Time: 25 minutes
Cook Time: 38–42 minutes
Total Time: 1 hour 10 minutes
Servings: 24 bars
Best For: Potlucks, cookie exchanges, and make-ahead dessert platters.
Ingredients:
- 1 cup unsalted butter (2 sticks), softened
- 3/4 cup granulated sugar
- 1/2 cup powdered sugar
- 1 tablespoon grated orange zest
- 1 teaspoon vanilla extract
- 1/2 teaspoon fine sea salt
- 2 3/4 cups all-purpose flour
- 1 1/4 cups cranberry sauce (whole-berry), chilled
- 2 tablespoons orange juice
- 2 tablespoons coarse sparkling sugar, for topping
Instructions:
- Preheat oven to 325°F. Line a 9×13-inch metal baking pan with parchment, overhanging on two sides for lifting. This is your serving vessel if you want rustic slicing; otherwise move to a white rectangular platter later.
- Cream butter with granulated and powdered sugars until smooth, 1–2 minutes. Beat in orange zest, vanilla, and salt.
- Add flour and mix until a soft, crumbly dough forms. Press two-thirds into the pan in an even layer; dock lightly with a fork.
- Stir cranberry sauce with orange juice until spreadable. Smooth over the base, leaving a 1/4-inch border.
- Crumble remaining dough over the top, leaving some cranberry peeking through. Sprinkle sparkling sugar.
- Bake 38–42 minutes, until edges are lightly golden and the top feels set. Cool completely in the pan, then lift and slice with a sharp knife wiped clean between cuts.
Variation ideas: Almond lovers can swap 1/2 teaspoon almond extract for vanilla and add 1/3 cup sliced almonds to the crumble. Gluten-free? Use a 1:1 GF flour blend and add 1 tablespoon cornstarch for tenderness. Freeze sliced bars in layers with parchment for up to 1 month. Pro Plating Tip: Arrange squares in a tight grid on a matte white platter and scatter a few fresh cranberries and orange zest curls in the negative space for color pop.
Quick mindset reset: Your dessert table doesn’t need twelve things. Two make-ahead anchors plus one fresh, no-bake piece can look abundant. Think color and height, not quantity.
3. Gingerbread Truffle Pops Dipped In Dark Chocolate With Gold-Speckled Shine

Hand-held truffles on sticks bring instant party energy, and they’re 100% no-bake. The filling tastes like soft gingerbread cookie dough with a hint of molasses and warm spice. Dipped in glossy dark chocolate and flicked with edible gold dust, they read boutique, not busy.
They’re ideal for kids’ tables and cocktail parties because there’s no plate-and-fork situation. Make them days ahead and store chilled; the chocolate shell protects the creamy center and keeps everything neat on your dessert table.
As a note of honesty: dipping can test patience. The moment when chocolate goes from silky to too thick happens fast. Breathe, rewarm gently, and you’ll be fine.
Prep Time: 35 minutes
Chill Time: 1 hour
Total Time: 1 hour 35 minutes
Servings: 30 truffle pops
Best For: Cocktail parties, kids’ treats, and edible gifts.
Ingredients:
- 8 ounces ginger snaps, very finely crushed (about 2 cups crumbs)
- 6 ounces cream cheese, softened
- 2 tablespoons unsalted butter, softened
- 1/4 cup powdered sugar
- 2 tablespoons molasses
- 1 teaspoon ground ginger
- 1/2 teaspoon cinnamon
- 1/8 teaspoon cloves
- 1/8 teaspoon fine sea salt
- 16 ounces dark chocolate melting wafers (or chopped couverture)
- 1 tablespoon neutral oil (if needed for thinning)
- Edible gold luster dust, for finishing
- 30 lollipop sticks
Instructions:
- Beat cream cheese, butter, powdered sugar, molasses, ginger, cinnamon, cloves, and salt until smooth. Stir in ginger snap crumbs until a soft dough forms.
- Roll into 1-inch balls. Chill 20 minutes on a parchment-lined baking sheet.
- Melt chocolate in a microwave-safe bowl in 20–30 second bursts, stirring until smooth. Add oil if thick.
- Dip the tip of each lollipop stick in chocolate and insert into each truffle. Chill 10 minutes to set.
- Dip pops into chocolate, gently tap off excess, and stand in a foam block or a colander flipped upside down to set. Dust lightly with gold luster once the chocolate is tacky but not wet.
Serve upright in a tall mercury-glass vase filled with dry rice to anchor the sticks, no extra garnish needed. Variations: Dairy-free by using vegan cream cheese and dairy-free chocolate; nut-free as written. For non-pop truffles, skip sticks and roll in cocoa or crushed ginger snaps. Pro Plating Tip: Group pops at staggered heights and sprinkle a little crushed ginger snap around the base for texture contrast.
Next up, something you can slice in perfect diamonds and scatter across a tray that looks like a bakery case: a no-stir fudge that never gets gritty.
4. Salted White Chocolate Eggnog Fudge With Nutmeg Flecks And Clean-Cut Squares
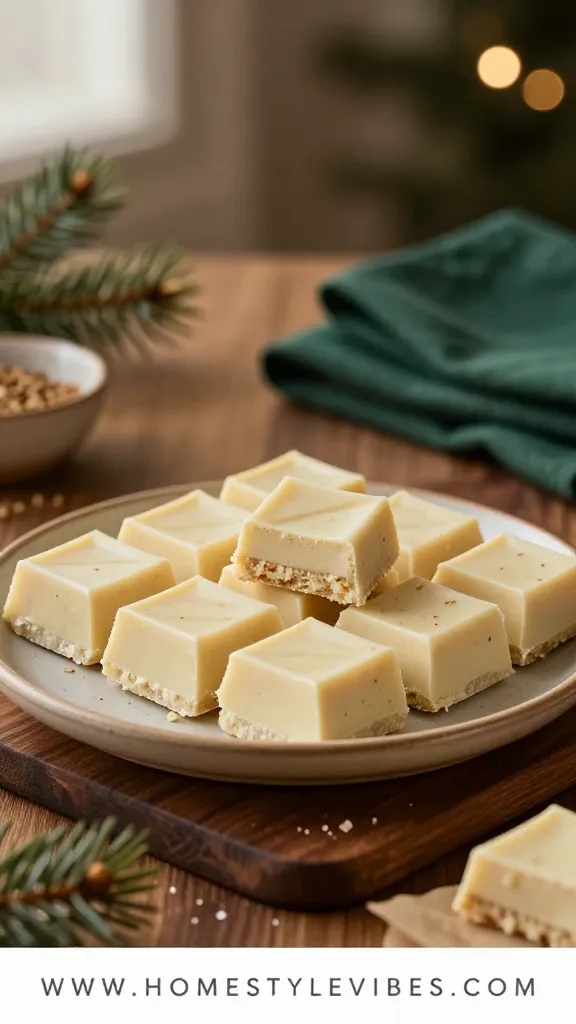
Fudge feels nostalgic and impressive, but it can be fussy. Not this version. It’s a quick stovetop stir that sets to a creamy, sliceable texture with warm nutmeg and gentle rum extract to give eggnog vibes without a raw egg in sight.
Here’s why this works: sweetened condensed milk plus white chocolate melts into a smooth base, and a proper 8-hour chill gives you those crisp knife cuts. It’s the perfect “fill the gaps” candy on your dessert table and travels well for gifting.
True story: I once tried to rush the chill and ended up with squishy edges that looked like I’d sliced cheese. Learn from me — give it time and you’ll get that bakery-worthy firmness.
Prep Time: 15 minutes
Cook Time: 8 minutes
Chill Time: 8 hours or overnight
Total Time: 8 hours 23 minutes
Servings: 64 small squares (8×8-inch pan)
Best For: Edible gifts, candy plates, and filling negative space on a dessert board.
Ingredients:
- 14 ounces sweetened condensed milk
- 20 ounces high-quality white chocolate, chopped
- 4 tablespoons unsalted butter, cubed
- 1 teaspoon vanilla extract
- 1/2 teaspoon rum extract (optional but lovely)
- 3/4 teaspoon freshly grated nutmeg, plus more for garnish
- 1/4 teaspoon fine sea salt, plus flaky salt for finishing
Instructions:
- Line an 8×8-inch metal pan with parchment, leaving overhang. This pan is your mold; transfer to a marble slab or slate board to serve later.
- In a medium heavy saucepan over low heat, combine condensed milk, white chocolate, and butter. Stir constantly until smooth and glossy; don’t let it bubble.
- Remove from heat. Stir in vanilla, rum extract, nutmeg, and fine salt until evenly combined.
- Scrape into prepared pan, smooth the top, and dust lightly with more nutmeg. Chill at least 8 hours until firm.
- Lift out by parchment and cut into 1-inch squares with a hot, dry knife, wiping between cuts. Finish with a tiny pinch of flaky salt on each square.
Variations: Swap rum extract for 1 teaspoon orange zest for creamsicle holiday vibes. Dairy-free is tough here; if you try it with coconut condensed milk and vegan white chocolate, expect a softer set. Stores airtight in the fridge 2 weeks; for gifting, layer squares in a tin with parchment. Pro Plating Tip: Arrange in tight rows on a dark slate; the nutmeg freckles and salt crystals will pop against the contrast.
Reminder: Cooking doesn’t have to be a performance. If you nail even one of these this week, that’s a win. Your guests remember the cozy feeling more than the perfect corners.
5. Pistachio-Cardamom Pavlova Wreath With Pomegranate Jewels And Marshmallowy Centers
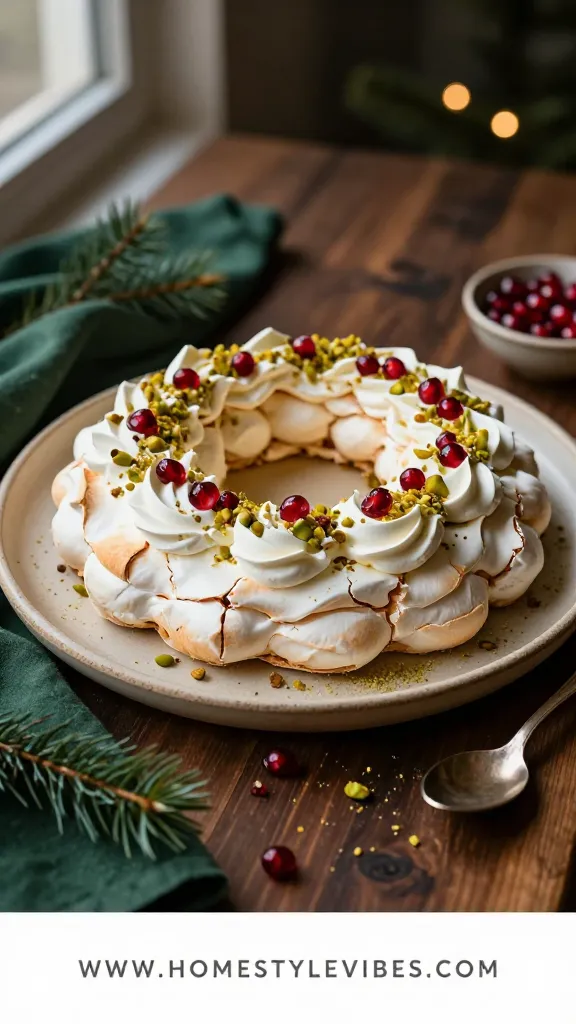
A pavlova wreath looks like it took hours, but the mixer does the heavy lifting. The crisp, crackly meringue shell yields to a marshmallowy center, topped with lightly sweet whipped cream, pistachios, and bright pomegranate arils that glitter like ornaments. It’s a centerpiece that still feels light after a big meal.
Yes, meringue can be finicky. Here’s the truth: room-temp egg whites, spotless bowl, and a slow sugar rain are your safeguards. Bake it low and let it cool in the oven — that’s how you avoid dramatic cracks.
Serve this on a large white ceramic cake stand for height and drama, and garnish with a few mint leaves for a green ribbon effect. Make the meringue shell a day ahead; assemble just before serving so it stays crisp.
Prep Time: 25 minutes
Cook Time: 1 hour 15 minutes
Total Time: 1 hour 40 minutes (plus cooling in oven)
Servings: 10–12
Best For: Christmas dinner finale, wow-factor dessert table centerpiece.
Ingredients:
- 6 large egg whites, room temperature
- 1 1/2 cups superfine sugar (or pulse granulated sugar briefly in a processor)
- 2 teaspoons cornstarch
- 1 teaspoon white vinegar
- 1/2 teaspoon ground cardamom
- 1 teaspoon vanilla extract
- 1 cup cold heavy cream
- 2 tablespoons powdered sugar
- 1/2 cup shelled pistachios, roughly chopped
- 3/4 cup pomegranate arils
- Small mint leaves, for garnish
Instructions:
- Heat oven to 250°F. Trace a 10-inch circle on parchment, then trace a 6-inch circle inside for a wreath guide. Flip parchment onto a baking sheet.
- Whip egg whites to soft peaks. With mixer running, slowly rain in sugar over 6–7 minutes until stiff, glossy peaks form and sugar is dissolved. Beat in cornstarch, vinegar, cardamom, and vanilla just to combine.
- Spoon meringue in dollops along the ring, using the back of the spoon to create swoops and peaks. Bake 1 hour 15 minutes; turn off oven and let the pavlova cool inside with the door cracked for 1 hour.
- Whip cream with powdered sugar to soft peaks. Just before serving, top the wreath with cream, scatter pistachios and pomegranate, and tuck in mint leaves.
Variations: Nut-free? Skip pistachios and add shards of dark chocolate. Dairy-free? Top with whipped coconut cream. The shell stores airtight overnight. Pro Plating Tip: Sift a whisper of powdered sugar over the mint and pomegranate right before serving for a snow-dusted look.
We’ve done creamy, crunchy, and glossy — now you need a bake-and-slice chocolate fix that never dries out and stacks like a dream for gifting.
6. Hot Cocoa Brownie Bites With Marshmallow Swirl And Shiny Crinkle Tops
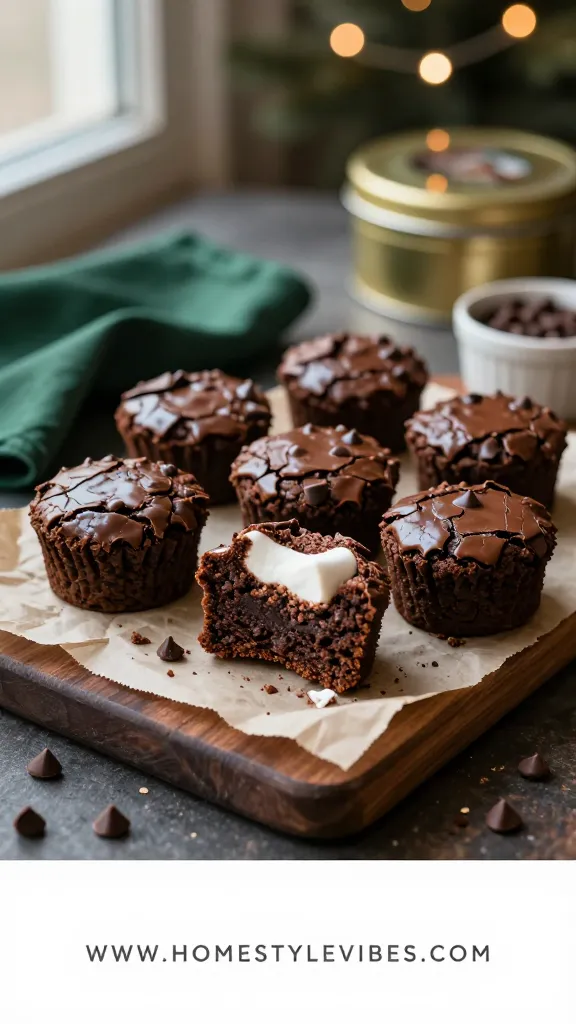
These one-bowl brownie bites nail the fudgy texture and deliver holiday flair with a marshmallow swirl and tiny chocolate chunks. The shiny crinkle is your bakery signal. They’re portioned, portable, and perfect for filling tiered stands or cookie tins.
They travel well and stay moist for days, which makes them ideal for parties and mailing to family. I made a batch for a Tuesday movie night last December, and my kids asked for them again before the credits rolled — that’s the energy you want on a dessert table.
Serve in a three-tiered stand or a vintage pie plate lined with parchment rounds. Garnish is a micro-marshmallow on each bite after baking; it softens slightly and looks adorable.
Prep Time: 15 minutes
Cook Time: 12–14 minutes
Total Time: 30 minutes
Servings: 36 brownie bites (mini muffin pan)
Best For: Cookie tins, class parties, and last-minute “bring a dessert” texts.
Ingredients:
- 10 tablespoons unsalted butter (1 stick + 2 tbsp), melted and slightly cooled
- 1 cup granulated sugar
- 1/2 cup brown sugar
- 2 large eggs + 1 egg yolk
- 1 teaspoon vanilla extract
- 1/2 cup natural cocoa powder
- 3/4 cup all-purpose flour
- 1/2 teaspoon fine sea salt
- 1/2 teaspoon baking powder
- 1/2 cup mini chocolate chips
- 1/2 cup marshmallow creme
- 36 mini marshmallows, for garnish
Instructions:
- Heat oven to 350°F. Grease a 24-cup mini muffin pan and a second 12-cup pan or bake in two rounds.
- Whisk butter with granulated and brown sugars until glossy. Whisk in eggs, yolk, and vanilla until thick and ribbony.
- Sift in cocoa, flour, salt, and baking powder. Fold just until combined. Stir in chocolate chips.
- Scoop 1 tablespoon batter into each cup. Warm marshmallow creme 10 seconds in the microwave to loosen, then dot 1/2 teaspoon on each. Swirl with a toothpick.
- Bake 12–14 minutes until tops are shiny and set with a slight crackle and a faint jiggle in centers. While warm, press one mini marshmallow on each bite. Cool 10 minutes; loosen edges with a small offset spatula.
Variations: Peppermint-chocolate by swapping 1/2 teaspoon vanilla for peppermint extract and sprinkling crushed candy canes after baking. Gluten-free works with a 1:1 blend; reduce bake time by 1 minute. Store airtight 4 days or freeze up to 2 months. Pro Plating Tip: Pile bites in a pyramid and dust lightly with cocoa through a fine sieve for a cozy “hot cocoa steam” look.
Quick Checklist
- Anchor your table with one tall centerpiece (pavlova wreath or stacked jars) for height
- Balance flavors: mint, citrus, warm spice, chocolate, and something creamy
- Mix textures: crunchy, creamy, chewy, and crisp for interest
- Choose vessels with contrast: white platters for jewel tones, dark slate for pale candies
- Prep garnishes day-of so they stay crisp (crushed candy canes, flaky salt)
- Cut bars cold for clean edges, then bring to room temp for best flavor
- Batch-bake, then freeze: shortbread bars and brownie bites freeze perfectly
- Label allergens on small tent cards (nuts, dairy, gluten)
- Stagger heights with cake stands, boxes under linens, and tiered trays
- Leave a small empty space on each tray to avoid a crowded look
Frequently Asked Questions
How far in advance can I make these Christmas dessert table recipes?
You can make most components 1–3 days ahead. Bars and fudge can be made 2–3 days early, truffle pops 3 days, cheesecake jars 1–2 days, and pavlova shell 1 day (assemble day-of). Brownie bites bake best within 24 hours.
What’s the best way to store and transport everything without smudging garnishes?
Store each dessert airtight and add fragile garnishes (candy cane bits, flaky salt, mint) at the venue. Use snug containers with parchment between layers and pack cold items in a cooler tote to prevent condensation.
Can I make these gluten-free or dairy-free for guests with allergies?
Yes, with targeted swaps. Use 1:1 GF flour for bars and brownies, GF cookies for jars, and dairy-free cream cheese and chocolate for truffles; pavlova is naturally GF. Dairy-free fudge is possible but softer; manage expectations.
How do I scale these for a large crowd without cooking all day?
Double bars and brownie bites; they scale cleanly in standard pans. For truffles, roll smaller 3/4-inch balls. Add one store-bought assist (berries, chocolates) to stretch the spread without more cooking.
What’s the trick to a professional-looking layout on the dessert table?
Vary height, color, and shape deliberately. Place a tall centerpiece, flank with squares and rounds, use odd-number groupings, and repeat one garnish color (like pomegranate red) in three spots to unite the look.
Conclusion
Start with one recipe this week — maybe the cranberry-orange bars for your freezer or those no-bake peppermint jars for Friday night. Once you’ve got one anchor made, the rest feels easy, and your Christmas dessert table begins to take shape without a scramble.
Remember, holiday hosting isn’t about perfection; it’s about creating a table that invites people to linger. With make-ahead pieces, simple garnishes, and smart vessels, you’ll serve a Christmas dessert table that looks bakery-worthy and feels completely doable.
You’ve got this. Pick your favorite, press print, and enjoy the compliments — you earned them, minus the stress.

About the Author

Krisztina P.Rendes, Founder of Home Style Vibes
Founder of Home Style Vibes
Krisztina Puskásné Rendes created Home Style Vibes as a cozy-modern lifestyle space where homemaking meets inspiration. Her goal is to help women create beautiful, organized, and peaceful homes they truly love — without overwhelm. You’ll find here heart-driven content on home decor, cleaning tips, easy family recipes, organization and decluttering, DIY home projects, plants, and seasonal ideas — all designed to bring more calm, comfort, and style into everyday life.