6 Christmas Front Door Decor Ideas Beyond the Basic Wreath
You want that classic outdoor red-and-green front door moment that makes neighbors slow down and smile. You hate that your “basic wreath” disappears on a dark door and never feels finished. The truth is, a Christmas front door is a whole scene, not a single circle of greenery. These 6 Christmas front door decor ideas beyond the basic wreath lean into true red, deep evergreen, warm white lights, and brass accents to build curb appeal that looks like a holiday hug the second twilight hits.
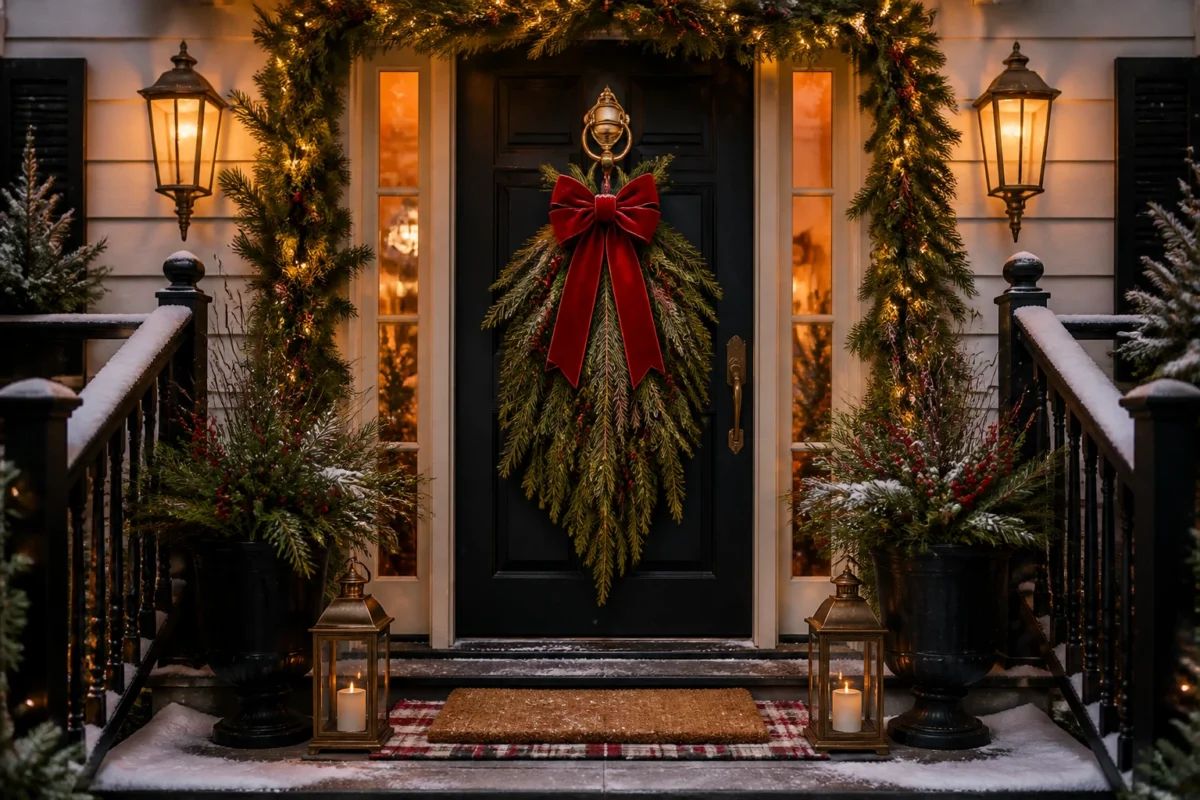
We’re talking fresh fir, cedar, berry sprigs, lantern glow, red velvet bows, and evergreen layers that stand up to cold weather and look incredible in photos. If you’ve felt stuck, this list is your friction remover: six complete, doable concepts you can set up in an afternoon, most under $200, and all of them seriously Pinterest-worthy from Thanksgiving weekend through New Year’s. This is for the person who loves tradition but wants it to feel intentional and finished outside. Let’s step up to the door, because this is where the welcome starts.
1) Red Velvet Bows And Cedar Door Swag On A Black Front Door
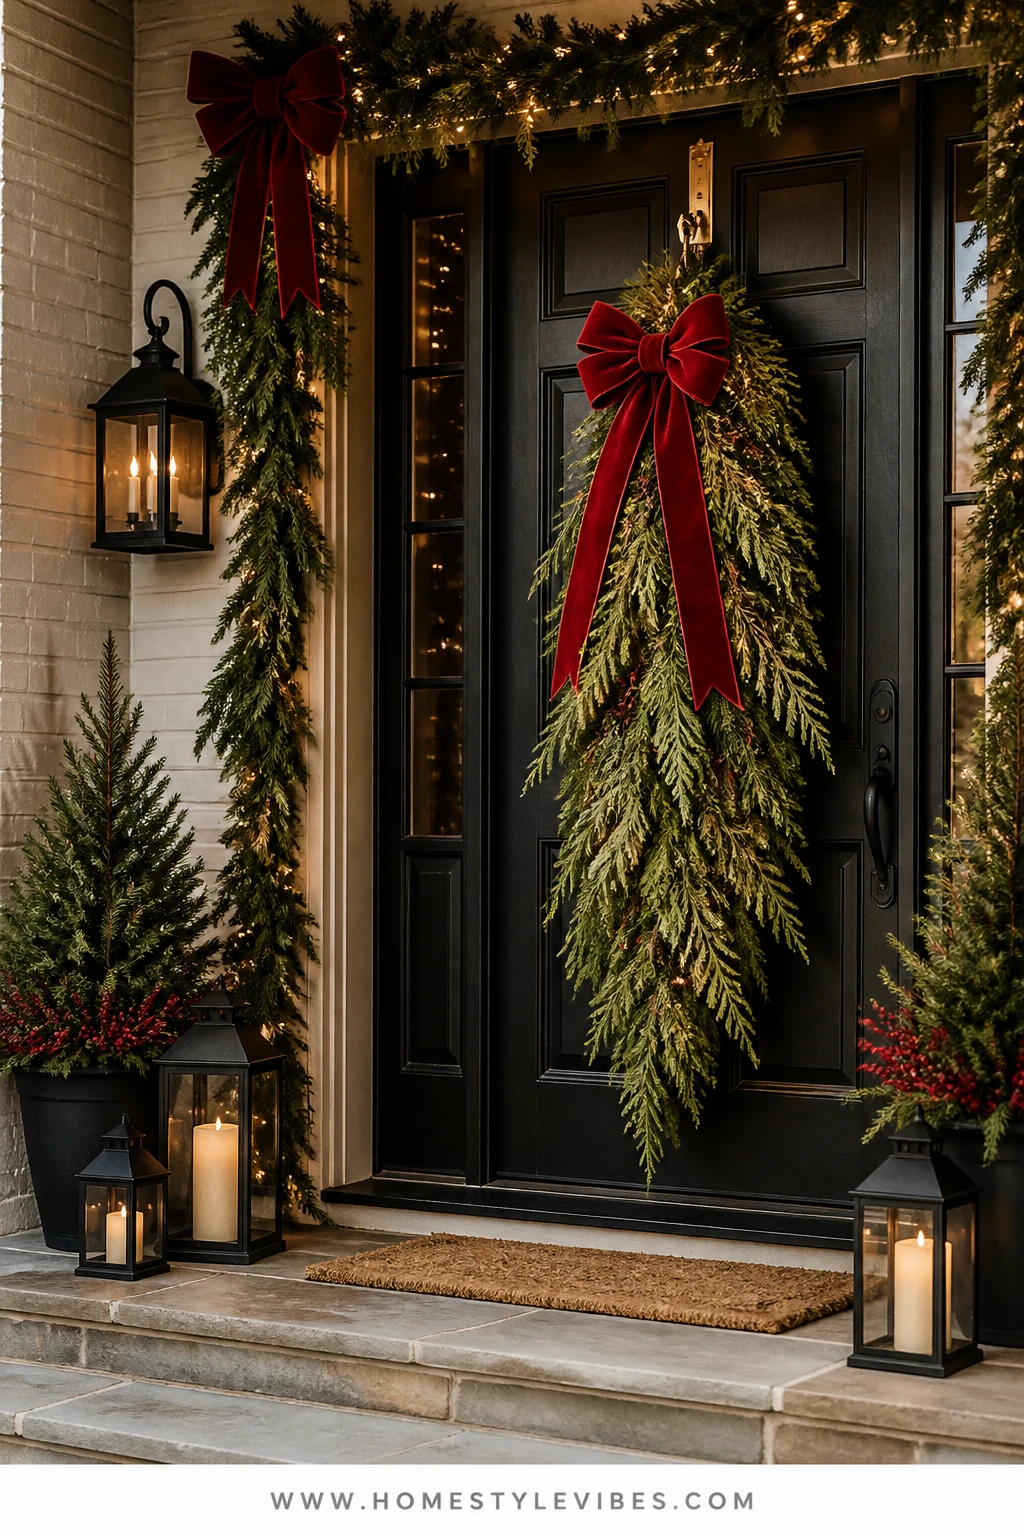
We’ve all been there—hanging a medium wreath that looks tiny, lonely, and somehow off-center once the wind gets hold of it. On a black or dark-painted door, that “floating donut” effect is especially real. Swap the wreath for a full-length cedar swag finished with a generous red velvet bow, and you’ll get a vertical line that reads elegant from the sidewalk and festive up close.
This look creates that warm, traditional mood we all crave: deep evergreen, a single note of true red, and the soft glow from nearby lanterns at dusk. It works in real homes because a swag is forgiving on proportion—tall doors look grand, short doors still look balanced—and it stores almost flat in January. A door swag also leaves room for visible hardware and house numbers, which means your entry won’t feel cluttered. Light-wise, the swag catches any sidelights or porch fixture glow, and if you wire a short strand of warm white lights into the greenery, it turns into a gentle vertical candle on blue-hour evenings.
Why will your photos love it? The bow adds a focal pop; the cedar layers give rich texture that holds up against a dark door; and the vertical shape pulls the eye straight to your entry. It’s a classic, but it doesn’t feel generic.
Variations:
- Budget-friendly: Use a faux cedar swag and upgrade with real clippings tucked in for scent.
- Small-space: Go slimmer and hang two mini swags stacked vertically for a tailored column.
- Understated: Swap velvet for matte red cotton ribbon and skip the lights for a daylight-only moment.
Timing: Hang this right after Thanksgiving. Keep the swag into early January by replacing the red bow with an ivory one the week after Christmas for a softer winter look.
Budget Breakdown:
- Faux or fresh cedar swag: $25–$80
- 2.5–3 inch red velvet ribbon (10 yds): $12–$25
- Floral wire and command hook (outdoor): $8–$15
- Optional battery micro-lights (warm white, outdoor-safe): $10–$18
Total Estimated Cost: $55 – $138
Best For: A black, navy, or dark green door that needs contrast; homeowners who love a traditional look with a slightly dressier finish and want something easy to store.
Key Design Elements:
- Main holiday props: Cedar swag, red velvet bow, optional micro-lights
- Color palette: Deep green, true red, warm white light
- Lighting strategy: Subtle battery micro-lights woven into greenery; porch light at dusk
- Textile and ribbon layers: Plush velvet, long tails for movement
- Greenery and natural elements: Cedar base with fir or juniper for body
- Accent details: Brass or black hardware left visible for contrast
How To Recreate This Look:
- Start with a cedar swag roughly 30–36 inches long; fluff the branches for a full silhouette.
- Add a few fir clippings into the center to bulk up the body and vary the texture.
- Layer in a small cluster of faux red berries near the top third for a single hit of color.
- Place a battery micro-light strand down the center and hide the battery pack at the back with floral wire.
- Style with an oversized red velvet bow at the top; let the tails fall past the swag’s bottom edge.
- Hang using an outdoor-safe adhesive hook or an over-the-door hanger that doesn’t pinch weatherstripping.
- Step back at dusk; adjust the bow tails to frame your handle and lock without covering them.
Why This Looks Expensive: The velvet ribbon quality and the scale of the swag do the heavy lifting. Long ribbon tails read custom, not off-the-shelf.
Watch Out: Don’t crowd the door handle. Keep at least 6 inches of clearance so you’re not swatting ribbon out of the way with grocery bags in hand.
Pro Styling Tip: Angle your micro-lights so the tiny bulbs face outward; that crisp pinprick glow photographs beautifully at twilight.
2) Fir Garland And Brass Bells With Warm White Lights Around A Brick Doorframe
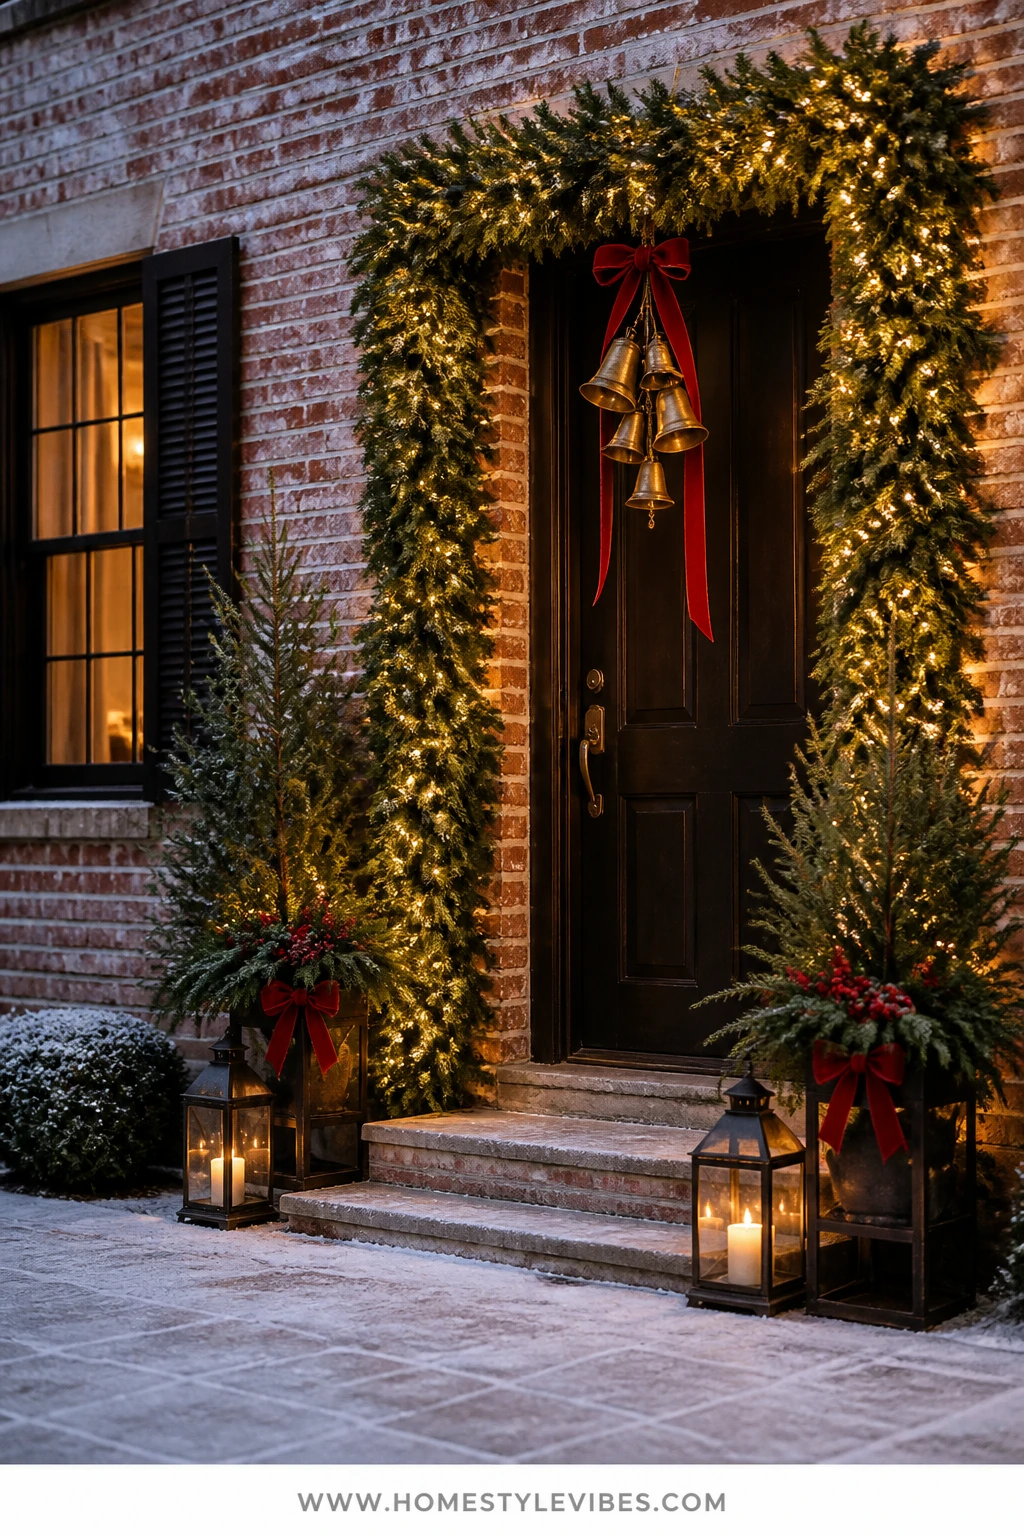
It’s that one entry that always feels flat against the brick—plenty of charm, no definition. You’ve tried a skinny garland in years past, but it sagged weirdly and vanished at night. The fix? Go fuller with layered fir garland, thread in warm white lights, and anchor the center with a cluster of brass bells tied in red velvet. Suddenly, your doorway becomes the frame that makes the whole house look dressed.
This mood is classic outdoor red and green with a gleam of brass that catches porch light like candle glow. It works on real homes because brick gives you lots of places to anchor discreetly, and the garland outlines the architecture you already have. In photos, you’ll see dimension—a halo of green, points of light, and bells that glint and sway just enough in the winter breeze. I used this exact combo for a client with a red-brick colonial, and honest truth: the mail carrier asked where they “bought the setup.” That’s how you know.
Variations:
- Budget-friendly: Use two standard faux garlands twisted together for fullness instead of a single premium one.
- Kid-friendly: Swap real brass bells for lightweight faux versions to avoid clanging against the door in high winds.
- Neutral week in January: Untie the red bow and leave the greenery and lights (and bells) up through the first snow.
Timing: Install the first weekend of December and keep the lights and greenery through New Year’s. Remove the red accents in early January to extend the winter glow.
Budget Breakdown:
- Two 9-foot faux fir garlands: $40–$120 (quality varies)
- Warm white outdoor string lights (50–100 count): $15–$30
- Brass bell cluster: $20–$60
- Red velvet ribbon (2–3 yards): $6–$12
- Brick clips or outdoor masonry hooks: $8–$15
Total Estimated Cost: $89 – $237
Best For: Brick or stone homes with a recessed entry; families who want high-impact curb appeal that reads beautifully day and night.
Key Design Elements:
- Main holiday props: Full fir garland, brass bells, warm white string lights
- Color palette: Evergreen, brass-gold, red accent
- Lighting strategy: Evenly spaced warm white bulbs outlining the frame
- Textile and ribbon layers: Velvet tie at bell cluster only
- Greenery and natural elements: Fir with cedar sprigs for texture
- Accent details: Brick clips and hidden extension cords for clean lines
How To Recreate This Look:
- Start by measuring your doorframe perimeter; plan enough garland to reach from ground up one side, across, and down the other with a slight drape.
- Add volume by twisting two garlands together, securing with floral wire every 12 inches.
- Layer the lights along the front of the garland so bulbs face outward; zip-tie lightly to keep spacing even.
- Place brick clips at the top corners and center top; hang the garland so it rests snugly without heavy tension.
- Style a cluster of 3–5 brass bells at the center top with a long red velvet bow; secure to a structural point.
- Hide cords along trim lines and plug into an outdoor-safe timer so the glow comes on automatically at dusk.
Why This Feels Designer: Outlining the architecture with scale-appropriate greenery makes the house look proportionate and intentional. Bells at the apex add a focal jewel.
One Thing To Avoid: Don’t use a single skimpy garland—brick eats volume. Double it up or choose a lush style; otherwise the whole effect gets lost.
Pro Styling Tip: For photos, turn off your overhead porch light for one shot so the garland glow becomes the star and you get that dreamy bokeh against brick.
Remember, this isn’t about recreating a showroom. It’s about a front door that actually feels like your family’s welcome sign—and gives you a smile every time you pull in the driveway.
3) Twin Evergreen Topiaries With Red Ribbons Flanking A White Door
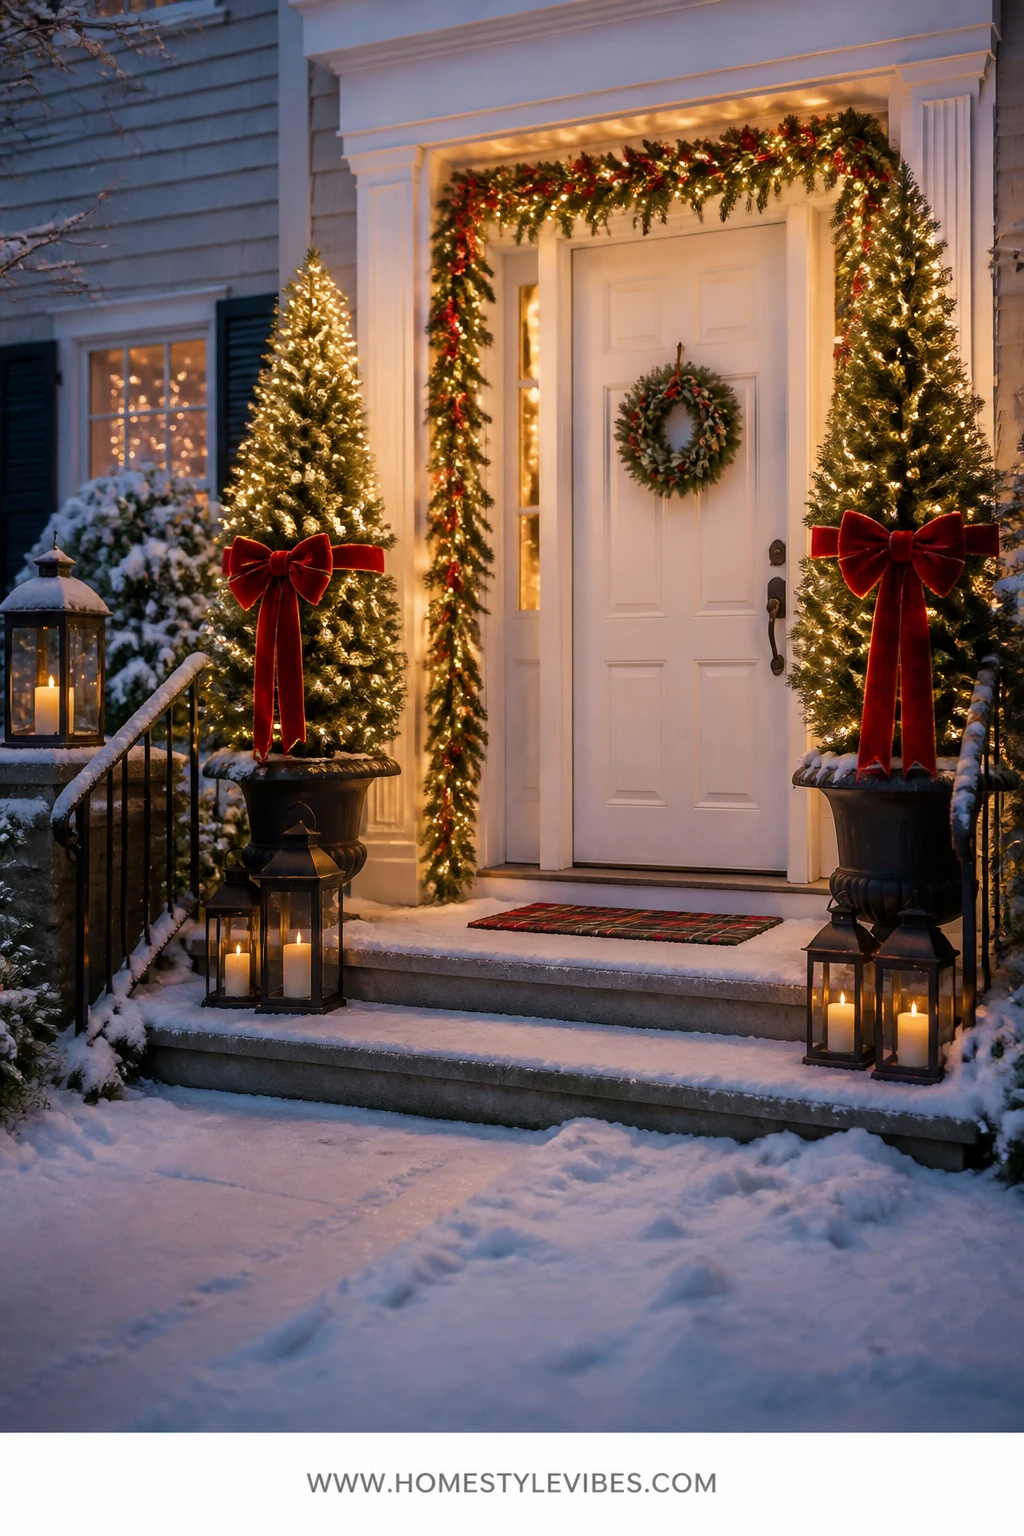
Maybe your door gets plenty of wreath love, but the area around it feels empty and a little echoey. You’ve tried small planters, yet they look like summer leftovers in December. Enter: a symmetrical pair of evergreen topiaries in classic urns, finished with red ribbon collars and a dusting of warm white micro-lights. The door becomes the centerpiece, framed like a portrait.
This look gives you tailored, trad vibes—green structure, a soft twinkle, and the hit of true red that reads from the street. It works for real homes because topiaries are hardy, easy to shape, and they give vertical presence without eating up porch square footage. Faux options store easily and don’t shed. Lighting-wise, micro-lights spiral up the form, so you get gently stacked glow rather than a single bright spot. In photos, the symmetry is what makes people stop scrolling—balanced, tidy, and instantly inviting.
My own porch? I fought droopy boxwoods for two winters before I admitted they looked tired by mid-December. I switched to faux cedar topiaries with weighted bases, tied fresh velvet bows, and I haven’t looked back. Zero regrets; lots of compliments.
Variations:
- Budget: Use simple plastic urns and spray paint them satin black for that cast-iron look.
- Small stoop: Choose single-ball topiaries or slim pencil evergreens to maintain walk space.
- January carryover: Remove the red bows and keep the micro-lights for a soft winter glow.
Timing: Set up anytime in late November. Water real topiaries minimally in cold snaps; switch to faux after heavy snow if needed.
Budget Breakdown:
- Pair of faux evergreen topiaries: $120–$260
- Two planters/urns: $60–$180 (or $25–$40 each for plastic + $8 spray paint)
- Two sets of micro-lights: $20–$36
- Red velvet ribbon (4–6 yards total): $12–$20
- Outdoor timer: $12–$18
Total Estimated Cost: $224 – $514
Best For: Front steps or porches with enough width for symmetry; anyone whose door needs height and structure without visual clutter.
Key Design Elements:
- Main holiday props: Twin topiaries, urn planters, velvet bows
- Color palette: Deep green, true red, black/bronze urns, warm white light
- Lighting strategy: Spiral micro-lights up each topiary
- Textile and ribbon layers: Bow “collars” just under the foliage
- Greenery and natural elements: Cedar or juniper texture; optional pinecones at base
- Accent details: Discreet river rock or moss to top-dress soil
How To Recreate This Look:
- Start by placing urns equally spaced on each side of the door, leaving a comfortable walkway.
- Add weight—river rock or bricks—so winter winds don’t tip them.
- Set your topiaries in and secure bases so they stand perfectly straight.
- Layer micro-lights from the bottom up in a slow spiral; hide the battery pack behind the planter lip or run a dark extension cord neatly along the baseboard.
- Style with a medium red velvet bow at the neck of each topiary; keep tails short so they don’t whip in wind.
- Optional: Top-dress the soil surface with preserved moss and tuck a few pinecones for texture.
Why This Reads High-End: Symmetry plus scale equals polish. Black urns against a white door create crisp contrast that looks custom.
The Most Common Mistake: Going too small. Short planters or low greenery make the doorway feel stumpy. Aim for at least two-thirds the height of your door for presence.
Pro Styling Tip: For that magazine shot, shoot slightly off-center so the urn, door hardware, and bow create a pleasing diagonal line.
If one idea resonates more than the others, that’s your starting point. You don’t need all six. Pick one concept that solves your specific “meh” feeling and let it carry the whole entry.
4) Lantern Cluster With Warm White Glow And Red Berry Sprigs On The Front Steps
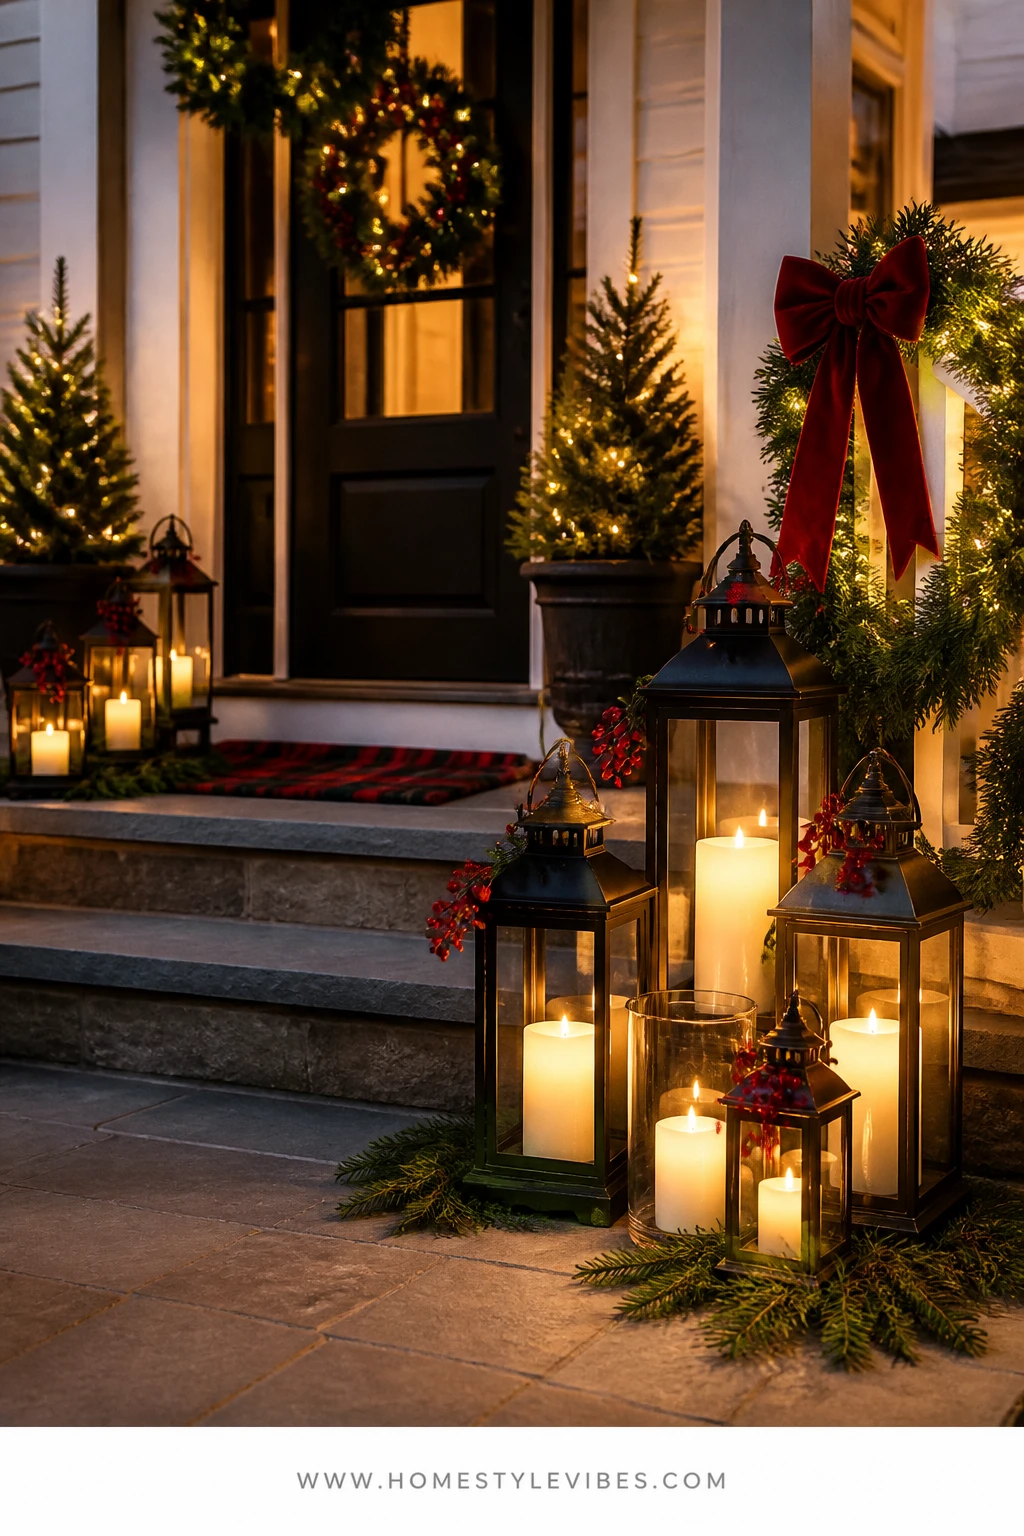
You love the idea of a festive glow, but your steps feel like a dark runway with no invitation to linger. Candles feel risky, cords feel messy, and everything looks random without a plan. Here’s your move: a neat cluster of metal lanterns in staggered heights on each side of your lowest step, with flameless candles inside, a sprig of faux red berries wired to the handle, and a few loose cedar cuttings at the base. It’s a vignette that looks intentional and friendly, even from the sidewalk.
The mood here stays rooted in classic red and green, but leans heavy on light. Warm white flameless candles flicker safely behind glass, giving you that candlelit feeling without an open flame (please don’t put real flames near garland or kids’ mittens). This setup works for real families because everything moves easily for shoveling, and you can bring lanterns inside on storm nights. It photographs like a dream—layers of light, a hint of red, and those little cedar shadows that make a porch feel alive.
Variations:
- Budget-friendly: Thrift lanterns in mixed metals and unify with a single ribbon color.
- Small stoop: Use one medium lantern per side and a single berry sprig each—clean and uncluttered.
- January mode: Remove berries, keep cedar minimal, and leave candles for cozy winter evenings.
Timing: Add lanterns anytime after Thanksgiving. Swap batteries once mid-season, especially if temps dip; cold drains them faster than you think.
Budget Breakdown:
- Set of 4–6 metal lanterns: $80–$240 (or $8–$20 each thrifting)
- Flameless outdoor candles (6–8): $40–$120
- Faux red berry sprigs (6–8): $18–$40
- Cedar clippings: $0–$15
Total Estimated Cost: $138 – $415
Best For: Homes with multiple steps or a landing; anyone who wants an evening glow without running cords or dealing with open flames.
Key Design Elements:
- Main holiday props: Metal lanterns, flameless candles, berry sprigs
- Color palette: Black or brass lanterns, warm white glow, true red berries, evergreen accents
- Lighting strategy: Multiple low-level lights for a soft wash, rather than one bright source
- Textile and ribbon layers: Optional thin velvet ribbon around handles
- Greenery and natural elements: Loose cedar for casual texture
- Accent details: Staggered heights to build a triangle shape on each side
How To Recreate This Look:
- Start by placing two or three lanterns of varying heights at the bottom step on each side; angle them slightly toward the walkway.
- Add flameless candles inside—one per lantern for a minimal look or two in the tallest for a fuller glow.
- Layer in battery timing: set all candles to turn on at the same hour for a uniform effect.
- Place a faux red berry sprig wired to each lantern handle; keep it neat and consistent.
- Style the base with a few cedar clippings; avoid covering step treads or risers for safety.
- Step back at night to check balance; adjust angles so the light cones overlap slightly.
Why This Looks Intentional: Repeating identical elements on both sides with small differences in height creates rhythm. Your eye reads symmetry plus warmth—not clutter.
Don’t Do This: Don’t block the natural walking path. Keep the inner edge of each cluster inside the step corners so guests don’t kick lanterns as they pass.
Pro Styling Tip: For that soft, cinematic glow in photos, clean lantern glass; smudges kill the sparkle.
5) Magnolia Leaves And Red Velvet Ribbon On A Storm Door-Friendly Hanging
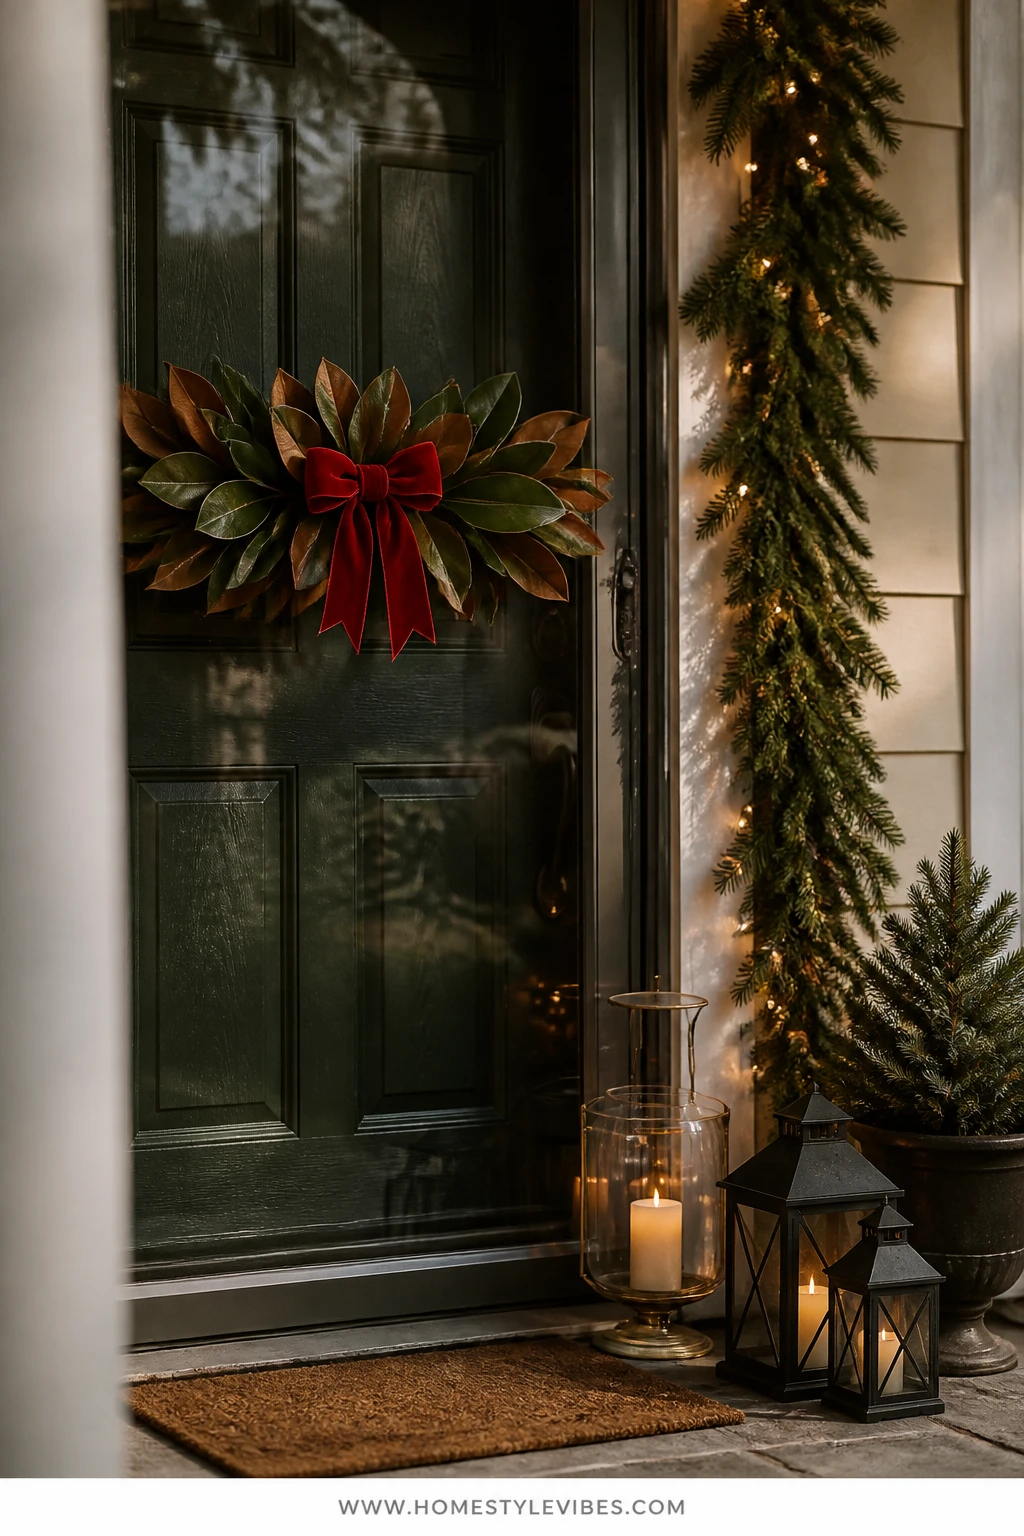
Storm door owners, I see you. You’ve hung a wreath, closed the glass, and watched it smush flat like a pressed flower. Or airflow turns your wreath into a spinning mobile. The workaround: a low-profile magnolia leaf hanger with a horizontal orientation, tied with a neat red velvet bow—not too deep, not too wide—so it fits comfortably between your main door and the storm door without scraping.
The mood? Heritage and warmth. Magnolia leaves add that green-meets-copper sheen that pairs beautifully with classic red. This look works in real life because it respects space—less depth, strong texture, and no spinning. A slim battery micro-light woven along the top edge gives a subtle twinkle at night without creating a bulky battery pack lump. In photos, the glossy leaves pick up reflections from the storm door glass; it looks like built-in polish.
Variations:
- Budget: Use faux magnolia stems; hot-glue leaves to a flat base for a narrow profile.
- Cottage tweak: Add a tiny cluster of red berries at the knot for a single pop.
- January option: Untie the red bow and swap for ivory or green to extend into winter.
Timing: Excellent for early December if you want something that still looks fresh at the New Year with minimal fuss.
Budget Breakdown:
- Faux or fresh magnolia leaves/stems: $25–$70
- Low-profile hanger or flat grapevine base: $8–$15
- Red velvet ribbon (2–3 yards): $6–$12
- Micro-lights with flat battery pack: $10–$18
- Clear suction hook for storm door glass: $8–$12
Total Estimated Cost: $57 – $127
Best For: Doors with storm or screen layers, narrow porch entries, and anyone who prefers a sophisticated, low-bulk decoration.
Key Design Elements:
- Main holiday props: Magnolia leaf hanger, red velvet bow, micro-lights
- Color palette: Deep green with bronze edges, true red, warm white light
- Lighting strategy: Micro-light strand along the top for a subtle halo
- Textile and ribbon layers: Narrow velvet bow with short tails
- Greenery and natural elements: Magnolia leaves with evergreen tips tucked in
- Accent details: Invisible mounting via clear suction hook
How To Recreate This Look:
- Start with a flat grapevine or thin wooden base about 18–24 inches wide.
- Add magnolia leaves overlapping like shingles, angled slightly downward to shed moisture.
- Layer in a few cedar or fir tips toward the center for varied texture without added depth.
- Place a micro-light strand along the top edge; tape or wire the flat battery pack at the back, centered.
- Style with a compact red velvet bow at the top center; trim tails to avoid door pinching.
- Mount to the storm door glass with a heavy-duty suction hook; test by closing the door slowly to ensure clearance.
Why This Looks Expensive: Magnolia’s natural sheen reads luxe, and a horizontal silhouette feels bespoke—not big-box.
Watch Out: Suction hooks let go on unclean glass or in abrupt temperature drops. Clean with alcohol, press firmly, and recheck after the first freeze.
Pro Styling Tip: Shoot from a slight side angle so the magnolia edges catch light and reveal those bronzy tones.
Little reminder: progress over perfection. If your ribbon is a hair off-center or a berry sprig goes rogue, it’s still festive. Your front door is welcoming people, not auditioning for a catalog.
6) Garland-Framed House Numbers With Red Bow And Brass Hardware On A Craftsman Entry
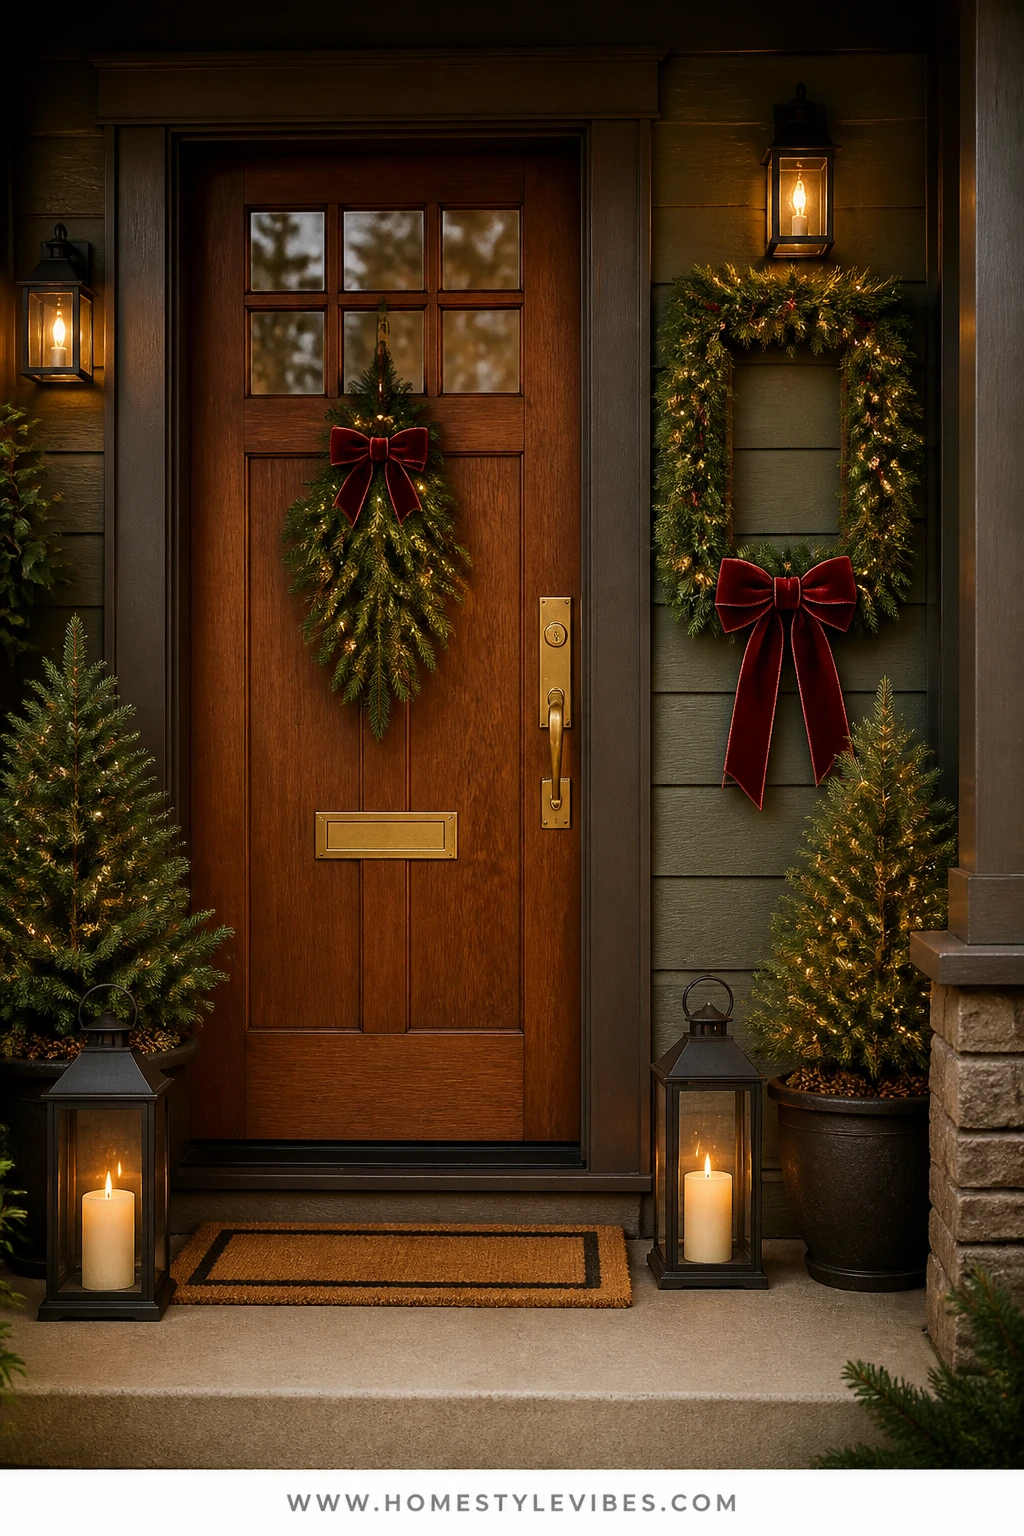
House numbers can disappear under December layers—or sit lonely while everything else gets the glory. You’ve tried spotlighting them, but the glare is harsh and not exactly charming. Try this: a compact frame of fresh fir garland around your numbers, a small red velvet bow under the first digit, and polished brass hardware that ties it all together. It’s signage and celebration in one clean move.
The mood is classic and purposeful—evergreen texture, a punctuation of red, and the warm glint of brass from the knob, mail slot, or kickplate. It works on real homes because it’s space-smart: you’re focusing on a small area but making it count, which is perfect on narrow Craftsman porches or bungalows with strong trim. Lighting becomes easy too: one warm white spotlight angled softly upward catches the greenery and numbers without washing out the door color. In photos, your address becomes a styled focal point—handy for guests and delivery drivers, charming for everyone else.
Variations:
- Budget-friendly: Use faux mini garland and a single brass jingle bell tied at the bow knot.
- Subtle: Choose a green velvet bow with no berries for a strictly classic look.
- January carryover: Remove the bow and leave the fir frame for a winter wreath alternative.
Timing: Install mid-December for the holiday rush—when deliveries ramp up and you actually want those numbers easy to spot.
Budget Breakdown:
- Mini fir garland (6–9 feet): $18–$36
- Velvet ribbon (1–2 yards): $4–$8
- Brass polishing cloth or metal polish: $6–$12
- Outdoor-safe adhesive clips: $8–$15
- Optional small bell accent: $4–$10
Total Estimated Cost: $40 – $81
Best For: Homes with centered house numbers on or beside the door; porches with Craftsman or traditional trim that love a tidy, tailored detail.
Key Design Elements:
- Main holiday props: Mini fir garland, red velvet bow, optionally a brass bell
- Color palette: Evergreen, red, brass, warm white
- Lighting strategy: Soft, low-angle spotlight or existing porch sconce aimed across, not directly at, the numbers
- Textile and ribbon layers: Small, precise bow
- Greenery and natural elements: Tighter, denser fir for clean lines
- Accent details: Polished brass hardware tying the look together
How To Recreate This Look:
- Start by cleaning the surface around your house numbers; polish brass hardware so it gleams.
- Add mini garland around the number plaque or area, forming a neat rectangle or simple swoop; secure with small outdoor adhesive clips.
- Layer a few short cedar tips on corners to soften the geometry, if desired.
- Place a small red velvet bow under the first digit, centered horizontally.
- Style a tiny brass bell at the bow knot for a quiet jingle as the door opens.
- Adjust your porch sconce angle or add a soft spotlight from below to graze the numbers and greenery.
Why This Looks Expensive: Crisp geometry paired with polished metal is a designer trick. Tight garland lines + gleaming hardware read custom.
One Thing To Avoid: Over-scaling the bow. Keep it petite so it accents the numbers, not covers them.
Pro Styling Tip: For photos, shoot straight on with a shallow depth of field so the numerals stay sharp and the greenery softens at the edges.
Quick Checklist
- Fresh or faux cedar/fir garland for volume
- Red velvet ribbon in 2.5–3 inch width
- Battery-operated warm white micro-lights
- Metal lanterns with flameless candles
- Brass bell clusters or single bells
- Outdoor-safe adhesive hooks, brick clips, or suction hooks
- Evergreen topiaries and sturdy urn planters
- Magnolia leaf stems for low-profile hangers
- Outdoor timers for hands-free evening glow
- Polish for brass hardware to finish the look
Frequently Asked Questions
How do I keep cords and timers tidy and safe outdoors?
Use outdoor-rated extension cords in green or black and run them along trim lines. Anchor with outdoor command clips and plug into a weatherproof covered outlet. Timers with dusk sensors remove daily fuss and reduce energy use.
Fresh vs. faux greenery—what actually lasts longer outside?
Faux wins for staying power and weight in wind. Fresh wins on scent and depth for the first three weeks. If your porch gets full winter sun or strong wind, mix them: a faux base garland with tucked-in fresh cuttings for scent and realism.
When should I decorate the front door for Christmas?
Thanksgiving weekend is perfect for most climates. If you’re using fresh garland or magnolia, aim for the first week of December so it still looks good at New Year’s.
Are candles safe in outdoor lanterns near greenery?
Use flameless candles only. Open flames near garland, bows, or dried leaves are a fire risk and can crack lantern glass in extreme cold. Today’s flameless options flicker convincingly and run on timers.
What’s the best way to store these items after the holidays?
Coil lights separately to avoid tangles (we all have that one strand that dies midseason). Use shallow under-bed bins for faux garlands and swags so they don’t crush. Keep ribbons rolled on cardboard cores in zip bags to prevent creases and dust.
Closing Thoughts
You don’t need another wreath. You need a front door scene that tells the whole story—evergreen layers, red velvet bows, warm white light, and a few brass notes that catch the eye and glow at dusk. Pick one of these six Christmas front door decor ideas beyond the basic wreath and run with it. One idea, well-done, can make your home feel finished from the curb.
Classic red and green is timeless for a reason. It feels like home—fir-scented air, soft candlelike light in lanterns, the hush of a cold evening meeting a warm threshold. Start with the piece that solves your pain point: a swag if the wreath feels small, garland if the doorway lacks definition, lanterns if nights look dark. Ten minutes into styling, you’ll see it click.
You’ve got this. Your front door doesn’t have to be complicated to be beautiful—just intentional. Tie that bow, plug in the timer, and step back for the “oh wow” you’ve been missing. And if the ribbon tail is a little crooked? Honestly, that’s part of the charm.

About the Author

Krisztina P.Rendes, Founder of Home Style Vibes
Founder of Home Style Vibes
Krisztina Puskásné Rendes created Home Style Vibes as a cozy-modern lifestyle space where homemaking meets inspiration. Her goal is to help women create beautiful, organized, and peaceful homes they truly love — without overwhelm. You’ll find here heart-driven content on home decor, cleaning tips, easy family recipes, organization and decluttering, DIY home projects, plants, and seasonal ideas — all designed to bring more calm, comfort, and style into everyday life.