6 Fall Flowers To Plant Now For A Colorful Autumn Garden
You want a backyard that glows with color when the air turns crisp and jackets finally feel right. But right now, your garden looks tired—summer annuals are leggy, the beds are patchy, and the vibe is more “end-of-season slump” than golden-hour glory. If you’re craving a fall garden that hums with burnt orange petals, burgundy shadows, and dew-tipped blooms that photograph like a dream, these six fall flowers to plant now will get you there—fast, within a two-week window, and under a realistic budget. Think deep-toned blooms, stacked planters, and a few secret layout tricks that make your beds look lush enough for a magazine cover without hiring a crew.
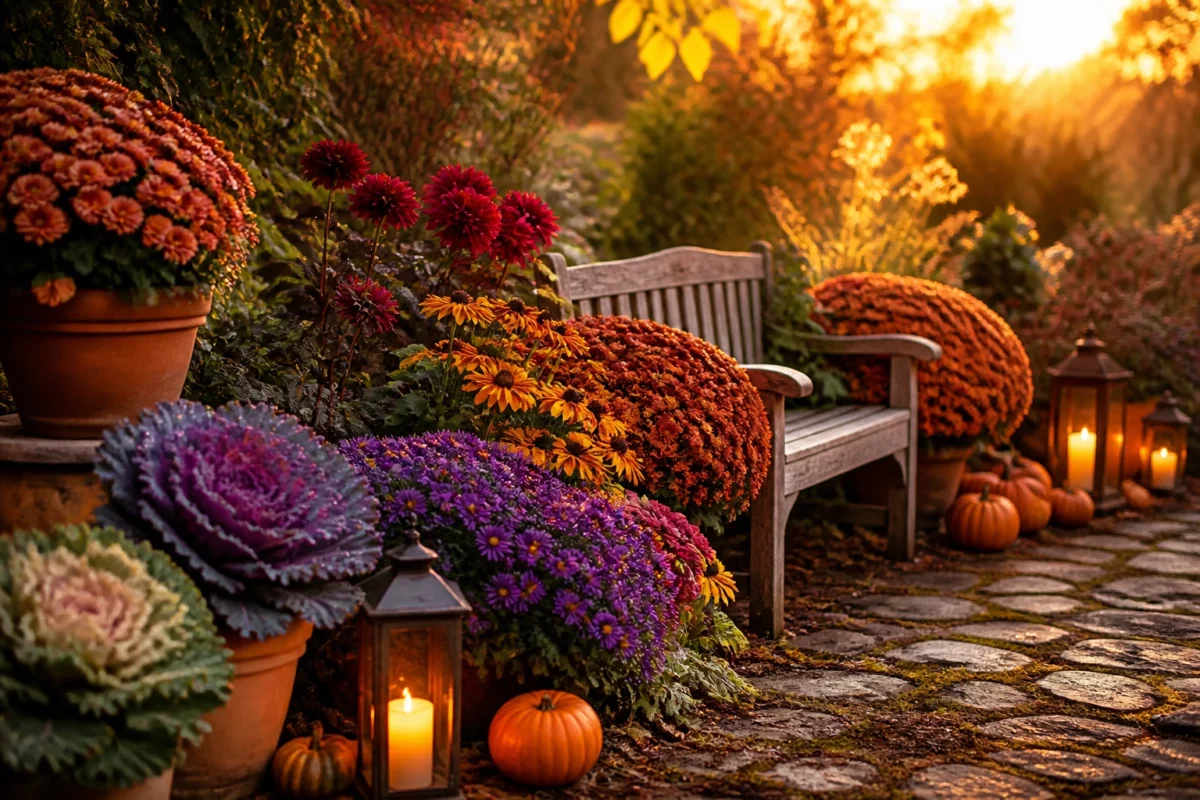
We’re leaning into textures (papery petals, velvety leaves), warm light (lanterns on the patio, late-day sunshine skimming the tops of seed heads), and rich autumn hues that hold their own through the first frost. The six ideas below tackle real-life frustrations—awkward corners, bare edges, random gaps, deer nibbles—and offer achievable ways to create color-drenched borders and containers that carry you from September through Thanksgiving. Pinterest-worthy? Absolutely. But more importantly: they’ll make your weekends outside feel like a celebration. If you love a generous, abundant look and you care about what your garden does for your mood at 5 p.m. with a mug of cider, this lineup is for you.
1. Rust Mums Along the Garden Bench with Pumpkin Accents and Candlelit Warmth
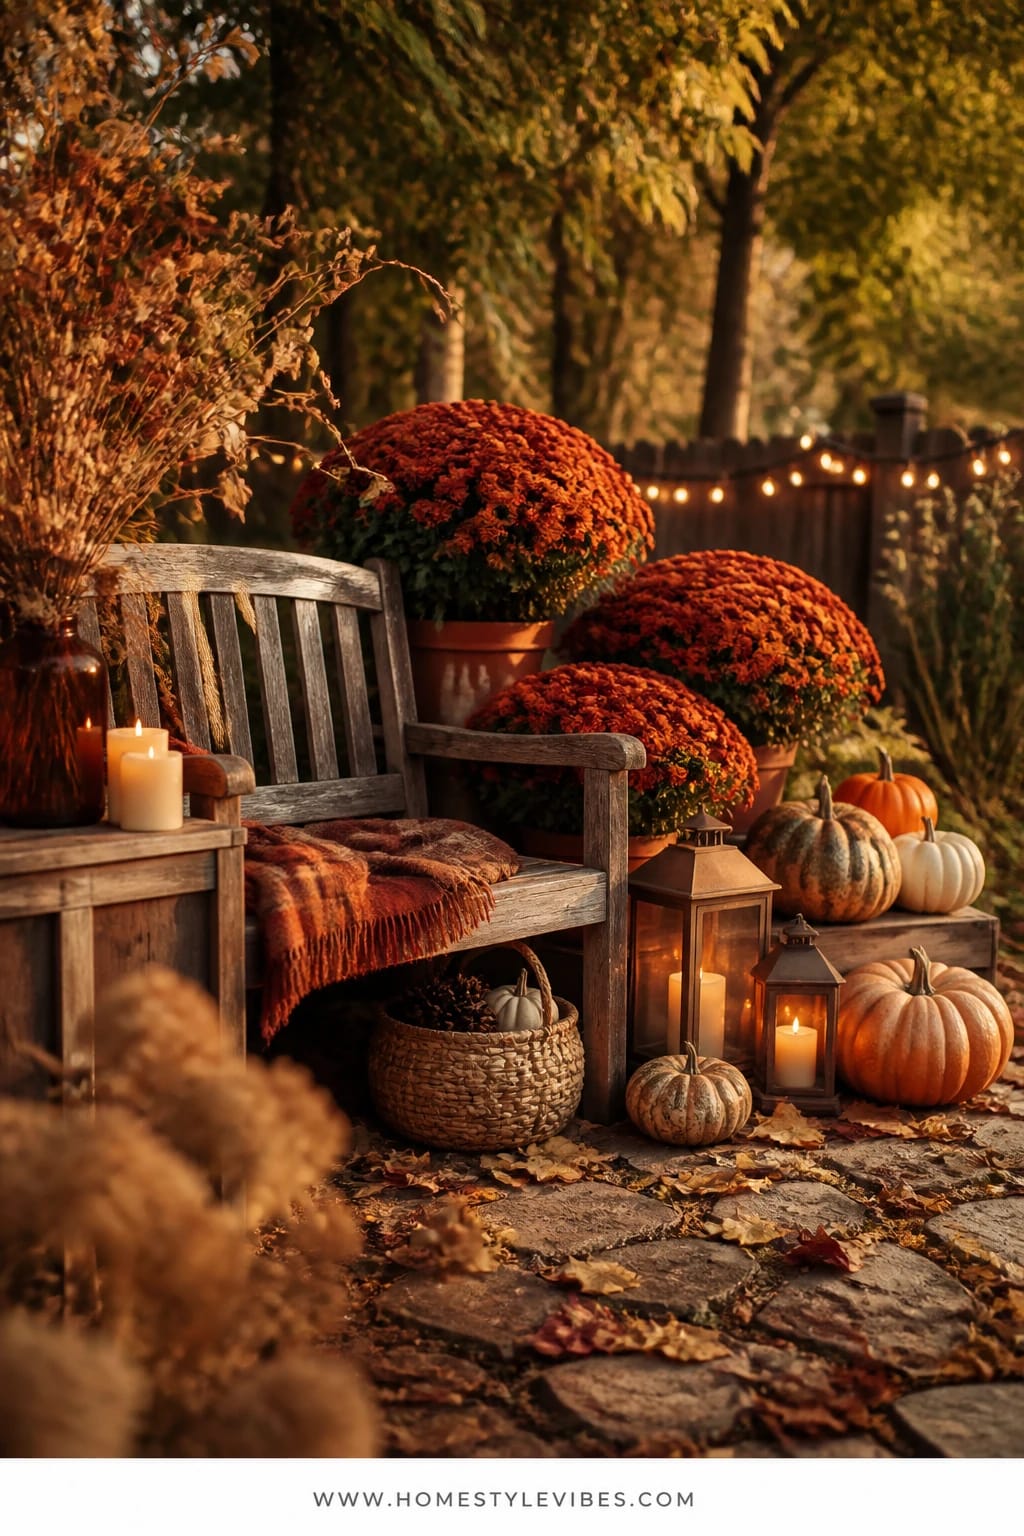
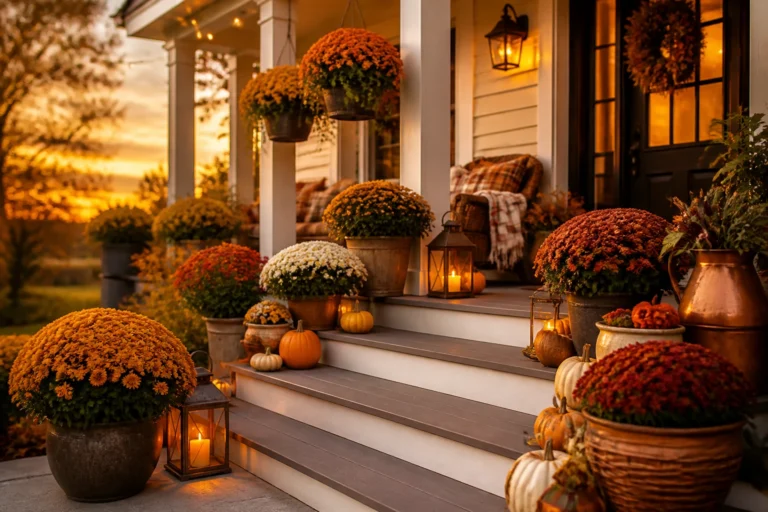
It’s that one corner that always feels off: the empty spot near your garden bench that becomes a dumping ground for hoses and stray tools. You’ve tried tucking in random perennials, but it still reads flat and end-of-summer sad. Enter rust-colored chrysanthemums, planted now in a staggered trio around your bench with petite pumpkin accents and low, candlelit lanterns as dusk rolls in. The mood? Warm harvest nook meets Sunday-afternoon storytime.
Here’s why it works in real gardens: mums deliver instant impact with dense, cushiony blooms that keep going for weeks. They love cool nights, which means you’ll have color well into late fall. Grouping them near a bench creates a focal rest spot, and the pumpkins add a clean, sculptural shape that visually “anchors” the flowers. Candlelight softens everything at golden hour; amber glass lanterns cast a flattering glow across the rust tones, so the whole scene photographs like a postcard—saturated petals up front, flames flickering in the mid-ground, and that weathered bench offering texture in the back.
Try these variations: a budget-friendly version swaps larger nursery pots for smaller 6-inch mums tucked into thrifted terracotta; a small-space version clusters two mums and a single sugar pumpkin by a compact metal bistro seat; a more neutral approach chooses butterscotch or creamy white mums with pale heirloom pumpkins for a quieter palette that still reads autumnal. Transition-wise, just swap pumpkins for pinecones in late November and keep the mums going as long as they’re blooming.
Budget Breakdown:
- Rust mums (3 large): $24–$45
- Small heirloom pumpkins (3–5): $12–$25
- Amber glass lanterns (2) + LED candles: $30–$60
- Compost/topsoil for planting: $6–$12
- Bench cleanup/sealant (optional): $10–$20
Total Estimated Cost: $82 – $162
Best For: A focal corner near a garden bench or seating area; works for cottage, traditional, or farmhouse-style gardens and carries from late September through early November.
Key Design Elements:
- Main seasonal props: rust mums, small pumpkins, amber lanterns
- Color palette: rust, pumpkin orange, warm wood brown, hints of sage green
- Lighting strategy: low lanterns positioned to throw glow across the bench and bloom faces
- Textile layers: a plaid throw on the bench (optional) to repeat the rust tone
- Natural elements: fallen leaves left lightly as mulch for an organic look
- Accent details: terracotta pots, copper-finish lantern handles
How To Recreate This Look:
- Start with a clean bench area—pull weeds, edge the bed by hand for a crisp outline.
- Add two large mums on either side of the bench and one slightly forward to create a triangle.
- Layer in small heirloom pumpkins in odd numbers around the bases of the mums.
- Place two lanterns at different heights—one on the bench end and one on the ground.
- Style with a folded plaid throw and a small side table for your mug, keeping pathways clear.
Why This Looks Expensive: The secret is repetition and restraint—three mums in one saturated tone, matched with two to three pumpkins in the same warmth band. That tight palette reads curated, not cluttered.
Watch Out: Don’t cram mums too close. They need airflow; otherwise, you’ll invite mildew and lose that crisp, mounded shape by week two.
Pro Styling Tip: For photos, tilt one lantern slightly forward and nestle a pumpkin just in front of it—your camera will catch the flame haloing the pumpkin’s ridges for instant depth.
2. Golden Marigolds Framing the Front Garden Path with Leaf Garland and Lantern Glow
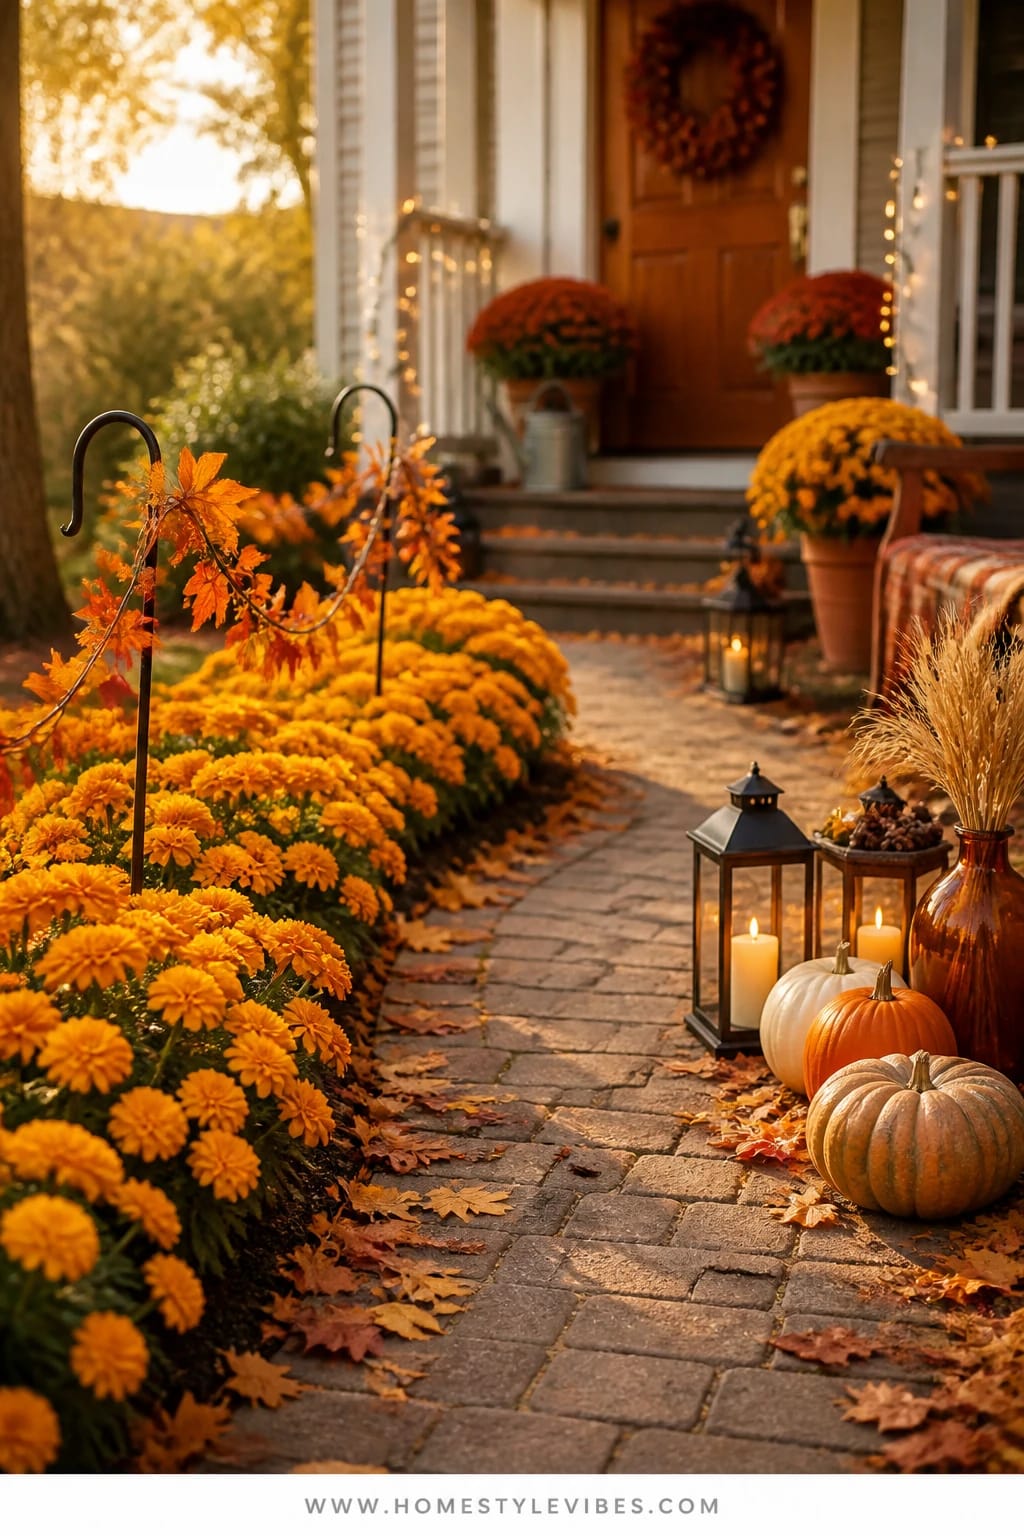
We’ve all been there: your front garden path looks like a runway that never got dressed. The edges feel bare, and guests walk up to a house that doesn’t say “fall” yet. Plant golden marigolds in drifts along the path now, then thread in a simple faux leaf garland on low shepherd’s hooks and add a couple of lanterns where the path turns. The vibe is cheerful harvest energy that greets you with color the moment you arrive home.
Why this works: marigolds love the lingering warmth of early fall and pump out blooms quickly. Their citrusy-gold petals catch late-afternoon sun like tiny lamps. By planting them in loose ribbons (not straight lines), you get a more natural, meadow-adjacent look that feels abundant. The garland and lanterns do the styling heavy lifting—just enough decor to say “seasonal” without feeling fussy. It photographs beautifully because the path creates a leading line. Blooms spill in the foreground, the garland arcs mid-frame, and the lanterns anchor the curve.
Variations: for a budget-friendly take, buy flats of marigolds and space them closer together for immediate fullness; in small garden strips, use two hooks and one short length of garland with a single lantern—simple, graphic, adorable. Prefer muted? Choose soft yellow and cream marigolds with a eucalyptus-toned garland and antique brass lanterns. As the season shifts, swap the garland to a pine-and-cedar mix after Thanksgiving and keep the lanterns for winter twinkle.
Budget Breakdown:
- Marigold flats (2–4): $12–$40
- Shepherd’s hooks (4–6): $20–$48
- Faux leaf garland (2 strands): $24–$50
- Lanterns (2) + LED pillars: $30–$70
- Mulch for crisp edges: $10–$20
Total Estimated Cost: $96 – $228
Best For: Homes with a visible front path or sidewalk border; perfect for mid-September through Halloween when foot traffic and trick-or-treat photos peak.
Key Design Elements:
- Main seasonal props: golden marigolds, faux leaf garland, lanterns
- Color palette: gold, amber, soft green, warm bronze
- Lighting strategy: lanterns set at path turns or step-downs for safety and mood
- Textile layers: none needed; lean on plant texture and garland leaves
- Natural elements: marigold foliage, scattered leaf mulch
- Accent details: bronze or black metal hooks and lantern frames
How To Recreate This Look:
- Start by edging your path and laying a thin layer of fresh mulch to define the bed.
- Add marigolds in a loose ribbon, spacing 8–10 inches, staggering for fullness.
- Layer shepherd’s hooks 4–6 feet apart and drape garland in soft swoops between them.
- Place lanterns at natural path transitions—curves, steps, or entry points.
- Style with a few small gourds near the first lantern to invite the eye in.
Why This Feels Designer: The asymmetrical swoop of garland paired with naturalistic planting creates movement. That sense of motion is what makes a simple path feel styled, not staged.
One Thing To Avoid: Don’t use too many garland strands. When it gets bulky, it competes with the flowers and looks costume-y instead of charming.
Pro Styling Tip: Shoot photos just after the lanterns come on at dusk—marigolds hold their color in low light and the garland recedes, letting the golds glow.
Remember, this isn’t about recreating a botanical garden. It’s about building a path that feels like your fall personality walked outside first and fluffed the pillows. Pick one edge, plant it generously, and call it done for the week.
3. Burgundy Pansies by the Patio Table with Pinecones and a Golden Glow
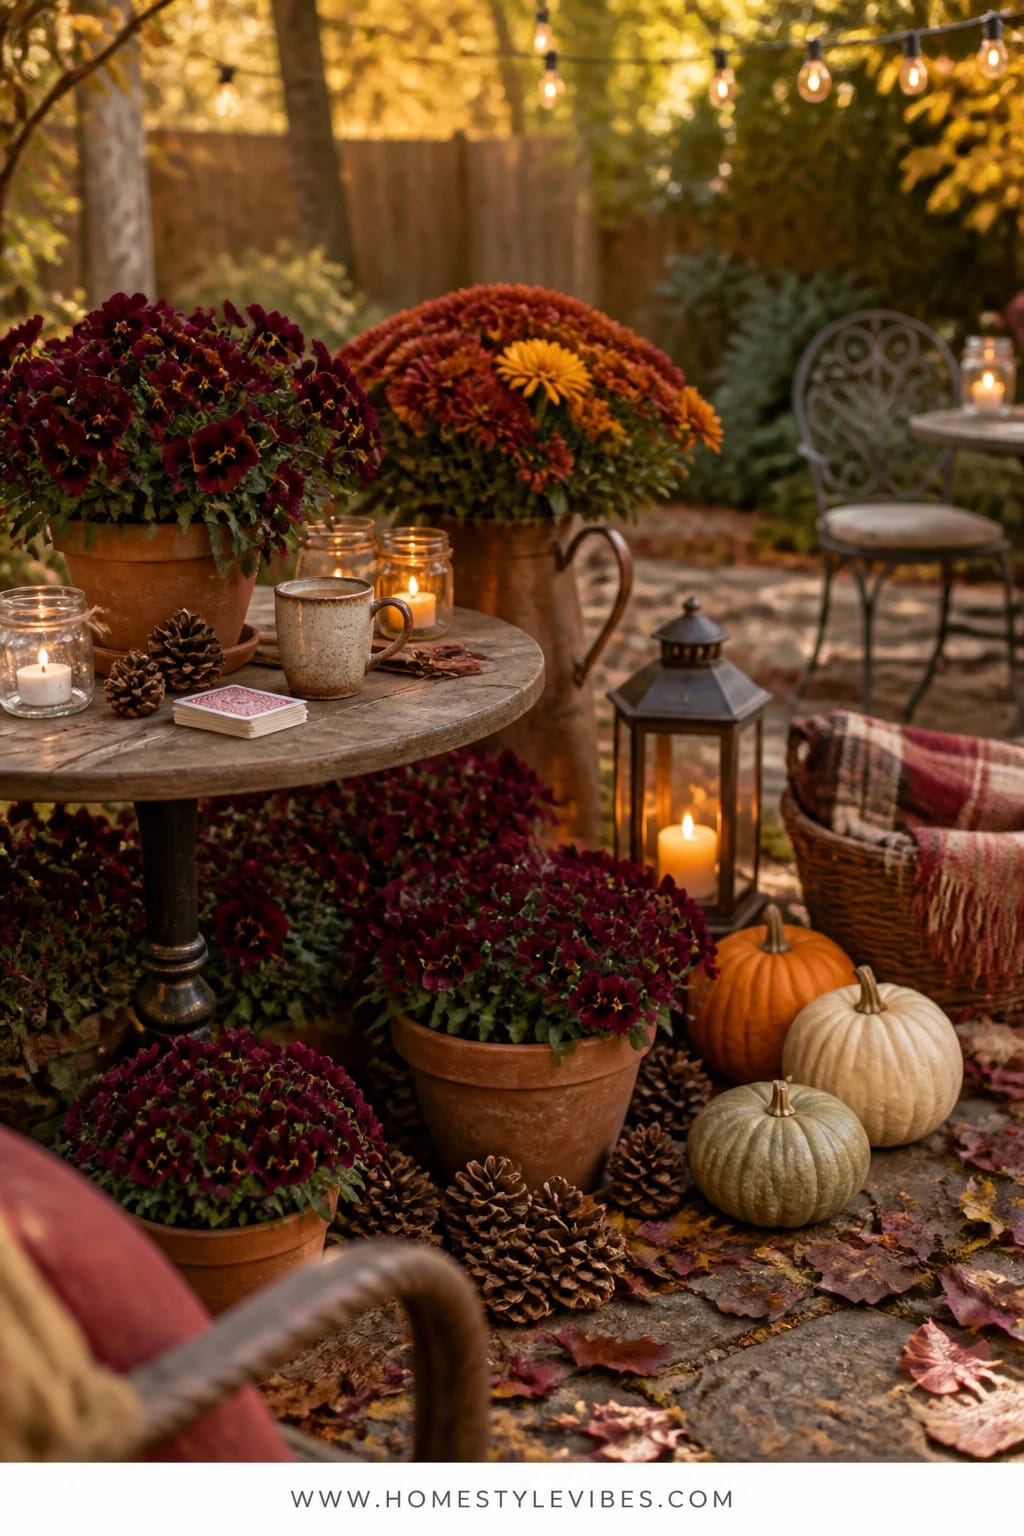
You want to sip cider at your patio table and feel surrounded by color, but the containers you planted in June have checked out. Pansies to the rescue. Burgundy pansies thrive in cool weather, deliver saturated fall tones, and look heartbreakingly sweet next to a ceramic mug. Cluster them by the patio table, then sprinkle pinecones as organic mulch and add a few tea lights for that low, golden glow while you play cards or chat with friends.
Here’s why this setup sings: pansies give you bold color without height drama, which is exactly right near eye level at a table. They tuck in close, hold up to light frosts, and rebound after chilly nights. Pinecones add texture without stealing the show, and the tea lights reflect off any metallic edges on your tableware for subtle sparkle. The effect reads cozy and intimate—great for smaller patios or those little nooks that love a layered, contained look.
Need options? A small-space version uses a single 12-inch bowl planter centered on the table with a ring of pinecones around the base. Neutral-leaning? Try plum-to-cream pansies (yes, they exist) and swap pinecones for pale wood chips. For a make-ahead vibe, plant now and keep a stash of spare pansy six-packs to refill thin spots after a surprise cold snap. I tried this on my own patio last October—honestly couldn’t believe how those tiny faces held their drama through three frosty mornings.
Budget Breakdown:
- Pansy six-packs (3–6): $9–$24
- Container planters (2–3): $30–$90 (reuse if you have them)
- Pinecones (for mulch): $0–$12 (foraged or store-bought)
- Tea lights + holders: $8–$18
- High-quality potting mix: $10–$16
Total Estimated Cost: $57 – $160
Best For: Intimate patios or a side yard seating zone where tabletop height planting feels friendly and not overwhelming; prime from late September through Thanksgiving.
Key Design Elements:
- Main seasonal props: burgundy pansies, pinecones, tea lights
- Color palette: burgundy, plum, umber, warm ivory
- Lighting strategy: low-level golden tea lights scattered in threes
- Textile layers: a wool runner or felt placemats to echo the pansy tones
- Natural elements: pinecones as natural mulch and scent
- Accent details: matte ceramic pots, brass tea light cups
Why This Reads High-End: Tight tonality—pansies, textiles, and metals sitting within the same deep burgundy-to-brass range—makes the vignette feel intentional and styled, not random.
How To Recreate This Look:
- Start with fresh potting mix in clean containers; elevate pots slightly on risers for drainage.
- Add pansies in clusters, leaving room for growth and airflow.
- Layer pinecones across the soil surface as natural, decorative mulch.
- Place tea lights in low holders scattered in odd numbers around the planters.
- Style your table with a simple wool runner and a small stack of cozy throws on a nearby chair.
The Most Common Mistake: Using too many small containers. Instead of five tiny pots, do two medium bowls. Fewer, fuller pieces read richer in photos and in real life.
Pro Styling Tip: Position one tea light slightly behind a pansy bloom for a backlit petal moment—your camera will pick up a halo that looks cinematic.
If one idea resonates more than the others, that’s your starting point. You don’t need all six. Choose the corner you see first when you step outside and make it sing; the rest can wait until next Saturday.
4. Amber Calendulas by the Garden Gate with String Lights and Dried Florals
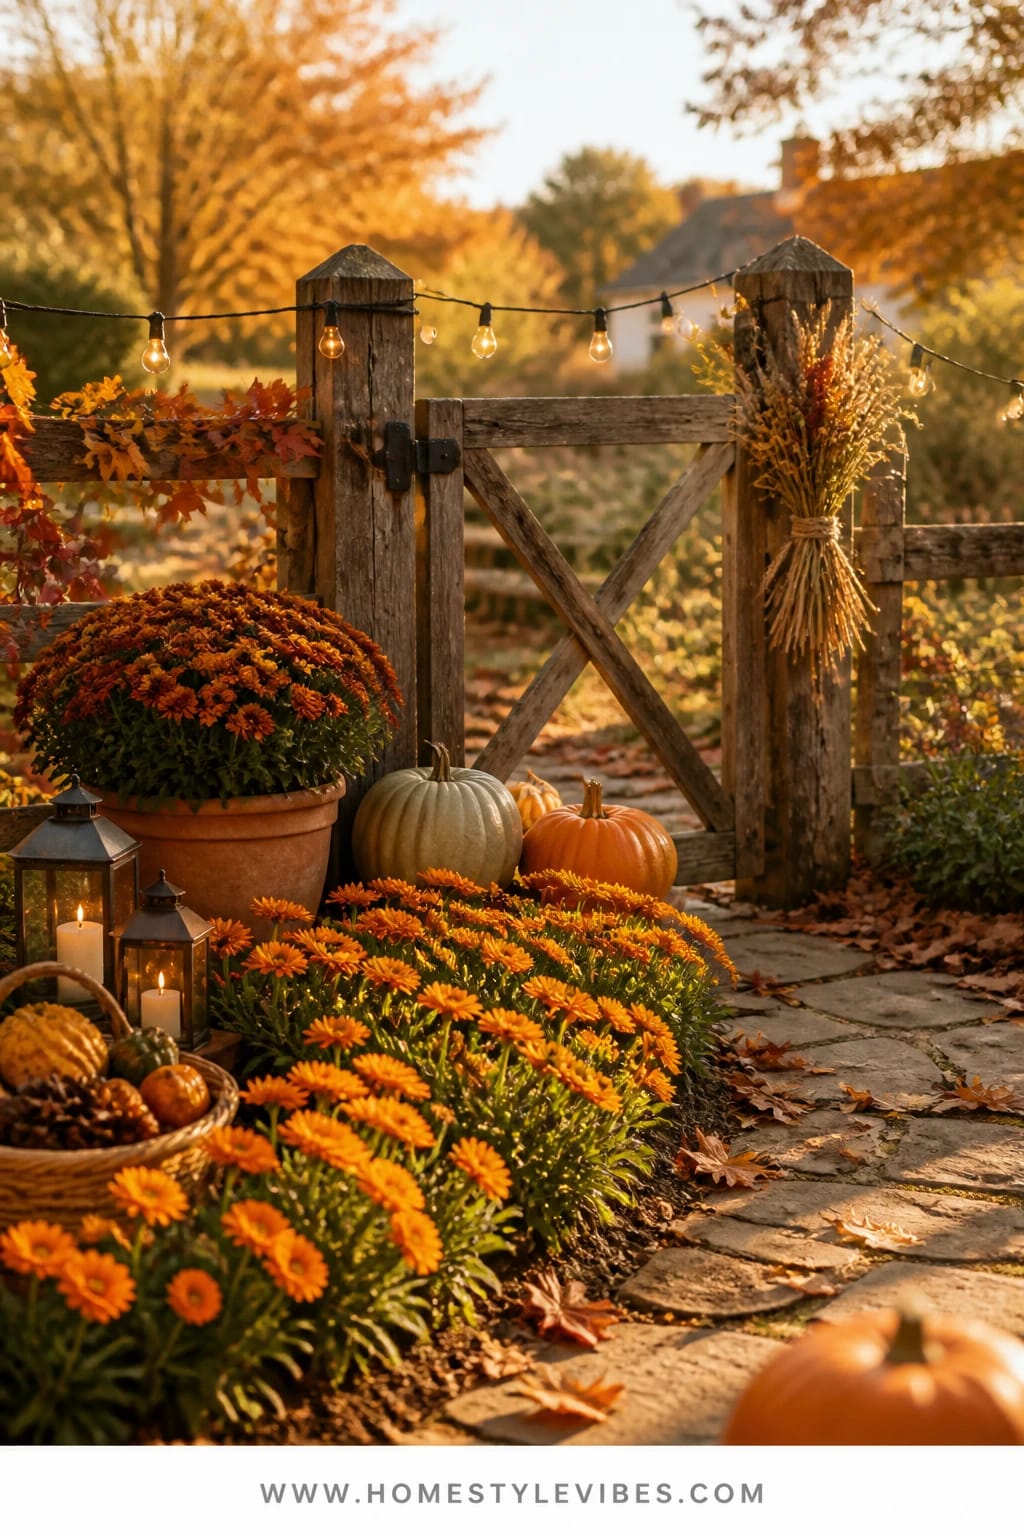
There’s always a spot near the gate that feels like an afterthought—scraggly grass, a sad annual hanging on from July, maybe a hose kinked around a post. Calendulas love early fall soil temps and bloom fast in cheerful amber tones. Plant them in a curving band at the gate base, tie a small bundle of dried florals to the post, and drape a single strand of warm string lights above. You get instant “welcome” energy with a touch of farmhouse charm.
Calendulas are practical, too. They handle light frost and keep blooming if you keep snipping. Their daisy-like faces look amazing against rough wood, stone, or metal posts, and the amber tone harmonizes with late-season grasses. The string lights add the glow you need on darker evenings, while the dried floral bundle (think wheat, bunny tails, and seeded eucalyptus) brings vertical texture without fuss. In photos, the gate creates a visual frame, calendulas fill the base with saturated color, and the lights add those perfect little bokeh dots in the background. Yes, I’m a sucker for the sparkle.
Variations: on a budget, use a single calendula six-pack and space plants wider, then infill with inexpensive straw mulch. Prefer a subtle look? Use pale apricot calendulas and a small, neutral twine wrap for the dried bundle. For small gates, skip the lights and instead hang one petite wreath made from a handful of dried stems. This setup transitions easily: keep the lights up through winter, and refresh the dried bundle for the holidays.
Budget Breakdown:
- Calendula six-packs (2–4): $8–$24
- Strand of warm string lights (outdoor-rated): $18–$35
- Dried floral bundle materials: $10–$22
- Hook or tie materials for lights: $6–$12
- Compost/topsoil for planting: $6–$12
Total Estimated Cost: $48 – $105
Best For: Garden gates, side-yard entries, or anywhere you want a cheerful welcome; ideal from late September into November with low maintenance.
Key Design Elements:
- Main seasonal props: amber calendulas, warm string lights, dried floral bundle
- Color palette: amber, apricot, straw, warm wood tones
- Lighting strategy: one warm strand overhead, not too bright, to avoid harsh glare
- Textile layers: jute twine wrap for an earthy touch
- Natural elements: dried grains, seed heads, eucalyptus pods
- Accent details: simple nails or cup hooks; rustic ties for the bundle
Why This Looks Intentional: The continuous color band at ground level paired with vertical texture at the post creates a top-and-bottom conversation. Your eye reads it as a complete thought, not random pieces.
How To Recreate This Look:
- Start by clearing a 12–18 inch strip along the gate base; amend the soil lightly.
- Add calendulas in a soft curve, spacing 8–12 inches apart.
- Layer straw or leaf mulch to tidy the base and conserve moisture.
- Place a small dried floral bundle at eye level on the gate post with twine.
- Drape warm string lights overhead, securing loosely for a relaxed line.
Don’t Do This: Avoid cool-blue string lights. They clash with amber blooms and make the entire scene feel colder and less inviting by night.
Pro Styling Tip: For photos, stand just inside the gate and focus through the calendulas toward the lights—foreground petals blur beautifully while the bokeh sparkles.
5. Burnt Orange Nasturtiums Around the Garden Bench with Pumpkins and Lanterns
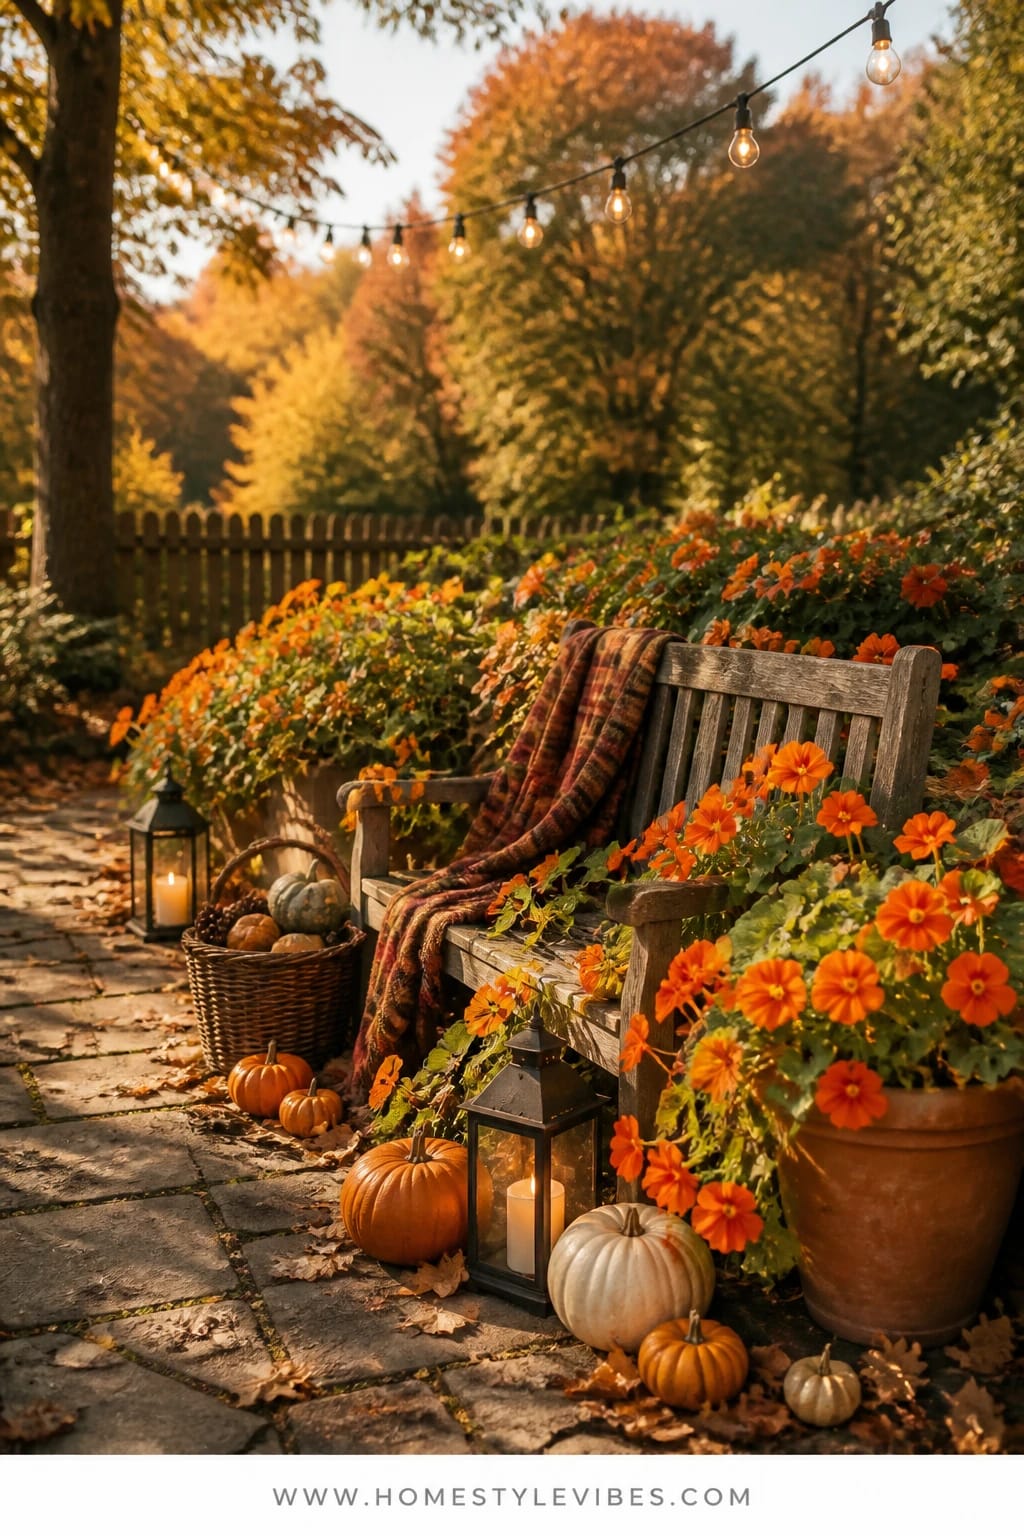
There’s that tricky bed edge near your seating where plants either flop or look too stiff. Nasturtiums thread the needle: they trail just enough to soften hard lines, bloom in punchy burnt orange, and their round leaves feel like tiny lily pads of joy. Plant them now where soil is still warm, nestle pumpkins in the gaps, and set two lanterns close by to wash the leaves in candlelit warmth. The whole scene turns into a soft, storybook border that makes you want to linger.
In real homes, nasturtiums are fuss-free and forgiving. They’ll sprawl gently without turning messy if you give them room, and those saucer leaves look incredible dotted with dew on cool mornings. Pumpkins act as sculptural punctuation marks between mounds. By night, lantern light skips across those circular leaves, creating little highlights that bring your garden to life after sunset. Photos love the layered shapes—the vines, the pumpkins, the glow—there’s depth from every angle.
Try this on a budget by sowing nasturtium seeds (they sprout fast in fall warmth) and supplementing with two small starter plants for instant gratification. Prefer a toned-down version? Choose peachy-apricot nasturtiums and pale pumpkins like Jarrahdale or Porcelain Doll. For a micro-spot, one trailing nasturtium in a low bowl with a single pumpkin and a lantern still hits the vibe.
Budget Breakdown:
- Nasturtium seeds and/or starts: $4–$18
- Pumpkins (2–4 mixed sizes): $16–$45
- Lanterns (2) with LED candles: $30–$70
- Compost or soil conditioner: $6–$12
- Low trellis pins (optional for training): $6–$10
Total Estimated Cost: $62 – $155
Best For: Edges of seating areas, curvy bed lines near patios, or around a garden bench where soft trailing texture makes hardscaping feel friendlier; perfect all October.
Key Design Elements:
- Main seasonal props: burnt orange nasturtiums, pumpkins, lanterns
- Color palette: burnt orange, mossy green, creamy pumpkin, warm brass
- Lighting strategy: lanterns placed just off-path to graze leaf surfaces
- Textile layers: a simple outdoor cushion in rust or olive on the bench
- Natural elements: vining habit, dew on leaves, carved pumpkin ridges
- Accent details: brass or black lantern frames; low bowl planters if using containers
Why This Feels Designer: It’s the interplay of form—round leaves, round pumpkins, soft arcs of vines. Repeating circles look intentional and soothing, especially under warm light.
How To Recreate This Look:
- Start by loosening soil along the bed edge; add compost for drainage.
- Add 2–3 nasturtium starts and sow seeds between them for a staggered bloom wave.
- Layer pumpkins into the gaps, mixing one ribbed heirloom with two smooth varieties.
- Place lanterns slightly behind the nasturtiums to backlight the leaves.
- Style with a low bowl of extra pinecones or acorns tucked near the bench leg.
Watch Out: Don’t overwater. Nasturtiums like it lean; too much love and they’ll give you leaves, not blooms.
Pro Styling Tip: Photograph in the morning when dew beads on the leaves—those tiny droplets sparkle like jewelry against burnt orange blooms.
Remember, your garden isn’t a showroom. It’s a living space that should make you exhale. If one bed feels abundant and the others are “in progress,” you’re doing it right.
6. Coppery Rudbeckia by the Garden Gate with a Wreath and Candlelit Lanterns
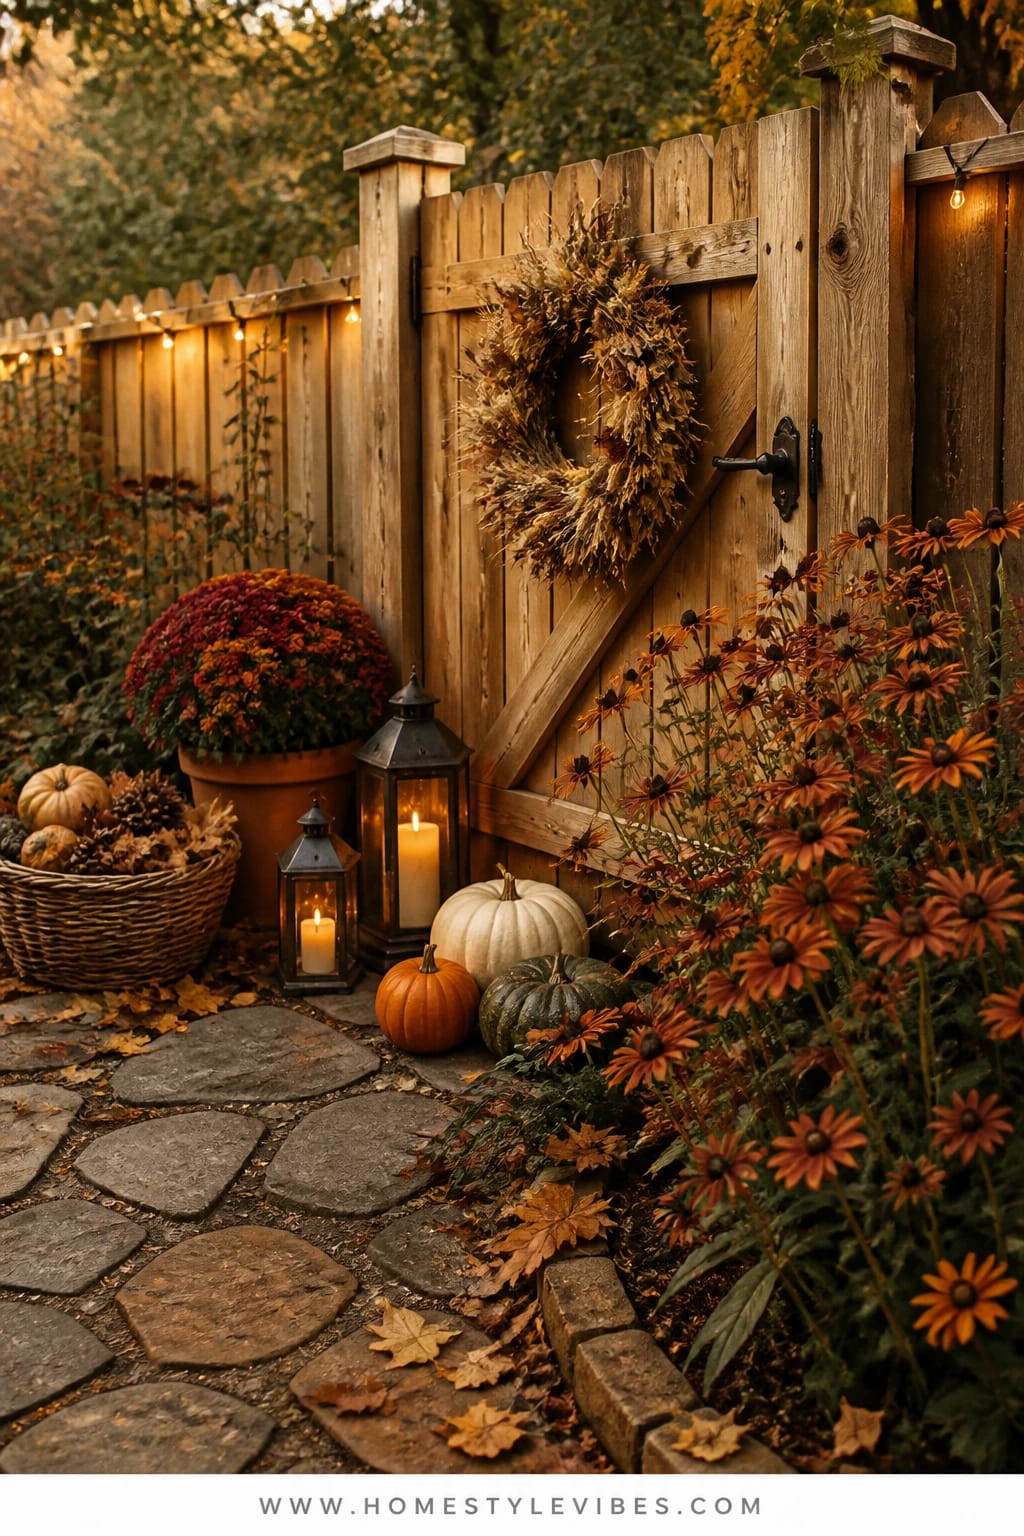
Maybe your back gate opens to a stretch of soil that always looks sparse, no matter how much you plant. Rudbeckia (Black-eyed Susan) in coppery, bronzy varieties brings height, movement, and classic fall color that lasts. Plant now in clumps to fill the vertical gap, hang a simple wreath on the gate, and park two candlelit lanterns at the threshold for that warm, welcoming glow when daylight dips early.
Rudbeckia thrives in cooler weather and stays upright when other perennials flop. Their warm “sun” faces stand out against fences and gates, creating a big visual payoff without constant care. A wreath made with dried seed heads, tiny pinecones, and a ribbon in burnt orange nods to the blooms without matching too perfectly. The lanterns frame the entry and make evenings outside feel special. In photos, the tall blooms lead the eye upward while the lanterns hold the base, and the wreath offers a focal point at eye level—a classic triangle composition the camera loves.
Variations: if you’re conserving budget, plant a single clump of rudbeckia and supplement with bronze-toned annuals like snapdragons or violas in front. For a neutral version, choose rudbeckia with more golden-yellow petals and a taupe ribbon on the wreath. Small gate? One lantern and a petite wreath still strike the chord. Honest note: staking tall blooms can be fiddly on windy sites. Use discreet green stakes and soft ties; it’s worth the few minutes to keep everything graceful.
Budget Breakdown:
- Rudbeckia (1–3 gallon plants): $10–$45
- Wreath base + dried elements: $18–$40
- Lanterns (1–2) + LED candles: $20–$70
- Compost/topsoil: $6–$12
- Soft plant ties and stakes: $6–$12
Total Estimated Cost: $60 – $179
Best For: Gates, fence lines, or the start of a garden path where vertical color makes a strong first impression through late fall.
Key Design Elements:
- Main seasonal props: coppery rudbeckia, dried-element wreath, candlelit lanterns
- Color palette: copper, burnt orange, golden yellows, deep brown centers
- Lighting strategy: lanterns flanking the entrance, dim enough to feel soft
- Textile layers: a narrow weatherproof ribbon on the wreath
- Natural elements: seed heads, pinecones, dried grasses
- Accent details: matte black or aged brass lantern frames; grapevine wreath base
How To Recreate This Look:
- Start by amending the soil and laying out where the tallest clump will go—usually slightly off-center looks most natural.
- Add rudbeckia in groups of three for fullness and staggered height.
- Layer a thin mulch ring to keep moisture even and the base tidy.
- Place lanterns at the gate’s base, testing sightlines from both inside and out.
- Style the wreath with dried bits in a loose crescent and hang it slightly higher than eye level.
Why This Looks Expensive: Layered verticals. You’ve got height (blooms), mid-level focus (wreath), and ground-level glow (lanterns). That tiered approach reads finished and thoughtfully designed.
The Most Common Mistake: Planting in a straight soldier line along the fence. Clump instead. Lines feel municipal; clumps feel garden-y.
Pro Styling Tip: At dusk, crack your camera exposure down a notch; the lanterns won’t blow out and the copper petals will look saturated and lush.
Quick Checklist
- Choose 1–2 focal areas outdoors to plant first
- Buy fall-friendly flowers: mums, marigolds, pansies, calendulas, nasturtiums, rudbeckia
- Stick to a warm, cohesive palette (rust, amber, burgundy, burnt orange)
- Edge beds and add a light mulch layer for crisp lines
- Use odd-number groupings for natural fullness
- Add one glow source: lanterns, tea lights, or string lights
- Mix in simple seasonal props: pumpkins, pinecones, dried florals
- Deadhead regularly to extend bloom time
- Water at soil level in the morning
- Take photos at golden hour or early dusk for the richest color
Frequently Asked Questions
When should I plant these fall flowers so they actually bloom this season?
Plant now while the soil still holds summer warmth—ideally 6–8 weeks before your first hard frost. Mums, marigolds, pansies, calendulas, nasturtiums, and rudbeckia all appreciate that window for quick rooting and fast color.
Can I mix real and faux elements like pumpkins and leaf garlands?
Absolutely. Real blooms paired with a few high-quality faux accents (a garland or a wreath) look generous without the maintenance. IMO, real pumpkins win every time for texture, but faux garlands save you from constant cleanup.
What if I only have a tiny garden or a small patio corner?
Focus on one container vignette and one glow source. A 12-inch bowl with burgundy pansies and a single lantern by your patio table gives you cozy energy without crowding your space.
How do I keep everything looking good with kids and pets around candles?
Use LED candles in lanterns and keep them slightly back from high-traffic paths. You still get the candlelit warmth and zero stress during tag games or zoomies.
I’m on a tight budget—where should I spend vs. save?
Spend on a few larger, healthy plants for immediate impact and one or two good-looking lanterns you’ll reuse for years. Save by buying annuals in flats, foraging pinecones, and using leaf mulch.
What’s the best way to store decor after the season?
Wipe lanterns dry and store them in a lidded bin with silica packs. Wrap garlands and wreaths in tissue and stash flat to prevent crushing. Terracotta pots can stay outside if they’re frost-proof; otherwise bring them into a shed or garage.
Do I need to fertilize fall plantings?
Go light. Mix in compost at planting and skip heavy fertilizer; you want sturdy roots, not soft, sappy growth heading into cold weather.
Wrap-Up: Your Garden, But Make It Fall
Pick one idea from this list and give it 45 minutes this weekend. Maybe it’s the rust mums by your bench with a couple of pumpkins, or a ring of burgundy pansies by the patio table. The truth is, cozy outdoors comes from layering warm color, simple seasonal props, and a touch of glow—nothing more mysterious than that.
As the days shorten, your autumn garden should feel abundant and welcoming. Let your beds collect a few leaves, light those lanterns, and enjoy the quiet crackle of a candlewick while the air turns crisp. You’ve got this. Start small, plant generously, and watch your backyard become the color-drenched haven you’ve been craving—seriously, your future dusk walks will thank you.
About the Author

Krisztina P.Rendes, Founder of Home Style Vibes
Founder of Home Style Vibes
Krisztina Puskásné Rendes created Home Style Vibes as a cozy-modern lifestyle space where homemaking meets inspiration. Her goal is to help women create beautiful, organized, and peaceful homes they truly love — without overwhelm. You’ll find here heart-driven content on home decor, cleaning tips, easy family recipes, organization and decluttering, DIY home projects, plants, and seasonal ideas — all designed to bring more calm, comfort, and style into everyday life.