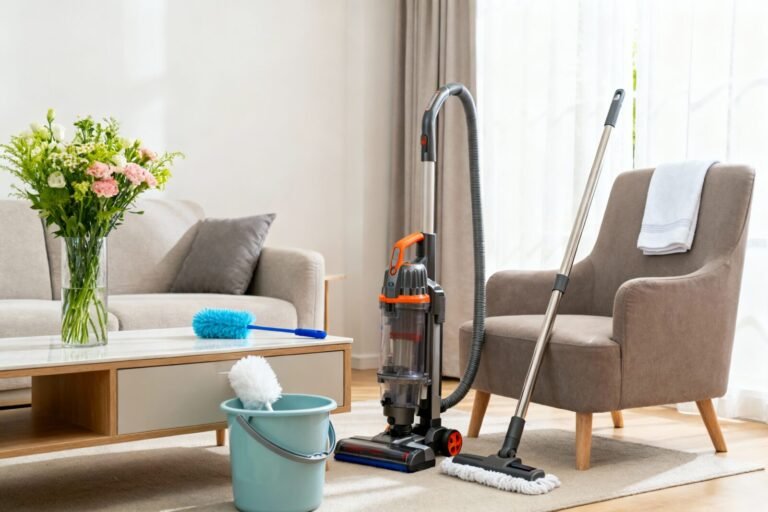
6 Laundry Room Storage And Organization Ideas For A Clutter-Free Space
You want a laundry room that smells like fresh cotton, looks like quiet sunlight on warm tile, and works like a tiny backstage crew handling life’s chaos. But you hate the teetering detergent bottles, the mystery sock purgatory, and those wire shelves that somehow make everything look messier. This is your place to fold in peace, not to juggle overflow baskets and random batteries. These six laundry room storage and organization ideas fix the daily snags—sliding doors that hide what you don’t want to see, smart zones that flow, and textures that make the room actually feel finished. Expect photogenic color palettes, serious function, and a setup you can pull off in a weekend or two for well under $2,500 per concept if you’re strategic. If you love crisp, cozy, and clutter-free with a bit of soul, you’re in the right spot.
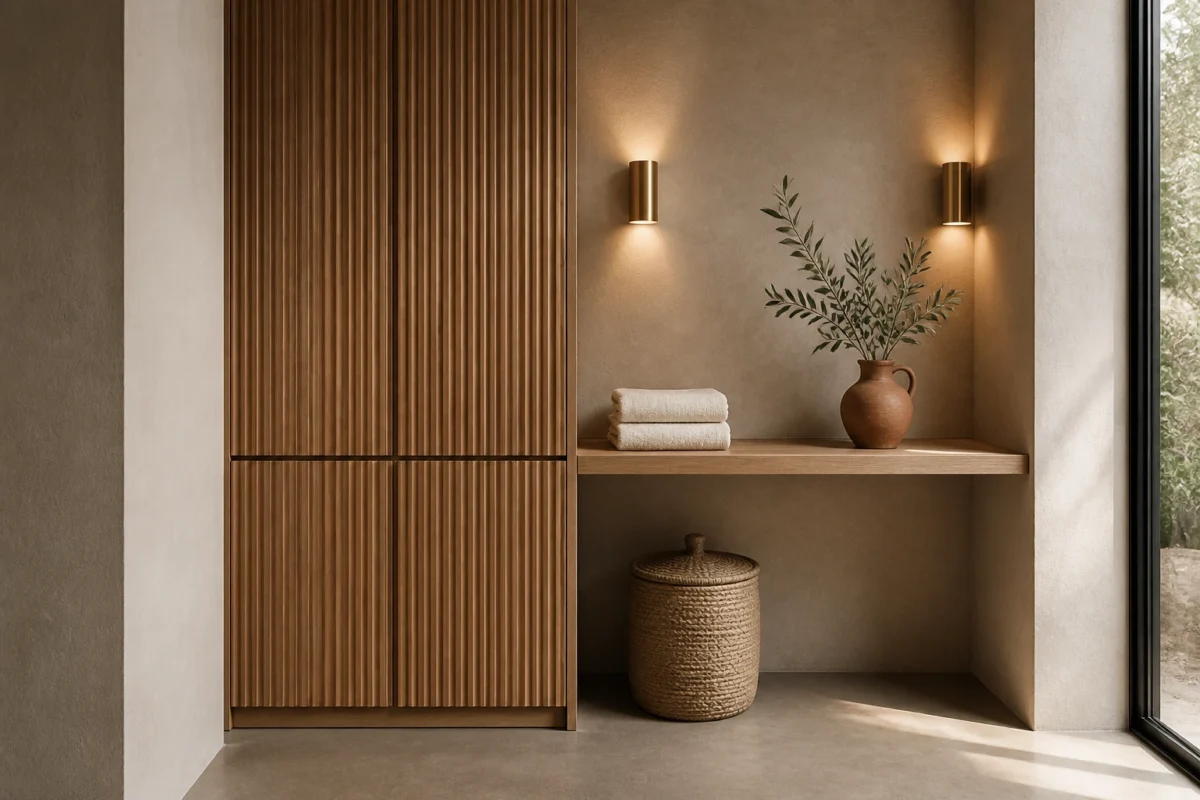
1. Fluted Oak Warmth With Soft Diffused Sconce Light and a Slim Counter-Depth Folding Station
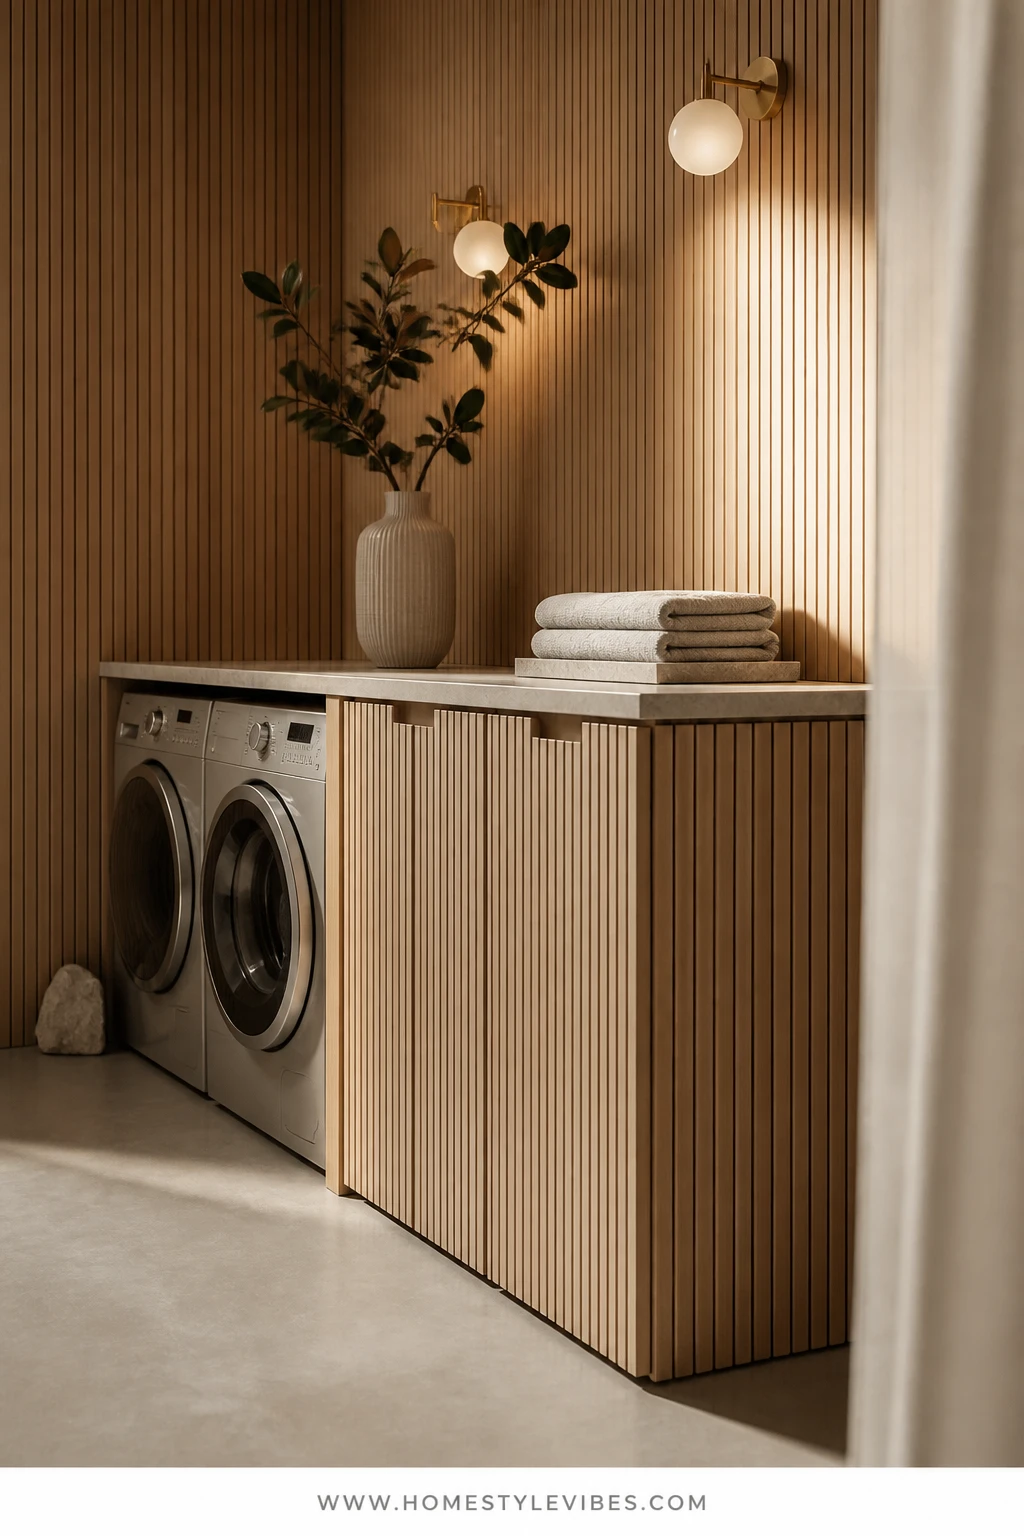
We’ve all been there: a laundry room that’s part drop-zone, part “I’ll deal with it later.” You’ve tried baskets and bins, but it still looks scattered. This design layers fluted oak fronts with a slim, counter-depth folding station and soft sconces that wash the wall in a glow—suddenly, that pile of towels reads like texture, not chaos. The mood feels warm minimal with a whisper of Japandi calm. Real homes win with this layout because the folding surface is narrow enough for small rooms, yet long enough to actually fold a queen duvet without wrestling it into the hallway.
Lighting matters here. Diffused, fabric-shaded sconces mounted above the counter cast gentle light that keeps whites from looking dingy and prevents those weird wall shadows cheap flush-mounts can create. Fluted oak or oak-look panels anchor the look with movement and depth, while a color palette of putty, stone, and soft whites photographs beautifully—clean lines, shadow play between each flute, and a counter that catches the light. If you’re a renter, swap fluted oak for peel-and-stick fluted panels or even ribbed wallpaper in a wood tone. On a tight budget, go for painted MDF with faux fluting using half-round molding—costs less and still looks crafted.
Two variations: For dark-room lovers, stain the oak a smoked walnut and use warm 2700K bulbs to avoid harshness. For tiny spaces, keep just one run of base cabinets with a single floating shelf above and integrated hooks underneath, so you can park a vacuum or hampers beneath the counter. Either way, this setup handles busy family life without broadcasting it.
Budget Breakdown:
- Fluted oak door fronts or peel-and-stick panels: $180 – $900
- Slim laminate or quartz-look counter (8–10 ft): $150 – $700
- Pair of fabric-shade sconces (dimmable): $120 – $380
- Base cabinets (stock, 2–3 units): $240 – $650
- Matte hardware set (pulls and knobs): $40 – $160
- Peel-and-stick backsplash tile (optional): $60 – $200
Total Estimated Cost: $790 – $2,990
Best For: Narrow laundry rooms or pass-through zones where depth is tight; families who want a warm, furniture-like look without heavy built-ins.
Key Design Elements:
- Main materials: Fluted oak, matte black or burnished brass hardware
- Color palette: Soft white, putty, warm oak, muted charcoal
- Lighting strategy: Diffused sconces above the folding run, 2700–3000K bulbs
- Furniture silhouettes: Flat-front cabinets, long slim counter, discreet toe-kicks
- Texture layers: Fluting, linen-look shades, matte finishes
- Accent details: Low-profile hooks, a narrow runner, a ceramic bowl for lint and buttons
How To Recreate This Look:
- Start with a single run of base cabinets and a slim counter no deeper than 20–24 inches.
- Add fluted fronts or apply peel-and-stick fluted panels to existing doors.
- Layer a pair of sconces evenly spaced over the counter, wired or plug-in with cord covers.
- Install a single floating shelf with a low lip to corral small bottles and jars.
- Style with a small linen-lined basket for stain sticks, a stone tray for dryer sheets, and a warm-toned runner.
Why This Looks Expensive: The fluting adds vertical rhythm, the sconces create soft shadows, and the restrained palette keeps every item intentional—no visual noise.
Watch Out: Don’t push sconces too high. Keep them around 60–66 inches center from the floor so the light kisses the counter instead of skimming over it.
Pro Styling Tip: Tuck a single branch in a tall vase near one sconce—the shadow line across the fluting photographs like editorial magic.
Keep scrolling—up next is a storage move that hides chaos in plain sight and saves major floor space.
2. Matte Black Steel Clarity With Cool Daylight LEDs and a Sliding Barn-Style Utility Panel
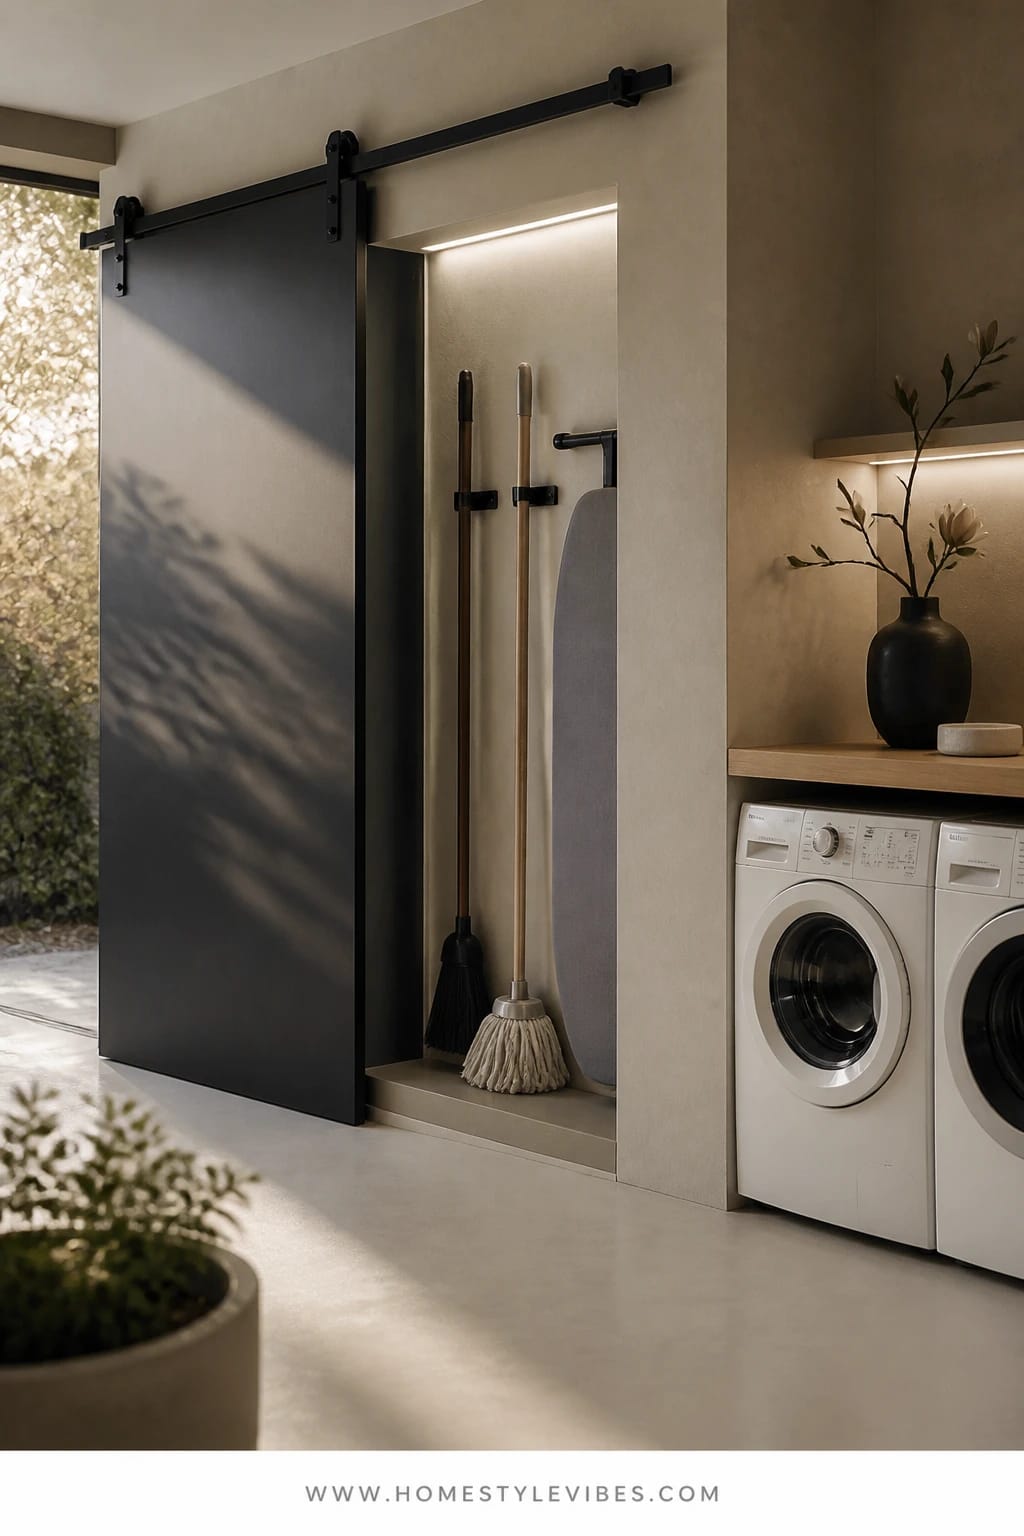
It’s that one corner that always feels off—the broom, the mop, the ironing board clanking against the wall like a cymbal crash. You’ve tried tucking them behind the door, but they boomerang back out. This layout corrals tall tools behind a sleek, matte black steel panel that slides like a barn door. Cool daylight LEDs make whites read crisp and stain checks straightforward. The vibe: urban utility meets tidy atelier, perfect for small spaces that need to feel exact and efficient.
Here’s why it works in real homes: a shallow track plus a steel panel gives you a full-height “closet” without the framing cost. Pegs and magnetic hooks on the inside keep everything vertical and off the floor. A narrow shelf above the machines handles bulk detergents; decant or not—this design doesn’t demand a matching decanter moment to look pulled together. Photographing this is easy: matte black absorbs glare, daylight LEDs cut yellow cast, and the linear track draws the eye across, making the room feel wider.
Variations: Renter-friendly? Use a pre-fab rolling garment rack with a blackout curtain in matte black hung on ceiling-mount track—same visual calm, zero drilling into studs. Budget save? Swap custom steel for a hollow-core door painted matte black with a surface-mounted flat bar track. Darker version lovers can go charcoal walls with a single stainless shelf for a subtle industrial nod.
Key Design Elements:
- Main materials: Matte black steel (or painted door), magnetic accessories
- Color palette: Crisp white, charcoal, hint of stainless
- Lighting strategy: 4000–5000K LED strips under shelves and above machines
- Furniture silhouettes: Linear track, flat shelves, skinny peg rails
- Texture layers: Powder-coated metal, canvas bin liners, rubberized mats
- Accent details: Magnetic timer, slim rail hooks, labeled clear bins
Budget Breakdown:
- Steel or painted panel: $150 – $600
- Sliding track hardware: $80 – $280
- LED strip lighting with diffuser: $60 – $180
- Wall-mounted peg rail or magnetic strip: $25 – $120
- Open shelving (metal or laminate): $90 – $250
Total Estimated Cost: $405 – $1,430
Best For: Apartment laundry closets, garage conversions, or anyone who wants tools hidden but instantly accessible.
How To Recreate This Look:
- Start by measuring your widest tool (usually the ironing board) and set track length 4–6 inches wider.
- Add an LED strip above the machines and another under the top shelf for even illumination.
- Layer a peg rail inside the panel zone for mops, plus magnetic hooks for small tools.
- Install a shallow shelf (10–12 inches deep) above machines to store bulk items.
- Style with two canvas bins—one for rags, one for lost-and-found—labeled cleanly.
Why This Feels Designer: The single, strong material statement—matte black—creates coherence. Even when life gets messy, the room’s outline stays sharp and graphic.
One Thing To Avoid: Don’t mix color temperatures. Keep all LEDs at 4000K or 5000K to avoid that mismatched patchwork lighting vibe.
Pro Styling Tip: Photograph straight-on with the panel half-open; the reveal of tidy tools behind the door adds story and depth.
Pause for a breath. If one idea is already clicking, that’s your cue. You don’t need all six—pick the one that solves your biggest daily snag and start there.
3. Honed Marble Calm With Dappled Morning Light and a Deep Apron-Front Sink Cabinet
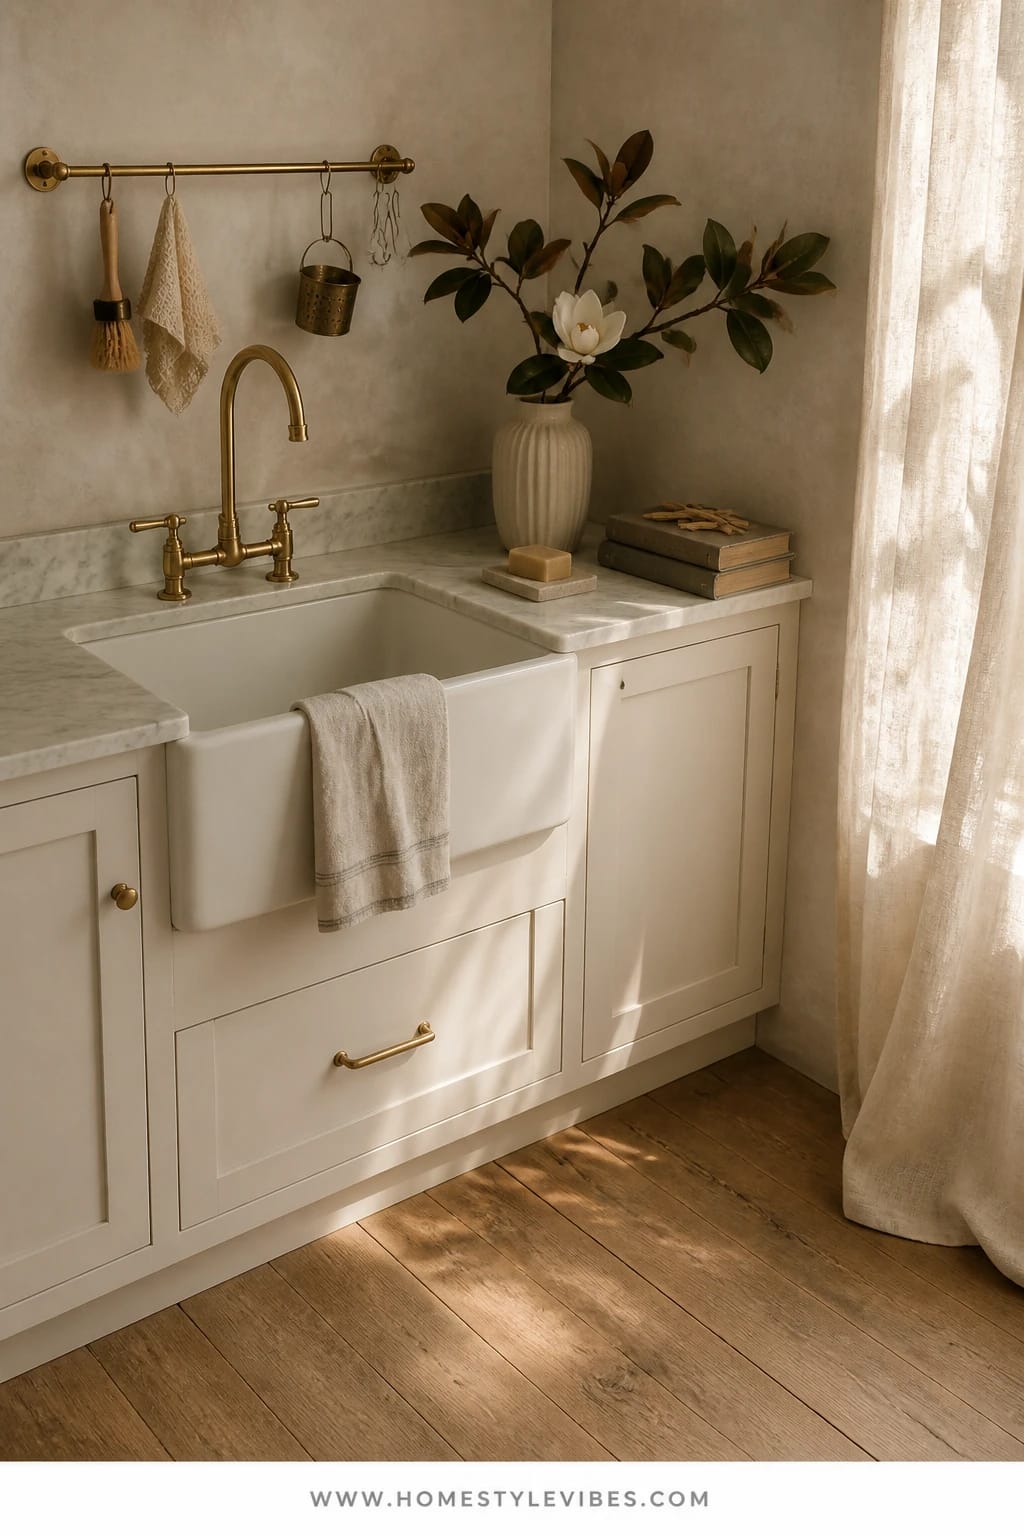
You love the idea of a serene, hotel-spa laundry, but the constant drip-dry chaos kills the mood. Hangers on door frames, soggy swimsuits lounging on the faucet—no thank you. This design centers a deep apron-front sink in a honed marble-look countertop with a wall-mounted rod over the basin so drips land where they should. The mood channels modern Mediterranean: pale stone, milky paint, and sunlit edges. It works for real homes because the sink becomes a utility hero, not a decorative afterthought.
Light plays a big role. Dappled morning light or a warm 3000K ceiling light keeps the stone looking soft, not shiny. Honed finishes photograph better than high-gloss here—less glare, more texture. Pair the sink with brushed brass or aged nickel and a simple bridge faucet. For renters or budget-watchers, use a deep composite utility sink and a quartz-look laminate—matte and forgiving. Quick anecdote: A friend of mine spent weeks agonizing over the “perfect” pale paint. She swapped nothing but the light bulbs to a warmer 3000K and suddenly her walls looked exactly how she pictured them. Lighting first, paint second—trust me on this one.
Variations: Small-space? Use a 24-inch sink base with a short rod that spans only the cabinet width. Darker twist? Go with a clay-colored wall and a limestone-look counter. Renter-friendly? Freestanding sink cabinet with a tension rod mounted below an open shelf—no drilling into tile.
Budget Breakdown:
- Apron-front sink (fireclay or composite): $280 – $900
- Laminate or quartz-look counter (honed finish): $220 – $800
- Wall rod and brackets (brass or matte nickel): $40 – $160
- Bridge or gooseneck faucet: $120 – $450
- Open shelf with drip tray underneath: $60 – $180
Total Estimated Cost: $720 – $2,490
Best For: Homes that line-dry or hand-wash frequently; spaces with a window or good artificial light; anyone who appreciates a timeless, quiet palette.
Key Design Elements:
- Main materials: Honed marble-look surface, ceramic or composite sink
- Color palette: Milky white, soft sand, gentle brass
- Lighting strategy: Warm 3000K ambient plus natural light where available
- Furniture silhouettes: Apron sink cabinet, thick-edge counter, slim rod
- Texture layers: Honed stone, linen towels, rattan baskets
- Accent details: Glass jars for clothespins, a low terracotta pot for greenery
Why This Reads High-End: Honed finishes look expensive because they absorb light softly. The sink isn’t shy—it’s a sculptural focal point—while the rest of the room steps back and lets it lead.
How To Recreate This Look:
- Start by centering a deep sink base on your longest wall to anchor the room.
- Add a honed or matte counter that overhangs slightly for a custom effect.
- Layer a rod above the sink so damp pieces drip into the basin, not onto the floor.
- Install a single open shelf above the rod for folded towels and a drip tray below for hand-washables.
- Style with linen towels, a neutral rug, and one small plant near the window or light source.
The Most Common Mistake: Skipping a splash zone. Add a short backsplash or bead of clear silicone behind the faucet to keep water from sneaking into seams.
Pro Styling Tip: For photos, drape one striped towel casually over the sink front; the pattern break adds life without clutter.
Ready for something wildly space-savvy? The next setup fits a whole sorting system into a footprint you thought only held a trash can.
4. White Oak Plywood Warmth With Soft Ambient Strip Lighting and a Triple Pull-Out Hamper Tower
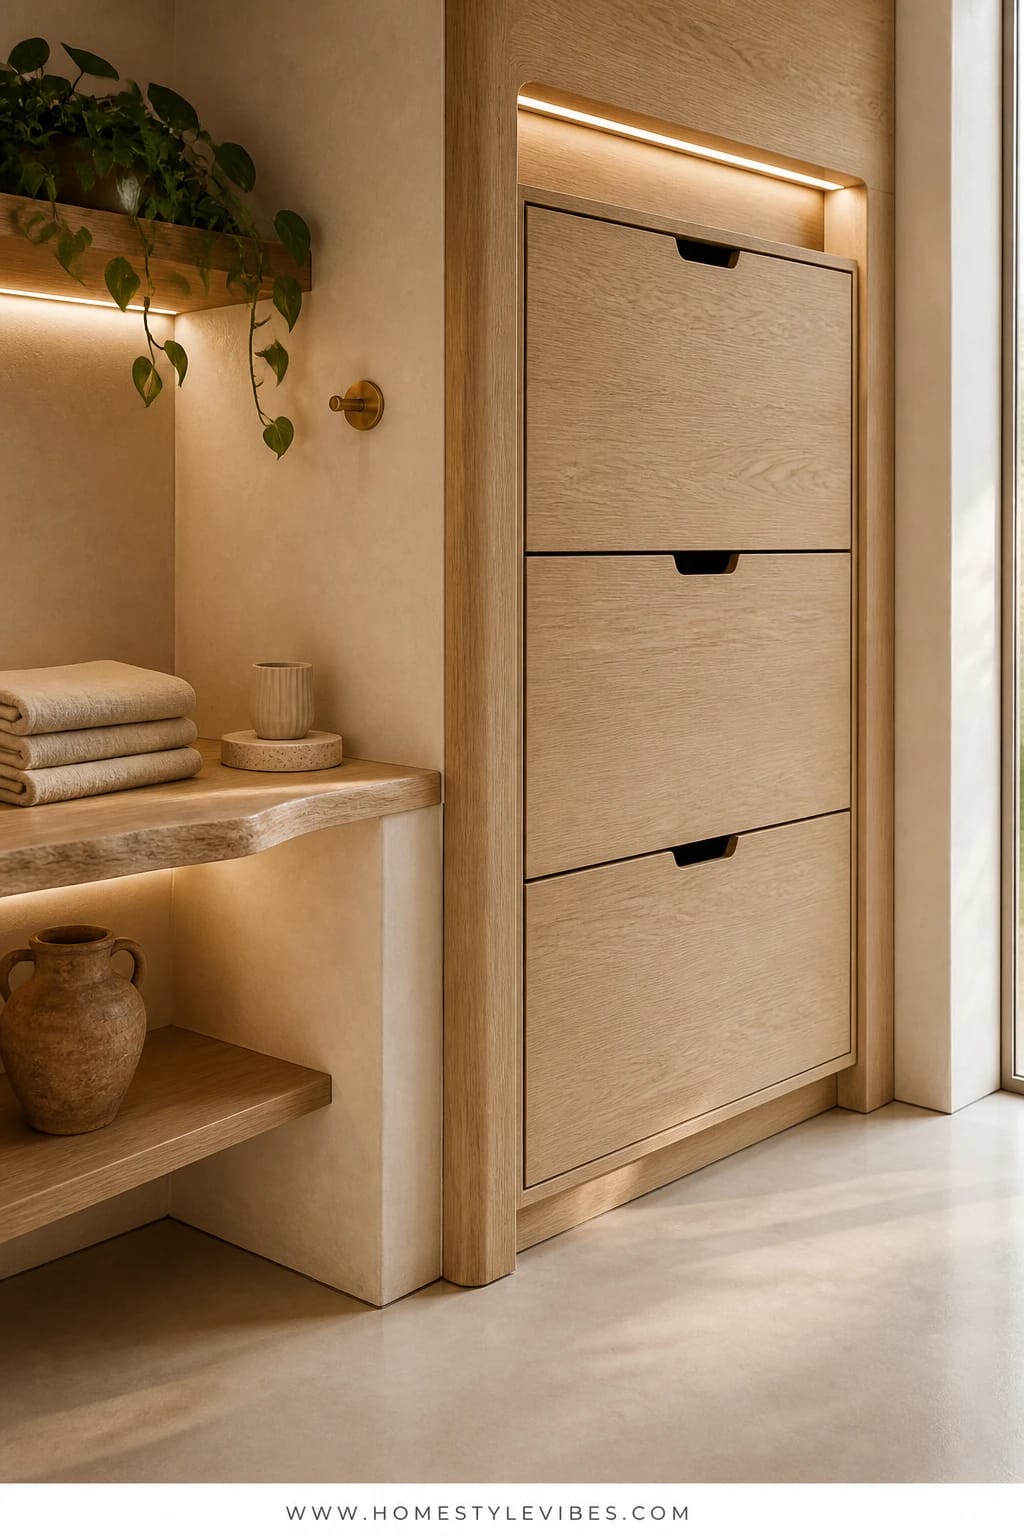
There’s always that cascade of mixed laundry—darks, lights, towels—piled in an open basket like a textile landslide. You’ve tried buying prettier baskets, but pretty doesn’t equal sorted. This design installs a vertical tower of three pull-out hampers tucked behind white oak plywood fronts so every load has a home before wash day. The mood reads Scandinavian-calm with honest materials and quiet lighting. Families love it because it teaches the system without nagging—if you can toss, you can sort.
Ambient LED strips mounted at toe-kick and under the top shelf create a glow that makes the room feel bigger and more finished. The plywood grain provides subtle movement that photographs soft and editorial—especially if you edge-band for a clean profile. For small apartments, do a two-hamper version and a third pull-out for cleaning supplies. Renter-friendly? Use a freestanding narrow cabinet with removable tilt-out hampers. Budget twist: Use birch plywood with a water-based stain that mimics white oak.
Personal confession: I installed a version of this last fall and honestly couldn’t believe the difference in my mental bandwidth. I stopped playing “guess the load” every time I walked in. The room felt calmer because the chaos had a door.
Key Design Elements:
- Main materials: White oak or birch plywood with clear finish
- Color palette: Pale oak, cloud white, soft grey
- Lighting strategy: Warm strip lights at toe-kick and shelf undersides
- Furniture silhouettes: Tall, skinny cabinet tower with full-overlay fronts
- Texture layers: Wood grain, cotton canvas hamper liners, wool runner
- Accent details: Black edge pulls, minimal labels, a tiny framed print
Budget Breakdown:
- Plywood and edge banding: $160 – $420
- Pull-out hamper hardware and baskets (set of 3): $150 – $380
- LED strip lighting kit: $60 – $160
- Cabinet carcass or freestanding tower: $200 – $600
- Hardware and finishing supplies: $40 – $120
Total Estimated Cost: $610 – $1,680
Best For: Busy households, laundry niches by entrances, or anyone who wants sorting to run on autopilot.
How To Recreate This Look:
- Start by measuring the tallest hamper you’ll use and design the tower with 3 equal bays plus 1-inch clearance.
- Add full-extension slides so each hamper glides fully out for easy dumping into the washer.
- Layer LED strips at the toe-kick and under the top shelf; wire to a single dimmer for gentle evening light.
- Install minimal black edge pulls centered on each door to keep things streamlined.
- Style with a neutral runner and a small art print to warm the utility vibe.
Why This Looks Intentional: Vertical repetition of the three equal doors signals order. The soft light at floor level creates that boutique-cabinetry feeling even in a builder-basic room.
Don’t Do This: Avoid making each door a different size. Uneven fronts read chaotic even when the inside is organized.
Pro Styling Tip: Pull one hamper out two inches for photos; the hint of canvas texture gives depth without showing the contents.
Perspective reset: Remember, this isn’t about recreating a showroom. It’s about building a system that suits your laundry patterns. If two hampers work for you, that’s your design—done.
5. Textured Linen Cabinet Panels With Golden Hour Track Lighting and a Fold-Down Ironing Niche
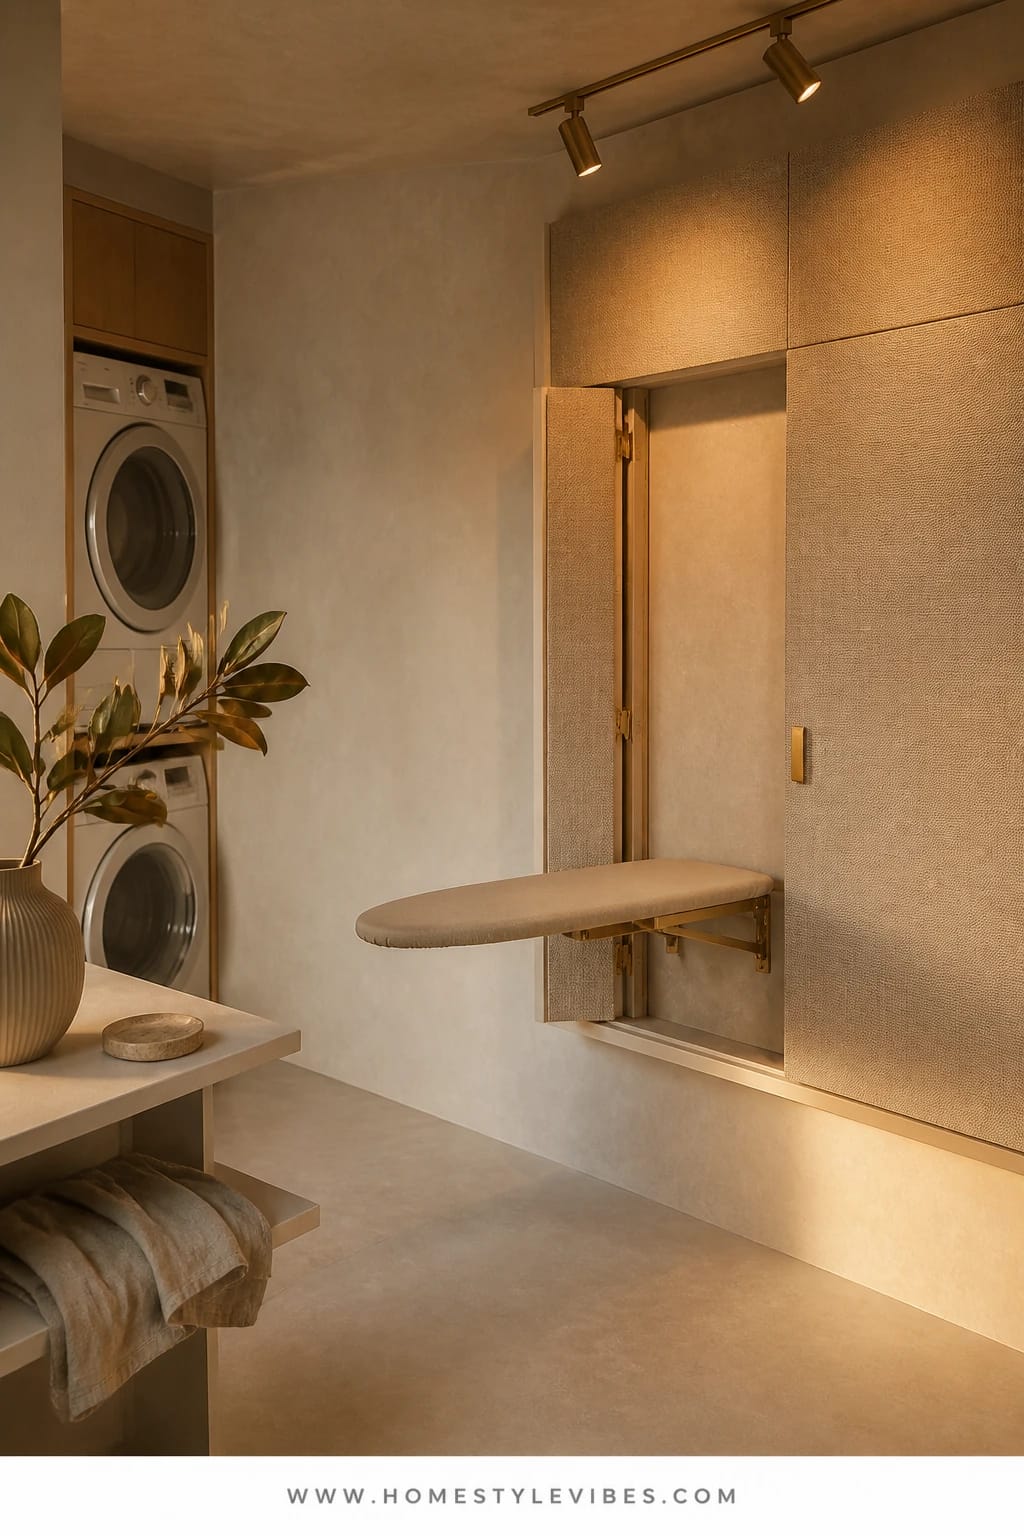
You iron exactly twice a week and resent the ironing board living rent-free in your hallway. You’ve tried leaning it behind the door. It falls. You try a hook. It looks like gym equipment. This design hides a fold-down ironing board inside a shallow wall niche, behind textured linen-look cabinet panels that read like soft fabric. Golden hour track lighting—aimed at the niche—casts warm, directional light that makes the job painless and flatters the space at the same time. The mood says quiet boutique dressing room meets clever millwork.
Why it works: the niche is only as deep as the folded board, which means slim footprint and big payoff. The linen-texture panels break up a wall of cabinetry without adding heavy color, and they photograph like expensive wallpaper. If you’re renting, consider a wall-mounted fold-down board with a removable fabric cover and magnetic close, then frame the area with tall peel-and-stick linen panels for the look. If you prefer a darker vibe, swap to a tweed-texture panel in charcoal and use warm 2700K bulbs for cozy contrast.
Variations for small spaces: Use a 24-inch-wide niche and a compact board. Add a skinny shelf above for starch and a small steamer. Budget-friendly trick: Create the “linen” using paintable textured wallpaper on MDF doors, then paint in a warm greige.
Budget Breakdown:
- Fold-down ironing board kit: $120 – $380
- Niche framing or surface-mount cabinet: $150 – $400
- Textured linen-look panels or wallpaper: $80 – $280
- Track lighting with 3 heads: $120 – $260
- Hardware and magnetic catch: $25 – $70
Total Estimated Cost: $495 – $1,390
Best For: Anyone who irons occasionally but wants it hidden; corridors and narrow rooms where floor space is precious.
Key Design Elements:
- Main materials: Linen-texture panels, MDF niche framing
- Color palette: Warm greige, cream, brushed brass or matte black accents
- Lighting strategy: Adjustable track lights aimed at the niche at 30–45 degrees
- Furniture silhouettes: Skinny cabinet doors, slim pull handles
- Texture layers: Linen paneling, woven basket for spray bottles, cork pinboard inside the door
- Accent details: Small steamer hook, cord management clips, scent beads jar
How To Recreate This Look:
- Start by locating studs and mapping a shallow niche or mounting a surface cabinet that fits your chosen board.
- Add linen-textured panels to the door fronts or use textured wallpaper over MDF and finish with paint.
- Layer in track lighting positioned to avoid harsh shadows on the board surface.
- Install cord clips and a small hook for the steamer inside the niche for zero-tangle storage.
- Style the surrounding wall with two slim frames or a simple shelf to make the niche feel intentional.
Why This Looks Expensive: Texture where you don’t expect it—on doors—instead of on countertops. It’s subtle but tactile, and the focused lighting gives a boutique dressing-room vibe.
Watch Out: Don’t mount the track lights dead center over the board; offset slightly to one side to prevent your head from casting a shadow while ironing.
Pro Styling Tip: Crack the door open for photos so the hinge detail shows—tiny craftsmanship cues make the shot feel high-end.
We’re almost at the finish line. Ready for the most storage in the least visual noise? The final idea is stealth-organization at its best.
6. Beadboard Serenity With Clean Neutral Task Light and a Hidden Rolling Cart Island
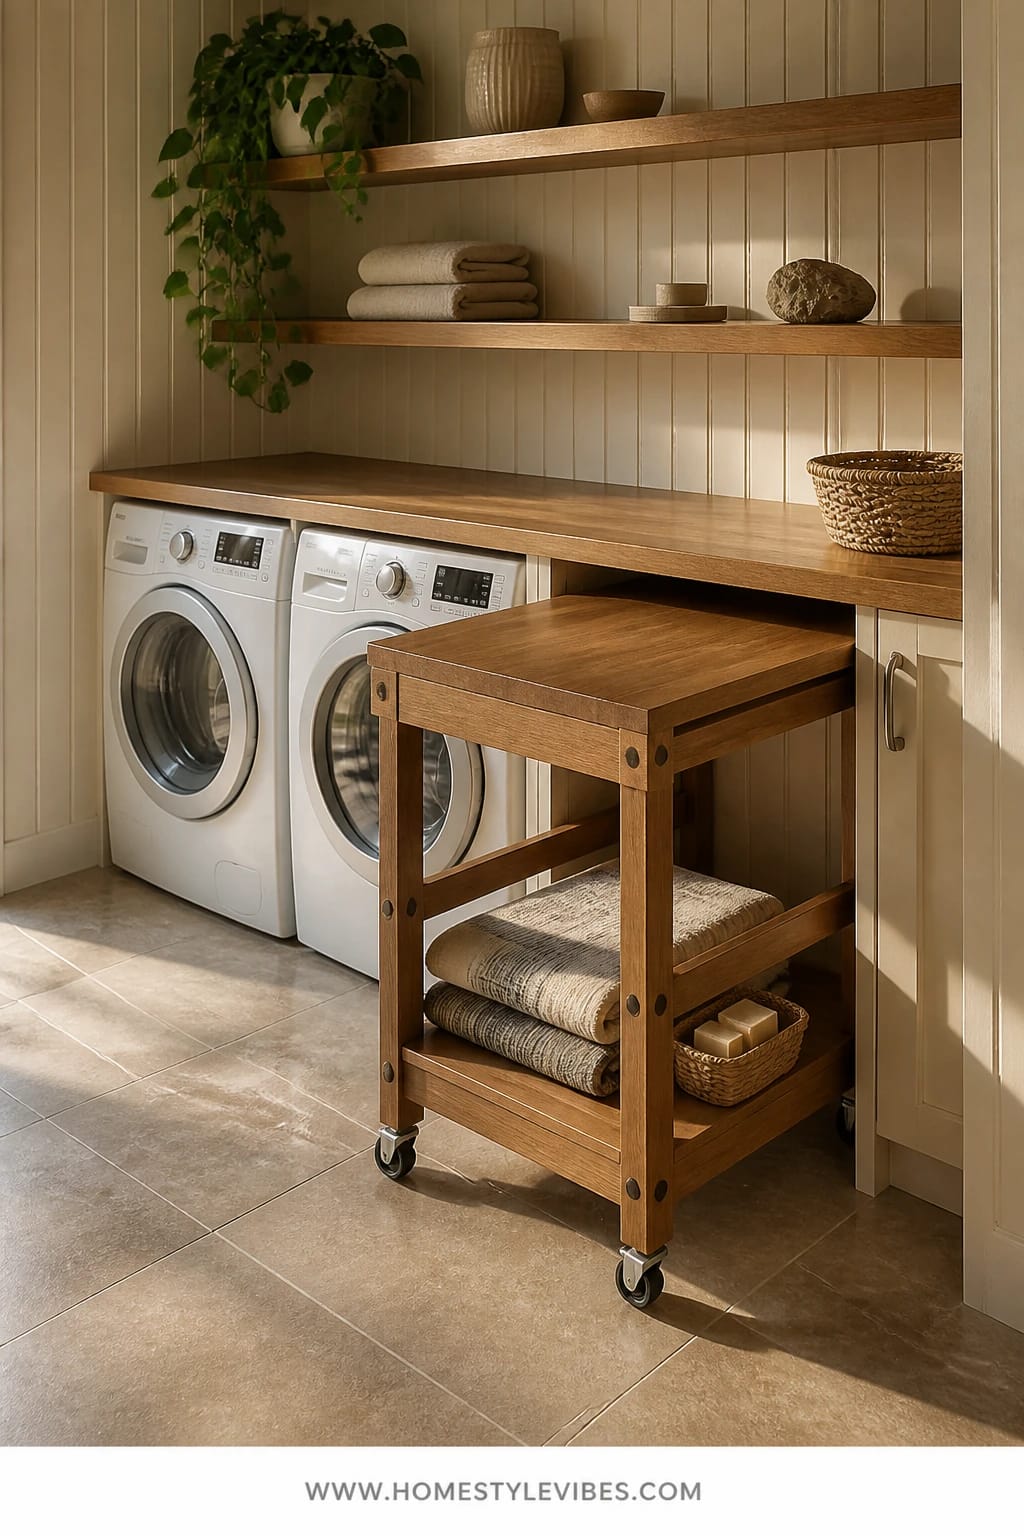
You crave that cottage-clean laundry feel—soap bars, stripes, light that lands soft on beadboard—but the middle of the room becomes a dumping ground. You’ve tried a fixed island, but it crowds the walkway. This design uses classic beadboard in a calm neutral, bright but gentle task lighting, and a hidden rolling cart tucked under the counter that slides out only when you need a mini island. The mood is coastal farmhouse meets smart studio.
Why it works: you gain a horizontal surface for folding and sorting without permanent bulk. The cart disappears under a counter skirt or cabinet apron when not in use. Beadboard adds character and photographs beautifully thanks to its tiny shadow grooves. Keep the color palette pale—think soft oatmeal or creamy white—so the room feels clean, not sterile. I’ll be honest: skirted counters can look messy if you choose the wrong fabric. Pick a heavier-weight cotton-linen blend with a crisp hem so it hangs like drapery, not like a wrinkled sheet.
Variations: For small apartments, use a half-depth rolling cart that tucks under a wall shelf. For renters, mount removable beadboard panels with Command strips and choose a freestanding cart with a butcher-block top. Prefer a moody version? Try smoky blue beadboard with bright neutral task lights to keep clothes color-true.
Budget Breakdown:
- Beadboard panels and trim: $120 – $320
- Rolling cart with locking casters: $150 – $450
- Counter skirt or cabinet apron kit: $60 – $200
- Task lighting (semi-flush or linear): $90 – $260
- Hooks, rail, and small baskets: $40 – $120
Total Estimated Cost: $460 – $1,350
Best For: Cottage-style homes, multipurpose laundry/mudrooms, or anyone who wants flexible surface area without permanent fixtures.
Key Design Elements:
- Main materials: Painted beadboard, butcher-block or laminate cart top
- Color palette: Cream, oatmeal, soft greys; optional smoky blue
- Lighting strategy: Neutral task lights at 3500K for color accuracy
- Furniture silhouettes: Slim cart with straight legs, Shaker-style hooks and rails
- Texture layers: Cotton-linen skirt, woven seagrass bins, ribbed glass jar
- Accent details: Striped tea towels, enamelware tray, a tiny wall clock
How To Recreate This Look:
- Start by paneling the main wall with beadboard and cap with a simple ledge or trim rail at 48 inches.
- Add a clean-lined task light centered over the folding zone; aim for 3500K for accurate colors.
- Layer a rolling cart under the counter with locking casters and a durable top.
- Install a short rail with hooks above the beadboard ledge for quick-grab tools.
- Style with a cotton-linen skirt or apron to conceal the cart when not in use; keep the hem crisp and just kissing the floor.
Why This Feels Designer: Flexibility masquerading as built-in. The cart reads like custom when parked, yet rolls out to earn its keep. The beadboard texture adds quiet depth without clutter.
The Most Common Mistake: Overfilling the cart. Leave the top mostly clear so it can pivot from “storage” to “fold station” in seconds.
Pro Styling Tip: For photos, pull the cart halfway out and place a single folded stack of white towels—clean lines, instant hero shot.
Mindset moment: If your laundry room lives inside a hallway or garage, it still deserves thoughtful materials and light. Treat it like a tiny kitchen for utility and you’ll stop dodging clutter and start using it like a pro.
Quick Checklist
- Commit to one dominant material (fluted wood, metal, beadboard, or stone)
- Match your light temperature and aim it with intent
- Add one slim, continuous counter for folding
- Plan vertical storage (peg rails, rods, or sliding panels)
- Hide tall tools behind doors or panels
- Install at least one pull-out or rolling element
- Use honed or matte finishes to avoid glare
- Label by function (delicates, line-dry, rags), not by person
- Leave negative space; don’t fill every shelf
- Add a soft runner for grip and warmth
- Use one standout hardware finish consistently
- Keep a small catch-all bowl for lost buttons and coins
Frequently Asked Questions
How can I upgrade my laundry room storage on a tight budget?
Work in stages. Start with a wall shelf above the machines, a peg rail for tall tools, and a single rolling cart. Paint the walls a calm neutral to unify what you own. Then add lighting—LED strips or a new ceiling light—before buying more bins. Light plus paint plus one smart cart = visible progress under $250.
My laundry space is a closet—are any of these ideas realistic?
Yes. Use the sliding panel from section 2 in a closet-by-closet scale or mount a tension rod over a compact sink as in section 3. A two-hamper pull-out (section 4) also fits within standard closet widths. Keep depth minimal and prioritize vertical storage.
I’m renting. What can I do without drilling into tile or cabinets?
Peel-and-stick fluted or beadboard panels, plug-in sconces with cord covers, freestanding rolling carts, and tension rods all work. You can attach temporary peg boards with removable strips and store heavier items on the floor beneath to balance weight.
How do I keep the laundry room from getting messy again after organizing?
Assign every item a “home” by function (sort, soak, hang, fold). Keep one empty basket always available for incoming odds and ends. Use labels sparingly but clearly. And set a micro-routine: five minutes to reset after your last load—wastebasket empty, rags in the wash, counter clear.
Do honed or matte finishes stain easily in a laundry room?
Honed stone can spot if unsealed. Go for sealed quartz-look or laminate with a matte finish for low maintenance. Wipe spills quickly, especially bleach or rust removers, and add a small tray near the faucet to catch drips.
Closing Thoughts
Pick one move from these six laundry room storage and organization ideas and start there. Maybe it’s the pull-out hamper tower that keeps sorting automatic, or the sliding panel that hides tall tools in plain sight. One shift that tackles your biggest pain point will change how the whole room feels.
The truth is, luxury in a utility space comes from texture, lighting, and restraint. Keep your materials honest, your light intentional, and your surfaces clear enough to work. When your laundry room functions like a tiny studio—everything within reach, nothing shouting—you’ll actually want to keep it tidy.
You’ve got this. Set your budget, mark your studs, and choose your anchor idea. A calm, clutter-free laundry room isn’t a fantasy Pinterest board; it’s five decisions and an afternoon with a drill away. And seriously, that first load you fold on a real counter? Chef’s kiss.

About the Author

Krisztina P.Rendes, Founder of Home Style Vibes
Founder of Home Style Vibes
Krisztina Puskásné Rendes created Home Style Vibes as a cozy-modern lifestyle space where homemaking meets inspiration. Her goal is to help women create beautiful, organized, and peaceful homes they truly love — without overwhelm. You’ll find here heart-driven content on home decor, cleaning tips, easy family recipes, organization and decluttering, DIY home projects, plants, and seasonal ideas — all designed to bring more calm, comfort, and style into everyday life.