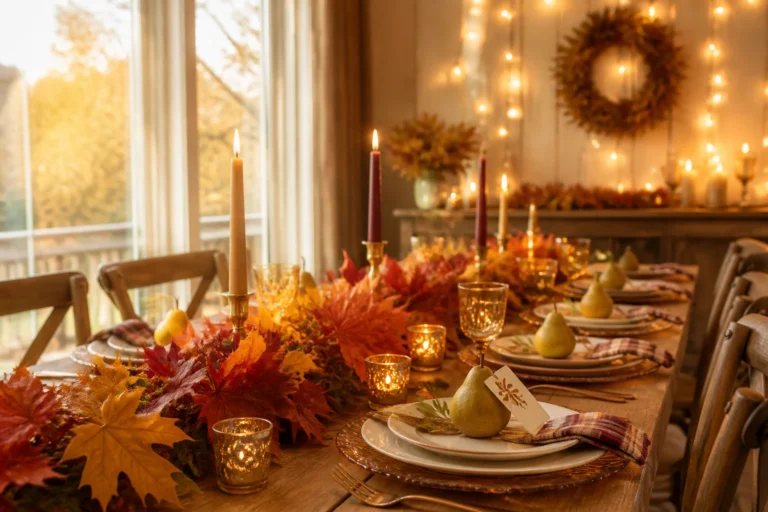
5 Christmas Cookie Exchange Recipes That Travel Well and Steal the Swap
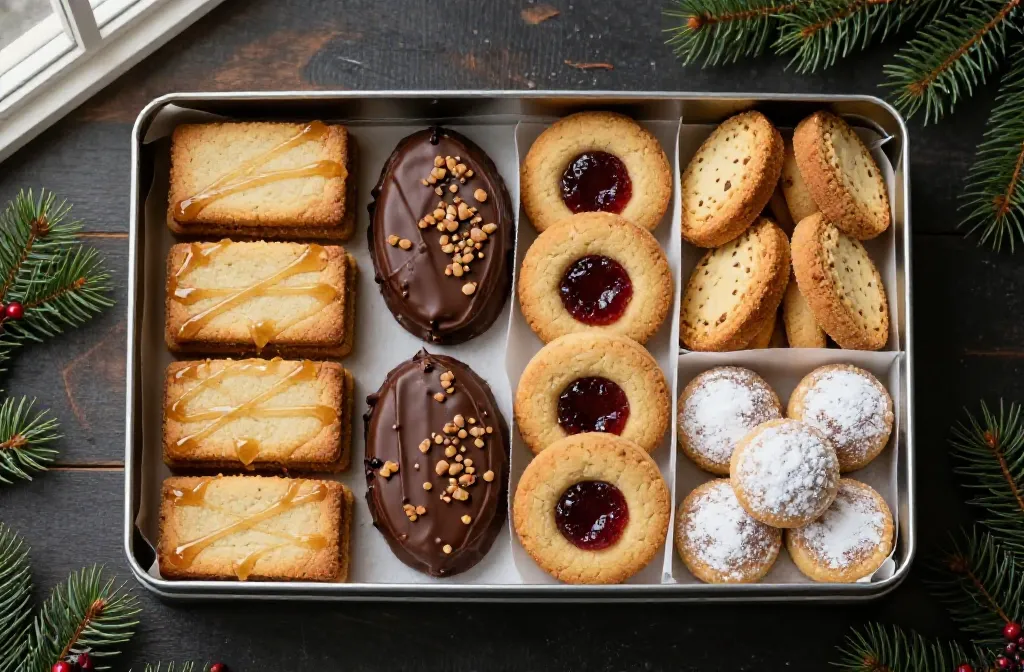
You want the kind of Christmas cookie exchange that earns you the most-traded tin and a flurry of “Can I get that recipe?” texts. But crumbly cookies, smeared frosting, and last-minute chaos keep getting in the way. These five Christmas cookie exchange recipes are sturdy, stunning, and built to travel—without tasting like cardboard. Expect quick prep, make-ahead options, freezer-friendly notes, and cookie-tin packing tips so you can actually enjoy the party (and your kitchen) this year. These are photogenic, brag-worthy bakes you’ll bookmark for every holiday season.
Quick Quiz: What’s the single most important factor for a cookie that travels well to a Christmas cookie exchange?
- A soft underbaked center for chew
- Stable structure and low-squish finishes (no messy frosting)
- High moisture from fruit add-ins
- Extra-large size for impact
Answer: 2 — Stable structure and low-squish finishes prevent smearing, crumbling, and breakage in tins and during travel.
1. Brown Butter Pecan Shortbread Wedges With Maple Glaze Drizzle And Clean-Cut Edges
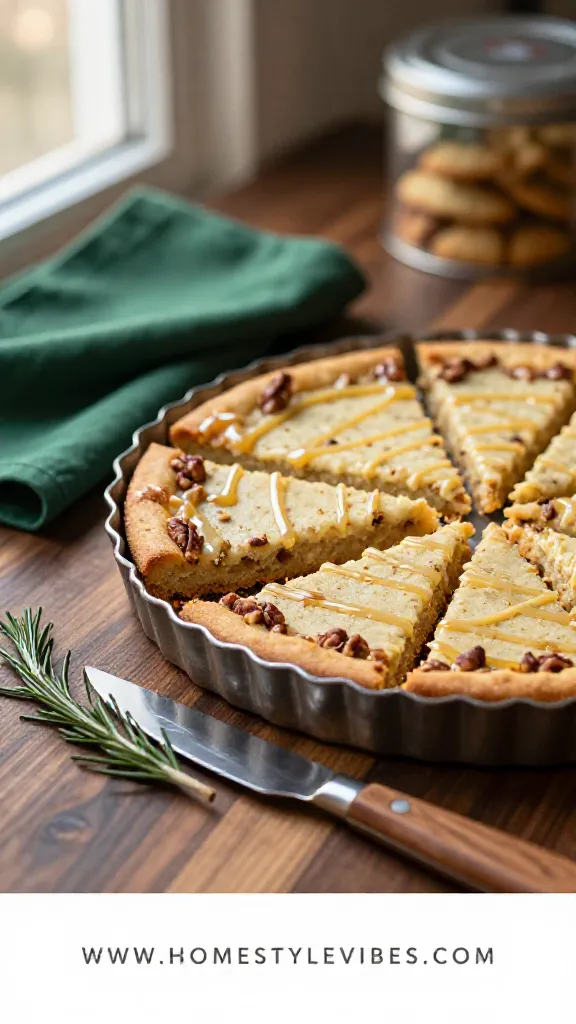
Shortbread is the cookie exchange MVP: buttery, sandy, and nearly indestructible. Browning the butter adds deep nuttiness that plays beautifully with toasty pecans, and a thin maple glaze gives just enough shine without going gloopy in the tin. Slice these into tidy wedges, and they stack like little golden pizza slices—zero crumbling drama.
This recipe bakes in a round metal cake pan for precise cuts and easy travel. The texture is tender but firm, thanks to a touch of cornstarch and a longer low-and-slow bake. Make the dough ahead, freeze it, then bake the day before the swap. The wedges hold for a week in an airtight tin with parchment between layers.
Variations? Swap pecans for toasted pumpkin seeds for a nut-free crowd, or add a pinch of cinnamon and orange zest for a holiday vibe. For gluten-free, use a 1:1 GF baking blend with xanthan; the crumb stays short and lovely.
Prep Time: 20 minutes
Cook Time: 35 minutes
Total Time: 55 minutes
Servings: 16 wedges
Best For: Cookie exchanges where you need clean cuts, elegant stacking, and a flavor that tastes like December in one bite.
Ingredients:
- 1 cup (2 sticks) unsalted butter
- 1/2 cup powdered sugar
- 1/4 cup granulated sugar
- 1 teaspoon vanilla extract
- 1/2 teaspoon fine sea salt
- 2 cups all-purpose flour
- 2 tablespoons cornstarch
- 3/4 cup finely chopped toasted pecans
- 1/2 cup powdered sugar (for glaze)
- 2 tablespoons pure maple syrup
- 1–2 teaspoons milk or cream, as needed
- Optional garnish: 2 tablespoons finely chopped pecans for sprinkling
- Nonstick spray or butter for pan
Instructions:
- Brown the butter: In a light-colored saucepan, cook butter over medium heat until golden with toasty milk solids and a nutty aroma, 5–7 minutes. Cool 10 minutes until slightly thickened but pourable.
- Heat oven to 325°F. Grease a 9-inch metal cake pan. Line bottom with a round of parchment.
- In a bowl, whisk browned butter, powdered sugar, granulated sugar, vanilla, and salt until creamy. Stir in flour and cornstarch until a soft dough forms. Fold in pecans.
- Press dough evenly into the pan. Score 16 wedges with a knife tip and prick evenly with a fork for neat edges.
- Bake 28–35 minutes until set and lightly golden at the edges. The center should look dry, not shiny.
- Cool 10 minutes in pan, then re-cut along scores. Cool completely in pan.
- Glaze: Whisk powdered sugar with maple syrup and 1–2 teaspoons milk to a thick drizzle. Drizzle over wedges and sprinkle with chopped pecans, if using. Let set 30 minutes.
- Lift out, break into wedges along cuts, and pack in a round cookie tin with parchment between layers.
Serve wedges on a simple white cake stand for contrast. For a cozy touch, scatter a few pecan crumbs around the base. Variations: Add 1/4 teaspoon almond extract with vanilla; or fold in 1/3 cup mini chocolate chips with the pecans for a kid magnet. Pro Plating Tip: Angle-stack three wedges slightly overlapped, then zigzag a final thread of maple glaze just before photos so it catches the light.
Ready for a no-crumb, eye-catching bar that ships like a champ? Up next: a cranberry-pistachio stunner with white chocolate gloss.
2. Cranberry Pistachio White Chocolate Biscotti With Ruby Studs And A Shiny Dip
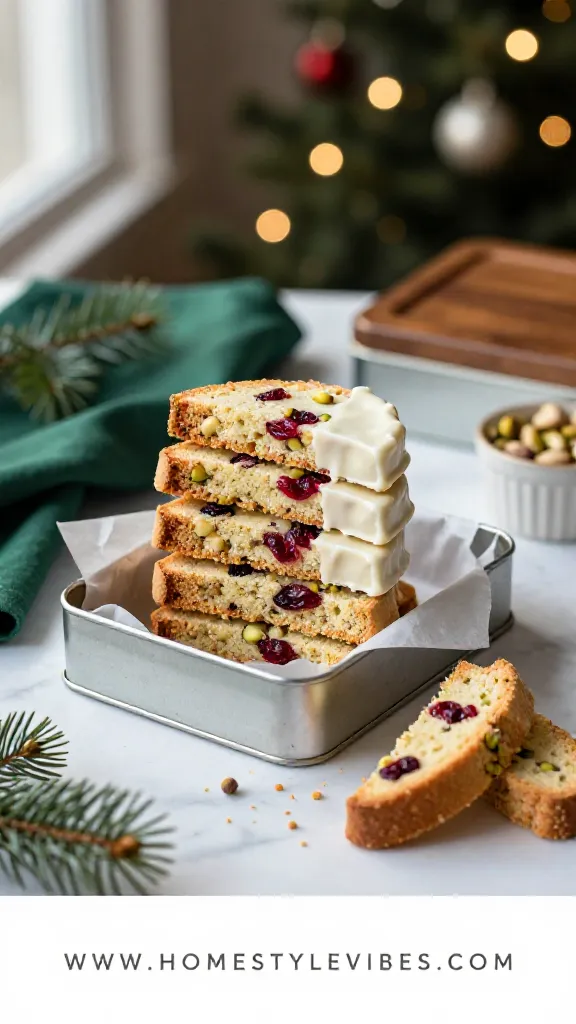
Biscotti own the travel lane. Twice-baked means crisp, sturdy edges that don’t mind the bumps to your cookie exchange. This version mixes jewel-like dried cranberries and buttery pistachios, then gets a clean white chocolate dip that sets hard for a glossy, giftable finish.
I brought a batch of these to my neighbor’s swap last year and watched people barter extra fudge squares for “one more biscotti.” They stack neatly in a rectangular hinged tin or a tall Weck jar with parchment slips, and they stay crunchy for two weeks. Dunkable? Absolutely. But they don’t require the coffee mug to impress.
Want a dairy-free path? Use dairy-free white baking chips and swap butter for neutral oil. Gluten-free works with a 1:1 flour blend plus an extra egg yolk for structure. Feeling festive: add 1 teaspoon orange zest and a whisper of cardamom.
Prep Time: 25 minutes
Cook Time: 50 minutes
Total Time: 1 hour 15 minutes
Servings: 24 biscotti
Best For: Long-distance gifting, cookie exchanges that favor crunch, and coffee-lovers who appreciate a dunkable, not-too-sweet bite.
Ingredients:
- 2 cups all-purpose flour
- 3/4 cup granulated sugar
- 1 1/2 teaspoons baking powder
- 1/2 teaspoon fine sea salt
- 3 large eggs
- 4 tablespoons unsalted butter, melted and cooled
- 1 teaspoon vanilla extract
- 1/2 teaspoon almond extract
- 3/4 cup shelled pistachios, roughly chopped
- 3/4 cup dried cranberries
- 8 ounces white chocolate, chopped
- 1 teaspoon refined coconut oil (for melting chocolate)
- Optional garnish: crushed pistachios and dried cranberry dust (pulse in a mini processor)
- Parchment paper
Instructions:
- Heat oven to 350°F. Line a large rimmed baking sheet with parchment.
- Whisk flour, sugar, baking powder, and salt. In another bowl, whisk eggs, melted butter, vanilla, and almond extract.
- Stir wet into dry to form a thick, sticky dough. Fold in pistachios and cranberries.
- Divide dough into two logs (about 12×2 inches each). Wet hands to shape smoothly. Place on prepared sheet, leaving room between.
- Bake 25–28 minutes until tops look dry and lightly golden with hairline cracks. Cool 10 minutes on the pan.
- Reduce oven to 300°F. Transfer logs to a board and slice on the diagonal into 3/4-inch slices using a sharp serrated knife with a gentle sawing motion.
- Return slices cut-side down to the baking sheet. Bake 10 minutes, flip, bake 8–10 minutes more until firm and lightly golden at edges. Cool completely.
- Melt white chocolate with coconut oil in a microwave at 50% power in 20–30 second bursts, stirring until smooth and glossy. Dip or drizzle cooled biscotti. Sprinkle with garnish. Set on parchment until firm.
- Pack in a rectangular metal tin with parchment dividers, or stand upright in a tall jar.
For a dramatic cookie exchange platter, line a long rectangular platter and arrange biscotti in tight overlapping rows so the white chocolate edges alternate left-right. Pro Plating Tip: Drag the dipped edge once across the bowl’s lip for a crisp line—no drips on the platter.
Cooking doesn’t have to be a performance. If you nail even one of these Christmas cookie exchange recipes this week, that’s a solid win. The tins, the bows, the perfect drizzle—fun extras, not requirements.
3. Chewy Ginger Molasses Buttons With Sparkling Sugar Crust And Crackled Tops
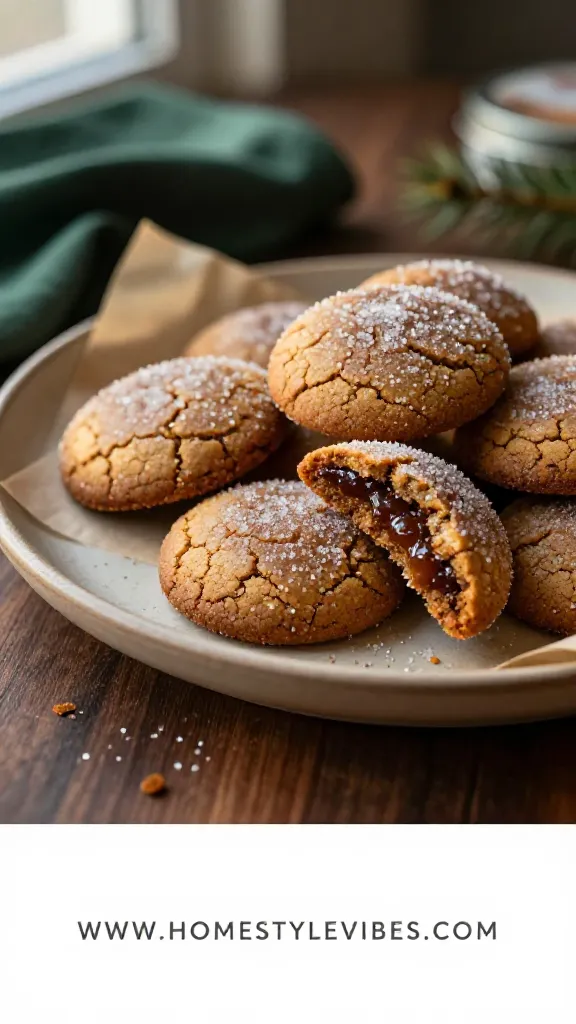
Nothing says Christmas like a chewy ginger cookie that smells like cinnamon-scented wrapping paper. These little “buttons” bake small and sturdy, with a crisp sugar shell that keeps them from sticking in transit. They’re deeply spiced, a touch peppery, and stay chewy for days—ideal for exchanges where everyone starts snacking immediately.
Here’s why they work: a mix of brown sugar and molasses keeps moisture locked in, while chilling the dough prevents spread so you get that prized crackle. You roll each ball in coarse sparkling sugar for the signature crunch and shimmer. They travel in a shallow enamel baking pan with a snap-on lid—no smush, no fuss.
When I tested these, I underbaked the first pan and they sank into soft domes. The next round got two extra minutes, and boom—perfect fissures and that toffee-chewy center we dream about. Learn from my impatience.
Prep Time: 20 minutes
Chill Time: 1 hour
Cook Time: 10–12 minutes
Total Time: 1 hour 35 minutes
Servings: 42 small cookies
Best For: Exchanges where scent and texture win hearts; great for kids and spice-lovers alike.
Ingredients:
- 2 1/4 cups all-purpose flour
- 2 teaspoons ground ginger
- 1 teaspoon cinnamon
- 1/4 teaspoon cloves
- 1/4 teaspoon nutmeg
- 1 teaspoon baking soda
- 1/2 teaspoon fine sea salt
- 3/4 cup (1 1/2 sticks) unsalted butter, softened
- 1 cup packed dark brown sugar
- 1/4 cup unsulfured molasses
- 1 large egg
- 1 teaspoon vanilla extract
- 1/2 cup coarse sparkling sugar (for rolling)
Instructions:
- Whisk flour, ginger, cinnamon, cloves, nutmeg, baking soda, and salt.
- Cream butter and brown sugar until fluffy, 2–3 minutes. Beat in molasses, egg, and vanilla until smooth.
- Stir dry ingredients into wet until a soft dough forms. Cover and chill 1 hour.
- Heat oven to 350°F. Line two baking sheets with parchment.
- Roll 1-tablespoon portions into balls, then roll in sparkling sugar. Place 2 inches apart on sheets.
- Bake 10–12 minutes until tops are crackled and edges look set; centers should puff slightly and just lose their shine.
- Cool on sheet 5 minutes, then transfer to a rack. Pack in a shallow enamel lidded pan with parchment layers.
Variation ideas: Add 1/4 teaspoon black pepper for a snappy finish, or replace 1/4 cup flour with 1/4 cup finely chopped crystallized ginger for zing. For gluten-free, sub 1:1 blend and rest the scooped dough 10 minutes before baking to reduce spread. Pro Plating Tip: Mound cookies in a low black slate tray so the sugar crystals sparkle; dust the tray lightly with extra coarse sugar for a frosty look.
Craving chocolate? The next recipe gives you fudgy brownie energy—without the brittle corners or frosting smears in the car seat.
4. Triple Chocolate Peppermint Crinkle Cookies With Powdered Snow And Shiny Cracks
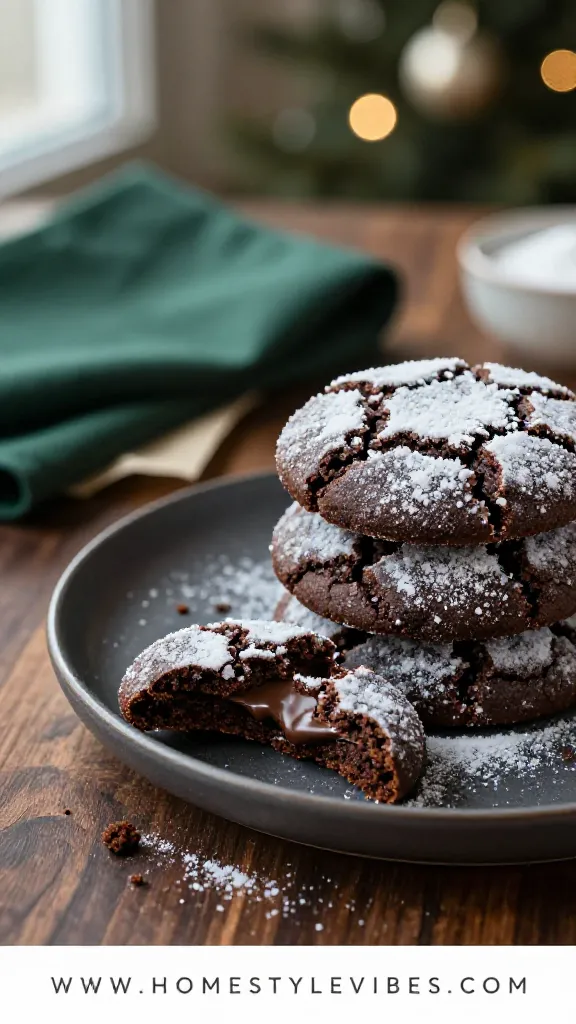
Chocolate crinkles look like they spent a week at the North Pole, and these bring an unmistakable peppermint finish that smells like a candy shop. Think brownie center, crisp sugared shell, and dramatic black-and-white contrast that steals the platter. No frosting required, so nothing smears during travel.
We use cocoa plus melted chocolate for depth, then double-coat in granulated and powdered sugar to guarantee that crackled “snow.” Peppermint extract goes a long way—measure carefully for a cool finish, not toothpaste vibes. These pack beautifully in a square tin lined with parchment and a single sheet of bubble wrap under the lid if you’re mailing.
Kid-friendly swap: skip the peppermint and add orange zest. Dairy-free: use oil instead of butter and dairy-free chips. If you want mint-chocolate chunks, fold in crushed candy cane pieces—but only 1/4 cup so they don’t melt into candy lava.
Prep Time: 20 minutes
Chill Time: 45 minutes
Cook Time: 10–11 minutes
Total Time: 1 hour 20 minutes
Servings: 30 cookies
Best For: Chocolate fans, dramatic cookie trays, and last-minute bakers who want big visual payoff.
Ingredients:
- 1 cup all-purpose flour
- 1/2 cup natural cocoa powder
- 1 teaspoon baking powder
- 1/2 teaspoon fine sea salt
- 4 tablespoons unsalted butter, melted
- 1/4 cup neutral oil
- 1 cup granulated sugar
- 2 large eggs
- 1 teaspoon vanilla extract
- 1/2 teaspoon peppermint extract
- 4 ounces semisweet chocolate, melted and cooled
- 1/2 cup mini chocolate chips
- 1/3 cup granulated sugar (for first roll)
- 3/4 cup powdered sugar (for second roll)
Instructions:
- Whisk flour, cocoa, baking powder, and salt.
- In a bowl, whisk melted butter, oil, and sugar until sandy and combined. Whisk in eggs one at a time, then vanilla and peppermint. Stir in melted chocolate.
- Fold in dry ingredients and mini chips. Chill dough 45 minutes to firm.
- Heat oven to 350°F. Line two baking sheets with parchment.
- Scoop 1 1/2-tablespoon balls. Roll in granulated sugar, then generously in powdered sugar until thickly coated.
- Bake 10–11 minutes until puffed with deep cracks; edges set but centers remain soft and slightly glossy between cracks.
- Cool on sheet 5 minutes, then transfer to a rack. Pack in a square cookie tin with parchment layers.
Serving idea: Arrange on a red ceramic plate for color pop. Add a tiny sprinkle of crushed peppermint in the center of the plate, not on the cookies, to avoid stickiness. Pro Plating Tip: Dust the plate lightly with powdered sugar using a fine sieve just before serving—snowy backdrop, crisp cookie edges.
Not every batch needs chocolate. Up next is a buttery, jammy classic that ships like a dream and tastes like a warm hug with a citrus ribbon.
5. Almond Thumbprint Cookies With Cranberry-Orange Jam Centers And Neat Rings
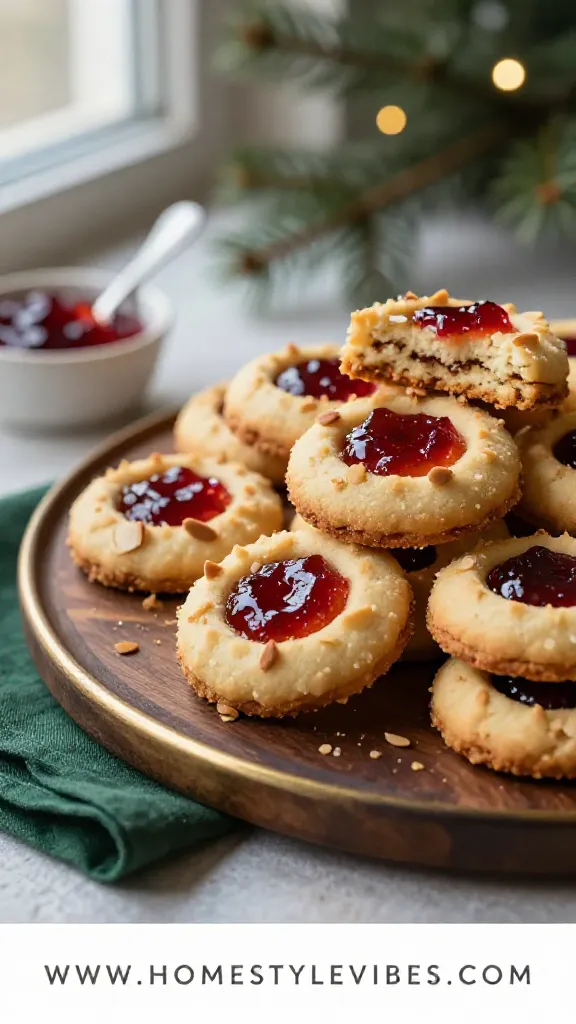
Thumbprints are the sleeper hit of every Christmas cookie exchange. They look delicate, but with the right dough, they’re sturdy and stackable. This version leans into almond richness with a bright cranberry-orange jam center that bakes just enough to set and travel without smearing.
Here’s why this works: a higher fat-to-flour ratio keeps the cookie tender, while a short chill prevents spread so your “wells” stay wells. A light roll in finely chopped almonds adds crunch and a festive ring. I once packed these in a vintage loaf pan wrapped in parchment and twine; they arrived looking like a bakery gift, and my friend asked if I’d switched careers.
Make the jam in 10 minutes or use store-bought cranberry preserves. Dairy-free? Use vegan butter sticks. Nut-free? Skip the almond coating and add 1/2 teaspoon vanilla plus a pinch of cardamom to the dough instead.
Prep Time: 25 minutes (plus jam, if making)
Chill Time: 30 minutes
Cook Time: 12–14 minutes
Total Time: 1 hour 15 minutes
Servings: 32 cookies
Best For: Pretty platters, gifting in loaf pans or rectangle boxes, and anyone who loves a not-too-sweet fruit center.
Ingredients:
- 2 1/4 cups all-purpose flour
- 1/2 teaspoon baking powder
- 1/2 teaspoon fine sea salt
- 3/4 cup (1 1/2 sticks) unsalted butter, softened
- 3/4 cup granulated sugar
- 1 large egg
- 1 large egg yolk
- 1 teaspoon almond extract
- 1/2 teaspoon vanilla extract
- 3/4 cup very finely chopped almonds (for rolling)
- 3/4 cup cranberry-orange jam (see quick jam below or store-bought)
- For quick jam: 1 cup fresh or frozen cranberries, 1/3 cup sugar, 1 tablespoon orange zest, 2 tablespoons orange juice, pinch salt
Instructions:
- Optional jam: Simmer cranberries, sugar, zest, juice, and salt over medium heat, 6–8 minutes, until berries pop and mixture thickens and glossy trails form when you drag a spoon. Cool to room temp.
- Whisk flour, baking powder, and salt.
- Cream butter and sugar until pale and fluffy, 2–3 minutes. Beat in egg, yolk, almond extract, and vanilla until smooth.
- Mix in dry ingredients just until a soft dough forms. Chill 30 minutes.
- Heat oven to 350°F. Line two baking sheets with parchment. Place chopped almonds in a shallow bowl.
- Roll 1-tablespoon portions into balls, then roll in almonds to coat. Place 2 inches apart. Use a 1/2-teaspoon measure or your knuckle to press a deep well in each.
- Spoon in 1/2 teaspoon jam, slightly heaping; don’t overflow.
- Bake 12–14 minutes until edges turn light gold and nuts toast. The jam should bubble at the edges and look set.
- Cool on sheet 5 minutes, then transfer to a rack. Pack in a metal loaf pan lined with parchment, layering with more parchment.
Serve on a pale wood board so the crimson centers pop. For sparkle, brush a whisper of warmed jam on a few centers right before the party. Variations: Swap in apricot preserves and add 1/4 teaspoon cardamom to the dough; or use raspberry jam and roll in finely chopped pistachios. Pro Plating Tip: Arrange in concentric circles on a round board with a single orange twist in the center for color echo.
Here’s a little perspective: your cookie exchange friends want something delicious and shareable, not a pastry school

About the Author

Krisztina P.Rendes, Founder of Home Style Vibes
Founder of Home Style Vibes
Krisztina Puskásné Rendes created Home Style Vibes as a cozy-modern lifestyle space where homemaking meets inspiration. Her goal is to help women create beautiful, organized, and peaceful homes they truly love — without overwhelm. You’ll find here heart-driven content on home decor, cleaning tips, easy family recipes, organization and decluttering, DIY home projects, plants, and seasonal ideas — all designed to bring more calm, comfort, and style into everyday life.