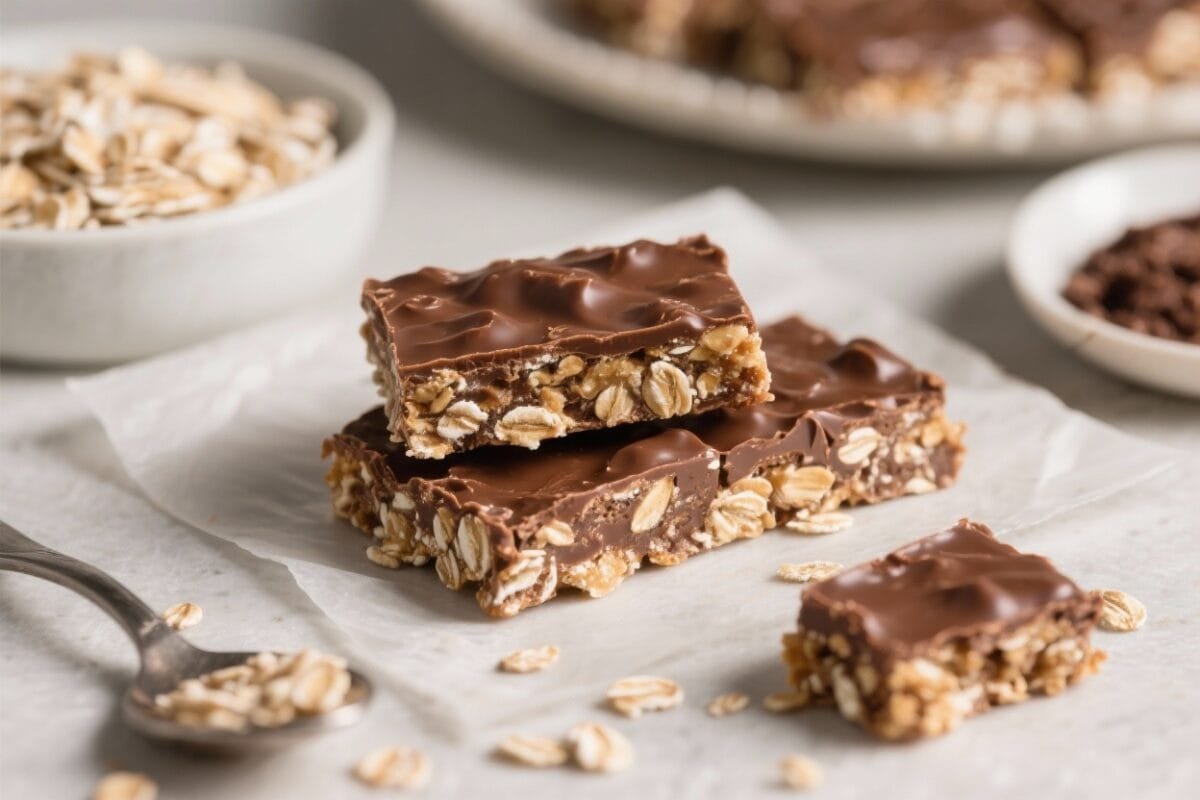
No-Bake Chocolate Oat Bars (5 Ingredients) – Easy, Chewy, and Satisfying
These no-bake chocolate oat bars are the kind of treat you can whip up in minutes and feel good about eating. They’re chewy, chocolatey, and just sweet enough, with a simple ingredient list you probably already have at home. No oven, no fuss, and no waiting around for complicated steps.
Whether you need a quick snack, a lunchbox treat, or a late-night dessert, these bars deliver every time. You’ll make them once and wonder how you ever lived without them.
What Makes This Recipe So Good
- Only 5 ingredients: Simple pantry staples come together fast with no extra shopping.
- No baking required: Everything sets in the fridge, so there’s no worry about timing or overcooking.
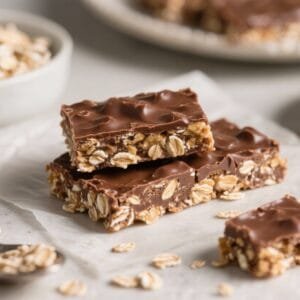
- Great texture: Chewy oats with a smooth, fudgy chocolate-peanut butter layer on top.
- Customizable: Easy to make gluten-free, dairy-free, or nut-free with quick swaps.
- Meal-prep friendly: Keeps well in the fridge or freezer for grab-and-go snacks.
Shopping List
- Rolled oats (old-fashioned oats work best; use certified gluten-free if needed)
- Peanut butter (creamy; or use almond butter, cashew butter, or sunflower seed butter)
- Honey or maple syrup (for sweetness and binding)
- Coconut oil (helps the bars set)
- Chocolate chips (semi-sweet or dark; dairy-free if needed)
Step-by-Step Instructions
- Prep your pan: Line an 8×8-inch square pan with parchment, leaving overhang for easy lifting. Lightly grease the parchment so the bars release cleanly.
- Warm the base: In a medium saucepan over low heat, add 1/2 cup peanut butter, 1/3 cup honey or maple syrup, and 2 tablespoons coconut oil.
Stir until smooth and just warm. Don’t let it simmer.
- Stir in the oats: Remove from heat and fold in 2 1/2 cups rolled oats until fully coated. The mixture should look thick and sticky.
- Press the bottom layer: Transfer about 2/3 of the oat mixture to the pan.
Press firmly into an even layer with a spatula or the bottom of a measuring cup. Pack it tight so the bars hold together.
- Make the chocolate topping: In the same warm saucepan (wipe if needed), melt 1 cup chocolate chips with 1 tablespoon coconut oil over low heat, stirring until glossy. Take off the heat and stir in 2 tablespoons peanut butter for extra creaminess.
- Assemble: Pour the chocolate over the oat base and smooth it out.
Crumble the remaining oat mixture over the top and gently press to set it into the chocolate. This gives a nice crumbly finish and extra texture.
- Chill: Refrigerate for 1–2 hours, or until the chocolate is firm. If you’re in a hurry, freeze for 30–40 minutes.
- Slice and serve: Lift the slab out by the parchment.
Use a sharp knife to cut into bars or squares. For the cleanest slices, warm the knife under hot water, wipe dry, and cut.
Keeping It Fresh
- Fridge: Store in an airtight container for up to 1 week. Place parchment between layers to prevent sticking.
- Freezer: Freeze for up to 2 months.
Wrap individual bars for easy single-serve snacks. Thaw in the fridge or at room temperature for 10–15 minutes.
- Best texture tip: If bars feel too firm straight from the fridge, let them sit at room temp for 5 minutes before eating.
Health Benefits
- Whole grains: Rolled oats offer fiber that supports digestion, steady energy, and fullness.
- Healthy fats: Peanut butter and coconut oil provide satisfying fats that help keep hunger at bay.
- Lower refined sugar option: Using maple syrup or honey keeps sweetness simple and minimal.
- Customizable nutrition: Add chia or flax seeds for omega-3s, or choose dark chocolate for antioxidants.
What Not to Do
- Don’t skip the parchment: These bars are sticky; parchment makes removal a breeze.
- Don’t overheat the chocolate: High heat can seize chocolate. Keep it low and stir constantly.
- Don’t use quick oats: They make the bars dense and pasty.
Rolled oats give better texture.
- Don’t cut too soon: If the chocolate isn’t set, you’ll end up with a messy crumble. Chill first.
- Don’t overload with add-ins: Too many extras can keep the bars from holding together.
Recipe Variations
- Nut-free: Swap peanut butter for sunflower seed butter and use allergy-safe chocolate.
- Gluten-free: Use certified gluten-free rolled oats.
- Dairy-free: Choose dairy-free chocolate chips and stick with coconut oil.
- Extra crunch: Stir 1/4 cup chopped roasted nuts or toasted coconut into the oat mixture.
- Protein boost: Add 1–2 tablespoons of your favorite protein powder to the oat mixture. If it gets dry, add a splash more sweetener or a teaspoon of coconut oil.
- Salted chocolate: Sprinkle flaky sea salt over the chocolate layer before chilling.
- Mocha twist: Stir 1 teaspoon instant espresso into the melted chocolate for a coffee kick.
FAQ
Can I use steel-cut oats?
Steel-cut oats won’t work here.
They’re too hard and won’t soften without cooking. Stick to rolled oats for the right texture.
What’s the best substitute for coconut oil?
Use butter or vegan butter in equal amounts. The bars need some fat that solidifies when chilled to help them set.
Can I reduce the sweetener?
Yes.
You can cut the honey or maple syrup to 1/4 cup, but add 1–2 teaspoons more coconut oil to keep the mixture cohesive.
How do I prevent the chocolate from cracking when slicing?
Let the bars sit at room temperature for 5–10 minutes, then slice with a warm, dry knife. Press down firmly instead of sawing.
Do these hold up in a lunchbox?
They do if kept cool. Pack with an ice pack or freeze the bars the night before; they’ll thaw by lunchtime and stay firm.
Can I make them in a larger pan?
Yes.
For a 9×13-inch pan, multiply the ingredients by 1.5. The bars will be slightly thinner but still set well.
What kind of chocolate is best?
Semi-sweet is classic and kid-friendly. Dark chocolate (60–70%) gives a richer, less sweet flavor.
Use what you enjoy.
Wrapping Up
These No-Bake Chocolate Oat Bars hit that sweet spot between easy and satisfying. With only five ingredients, minimal cleanup, and lots of room to personalize, they’re perfect for busy weekdays or casual get-togethers. Keep a batch chilled, and you’ll always have a homemade treat ready when a craving hits.
Simple, reliable, and delicious—exactly what a go-to recipe should be.
No-Bake Chocolate Oat Bars (5 Ingredients) – Easy, Chewy, and Satisfying
- Rolled oats (old-fashioned oats work best; use certified gluten-free if needed)
- Peanut butter (creamy; or use almond butter, cashew butter, or sunflower seed butter)
- Honey or maple syrup (for sweetness and binding)
- Coconut oil (helps the bars set)
- Chocolate chips (semi-sweet or dark; dairy-free if needed)
- Prep your pan: Line an 8×8-inch square pan with parchment, leaving overhang for easy lifting. Lightly grease the parchment so the bars release cleanly.
- Warm the base: In a medium saucepan over low heat, add 1/2 cup peanut butter, 1/3 cup honey or maple syrup, and 2 tablespoons coconut oil.
Stir until smooth and just warm. Don’t let it simmer.
- Stir in the oats: Remove from heat and fold in 2 1/2 cups rolled oats until fully coated. The mixture should look thick and sticky.
- Press the bottom layer: Transfer about 2/3 of the oat mixture to the pan.
Press firmly into an even layer with a spatula or the bottom of a measuring cup. Pack it tight so the bars hold together.
- Make the chocolate topping: In the same warm saucepan (wipe if needed), melt 1 cup chocolate chips with 1 tablespoon coconut oil over low heat, stirring until glossy. Take off the heat and stir in 2 tablespoons peanut butter for extra creaminess.
- Assemble: Pour the chocolate over the oat base and smooth it out.
Crumble the remaining oat mixture over the top and gently press to set it into the chocolate. This gives a nice crumbly finish and extra texture.
- Chill: Refrigerate for 1–2 hours, or until the chocolate is firm. If you’re in a hurry, freeze for 30–40 minutes.
- Slice and serve: Lift the slab out by the parchment.
Use a sharp knife to cut into bars or squares. For the cleanest slices, warm the knife under hot water, wipe dry, and cut.