DIY Above Ground Pool Landscaping Ideas: 5 Affordable Ways to Make Your Backyard Look Like a Resort
So you bought an above ground pool for “easy summer fun,” and now your backyard kind of looks like a giant blue cereal bowl landed there from space. Same vibe over here. The good news? You can make it look finished, cozy, and honestly… a little resort-y without spending a fortune or turning it into a month-long backyard project.
This post walks you through DIY Above Ground Pool Landscaping ideas that feel affordable and actually doable. Think: clean borders, cute paths, privacy that doesn’t scream “construction zone,” and a few details that make guests go, “Wait, this is an above ground pool?” 🙂
And yes, I’ve done this with my 1-year-old crawling around like a tiny determined Roomba (she’s not talking yet, but she sure has opinions). So I’m not giving you imaginary-perfect advice. I’m giving you real-life advice.
Quick safety note: If you add lighting or outlets near water, use outdoor-rated gear and a GFCI outlet. And if your town gets picky about pool barriers, check local requirements first. I know, boring… but also, important.
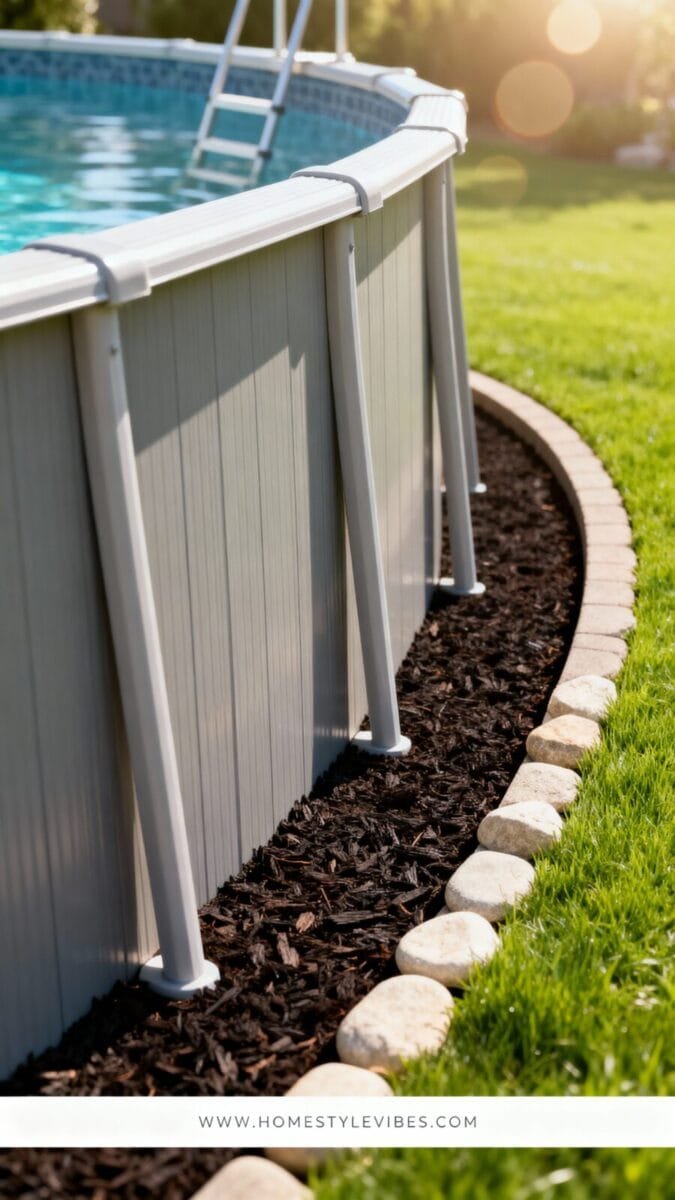
1) Frame the Pool with a Clean Border (the “Oh, this looks intentional” move)
The $40 edge that instantly looks more expensive
Right now your pool probably sits on grass or gravel and your eye goes, “Pool.” That’s it. When you add a border, your eye goes, “Ohhh, a pool area.” Big difference.
Honestly, this is the cheapest makeover that makes the biggest visual change. You don’t need a full deck. You just need a clean line around the pool so the whole yard stops looking unfinished.
- Start with a simple shape: I used a curved border about 2–3 feet wide around the ladder side and the “main view” side. You can do the full circle if you want, but you don’t have to. (I didn’t. I like shortcuts.)
- Lay down weed barrier… but do it right: I once rushed this and left gaps. A week later, weeds popped up like they paid rent. So tuck and overlap the fabric by at least 6 inches, and pin it down every 12–18 inches.
- Add edging to lock the look in: Plastic no-dig edging works, metal edging looks sharper, and pavers look the fanciest. IMO, pavers feel the most “resort,” but plastic wins if you want fast.
- Top it with mulch or small stone: Mulch feels warm and cozy. Stone feels crisp and modern. Either works—just keep it consistent so it doesn’t look like you dumped leftover bags from 2019.
And here’s a weird little thing: when you finish that edge, the pool somehow looks cleaner even before you skim it. Yes, really. Every. Single. Time.
Teaser: Once the border looks neat, you’ll notice the next problem fast… the muddy-foot runway to the ladder.
2) Add a “Resort Path” So Your Feet Stop Living in Mud
The walkway that saves your floors in one weekend
Have you ever stepped out of the pool, took two steps, and suddenly your feet look like you walked through chocolate pudding? That was my life last summer. The pool looked fun, but the yard around it looked… tragic.
A path fixes that. It also makes the whole setup feel like a real outdoor space, not just “pool dropped in grass.”
- Pick your vibe: Large concrete pavers (like 16″ x 16″) feel clean and modern. Round stepping stones feel cottage-y. Gravel paths feel budget-friendly. I went with pavers because my daughter loves to crawl everywhere and gravel + baby hands = nope.
- Give yourself a width that feels comfy: Aim for about 24–30 inches wide so you can walk holding towels, drinks, a float, and your dignity.
- Use leveling sand if you choose pavers: Not a huge job, just a little layer so the stones don’t wobble. The first time I skipped this, I watched my husband step on a paver and it did that cartoon tilt. He just stared at me. I deserved it.
- Border it so it doesn’t spread: Even cheap plastic edging helps keep gravel or mulch in place. Otherwise it slowly creeps like it’s trying to escape.
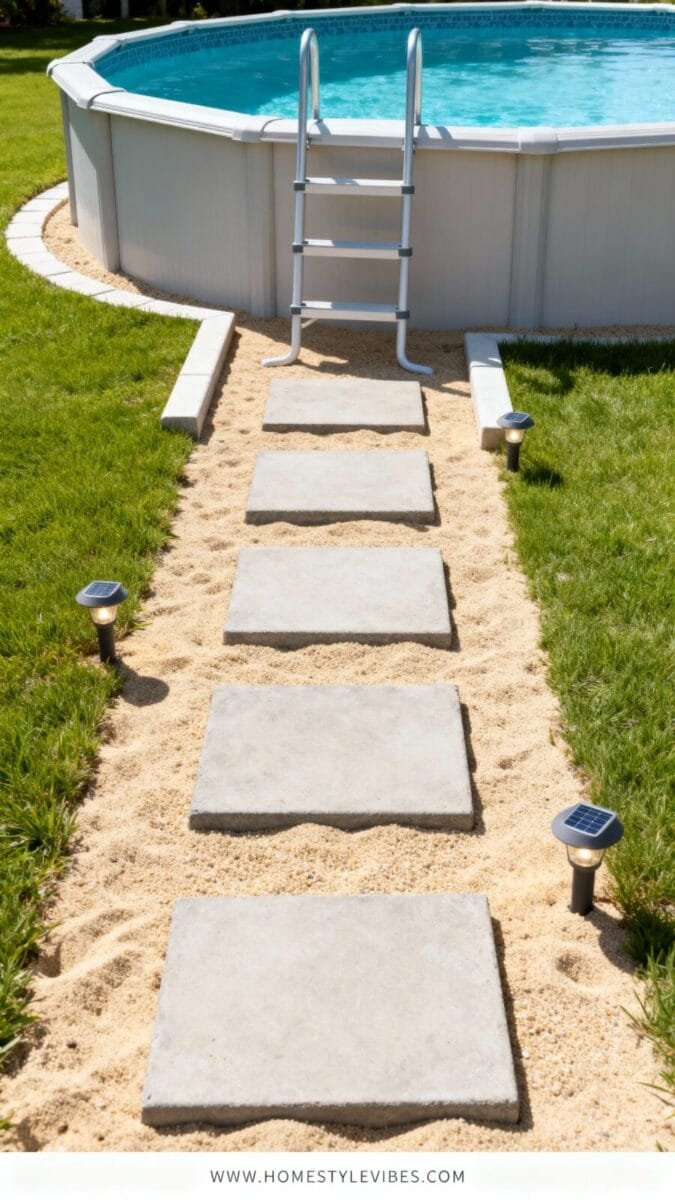
And okay fine—this sounds extra—but add two solar path lights. Two. Not twelve. It’s enough to feel intentional without turning your yard into a tiny airport runway.
Teaser: Once you can walk to the pool without creating a mud documentary, you’ll start craving something else… a little privacy.
3) Get Privacy Without Building a Full Fence
The “hide the pool clutter” move that works shockingly well
If your pool sits in an open yard, you might feel weirdly exposed. Like you can’t relax because your neighbor’s window exists. Been there. Also, pool stuff multiplies. Floats, chemicals, skimmer nets, random cups—where does it all come from?
Privacy doesn’t have to mean a full fence project. You can fake it. And faking it looks great, becuase outdoor spaces love layers.
- Reed/bamboo fencing on the pool frame: This is the quick fix. You zip-tie it around the outside and suddenly the pool looks “styled.” Just make sure it dries out and doesn’t trap moisture.
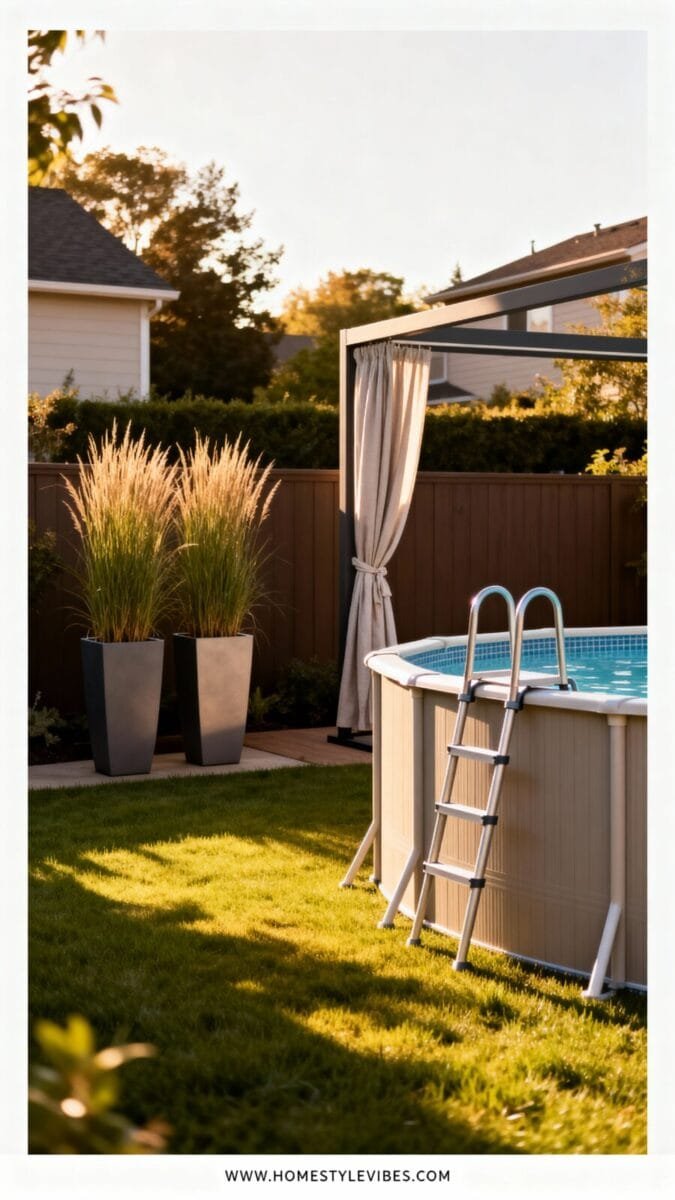
- Tall planters that act like a living screen: Think big pots with ornamental grasses or shrubs. They hide the ladder area and create that tucked-away feel. I like grasses because they sway in the breeze and make everything feel calmer.
- A simple freestanding lattice panel: Add two posts in planters, attach lattice, and let a climbing plant do its thing. Actually… scratch that. Don’t do aggressive bamboo as your “climber.” It can take over your whole yard and then you’ll hate your past self. Ask me how I know (ugh).
Last Friday night, I tried hanging outdoor curtains on a cheap metal frame near the ladder area. My husband looked at me like, “You’re serious?” Yup. The fabric moved in the breeze, the pool lights reflected off it, and suddenly it felt like a little cabana moment.
Also: the smell of sunscreen + chlorine + warm night air? That’s the closest thing to a vacation I’m getting right now, so I’ll take it.
Teaser: Privacy sets the mood… but the real “resort” feeling shows up when you style the hangout zone next.
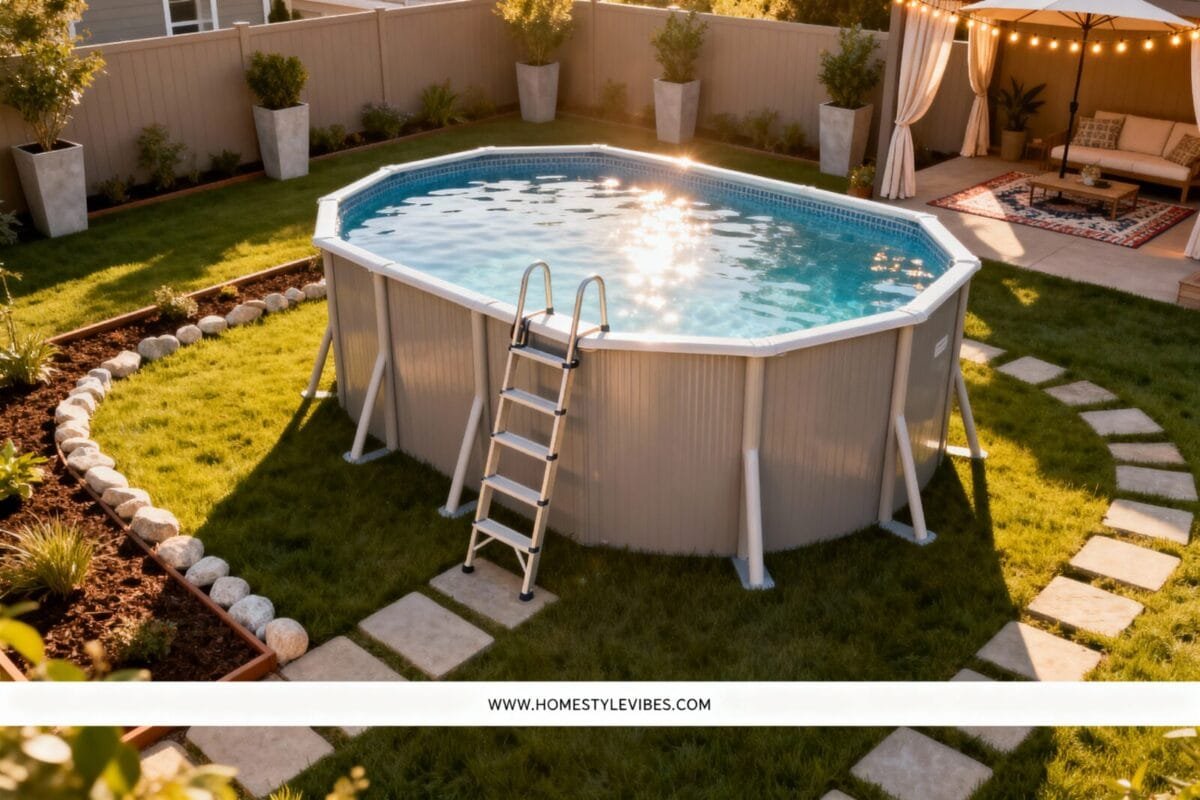
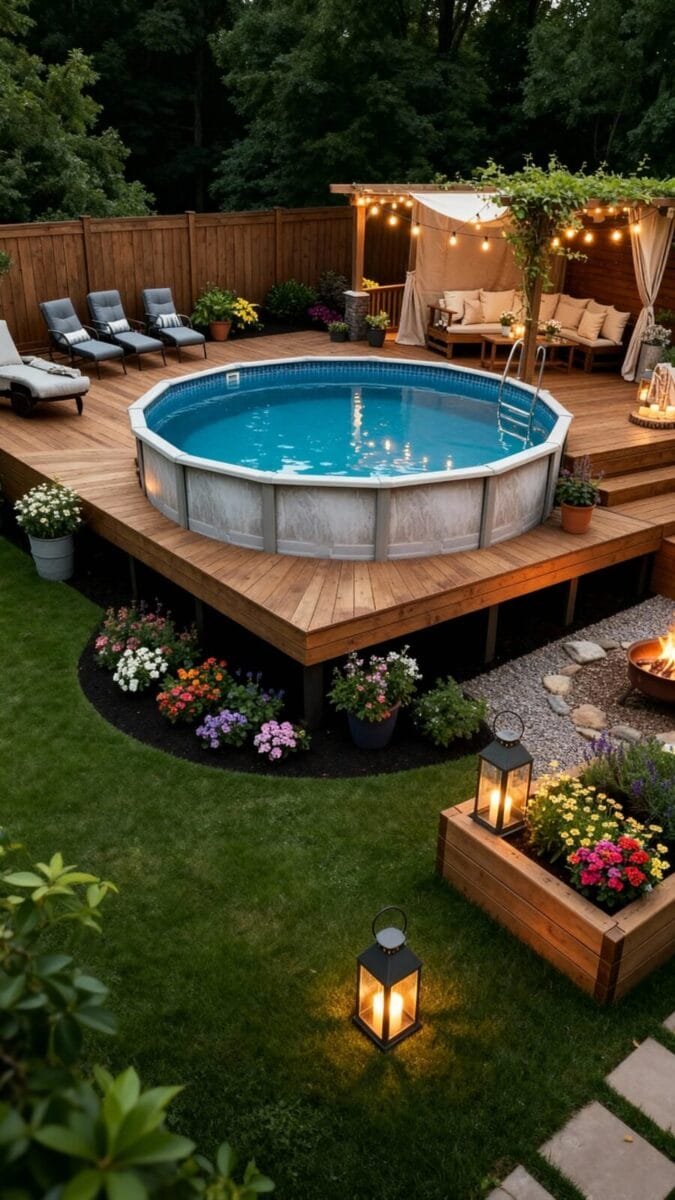
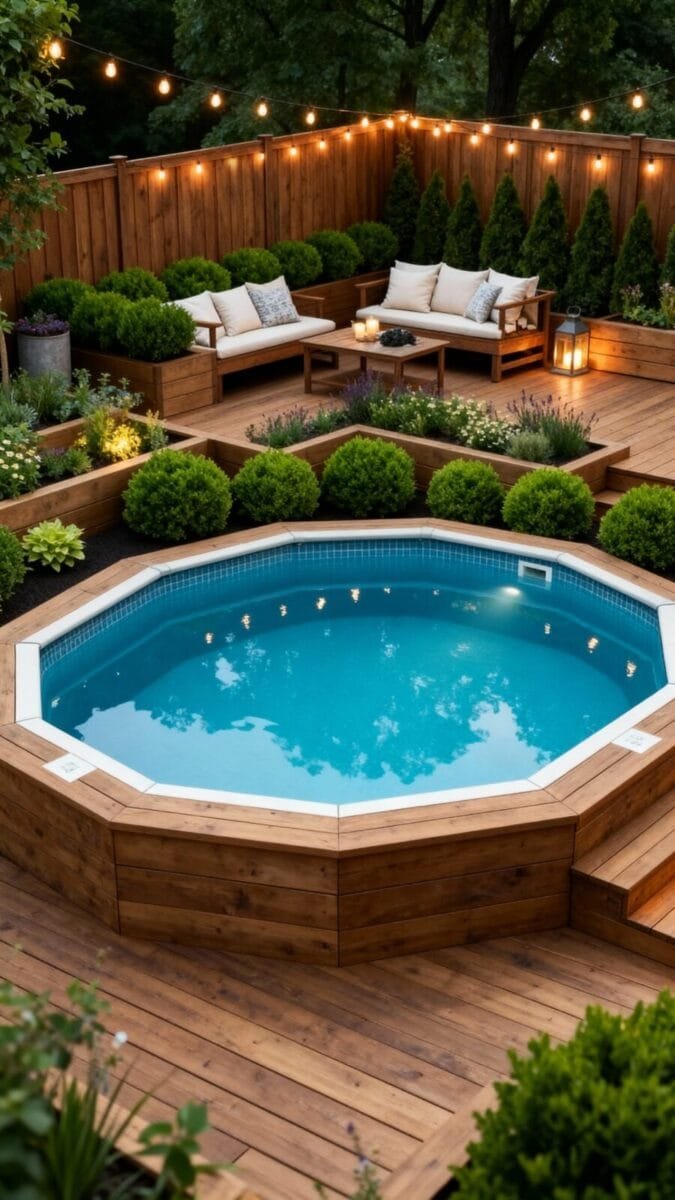
4) Create a Cozy Deck Zone with Lights + a “Cabana Corner”
…and this is where you stop thinking like “pool owner” and start thinking like “backyard lounge person.” You don’t need a full deck, but you do need one spot that says, “Sit here, relax, stay awhile.”
Okay, let’s pause for a sec… because this is the part where people go overboard and buy a million matching items, and then the whole yard looks like a patio clearance aisle. Don’t do that. Pick one corner, keep it simple, and you’ll get that calm resort look without spending alot.
Here’s what worked for us the moment I stopped overthinking and just started placing things where they felt good—like where the sun hits in the afternoon, where you can watch the kids splash, where you can set down a drink without panic—and then I added the lights and the rug and it kind of snowballed in the best way, but the part that matters most is…
…you create a “landing zone.” A place to drop towels, sandals, and the random pool toys that appear out of nowhere. And once you have that, everything looks calmer.
The 15-minute glow-up that makes nights feel magical
If you do only one thing here, do lighting. Not the blinding kind. The soft, warm, “I might be at a boutique hotel” kind. Because… I mean, you’ll see.
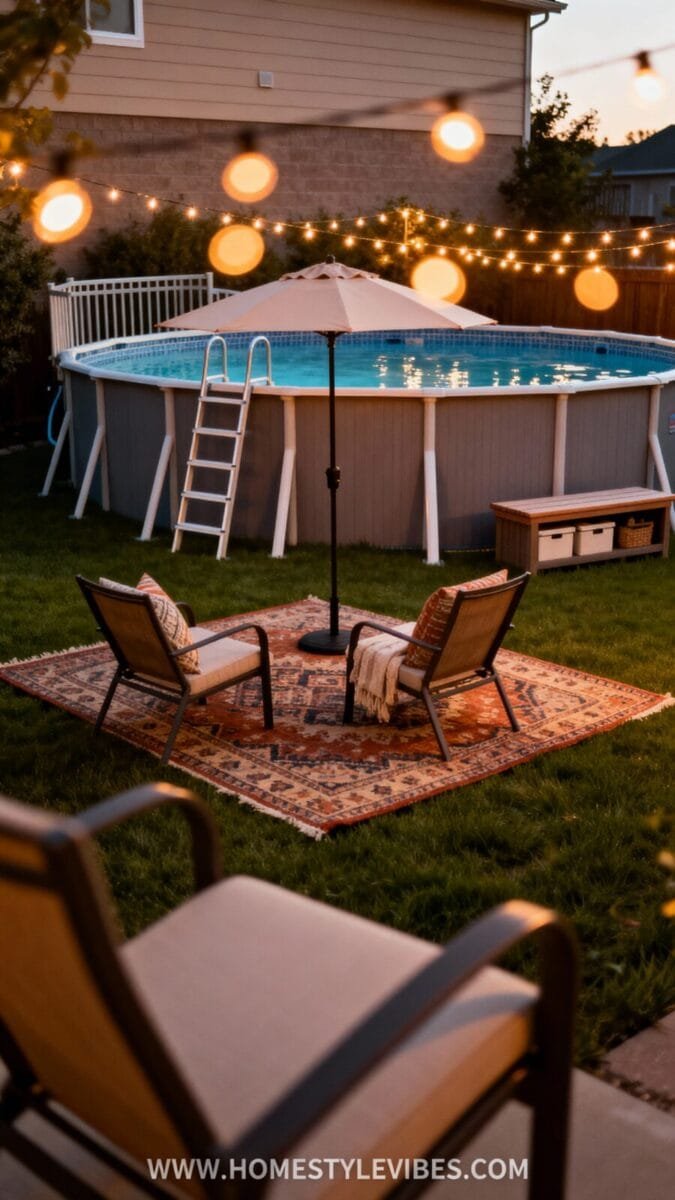
- String lights overhead (or along a rail): I used outdoor string lights and hung them from two shepherd hooks and a fence post. It looked questionable while I installed them. Then the sun set and—wow—suddenly I felt fancy.
- An outdoor rug under the seating: This is the secret to making a pool corner feel like a room. Pick a rug that hides dirt. I once chose a pale one and regretted it after one wet-foot sprint. Definately choose something forgiving.
- A “cabana corner” with one umbrella or canopy: A 9-foot umbrella or a small pop-up canopy creates shade and that resort silhouette. Add one side table and two chairs and you’re done. (Don’t roll your eyes—this looks way more expensive than it is.)
- A storage bench that hides the chaos: You can toss towels, goggles, and pool noodles in there and pretend you live a tidy life. You know what’s funny? The bench also becomes the “dry-off station” and everyone uses it, even if they claim they won’t.
Mini rant, because I can’t help myself: stop buying tiny decor objects that have no job. I mean, really—really. A little lantern, three little signs, a fake plant, a random tray… it turns into clutter. Give yourself one bigger statement item (rug, umbrella, or lights) and keep the rest functional.
Okay, deep breath. Back to it.
Teaser: Once the hangout zone feels cozy, plants become the final “resort” layer—and they don’t have to be high-maintenance divas.
5) Plant Like You Mean It (But Keep It Low Drama)
The plants that survive real life (aka forgetting to water)
I love the look of lush landscaping around a pool. I also live in reality. Reality includes a 1-year-old who tries to taste mulch and a schedule that sometimes forgets plants exist. So I aim for “pretty but tough.”
Also, poolside plants should stay neat. You don’t want constant leaf litter in the water. You don’t want thorns. You don’t want anything that drops berries that stain the patio. Keep it simple and you’ll thank yourself later.
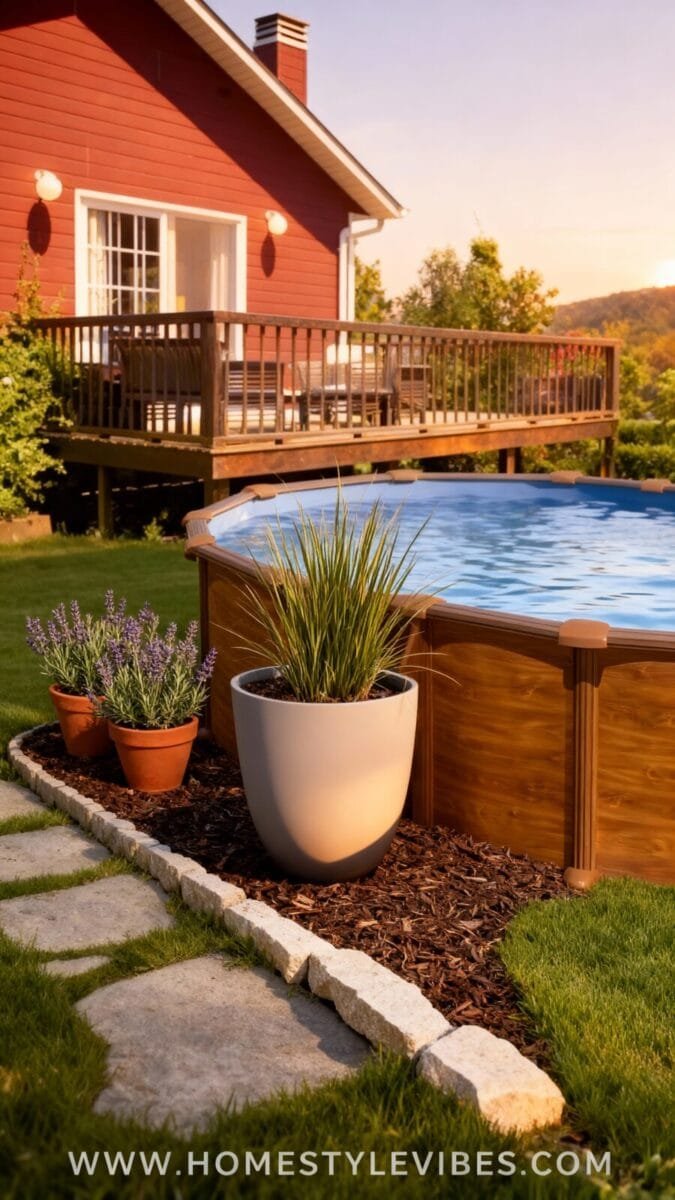
- Ornamental grasses: These look expensive and modern, and they don’t drop messy petals. Plant them in groups of 3 for that designer look. I tried one lonely grass once and it looked… sad. Three looks intentional.
- Lavender or rosemary (if your climate likes it): They smell amazing when you brush past them, and they keep a tidy shape. That scent plus pool air feels like an actual vacation, not even kidding.
- Hostas or ferns for shade: If your pool sits near trees or the house casts shade, go with shade-lovers. They fill space fast and they look lush without acting fussy.
- Low shrubs like boxwood alternatives: Ask your local nursery for something compact in your zone that stays neat. (This is where local advice beats the internet.)
Spacing matters here. Give plants room to grow so you don’t create a tight jungle that traps moisture. I learned that the hard way when I crammed pots too close to the pool wall and everything stayed damp. It looked nice for a week, then it started to smell… off. Like wet towels that never dried. Nope.
And if you want instant “resort,” do a few large pots instead of a full bed. Big planters look upscale, and you can move them if you change your mind. I love flexibility because sometimes I swear I want tropical vibes, and then two weeks later I want clean minimalist vibes. Actually… wait, no, I take that back. I always want cozy. I just like pretending I’m a minimalist.
Teaser: If you’re wondering about gravel vs mulch, decks vs pads, or what to do with a sloped yard, the quick answers are coming up next.
FAQ
What’s the cheapest way to make an above ground pool area look finished?
Add a clean border and a simple path. Seriously. A 2–3 foot mulch or stone border plus stepping stones changes everything visually, and it helps with mud control too.
Should you put gravel around an above ground pool?
Gravel works if you contain it with edging and you choose a comfortable size (pea gravel feels nicer underfoot than sharp rock). But if you have kids who crawl or you hate stepping on tiny rocks, go with mulch, pavers, or a small patio pad instead.
Do you need a deck for an above ground pool to look like a resort?
Nope. A deck looks amazing, but you can get the “resort” vibe with one cozy seating zone, a rug, and soft lighting. The mood matters more than the structure.
What plants work best near pools?
Choose low-litter, low-thorn plants that won’t drop messy fruit. Ornamental grasses, compact shrubs, lavender/rosemary (in the right climates), and shade plants like hostas work well depending on sun and zone.
How do you hide pool equipment and supplies?
Use a storage bench, a small deck box, or a privacy screen near the ladder side. You can also tuck things behind tall planters. I used a bench and it changed my life… and then my daughter tried to climb it, so just place it smartly.
Wrapping up
If your above ground pool looks a little “plopped in the yard” right now, you’re not alone. You don’t need a massive remodel. You need a few intentional details: a clean border, a path that stops mud chaos, a little privacy, one cozy lounge zone, and plants that behave.
And here’s the thing I wish someone told me sooner: don’t do everything at once. I once tried to buy supplies for a whole makeover in one shopping trip and literally couldn’t pay at Aldi. (The tap-to-pay said no, and the receipt smelled like cinnamon from my latte.) I stood there holding outdoor lights like a confused raccoon. So… go piece by piece. Your wallet and your brain will thank you.
Sometimes you’ll adjust as you go. Sometimes you’ll hang lights and realize you hate the placement. Sometimes you’ll buy the wrong rug size and mutter under your breath while folding it back into the bag. That’s normal. And then one night you’ll turn on the lights, the water will shimmer, and your backyard will finally feel like yours.