5 Easy Diy Garden Ideas Using Pallets (Cheap & Creative) – Transform Your Patio
You want a gorgeous garden that feels curated, not chaotic—lush greens, warm wood, soft dappled light. But the pain point? Budget, time, and the “where do I even start?” spiral. These 5 easy DIY garden ideas using pallets fix that fast. We’ll turn humble pallets into sculptural planters, vertical herb walls, café-worthy seating, and even a mini greenhouse—elevating your outdoor space with layered textures, smart lighting, and ridiculously photogenic angles that’ll make your patio look Pinterest-famous.
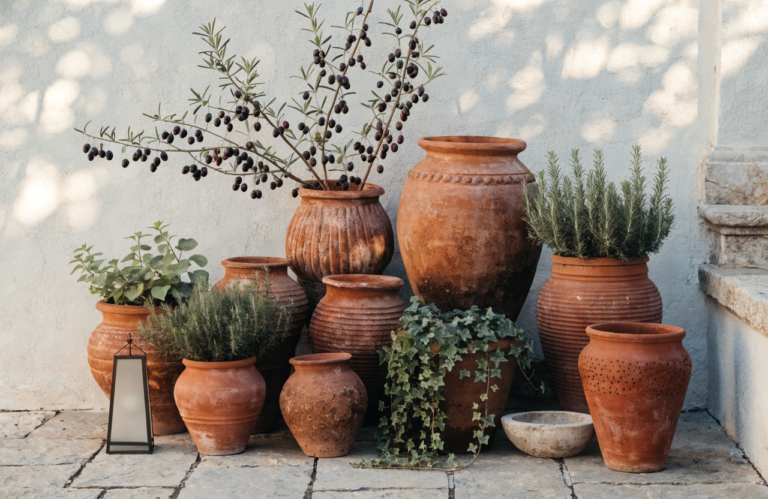
Expect rich wood tones against olive greens, matte black accents, terracotta warmth, and brushed brass touches that read designer without the price tag. These concepts add structure, height, and rhythm to a garden—like a good haircut for your yard. If you love modern Mediterranean meets urban cottagecore, or you’re short on space but big on style, these styles will feel like a breath of fresh, rosemary-scented air.
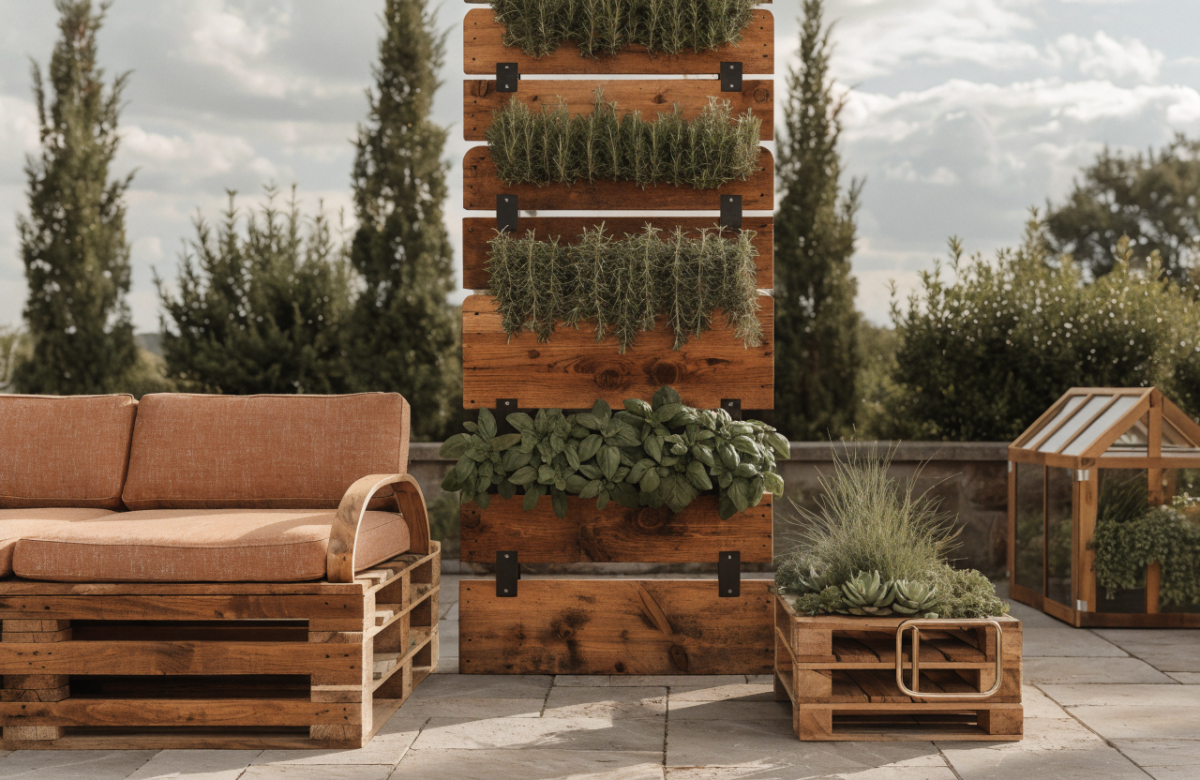
1. Vertical Herb Wall With Hidden Irrigation Glow
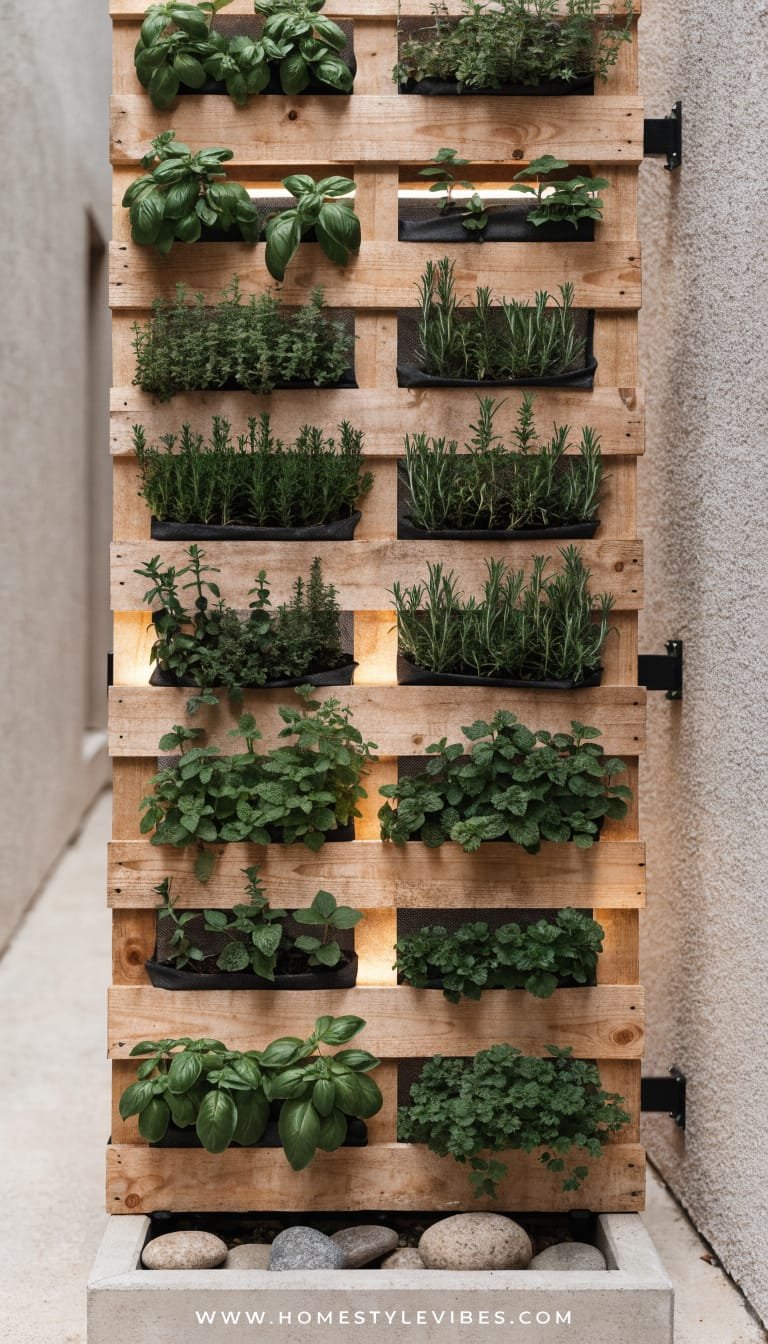
We’ve all been there: you’ve tried herbs in mismatched pots on the windowsill, but they get leggy, dry out, and frankly, look like a plant yard sale. This vertical herb wall turns pallets into a lush, green tapestry that smells incredible and photographs like a boutique café patio. It’s cozy-modern with a tiny greenhouse vibe and tons of texture, perfect for small balconies, narrow patios, or that blank garage wall begging for purpose.
Why it works in real homes: it saves floor space, organizes your plants, and makes watering almost foolproof. The lighting? We add a warm LED strip tucked under a slat so the leaves glow at night—think hygge, but outdoors. Great for renters if you use freestanding supports or lean it and secure with removable fasteners. Family-friendly and low-maintenance once you dial in the watering.
Why It Looks Expensive: crisp lines, uniform spacing, matte black brackets, and one “hero” material (sealed pallet wood) create a cohesive, custom feel. The hidden irrigation looks like a pro installed it, and the warm backlight screams restaurant courtyard. It bridges DIY and designer by controlling proportion and negative space—no messy clutter here.
Materials dominate: warm sealed wood, matte black hardware, copper or black irrigation tubing, terracotta or white herb labels. It photographs beautifully because you get repeating geometry, contrasting greens, depth from staggered shelves, and that sexy glow after sunset.
Variations:
– Budget-friendly: skip irrigation, use recycled plastic bottles as slow-drip feeders.
– Small-space version: one narrow pallet with three troughs.
– Darker version: stain the wood espresso and use brass labels for glam.
– Renter-friendly: mount herb pots to a pallet frame and hang from a stand—no wall drilling.
Key Design Elements:
- Main materials: pallet slats, deck screws, landscape fabric, drip irrigation kit (optional), LED strip
- Color palette: olive, sage, warm honey wood, matte black, soft white
- Lighting strategy: hidden warm LED strip under middle slat; small solar up-lights below
- Furniture silhouettes: slim bistro table nearby, airy metal chairs
- Texture layers: rough-sawn wood, soft herb leaves, matte metal, smooth terracotta
- Accent details (hardware, decor pieces, plants): black L-brackets, copper plant markers, thyme, basil, mint, rosemary
How To Recreate This Look:
- Start with a clean, heat-treated pallet (stamped HT), sand the face, and seal with outdoor polyurethane.
- Add troughs by reattaching slats to form pockets; staple landscape fabric inside to hold soil.
- Layer potting mix with perlite for drainage and plant herbs in repeating rows for rhythm.
- Install a basic drip irrigation line along the top pocket; run emitters to each trough; hide tubing behind slats.
- Style with uniform plant labels, a slim LED strip under a slat, and a micro bistro setup to the side.
Why This Looks Expensive: the symmetry and consistent materials create a tailored façade. The concealed irrigation and lighting read “custom millwork” rather than weekend project. Repeating plant types in clusters avoids the chaotic nursery look.
Common Mistakes To Avoid: overcrowding herbs (give them room), skipping sealing (wood warps), and using mixed pot styles that break the visual rhythm. Don’t mount too high—keep the lowest row at hip height for easy trimming.
Pro Styling Tip: Photograph at golden hour with the LED on; angle slightly from the side to catch leaf texture and layered shadows between slats.
Scroll for something wildly cozy and surprisingly modular—your new outdoor lounge awaits.
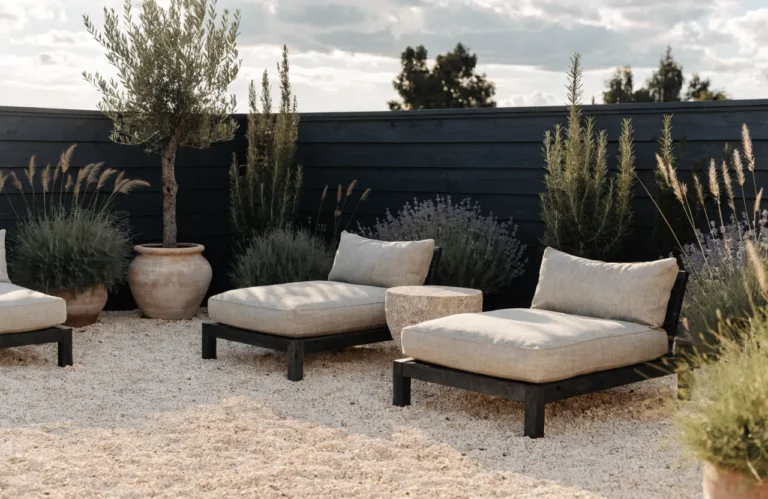
2. Modular Pallet Lounge With Deep Cushions And Planter Arms
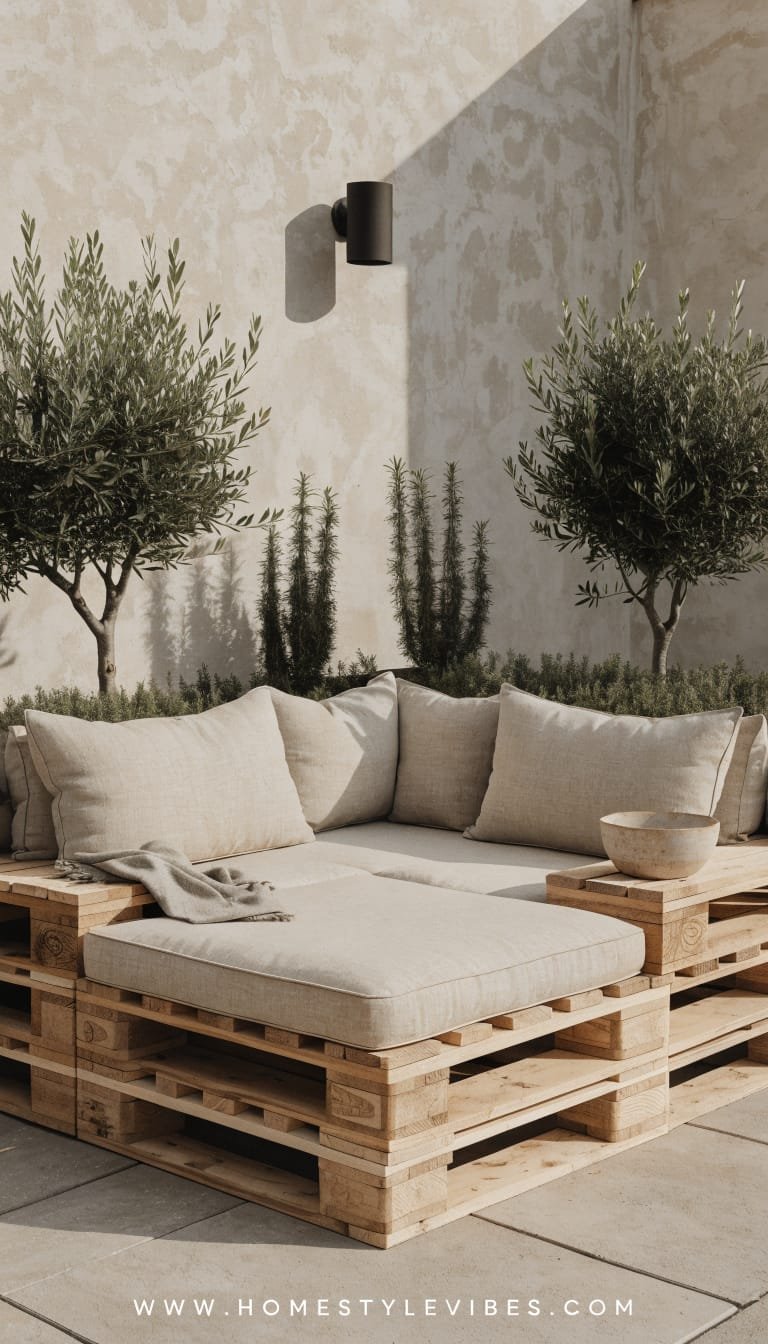
It’s that one corner that always feels off—your patio seating either eats up space or looks flimsy. You’ve tried plastic chairs, but they tip, squeak, and never invite a second glass of wine. Enter the modular pallet lounge: low-slung, deep seats, planter “arms” that double as side tables, and a feeling like you booked a boutique rooftop without the valet fee.
This mood leans modern Mediterranean meets Japandi: calm, tactile, and unapologetically loungey. It works in real homes because the modules shift—host six? Pull them apart. Solo Sunday? Create a daybed. The height keeps sightlines open in small yards, and deep cushions make it family- and nap-friendly. Lighting matters: a few solar lanterns at floor level plus string lights overhead dial up the ambience, while the planters softly frame the seating with movement and scent.
Why It Looks Expensive: intentional proportions and tailored upholstery. The planter arms in the same wood tone make the set look custom, and the low profile—paired with chunky cushions—feels resort-like. It’s the balance of negative space, consistent color story, and integrated greenery that sells it.
Materials dominate: sealed pallet bases, smooth outdoor foam with washable covers, limewash-style cushions in sand or flax, brushed brass or matte black corner brackets. Photographs beautifully because of the strong horizontal lines, cushion volume, and soft plant silhouettes leaning into frame.
Variations:
– Budget-friendly: thrifted cushions with new slipcovers in canvas drop cloth.
– Small-space: build a two-seater with one planter arm as a slim table.
– Darker version: espresso-stained bases + charcoal cushions + olive plants.
– Renter-friendly: add hidden caster wheels to slide modules under a cover when not in use.
Key Design Elements:
- Main materials: pallets, exterior screws, 4-inch outdoor foam, washable cushion covers, planter liners
- Color palette: sand, flax, olive green, charcoal, warm wood
- Lighting strategy: string lights overhead, solar lanterns at ground level, one dimmable table lamp
- Furniture silhouettes: low, boxy bases with generous cushions; squared planter arms
- Texture layers: nubby linen-look fabric, smooth wood, leafy greens, woven tray
- Accent details: striped lumbar pillows, matte black brackets, terracotta or corten steel planters
How To Recreate This Look:
- Start with two sturdy pallets per seat; stack and screw together for height, then sand and seal.
- Add a back by attaching a slanted pallet section; brace with L-brackets for comfort.
- Layer 4-inch foam cut to size; slip on washable covers in a neutral, tightly woven outdoor fabric.
- Install planter arms: build simple box planters from pallet slats with plastic liners; secure to ends.
- Style with a low tray, throw in one striped pillow for pattern, and add weighted lanterns for glow.
Why This Looks Expensive: cohesive cushion color and generous seat depth mimic high-end outdoor retailers. Planter arms integrated into the frame read like bespoke carpentry. Clean lines, zero visual clutter—just intentional forms.
Common Mistakes To Avoid: too-thin cushions (looks cheap and feels worse), untreated wood (splinters), and mismatched wood tones. Keep cushion colors consistent; introduce pattern in small accents only.
Pro Styling Tip: For photos, steam cushions, fluff corners, and slightly angle modules to catch side-light that highlights fabric weave and wood grain.
Keep scrolling—next up is a sculptural moment that turns a dull fence into a living gallery wall.
3. Tiered Pallet Planter Stairs For Small-Space Drama
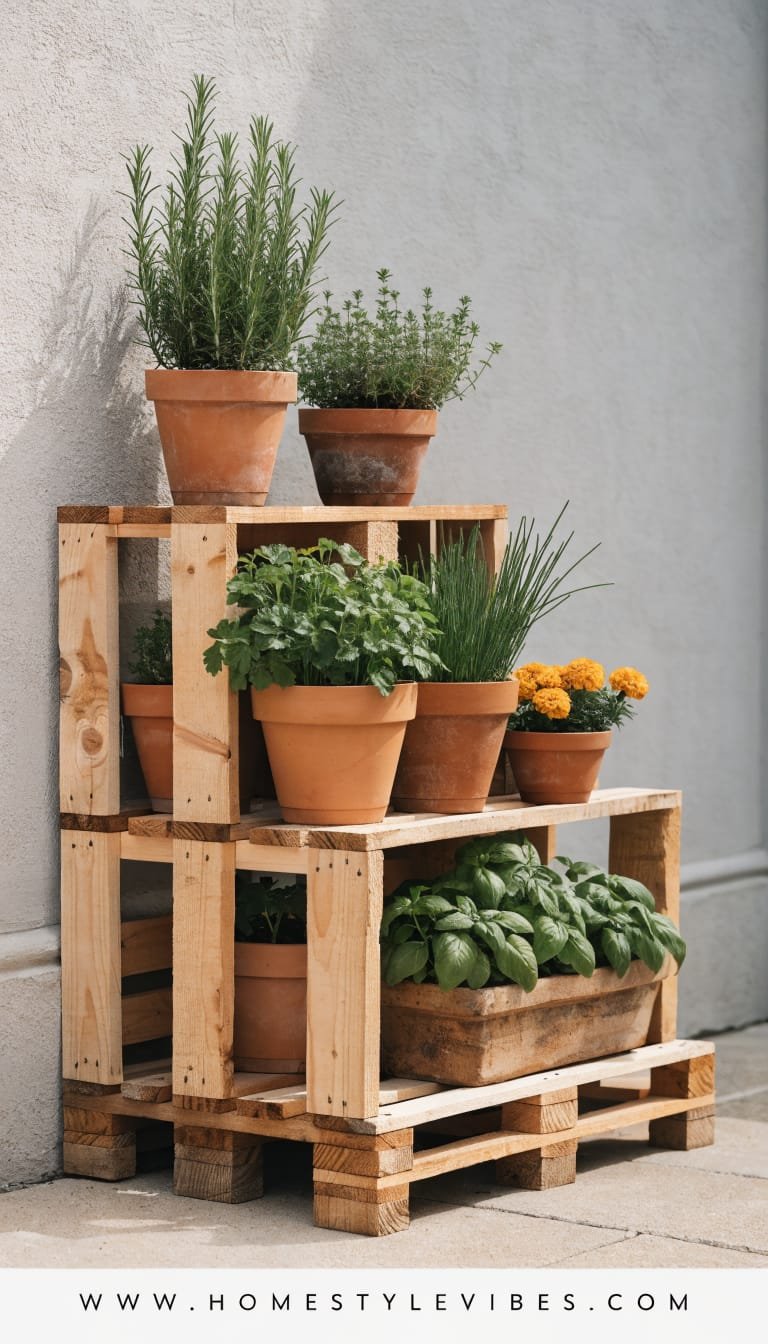
You’ve tried a few pots on the ground, but everything looks flat and, honestly, a little sad. It’s that depth issue—no height, no layers, no visual story. Tiered pallet planter stairs change the game: three cascading levels that turn your corner into an herb amphitheater or a seasonal flower runway. The vibe? Urban cottage garden meets sculptural display—compact, hardworking, instantly charming.
Why it works: you maximize vertical real estate and get that market-garden abundance even on a tiny patio or balcony. It’s kid-friendly (everyone gets a “step” to plant), and the built-in rhythm photographically anchors the shot. Lighting? Place a single solar spotlight to rake across the tiers at an angle—shadows add drama and make foliage textures pop.
Why It Looks Expensive: the geometry. Consistent riser heights, clean edges, and a restrained palette (two to three plant colors per tier) feel curated. Add a slim gravel pad beneath for a gallery moment. The stairs read like a custom planter system, not stacked junk, because we respect proportion and finish.
Materials dominate: sealed pallet slats, landscape fabric, pea gravel base, galvanized corner braces. Photographs beautifully due to repeating steps, different foliage scales (trailing + upright), and negative space on the gravel “stage.”
Variations:
– Budget-friendly: single two-step unit against a wall.
– Small-space: narrow footprint with deeper treads for herbs.
– Darker version: charred Shou Sugi Ban finish for striking contrast with silvery greens.
– Renter-friendly: build as a freestanding unit with felt pads to protect decking.
Key Design Elements:
- Main materials: pallet slats, 2×2 cleats, exterior screws, landscape fabric, gravel
- Color palette: sage, lavender, white blooms, espresso or natural wood
- Lighting strategy: one angled solar spotlight from below; optional fairy lights under the top lip
- Furniture silhouettes: nearby café stool or plant stand to echo the stepped geometry
- Texture layers: rough wood, smooth gravel, soft trailing plants, matte metal
- Accent details: zinc plant markers, a single sculptural watering can displayed like art
How To Recreate This Look:
- Start with a level base; lay a 2–3 inch gravel pad slightly larger than the planter footprint.
- Add a frame from pallet slats and 2×2 cleats; build three equal-height tiers with treads wide enough for pots or soil pockets.
- Layer landscape fabric to line each tier; fill with potting mix or set in uniform pots for tidy maintenance.
- Install corner braces to keep everything square; sand edges; seal or char for durability.
- Style with cascading plants on the top step, upright herbs in the middle, and a color “moment” at the base.
Why This Looks Expensive: a clean gravel perimeter creates a framed vignette and removes the “thrown together” vibe. Repeating plant species per tier adds visual discipline—very designer, very intentional.
Common Mistakes To Avoid: uneven riser heights (reads messy), skipping a level base (causes wobble), and overcrowding with random plants. Stick to a palette—two greens, one accent bloom.
Pro Styling Tip: Shoot from a low angle so the tiers create leading lines; include a sliver of negative space on the gravel to let the composition breathe.
Ready for something wildly practical and cycle-chic? Let’s organize your tools like a Scandinavian shed display—no shed required.
4. Pallet Potting Station With Pegboard-Style Tool Wall
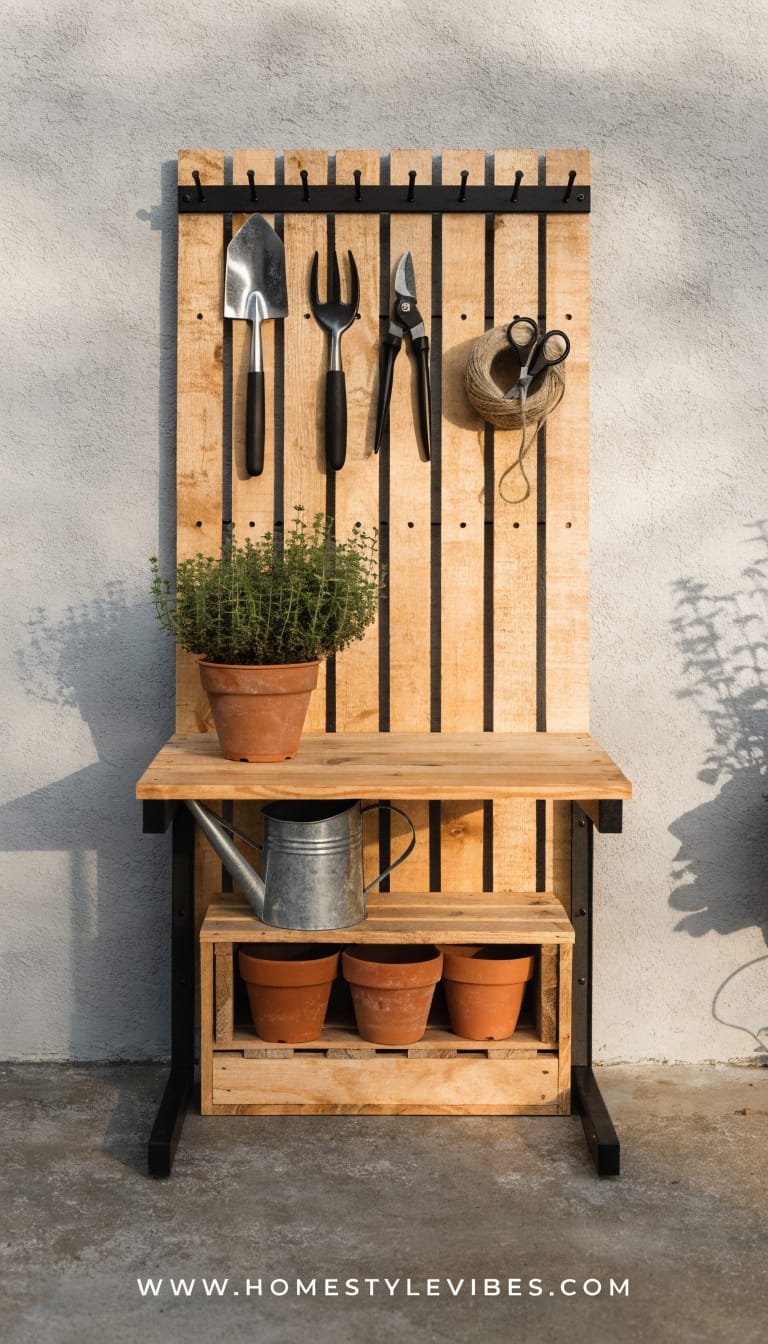
You’ve tried keeping tools in a bin, but somehow the trowel migrates and the pruning shears play hide-and-seek. It’s that clutter cloud that kills your gardening momentum. This pallet potting station corrals everything into a compact, beautiful hub: waist-height worktop, hidden storage shelf, and a pegboard-style tool wall made entirely from pallet slats. The look? Modern farmhouse meets Scandinavian utility—crisp, functional, and unexpectedly chic.
It works in real homes because it’s narrow, sturdy, and insanely useful—perfect along a fence or garage wall. Add a small awning or mount under an eave to keep things dry. Lighting transforms it into a twilight floral lab—install a slim task light under the top shelf for moody, editorial shadows. Resale-wise, it reads as an “outdoor mudroom,” which buyers love.
Why It Looks Expensive: clean grid layout on the tool wall, matte black S-hooks, and a butcher-block-inspired top. The palette stays disciplined, which makes it look like a retail display, not a garage sale. Bonus points for a linen apron hung like decor and a small bouquet staged in a jar—that “designer touches” effect.
Materials dominate: pallet slats, a couple of 2x4s for legs, outdoor poly, matte black hooks. It photographs beautifully because the vertical/horizontal lines create order while tools and terracotta add warm, tactile layers.
Variations:
– Budget-friendly: use a single pallet with fold-down legs.
– Small-space: narrow top, integrated drop-down side shelf.
– Darker version: deep walnut stain and brass hooks.
– Renter-friendly: freestanding unit on locking casters you can roll into storage.
Key Design Elements:
- Main materials: pallets, 2×4 legs, exterior screws, S-hooks, small bin containers
- Color palette: natural wood, black hardware, terracotta, touches of eucalyptus green
- Lighting strategy: under-shelf task light; optional solar sconce above
- Furniture silhouettes: narrow console height with sturdy legs and a lower shelf
- Texture layers: sealed wood grain, matte metal, clay pots, linen apron
- Accent details: labeled jars for twine, hand brush, copper misting bottle
How To Recreate This Look:
- Start with a solid top: edge-glue sanded pallet slats or use a single wide plank; seal thoroughly.
- Add legs from 2x4s; include a lower shelf framed with slats for potting soil and bins.
- Layer a vertical backboard of slats; arrange a crisp grid and attach firmly to the bench and wall or braces.
- Install hooks, small bins, and a magnetic strip for shears; mount a slim LED task light under a narrow top shelf.
- Style with a cluster of terracotta pots, a clean brush in a jar, and one sculptural watering can.
Why This Looks Expensive: the monotone hardware and grid layout feel retail-level. The sealed, slightly satiny top mimics butcher block, and the intentional negative space around tools feels like art direction.
Common Mistakes To Avoid: uneven slat spacing, too many random hooks, and skipping a protective seal (potting soil stains like ink). Keep the wall organized by function—cutting tools together, planting tools together.
Pro Styling Tip: For a magazine shot, coil twine neatly, stage a small soil spill for texture, and place one sprig of eucalyptus on the worktop—just a touch of “perfectly imperfect.”
And now, for the pièce de résistance: a tiny, jewel-box greenhouse you can actually build in a weekend.
5. Mini Pallet Greenhouse With Poly Panels And Nighttime Sparkle
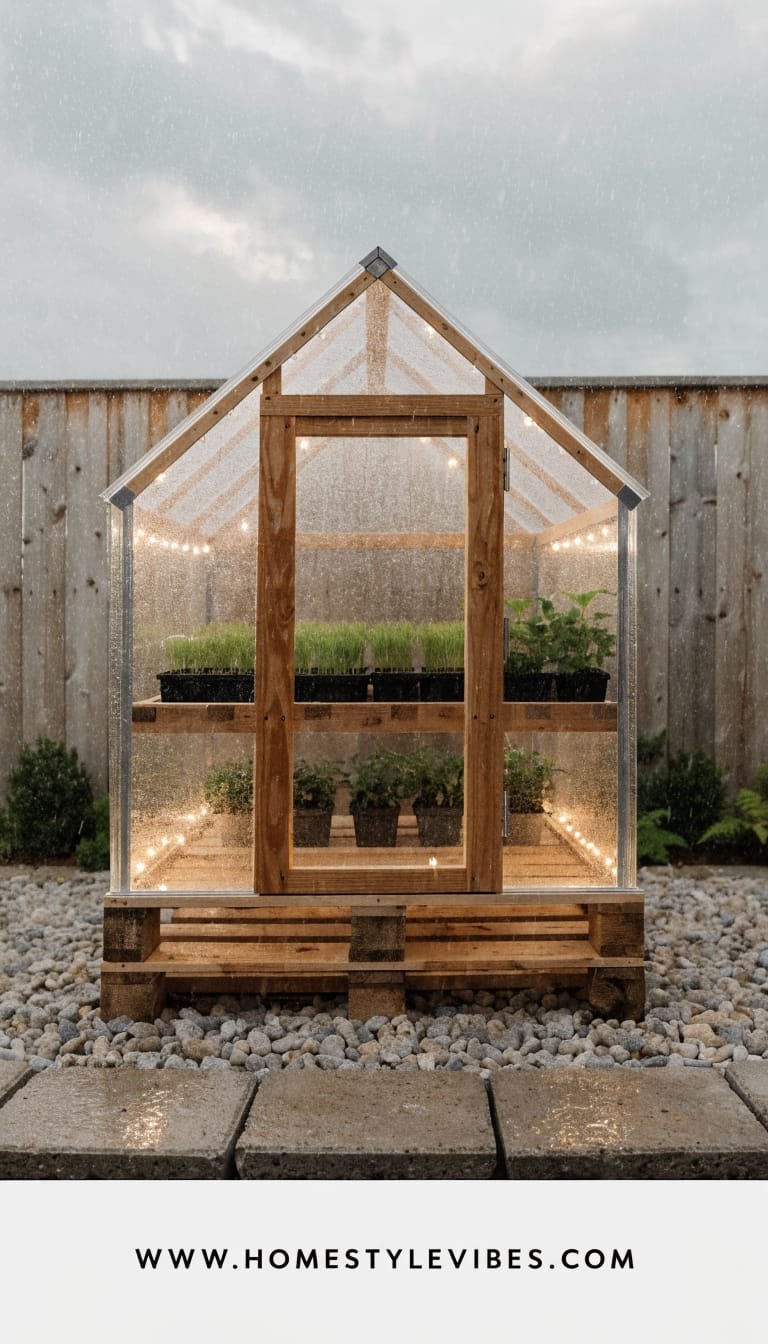
You’ve tried nursing seedlings on a windowsill, but they stretch, sulk, and thank you by dying the day after you harden them off. Heartbreaking. A mini pallet greenhouse changes the whole vibe: structured, protective, and ridiculously charming. It brings hotel-spa calm to your yard—clean lines, soft acoustics when it rains, and a gentle glow at night that feels like a garden lantern.
Why it works in real homes: it’s compact, efficient, and a total conversation piece. You can tuck it near a fence or make it the star of a small courtyard. It extends your growing season and protects delicate plants from wind and pests. Lighting? Add a tiny, low-voltage string inside for nighttime ambience—suddenly your seedlings look like a botanical exhibit.
Why It Looks Expensive: we use clear polycarbonate panels (or greenhouse film), crisp framing, and one restrained color palette. The architectural silhouette—little gable roof or lean-to—reads designer. Inside, uniform trays and a simple gravel floor keep it gallery-clean, not chaotic.
Materials dominate: pallet frames for walls, 2x2s for structure, clear corrugated polycarbonate or UV-stable film, gravel base. It photographs beautifully: reflections on the panels, warm interior lights, and layered plant heights create depth and polish.
Variations:
– Budget-friendly: greenhouse film over a pallet frame with batten strips.
– Small-space: lean-to against a sunny fence.
– Darker version: charred frame with bronze-toned hardware for a moody, modern look.
– Renter-friendly: build on a skid platform you can move with help.
Key Design Elements:
- Main materials: pallet slats/frames, 2x2s, polycarbonate panels or UV film, exterior screws, hinges, latch
- Color palette: natural wood or deep charcoal, clear panels, touches of black hardware, green foliage
- Lighting strategy: tiny string lights or a solar puck lamp inside; optional exterior spotlight
- Furniture silhouettes: simple potting bench or narrow shelf inside for trays
- Texture layers: smooth clear panels, gravel crunch, leafy seedlings, matte hardware
- Accent details: uniform black seed trays, copper plant labels, a single hanging thermometer
How To Recreate This Look:
- Start with a level gravel pad the size of your greenhouse; frame a skid base from pallet runners for stability.
- Add vertical frames from pallet sections reinforced with 2x2s; ensure square corners for panel fit.
- Layer polycarbonate panels onto frames with roofing screws and rubber washers; orient ridges vertically for drainage.
- Install a simple door with pallet slats, a clear panel inset, black hinges, and a latch; add interior shelves from slats.
- Style with uniform trays, a small gravel floor for drainage, and subtle string lights along a roof brace.
Why This Looks Expensive: the clarity and uniformity—no flapping plastic, no mishmash of trays. Strong geometry and glints of light on the panels give that high-end conservatory feel. Keeping interiors neat elevates everything.
Common Mistakes To Avoid: building without a square base (panels won’t sit flat), skipping ventilation (prop door or add a vent), and mixing random containers. Choose one tray style for cohesion and easy watering.
Pro Styling Tip: For photos, shoot at blue hour with interior lights on; frame a plant just inside the door to create depth and a welcoming focal point.
Let’s land this in your backyard reality. Here’s the thing: luxury in the garden doesn’t come from price tags—it comes from composition, texture, and light. Pick one of these easy DIY garden ideas using pallets and commit to a restrained palette. Then layer shadows with warm lighting and add one or two sculptural moments. Suddenly, your space moves from “yard” to “outdoor room.” You’ll feel it the first evening you sit down and the air smells like basil and cedar.
If you’re overwhelmed, start tiny. A single vertical herb wall or a two-module lounge will change how you use your yard. When you keep materials consistent—sealed wood, matte black metal, simple textiles—you create a through-line that makes the entire space look intentionally designed. IMO, restraint always wins. Give each vignette a little breathing room, and let textures do the heavy lifting: rough wood against soft leaves, glossy planters next to nubby cushions, a stripe of shadow across a clean gravel base.
And please, enjoy the process. Sanding a pallet while the sun warms your shoulders, arranging thyme like you’re styling a photo shoot, turning on lights at dusk—this is the good stuff. Build one piece, live with it, tweak the styling, and then add the next. Your garden will evolve like a beautiful story—layer by layer, season by season—until it feels like you always wanted it to: elevated, effortless, and unmistakably you.